


How To Make A Custom In Drawer Knife Block


Updated July 13, 2026
Save precious counter space and make an in drawer knife block! When I customized these stock cabinets from home depot to get my new luxurious kitchen, I had lots of drawer space that I knew I would use, but I wanted to make sure I was using the space efficiently. My goal was to get as much stuff off of the countertops as possible, which meant the knife block had to go. So, while I was building my custom drawer dividers, I had an idea for how I could store my knives and after a little experimenting worked perfectly!


Watch Me Build a Custom In-Drawer Knife Block to Clear My Counters
When I move into a new house, I always organize my kitchen first. Through experience, I have learned what is effective and what is not.
Knives always pose a storage challenge. Traditional knife blocks sit on countertops, are ugly, and collect dust. However, a solution exists: make a knife block that fits neatly inside a drawer. And it’s so simple!
Supply List
- Wood
- Table Saw
- Measuring Tape
Measure the Drawer To Determine the Sizing
First, measure the dimensions of your drawer to ensure the in drawer knife block will fit snugly. My drawer is 7 inches wide. I just used some scrap wood I had in my garage and wood-glued 2x4s together and clamped them until dry. Or make it simple and buy a wide piece of wood. Whatever floats your boat.
Measuring the Slot Depth of the In Drawer Knife Block
There are a few different ways to approach cutting the slots, and this is where you can really customize your in drawer knife block.
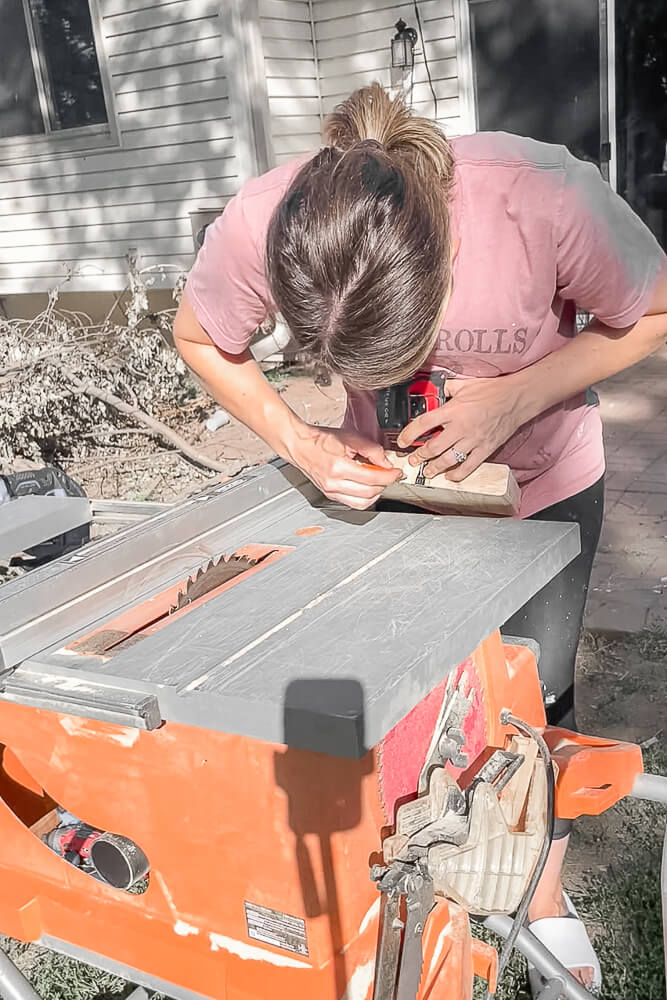
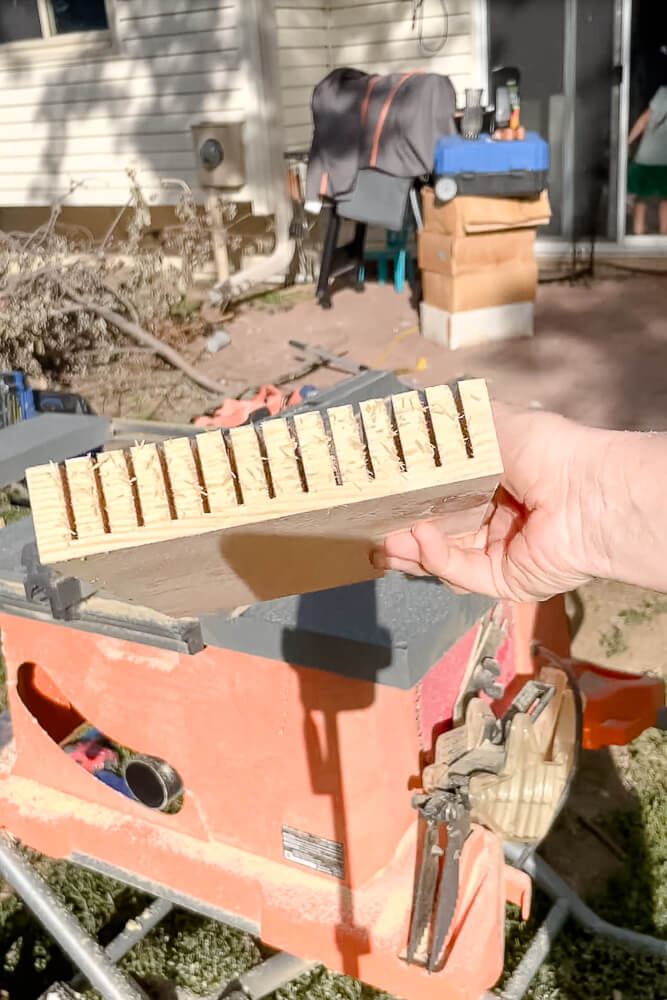
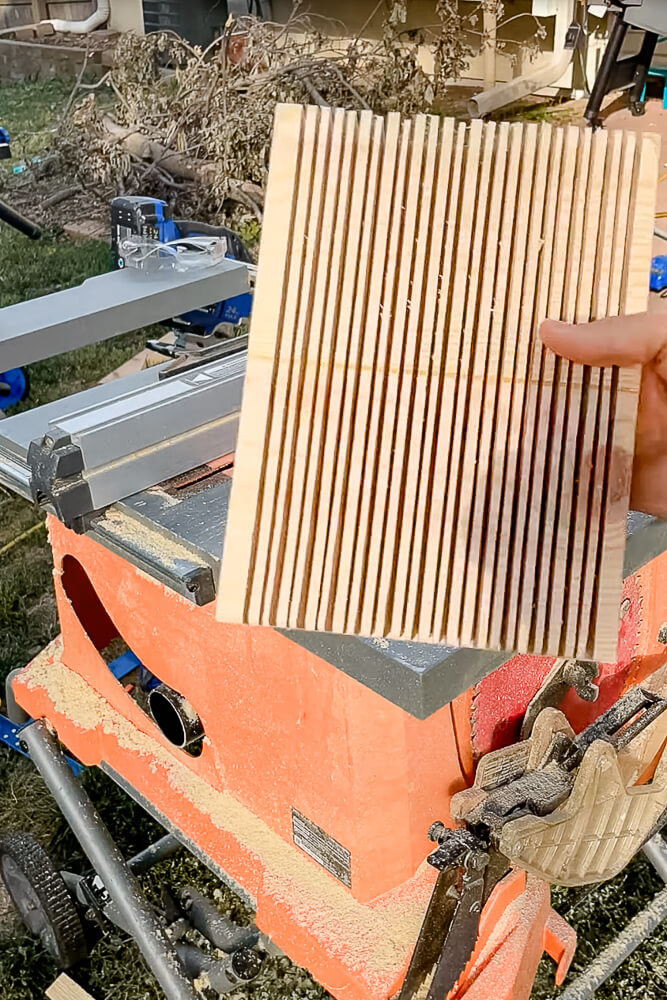
The slots need to be deep. Since my wood was 1 1/2 inch thick, I figured it was thick enough to make 1 1/4 inch deep grooves. So, I measured 1/4 inch down and made a mark. This was as far as my blade should cut, so I set the wood against the saw blade and adjusted it down enough so that the top most teeth were hitting the mark.

Measuring the Spacing of the In Drawer Knife Block
It’s hard to know beforehand how you want the knives arranged within the block. Since I wasn’t exactly sure of the spacing I needed, I decided to go wider knowing I could always go back and add more slots.
The width of my saw blade is 1/8 in, which is plenty of room for a knife. To make everything as evenly spaced as possible, a 3/8 in spacing between each knife slot worked. I adjusted my fence and made my first cut.
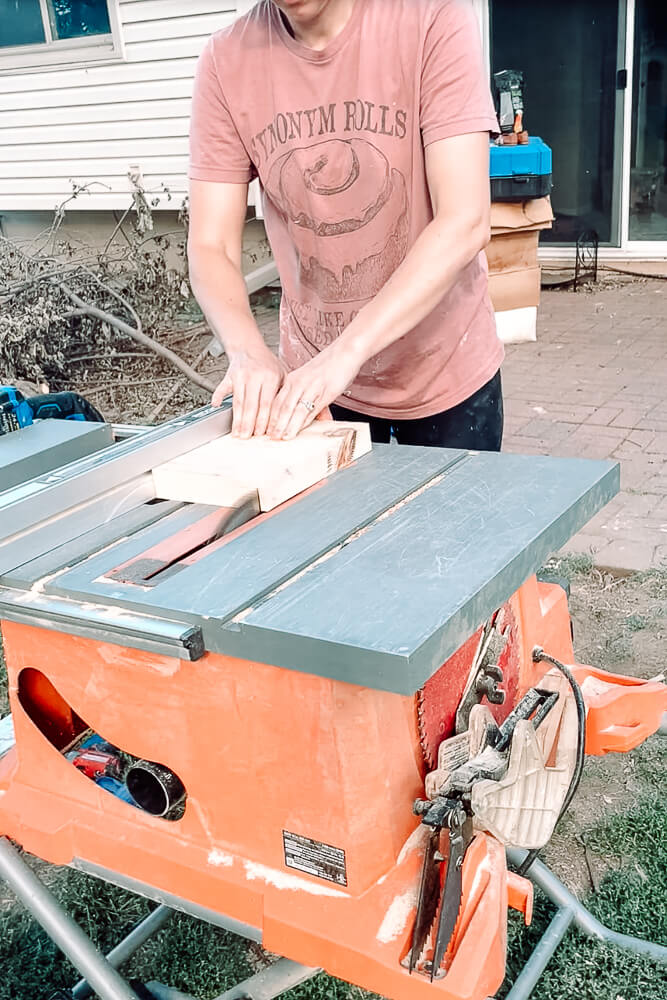
Next, I adjusted my fence before each pass until I finished cutting all the slots for the in drawer knife block.
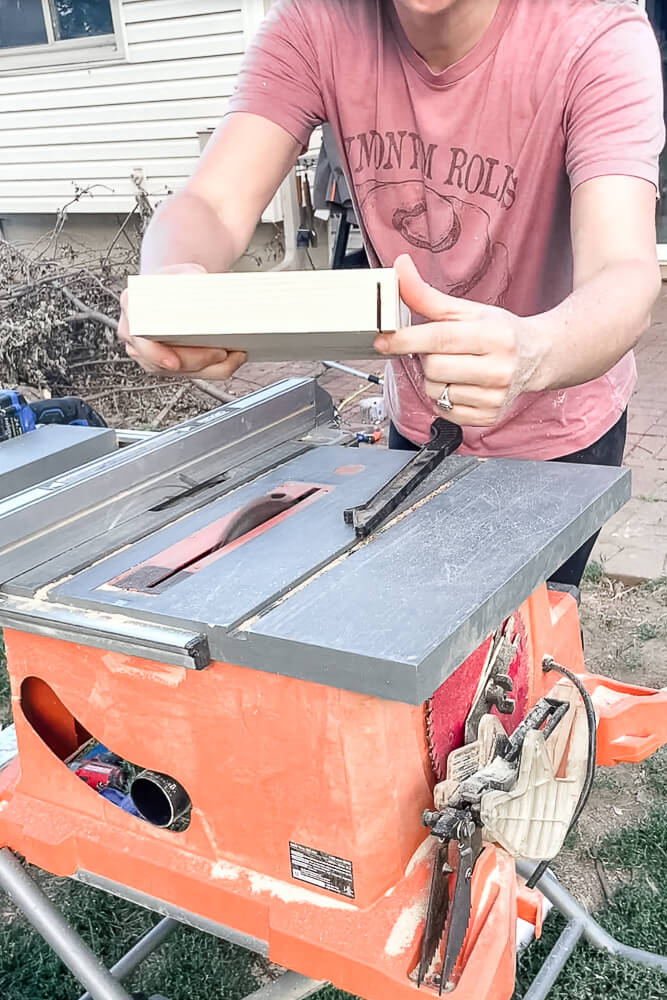
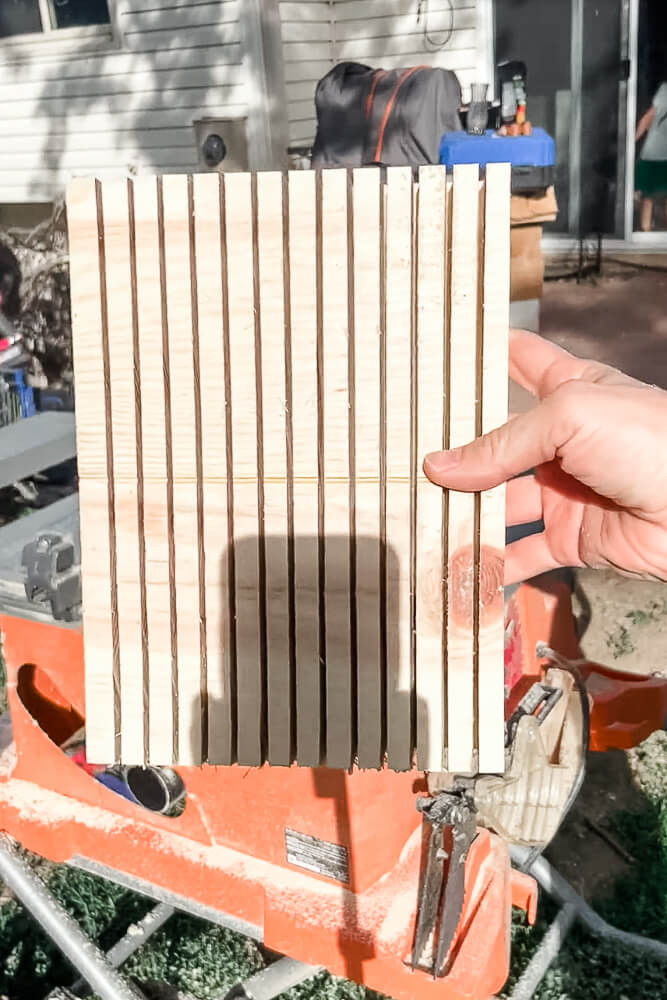
Sanding the Custom Knife Block
Once the slots were cut, I used an orbital sander to smooth out rough edges and splinters and round out the edges. You can see from the pictures below what a difference sanding makes!
Figuring Out the Spacing of the Custom Knife Block
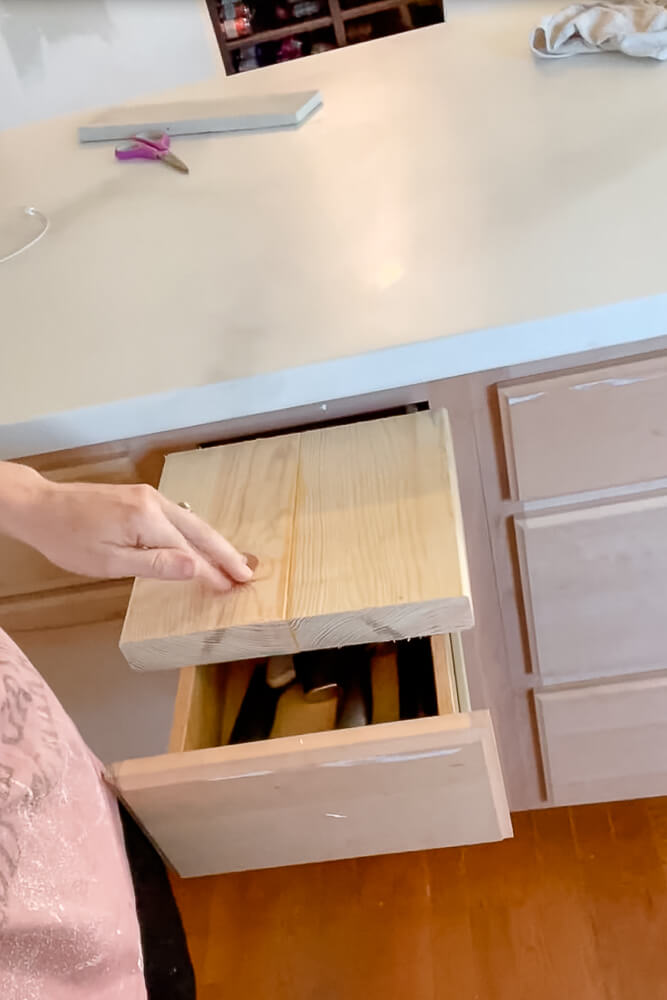
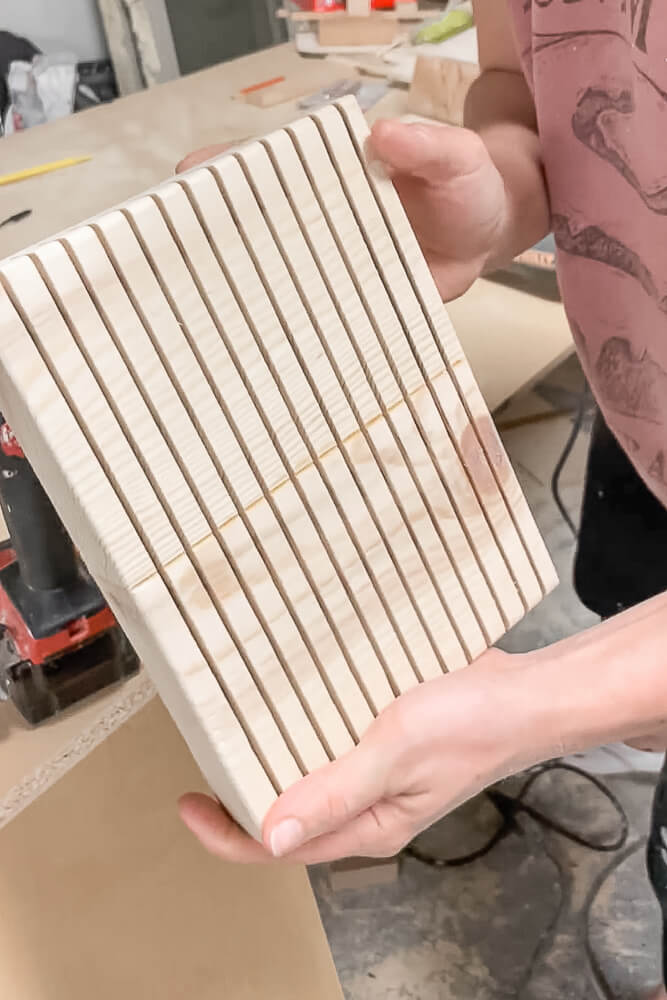
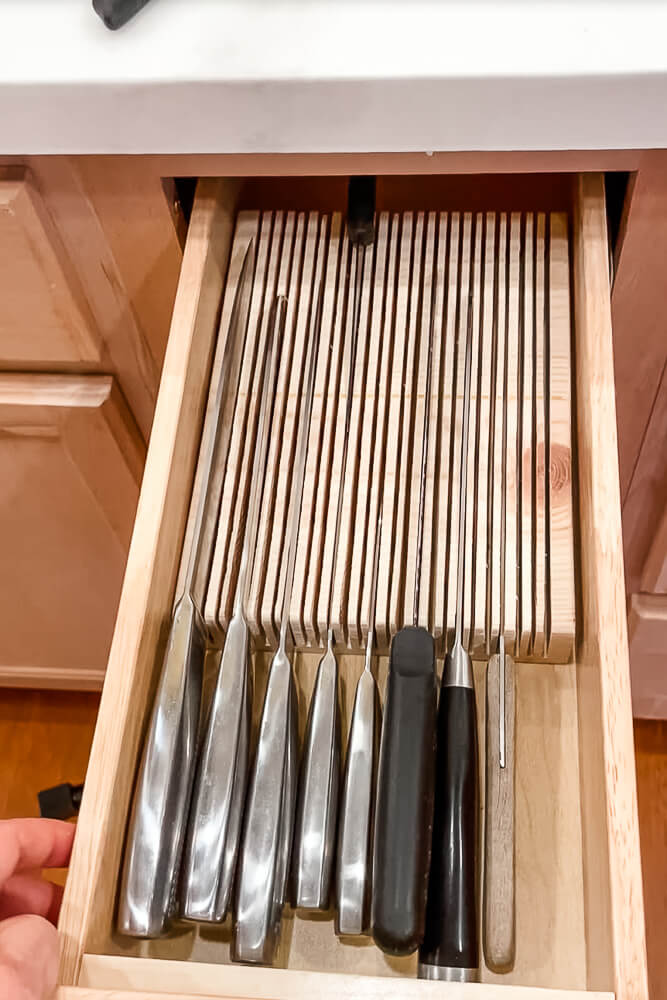
And then…… I didn’t like it. The drawer is too skinny. My organizational brain needs ALL my knives in the same spot, and the steak knives didn’t fit the in drawer knife block because there weren’t enough slots and because some of the hilts are thick and don’t leave space in between for other knives to fit.
I took the in drawer knife block back to the table saw and cut more slots, this time leaving about 1/8″ between each pass.
Figuring Out the Spacing of the Custom Knife Block…Again
And again…it didn’t work. The drawer is just too skinny and the handles are too thick. I tried utilizing the other side of the knife block, but the drawer isn’t deep enough. Another issue is some of the handles are heavier than the blade, which causes the blade to stick up out of the in drawer knife block.
A Solution for the Spacing of the In Drawer Knife Block
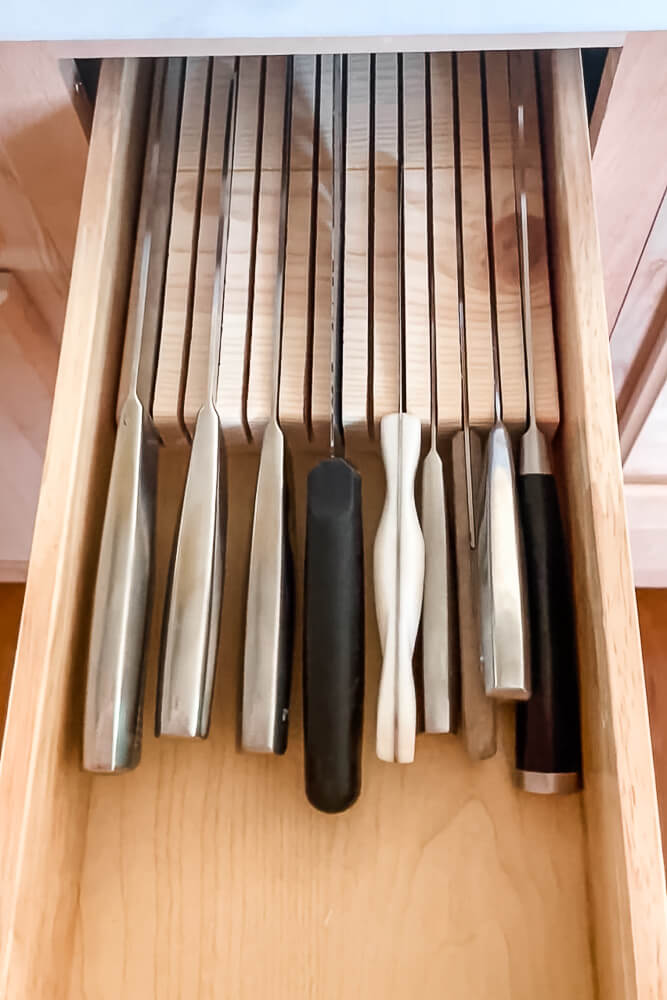
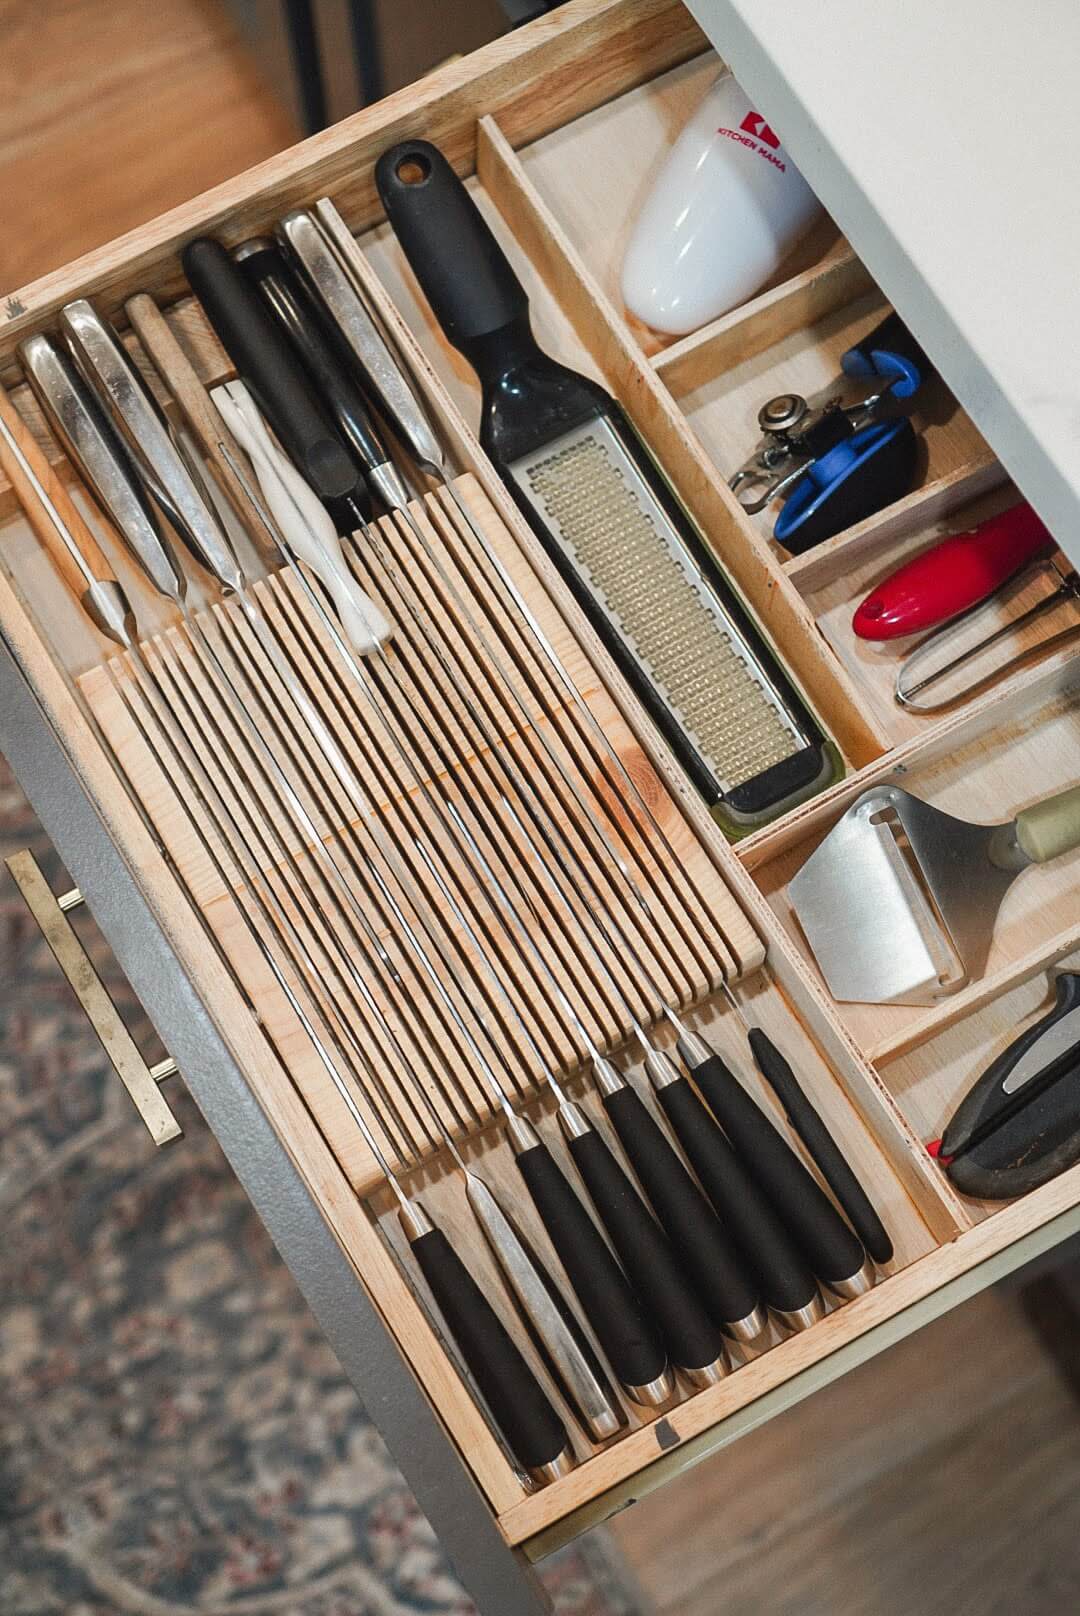
And then, one of my followers gave me the fabulous idea to turn it sideways so I could use both sides of the knife block. Genius! Thankfully, I have drawers that are wide enough, and it worked! Better yet, my organizational brain was thrilled because now I could have a “things that cut” drawer.
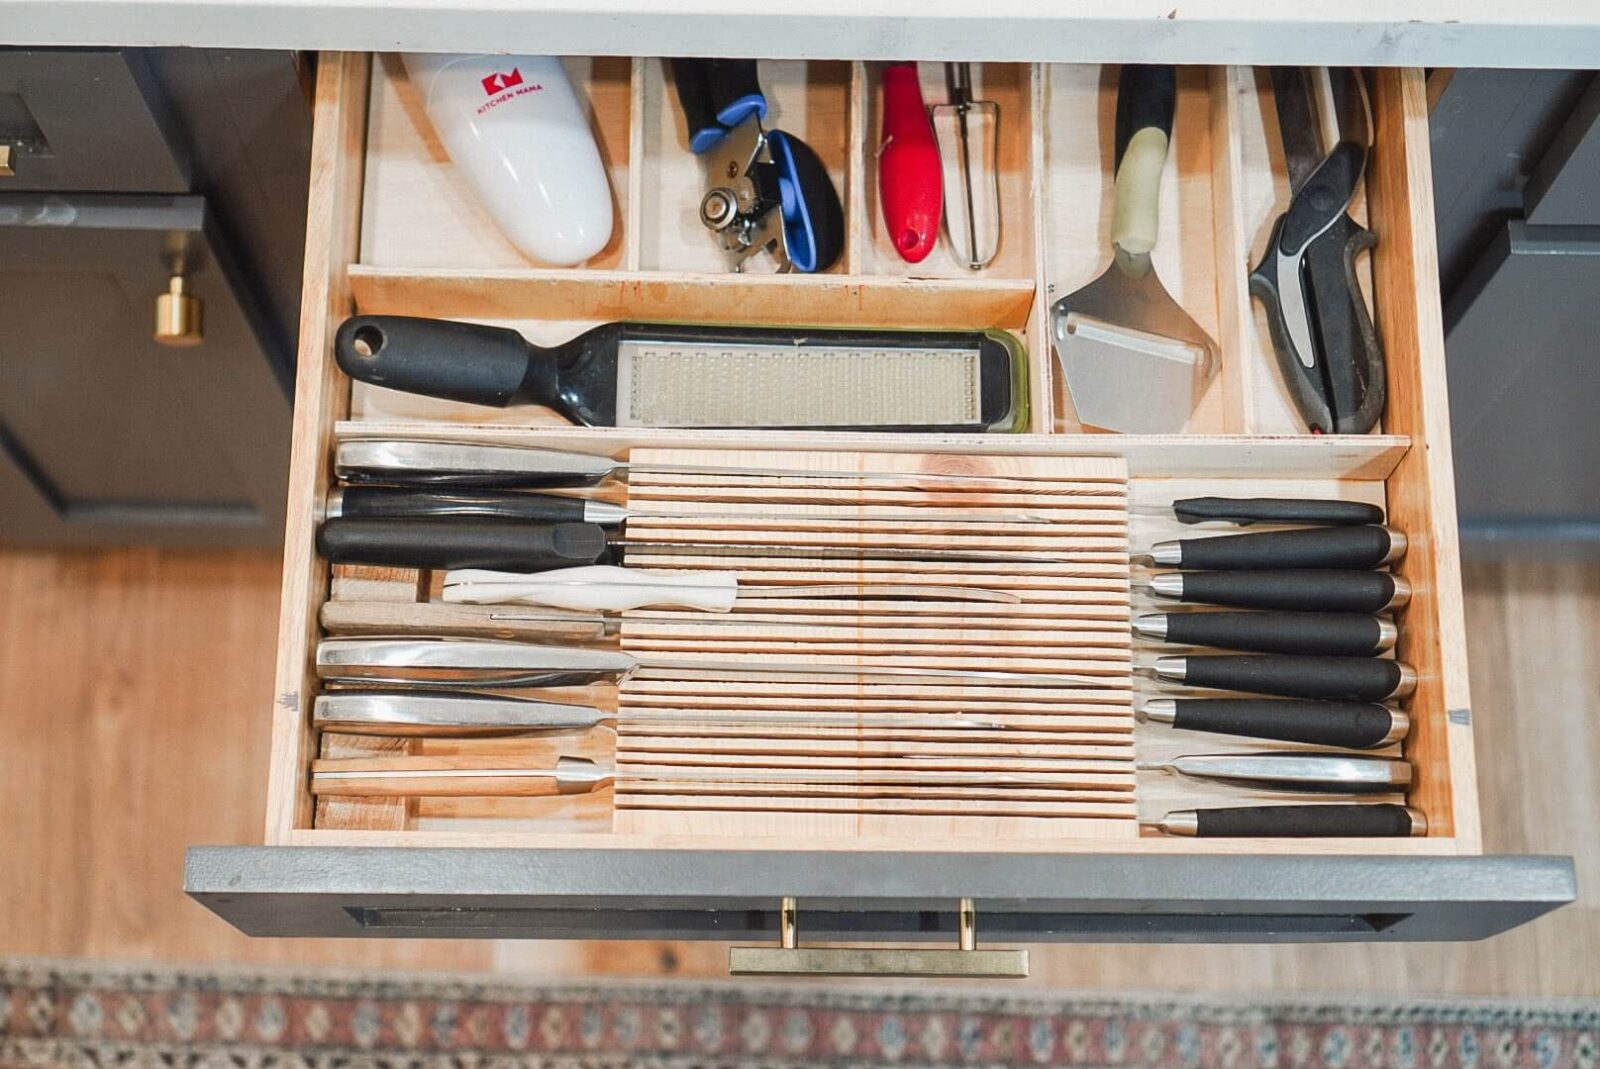
I also slid some blocks of scrap wood one one end to support the handles of the larger knives, which kept the tips from sticking up. Also, you could apply a stain or finish to the knife block, but I’m happy with the natural look since it matches the inside of my drawer. Just choose a food-safe finish.
If you’re like me and LOVE an organized kitchen, here are a few blog posts with easy to follow instructions that will help you customize your space.
How to Build a Silverware Drawer Organizer

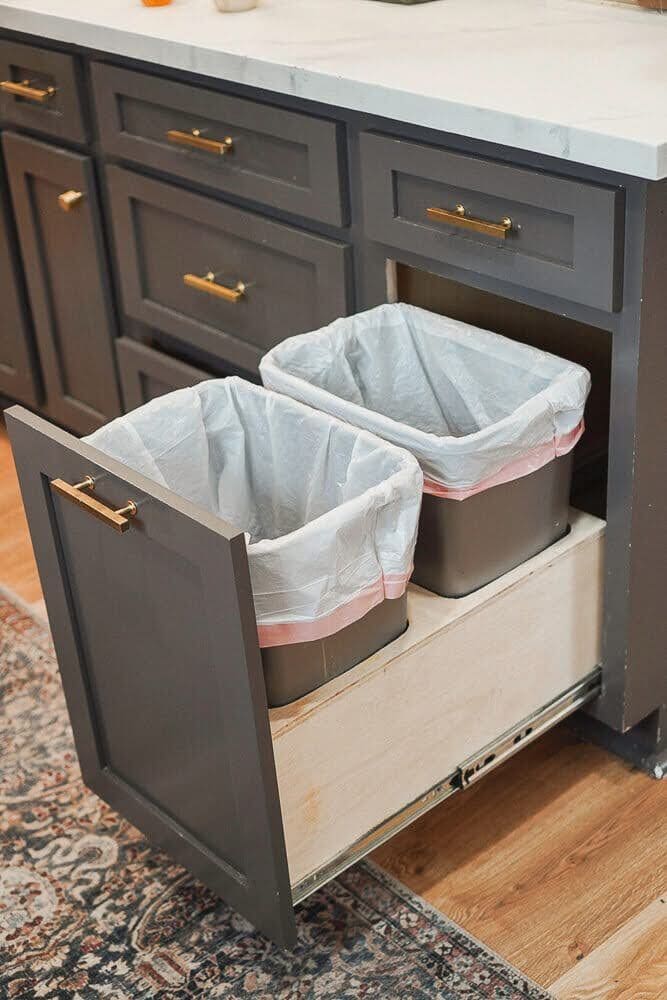
How to Build a Pull Out Trash Can
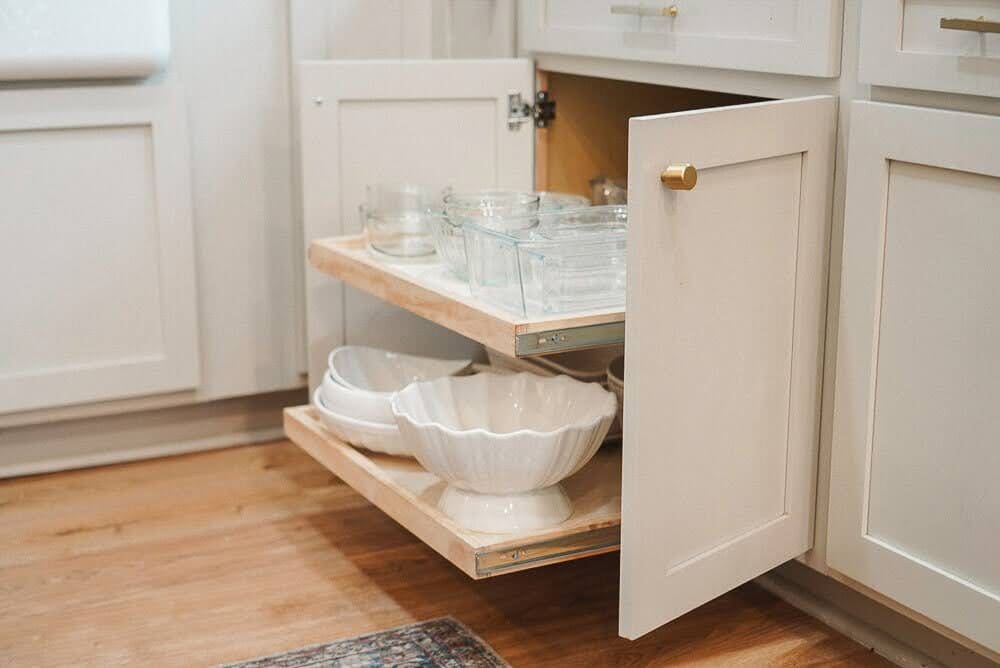
How to Build Cabinet Pull Out Shelving
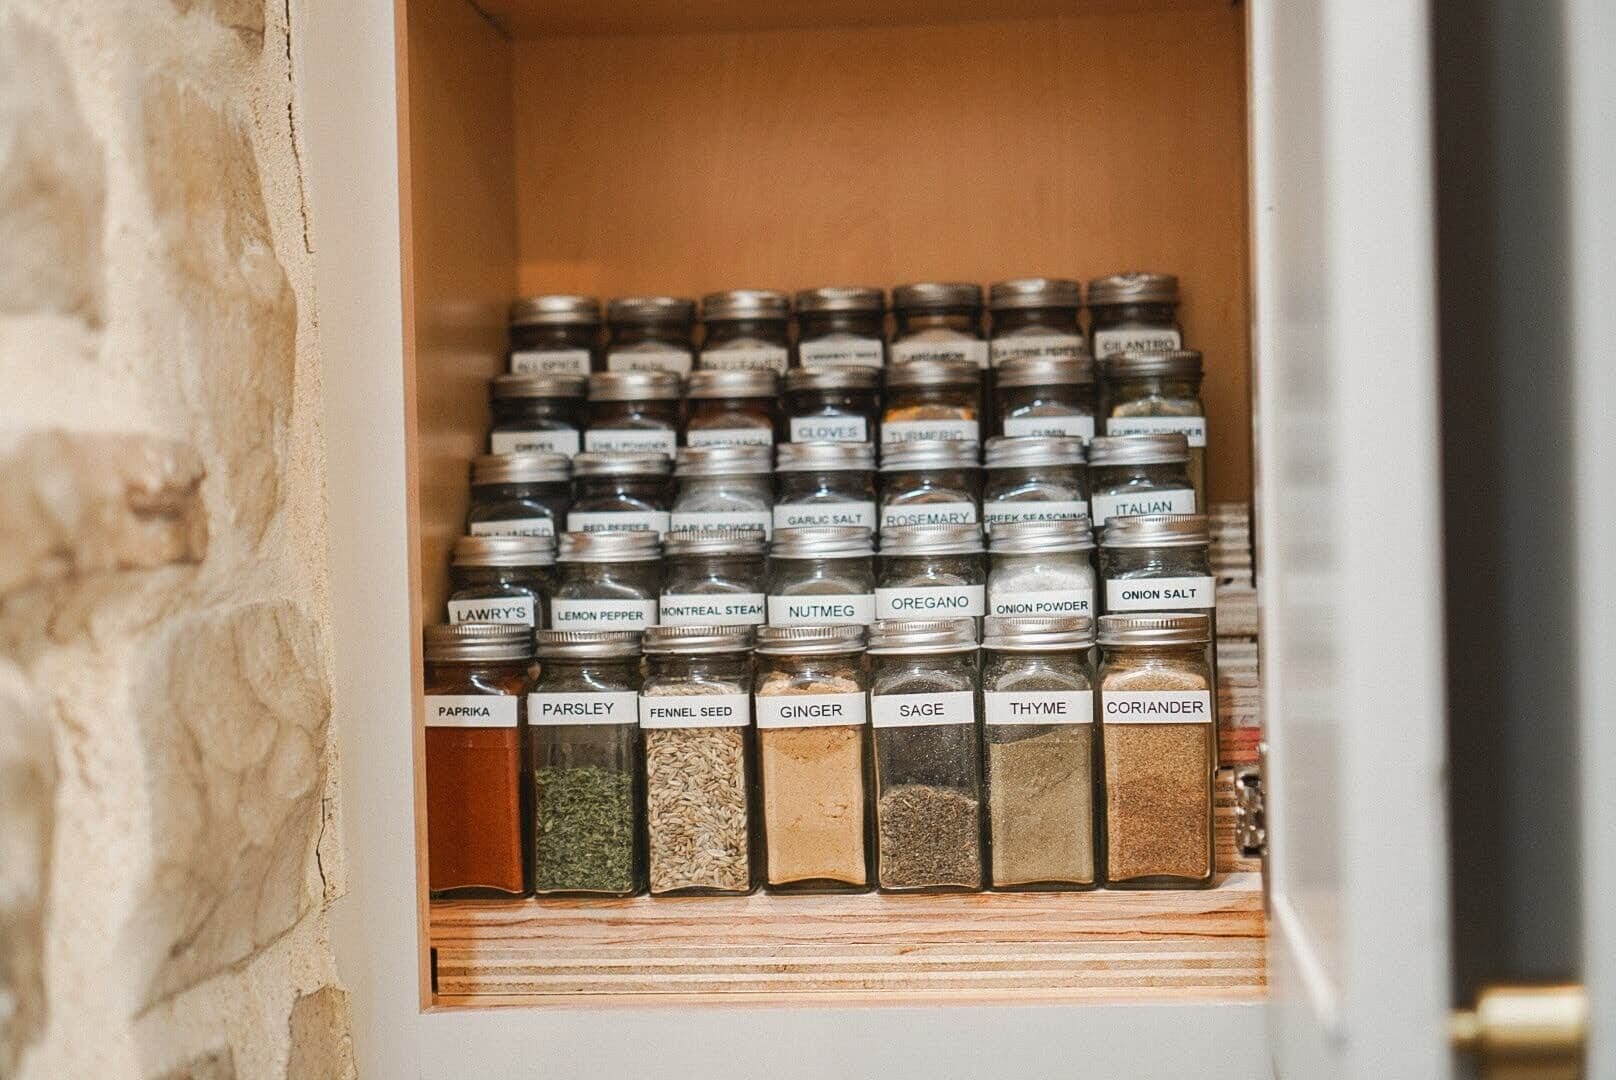
How to Build a Tiered Spice Rack

I’m planning my future island. Love this idea. Could I make the block only just longer than my longest knife blade to fit it into a somewhat less wide drawer? With the 1/8” cuts, I think that could work well for me.
Yep! That sounds like a great idea.