Set It and Forget It With a DIY Automatic Watering System


Updated May 9, 2026
Keep your lawn lush and happy the easy way, with an automatic watering system! My DIY sprinkler system is all about simplicity: set it up and forget about it. With a few inexpensive supplies you will have your own system ready to go in no time, allowing you to enjoy a gorgeous, green lawn without the fuss.
Can you tell that my neighbor has been doing a better job at watering their yard than I have? Right now the grass truly is greener on the other side, but not for long.

On average, an installed sprinkler system costs around $2,500. I can think of a lot of other projects around my house that I want to spend that kind of money on besides watering my grass. But, I do need an automatic watering system in place, because I don’t want to be responsible for remembering to turn on, turn off, and move a basic sprinkler around my yard.
My DIY automatic watering system that I came up with is much more affordable than an installed sprinkler system, and is just as convenient to use.
Supplies
How to Install the Automatic Watering System
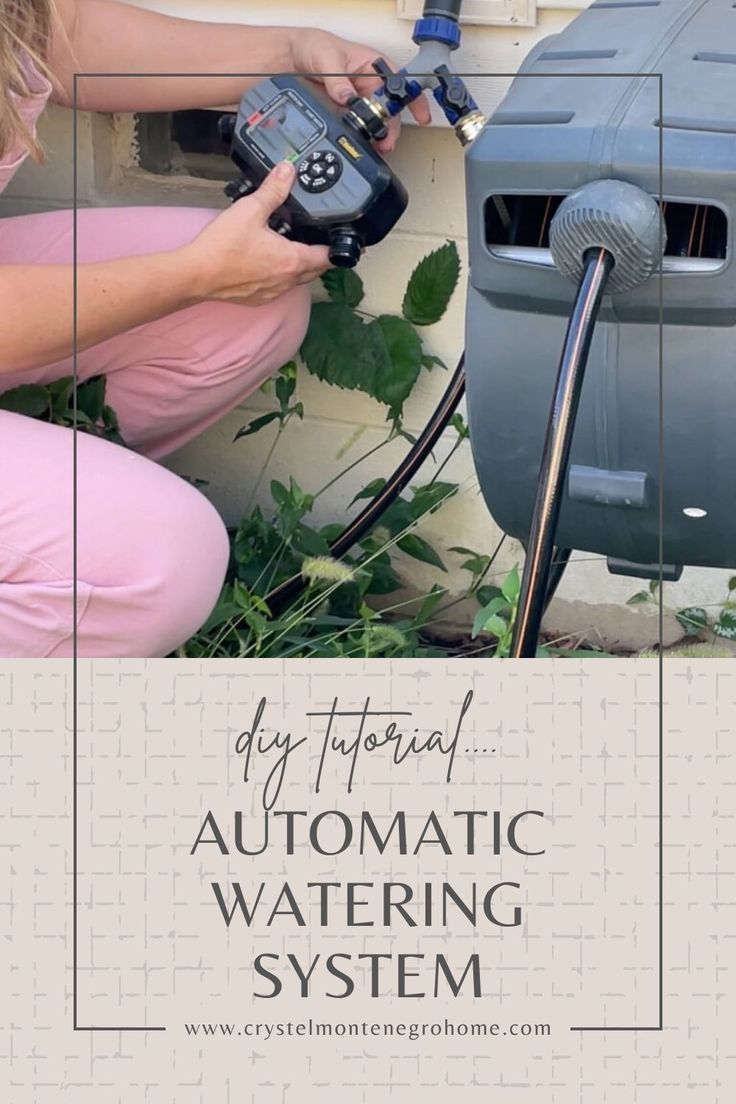
First thing that I put on was a hose splitter. I had already installed this amazing Giraffe hose reel. I wanted to be able to still use it, and set up my automatic watering system at the same faucet.


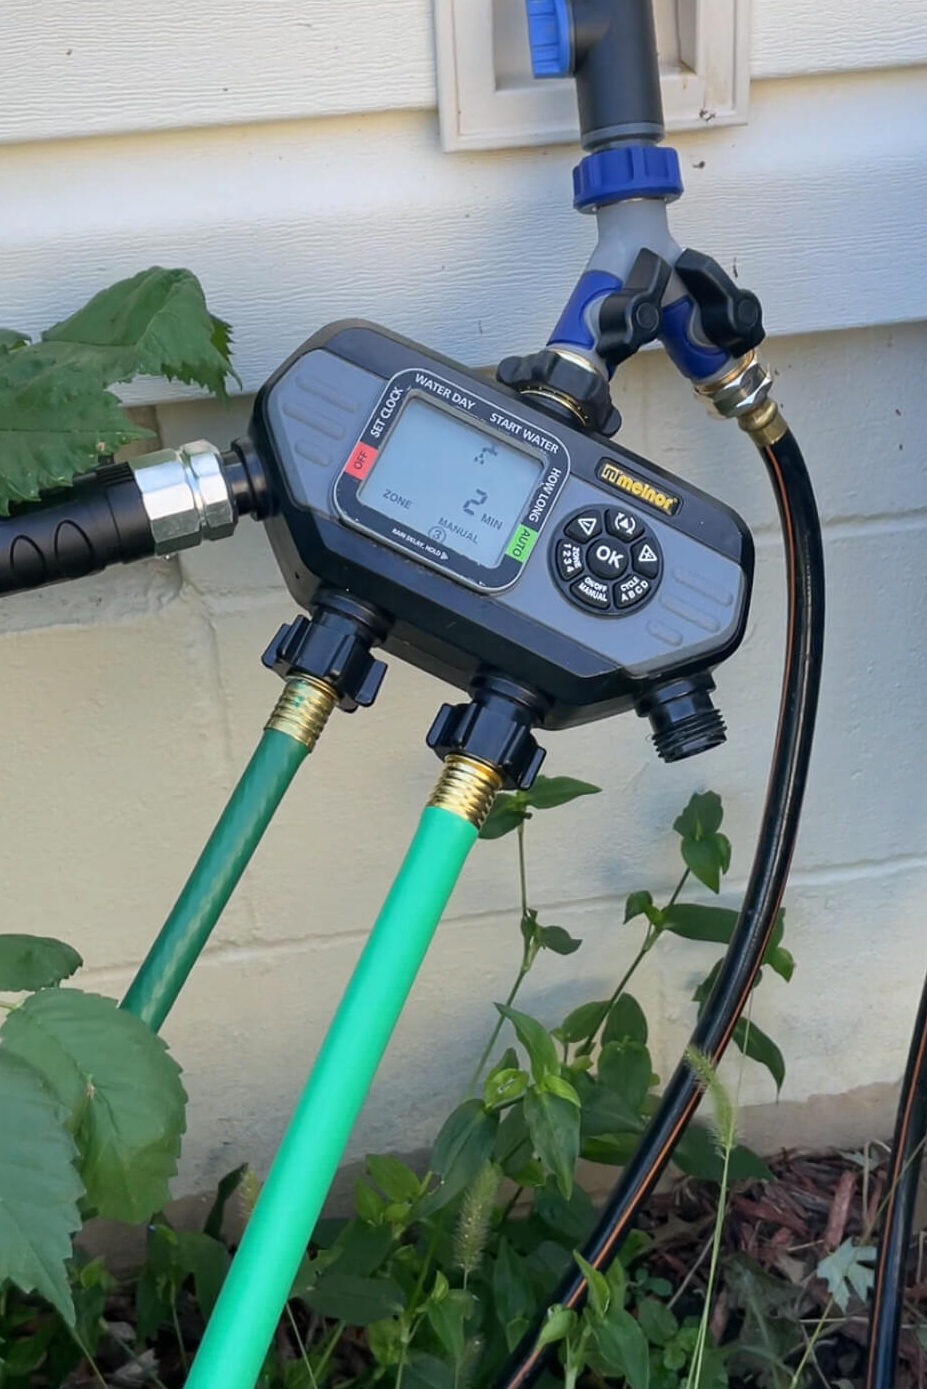
The next step is to twist the timer right onto the hose splitter. If you aren’t using a hose splitter, then the timer will just twist directly onto your water spigot.

For my yard, I have one small section on the other side of my driveway that will be one watering zone, then I will divide the main section of my front yard into two more watering zones. The timer that I purchased can do up to four different watering zones. The water pressure at my house is just too low to try to water all of my grass at once. Instead, I will set the timer so that each zone is watered one right after the other.

You’ll need to attach a separate hose to the timer for each watering zone. Since I have three separate zones, I’m attaching three separate hoses.
Adding Sprinklers to the Automatic Watering System
The sprinklers that I’m using are called Impulse Spike Sprinklers. They are easy to install wherever you need them and can be adjusted from a 360° spraying pattern to even the smallest of angles. You can put just one sprinkler on one hose or twist off the black cap on the opposite side and connect multiple sprinklers together with hoses. These sprinklers will be the perfect choice for our automatic watering system.

First, choose where you want your sprinkler to be. Then, press the spiked base of the sprinkler down into your lawn.

This first sprinkler I put in is a short distance to the water spigot, so I used a 15 foot hose to connect the sprinkler back to the timer. On the opposite side I’m running a longer hose down to the second sprinkler that will be in the same watering zone.


That’s it. This first watering zone is ready to go. Next, I simply repeated those steps of running a hose from the timer to the other side of my yard, connecting more hoses and sprinklers. Just remember that each watering zone must be connected separately to the timer.

Adjusting Your Sprinklers
These Impulse Spike Sprinklers are incredibly easy to adjust.
First, you’ll want to adjust how wide of an angle your sprinkler is watering. The green pieces you see just above where we connect the hoses are called friction collars. Wherever the edges of the friction collars are is how far the head of the sprinkler can turn. If you’ve them pulled all the way to the back, then your sprinkler can water in a full 360° pattern. I only needed them to water at a 90° angle, so I adjusted the friction collars accordingly.


This little, black knob located right underneath the sprinkler head can be turned to adjust the sprinkler from a stream to a spray, and the dial on top will adjust the water pressure. Obviously, a stream shoots farther than a spray, so you may have to play around with both the little knob and the large dial on top until you get your sprinkler watering just how you need it to.

Perfection! These two sprinklers are adjusted to hit just on my side of the yard, and water out towards the other watering zone that I set up with two other sprinklers on the other side of my front lawn.
I’ve set the timer so that my lawn will get watered every day starting at 6am and 7pm. Each watering zone is watered for 15 minutes, right after the other. This truly is a set it and forget it, automatic watering system for your yard.

If you want to keep the hoses for your automatic watering system set in place, use these hose stakes. They’ll keep your yard neat and the hoses nice and straight.
Do you need an automatic watering system for your garden? Check out this post where I set up a drip irrigation system for my raised garden beds.