DIY Built-In Bookshelves for a Cozy Home Library


Published February 14, 2026
For years, I’ve dreamed about having built-in bookshelves in a cozy home library. Walls of books, a big table in the middle, and cabinets that hide all the not-so-pretty homeschool supplies, but still feel calm and intentional.
The shelves and cabinets aren’t completely finished yet. I still need to add doors and build a few more pieces. But they’re up, mostly painted, attached to the wall, and already holding books.
In this post, I’m walking you through exactly how I built these DIY built-in bookshelves and cabinets, from painting the panels first to building the base cabinet, adding sliding shelves, securing everything to studs, and stacking the upper bookcases.
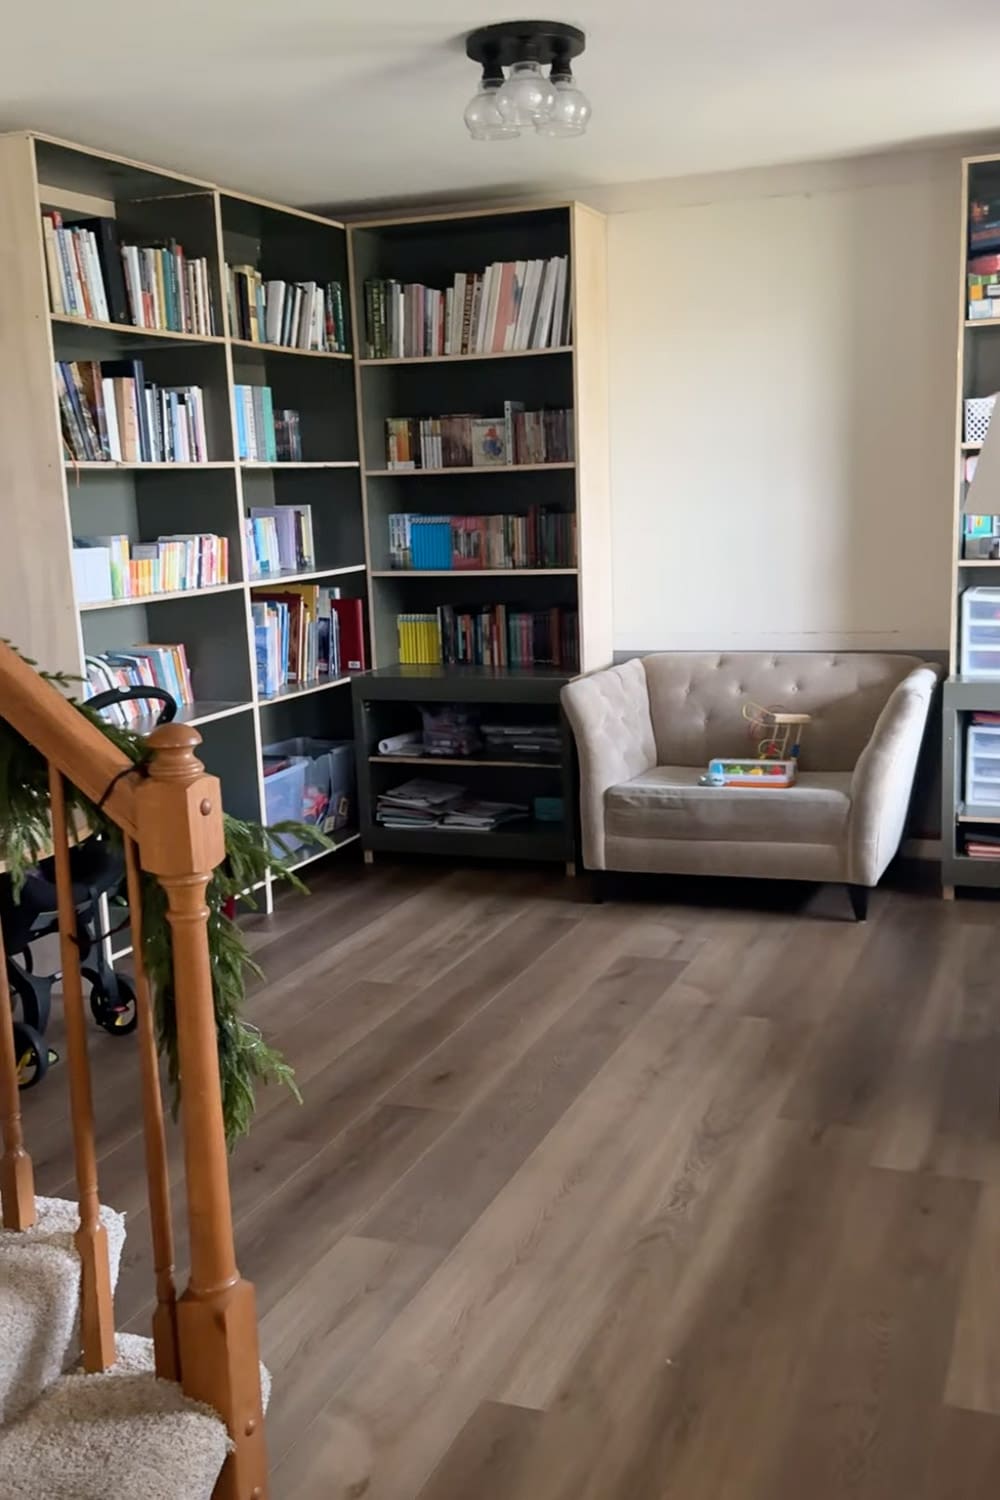
Table of Contents
- Tools and Materials for DIY Built-In Bookshelves
- The Before: From Formal Dining Room to Home Library
- The Step That Always Stops Me: Painting
- Use a Good Primer on Built-In Bookshelves
- Painting Before Building Built-In Bookshelves
- Cutting and Prepping the Panels
- Building the Base Cabinet
- Building the Upper Bookshelf Unit
- My Wall of Built-In Bookshelves
- Built-In Bookshelves: What’s Done and What’s Left
- The “Right Way” To Paint Built-In Bookshelves
- 📌 Save This DIY Built-In Bookshelves Project for Later
- Frequently Asked Questions About DIY Built-In Bookshelves
Tools and Materials for DIY Built-In Bookshelves
Before we get into the step-by-step process, here’s what I used to build these custom home library built-ins.
Tools
Materials
- 4×8 sheets of plywood
- Trim boards
- Hardboard (for shelf backing)
- 180-grit sandpaper
- Wood glue
- Wood screws
- Drawer slides
- Primer
- Paint
The Before: From Formal Dining Room to Home Library
This is how the room looked when we first walked into our home.
We’re redoing the entire first floor, and we’ve shifted things around to work better for our family. Our dining table now lives closer to the kitchen in what used to be the family room. This formal dining room was just begging to be transformed into a cozy library.
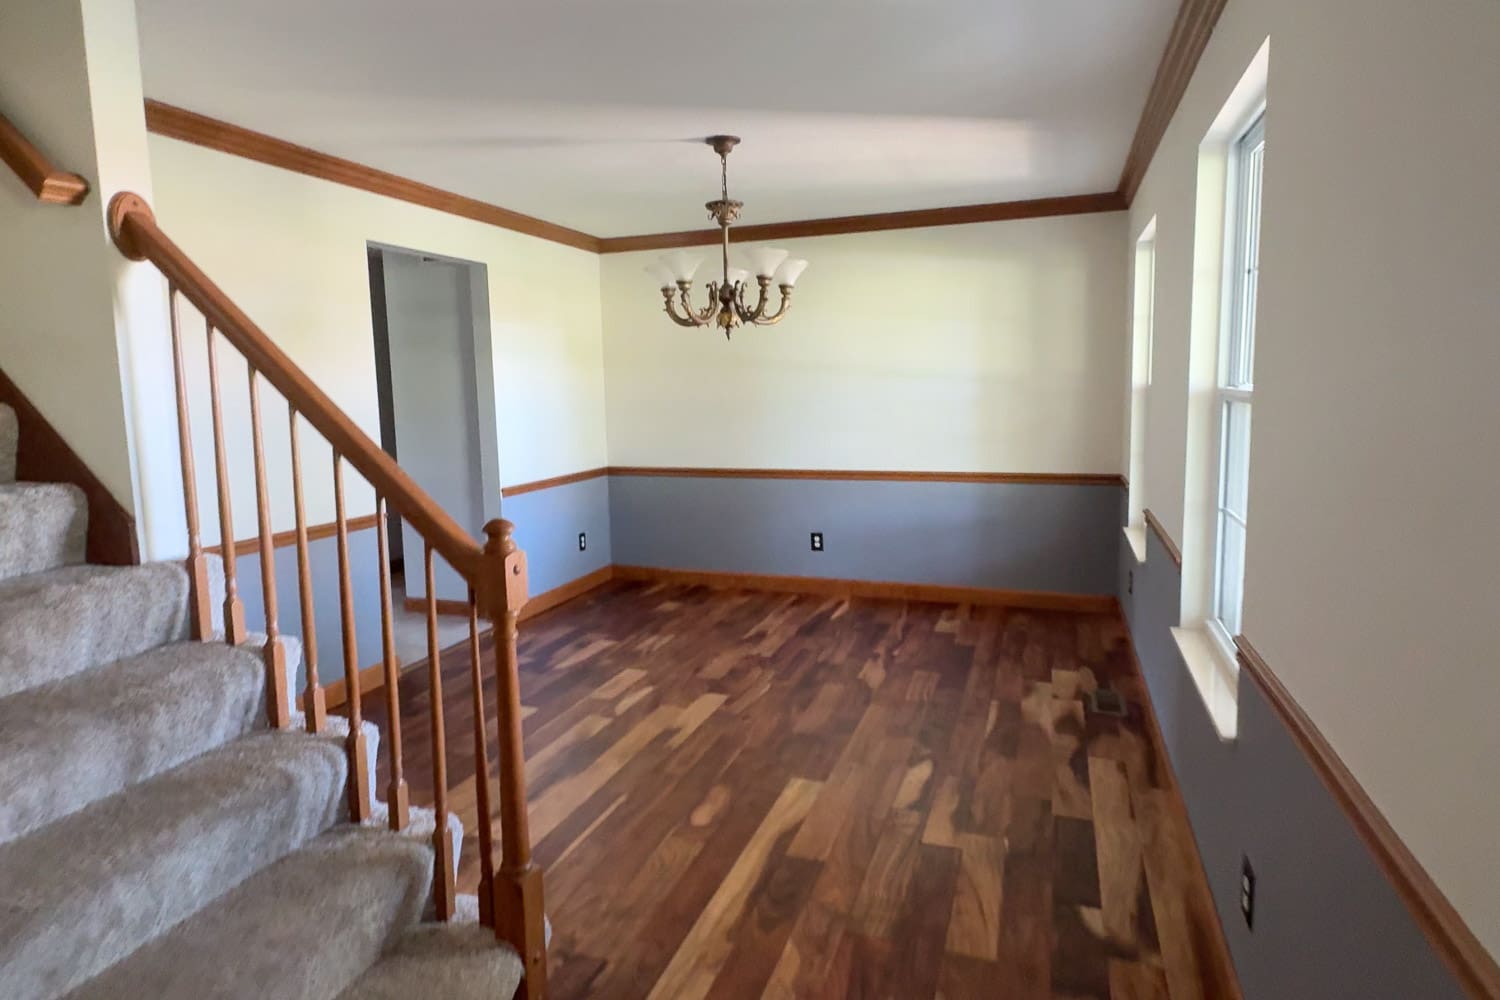
I pictured walls of built-in bookshelves. A table in the middle. Cabinets for storing homeschool and office supplies. French doors for closing it off, but still letting light through. I’ve got some big ideas for this space.
The Step That Always Stops Me: Painting
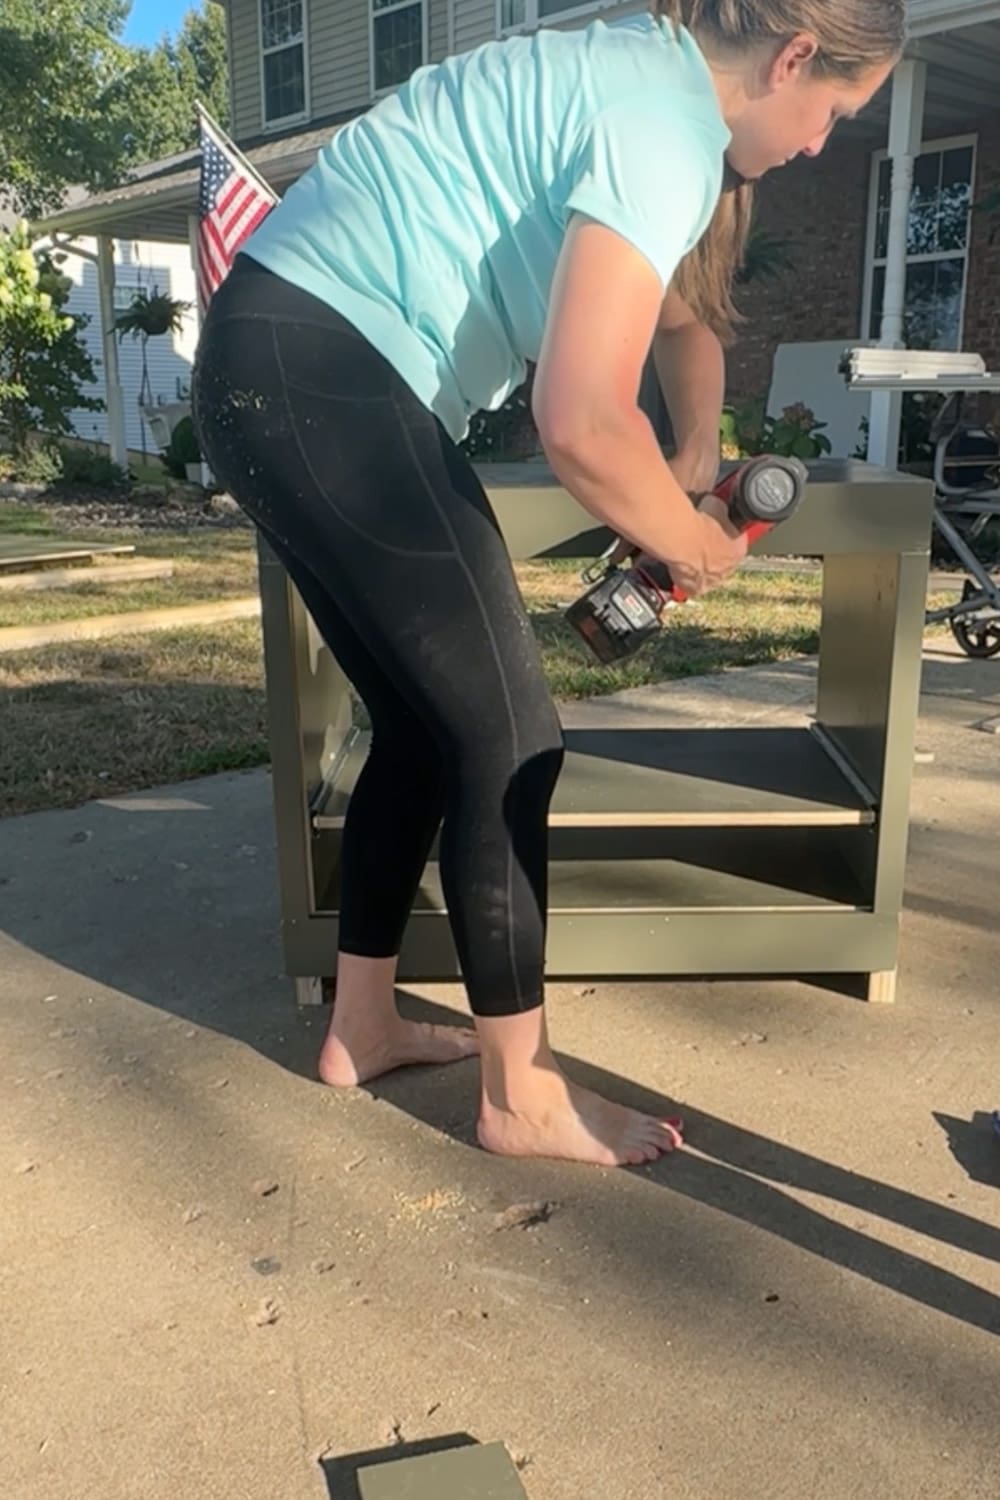
I’ve built built-ins more times than I can count. And every single time, the step that gets me hung up is the priming and painting.
I’ll get everything built. Attached. It looks amazing. And then… I live with unfinished wood for months because the prep work, sanding, taping, and cleanup of painting built-ins inside the house is a lot.
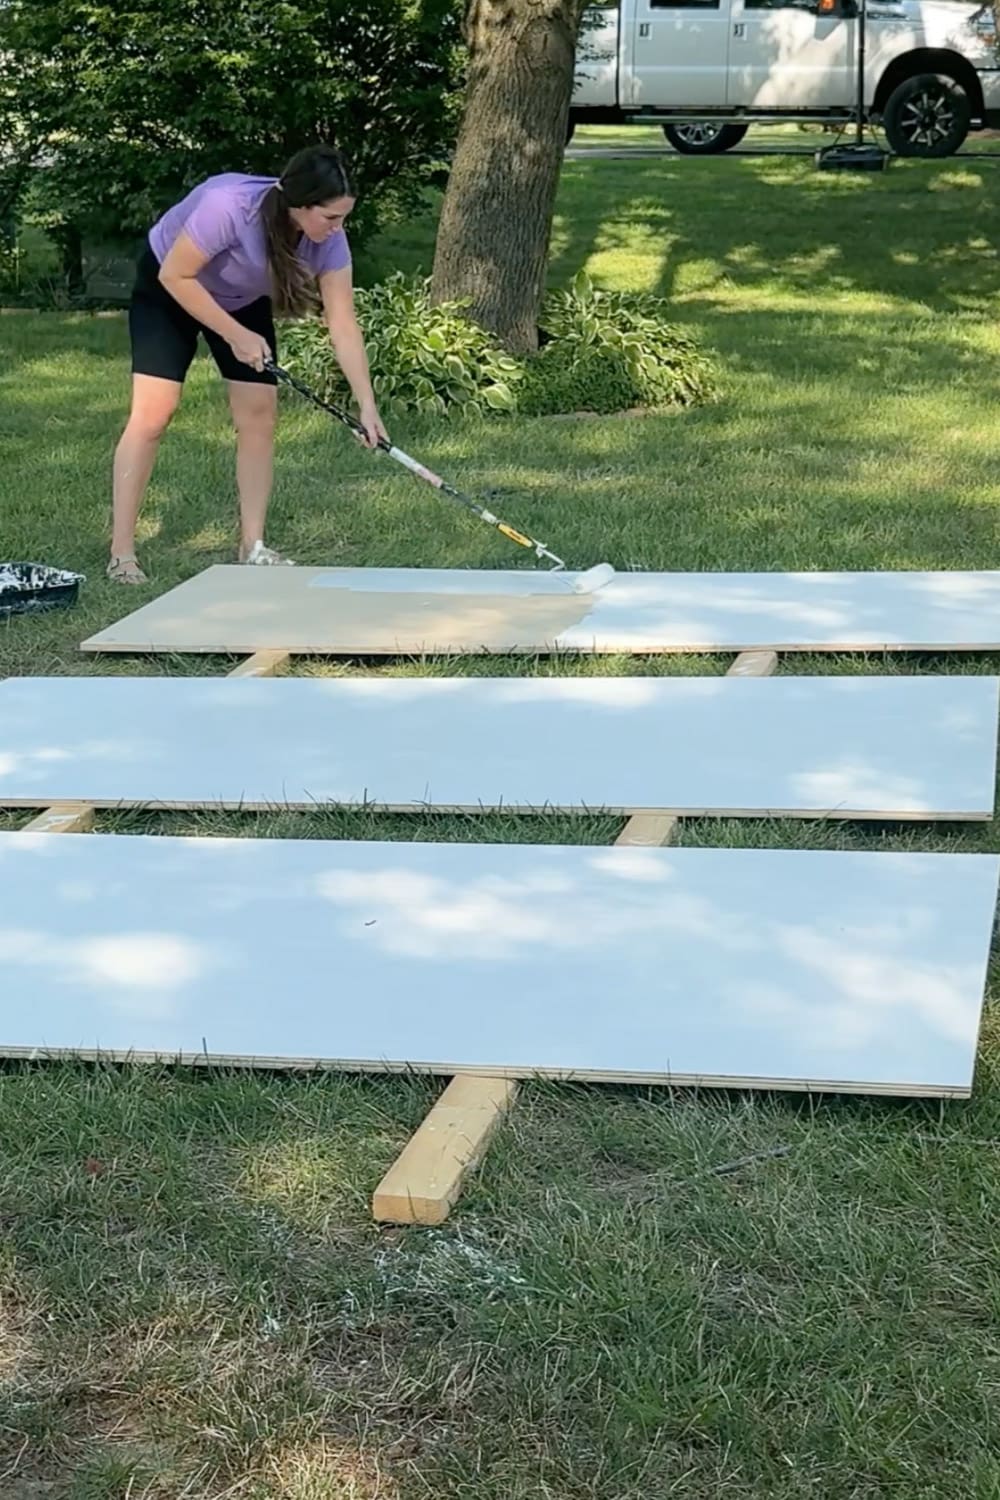
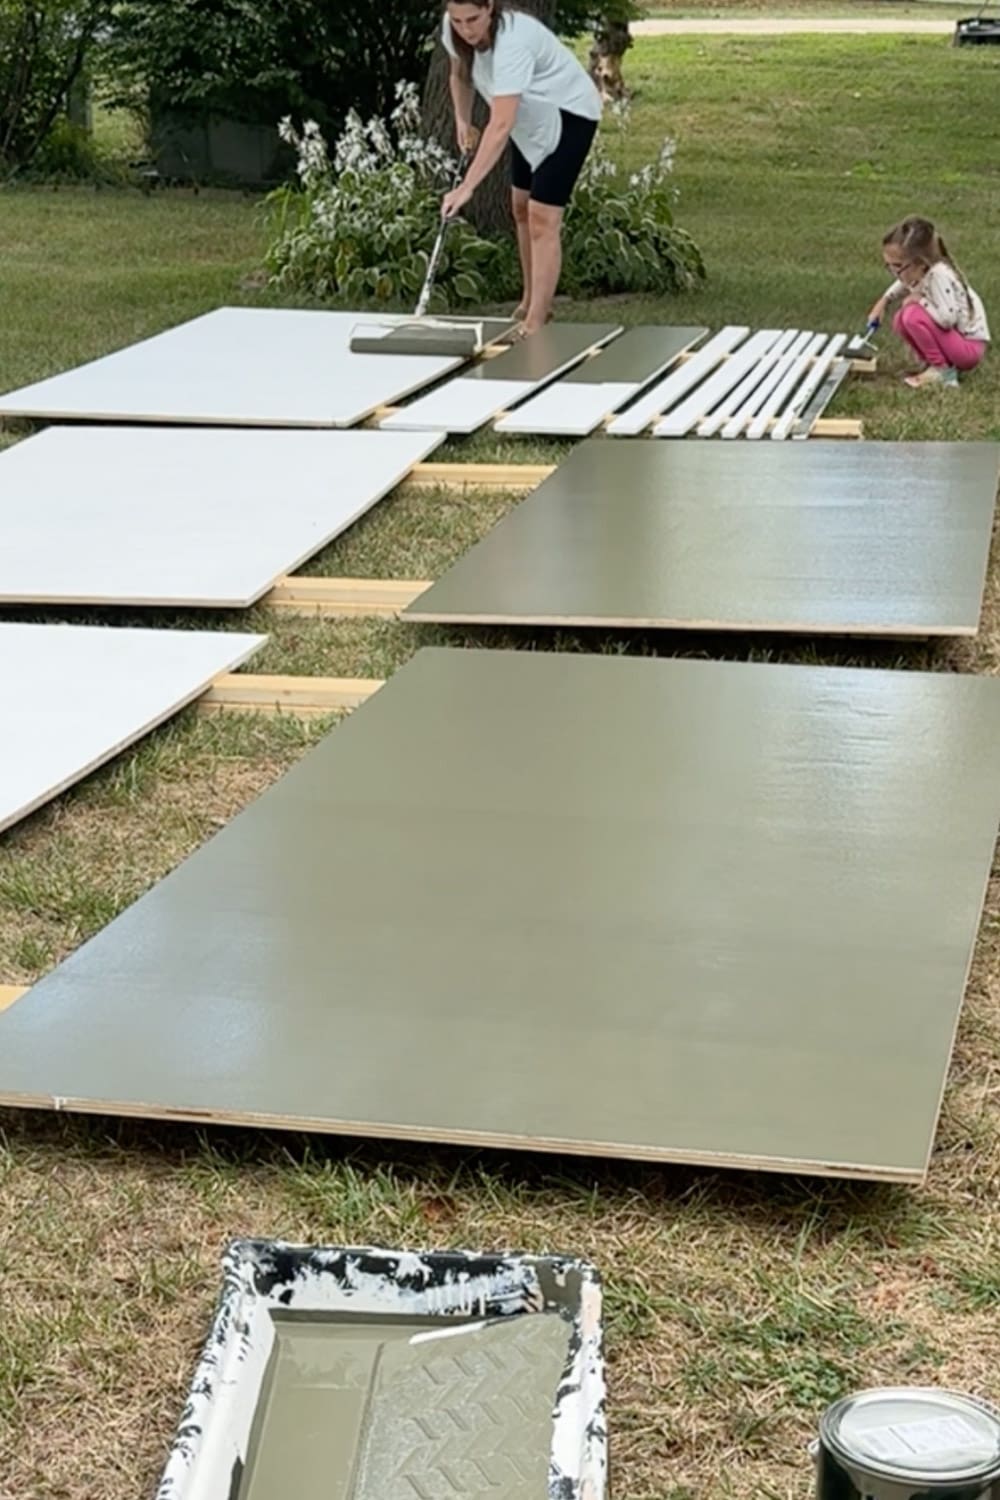
This time I decided to change things up. Instead of building everything and then painting, I painted first.
Use a Good Primer on Built-In Bookshelves
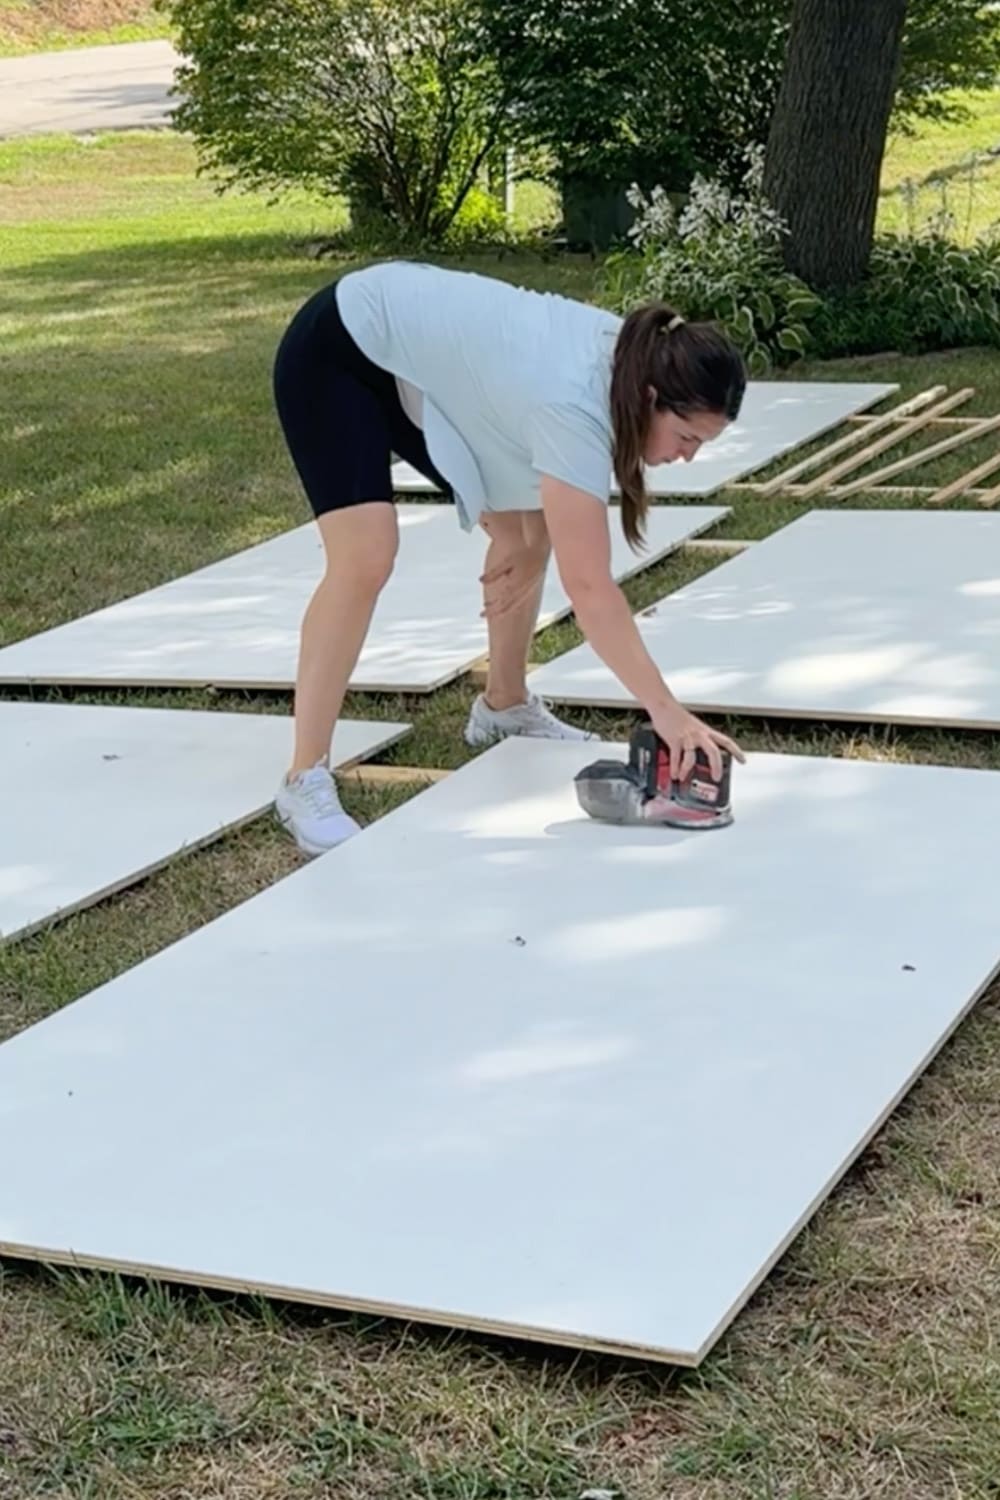
When you’re painting furniture or cabinets, always start with a good-quality primer. Don’t skip this. It helps with adhesion and gives you a smoother, long-lasting finish.
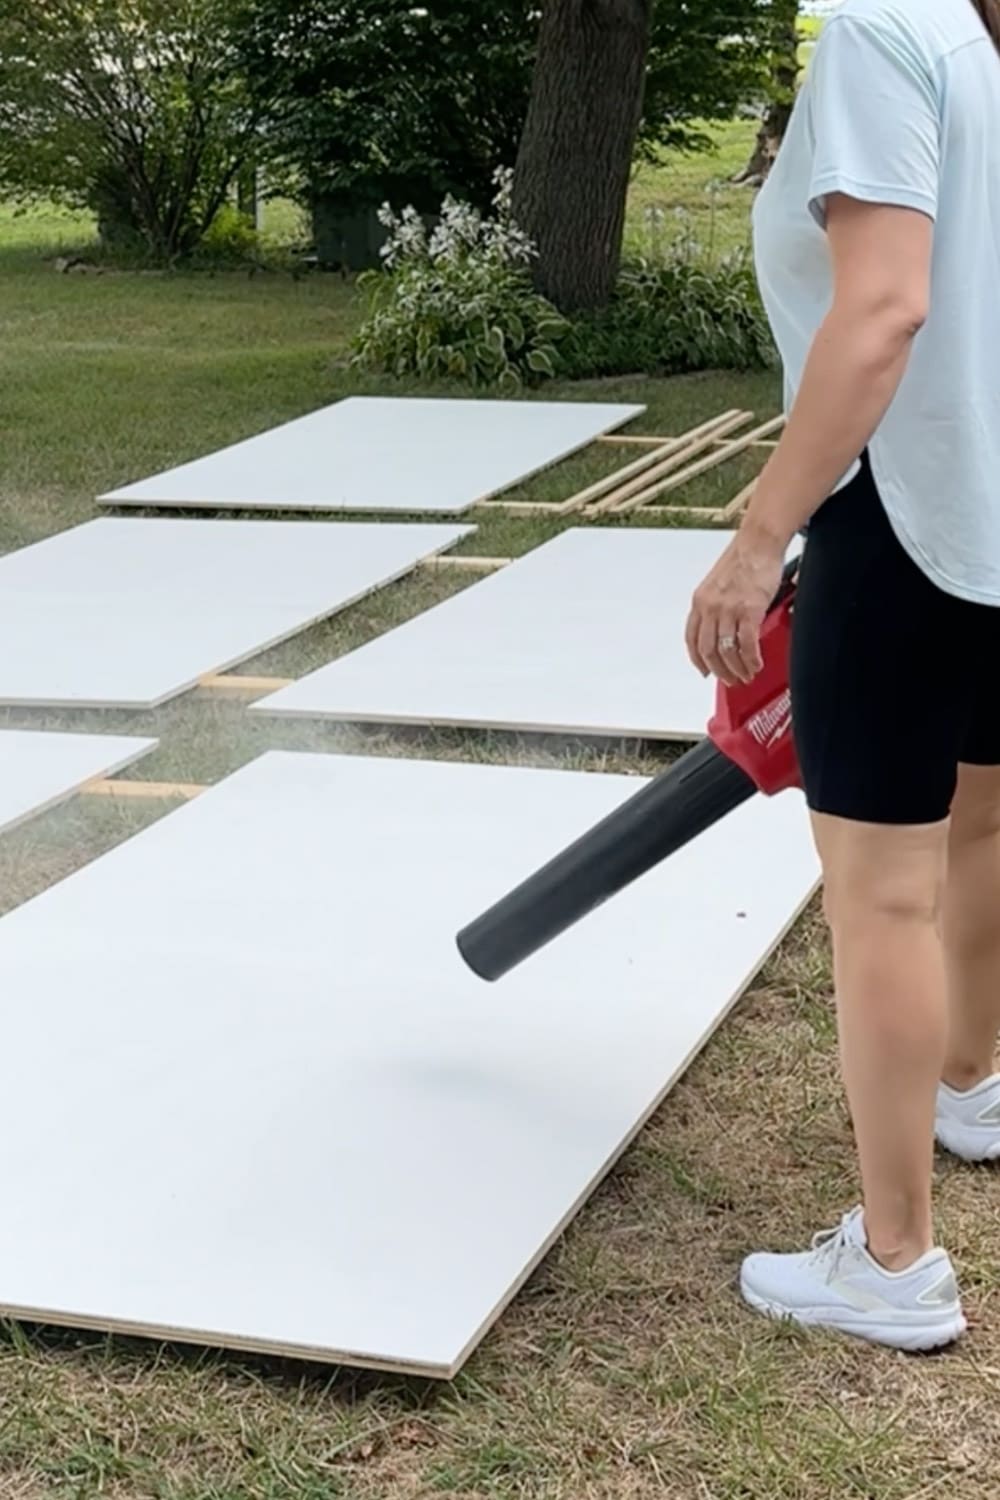
Once the primer dried, I used my handheld sander and 180-grit sandpaper to give everything a very light sanding. This step makes such a difference in how smooth your paint ends up looking. Just be sure to clean off all the sanding dust. A blower works great for this!
Painting Before Building Built-In Bookshelves
After priming and lightly sanding, it was time for paint.
I chose a gorgeous dark green, SW Hidden Trail. It’s moody and cozy without feeling too dark, especially next to all the books. And I’m using my favorite paint when it comes to painting cabinets and furniture like these built-in bookshelves: Sherwin-Williams Emerald Urethane Trim Enamel.
I painted:
- The 4×8 panels I primed
- Trim pieces I knew I’d be using
Painting them outside, propped up on scrap wood, was a total game-changer for me. The 18-inch roller frame makes it go especially fast.
Cutting and Prepping the Panels
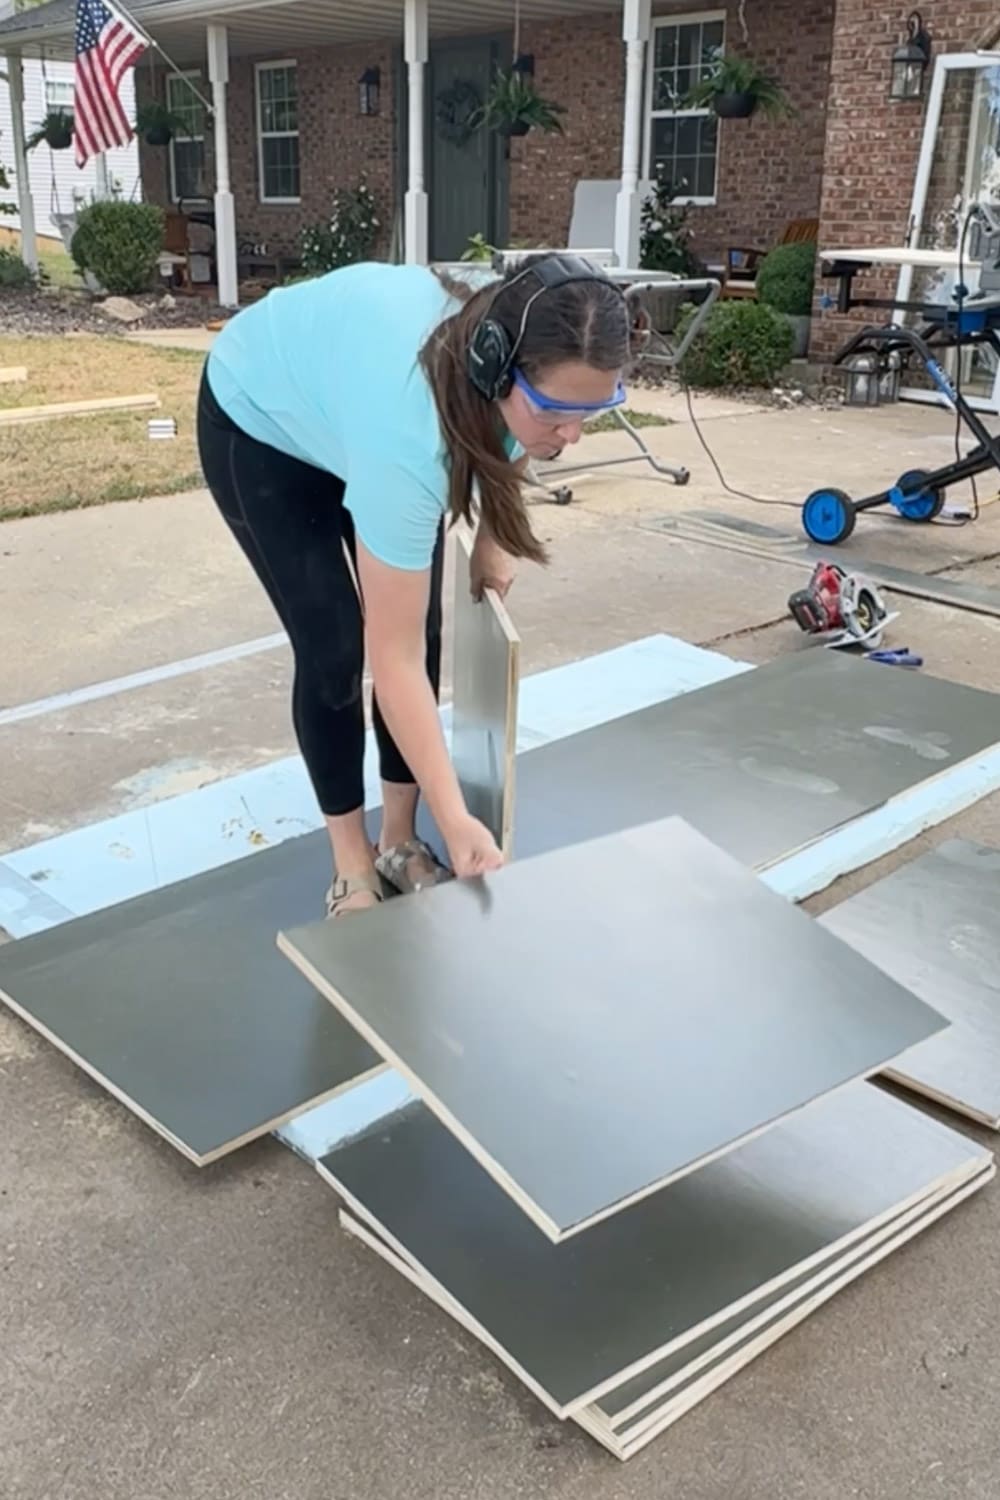
Once the paint had fully dried, I started cutting everything down to the sizes I needed for my built-in bookshelves using my circular saw and table saw.
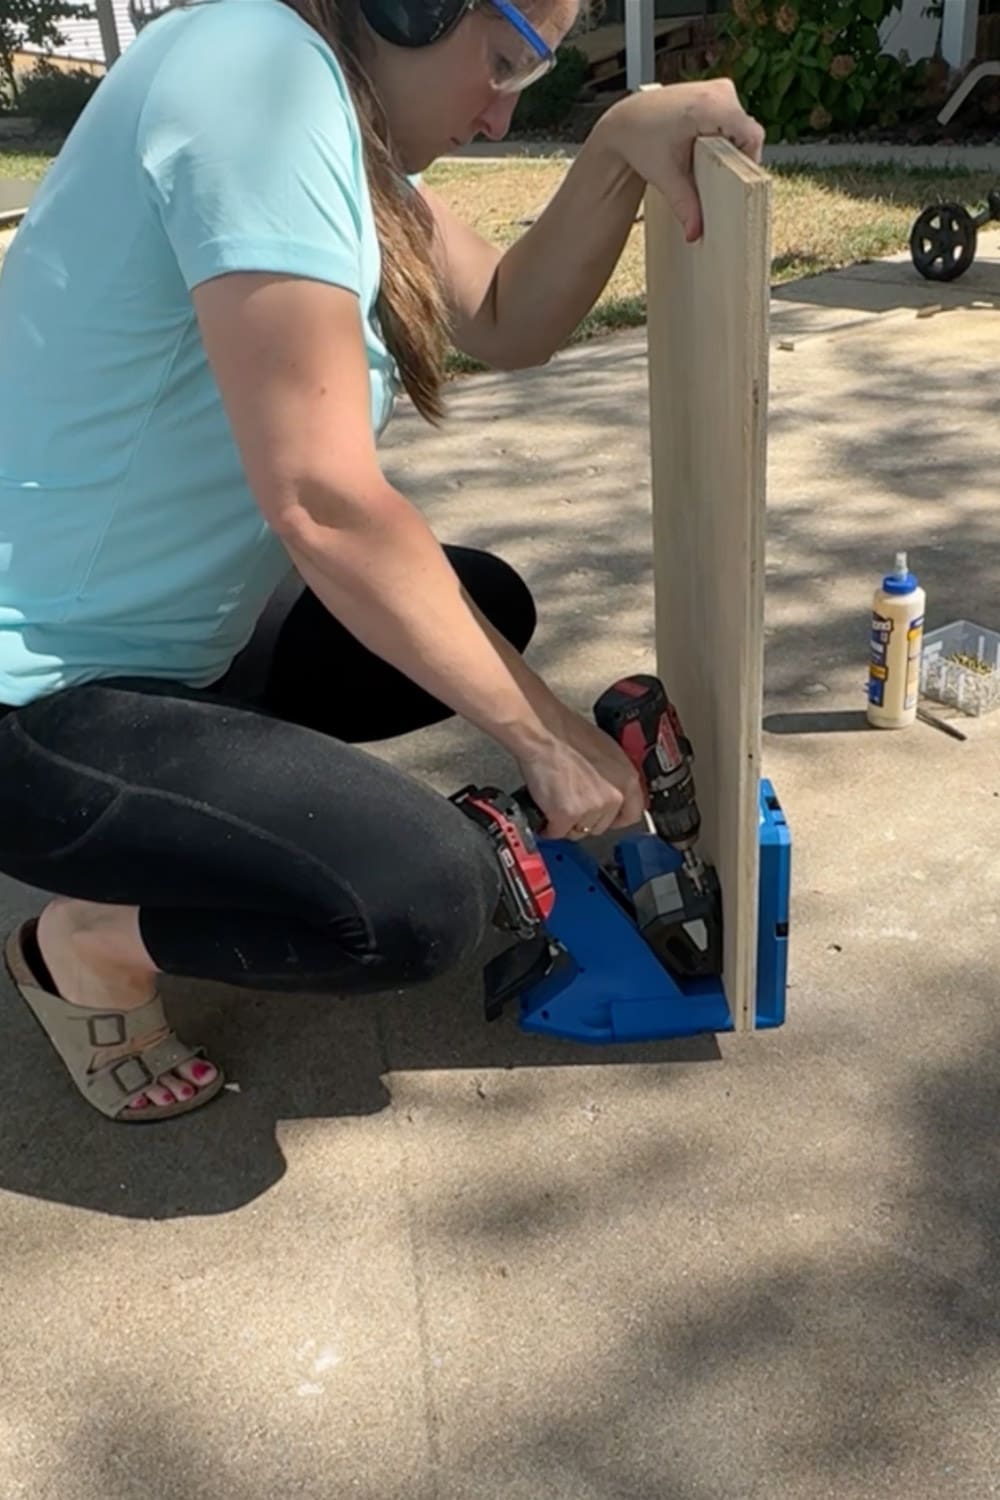
Next, I used my pocket hole jig to add some pocket holes as needed. Pocket holes are perfect for this kind of build. They create a strong connection using screws that are completely hidden inside the cabinet.
Building the Base Cabinet
Even though we’re calling this the “library,” this room needs to be multipurpose. It’s also going to function as a home office and homeschool room. So in addition to the built-in bookshelves, I also need larger cabinets for hidden storage.
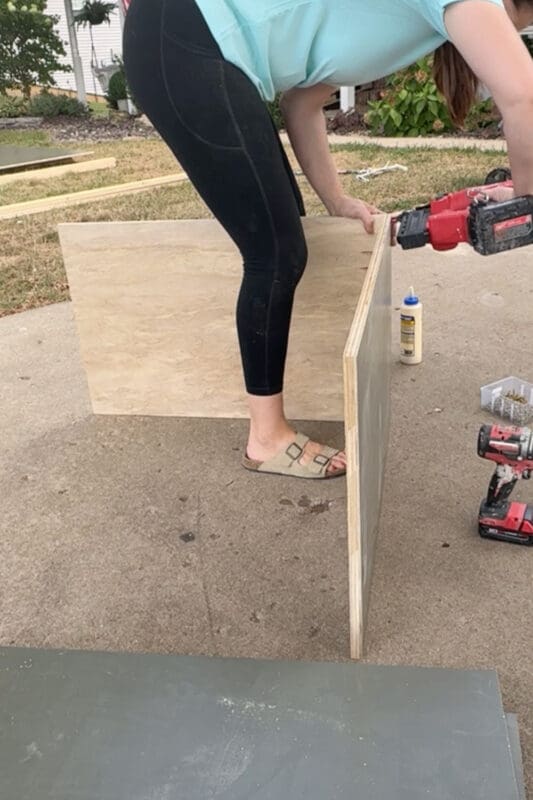
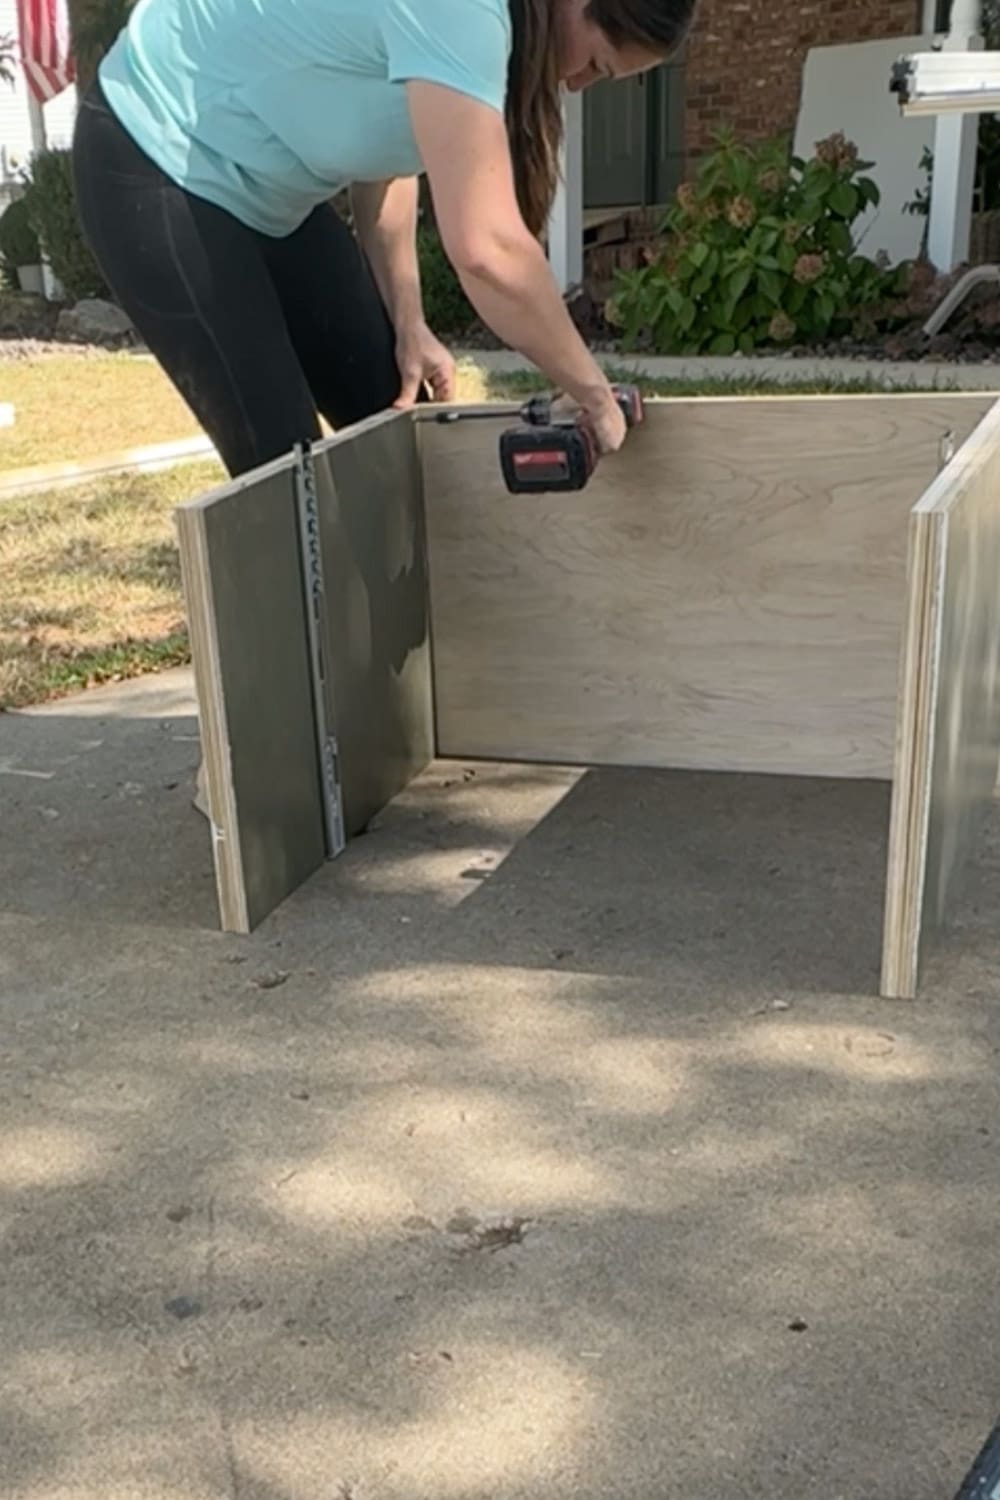
Step 1: Assemble the Main Box
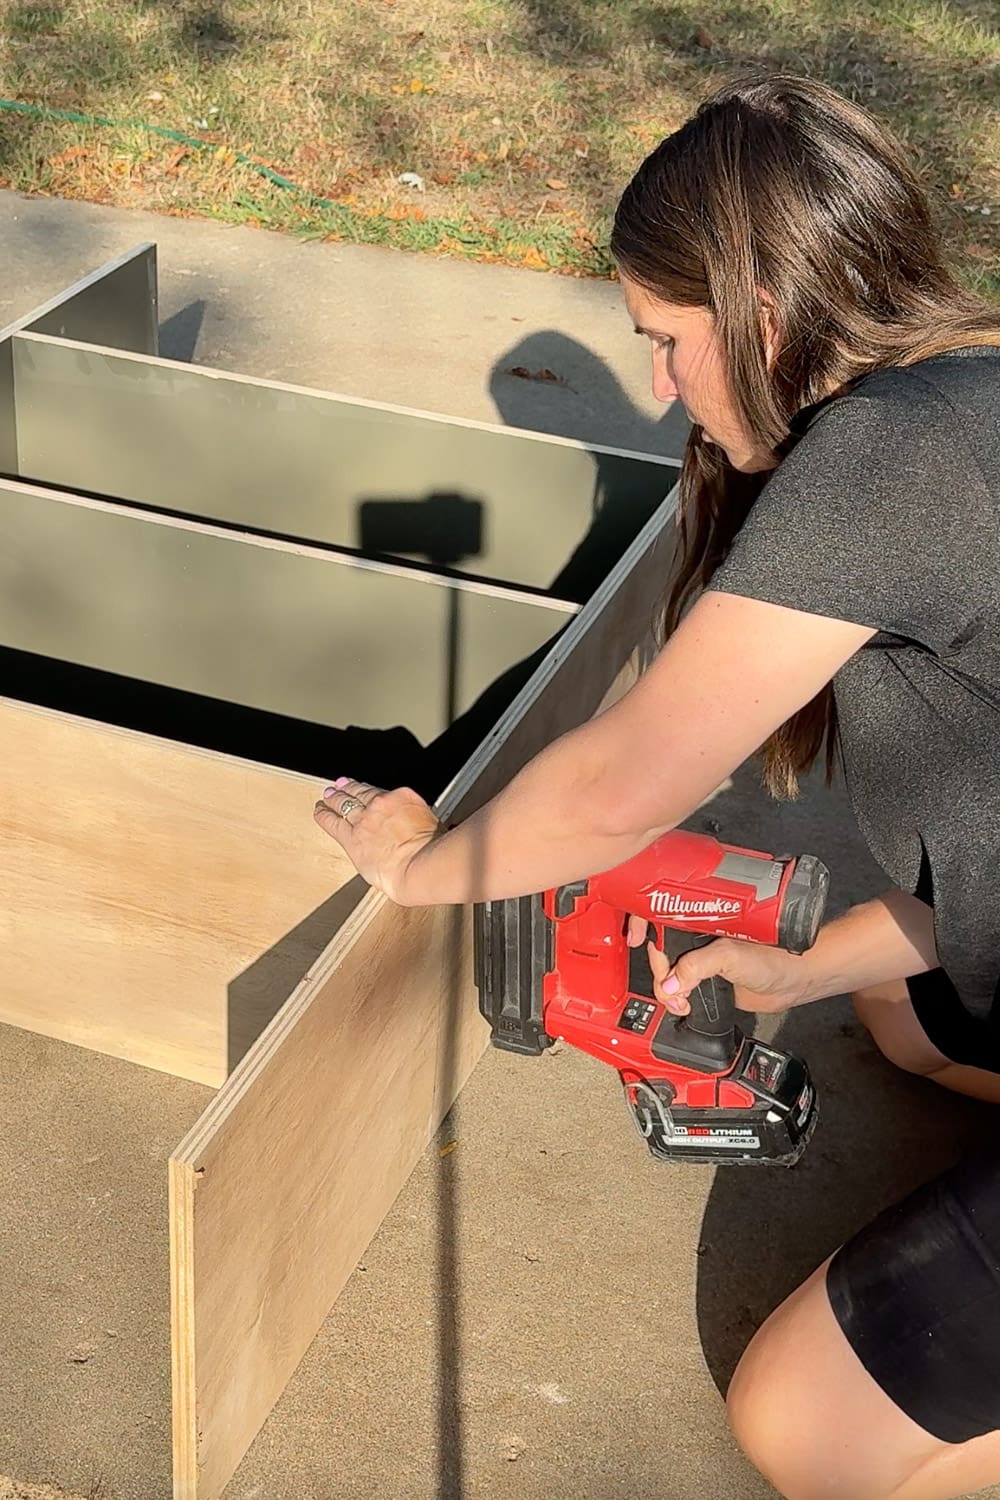
To assemble this cabinet box, I started with wood glue anywhere two boards would touch. Then I used a couple of brad nails to hold everything together.
Brad nails are not strong enough on their own in the long term. But the brad nailer is easy to use one-handed, so they’re perfect for holding pieces in place until you can secure them permanently by driving screws through the pocket holes on the inside.

Step 2: Adding Drawer Slides
Once both side panels were attached to the top board, the cabinet box started taking shape.
Next, I took two additional panels sized to fit inside the cabinet. On the green side (the visible side), I attached the drawer slides for a sliding shelf. On the back side, I covered the panel with wood glue.
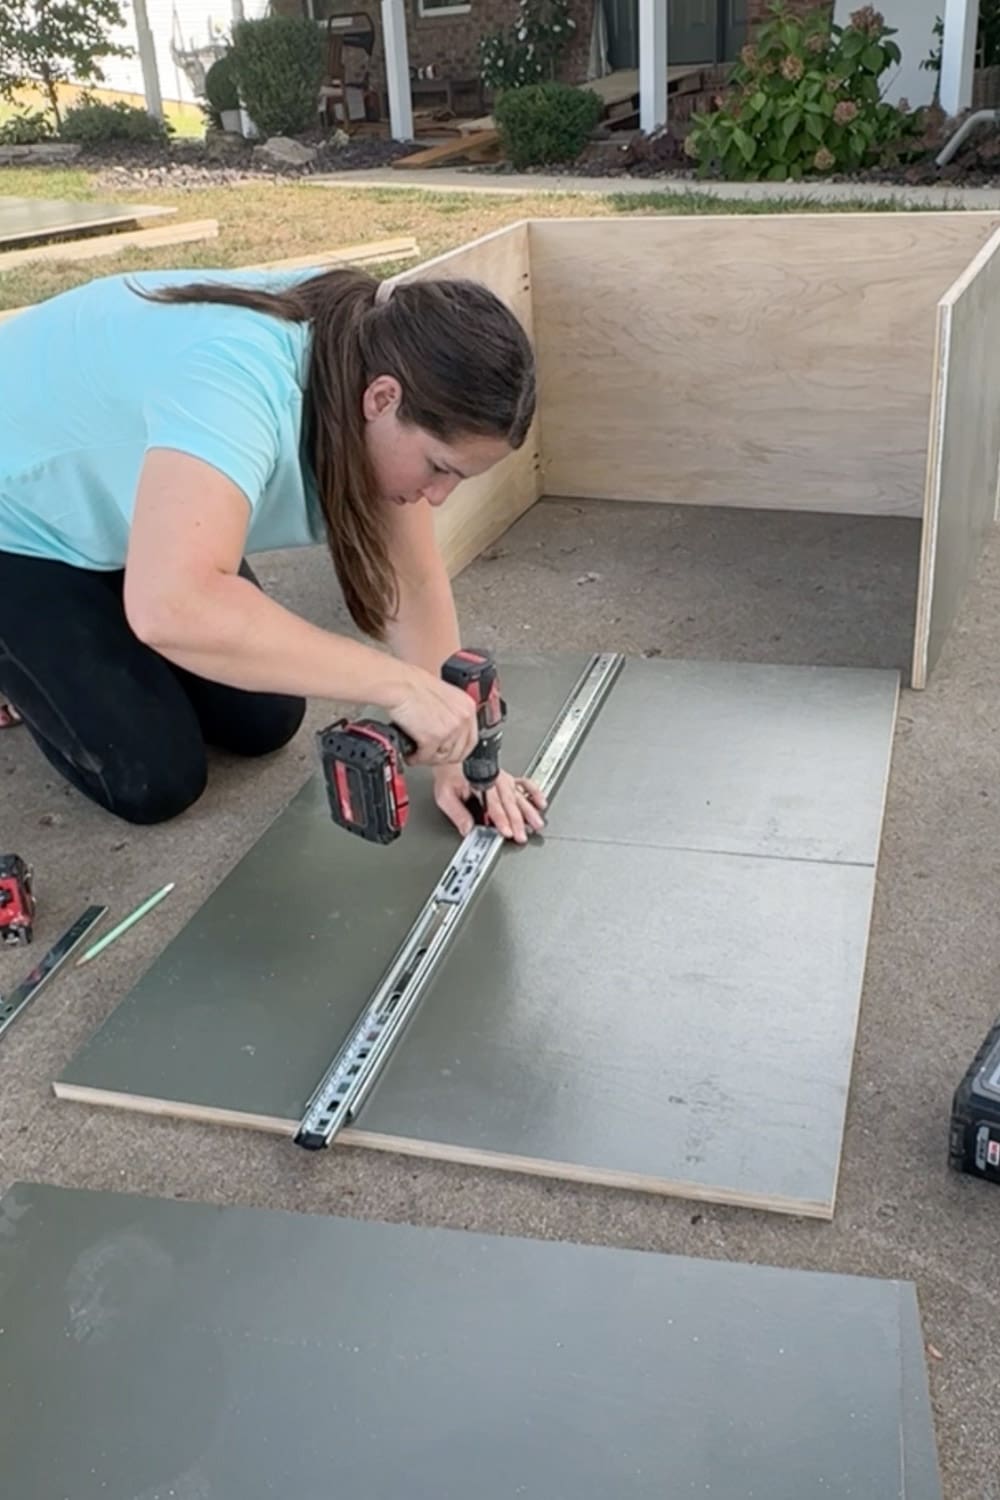
Then I pressed those panels against the side walls and secured them with screws at the corners.
This makes the cabinet sides double thick, which creates a really solid and sturdy base.
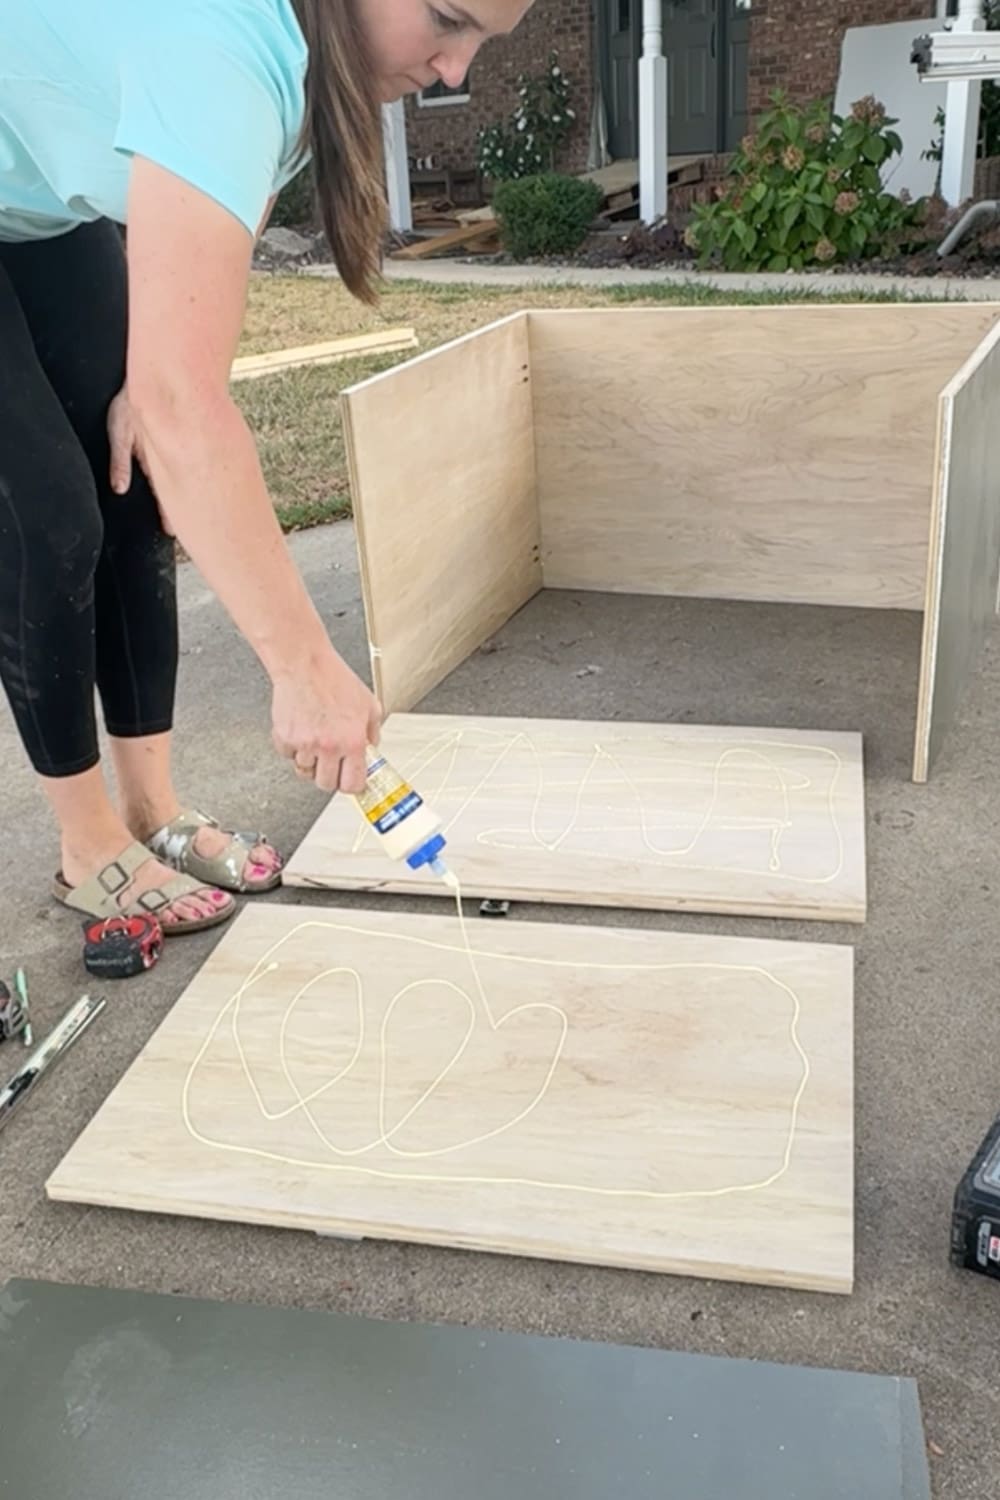
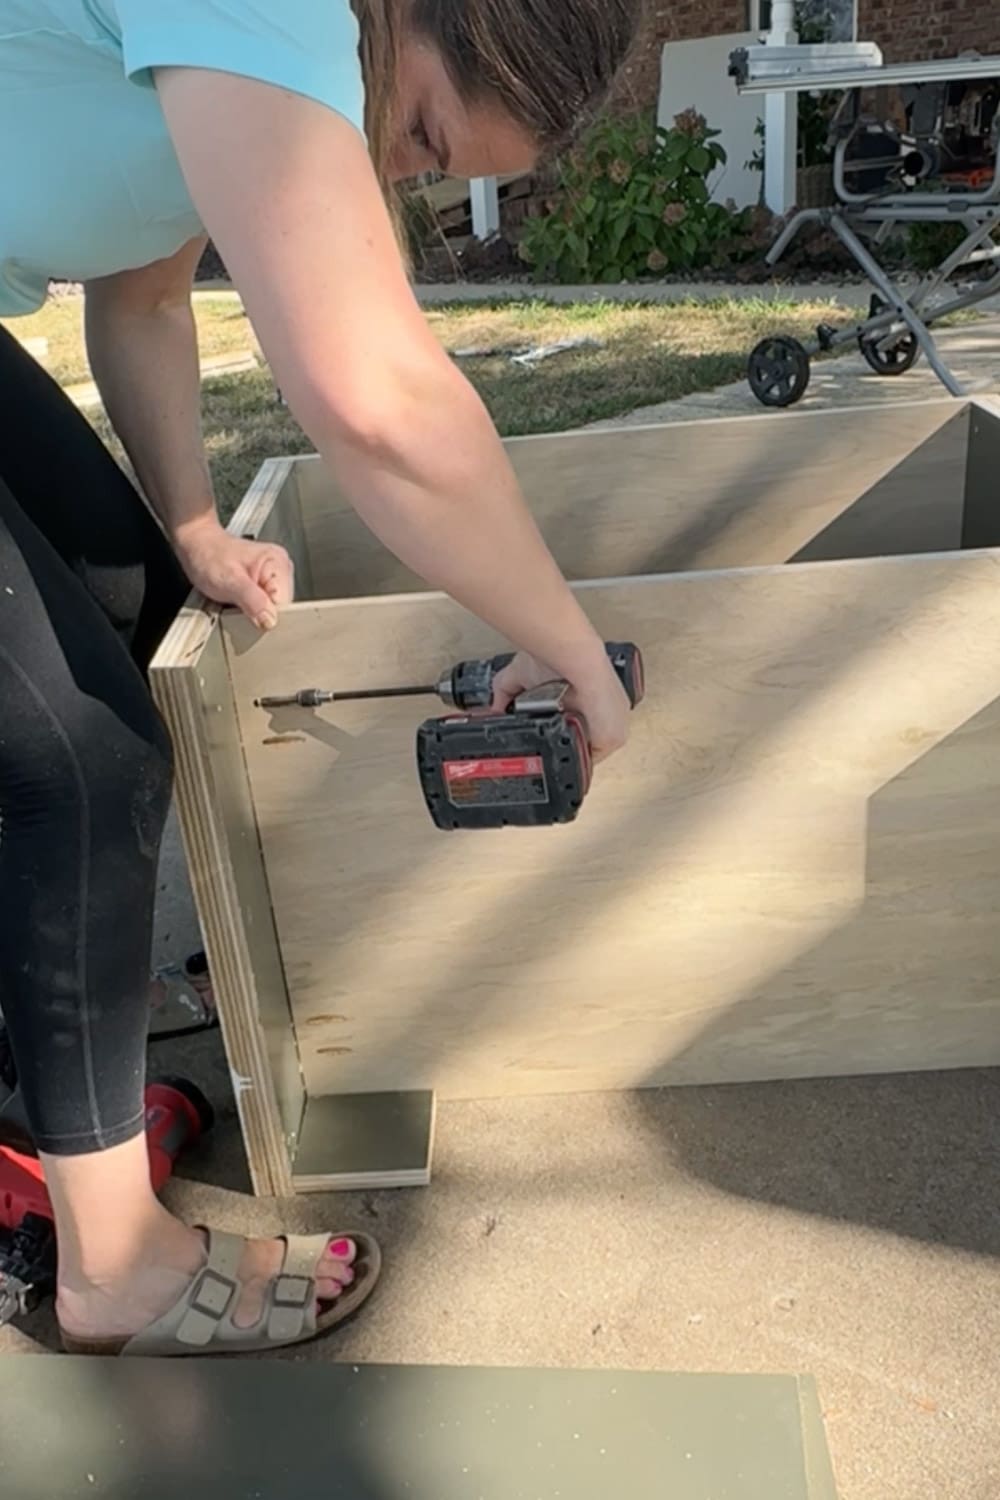
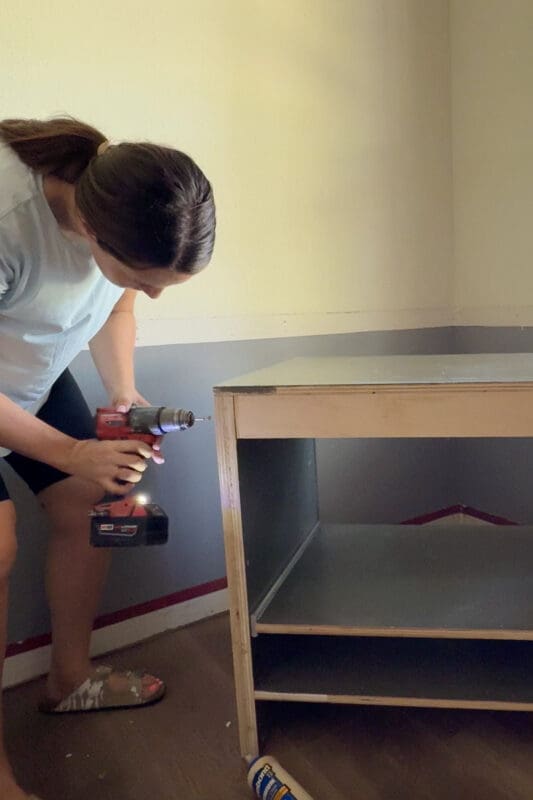
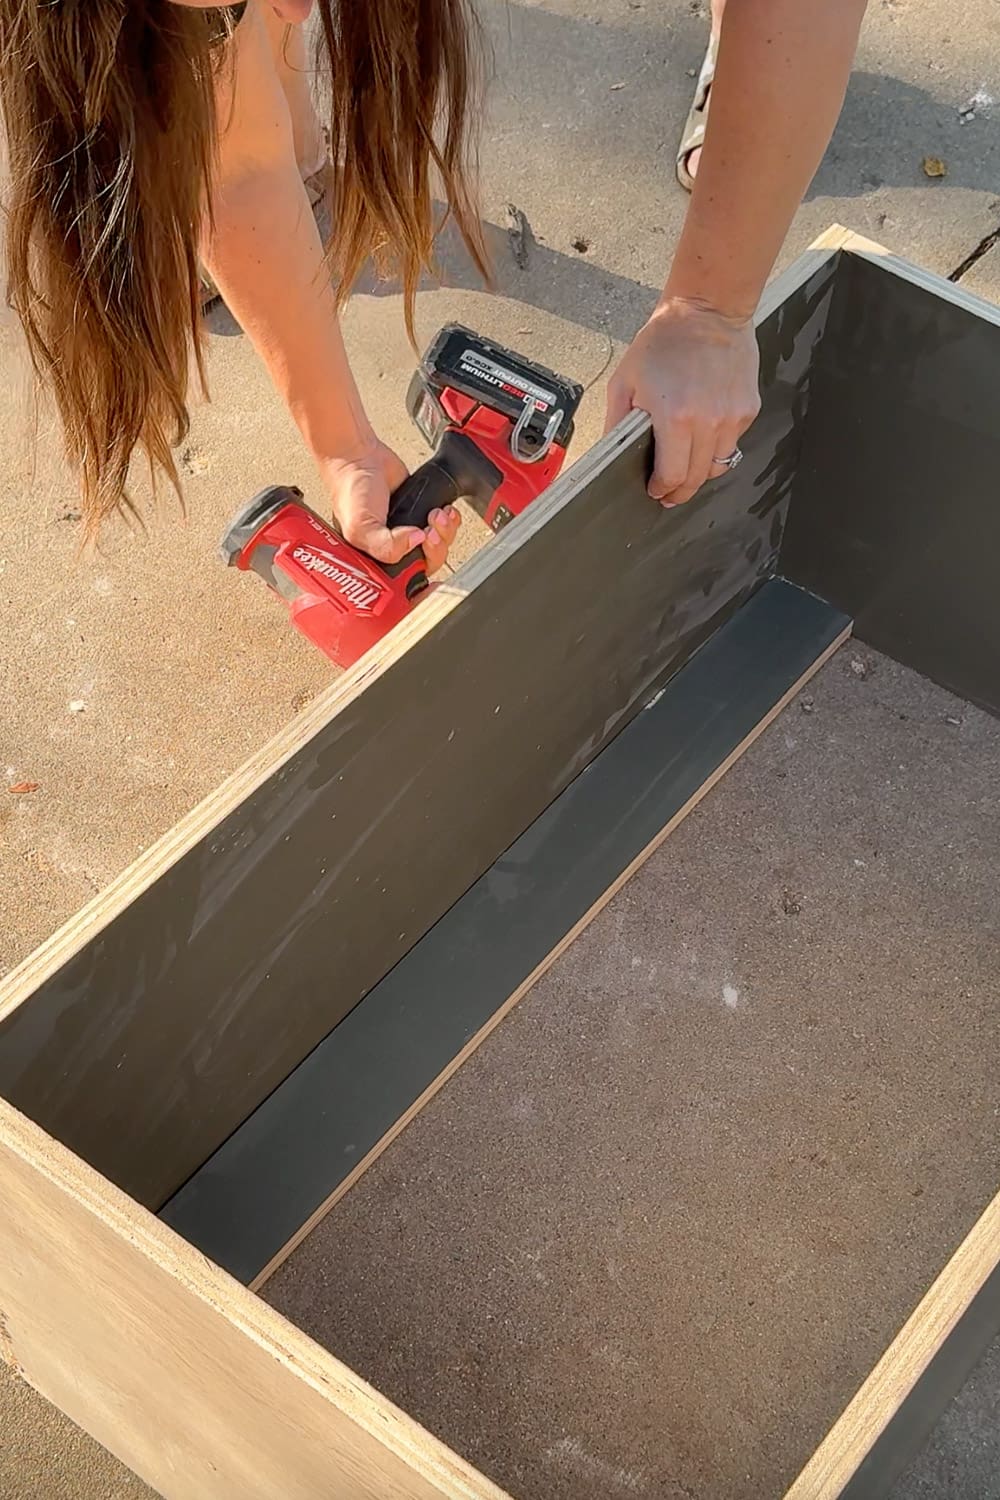
Step 3: Installing the Bottom Panel
With the sides attached, it’s time to install the bottom piece.
I added wood glue to the ends, used a small scrap board as a spacer to hold it at the correct height, and drove screws into the pocket holes using my drill.
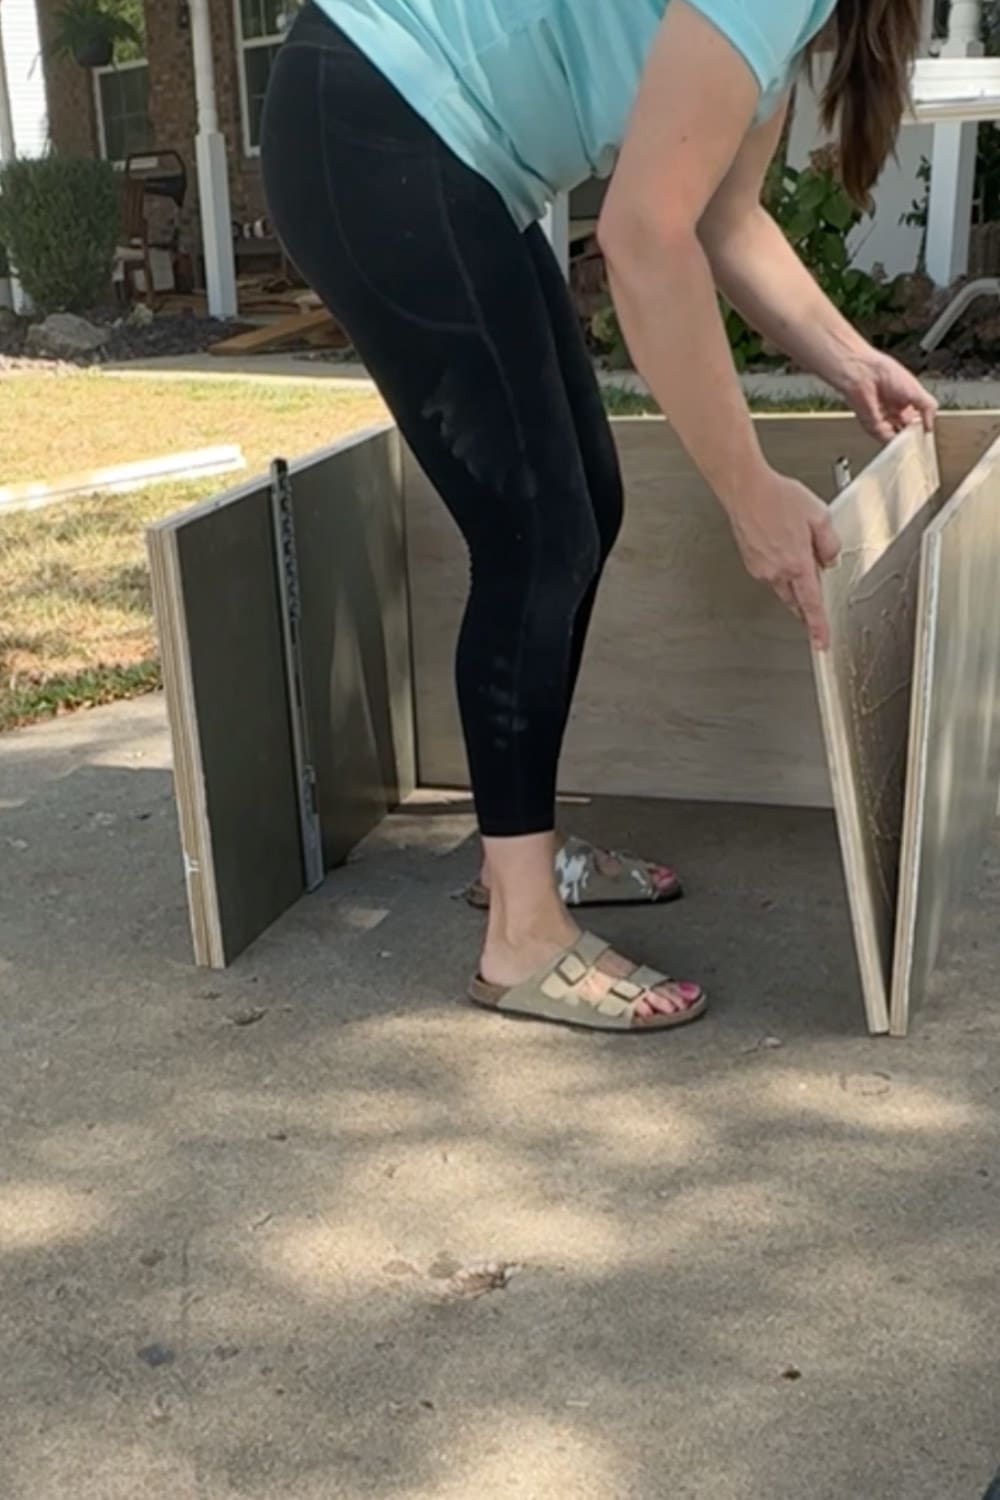
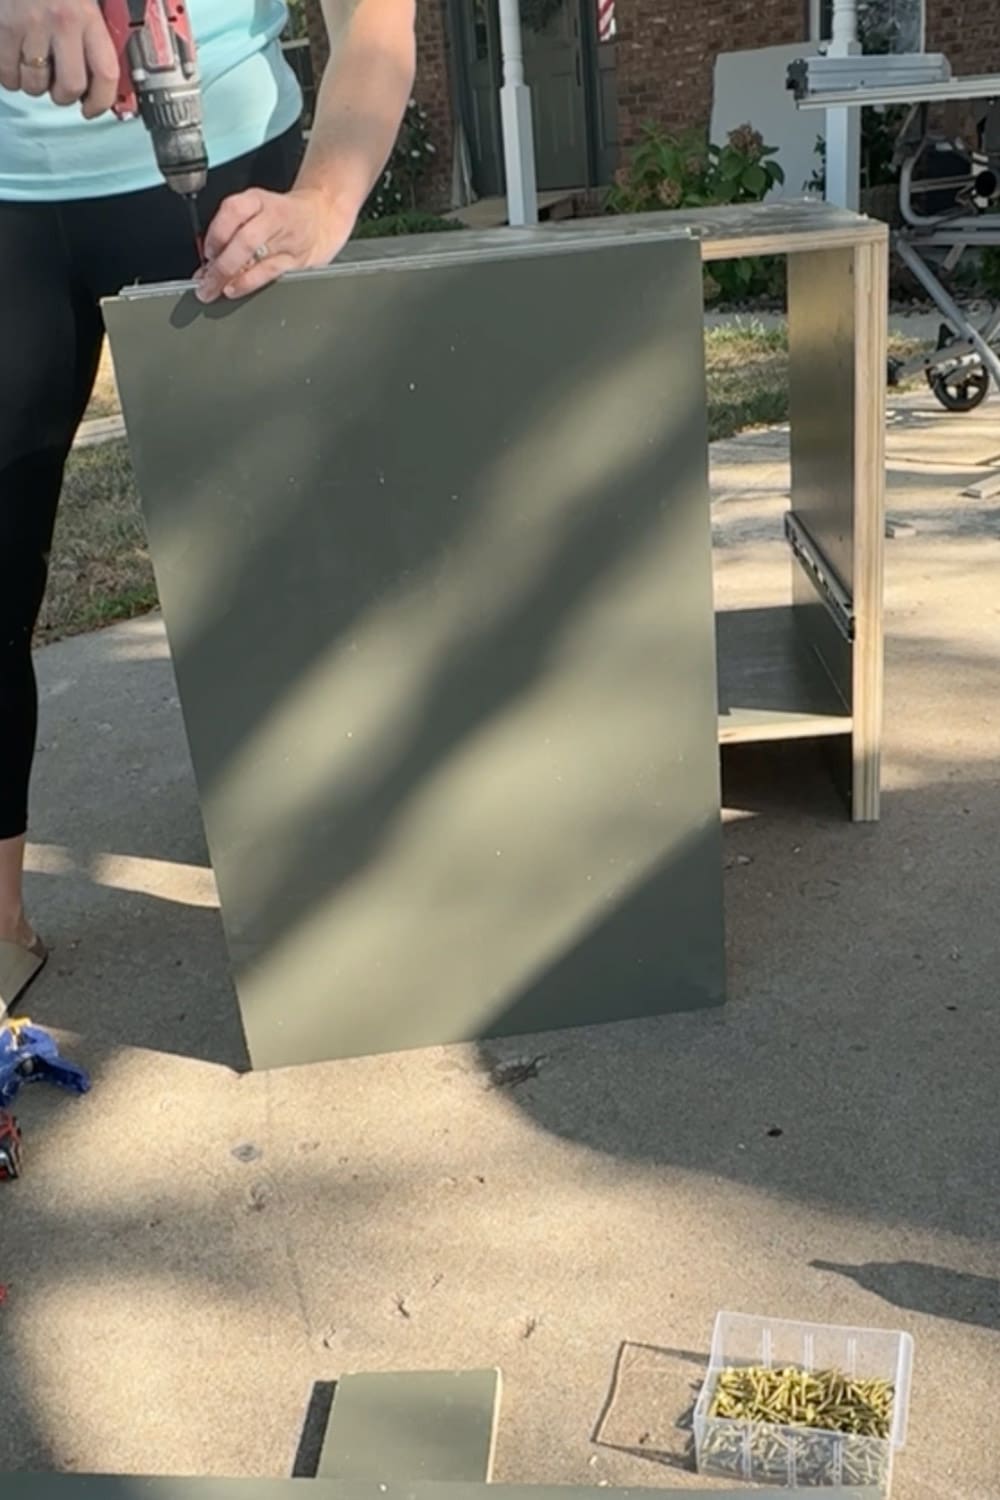
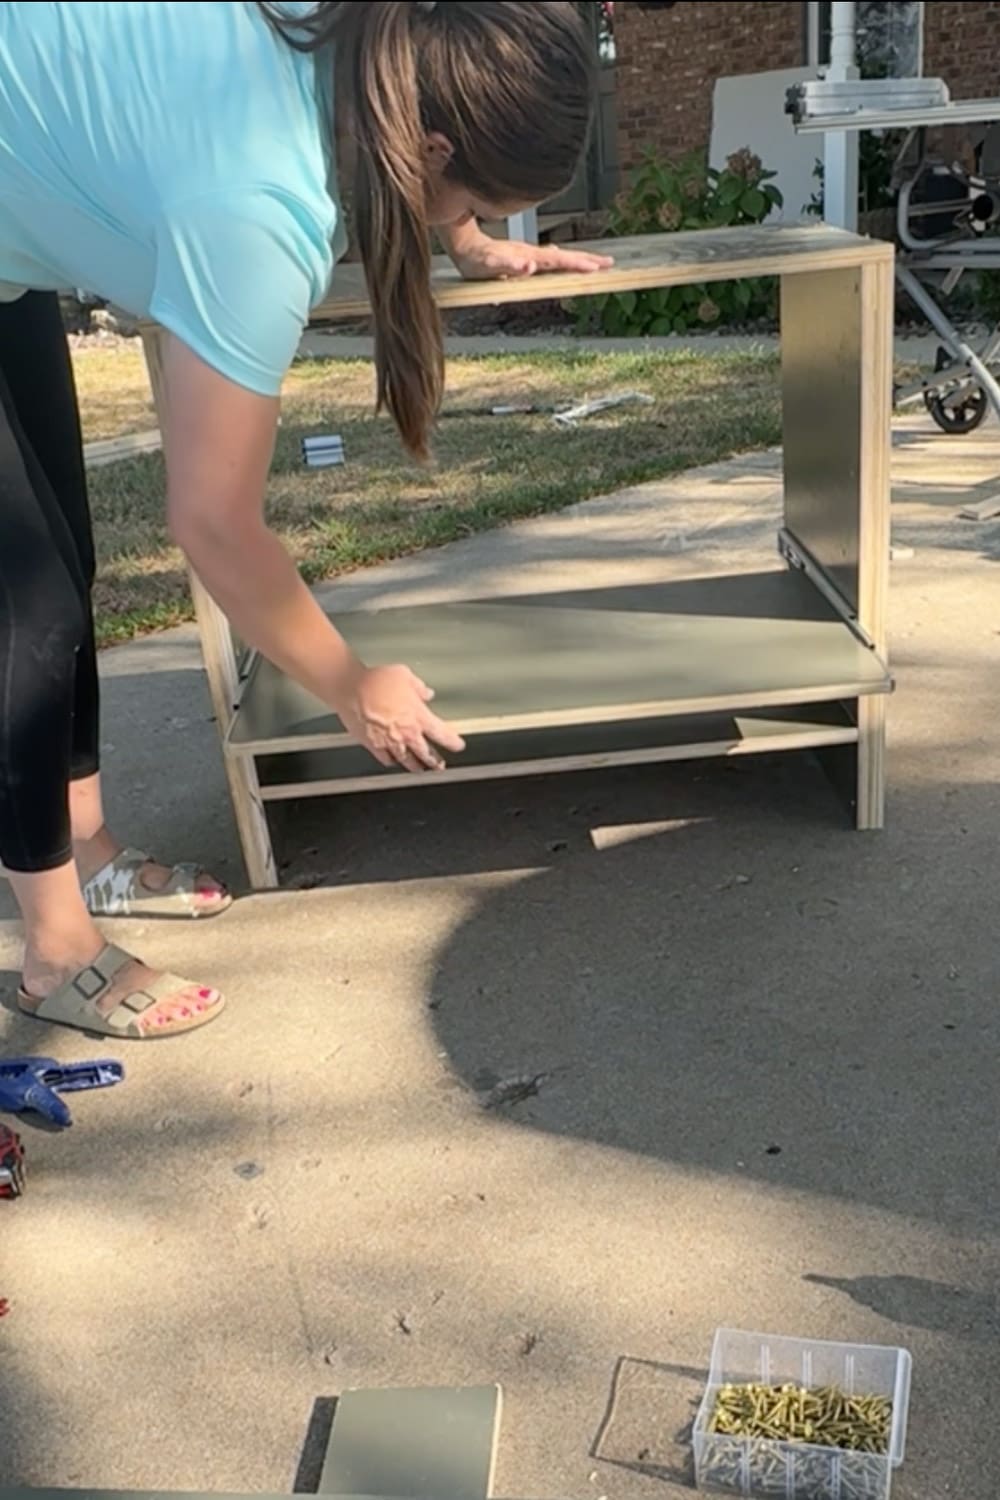
Step 4: Adding the Sliding Shelf
Next, I attached the remaining side of the drawer slides and installed the sliding shelf.
This is going to hold our printer, which means:
- Easy access
- No dragging it out
- No awkward cords everywhere
Step 5: Building and Attaching the Face Frame
To give the cabinet a finished, professional look, I built a face frame.
I used wood glue and pocket holes to assemble the frame itself, attaching the side pieces to the top and bottom. Then I used wood glue and brad nails to secure the face frame to the front of the cabinet. Look at the difference!

Step 6: Adding the Rear Stretcher
Before attaching the cabinet to the wall, I added a stretcher across the top back.
A stretcher:
- Is a horizontal support piece installed across the back top of a cabinet or bookshelf
- Helps keep the cabinet square and rigid
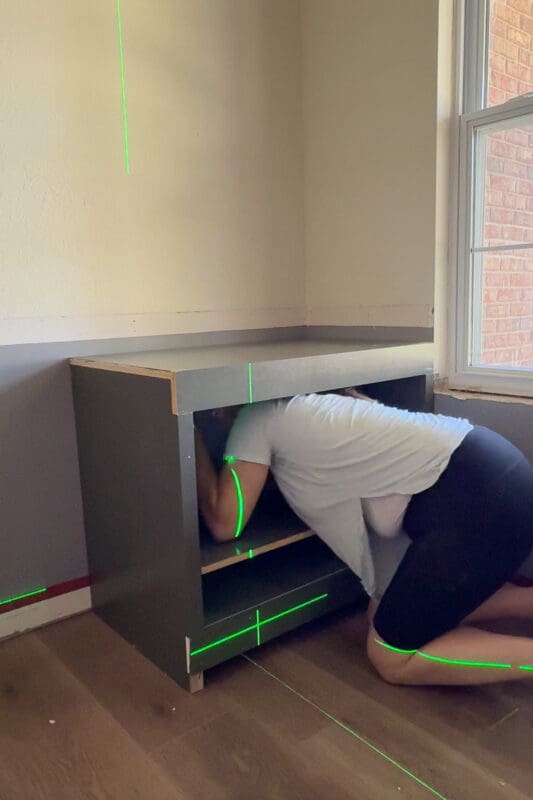
- Gives you a solid place to drive screws into wall studs
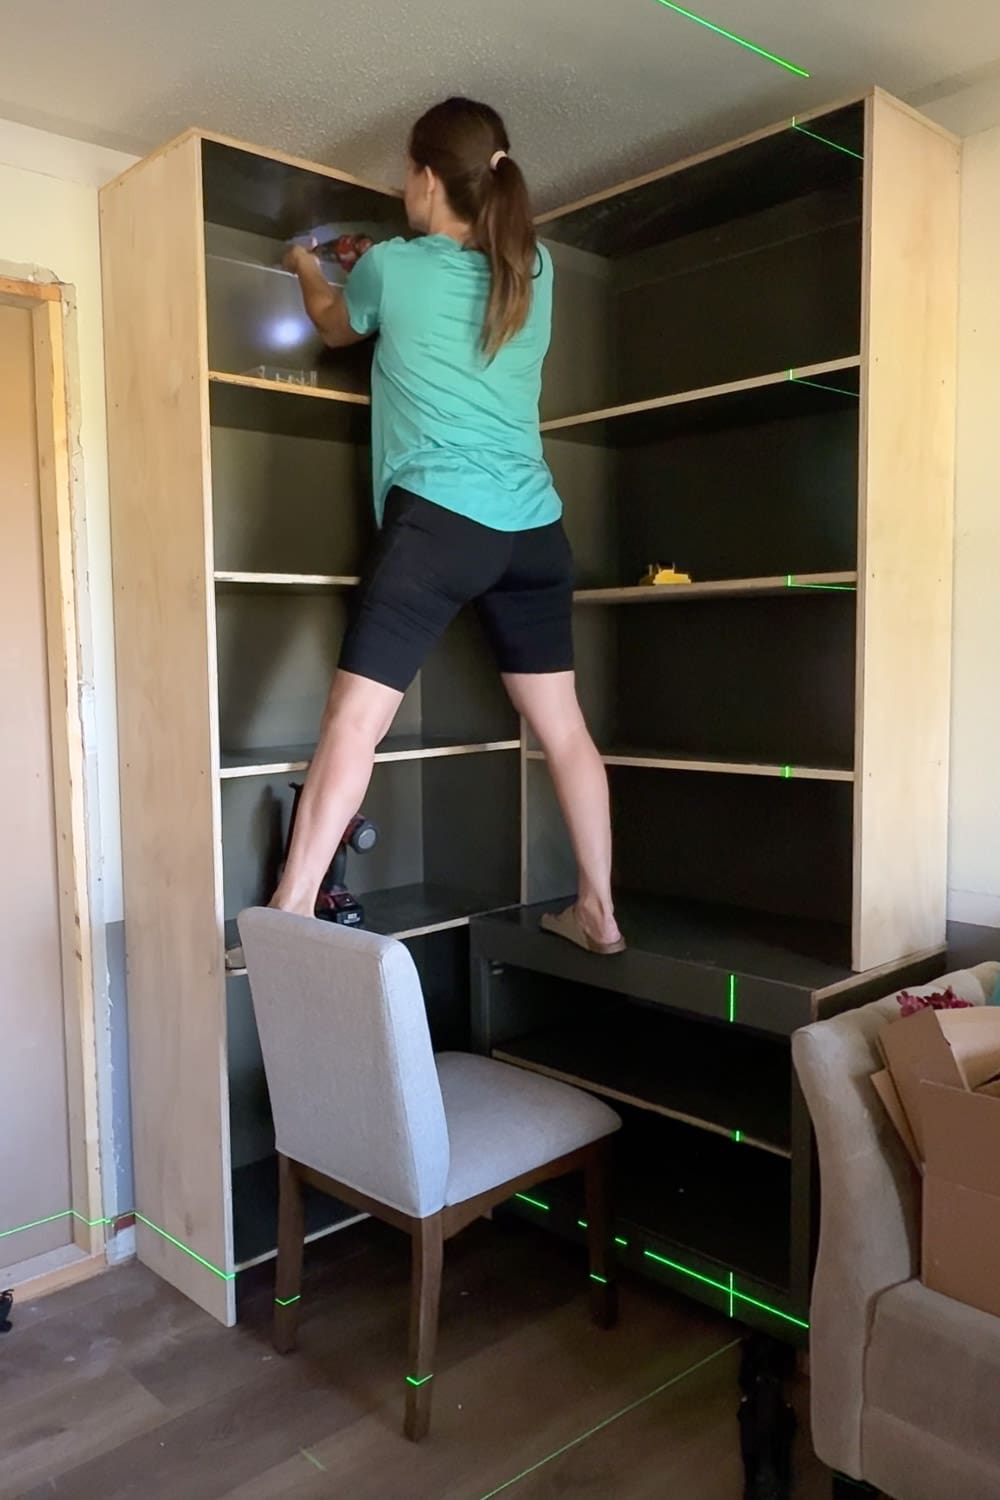
I used my stud finder, then marked my studs, used my laser level to create a straight reference line, and drove screws through the stretcher directly into the studs. The base cabinet was officially installed.
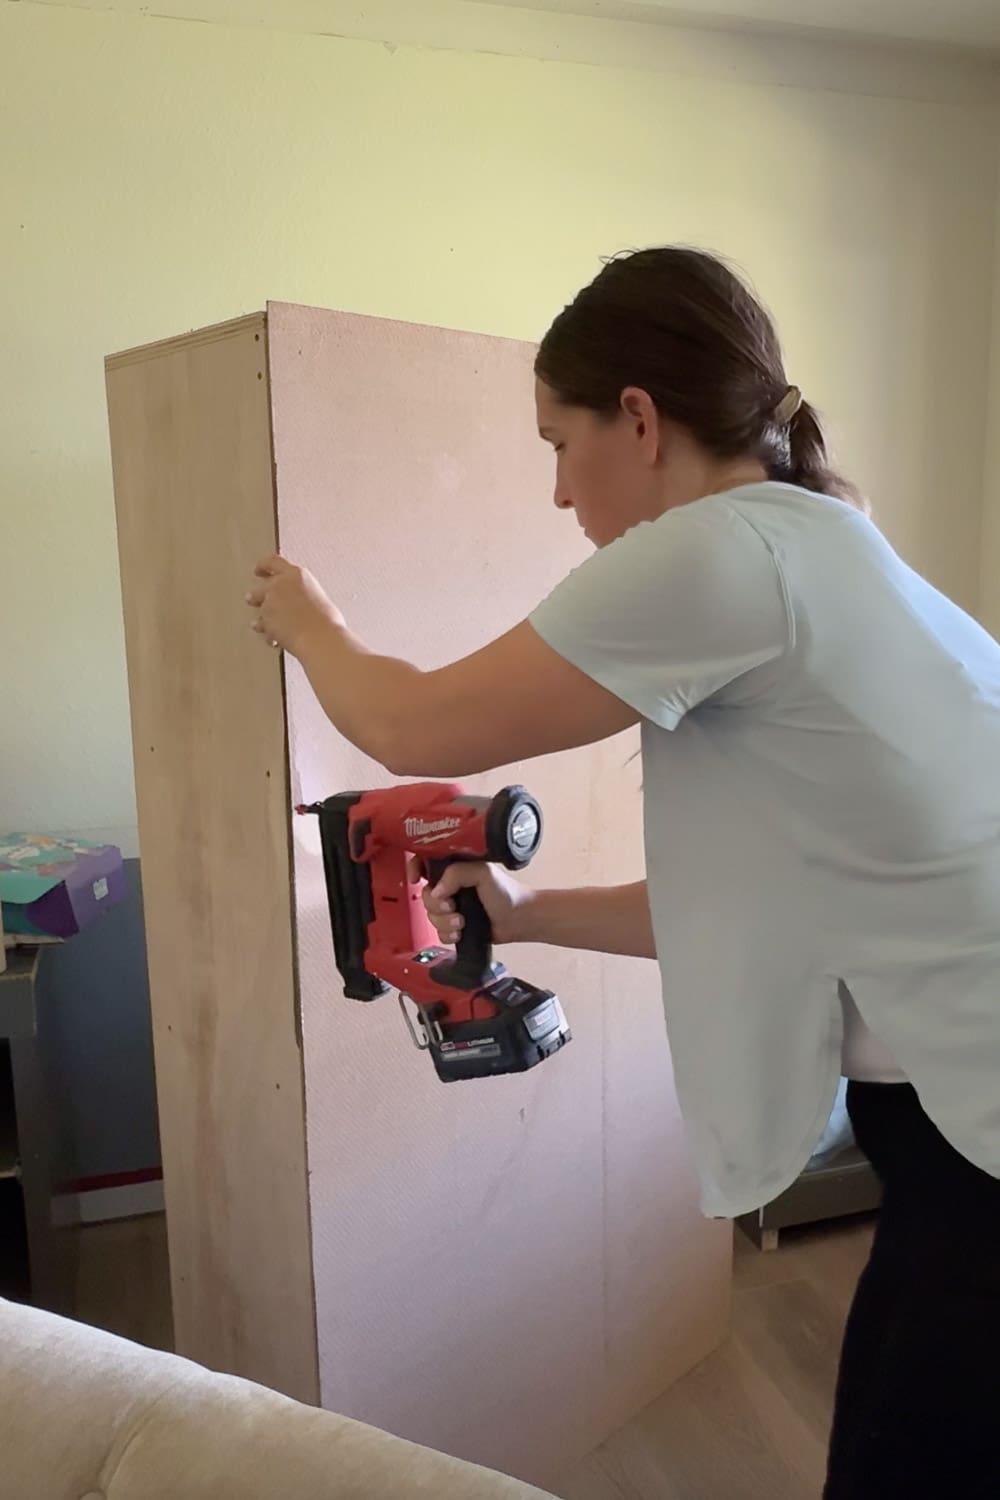
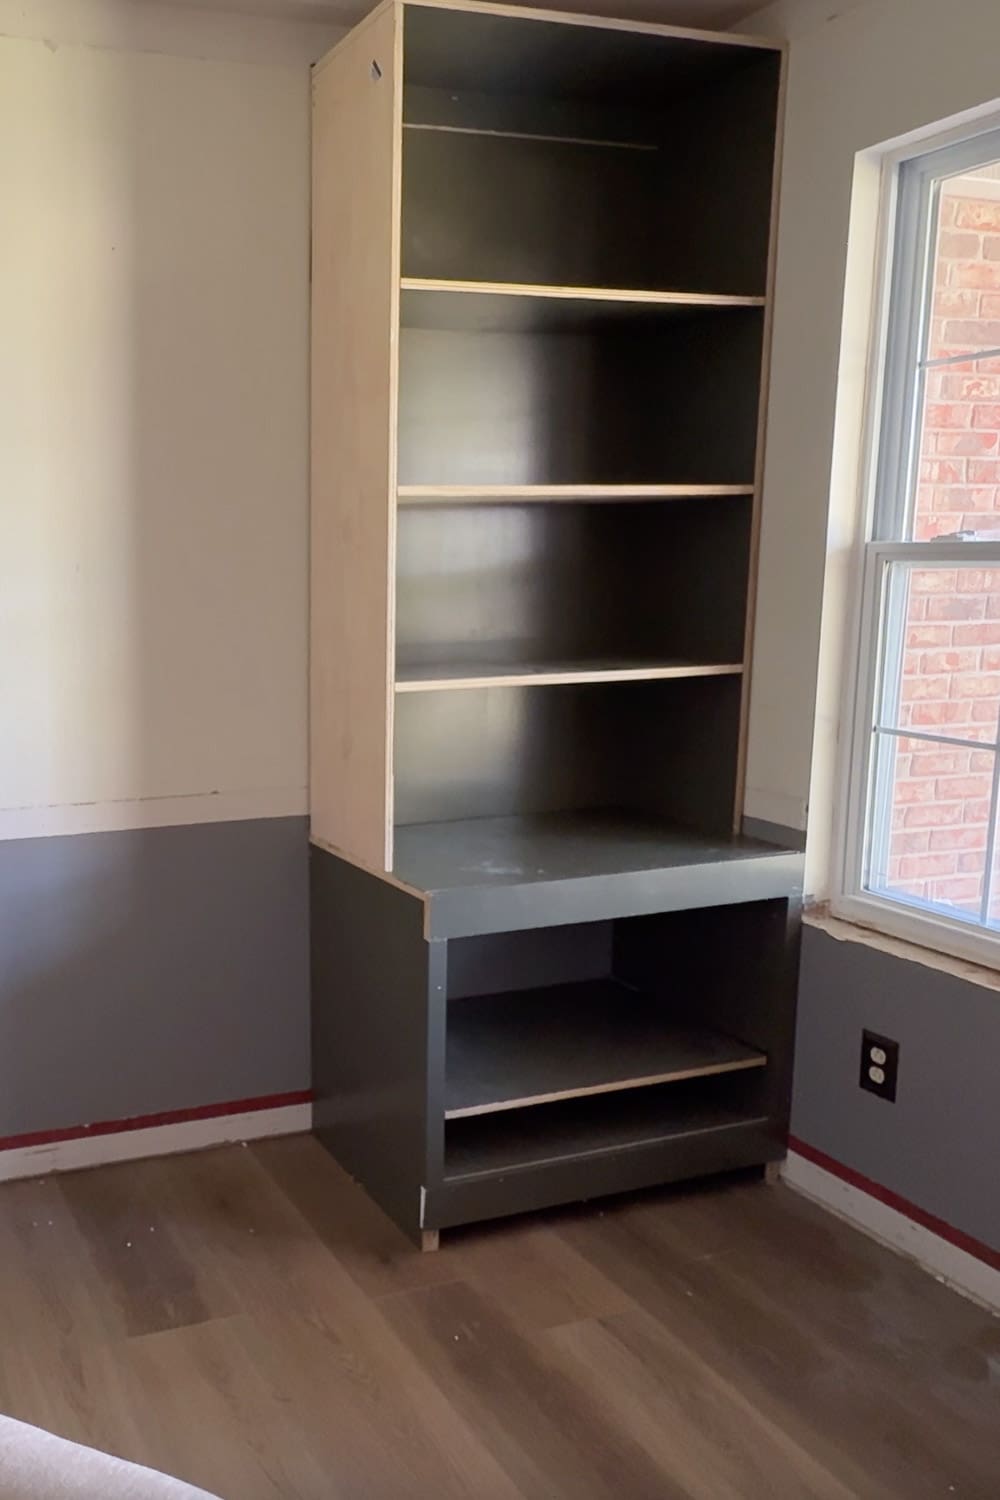
Building the Upper Bookshelf Unit
With the base cabinet done, it was time to build the shelf that would sit on top.
I followed the same pattern:
- Cut pre-painted panels to size
- Wood glue
- Brad nailer
- Screws for strength
For these built-in bookshelves, I chose fixed shelves instead of adjustable ones. I prefer the clean, symmetrical look of shelves all at the same height. If you prefer adjustable shelving, check out my post where I built adjustable shelves in my pantry – How to Build Beautiful DIY Pantry Shelves.
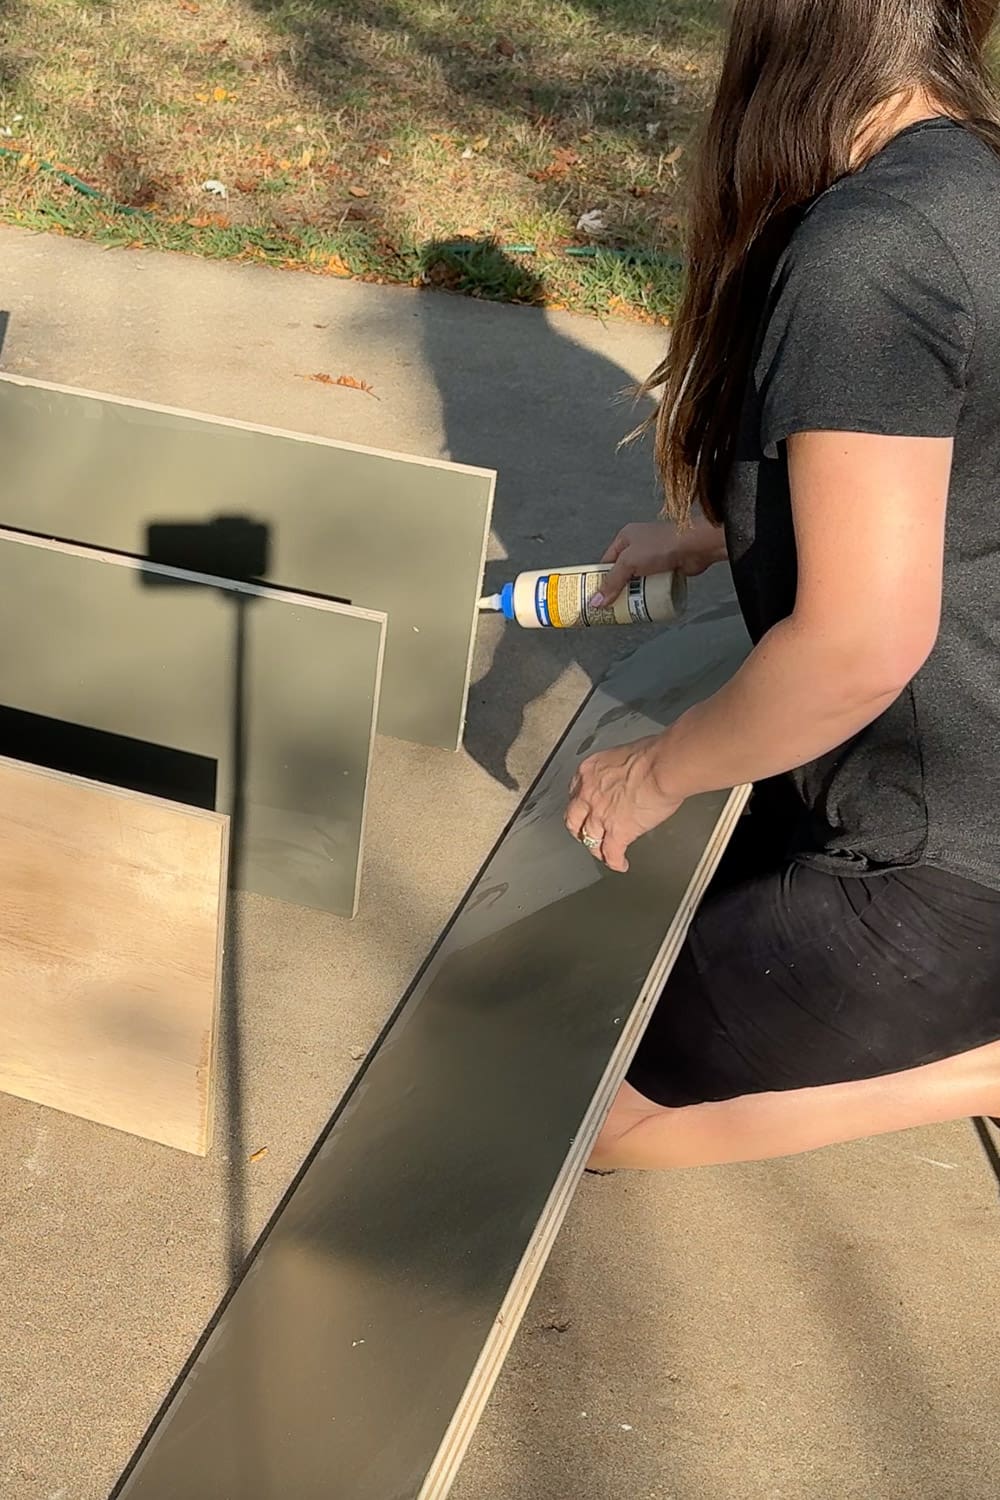
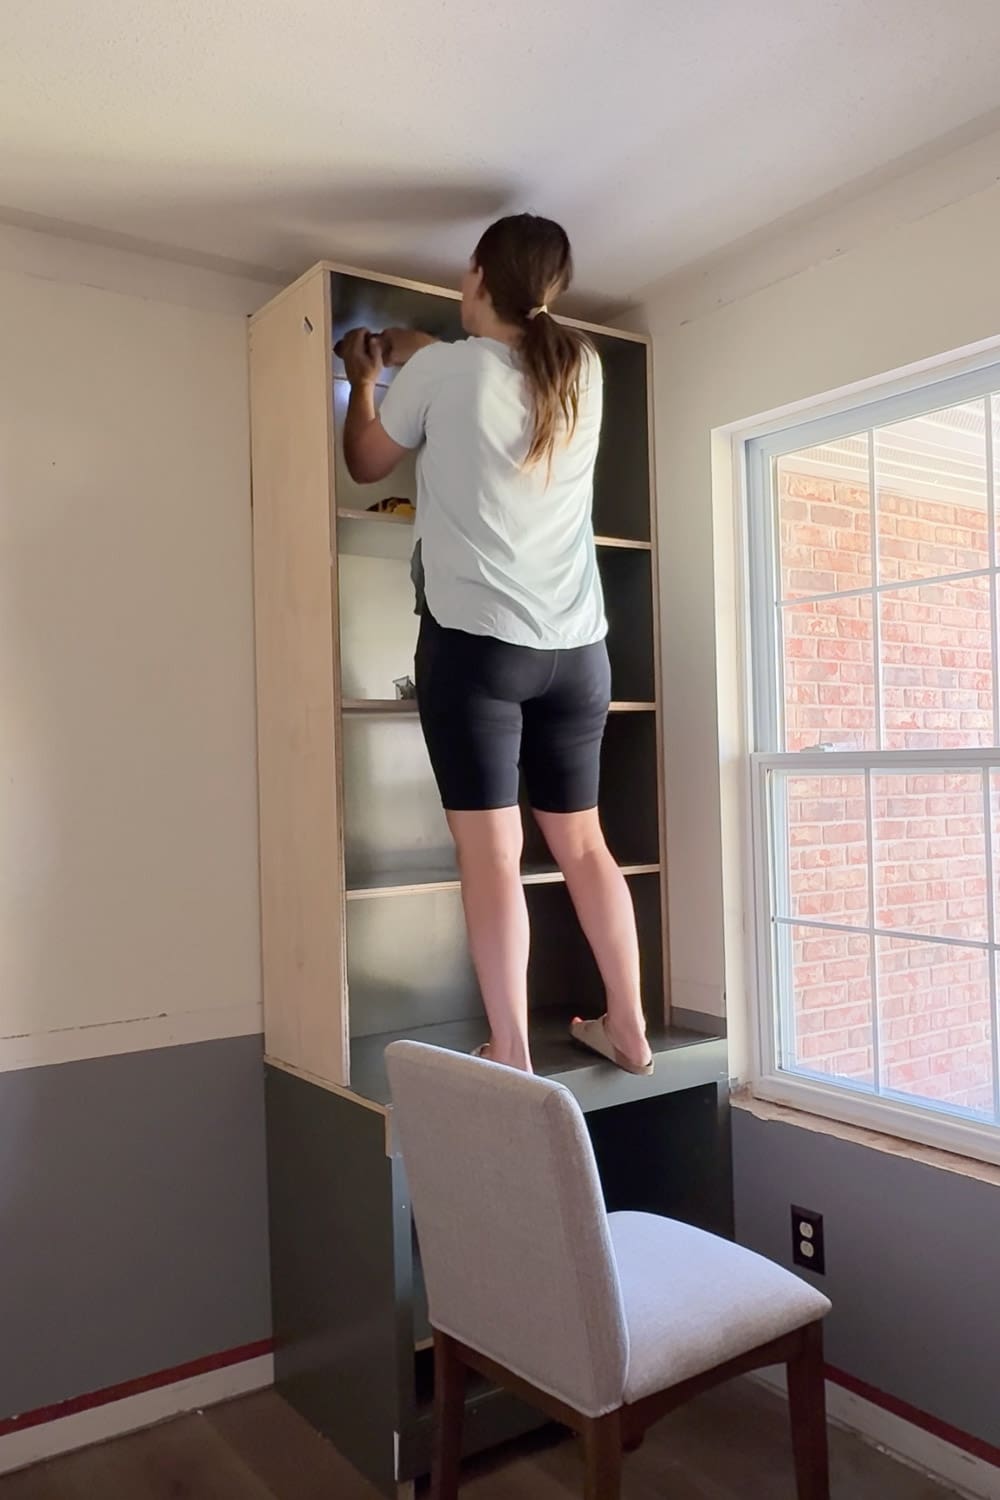
Once the upper shelf was assembled, I added:
- A rear stretcher just under the top
- A hardboard panel for backing
I skipped backing on the cabinet because you rarely see the back of a cabinet interior. But with shelving, a backing makes it look finished.
With the bookshelf done, it was time to install it in our home library. I stacked the shelf on top of the base cabinet and secured it to the studs through the stretcher board.
My Wall of Built-In Bookshelves
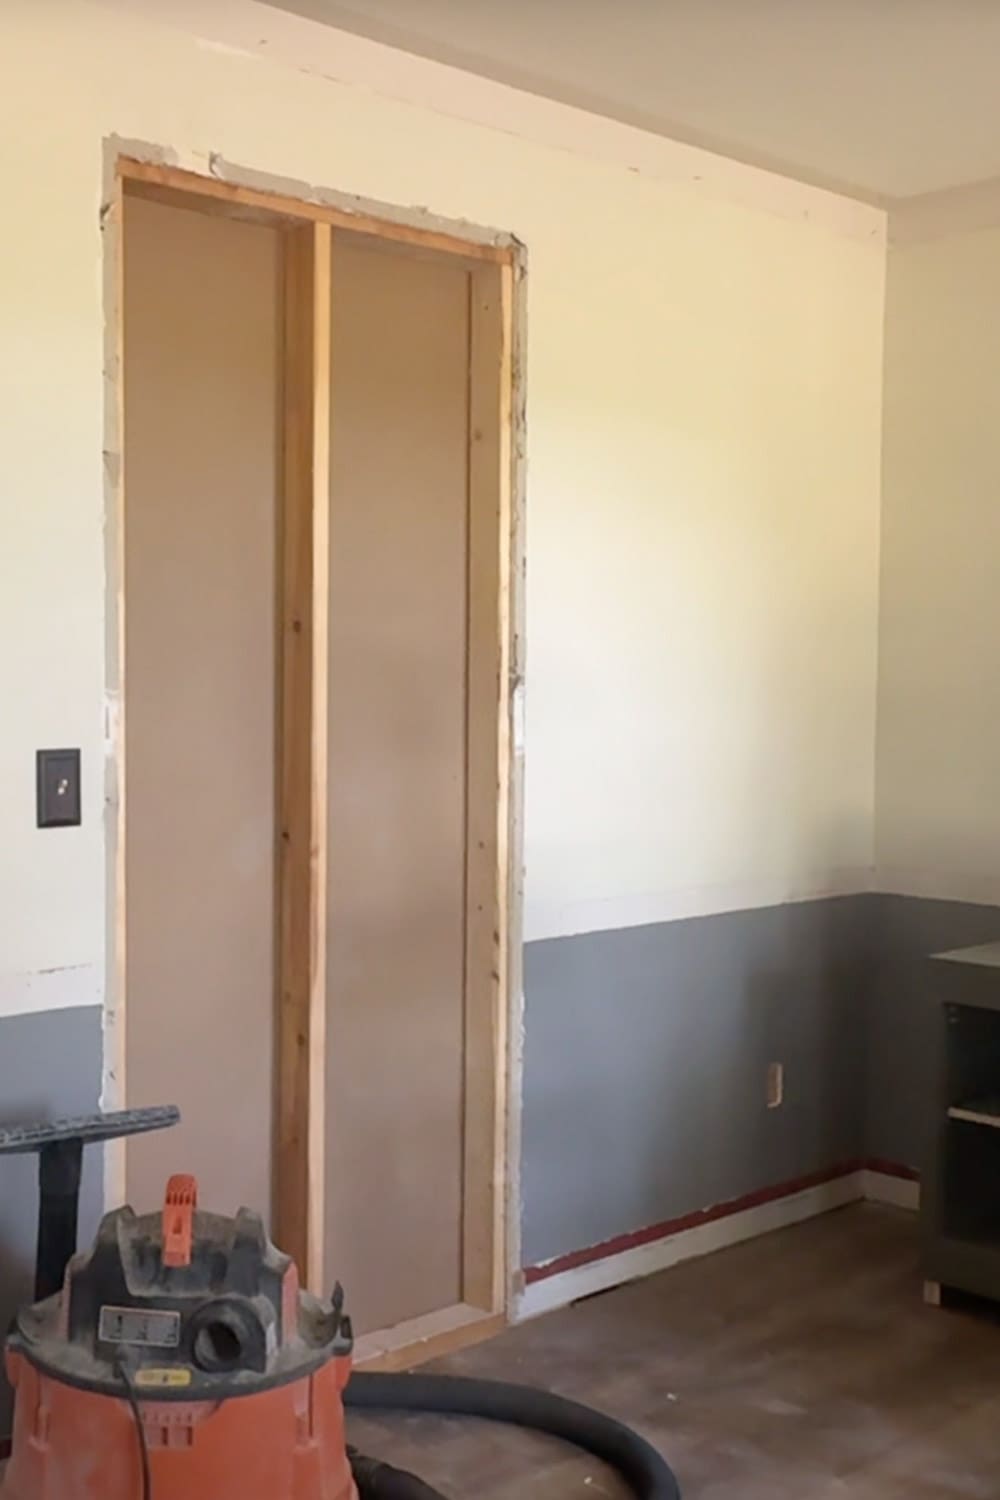
On the other side of the room, there used to be an opening into the kitchen. Since this is no longer a dining room, we drywalled it closed.
Over on the kitchen side, that entire wall is now covered in pantry cabinets. If you want to see how that looks, check out “Kitchen Update: Our DIY Remodel Progress After 6 Months”.
To finish off the back wall of the library, I built a second cabinet and bookshelf combo. And on the wall where the kitchen opening used to be, I’m building a wall of built-in bookshelves, nearly floor to ceiling. I’m following the same building method. Just making them taller.
Built-In Bookshelves: What’s Done and What’s Left
When you’re living with 5 kids and remodeling your whole first floor at one time, things don’t necessarily get done as fast as you’d like. Our library isn’t finished, but it’s usable, and right now that’s what matters.
Cozy Library To Do List:
- Fill lefthand wall with built-in bookshelves
- Build a small cabinet over the couch between the two upper bookshelves
- Add cabinet doors to the units on the back wall
- Close off the room with French doors and a pretty transom
When I get around to all that, I’ll write up those projects on separate posts and link them here.
The “Right Way” To Paint Built-In Bookshelves
This project is the first time I’ve ever tried painting the plywood panels before cutting and building. For me, it was a win. But, if you prefer the more traditional method of building first and painting after, I have a full post walking through my tried-and-true method I’ve used on everything from bunk beds to fireplace shelves to kitchen cabinets and bathroom vanities.
The ULTIMATE Guide to Painting Cabinets & Furniture

📌 Save This DIY Built-In Bookshelves Project for Later
Pin this post so when you’re ready to build your own DIY built-in bookshelves, you’ll have the full step-by-step process saved and ready to go — from painting panels first, to pocket hole assembly, to attaching everything securely to the wall studs.
This project is perfect if you want:
- A custom home library on a budget
- Built-in bookshelves without hiring a contractor
- Hidden cabinet storage for homeschool or office supplies
- A multipurpose room that actually works for your family
Frequently Asked Questions About DIY Built-In Bookshelves
To build DIY built-in bookshelves, start by cutting your panels to size, then assemble the pieces using wood glue, brad nails, and pocket hole screws for a strong hidden connection. Add a stretcher board across the back for stability and secure the unit to wall studs using long screws. If you want a more finished look, attach the backing before installation.
A stretcher board is a horizontal support piece installed across the back top of a cabinet or bookshelf. It adds rigidity to the structure and gives you a secure place to screw the unit into wall studs.
First, locate and mark your wall studs. Use a level or laser level to keep everything straight. Then drive screws through the stretcher board and directly into the studs. This prevents tipping and ensures the built-in bookshelves are securely anchored. If your shelf doesn’t have a stretcher, you’ll need to use brackets like these to attach to your wall studs.
Adjustable shelves offer flexibility, but fixed shelves provide a cleaner, more uniform look. For a home library aesthetic, fixed shelves spaced evenly can feel more custom and intentional. If you prefer flexibility, you can install shelf pin holes instead.
A high-quality cabinet or trim paint works best for durability. Start with a good primer, lightly sand once dry, remove all dust, and then apply your paint. I personally love Sherwin-Williams Emerald Urethane Trim Enamel.
