Kitchen Update: Our DIY Remodel Progress After 6 Months


Published February 7, 2026
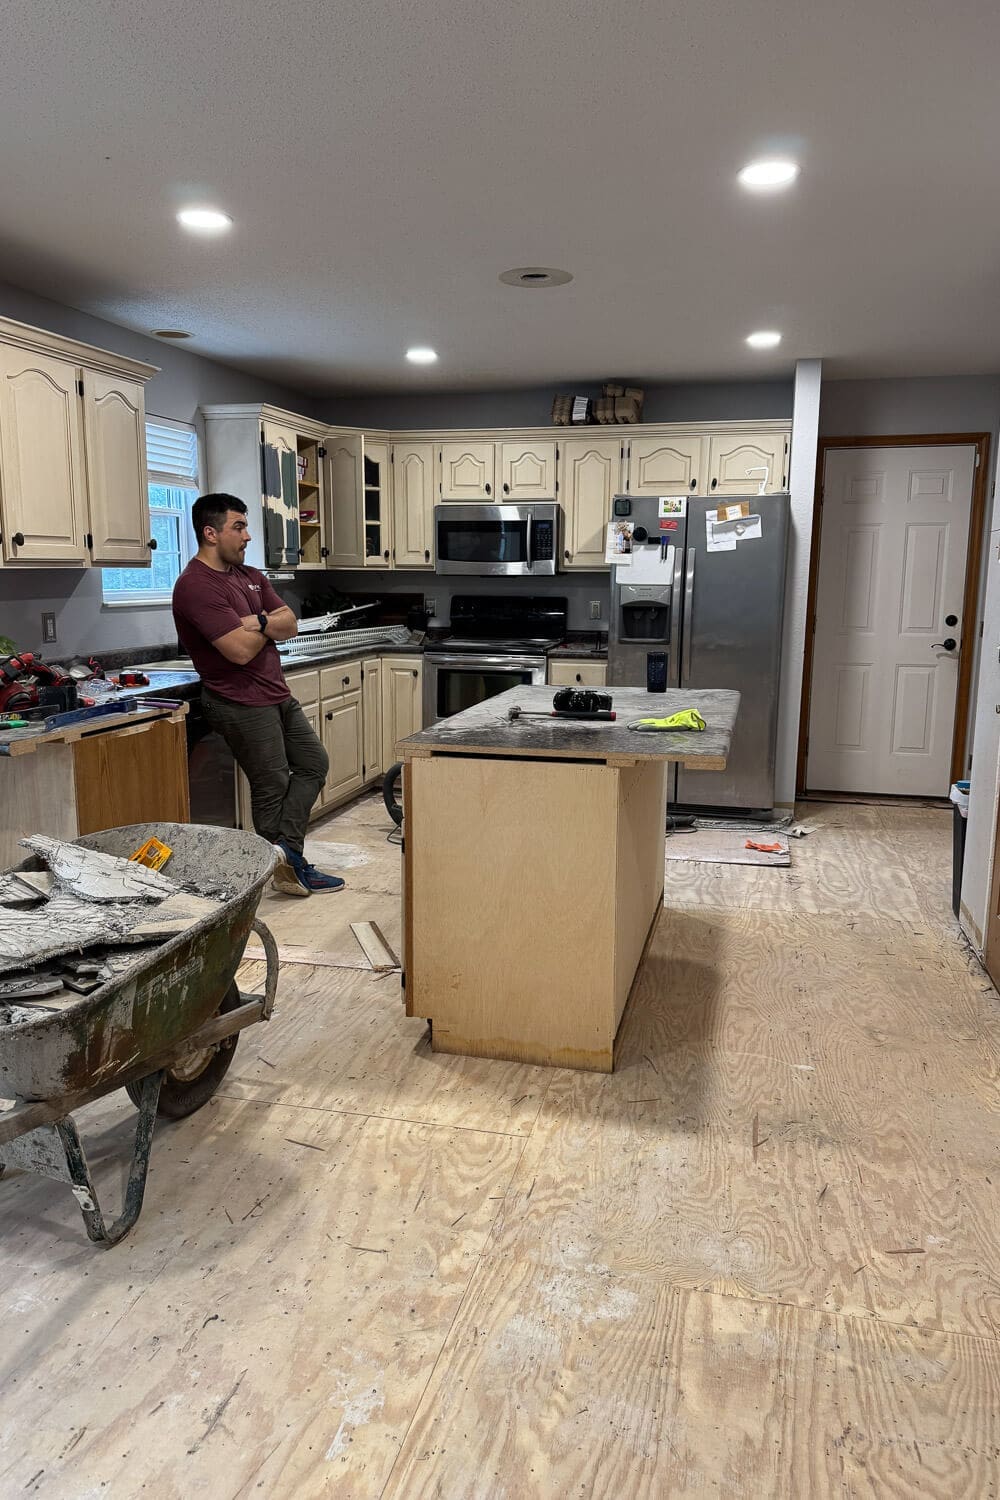
Kitchen update time: this remodel started basically the moment we got the keys, because apparently moving into a new house with five kids wasn’t chaotic enough. We jumped straight into renovating the entire first floor at once, and while TV makeover shows make it look like you can demo a kitchen on Monday and host a dinner party on Friday, real life doesn’t work like that. When you’re DIY-ing a remodel while living in the mess, progress is still happening; it just takes a little longer.
Today’s post is a realistic update on where our kitchen is right now. It’s not finished, but it’s already a completely different space, and I’m honestly proud of how far we’ve come in about six months.
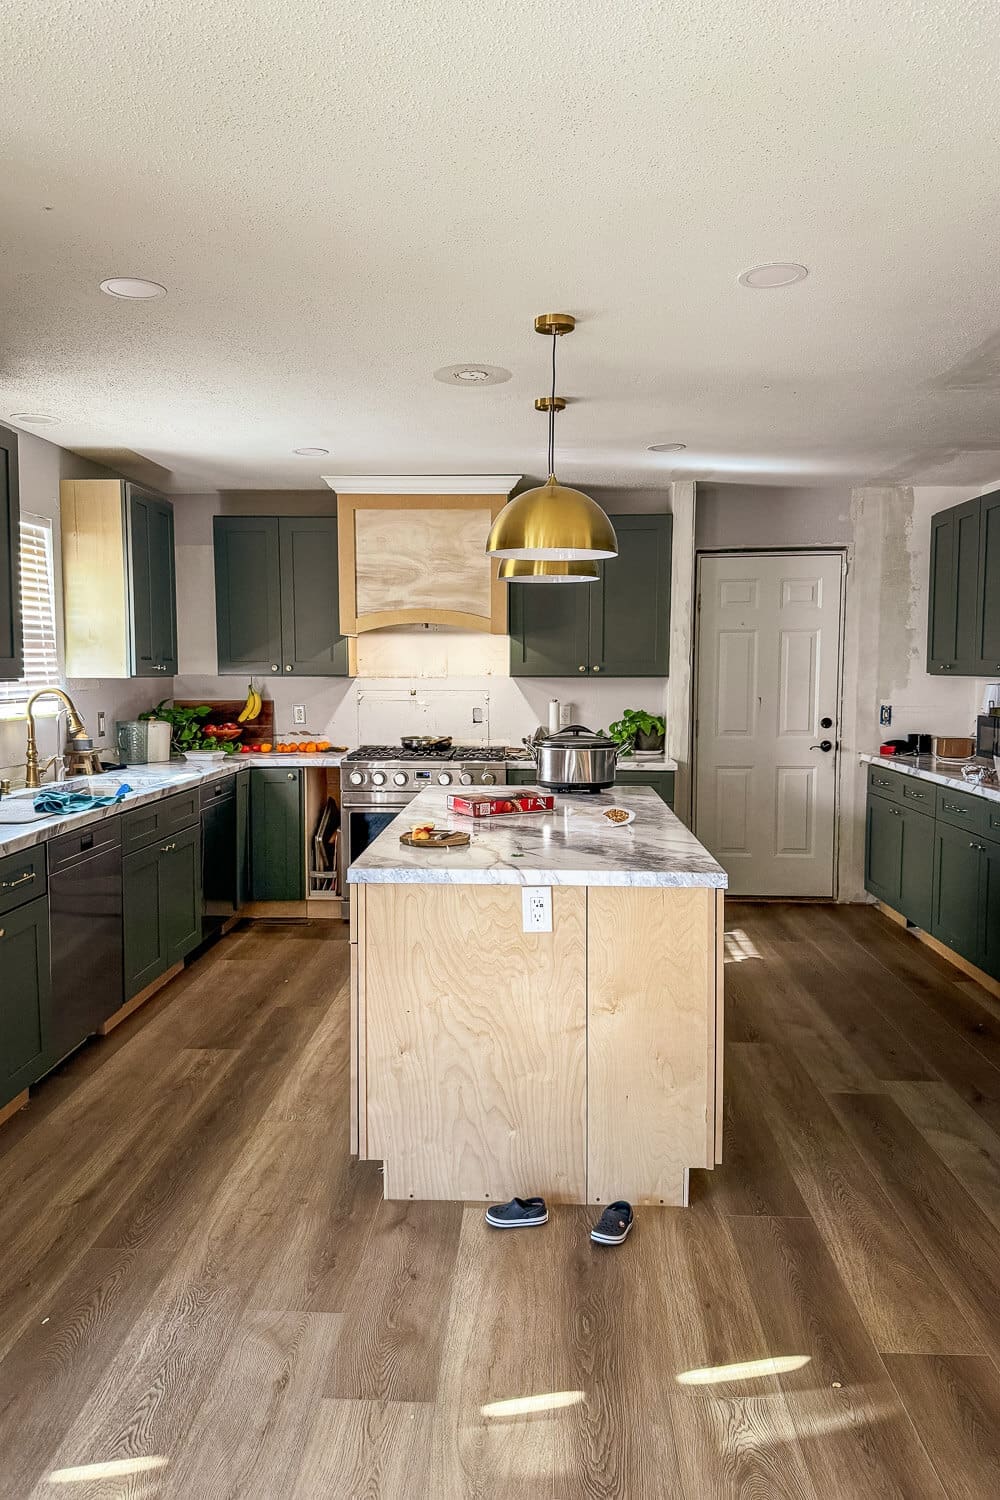
Table of Contents
- Before Our Kitchen Update
- Making a Design Plan (And Using ChatGPT for Help)
- Removing the Old Floors as a Family
- Cutting Off the Peninsula and Creating an Island
- Tearing Out the Pantry and Closet for More Floor Space
- Closing Off an Opening for a Wall of Cabinets
- Installing the New Flooring
- Installing Cabinets in a Kitchen Update
- Moving the Fridge as Part of a Kitchen Update
- DIY Countertops (Our Go-To Process)
- Kitchen Update Priorities: Function First
- Building a DIY Range Hood Cover
- Living Through a Remodel (And Still Hosting!)
- What’s Left in Our Kitchen Remodel
- 📌 Save This Kitchen Update for Later
- Kitchen Update FAQ
Before Our Kitchen Update
Let’s start with where we were “before” our kitchen remodel.
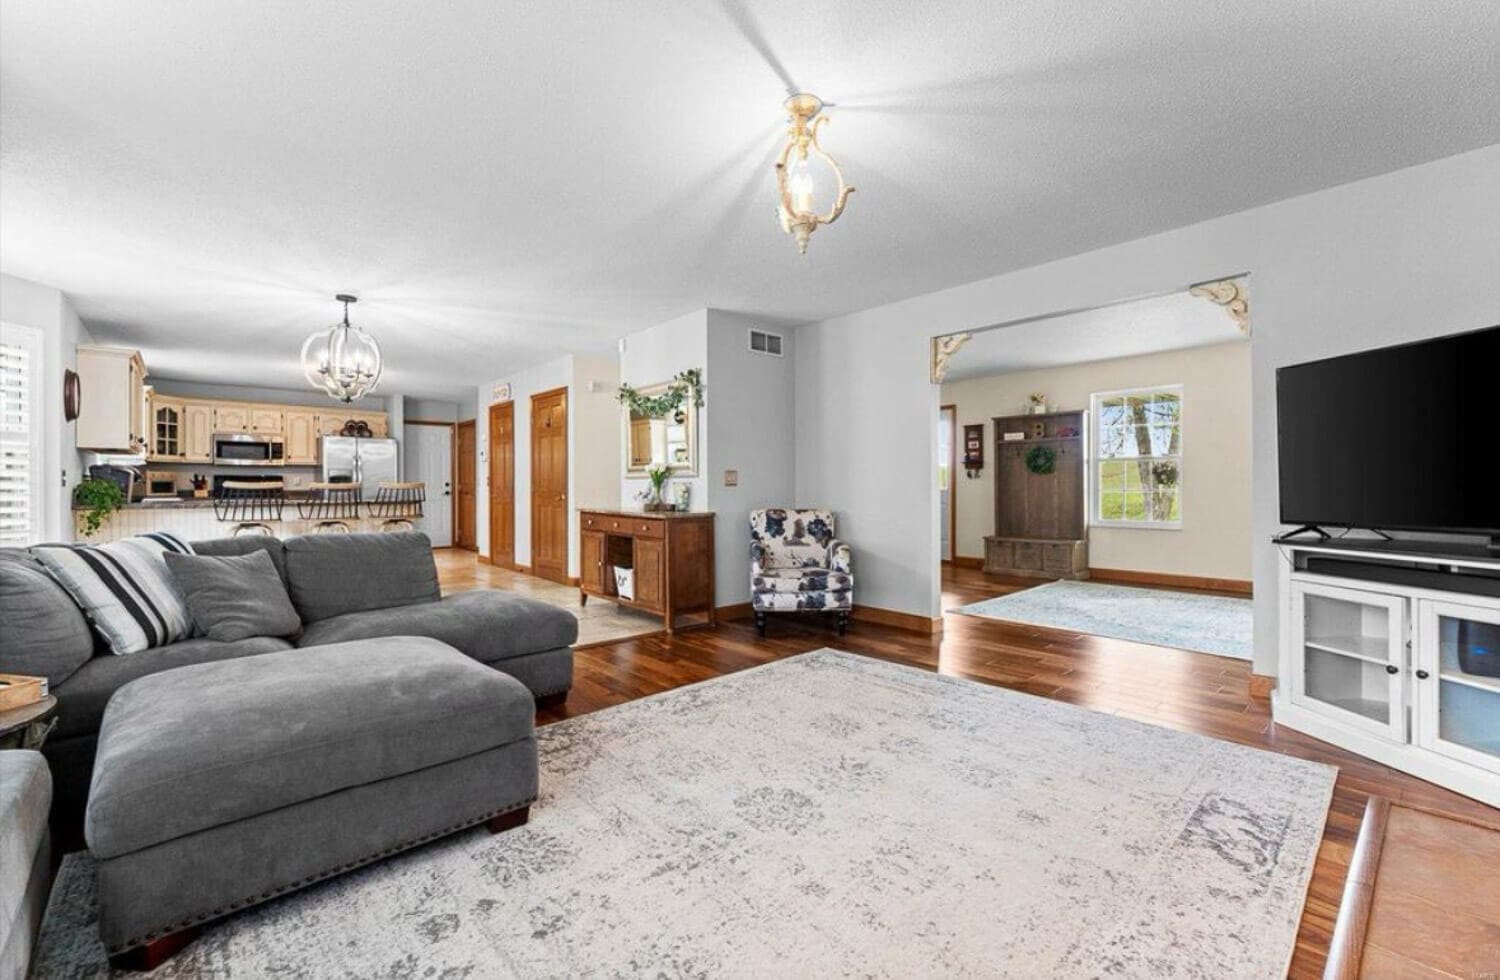
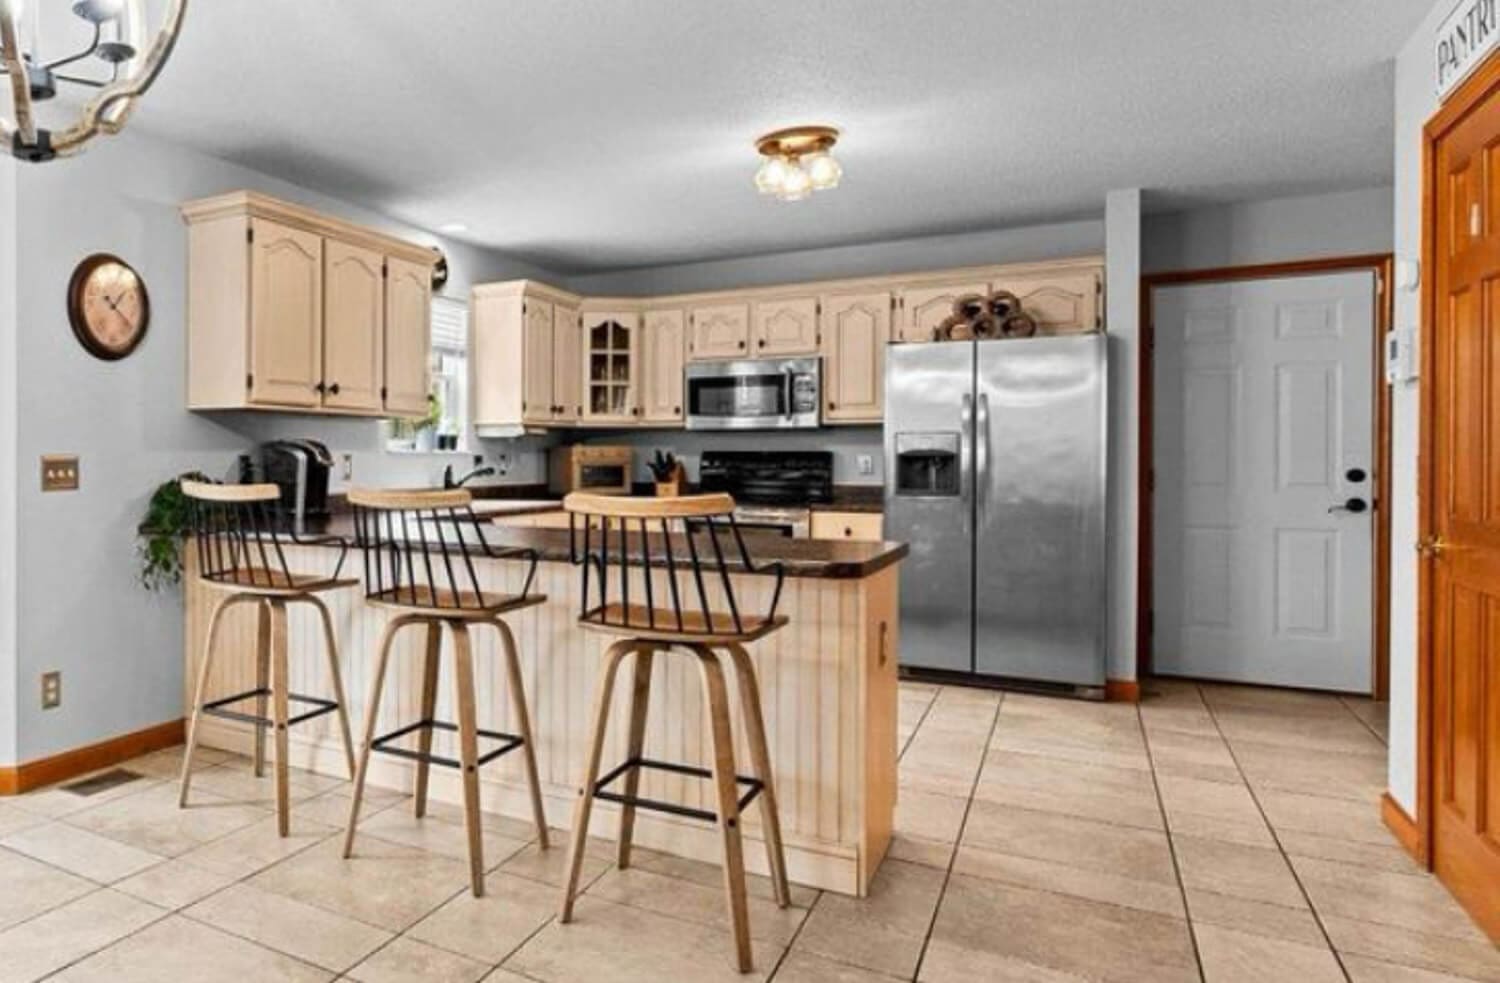
Originally, our house was staged with a family room and kitchen; the two spaces were separated by a peninsula. It made the kitchen feel closed off, and it didn’t really work for how our family lives day to day.
Our kitchen remodel plan from the beginning was to shake up the layout.
- Move our dining area into the space that was previously the family room
- Relocate the fridge
- Swap the peninsula for an island
- Tear out a few closets to gain floor space
- Open up the flow so the kitchen feels connected, not cut off
If you want to see the full before and get the best feel for the layout of the entire house, I have a full walk-through video tour in this post: New House Tour: A First Look at Our Fixer-Upper
Making a Design Plan (And Using ChatGPT for Help)
Before we even moved in, I was dreaming up design plans for this kitchen update. I used ChatGPT to create the prettiest artist-style renderings and help me map out the vibe for this kitchen. It helped me experiment with colors, cabinet style, layout ideas, shop for an oven, and more.
If you want to try this for your own home, I wrote a full post on exactly how I did it and the prompts I used: Using ChatGPT for Interior Design Help
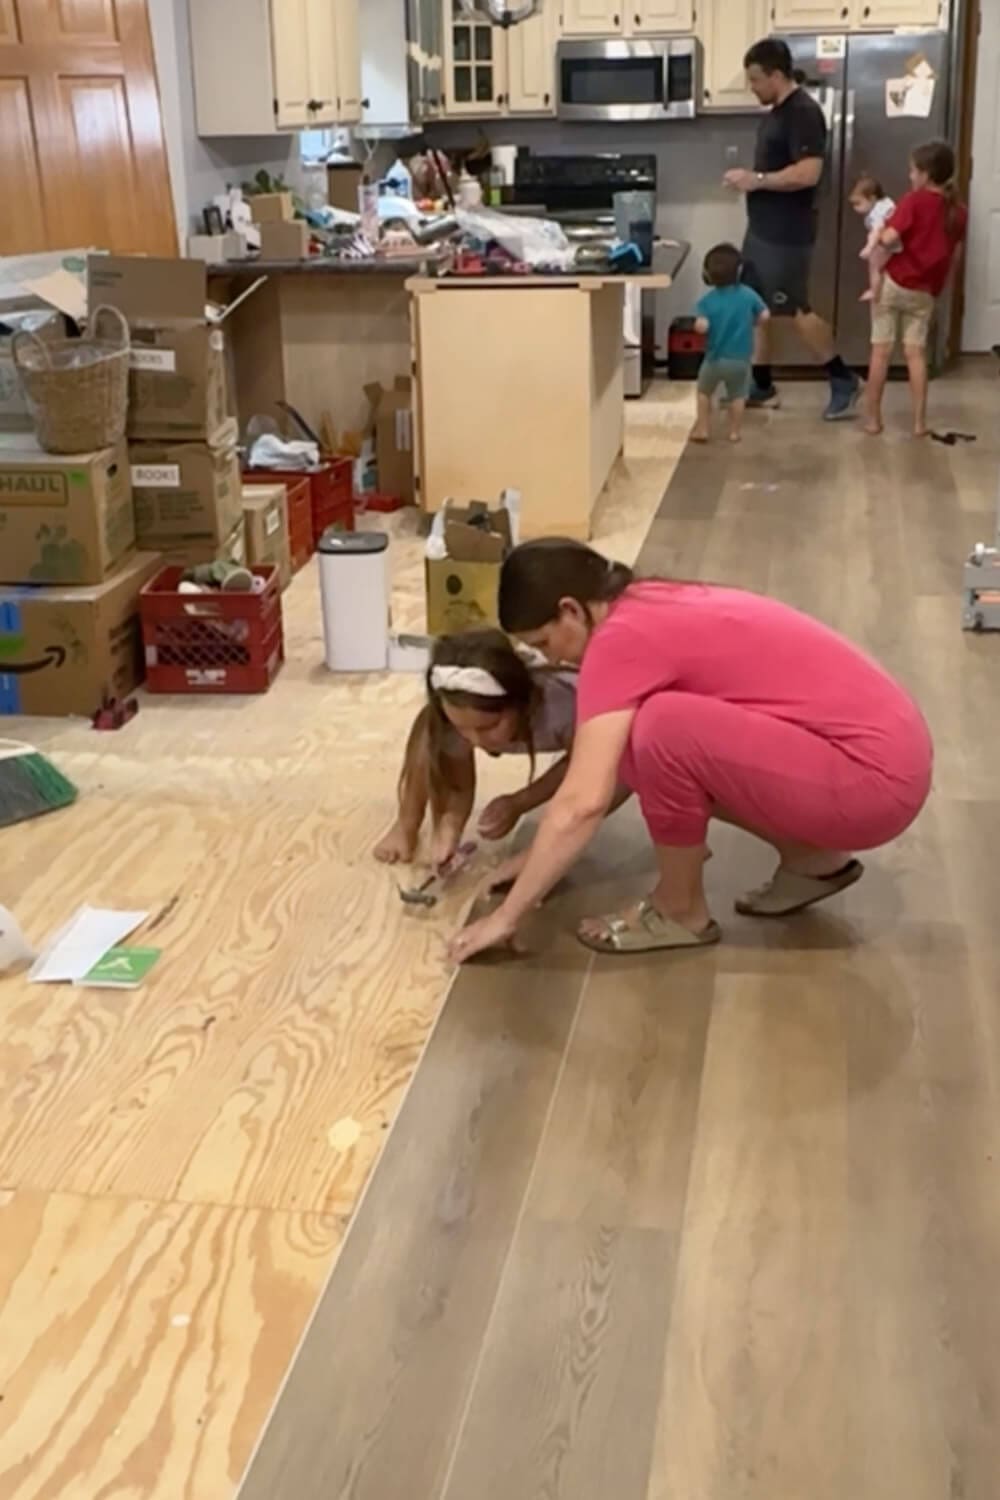
Removing the Old Floors as a Family
Next up in our kitchen update was flooring. The first floor had a mismatch of laminate and tile, and I wanted one continuous floor throughout the entire space. The whole family helped pull up the old flooring and haul it out of the house.
The tile was not a “grab and go” situation, unfortunately. We ended up breaking out the jackhammer just to scrape it up. And then we got a fun surprise underneath.
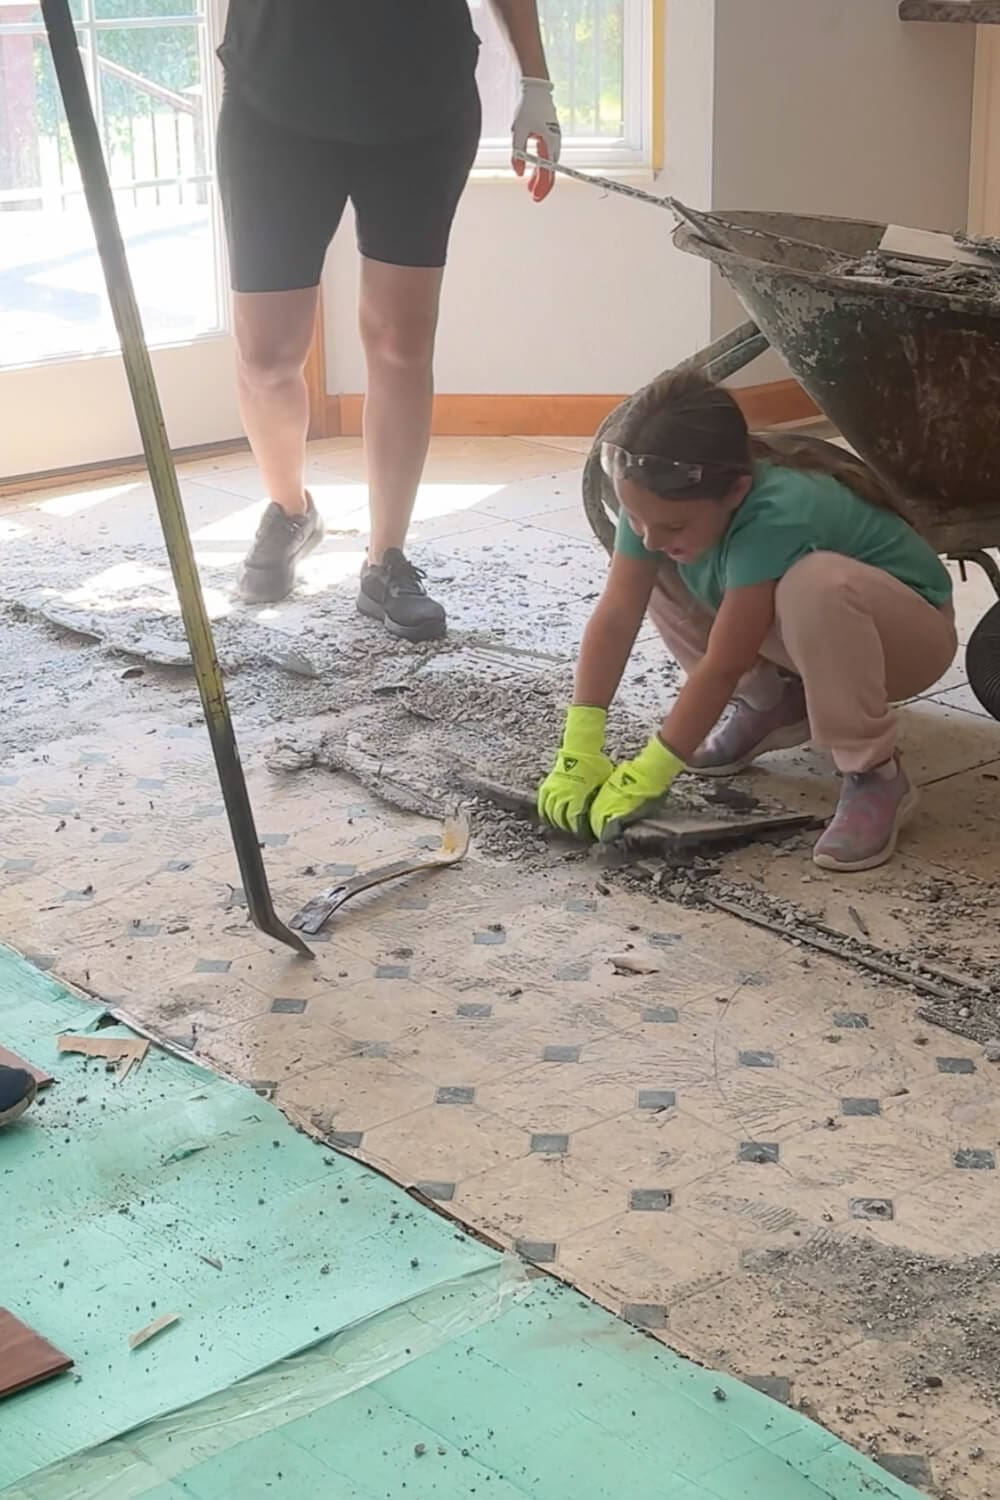
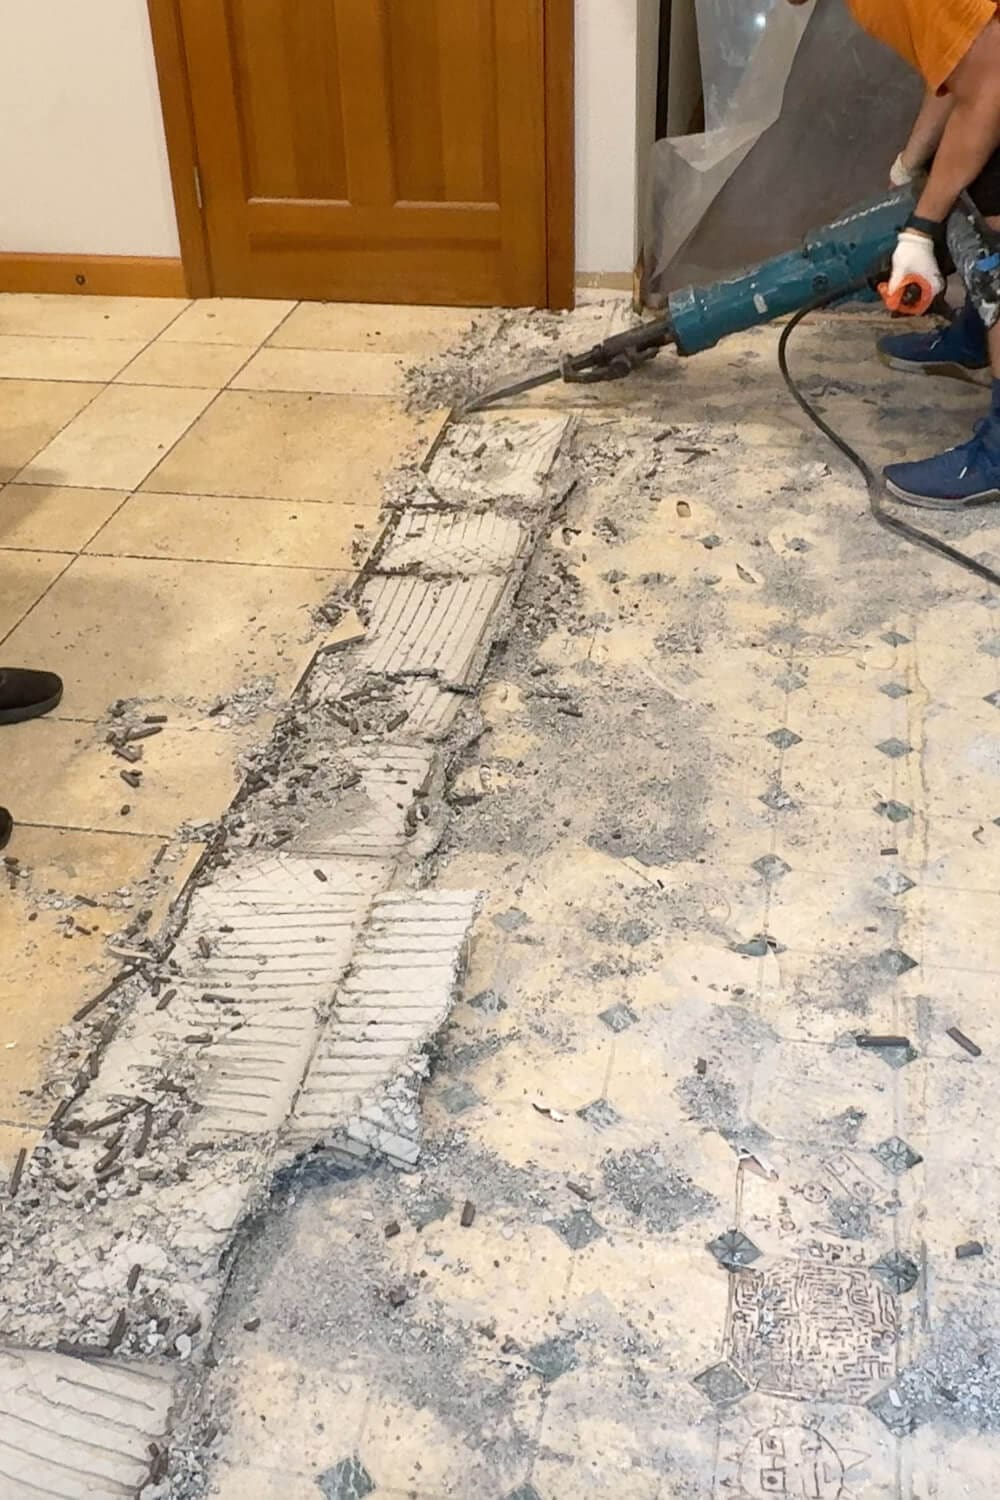
Under the tile was linoleum.
Under the linoleum was 1/4-inch plywood.
And that plywood was attached with approximately one million staples.
There is a point in every DIY remodel where you get personally offended by whoever owned the house before you. Hammering in all those staples for what felt like 37 years was that moment for us.
Cutting Off the Peninsula and Creating an Island
Once the old flooring was out, we started rearranging the layout. The first big change in our kitchen update was cutting off the peninsula and swinging those cabinets to the center to visualize an island.
I’m just going to say it. A peninsula cuts off a kitchen. An island gives you flow. The traffic pattern is better, the space feels open, and you don’t end up trapped in a corner while everyone walks through the same two-foot opening. This one change alone made the kitchen feel bigger.
Tearing Out the Pantry and Closet for More Floor Space
To make room for the island, we needed to gain some floor space in this kitchen update. On one wall, we had three doors.
- A small closet
- A pantry
- The stairs down to the basement
The basement stairs weren’t going anywhere, but the closet and pantry absolutely could be taken out. Once those two were gone, it was shocking how much more space we gained. It opened up the kitchen and gave us room to build something way more functional than what was there before.

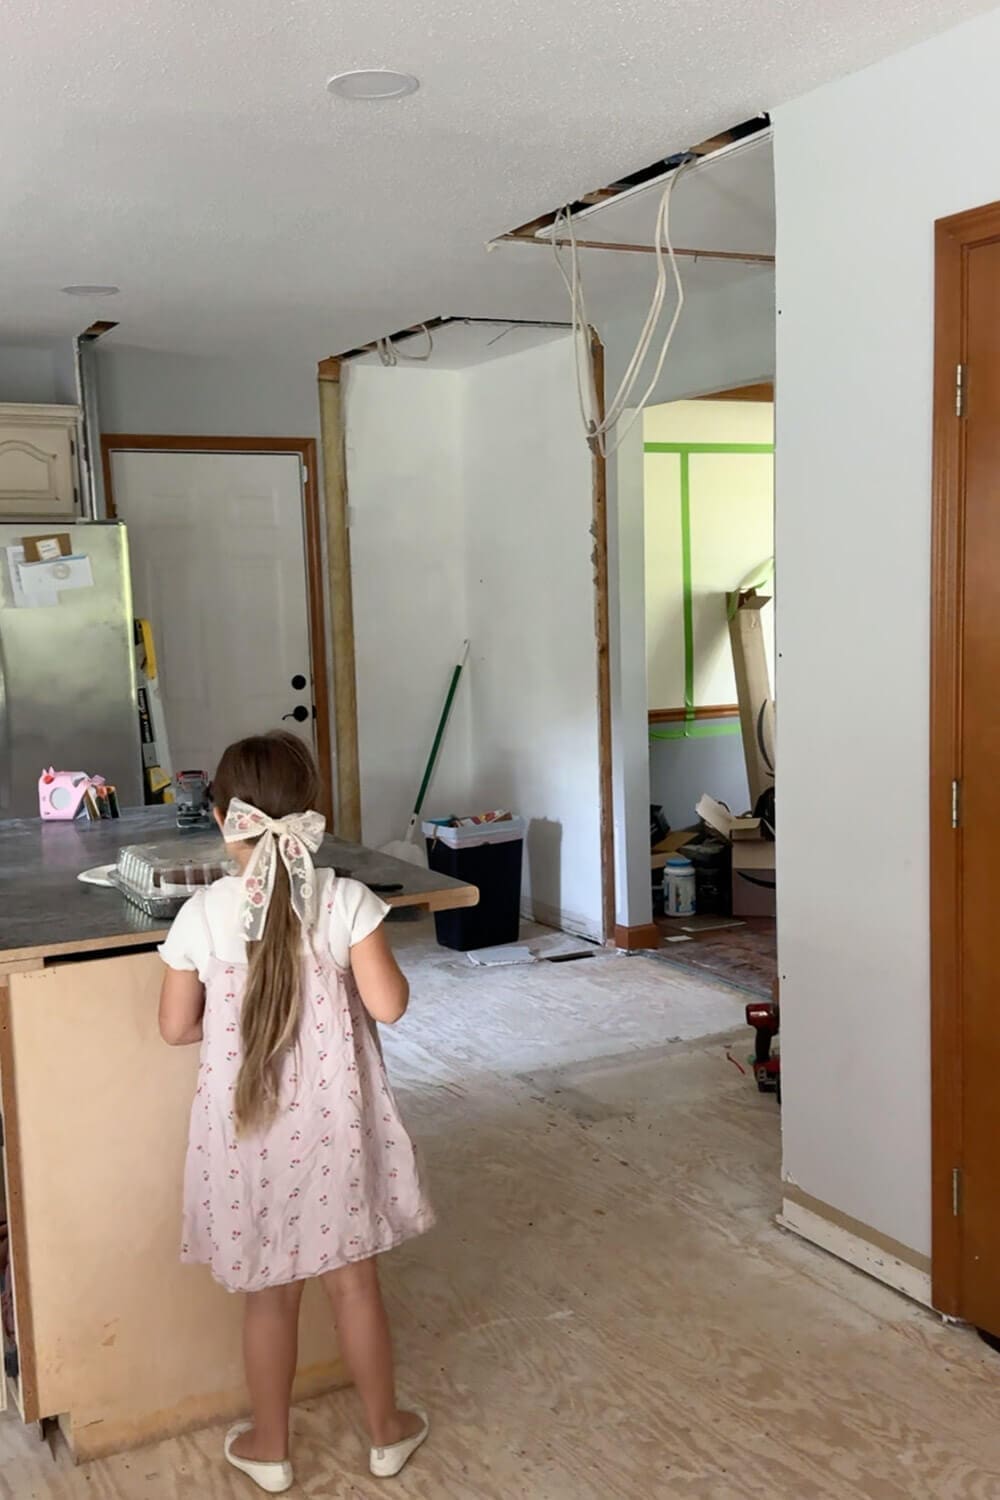
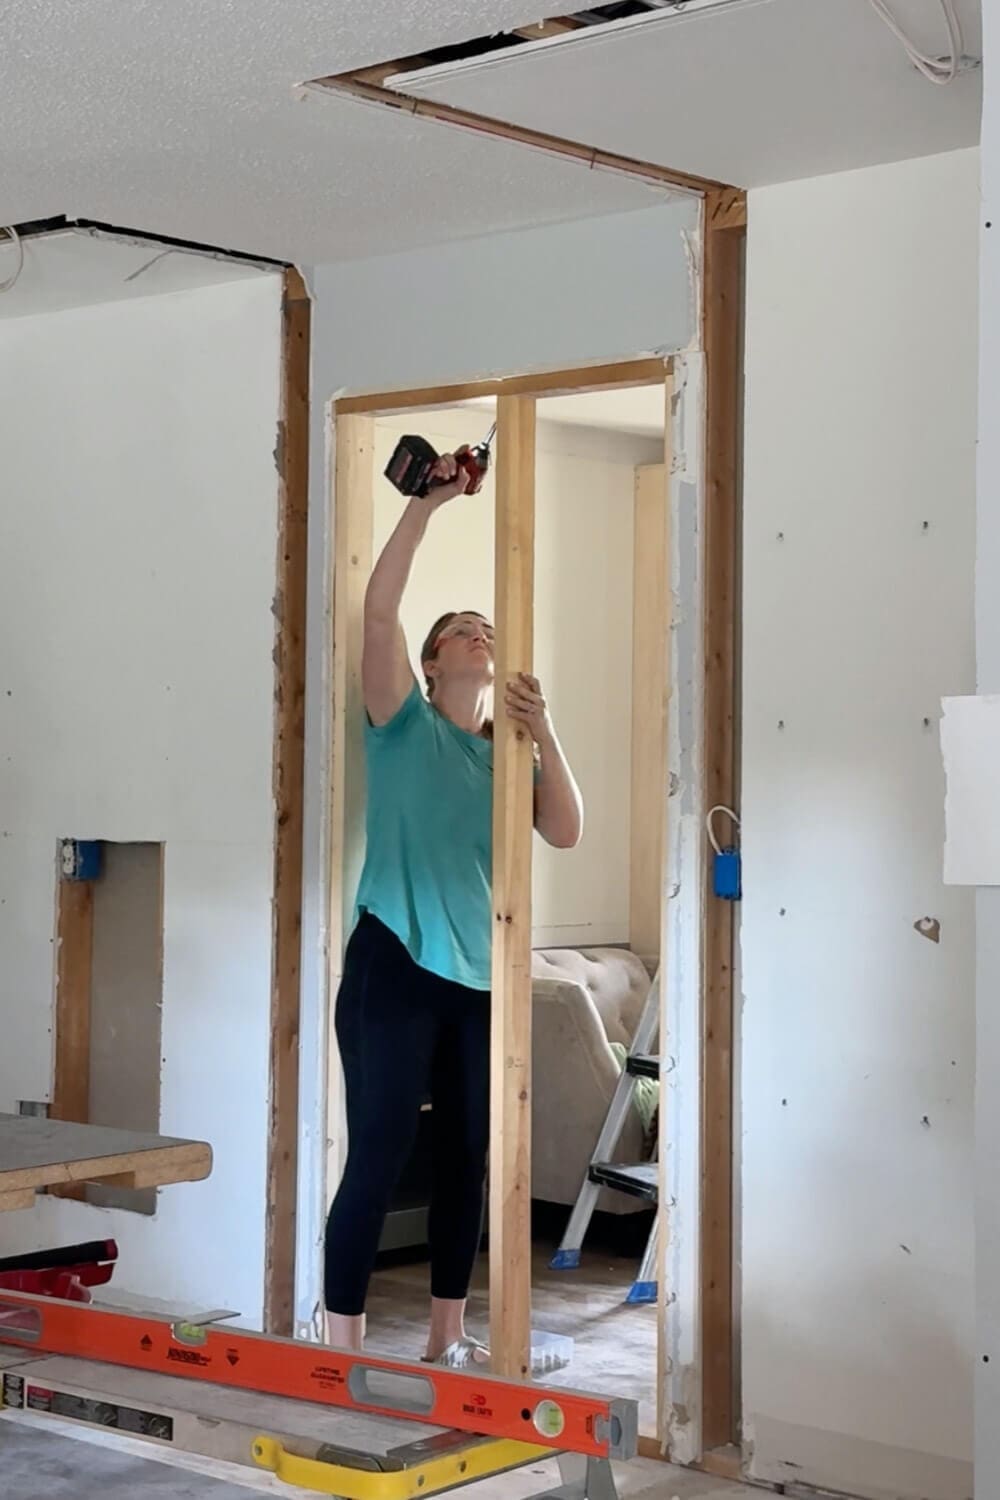
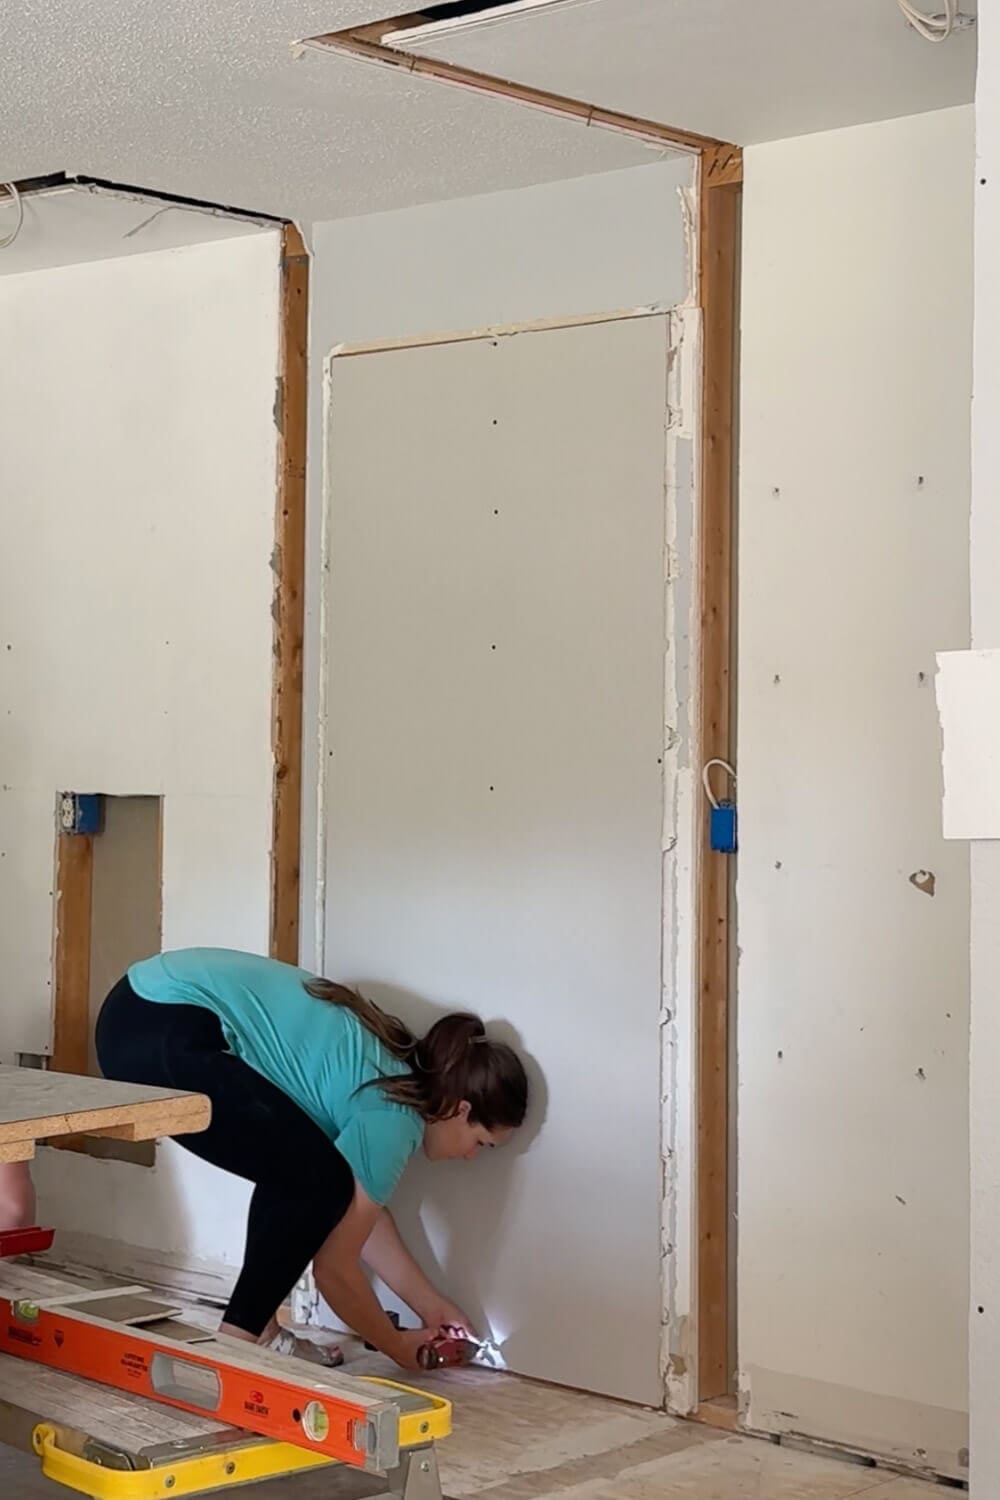
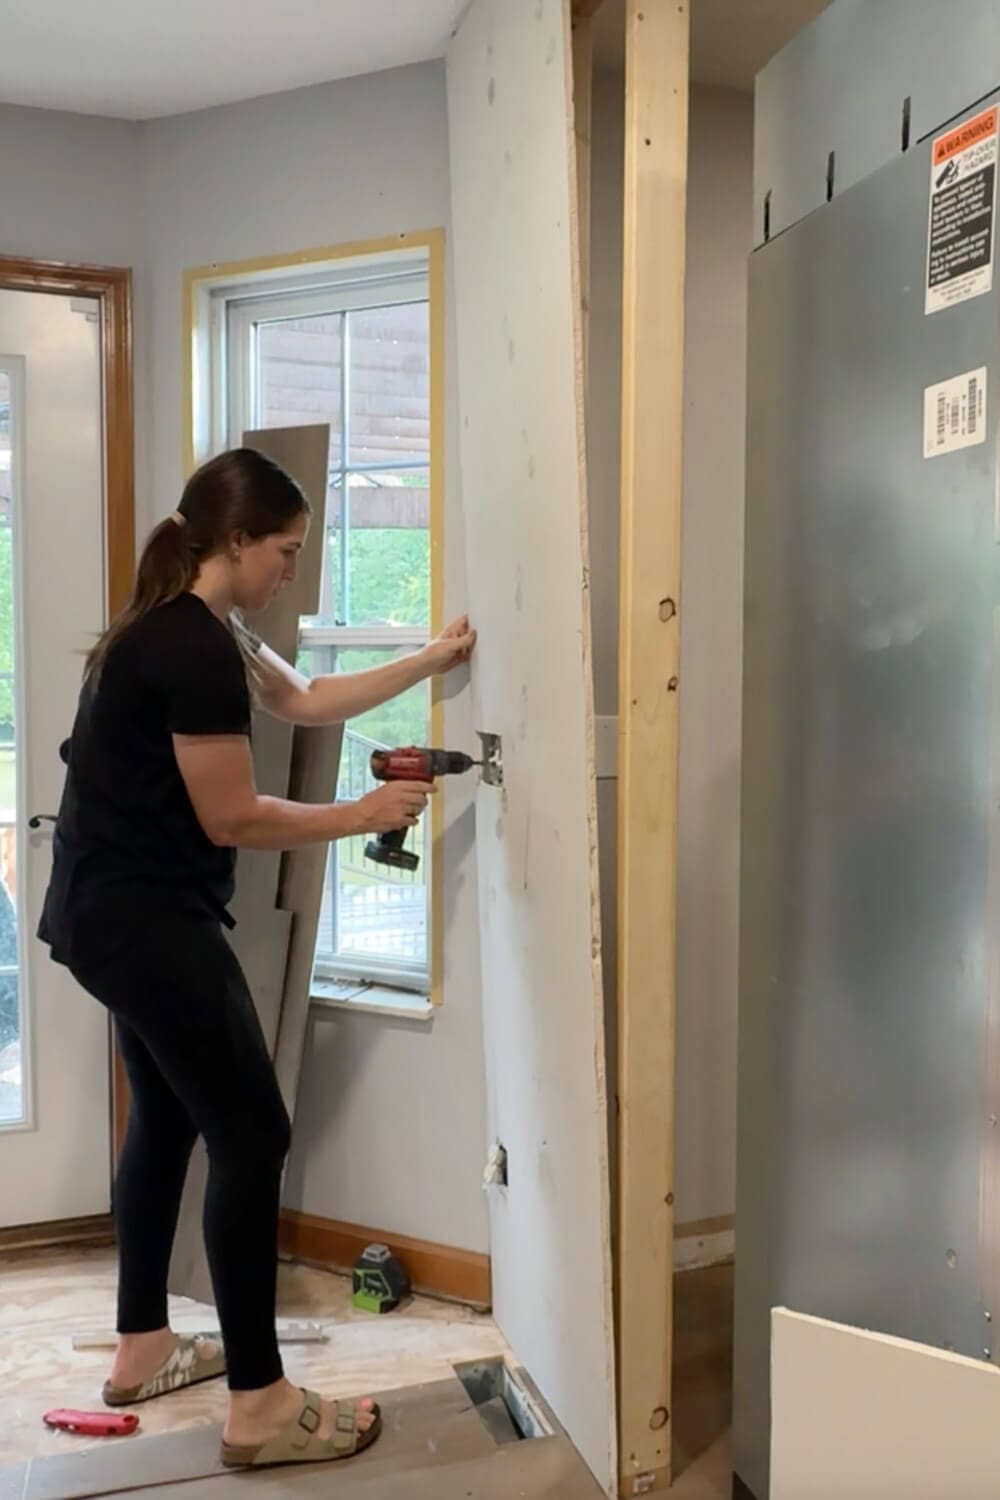
Closing Off an Opening for a Wall of Cabinets
Between the old pantry and closet was an opening into the formal dining area. That formal dining space is becoming our library/homeschool room, and we decided to move our dining table to the space right next to the kitchen, which used to be the family room.
To make the kitchen update layout work and allow for a full wall of cabinets where the pantry and closet used to be, I framed in that opening and closed it up with drywall.
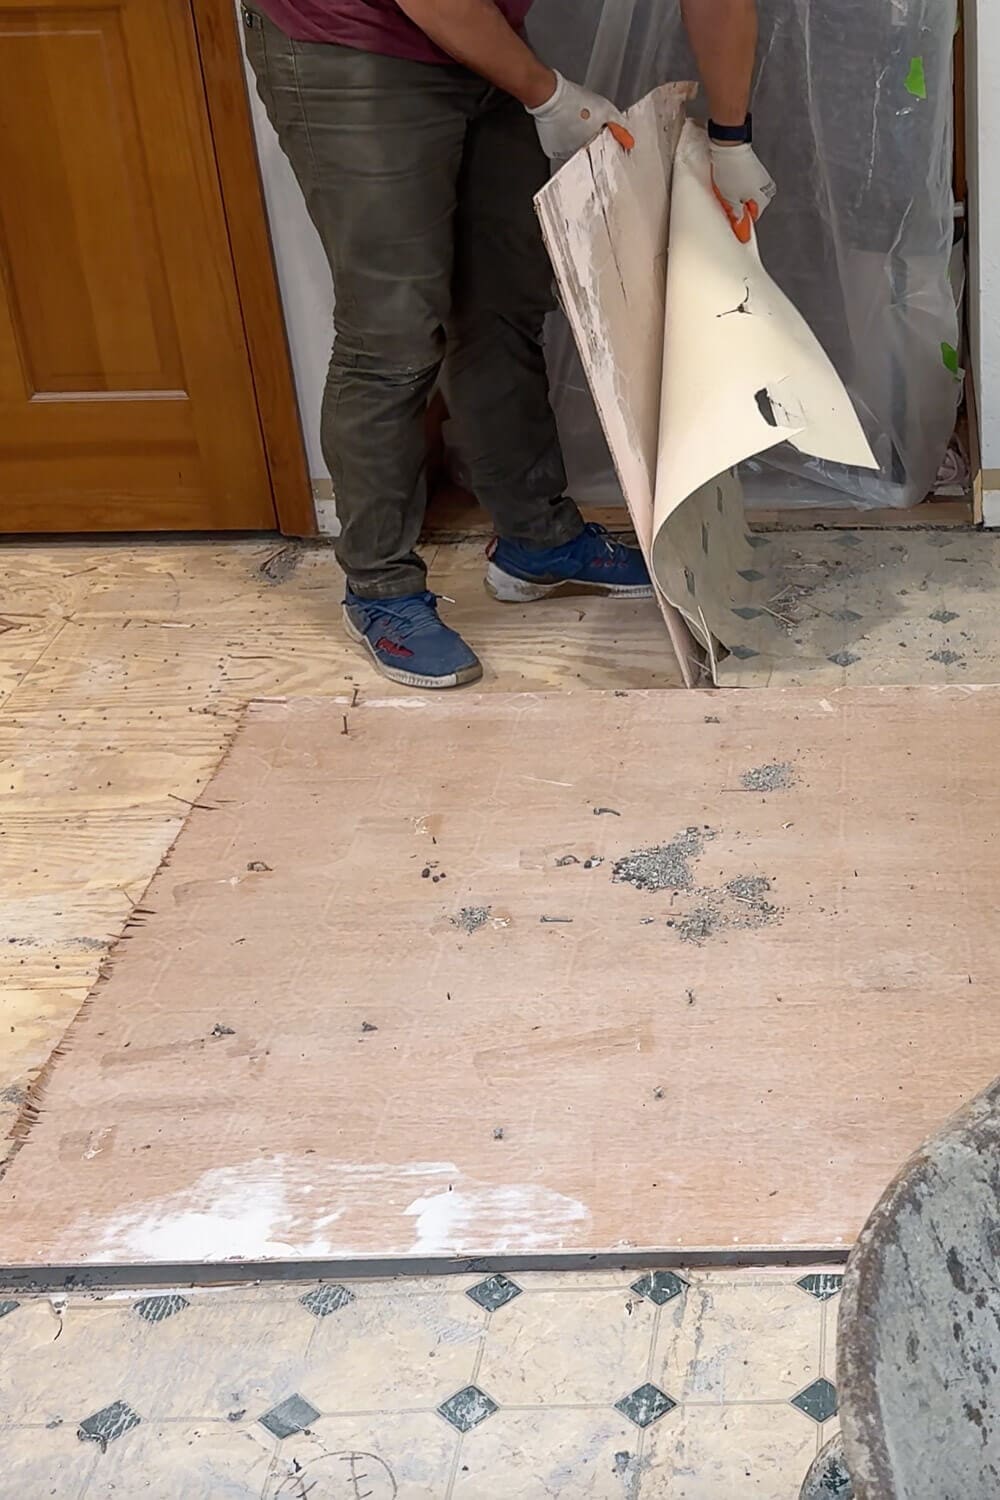
Installing the New Flooring
Once we were done ripping out walls and reworking the layout, we moved on to installing the new flooring. It’s click-together flooring, and it was honestly super beginner-friendly. Having a good tool for cutting pieces made the process so much faster and cleaner.
We are using the Stoneform flooring from Hewn. It’s waterproof, it looks like wood, and it’s way more durable for real family life. We’re already obsessed with it.
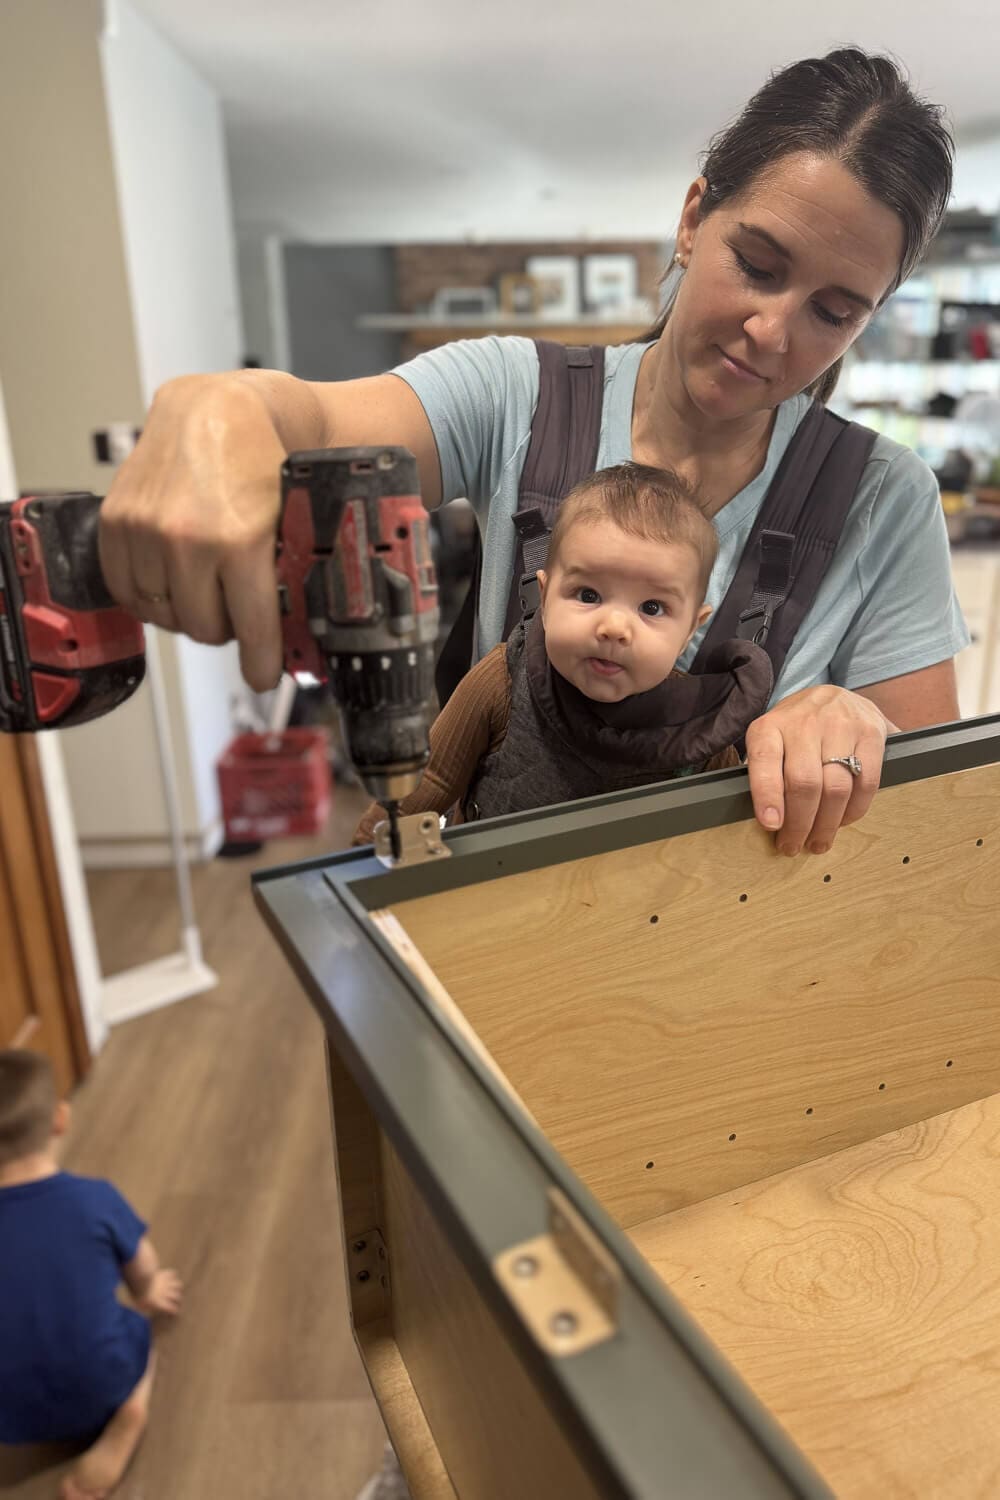
Installing Cabinets in a Kitchen Update
Now for the fun part of the kitchen update. Cabinets.
In our last fixer-upper, we used stock, unfinished cabinets from a big-box store and upgraded them ourselves with paint, trim, new doors, and hardware.
On our current kitchen update, we opted to buy cabinets from a local cabinet maker, and I’m so glad we did. To make delivery easier and save a little money, we decided to assemble them ourselves.
Bad choice.
It took FOREVER.
We absolutely should have paid the few dollars per cabinet and had them dropped off fully assembled. But we survived, and now we can say we built the cabinets too, I guess.
The Pantry Wall and Appliance Storage
The first section of cabinets in our kitchen update went on the wall that will act as our pantry and hold all of my small appliances, like my Bosch mixer, Instant Pot, toaster, and microwave. All the things that usually live on counters and make a kitchen feel cluttered.
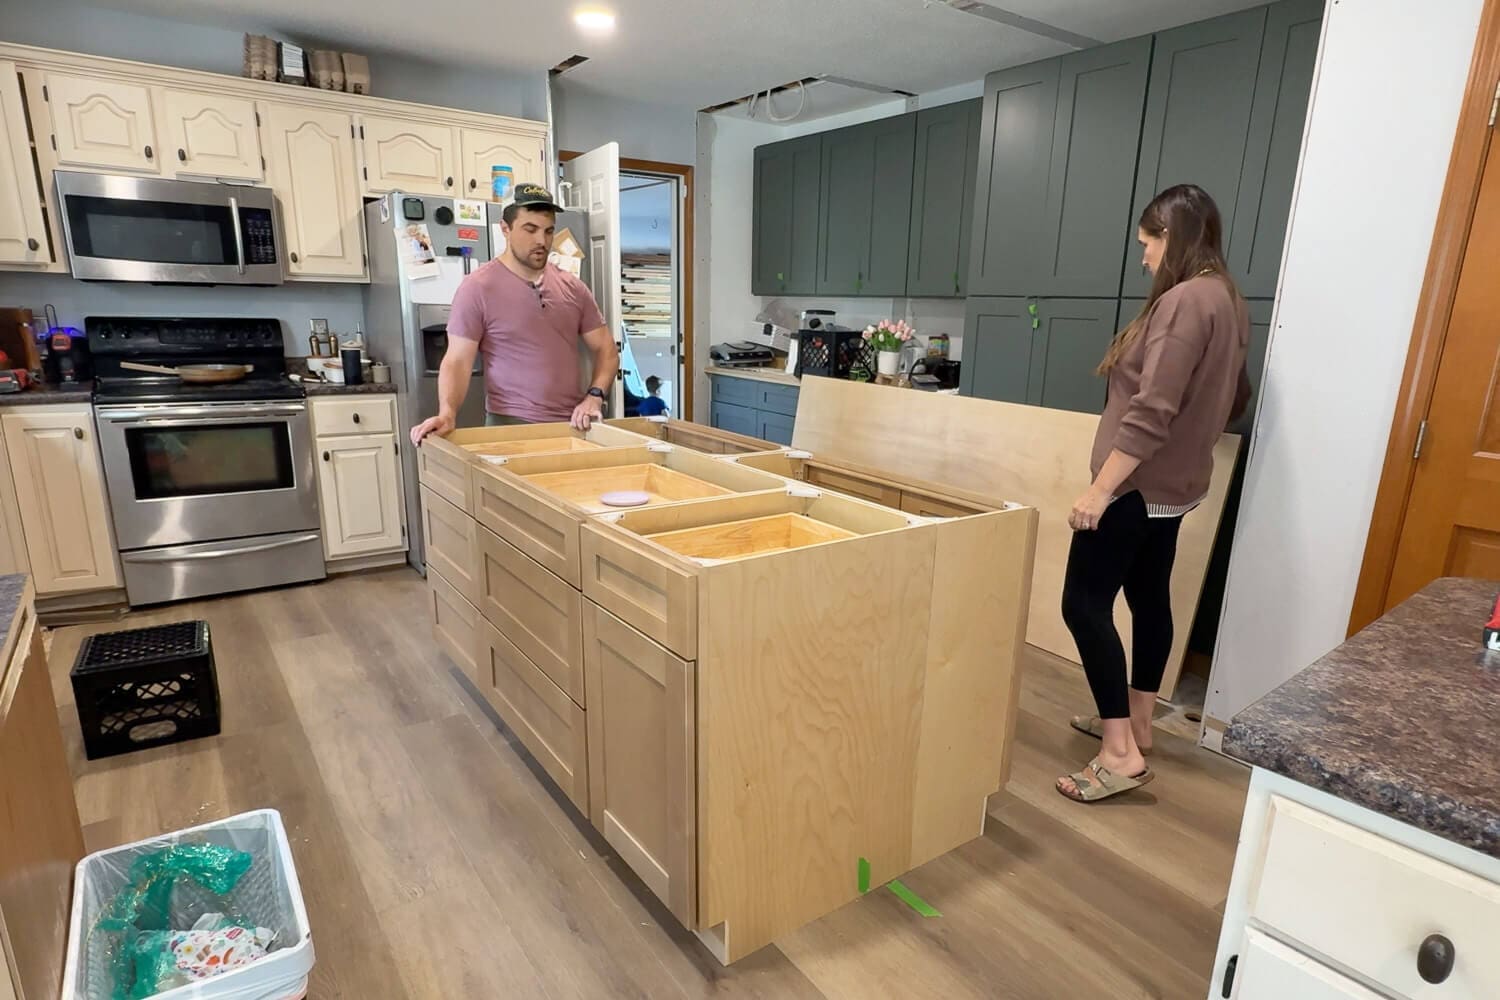
Building the Kitchen Island
Next we moved on to the island.
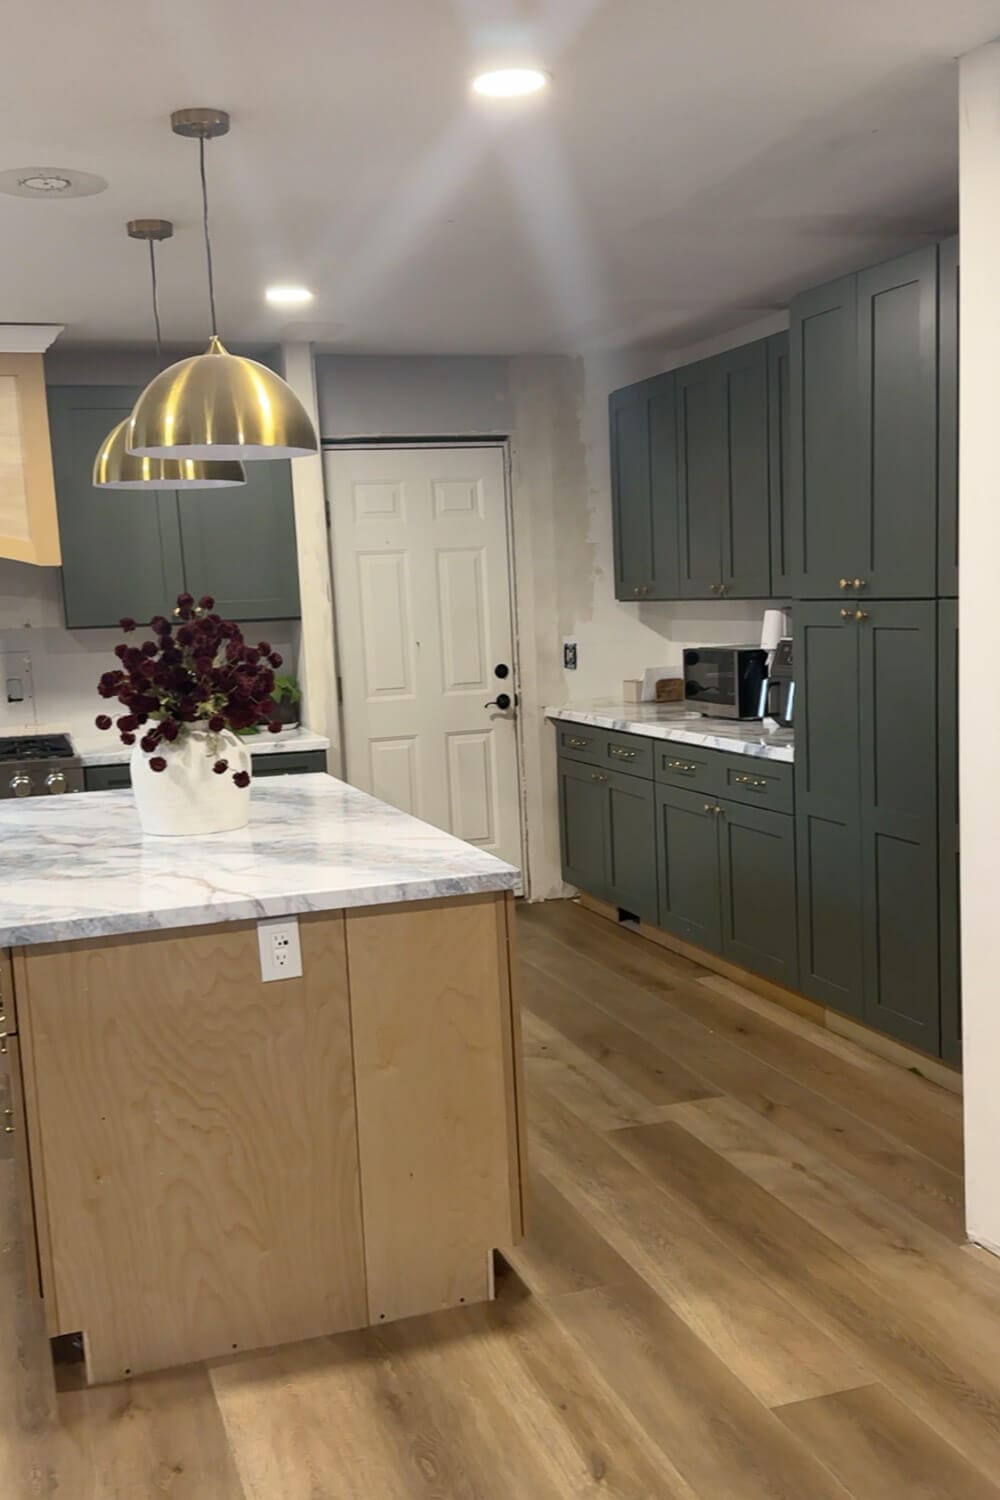
The perimeter cabinets are green, but the island is going to be stained a dark wood tone. And I’m not doing an eating bar at the island, because our table is literally a few feet away and I’d rather have storage.
So we’re doing:
- Deep cabinets with drawers on the front
- Narrow cabinets with bonus storage on the back
If you want the full tutorial on how I built our island during this kitchen update, you can read it here: DIY Kitchen Island: Easy Beginner Build
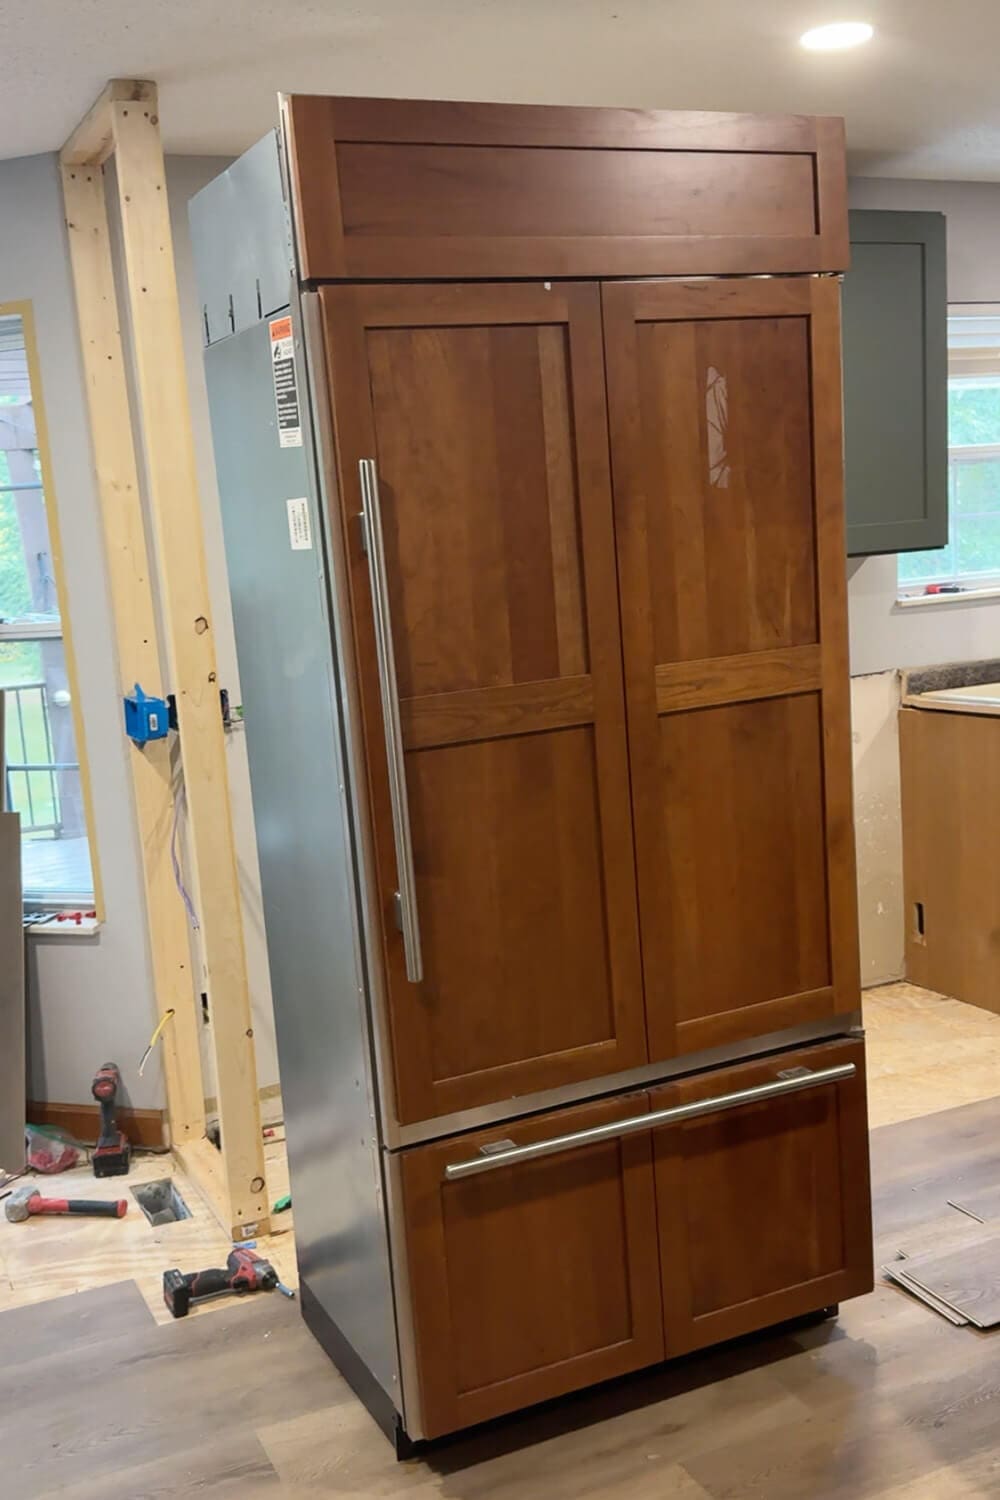
Moving the Fridge as Part of a Kitchen Update
The last big layout change in this kitchen update was moving the fridge. Originally, the fridge was over by the garage door. We’re moving it to the other end of the kitchen where the peninsula used to be.
I built a small wall the same depth as the fridge, and we had to reroute the floor vent and move light switches, but it’s worth it. This change makes the whole kitchen feel more intentional and less like everything is shoved into random corners.
And the best part.
We scored an amazing counter-depth Sub-Zero fridge on Facebook Marketplace for a fraction of what it would have cost new. Once the panels are painted to match the green cabinets, it’s going to look so built-in and so fancy.
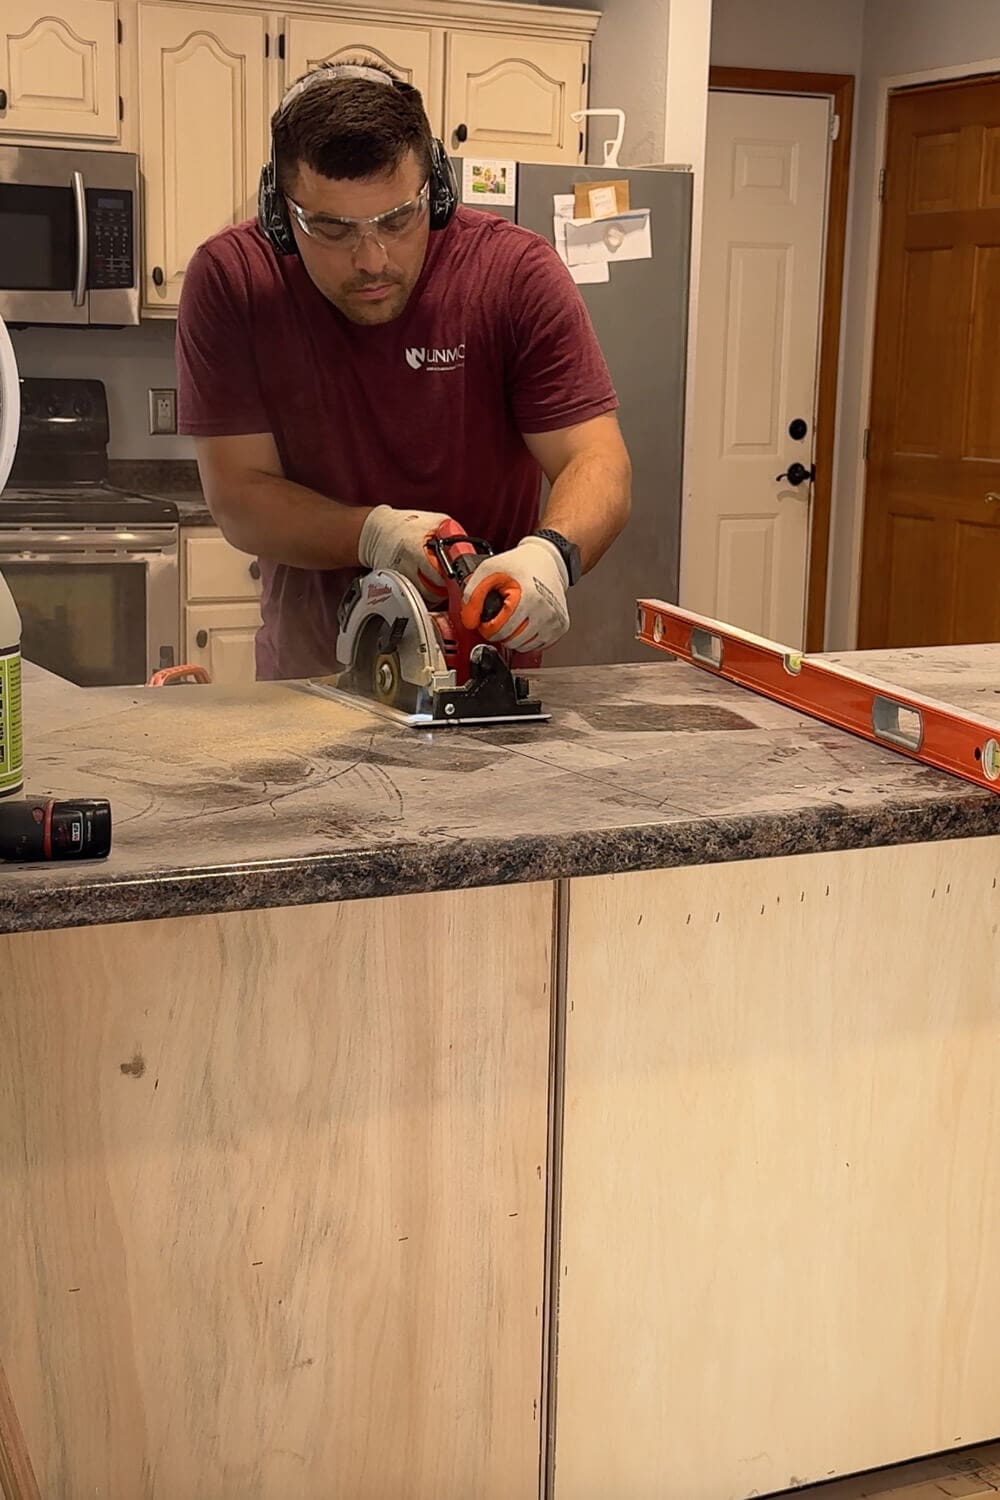
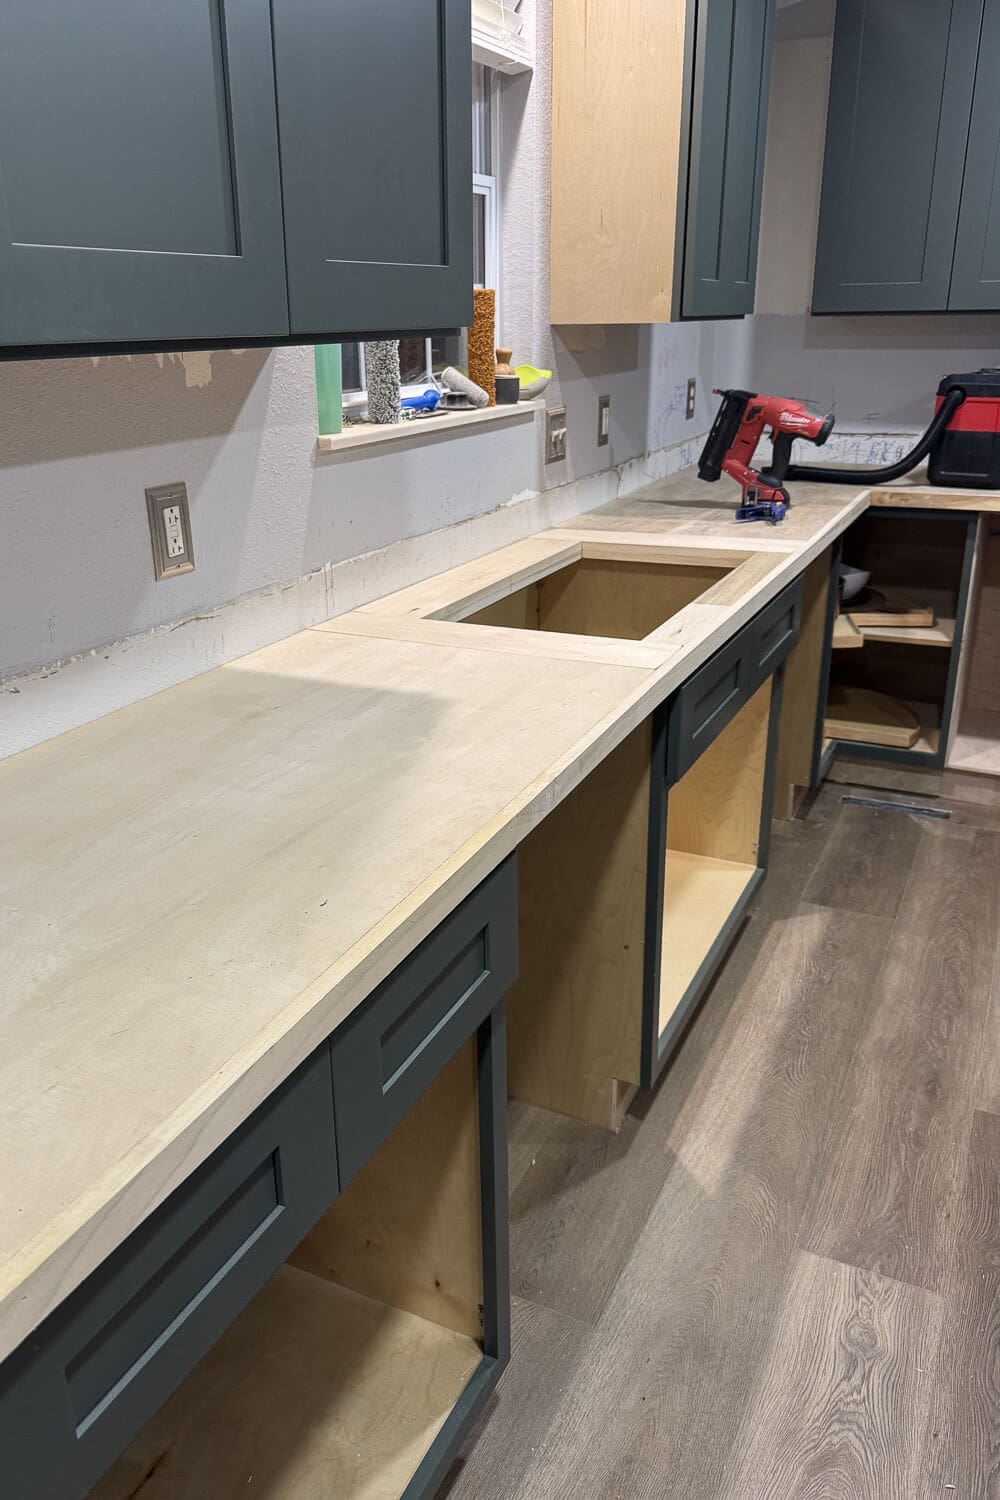
DIY Countertops (Our Go-To Process)
After cabinets came countertops, and if you’ve been around here for a while, you already know this kitchen update is not our first rodeo with DIY counters. We’ve done this in our last three houses and love them!
At this point, I have the process down. We built a plywood base, next, I did a faux marble contact paper, and then we poured epoxy over the top.
They look amazing. They’re durable. And the cost is almost laughable compared to real stone. The entire kitchen cost less than $600 for everything. That still blows my mind.
If you want the full tutorial, I’m linking it here: DIY Countertops That Look Like Marble Without the Cost

Kitchen Update Priorities: Function First
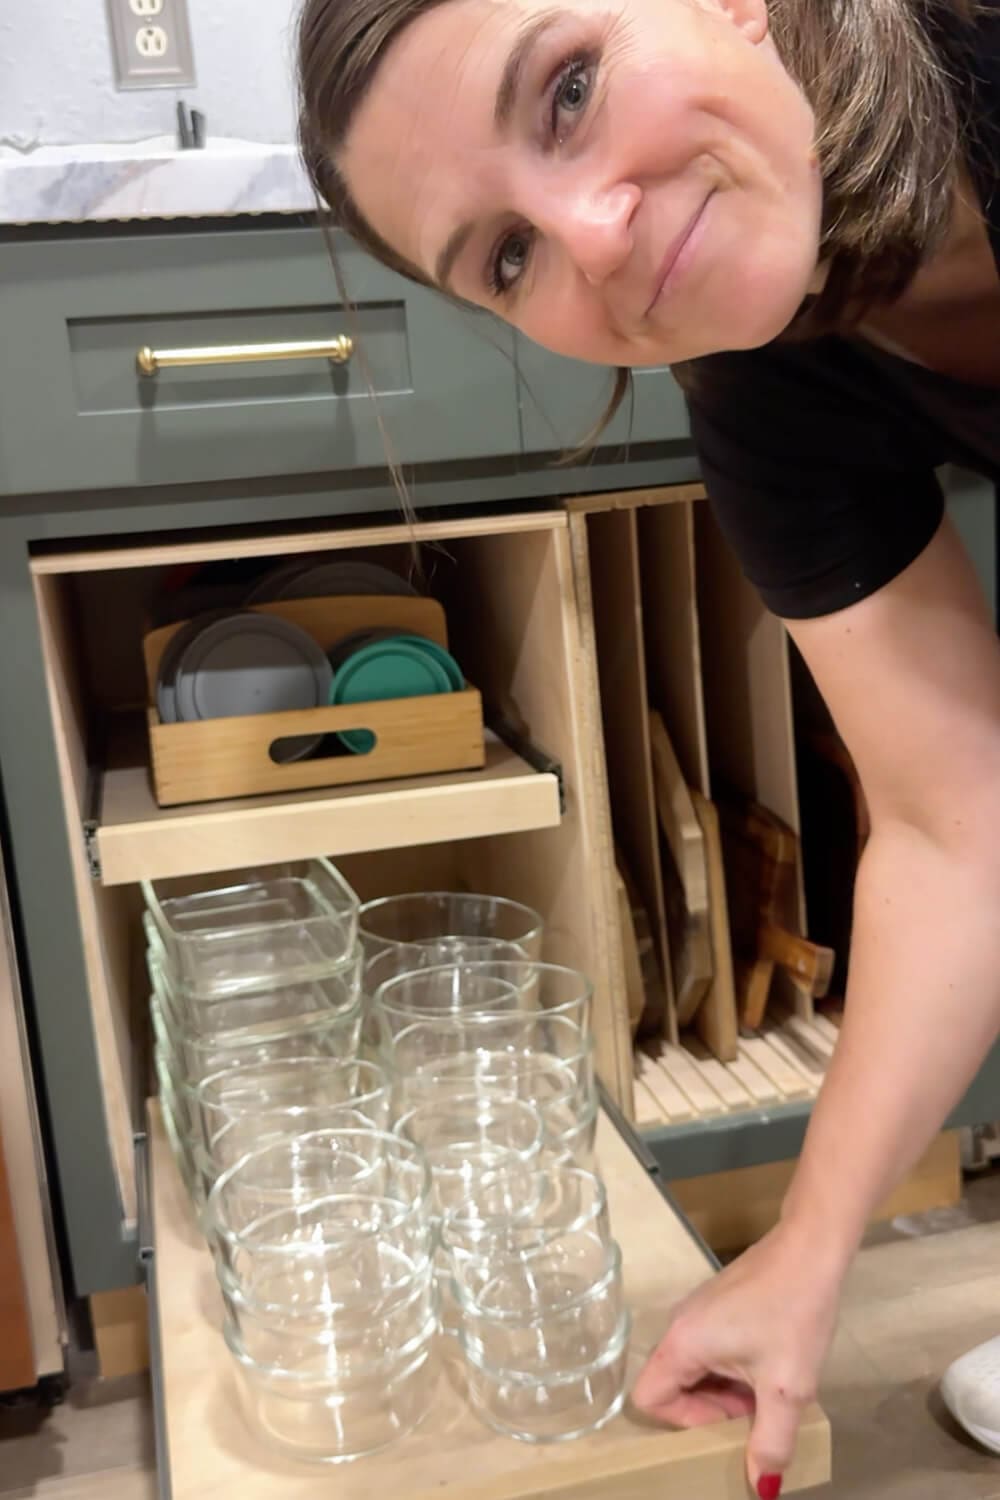
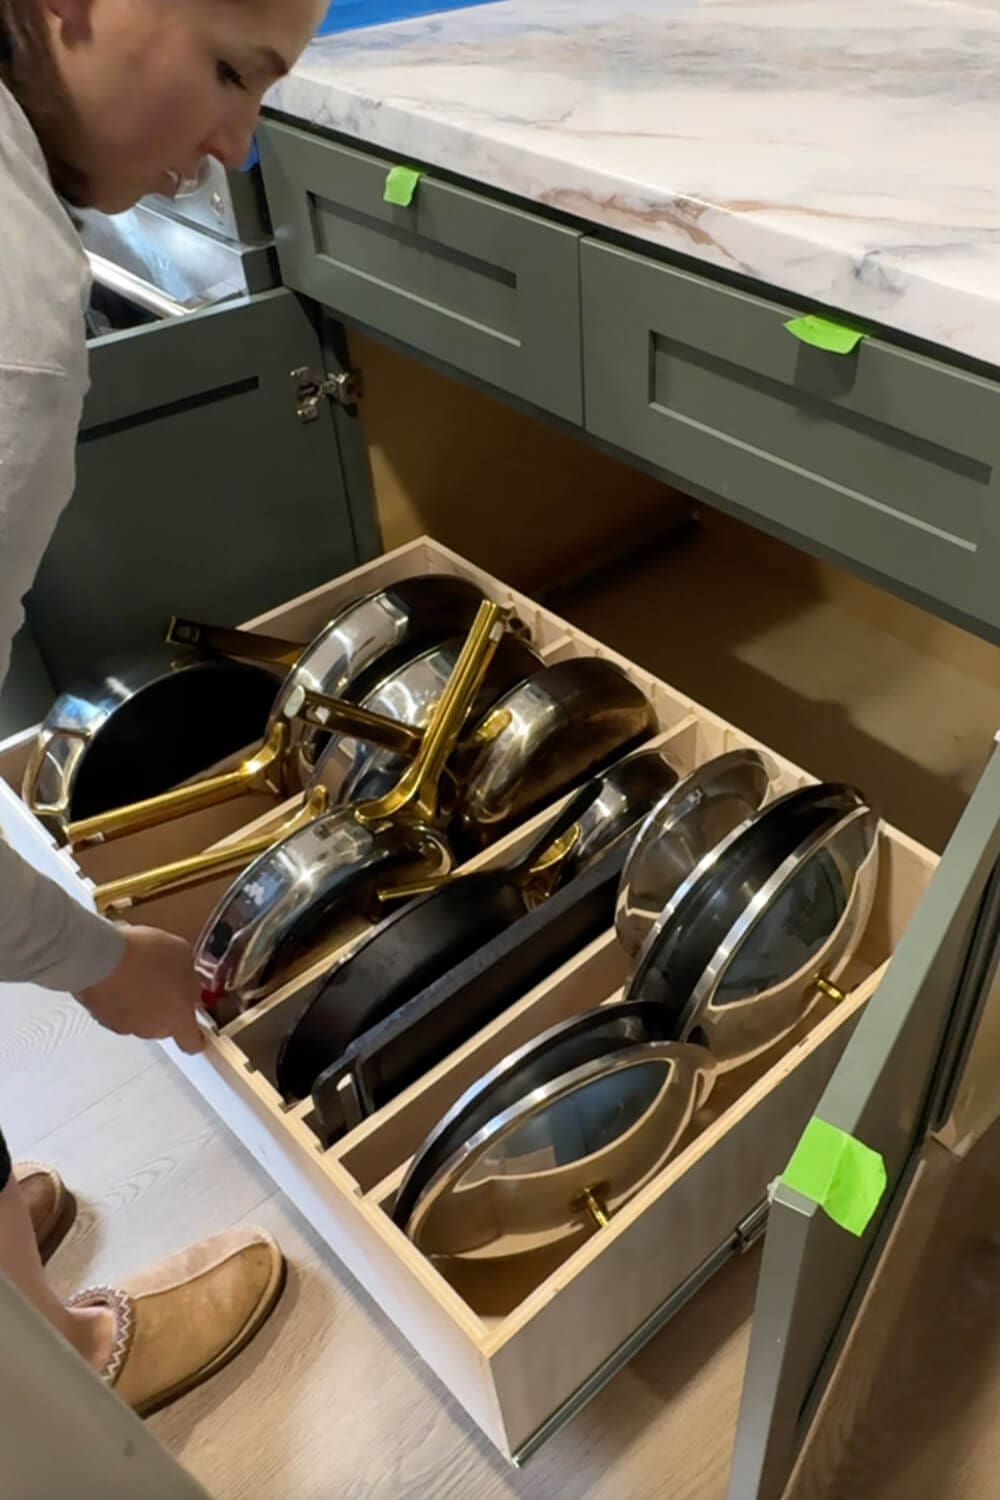
One of my biggest goals with this kitchen remodel is making this a functional space before I worry about making anything look pretty.
So no, I don’t have a backsplash yet. But yes, everything in this kitchen already has a home. From my glass containers, our cutting boards, my pots and pans, spices, and even the trash cans. I’ve already started building custom organization pieces and inserts so the kitchen works for our family right now, even while it’s still a work in progress.
You can see all of those kitchen organization customizations here: 7 Kitchen Organization Ideas for Cabinets and Drawers

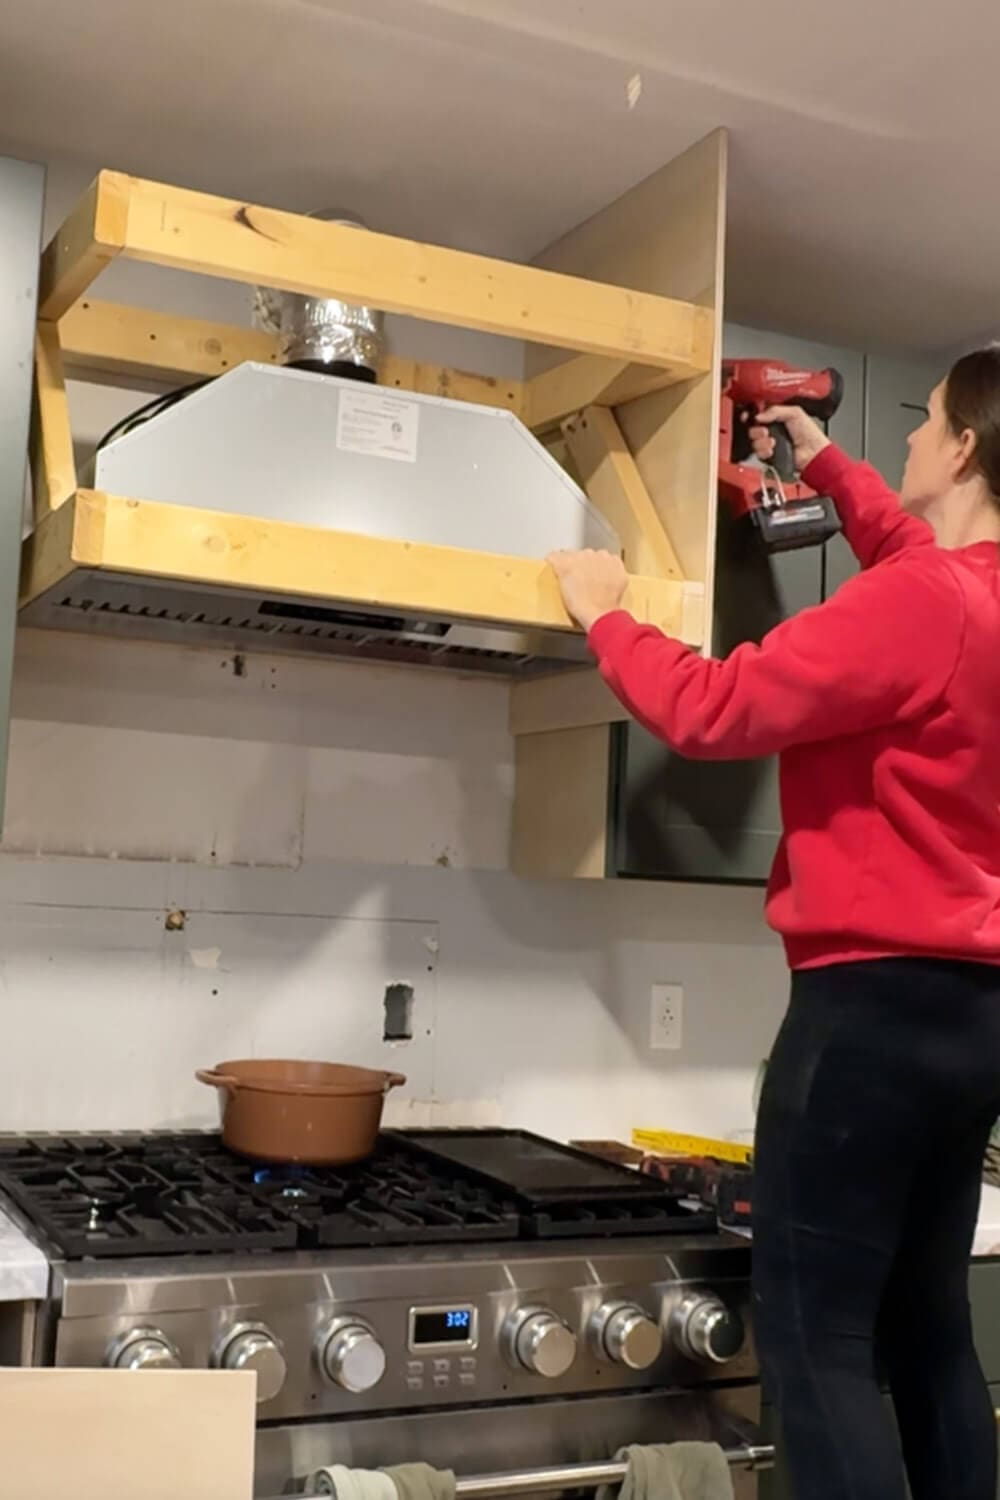
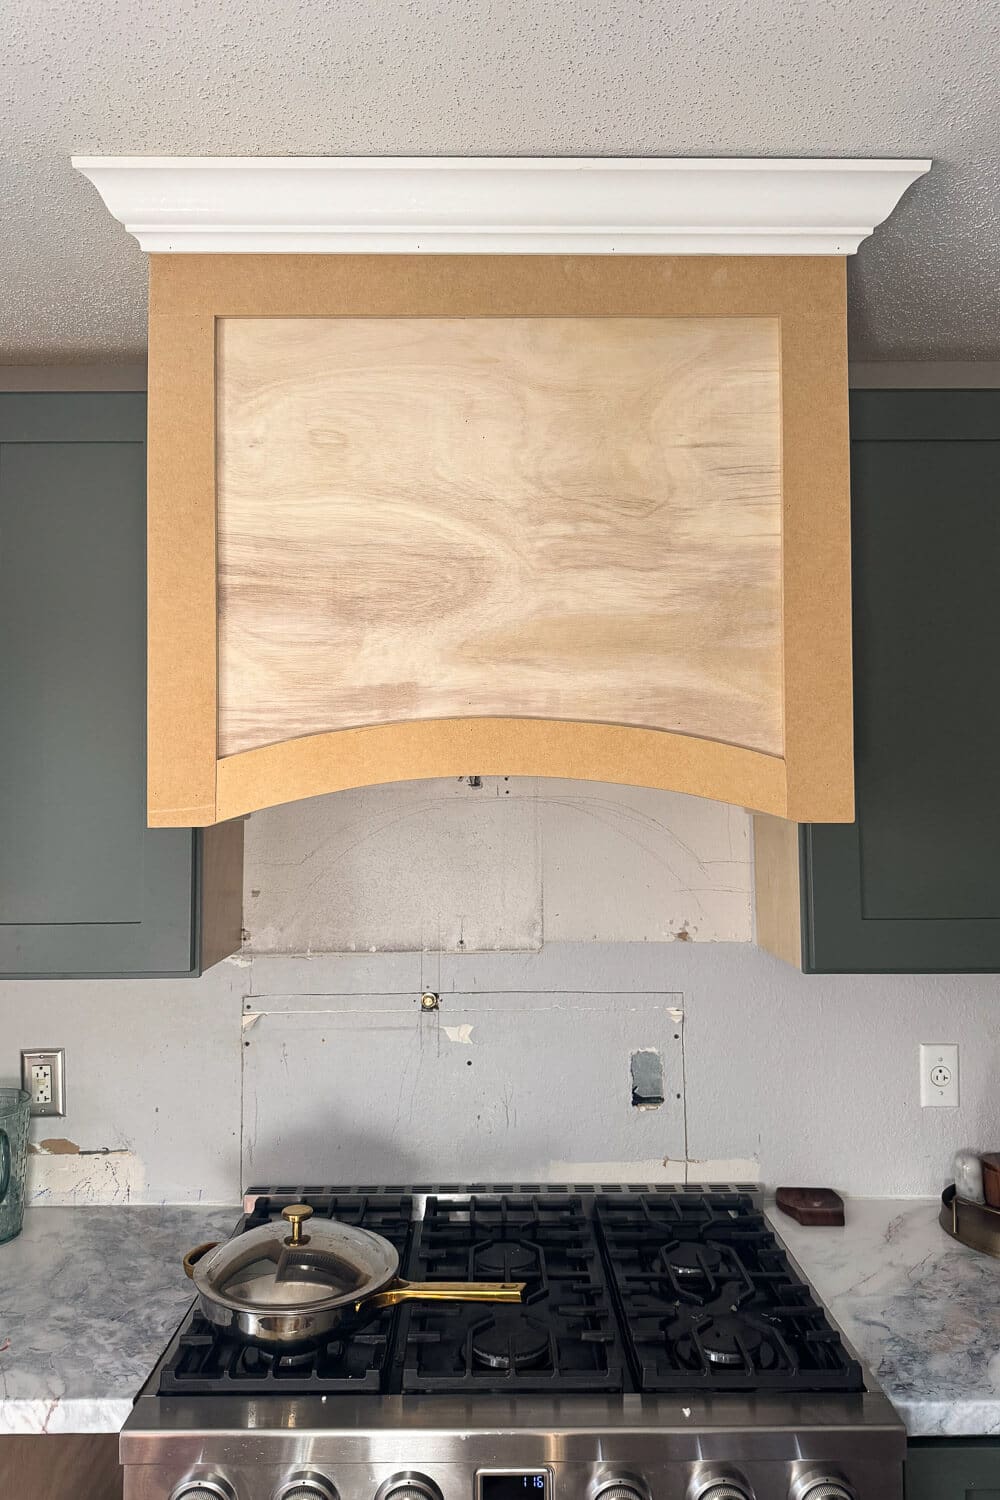
Building a DIY Range Hood Cover
My most recent big project is the range hood.
In our last house, I built a giant stone range hood that became a focal point for the entire kitchen. This time, I went with wood to match the classic trimwork we’re adding throughout the first floor.
I’ll probably paint it to match the cabinets eventually, but for now, it’s built, it’s installed, and it’s doing its job. We also used the same hood insert we loved in our last house, and yes, we bought it again for this one because it was that good.
Here’s the full tutorial on how I built this range hood: How to Build a Wood Range Hood Cover (Step-By-Step)
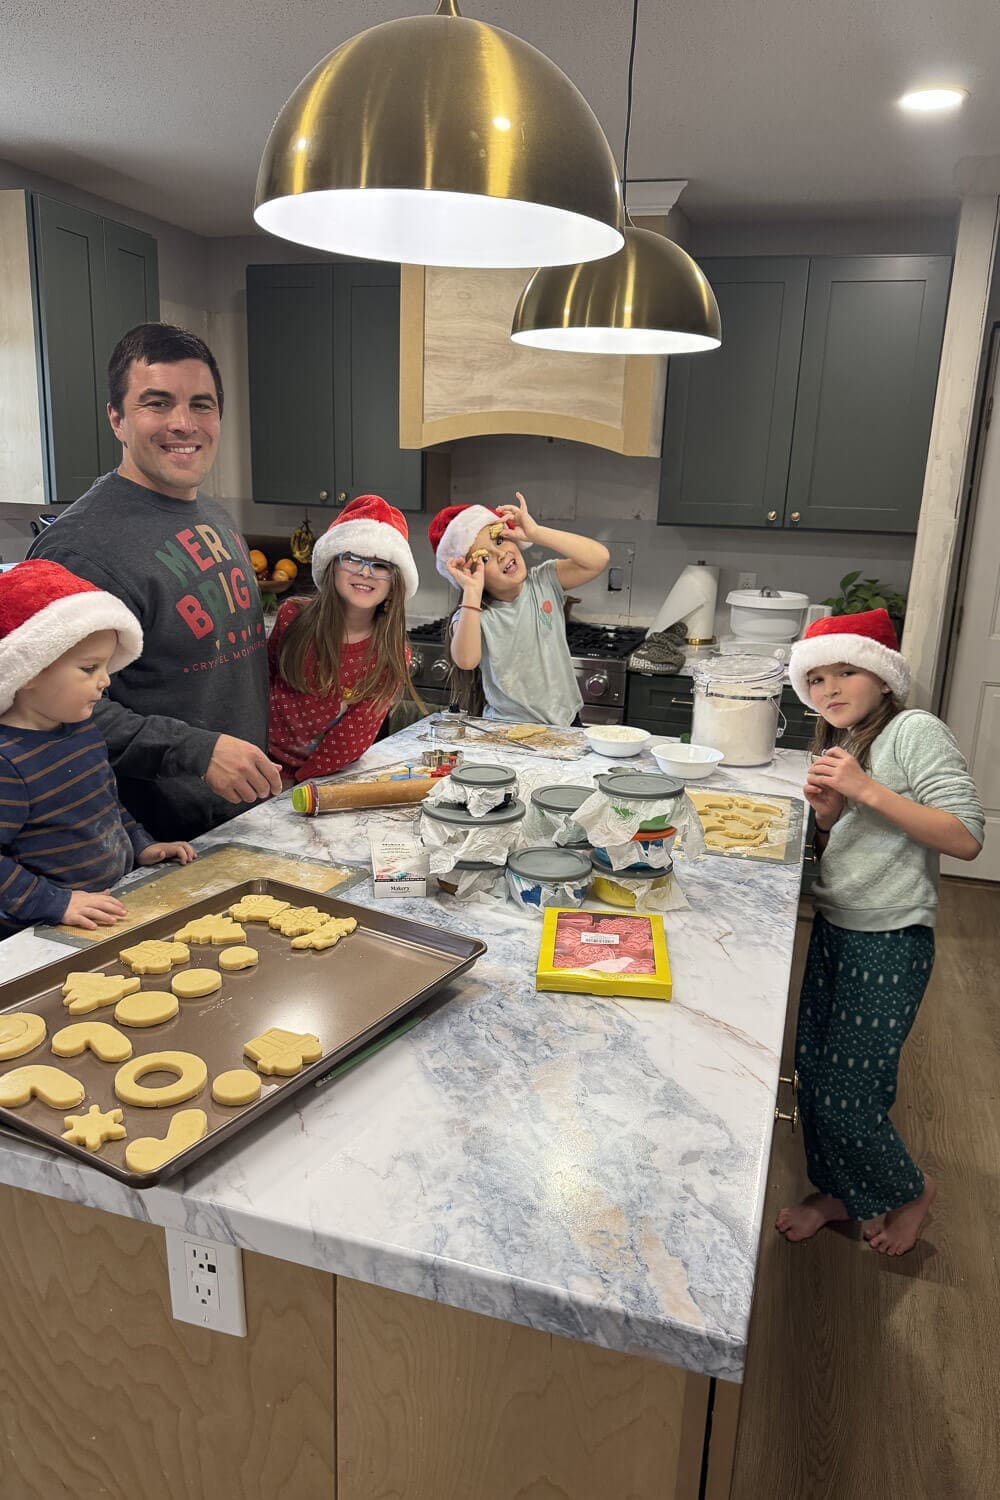
Living Through a Remodel (And Still Hosting!)
Even though this kitchen isn’t finished, we’re still living and thriving here. We even hosted a few times at Christmas, and none of our guests cared that we’re still a work in progress.
Living in the space definitely makes the remodel take longer, but it’s also the only realistic pace for us. We’re making progress, we’re making it livable as we go, and honestly, that’s a win.
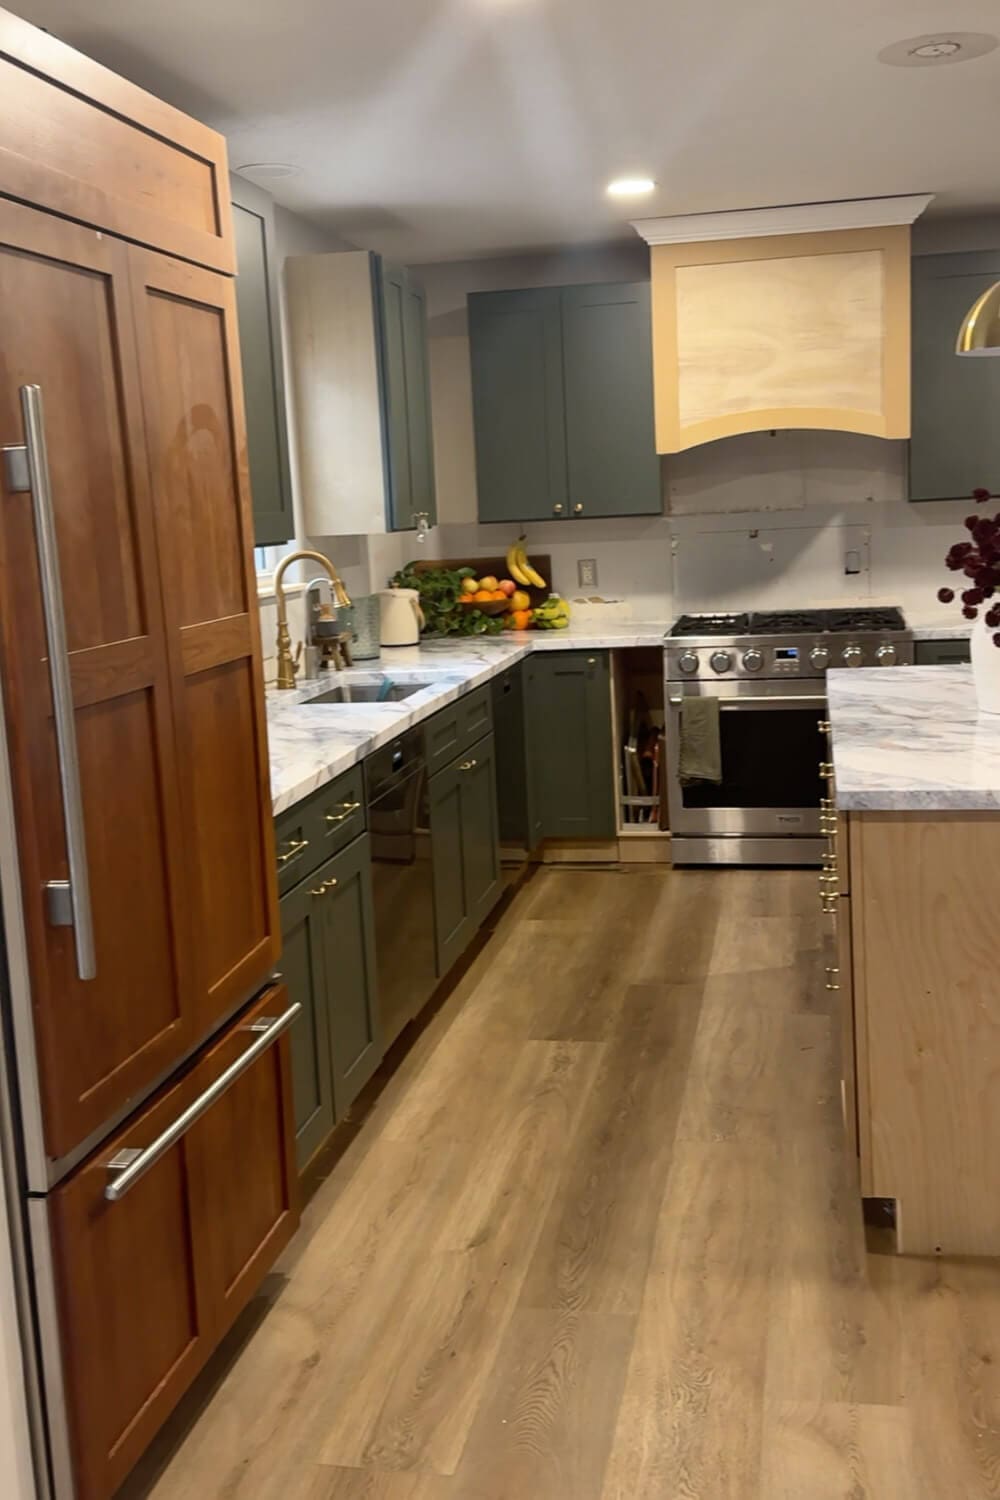
What’s Left in Our Kitchen Remodel
I’m already so happy with how the kitchen is looking. The green cabinets and “marble counters” look just how I pictured, and the brass lights over the island look amazing with the brass faucet, the cabinet knobs, and the cabinet pulls.
Here’s what’s coming next:
- Paint the fridge panels to match the green cabinets
- Take the cabinets to the ceiling
- Add a backsplash
- Add a pot filler
- Finish the kitchen island details
- And a bunch of other little things that will make it feel complete
If you want to follow along with the entire first-floor remodel, come hang out with me on Instagram.
📌 Save This Kitchen Update for Later
If you’re dreaming up your own kitchen update and want to follow a realistic DIY timeline (you know, the kind where kids still need dinner every night), pin this post so you can come back when you’re ready to start.
Kitchen Update FAQ
It depends on how big the changes are, how much you’re doing yourself, and whether you’re living in the house during the work. For us, we’re about six months in and still moving forward in phases.
Start with a plan. Even a simple layout sketch and a design direction will save you from decision fatigue mid-demo. Once you know the direction, demo and layout changes usually come first, then floors, then cabinets and countertops.
For traffic flow, yes, an island usually wins. A peninsula can make a kitchen feel closed off, while an island keeps walkways open and makes the space feel more connected.
Yes. We’ve DIYed countertops in multiple homes and have a process we love. With a solid base and the right finish, you can get a durable, beautiful look without spending thousands. Tutorial posted here: DIY Countertops That Look Like Marble Without the Cost
