DIY Laying Sod the Simple Way


Updated March 3, 2025
You can completely transform the look of your front yard by laying sod without having to painstakingly wait weeks for grass seed (and weeds) to grow and fill in. My guide for laying sod will walk you through detailed, step-by-step instructions while giving you all my tips and tricks to help you achieve a lush, green lawn. Say goodbye to old, patchy grass and hello to your new, beautiful yard!

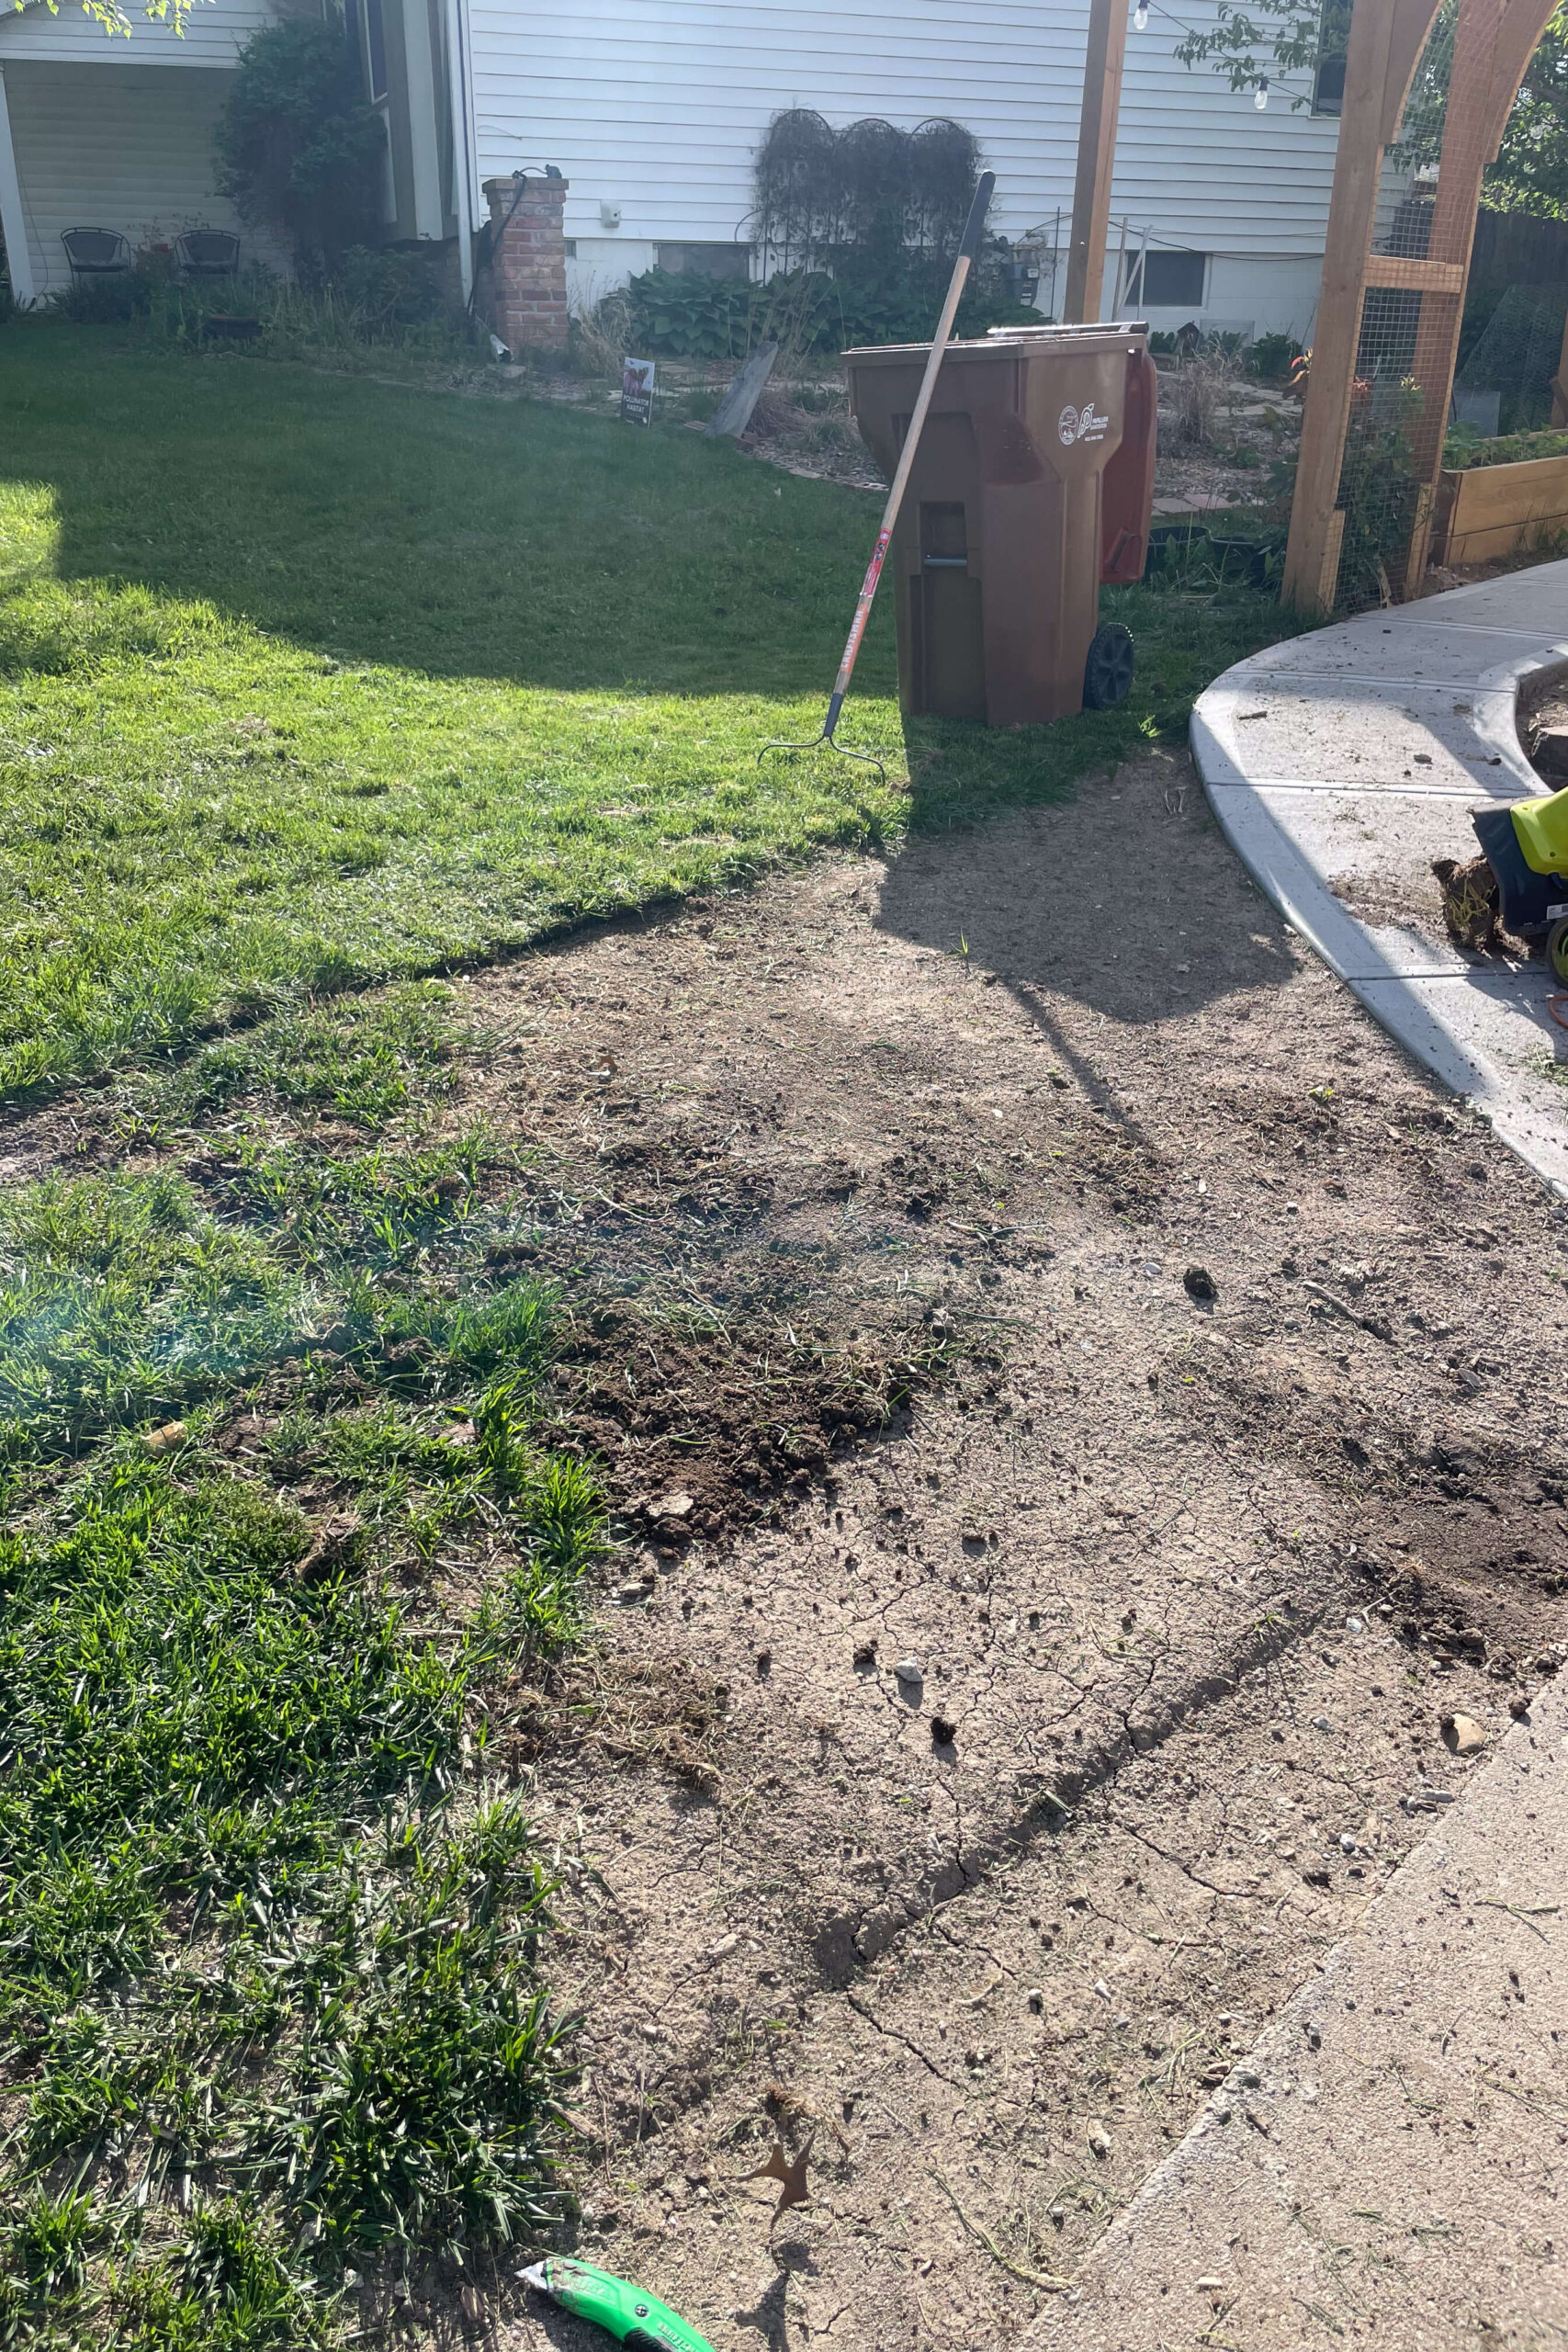
This is what I was working with in my front yard before taking on this project. My grass was patchy and uneven. I had loads of dead spots due to a grub infestation. It just looked awful!

When I first decided to tackle revitalizing my lawn, sod was not even on my radar. My original plan was to use my tiller on the dead areas, plant some grass seed, water and care for it, and hopefully have a beautiful, evenly growing lawn. I was going to go with seed mainly because of how much cheaper it is.
When pricing out grass seed, it would be around $100 for the amount of coverage I needed for my yard. Comparatively, sod from the hardware store was going to be closer to $1500. I wanted a beautiful lawn, but I wasn’t willing to pay that much.
I ended up finding a DEAL on sod that only cost me $300! This meant I would have an instantly beautiful lawn for just a bit more than the seed cost. I was so excited! More about how I got this deal further down in the post.
Tools and Materials
Preparing the Ground for Laying Sod
Before you can begin laying sod in your yard, you have to prepare the ground.
First, I had a few low spots in my yard, which you really don’t want. Your lawn should have a gentle slope away from your house, but it should all be even and level. If you have low spots, then you’ll have drainage issues, and the grass in the low areas will most likely die from water puddling there.
When doing other projects around the yard, like this paver driveway extension, I ended up with some extra dirt that I could relocate to these low spots.

After dumping the dirt, I used my stiff rake to spread it around evenly.

In addition to filling in any low spots, I had to remove the old grass before I could start laying sod. The new sod needs to have contact with the ground so it can take root and grow.
First, I got out my mower to cut the grass down as low as possible. Since my current grass was so long in some spots, I had to do one pass at a higher level for the taller stuff, then was able to do a lower pass on the whole yard.

I knew that before laying the sod I needed to get the whole thing down to dirt. I thought that the easiest way to do that would be using my weed eater. Keeping the strings as long as possible and putting it low to the ground, I made some progress cutting right to the dirt, but it was slow. I quickly realized that this would take way too long to finish all 1200 sq. ft. of my yard.
Side note: We had friends helping us with laying sod in our yard, then we went over to their house and helped them lay sod in their yard. Their yard was mostly weeds, and using the weed eater to cut down to the ground worked great at their house. Since my yard was mostly old grass, it was too dense for the weed eater. If you have mostly weeds, the weed eater might also work at your house.

I decided to switch the weed eater out for my tiller, but all I achieved was turning my yard into mud (we had some rain a few days before), and it wasn’t removing any roots from our old grass. Plus, I had to be really careful that the tiller did not go too deep. When laying sod you don’t want the ground to be too soft, or else as the ground settles, the sod can sink and your lawn will end up uneven.

I knew that I needed to change up my tactic here, so I headed out to my local Home Depot to rent a sod cutter, and while I was there, I grabbed a lawn roller too (more on that later).
Did you know you could rent large tools like this from your local hardware store? It’s a great way to use large, expensive tools you only want for a day or so. You can rent tile saws, jackhammers, augers, all kinds of things.

Once I got the sod cutter home, I started to make some actual progress on getting this old grass out of here. However, just be aware the machine itself is really heavy, despite it having a self-propelling feature. I also had to figure out the right depth to cut it at. I started at an inch and a half, but realized I was going to be hauling out way more dirt than was necessary, so I lowered it to 1/2 an inch, and that worked much better just skimming off the grass.
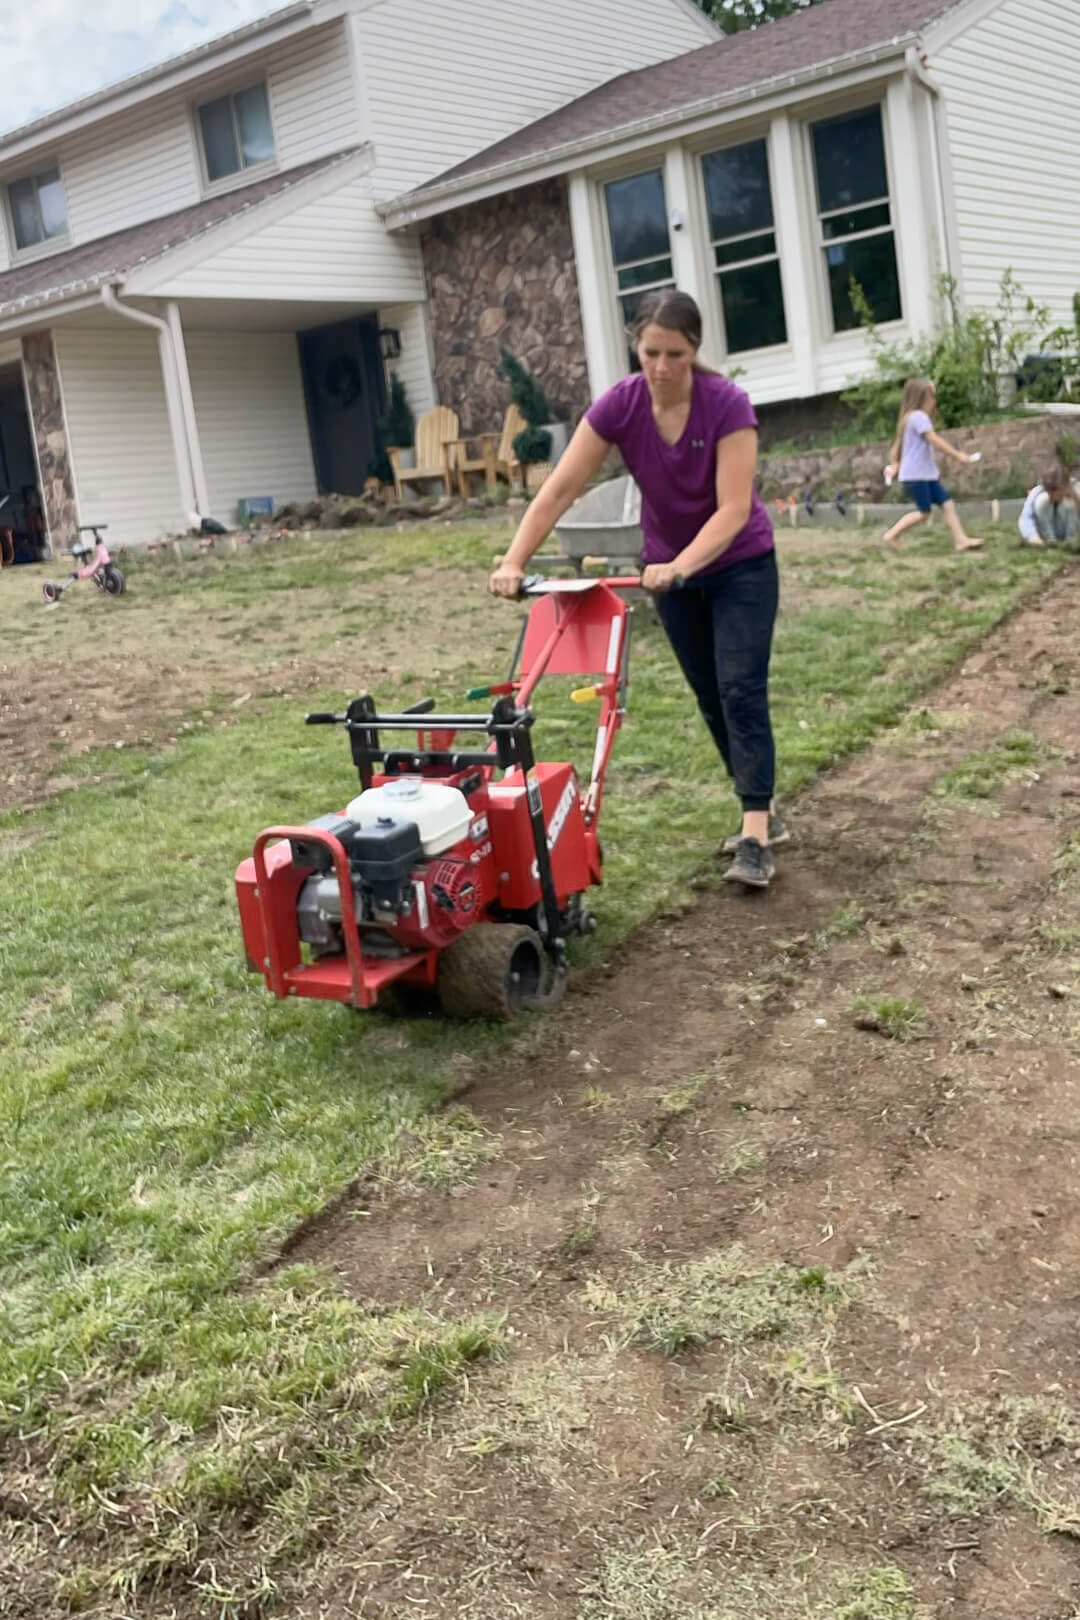
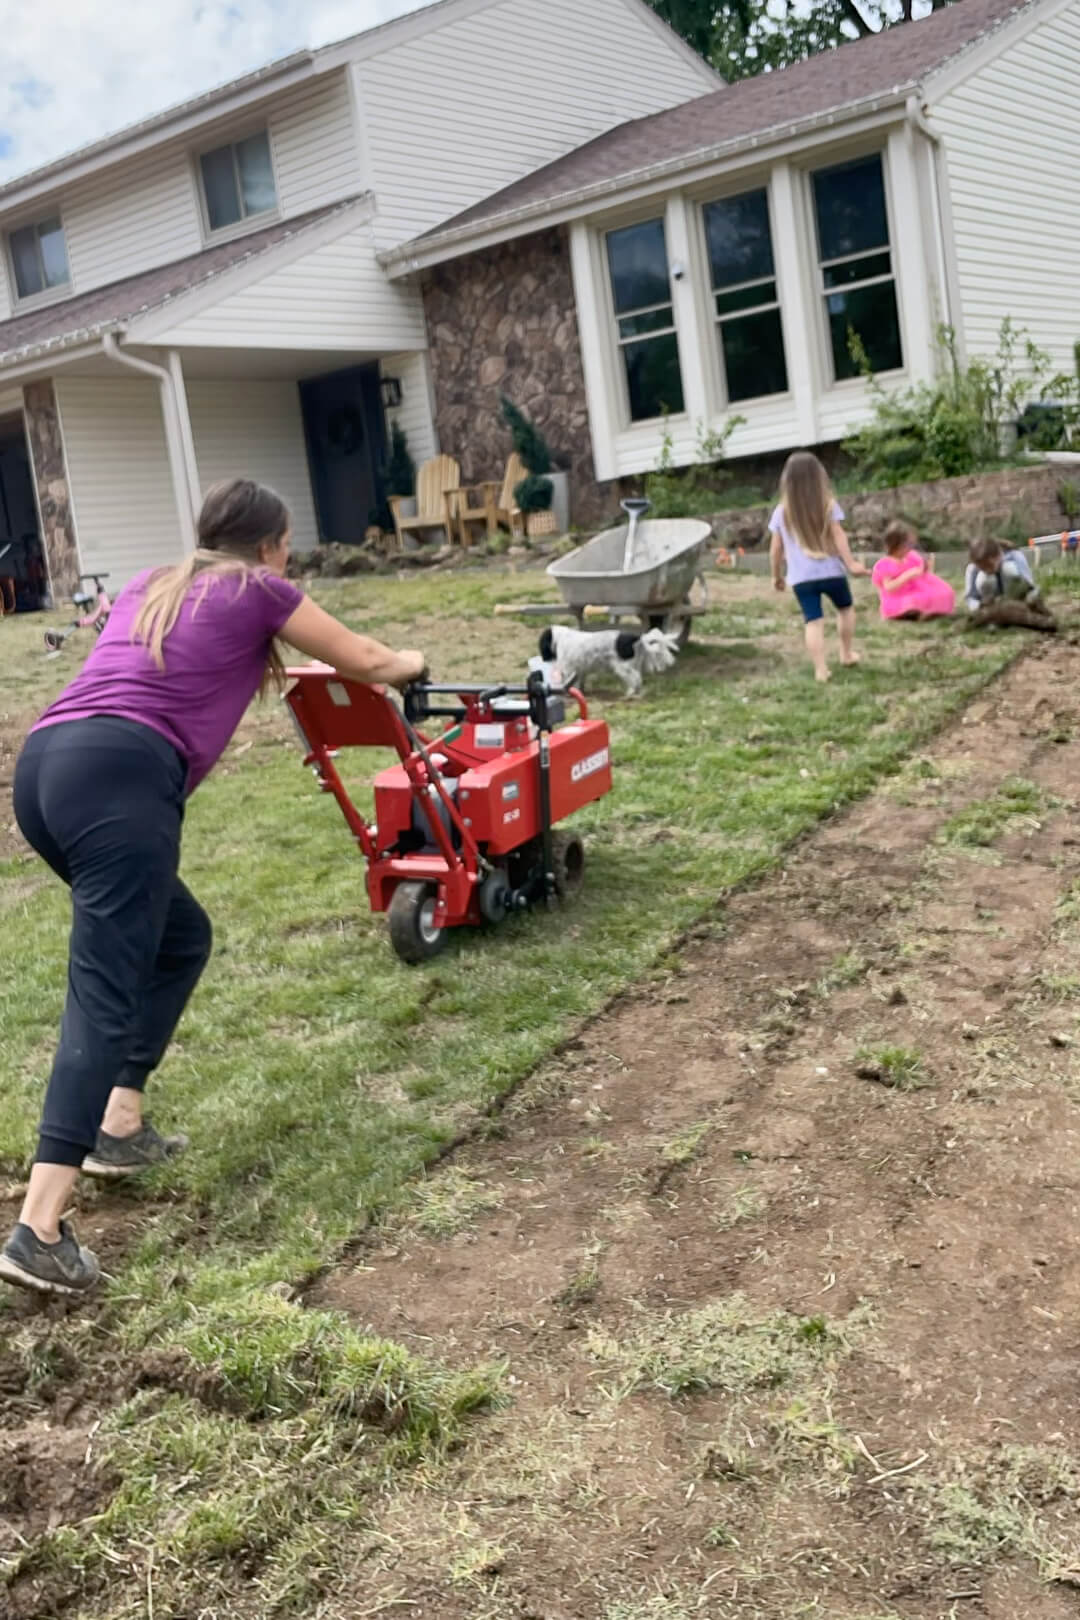
It cut the top layer of the ground, taking the grass with it. The girls were a big help in rolling it up and helping me get it out of the yard. Some of it didn’t want to roll well, but just kind of clumped and crumbled. For those sections I shoveled it into the wheelbarrow and hauled it off.

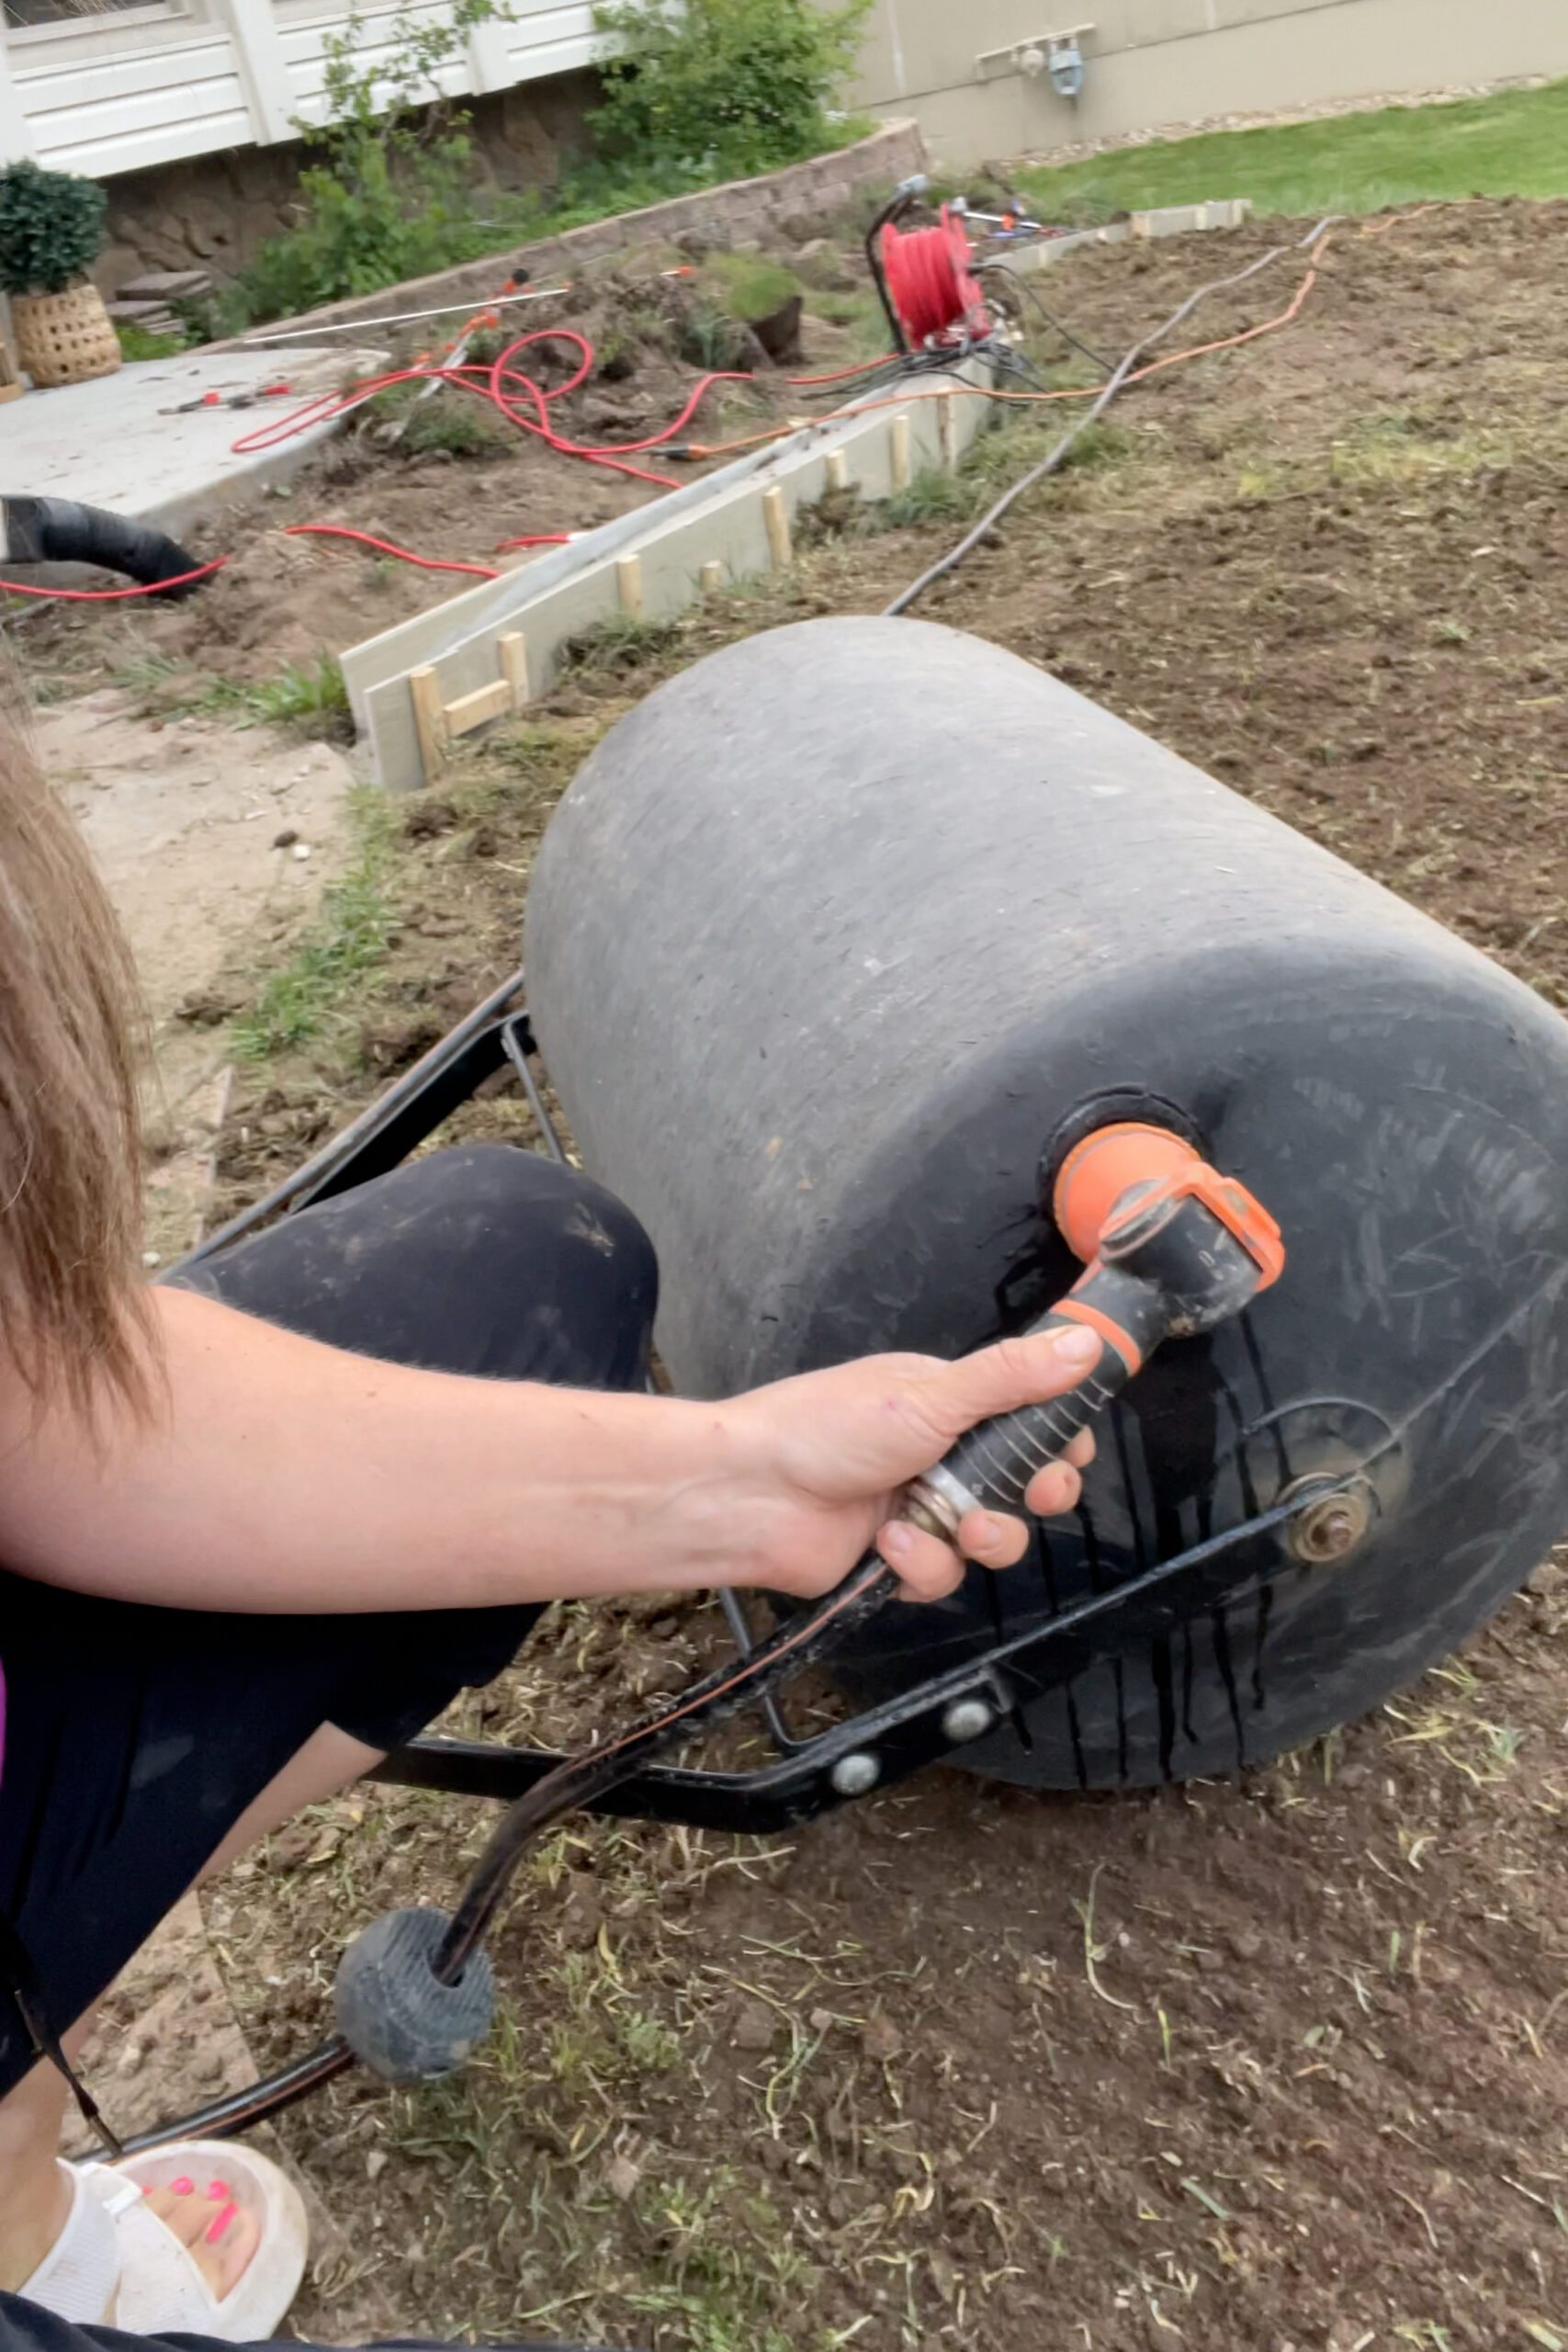
After we got all the old grass out of the way, we raked and raked (and probably raked some more) to even out our ground, smooth it out, and remove any chunks of weedy dirt left. As I mentioned a bit earlier, you don’t want soft ground underneath sod. When laying sod you want the dirt underneath to be nice and compressed. This is where the lawn roller I rented comes in.
The lawn roller is very easy to use. I filled it up with water using my Giraffe hose reel. The water makes the barrel really heavy, and then you just push it around all over your yard to pack down the dirt.
Before laying down the sod I added a pre-emergent to keep any weeds from coming up, but later was told by the man we purchased the sod from that isn’t a good idea because pre-emergent still damages the roots of plants. So he told me to be sure I got tons and tons of water on it to try to dissolve the pre-emergent asap. We did apply a grub killer simultaneously, though, which was super necessary for our lawn. When moving dirt and working in the yard, we found a lot of grubs, and the sod we bought also had grubs in it. It’s not uncommon, but it’s definitely something we wanted to get a handle on.
A walk behind spreader is the way to go when applying granules like these to a large yard like ours. They don’t cost much more than a hand held spreader, while being faster and easier, and giving you more even coverage.

Purchasing Sod for Cheap
Prices for sod will, of course, vary based on the area you live, but the $1500 price tag from some local sod merchants was not in my budget. That was way more than I wanted to pay.
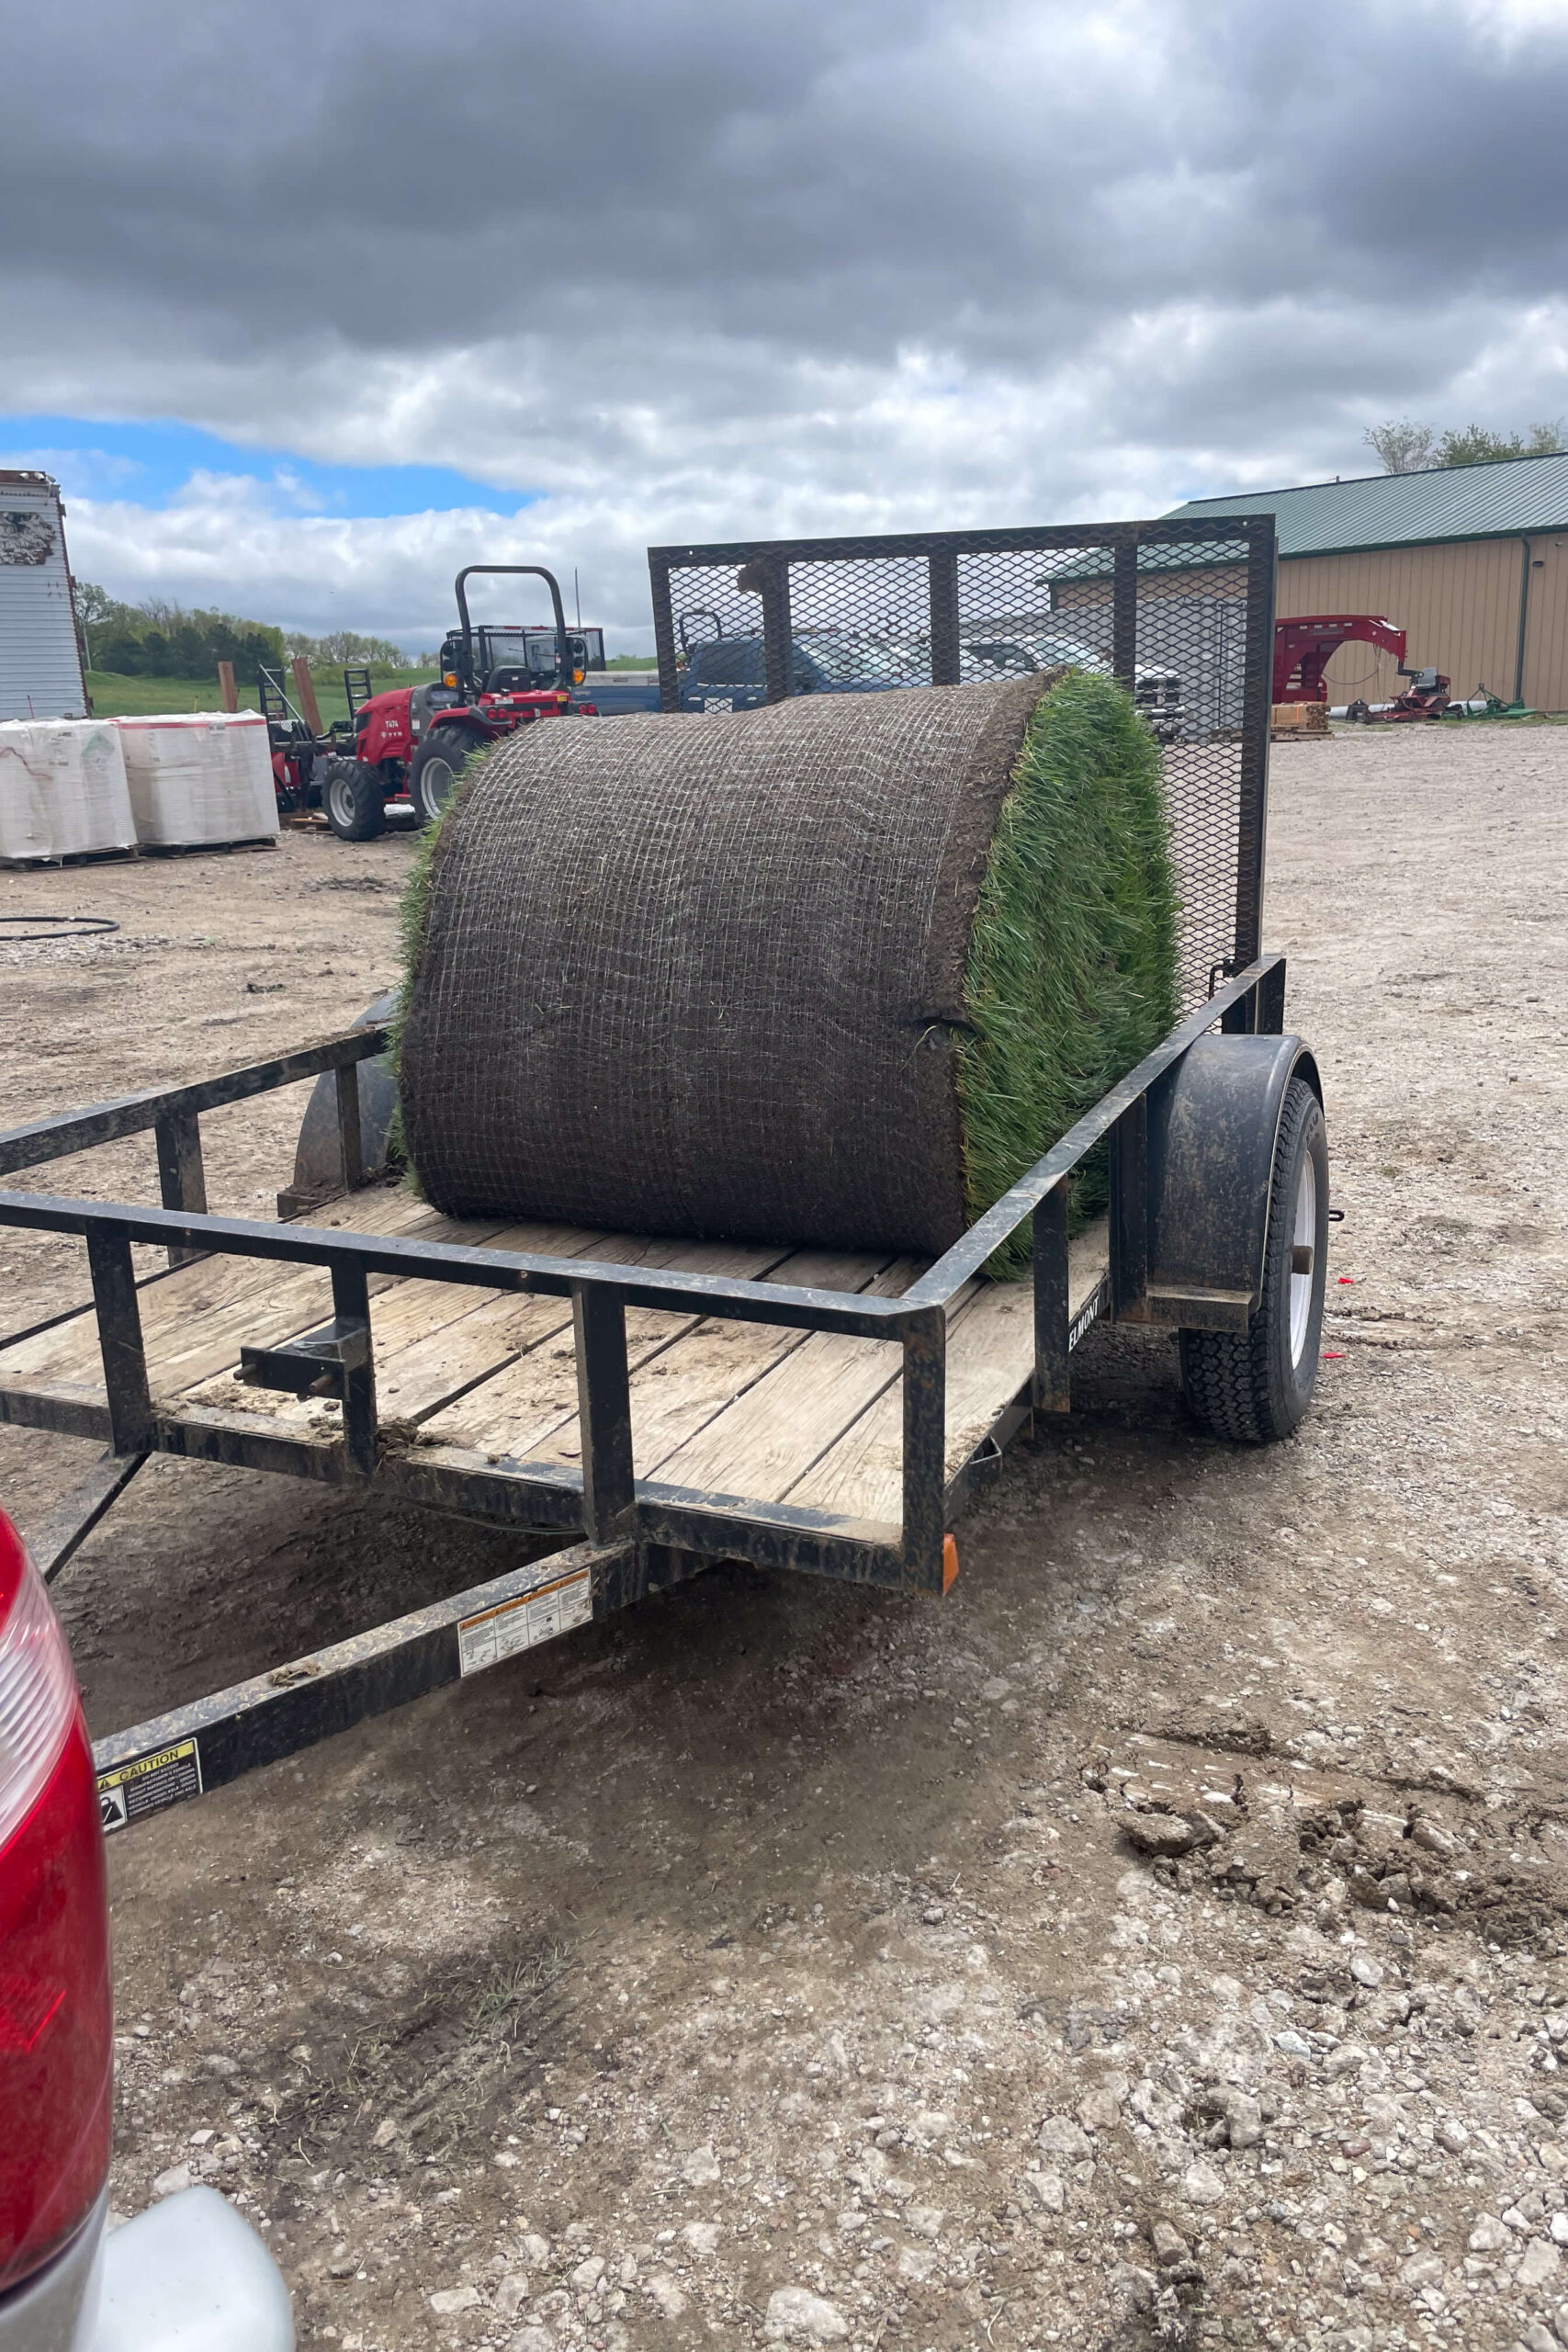
Using Google I found some sod farms in my area and I gave them a call. Doing that little bit of research totally paid off, as I found a farm about an hour outside of Omaha that would sell me 400 sq. ft. rolls of sod for $100 each if I picked them up! Even better, they come down to Omaha on a regular basis, where I could meet up with them to pick up the sod.
These rolls of sod are huge! My 8ft trailer was able to hold one roll which weighed about 1,000 pounds. Fortunately, we were able to enlist the help of some friends who rented a trailer to pick up the other two rolls we needed for our yard and went back for another two rolls for their yard as well.
Laying Sod in Your Yard
The big rolls of sod were way too big for us to unload in one piece. Instead, we cut it into smaller, more manageable-sized pieces as we unloaded it from the trailer.

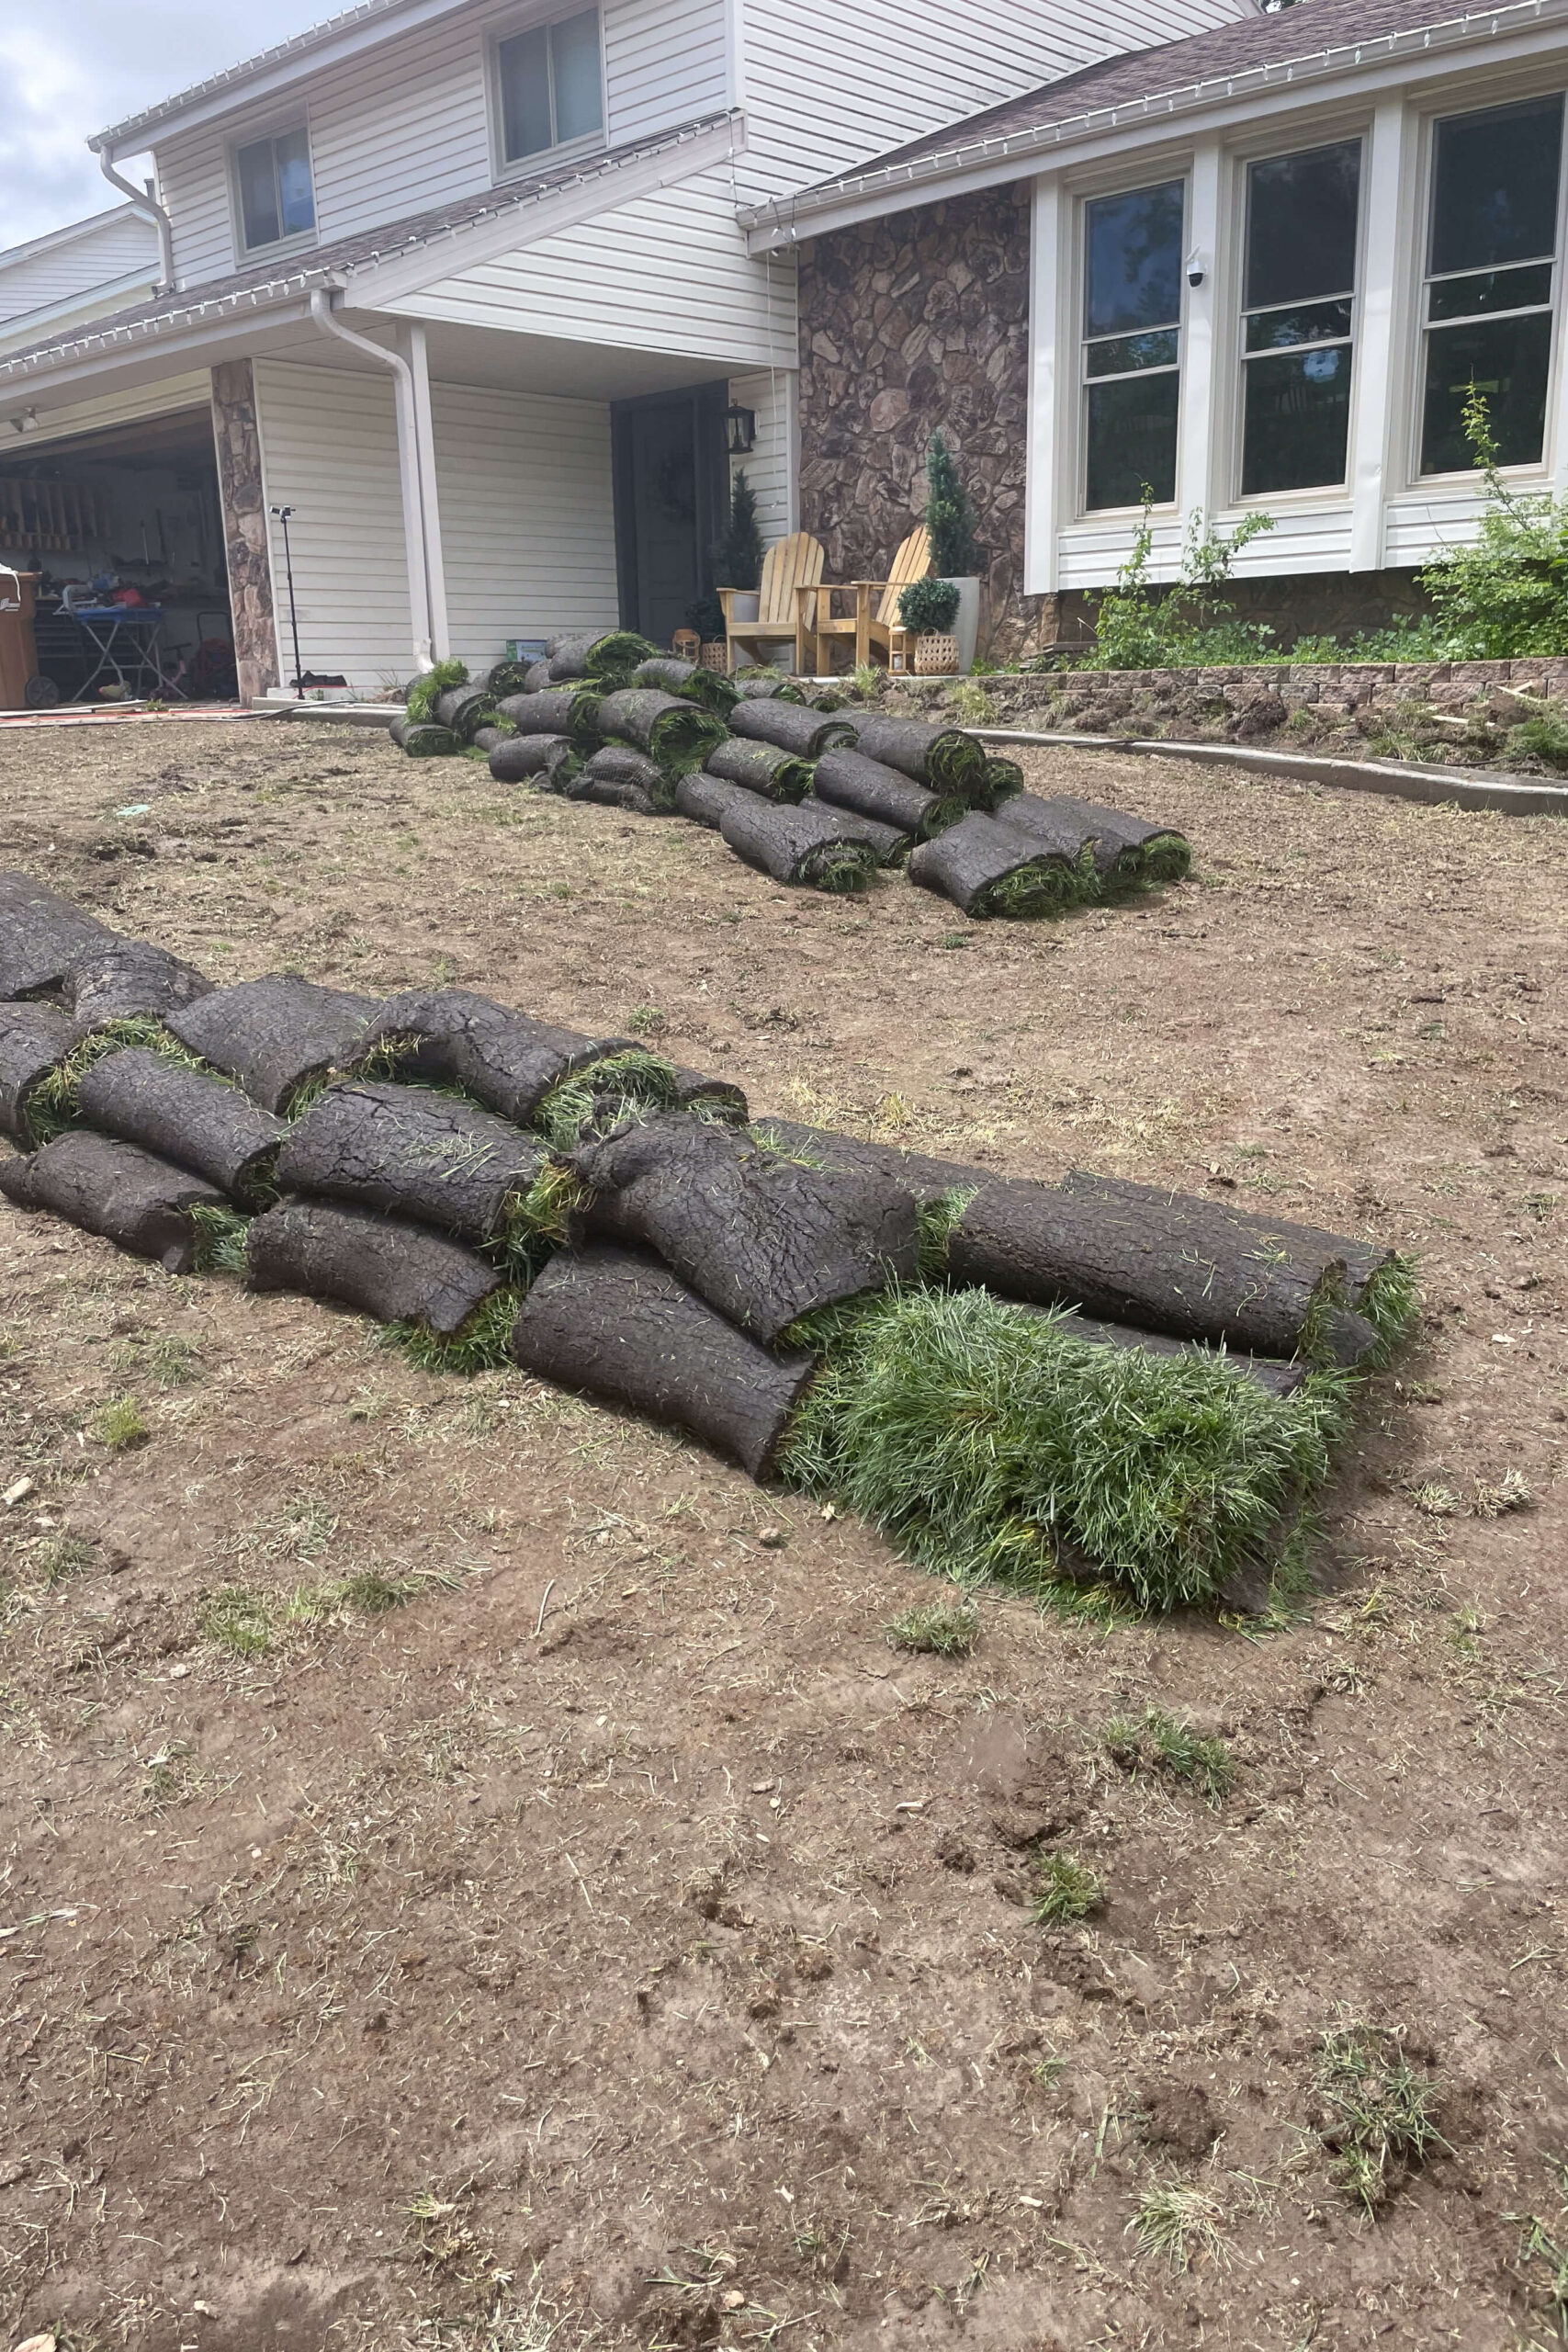
Then, it’s time to unroll it and lay it out. Little-by-little, piece-by-piece, we worked our way from the sidewalk up to the house. It’s kind of like laying out a bunch of area rugs. You want them to fit tightly together, and it’s also a good idea to stagger the seams.


When you get to an end, or an edge, or anywhere that you need a smaller piece, you can simply cut the sod with a utility knife. The leftover piece that you cut off can go elsewhere. It’s fun. Like a giant puzzle.

Even a small, triangular shaped gap like this one, is easy to fill in with a small, leftover piece of sod.


Laying sod really is as simple as cutting your piece of sod to fit, and laying it right in place with contact to the ground.


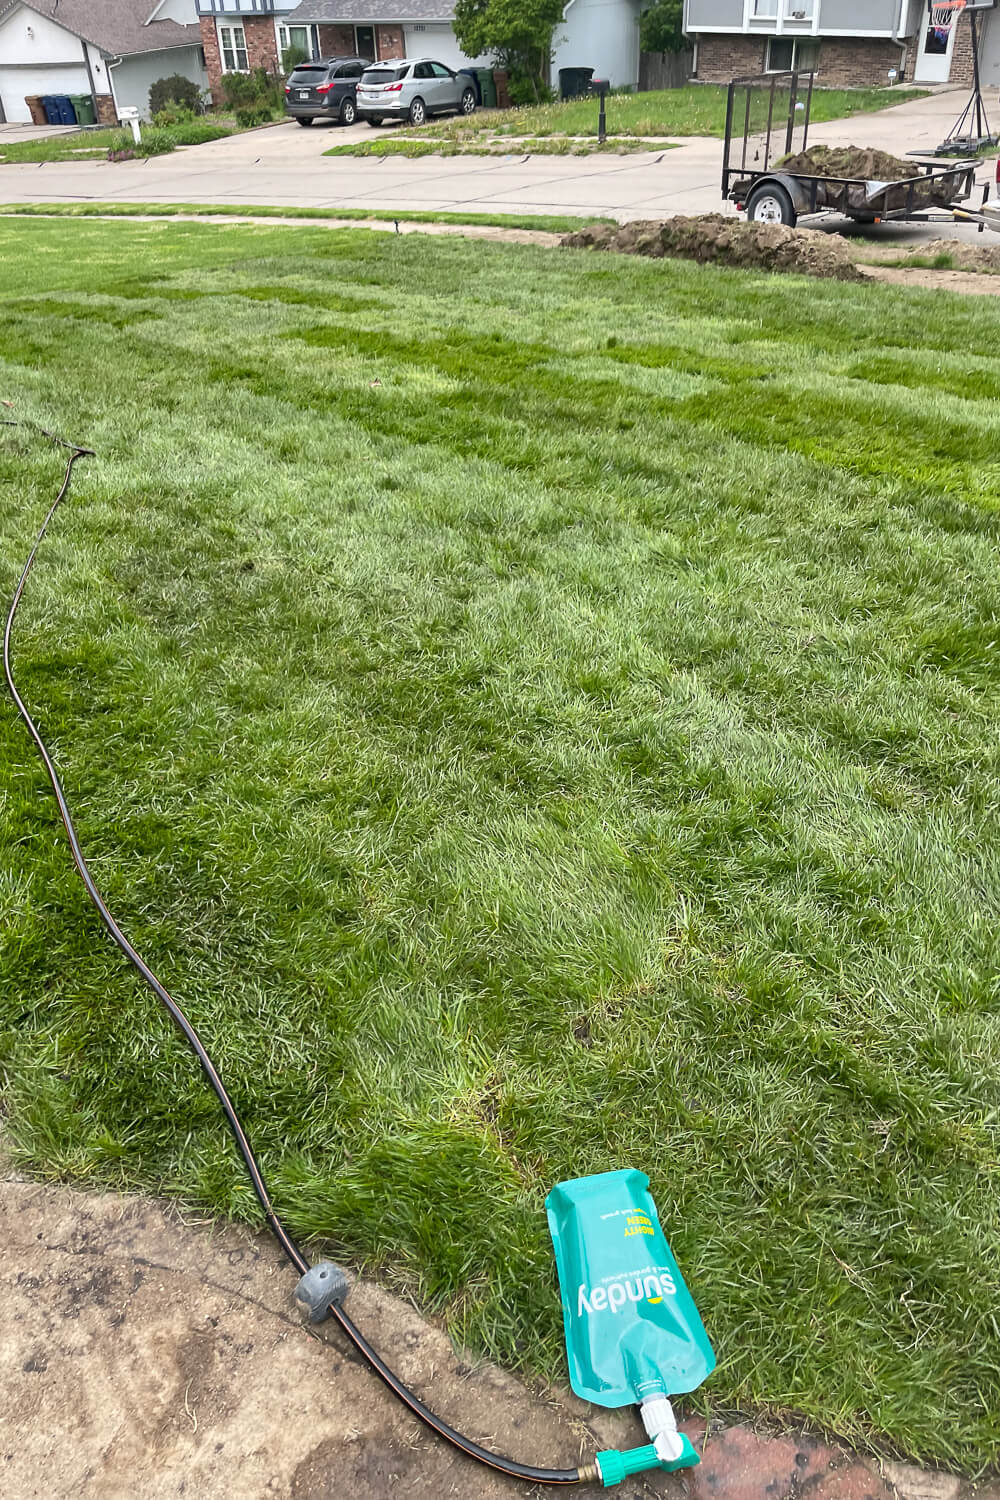
And just like that our front lawn was done! I truly can’t believe what a transformation laying sod had on our yard. It’s just gorgeous. I can’t get over how good it looks!
Remember what this grass looked like before? Huge improvement!

Here is another area over by the garden in our side yard. We had some concrete removed here when we put in the sidewalk, so it was a mess.
Now look at the transformation from laying sod! It looks so pretty over here now.

Laying sod was definitely a lot of work, especially the preparations for it, but so worth it to immediately have a fresh start to our lawn.
Taking Care of Our New Lawn
After you invest the money in sod, and put all of that back breaking labor into laying sod, you want to be sure to take care of your new lawn. First, you will want to fertilize it right away. I used Sunday Lawn Care on mine. It was easy to apply, and will encourage the sod to take root and grow.

A watering system, especially as we head into summer, is essential. We have an old sprinkler system, which is actually not common in our neighborhood, but it’s a mess, and I didn’t want to invest in fixing it with how little we use sprinklers around here. But I knew I needed something automatic, or else I would end up forgetting to water my grass. I set up an awesome, automatic sprinkler system for less than $100, and have all the details for that here.
The key to getting your sod to flourish is to WATER, WATER, WATER. It needs waaaaay more water than you think. The ground underneath the sod should be completely soaked through, enough that if you walk on it the ground should be squishy. I set my timer to water 3 times a day for 40 minutes each. In dryer climates, you should probably let it go for at least an hour.

Looking for more projects to upgrade your yard? Check out this post where I DIY my own concrete curbing, or this one where I completely revitalize my old, weathered fence.