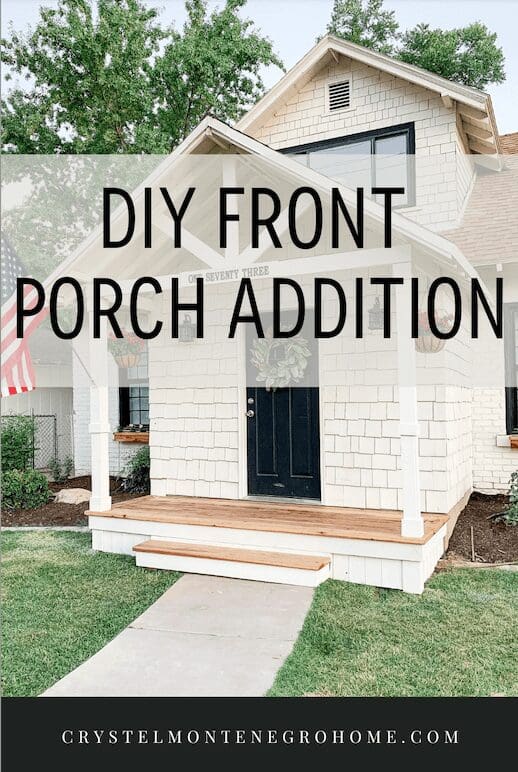
How to Add a Front Porch to a House (Foundation and Frame)


Updated July 13, 2026
Thinking about adding a front porch to a house but not sure where to start? You’re in the right place: we added ours for $500 to $2,000 in materials (compared to the $6,000 to $18,000 contractors charge), and this first stage, the foundation and frame, took about a weekend. This step-by-step tutorial shows you how, from permits and plans to drilling, framing, and setting posts. It’s beginner-friendly, budget-friendly, and full of real-life tips.
DIY Front Porch Series, Part 1: Foundation and Frame. The rest of the build: Part 2: Trim and Deck Boards, Part 3: Building the Step, and Part 4: The Porch Roof.
How do you add a front porch to a house?
To add a front porch to a house, you attach a pressure-treated ledger board to the wall, set support posts in concrete footings, then frame the deck with rim joists and floor joists. That frame is the foundation everything else builds on, and it’s exactly what this post walks you through, start to finish.
Table of Contents
- Watch the Full Front Porch Build
- How to Add a Front Porch to a House: At a Glance
- Supplies for Adding a Front Porch to Your House
- Step 1: Check Permit Requirements + Sketch Your Porch Plans
- Step 2: How to Attach a Ledger Board to Add a Porch to Your House
- Step 3: Prepping the Deck Post Holes for Your Porch
- Step 4: How to Frame a Porch and Set the Support Posts
- Step 5: Pouring Concrete Footings to Secure Porch Posts
- Step 6: Installing Deck Joists for a Strong Porch Frame
- How Much Does It Cost to Add a Front Porch to a House?
- How Deep Should Front Porch Footings Be?
- More Front Porch and Outdoor Projects to Try
- FAQs About Adding a Front Porch to a House
Watch the Full Front Porch Build
Want to see exactly how this came together step by step? Watch the full video of our DIY porch build, from drilling into concrete to pouring posts and framing the deck. It’s packed with tips, tools, and the real-life process behind creating this charming front porch.
How to Add a Front Porch to a House: At a Glance
- Cost: $500 to $2,000 in materials for a small porch (a contractor runs $6,000 to $18,000)
- Time: about a weekend for this frame stage, plus overnight for the concrete to cure
- Difficulty: beginner-friendly – if you can use a drill, a saw, and a level, you can do this
- Permit: check your city first – anything attached to your house often needs one
- Helpers: one extra set of hands for squaring the frame and holding boards
Here’s the whole build, start to finish, so you can see where this foundation-and-frame step fits:
- Part 1 (you’re here): Foundation and frame covers permits, the ledger board, setting posts, pouring footings, and the deck joists.
- Part 2: Trim and deck boards covers mitering the border trim, notching around posts, and laying the decking.
- Part 3: Building the step covers the box step and skirting.
- Part 4: The porch roof covers the gable roof, columns, and paint – the grand finale.
Supplies for Adding a Front Porch to Your House
Here’s what you’ll need to get started on your DIY front porch project. From essential tools to building materials, this list includes everything you need to build a porch foundation, frame the structure, and secure it properly. These are the tools and materials I used for this DIY front porch build:
Lumber:
- 4 in. x 4 in. x 12 ft. Pressure-Treated Pine Post
- 2 in. x 6 in. x 12 ft. Pressure-Treated Yellow Pine
- 2 in. x 6 in. x 8 ft. Pressure-Treated Yellow Pine
- 2 in. x 6 in. x 12 ft. Untreated Redwood
Power Tools:
Misc Supplies:
- 3/8 in. Carbide Drill Bit for Concrete
- Quikrete Concrete Mix
- 2 in. Framing Nails
- Masonry Anchors
- Level
- Carpenter Square
- 3″ Star Bit Wood Screws
- 2 in. x 6 in. Joist Hanger
- Ratchet Set
- Hammer
- Tape Measure
Want more of my go-to gear? Browse my favorite DIY tools and supplies on my Amazon storefront.
Step-by-Step: How to Add a Front Porch to a House
Fair warning: this stage is all about precision. The ledger board and frame you build here carry everything in Parts 2 through 4, so measure twice, level everything, and grab a helper for the long boards. None of the cuts are hard – it’s careful work, not skilled work. Take it one step at a time.
Step 1: Check Permit Requirements + Sketch Your Porch Plans
Before you do anything else, check with your local building office to see if a permit is required. This step is key when figuring out how to plan a front porch. For my small DIY front porch addition, I didn’t need one, but always double-check with your city or county to be sure.
Pro tip: Call 811 a few days before you dig and the utility companies will come mark your buried lines for free. It’s the easy way to skip the surprise water pipe I hit.
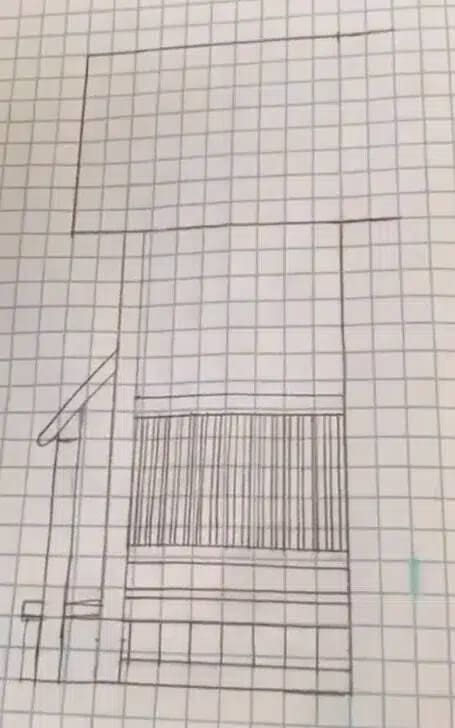
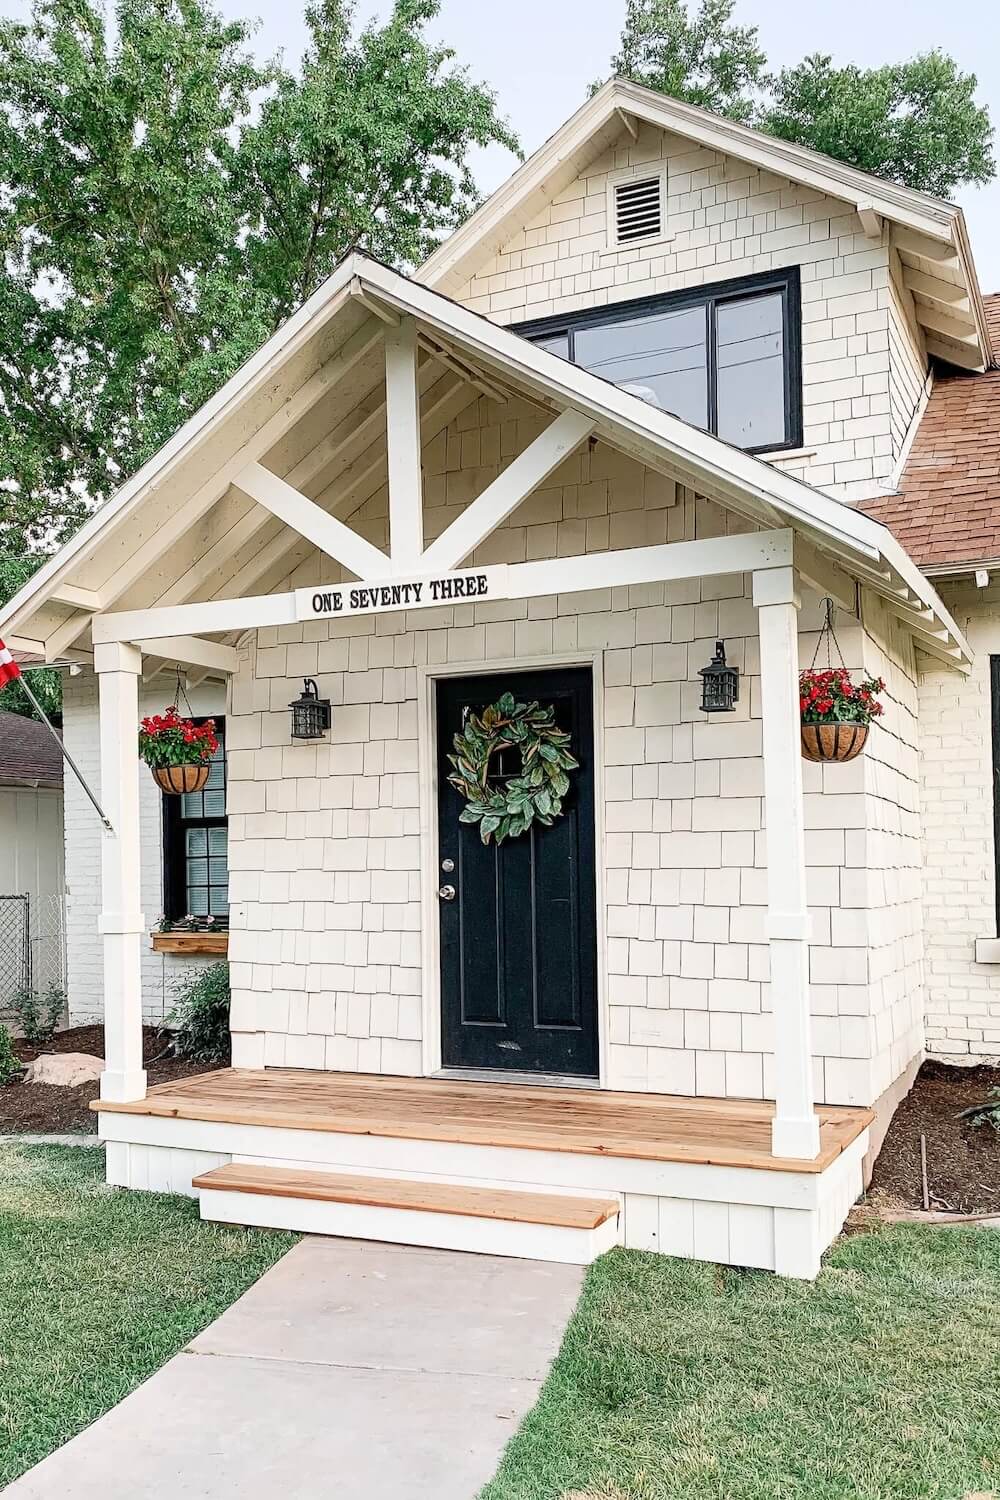
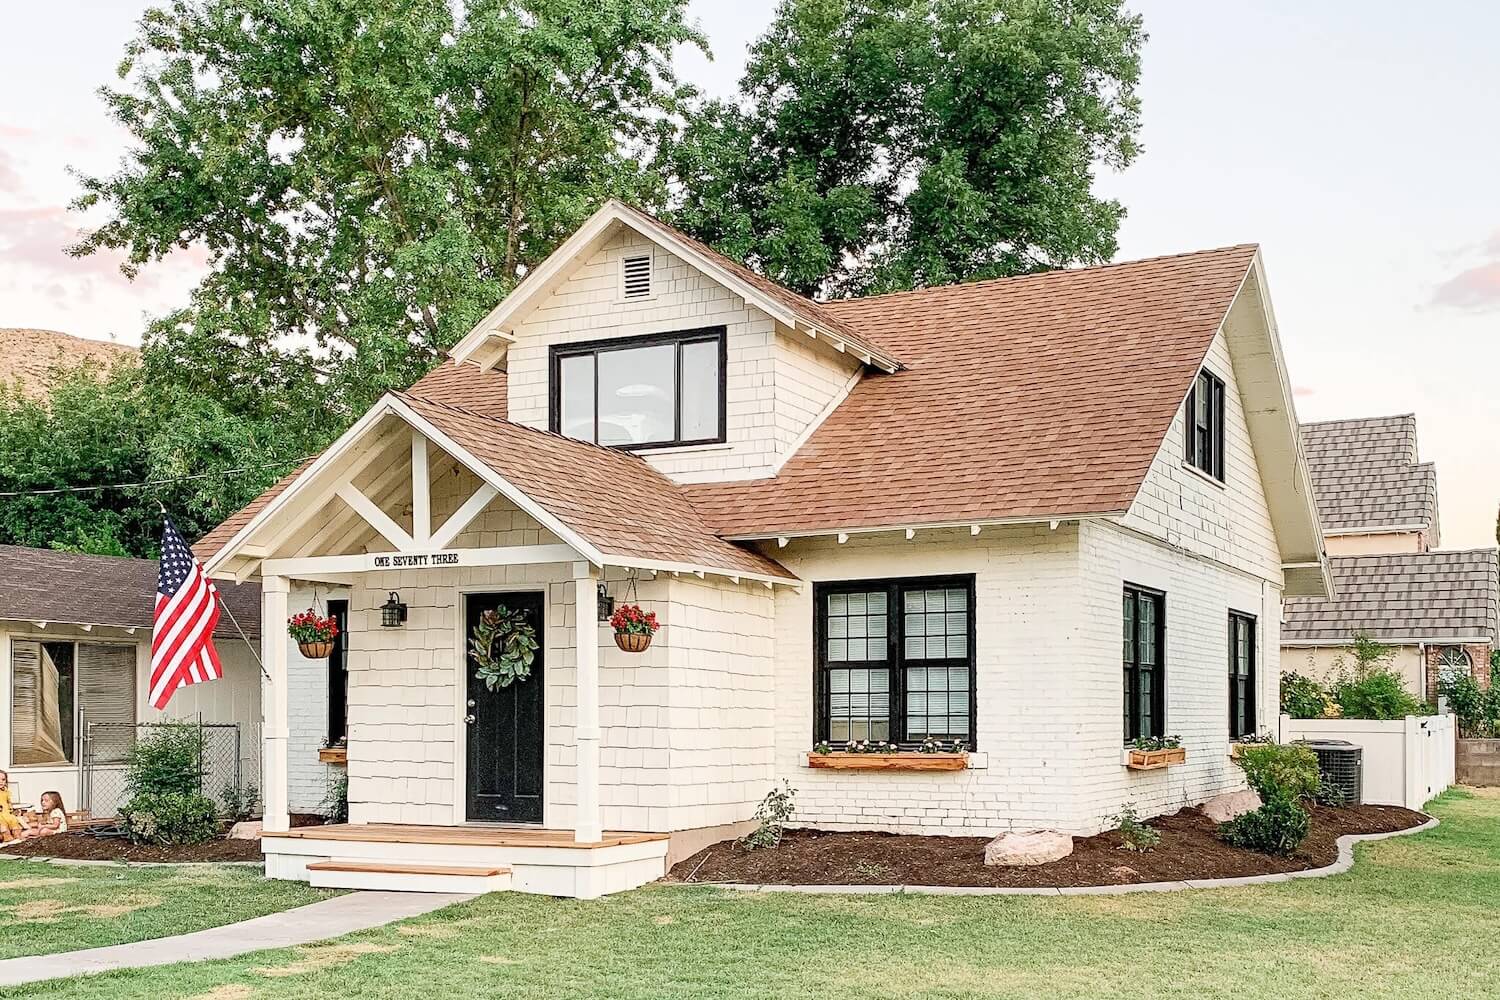
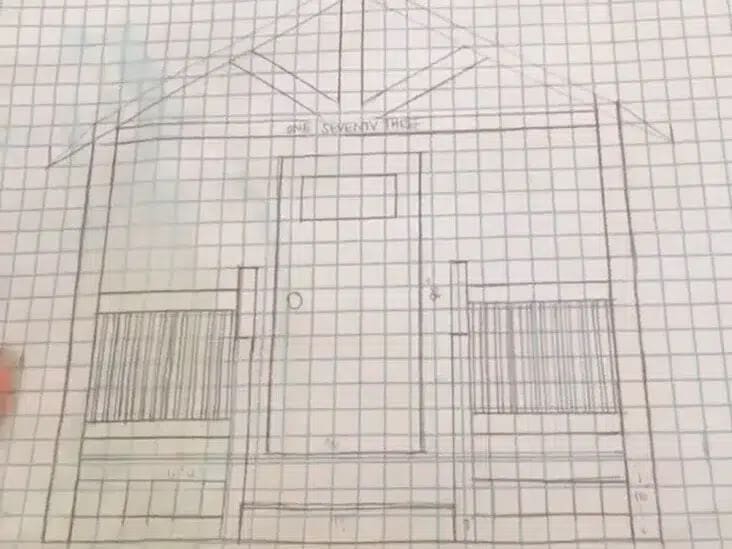
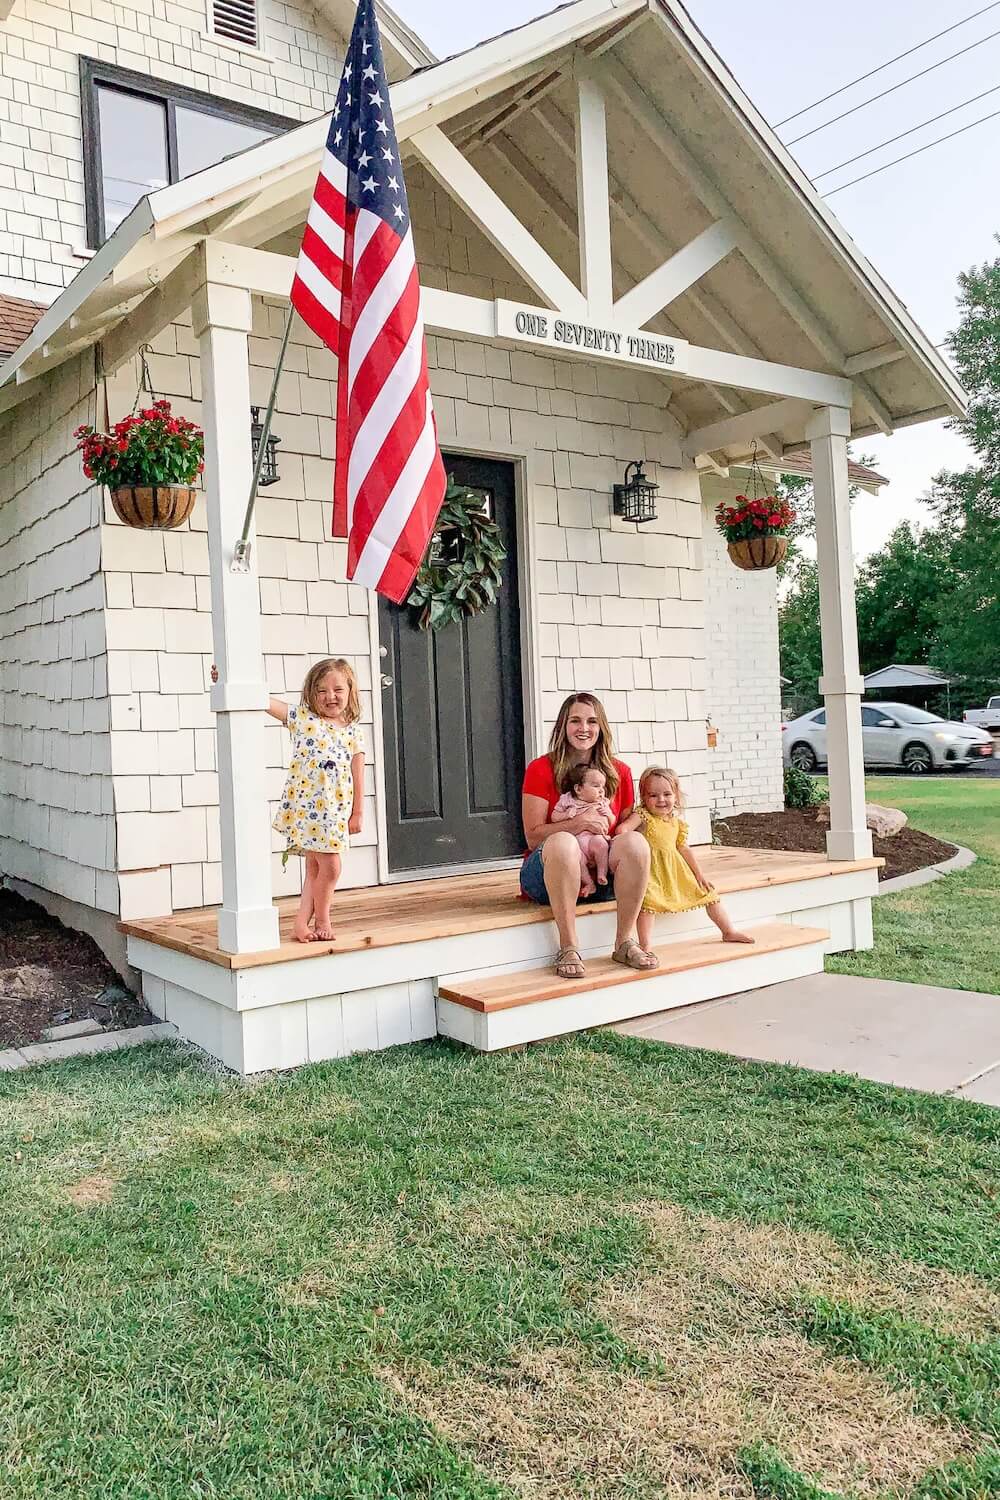
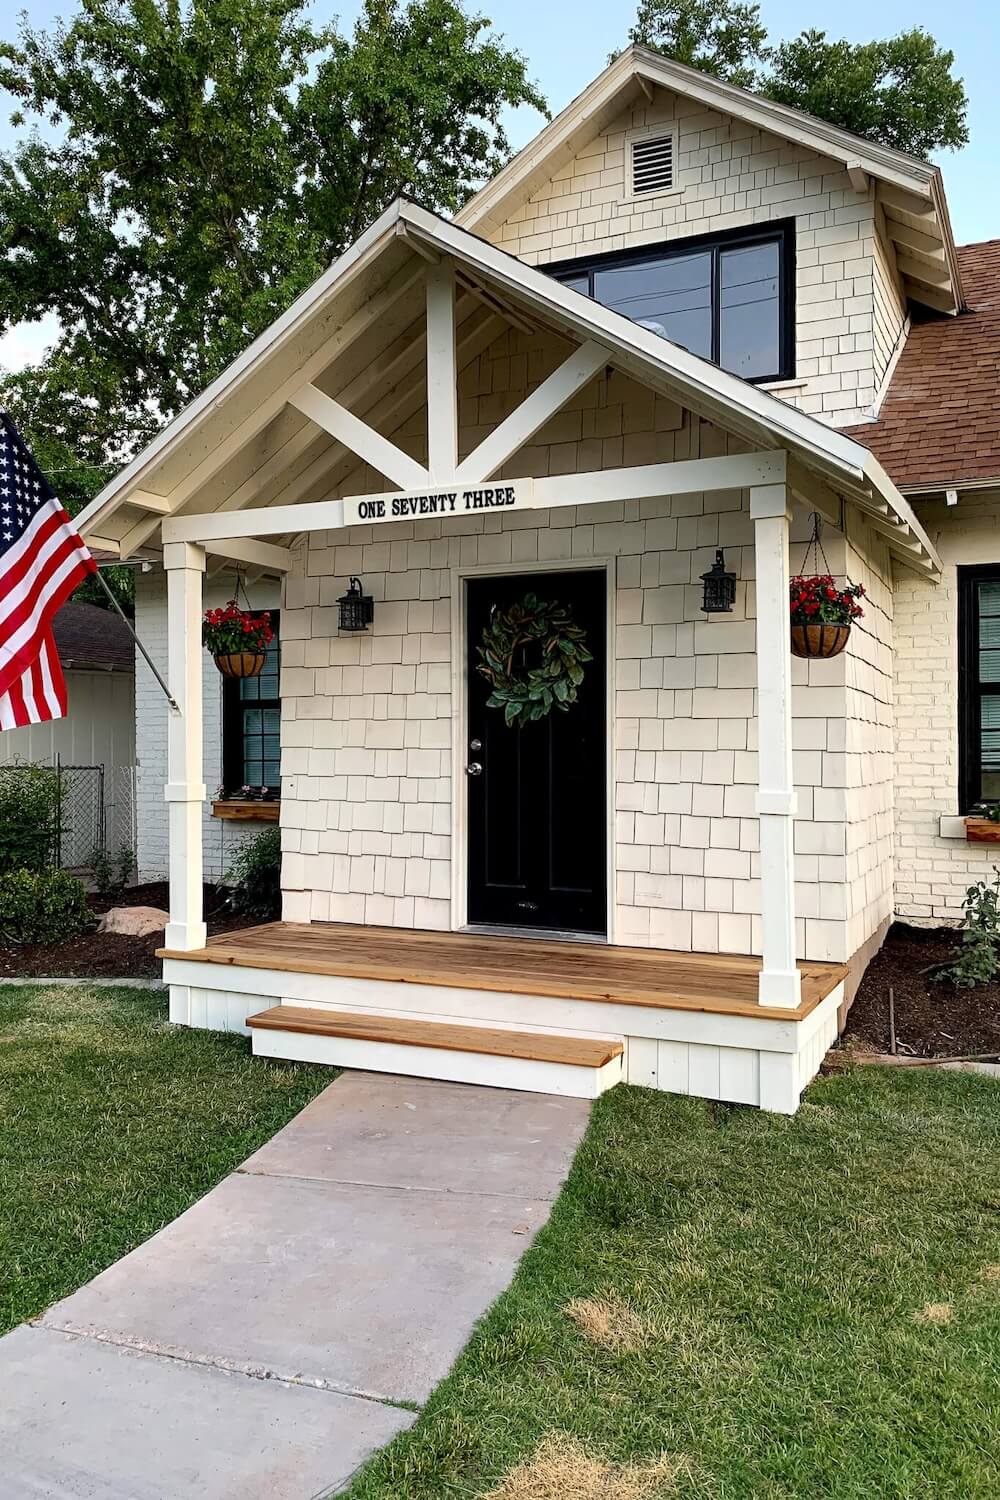
Since my house has a historic-style exterior with wood shingles, I designed the porch to complement it (simple, clean, and classic). I sketched everything out on graph paper (no fancy software needed), which helped me get a clear vision before starting construction.
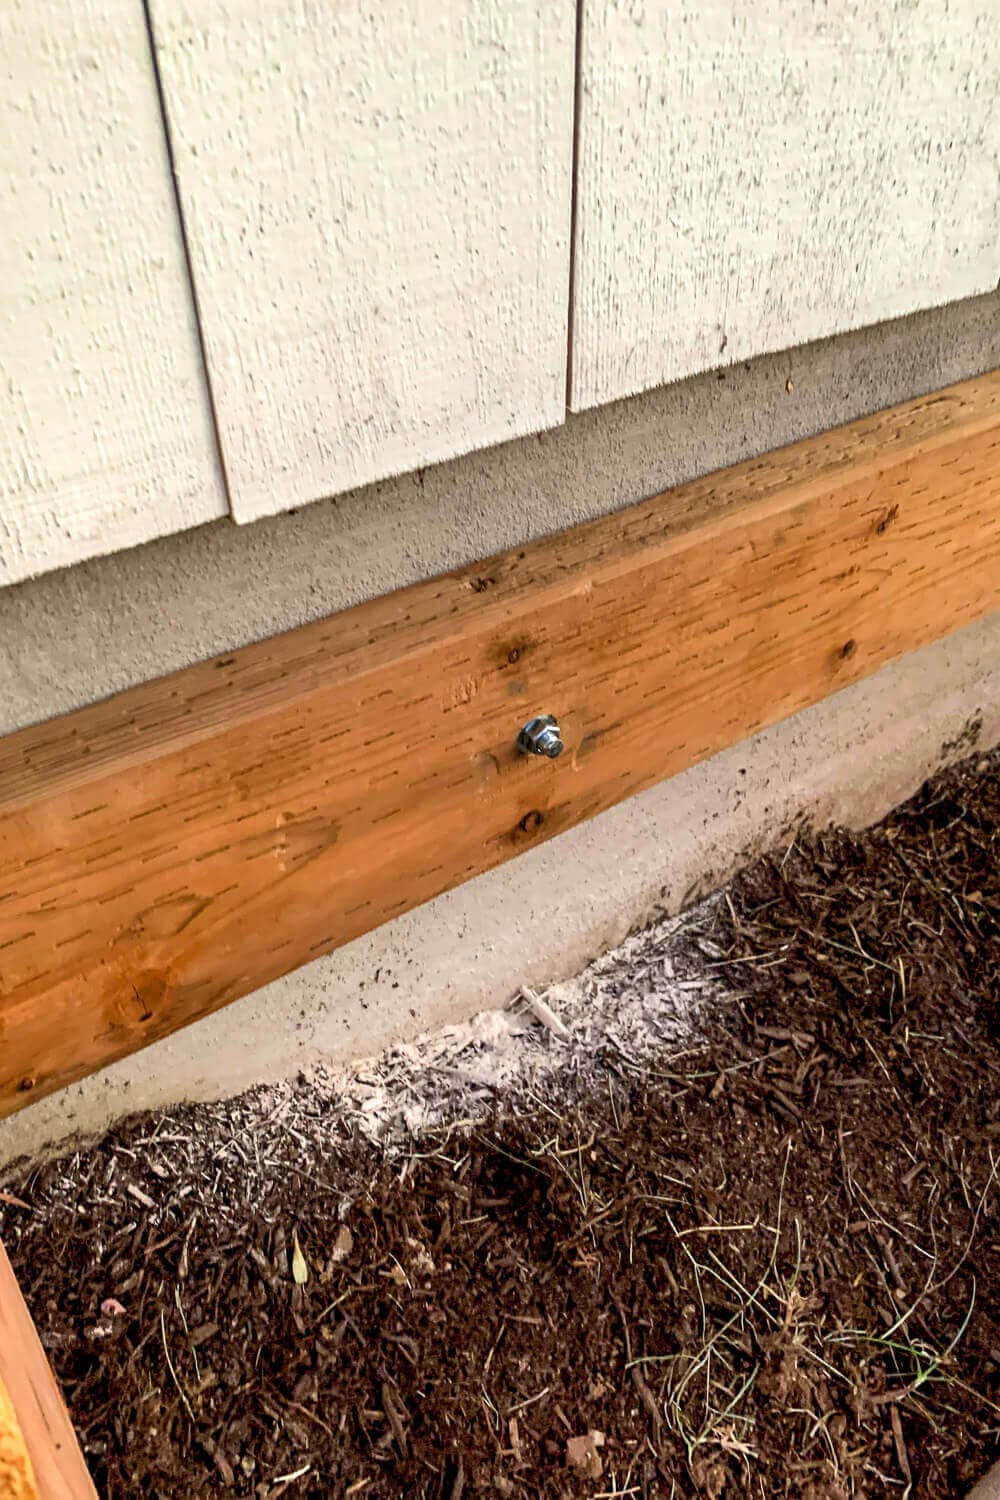
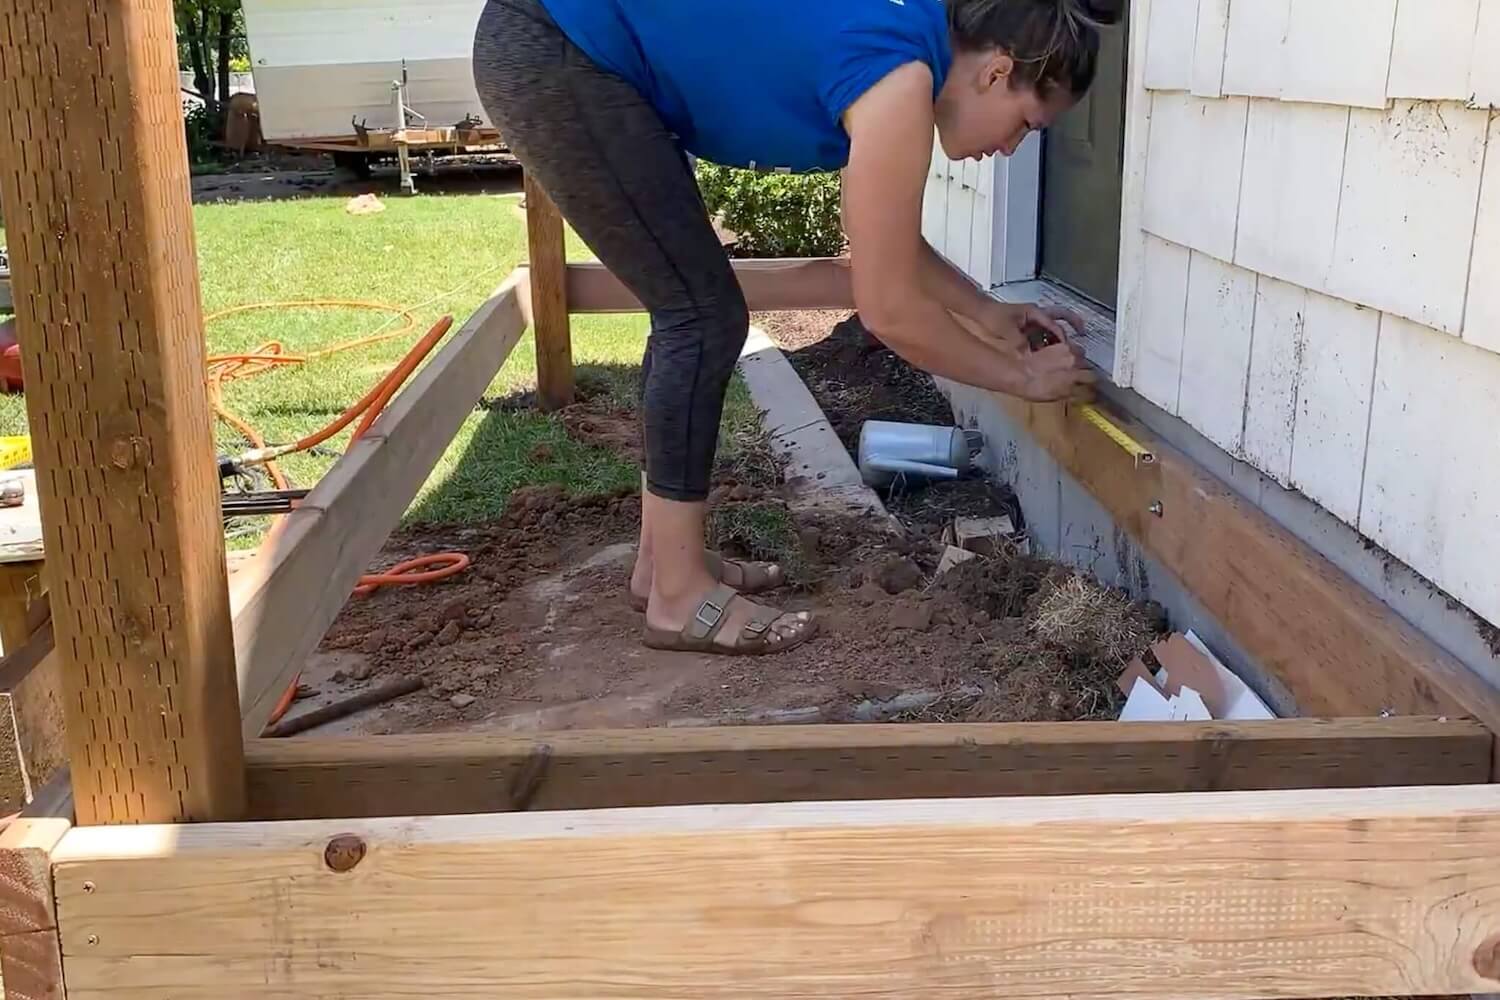
Step 2: How to Attach a Ledger Board to Add a Porch to Your House
This step is essential if you’re wondering how to install a ledger board for a porch. The ledger board acts as the structural anchor between your home and your new DIY white front porch frame.
The front of my house is just a bit over 12 feet wide, so I attached a 12-foot pressure-treated 2×6 ledger board to the front of the house as the main anchor point for the deck.
First step is to drill 5 evenly spaced holes into the ledger board using a 3/8″ masonry bit and the hammer drill setting.
Next, use a scrap piece of wood as a spacer to maintain correct height under your threshold. The ideal drop from a threshold to deck surface is between 1 1/2 and 3 inches.
My deck boards were already 1 1/2 inches thick, so the spacer helped ensure everything lined up just right, fitting under the door and on top of the ledger.
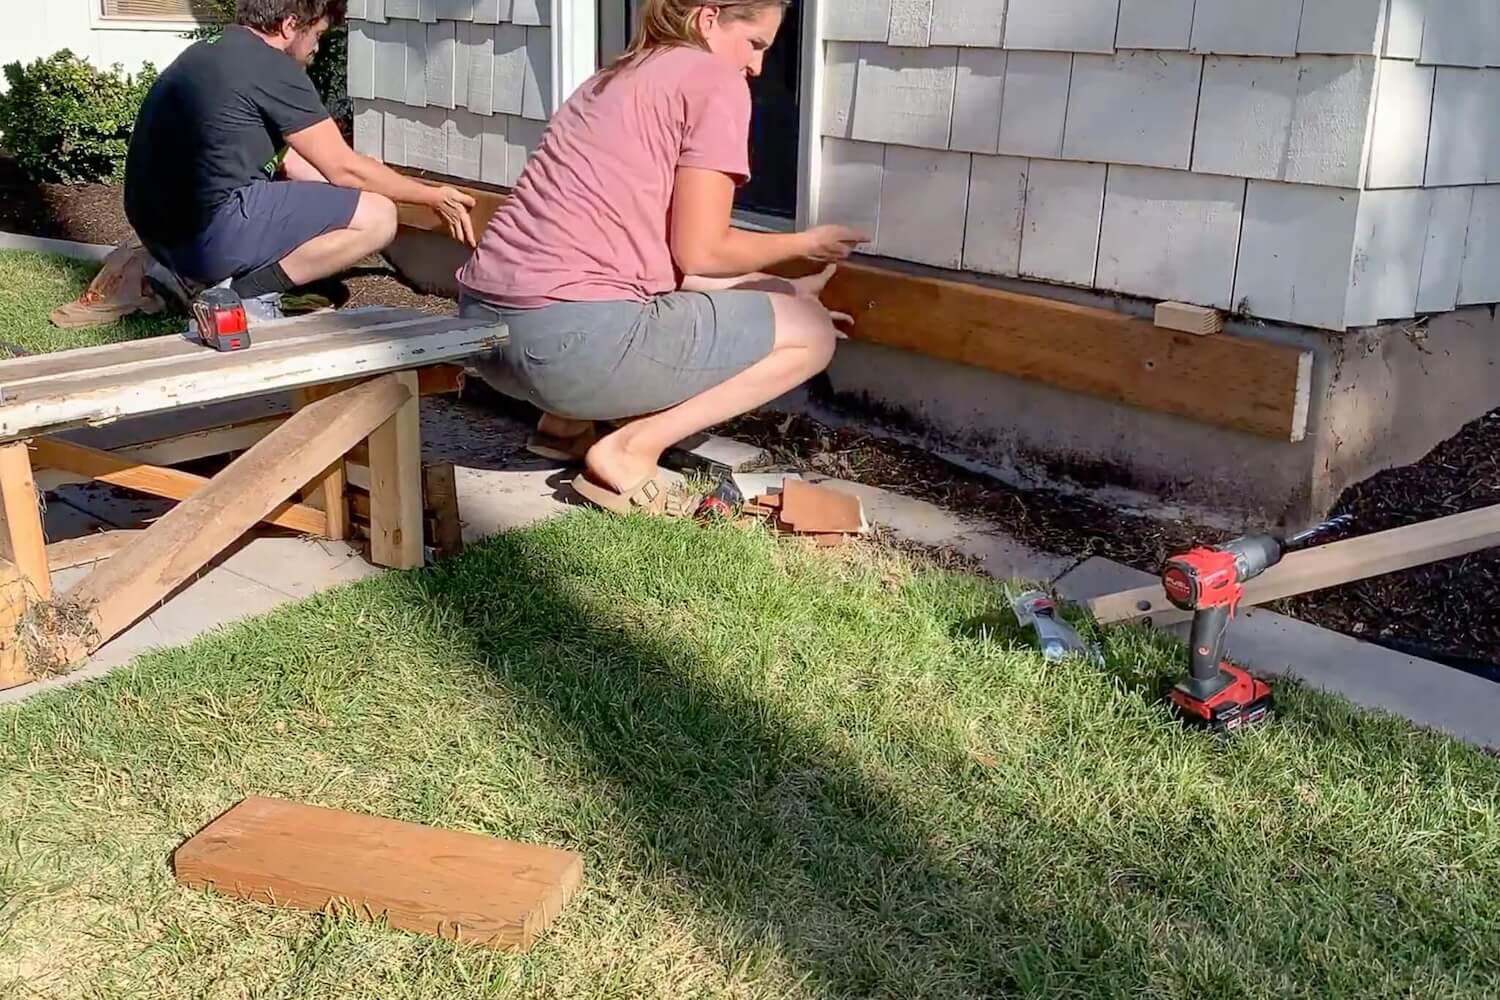
From this point forward, it helps to be a perfectionist since the success of this project depends on exactness.
Once the ledger board was held perfectly level in place, I used a pencil to mark the position of each hole onto the concrete behind it. Then I removed the board temporarily and drilled pilot holes into the concrete at those exact marks.
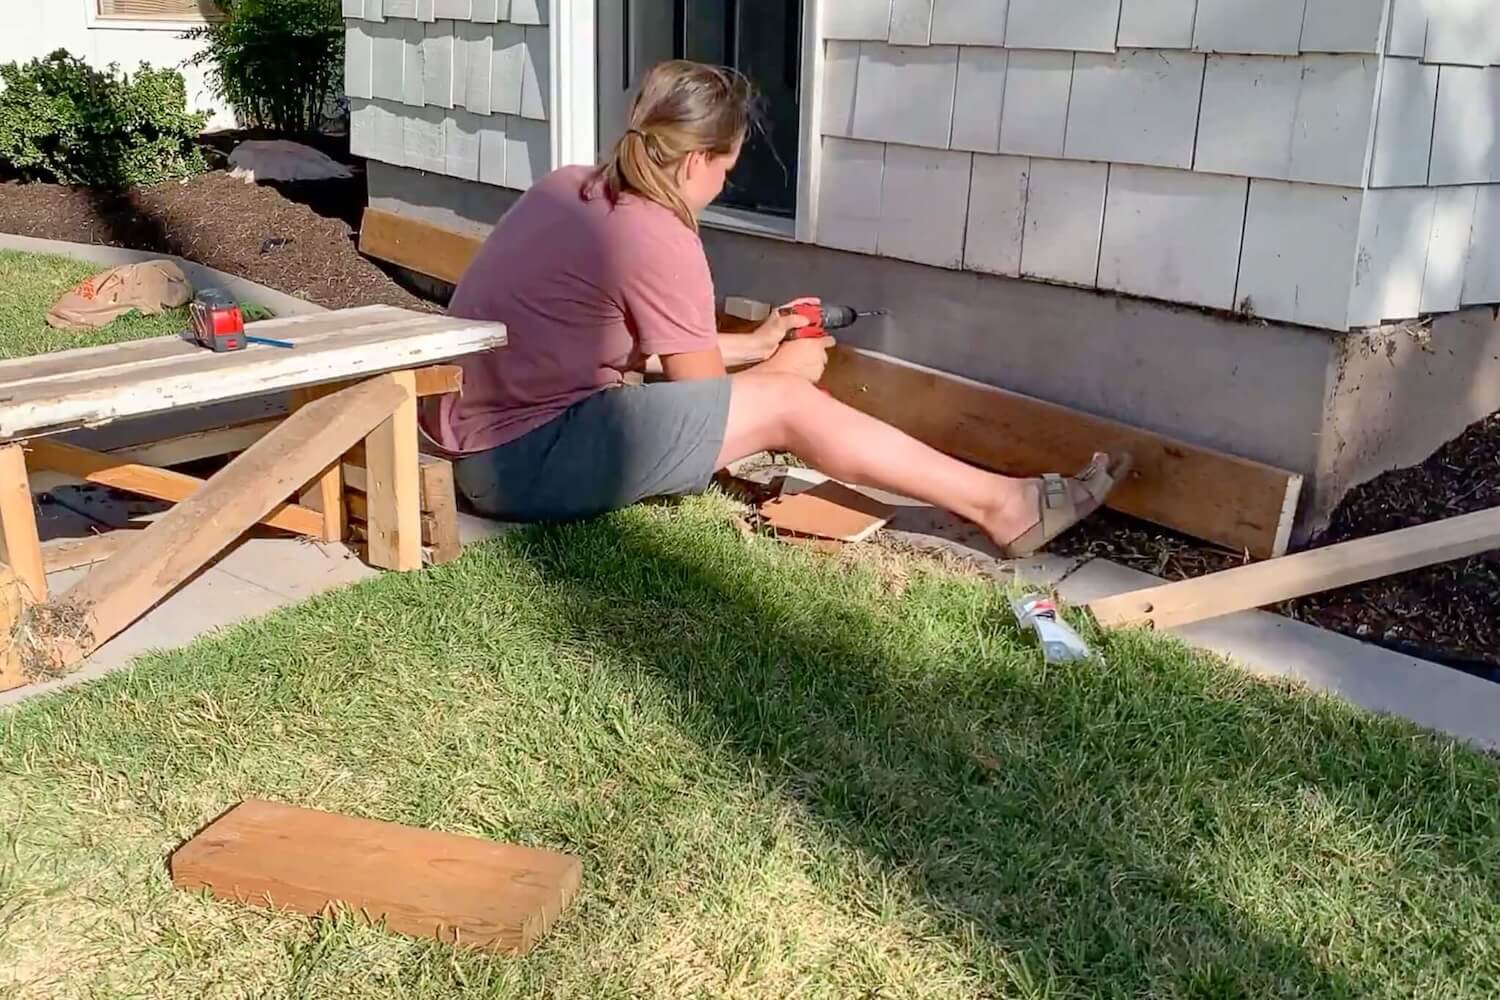
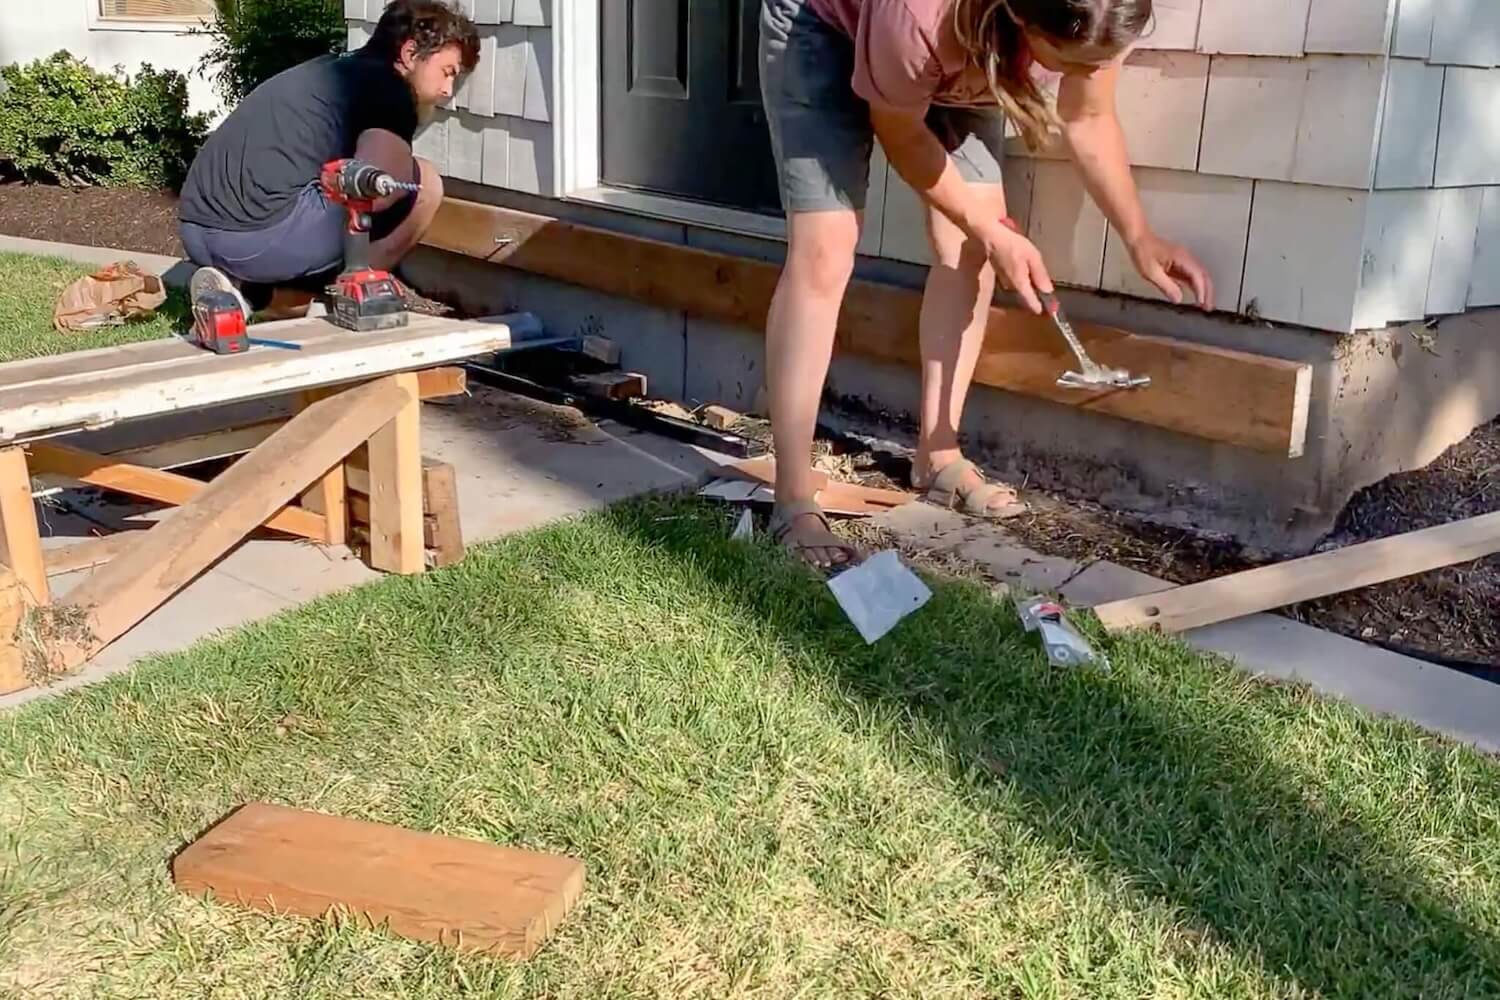
How to Secure the Ledger Board to the House
To install the ledger board, I inserted masonry anchors into the two holes on each end, just enough so the tips poked through the back. This helped me align the board correctly with the pilot holes in the concrete. Once everything was lined up, I held the board in place and hammered those anchors into the pre-drilled holes. Then I installed the remaining anchors through the center holes. A ratchet helped snug everything up, securing the ledger board tightly to the house.
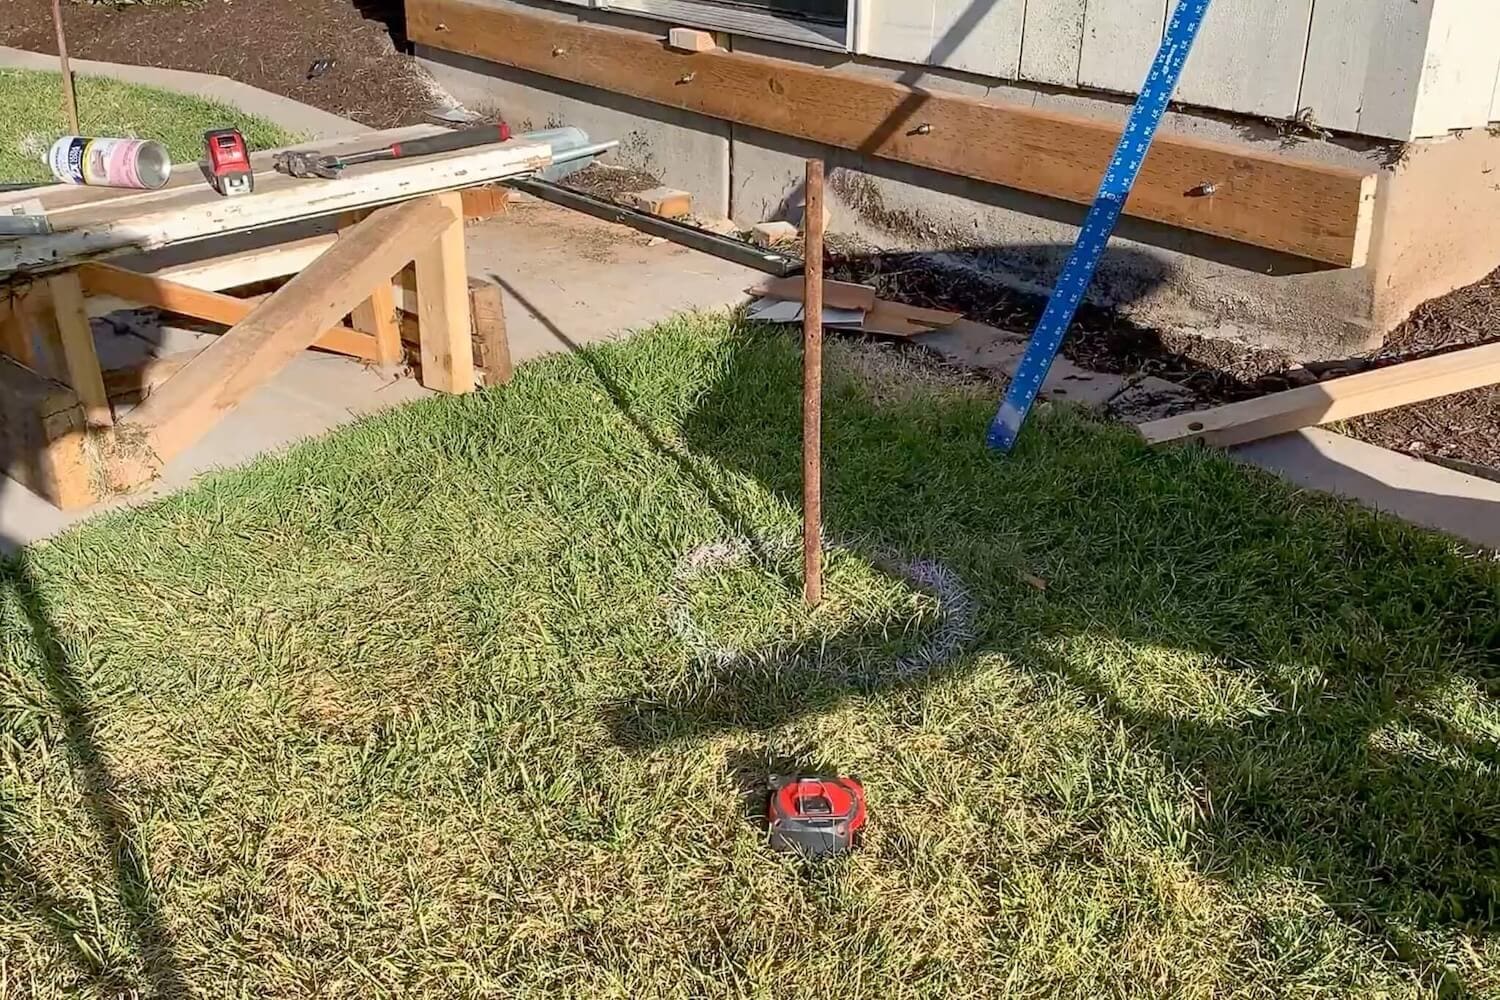
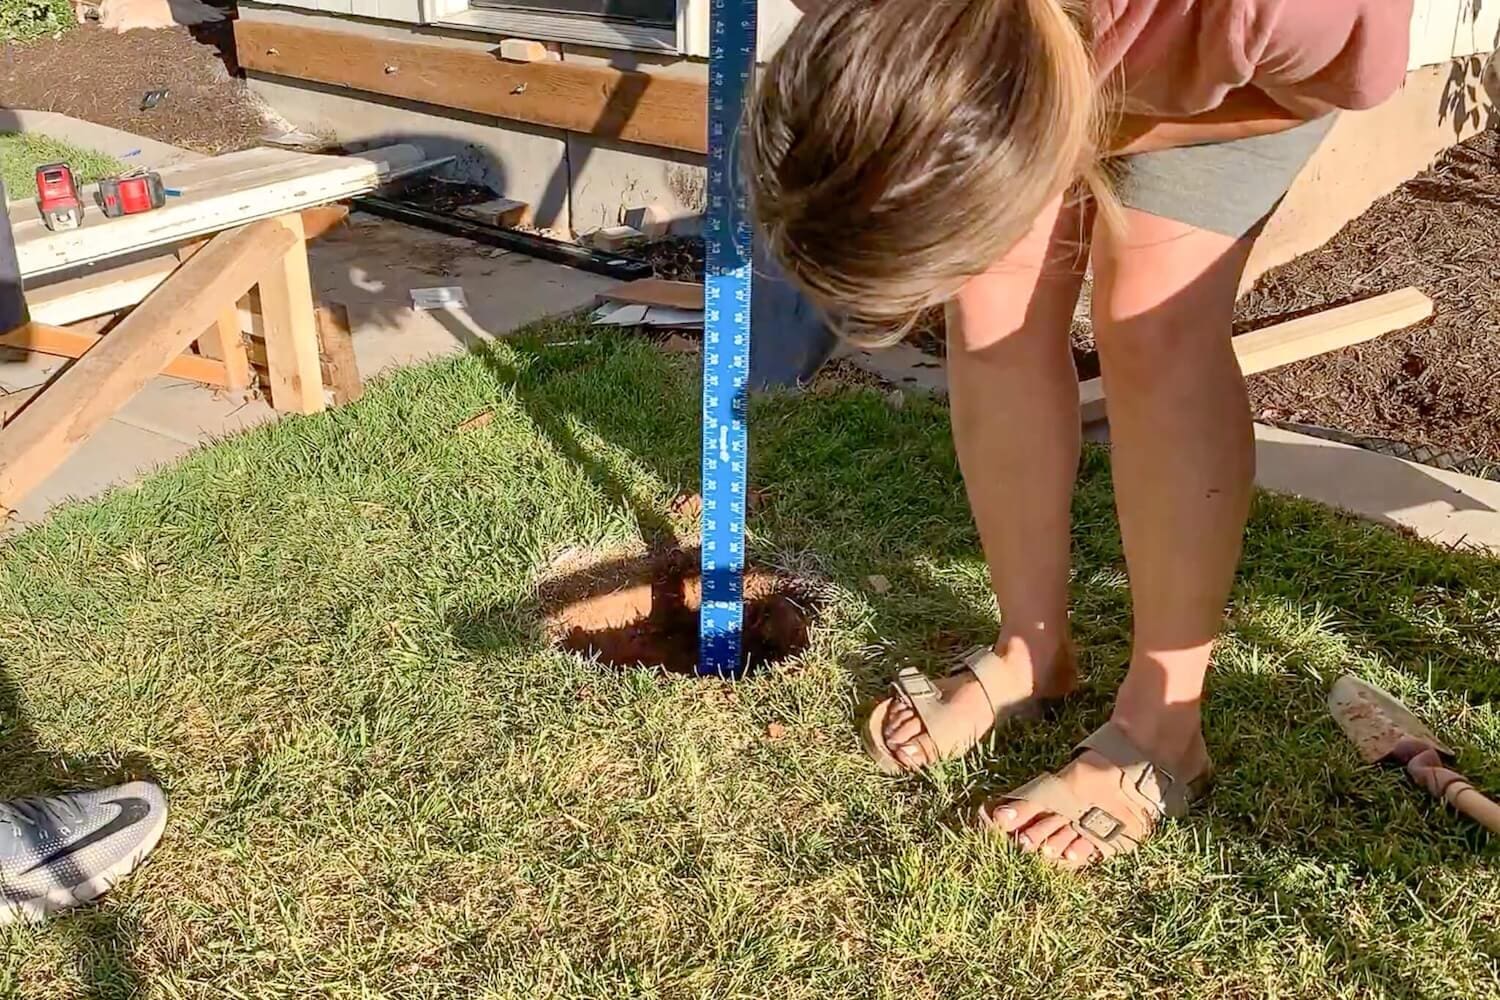
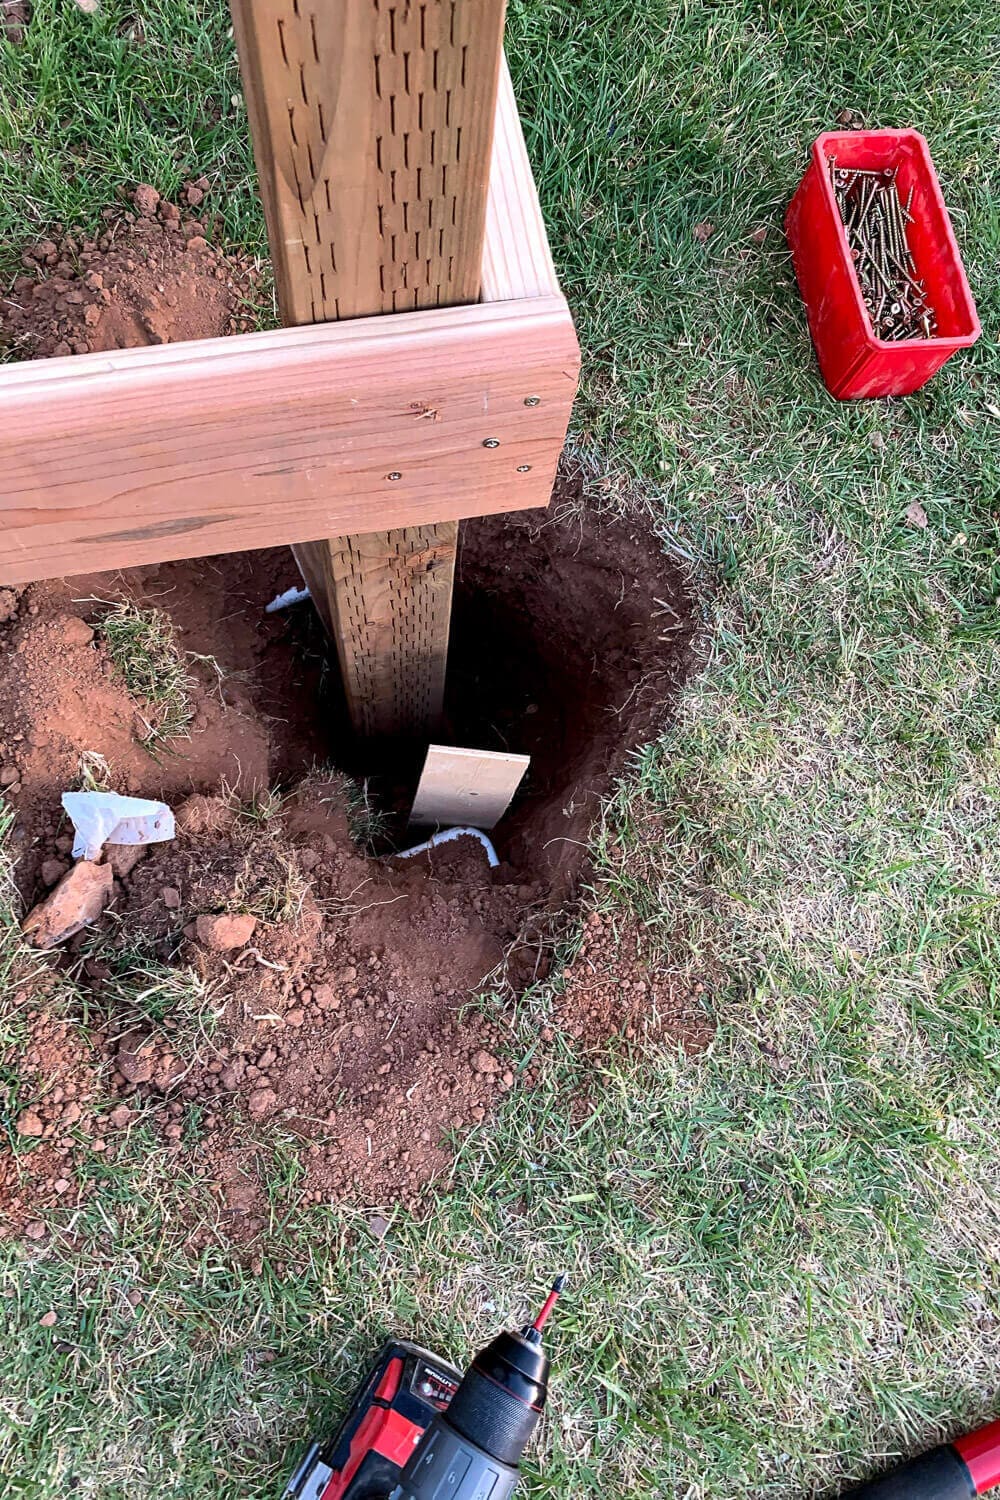
Step 3: Prepping the Deck Post Holes for Your Porch
We used the string method to line up and square our corner post locations, driving a stake at each spot. Each post sat 41.5 inches out from the house, aligned with the ledger board edge.
Now, here’s a quick cautionary tale. Before you dig, always check for sprinkler lines, irrigation pipes, and anything else hiding underground. I skipped that step and (surprise!) uncovered a water pipe right where I planned to pour concrete. We had to reroute the line, which wasn’t a huge deal, but it definitely slowed us down.
Once we were clear:
- We sprayed a 12-inch diameter circle around each stake
- Dug each hole to 18 inches deep (yes, I was wearing sandals, I don’t recommend it 😅)
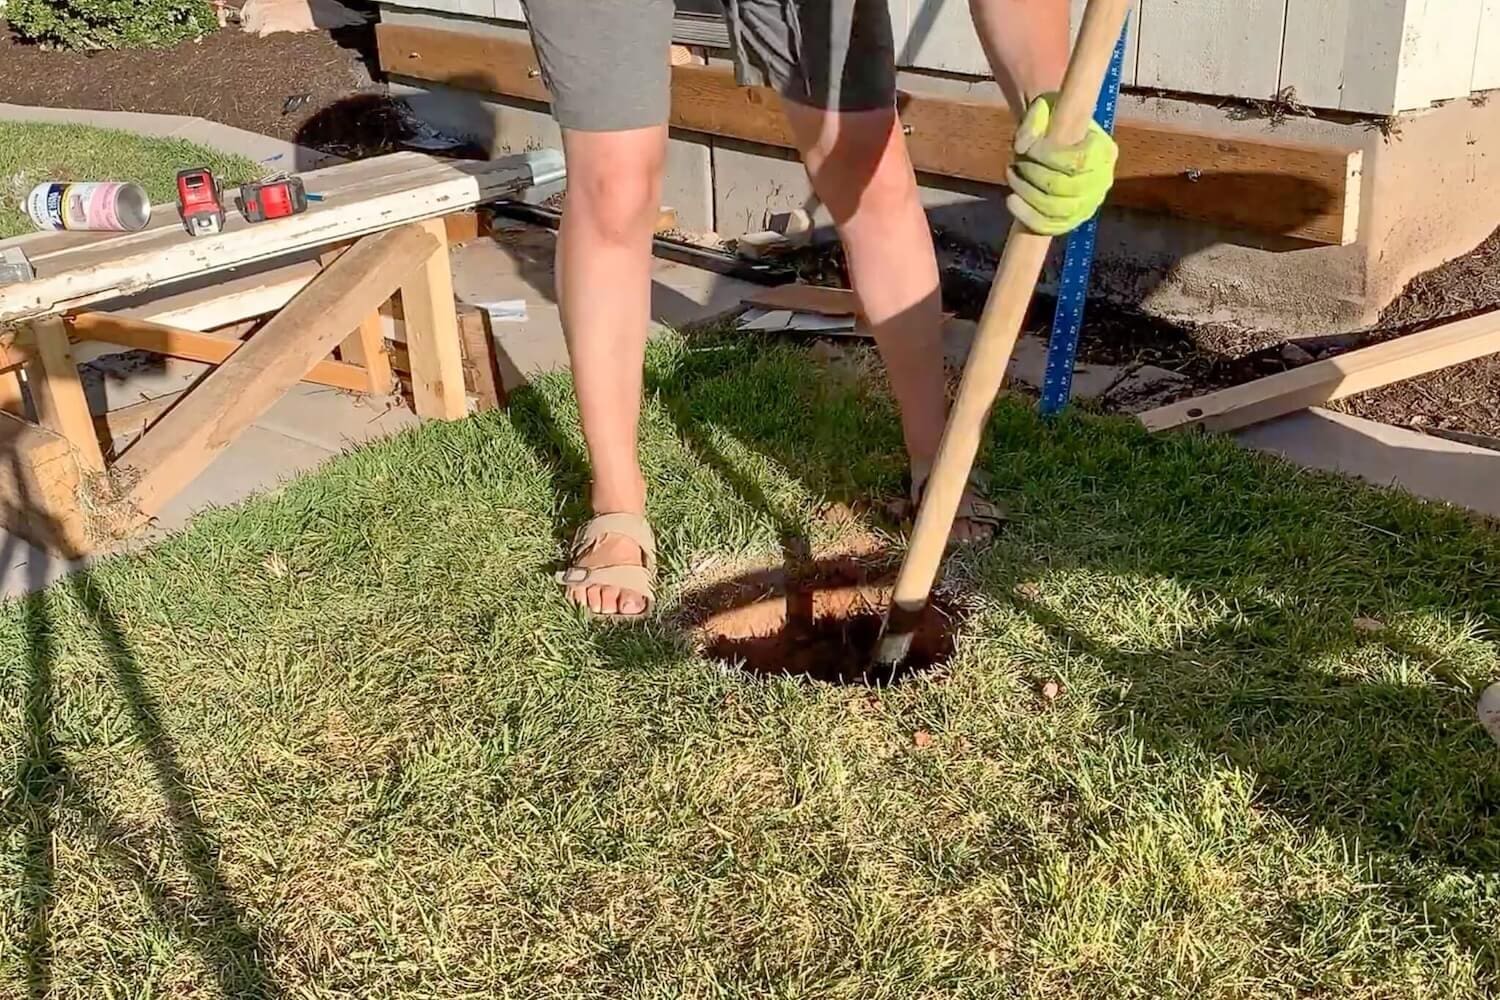
I checked to make sure we had hit our 18 inches goal, and we did!
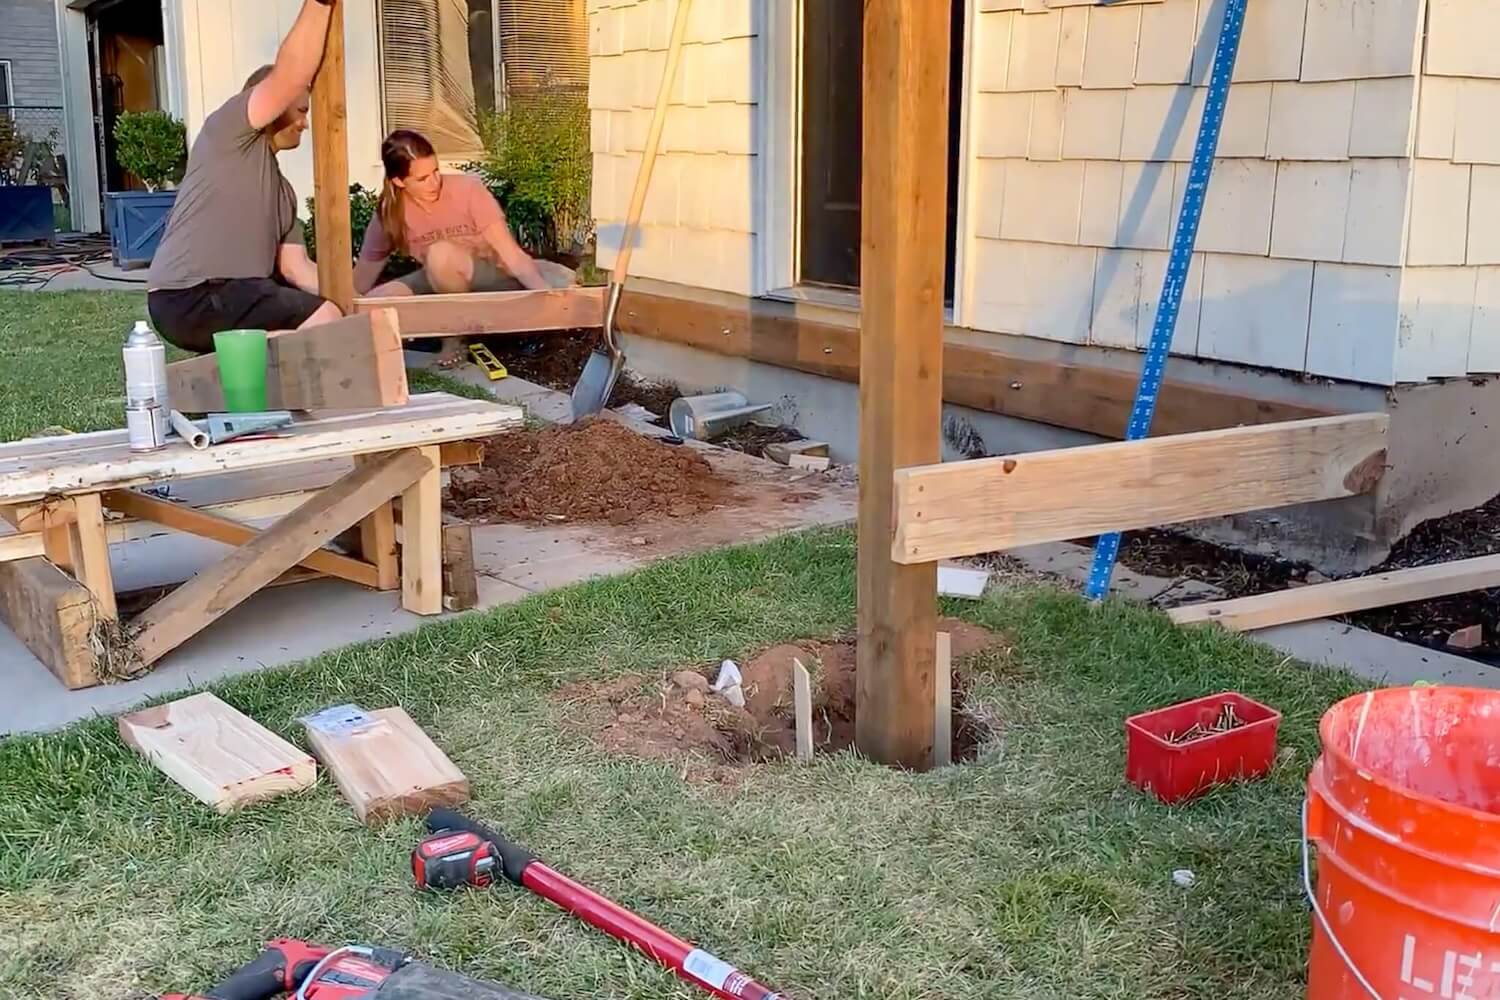

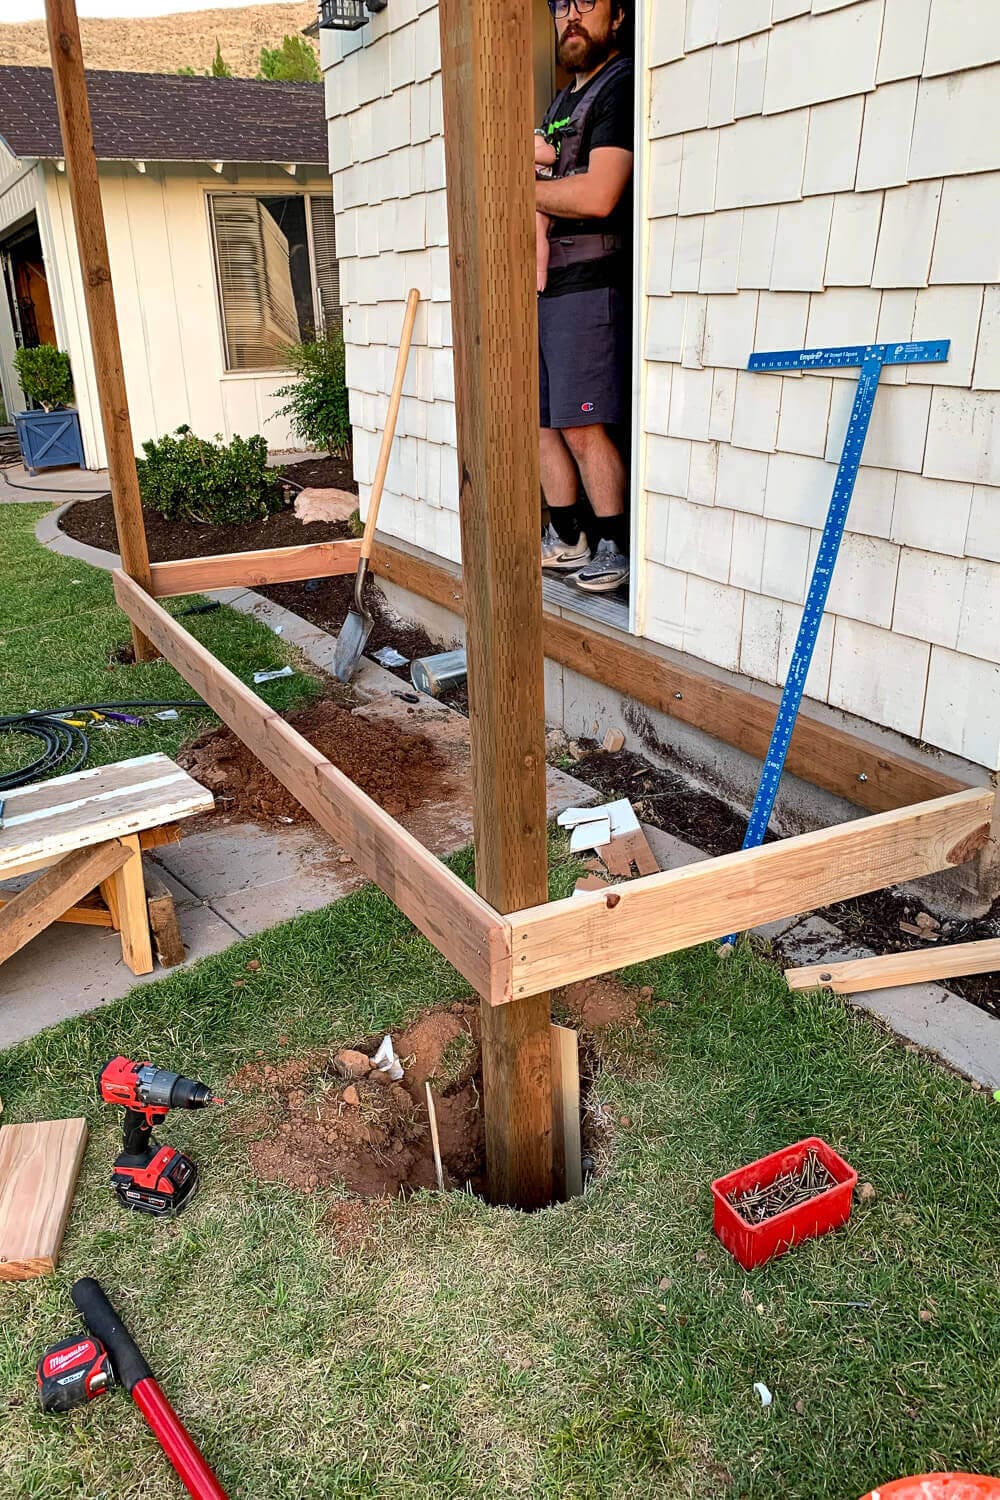
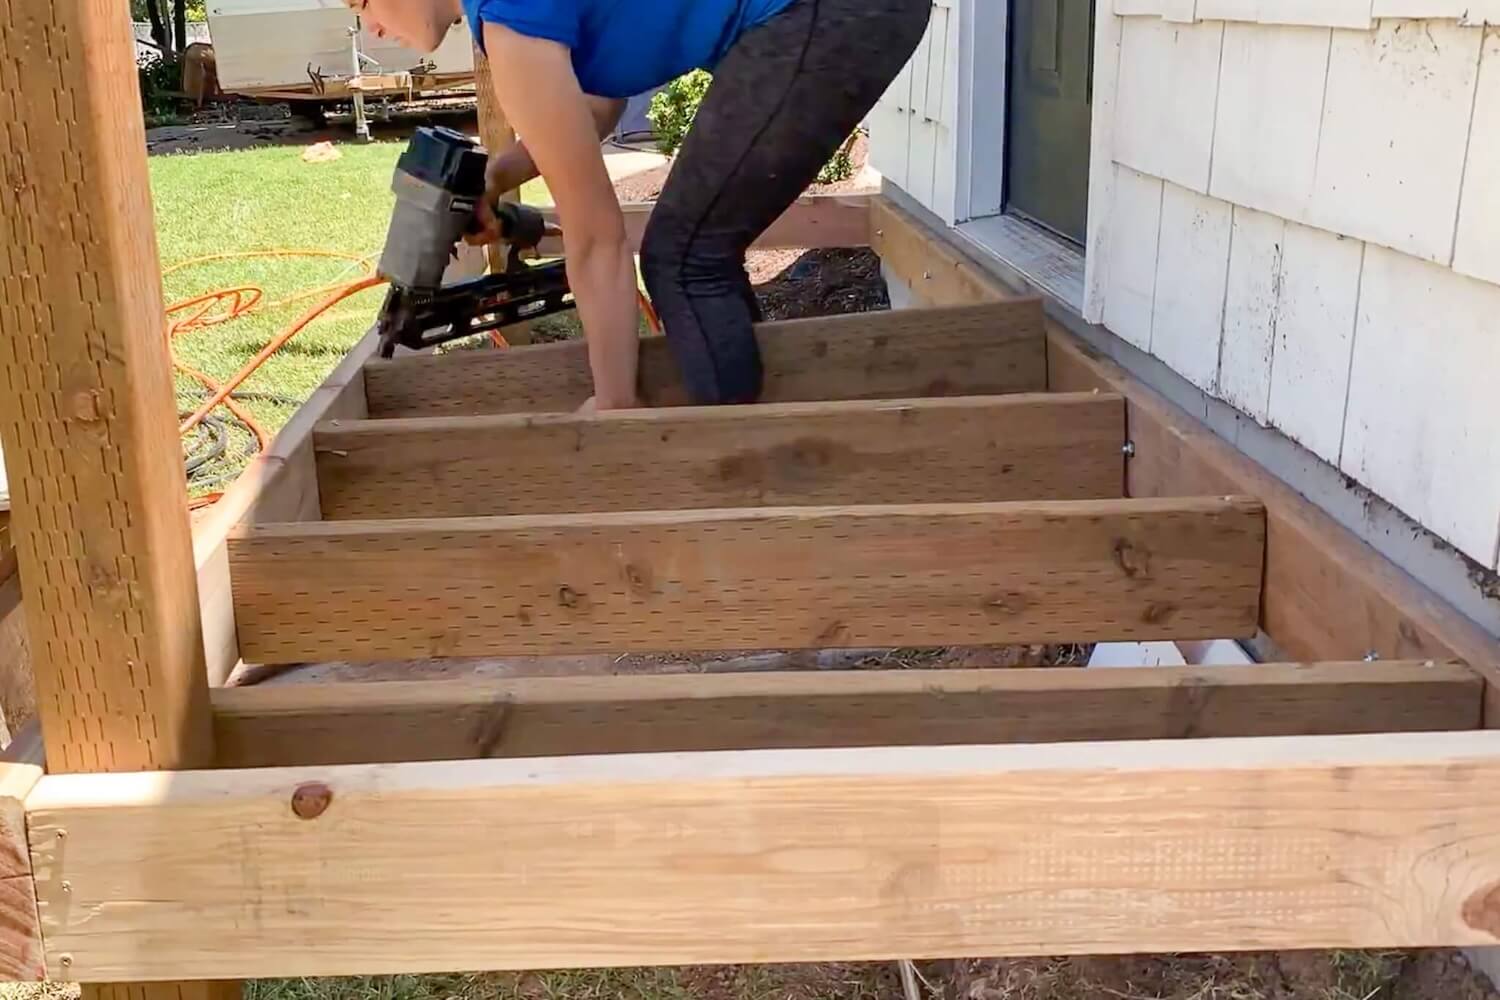
Step 4: How to Frame a Porch and Set the Support Posts
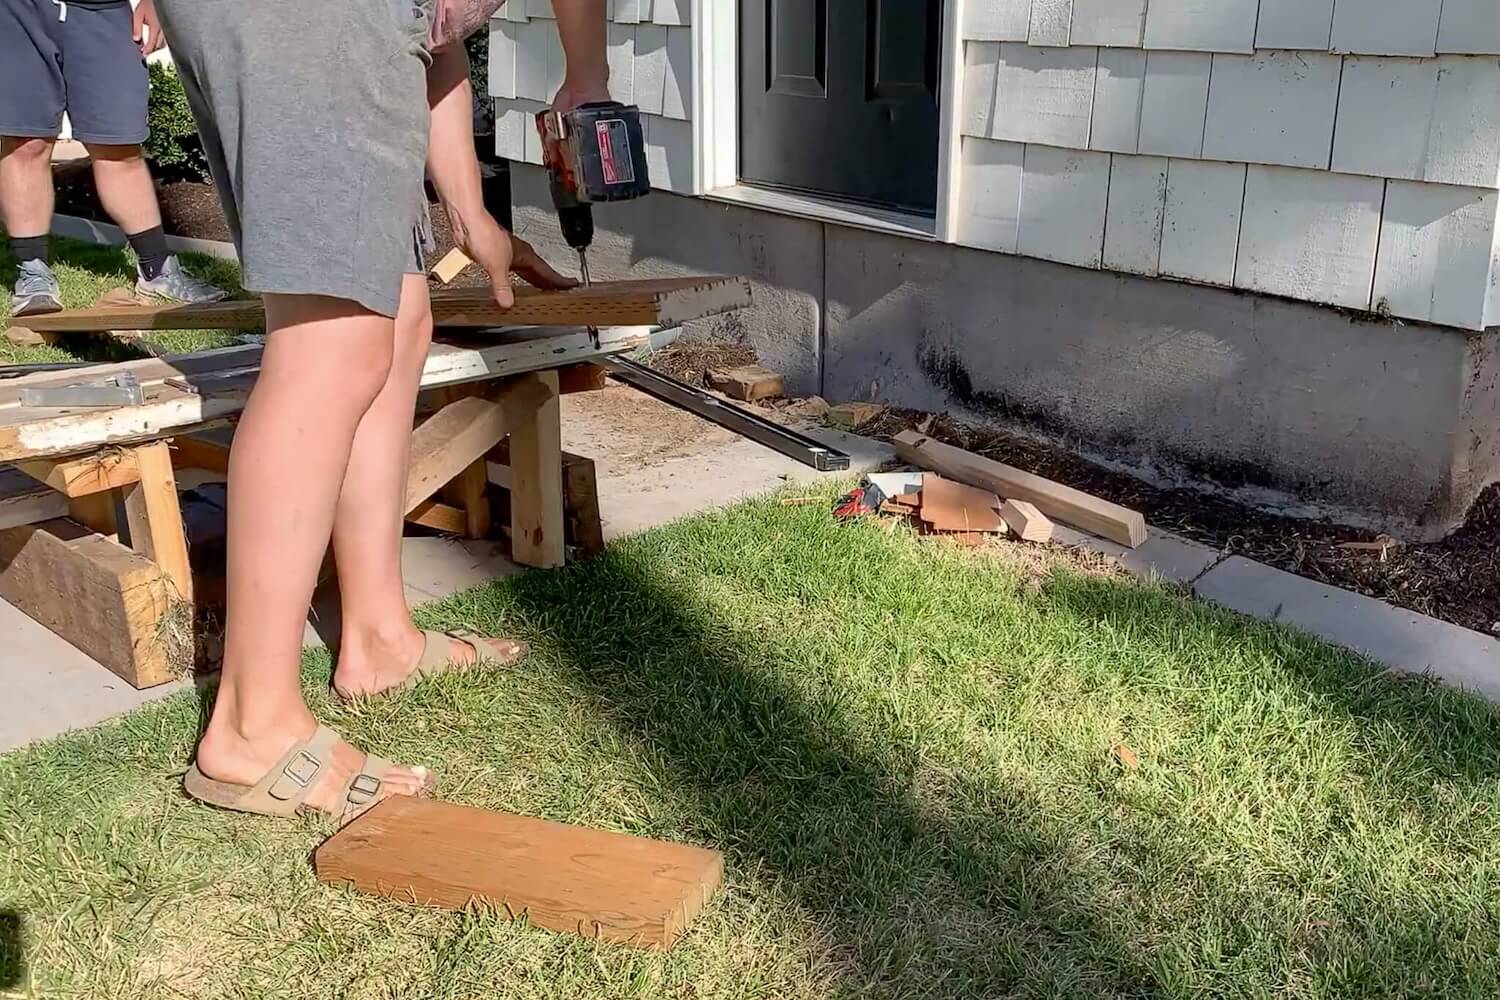
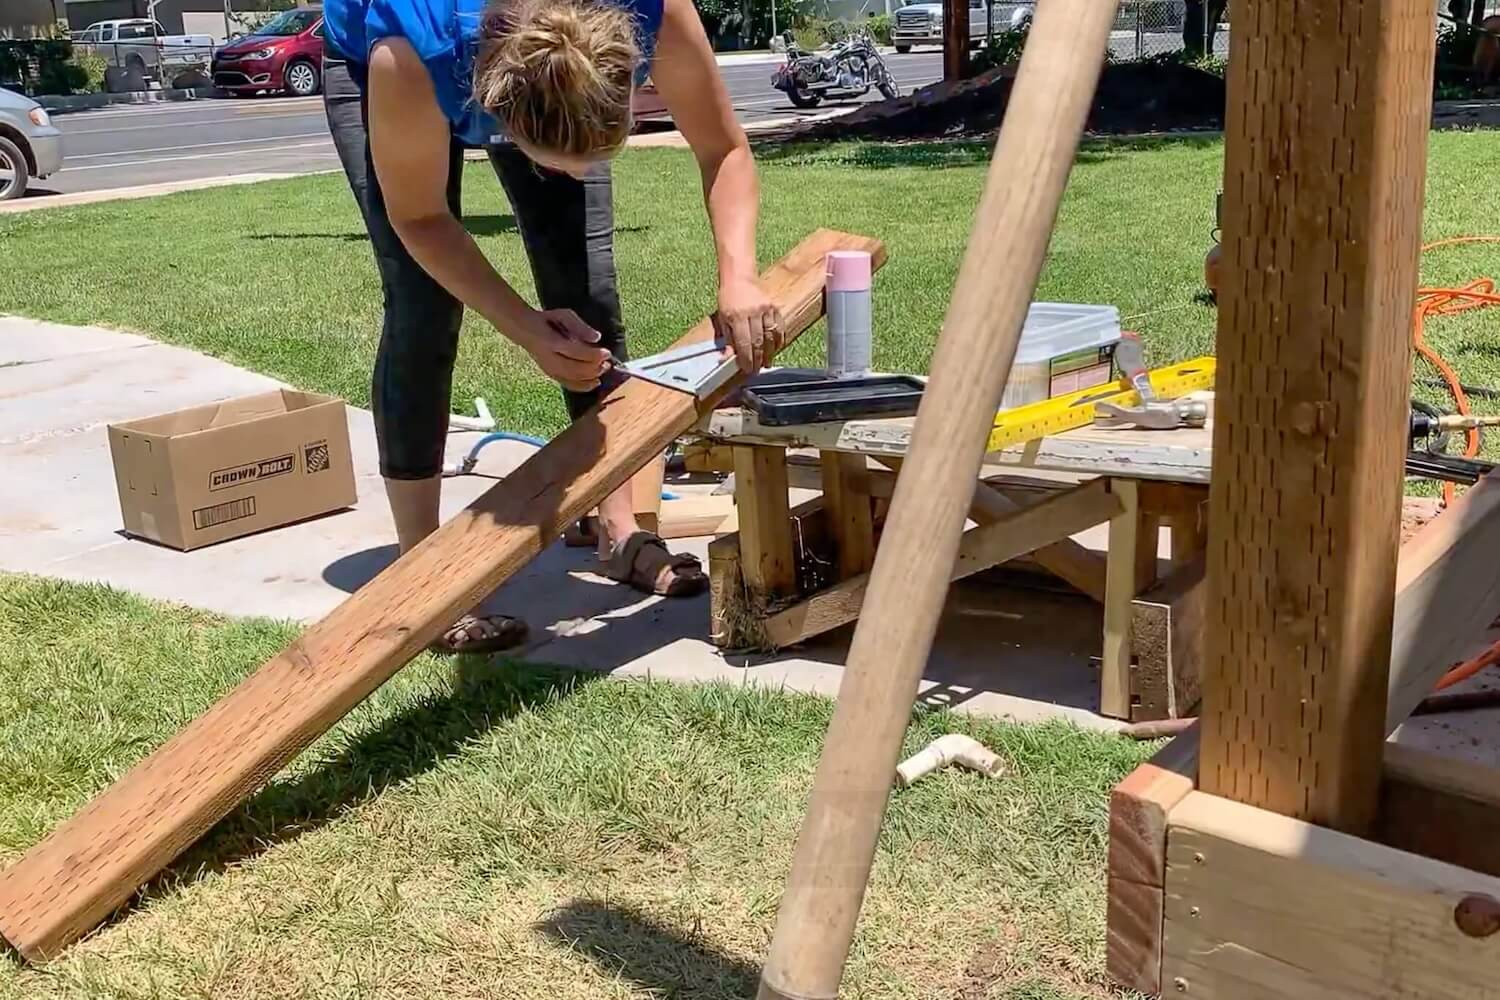
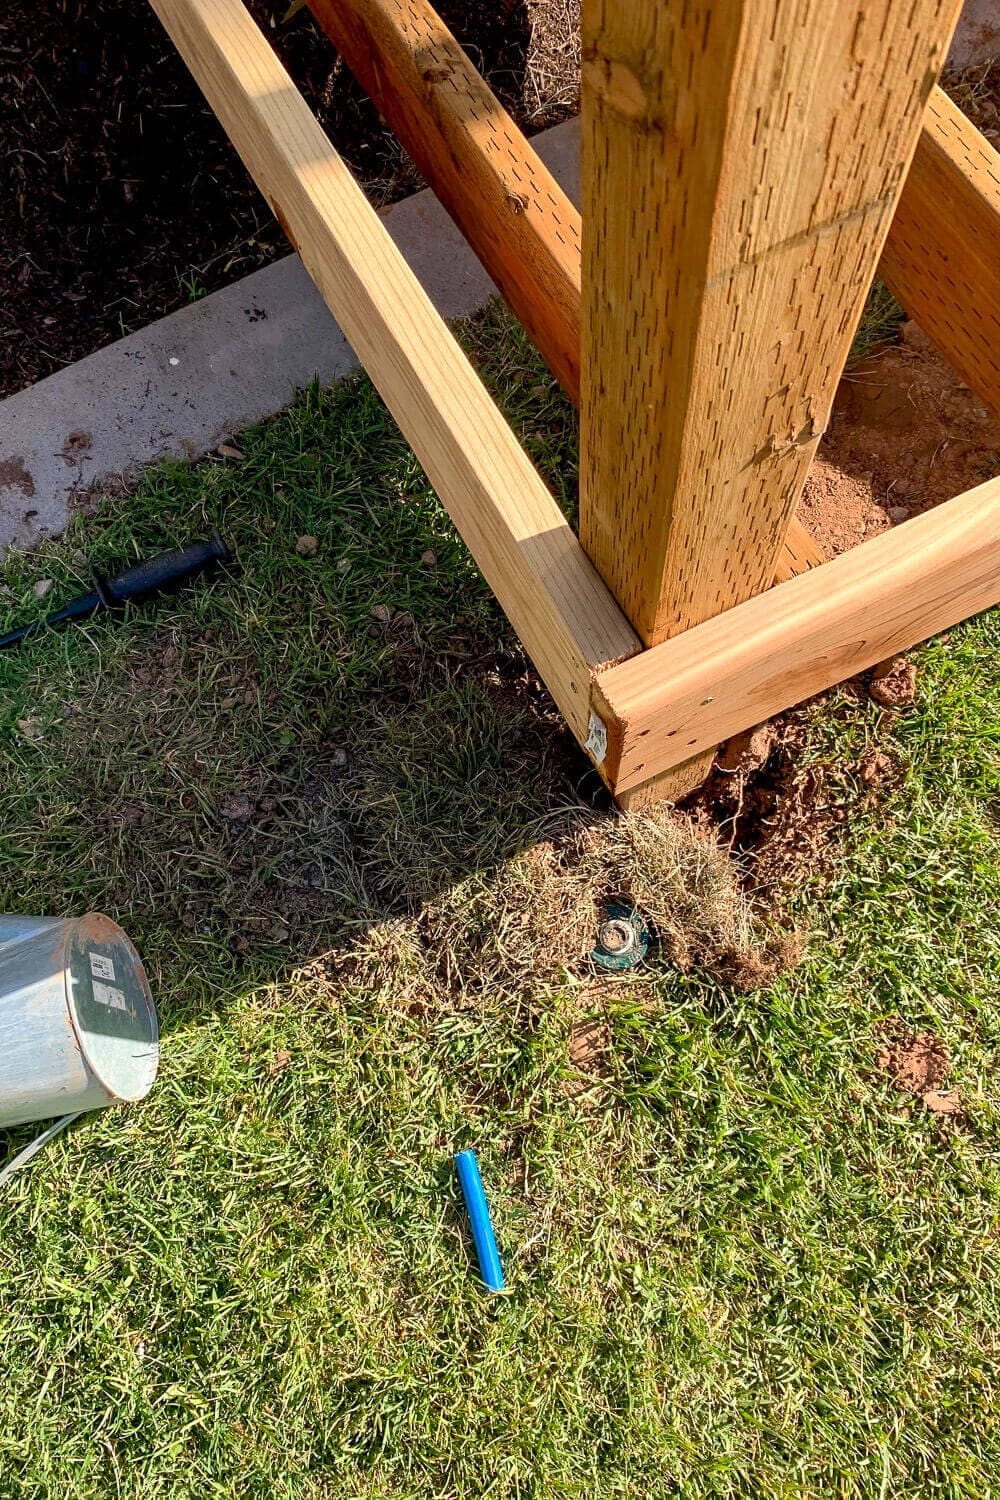
With the ledger board fully secured and post holes dug, it was time to build out the frame of the deck and set the posts. I used redwood for the rim joists. It’s naturally rot-resistant and has a pretty finish if left exposed.
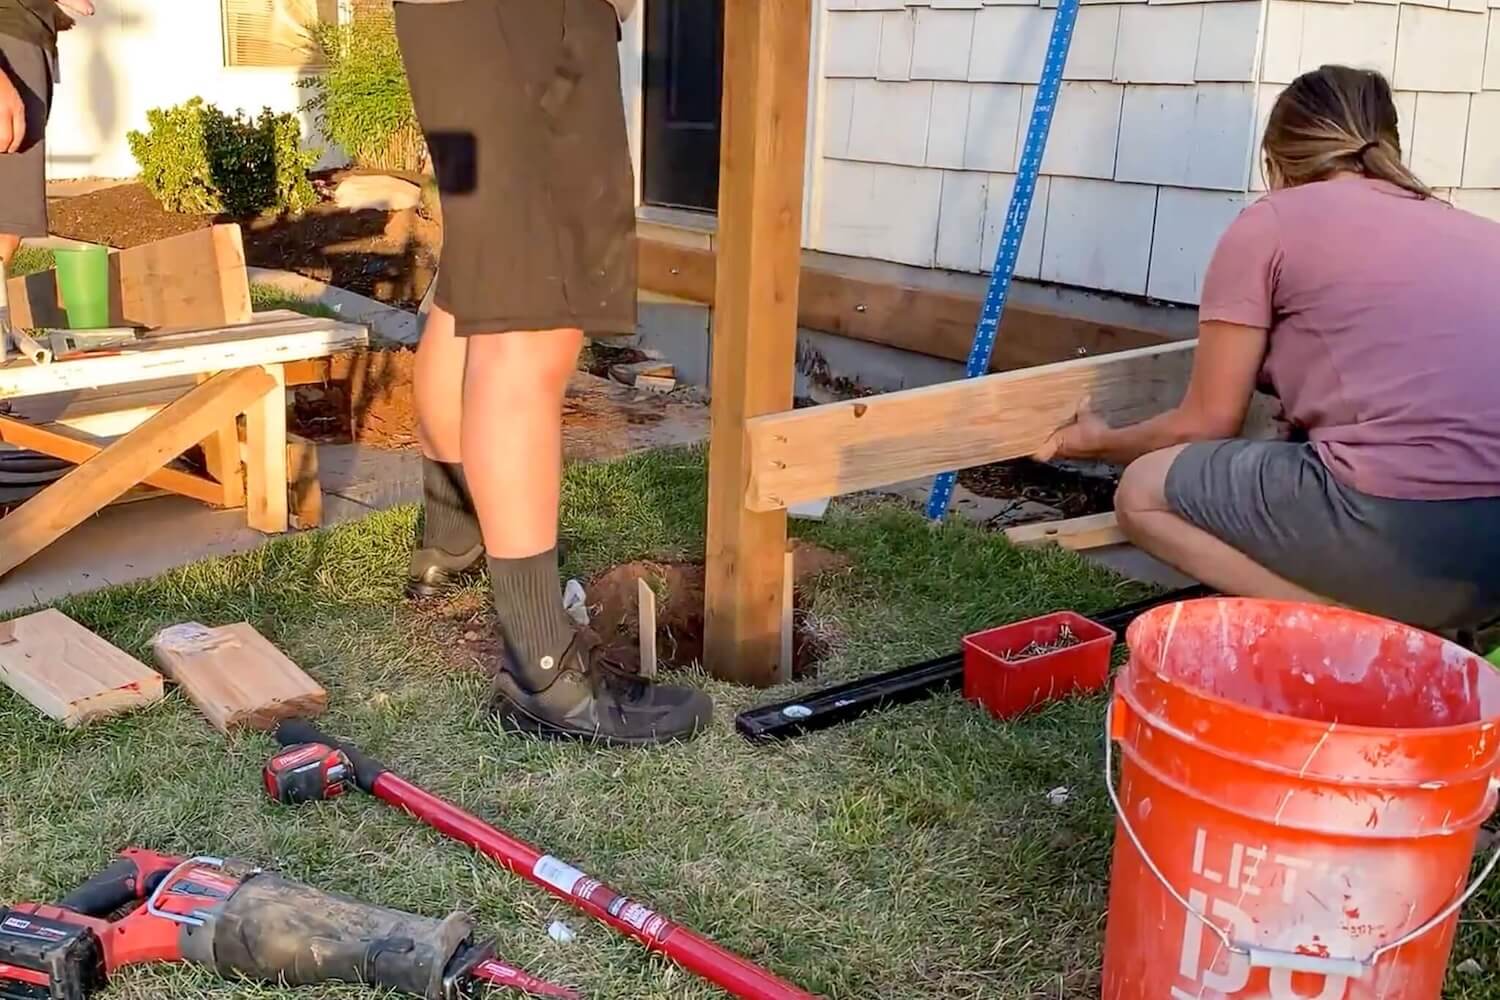
We dropped the 4×4 posts into the holes, one at a time, and I measured and cut the rim joists to size as we went. To keep the boards steady while attaching them, I predrilled 3″ wood screws partway into the rim joist ends, just enough to have them ready without poking through.
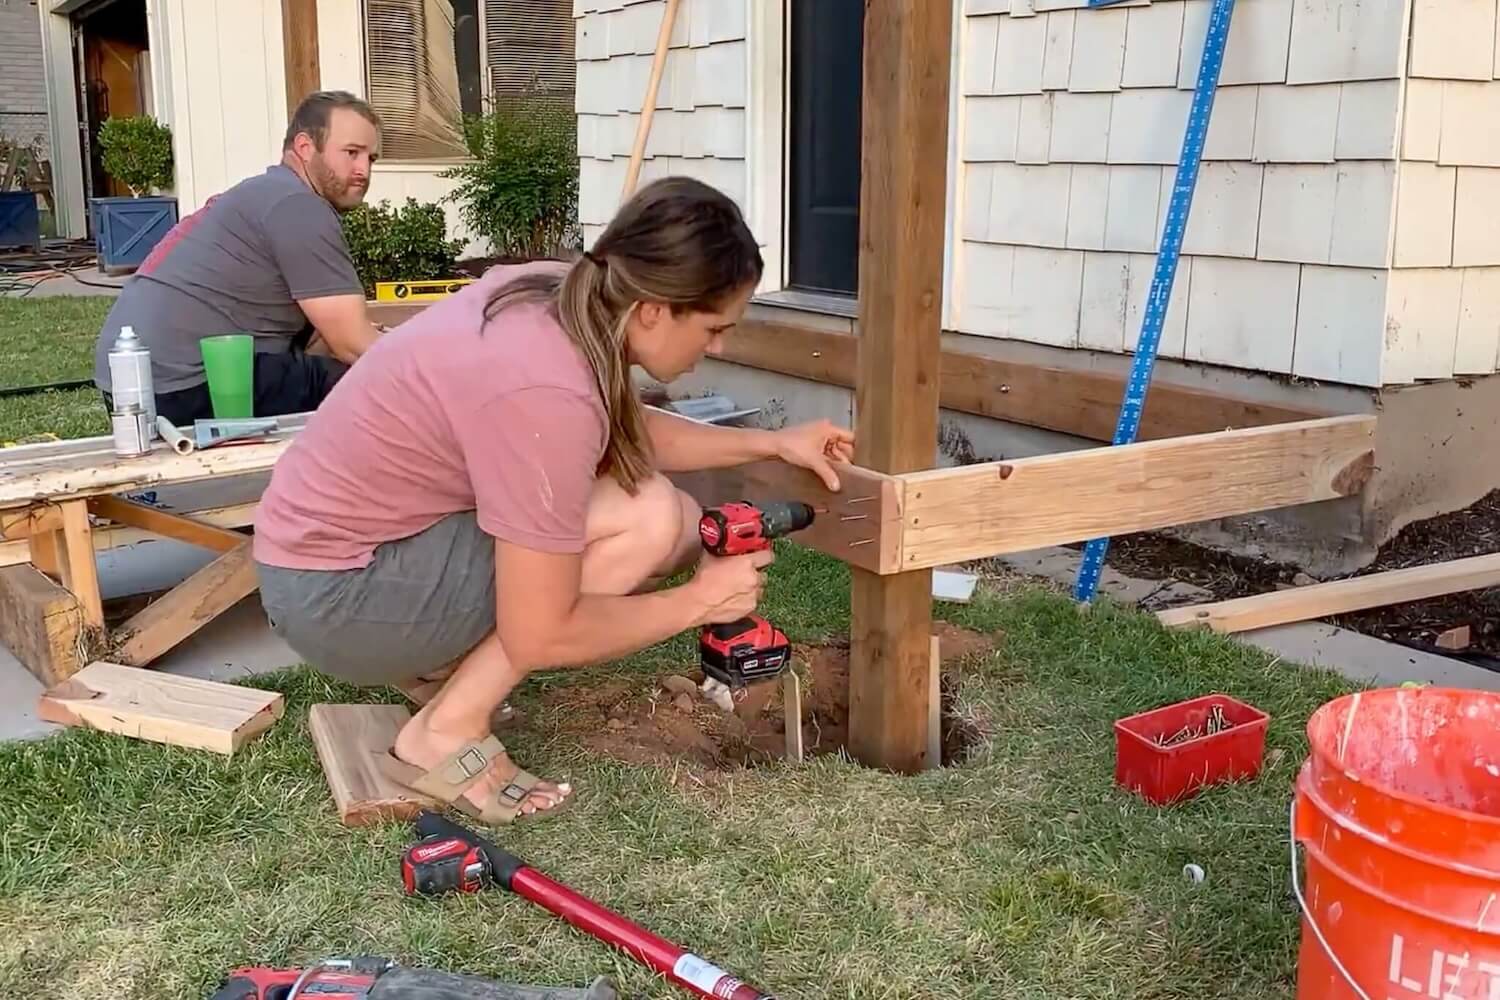
Each rim board was then screwed into the ledger board and into the posts using the pre-set screws. You’ll definitely want a second set of hands here to help hold things level and square while you attach everything.
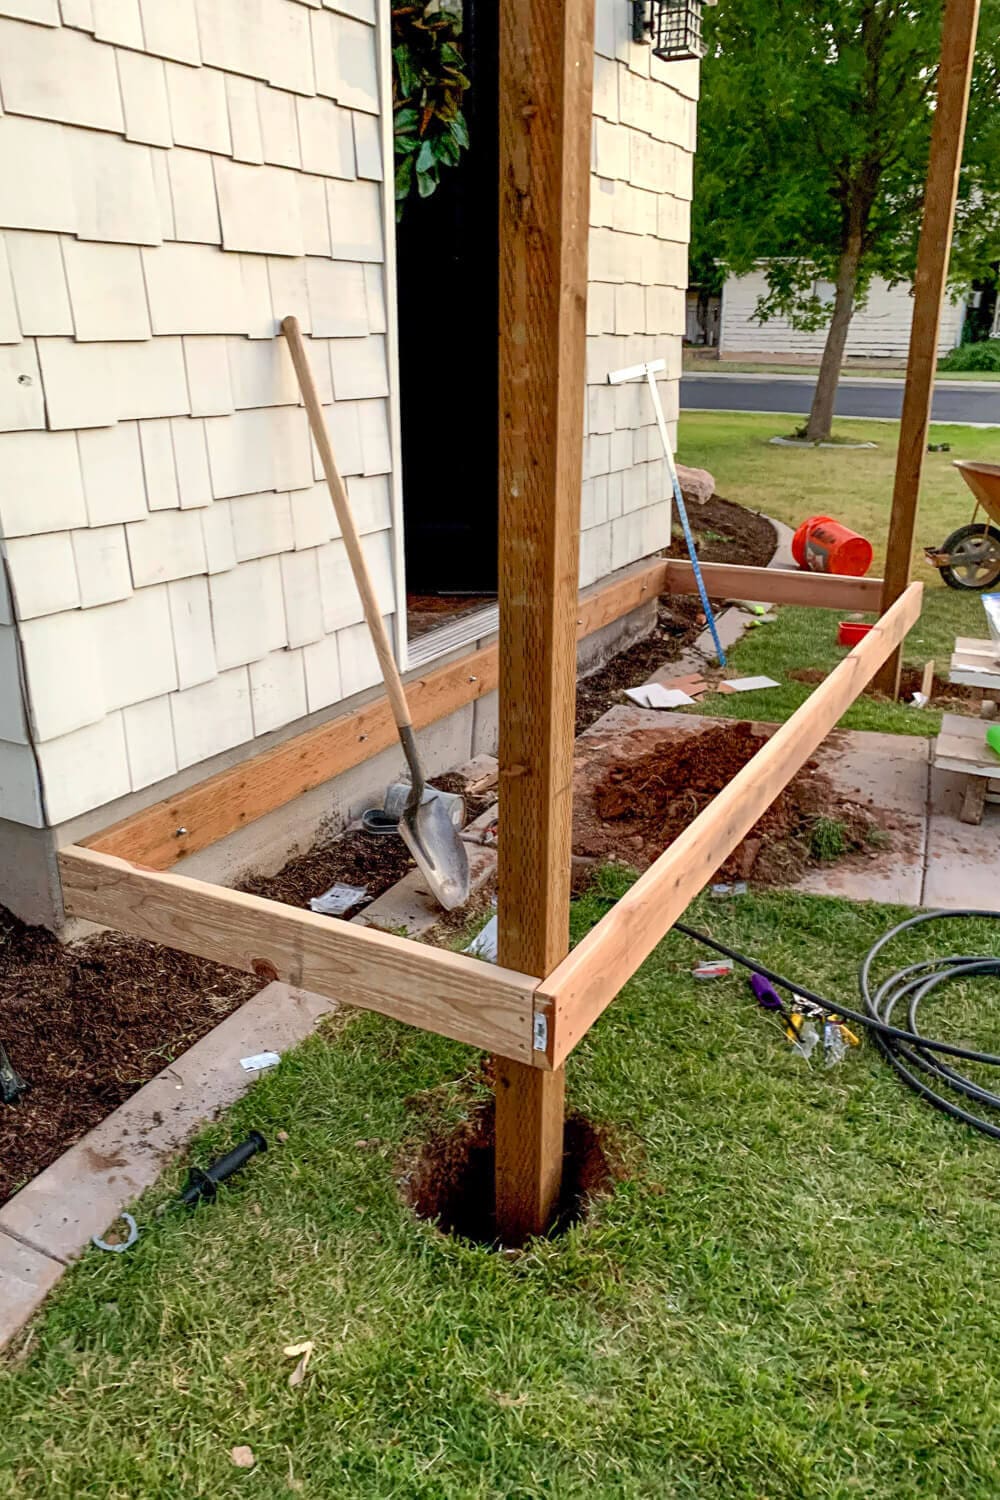
After all the sides were in place and the frame was square, I used a level to triple-check alignment from every angle, front to back, side to side, and diagonally. Then we were ready to pour the concrete and lock those posts into place.
Pro tip: To check a corner is truly square, measure 3 feet out along one side and 4 feet out along the other, then measure across between those two marks. If that diagonal is exactly 5 feet, the corner is square. Nudge the frame until it lands on 5.
This framing step is the foundation of adding a front porch to a house.
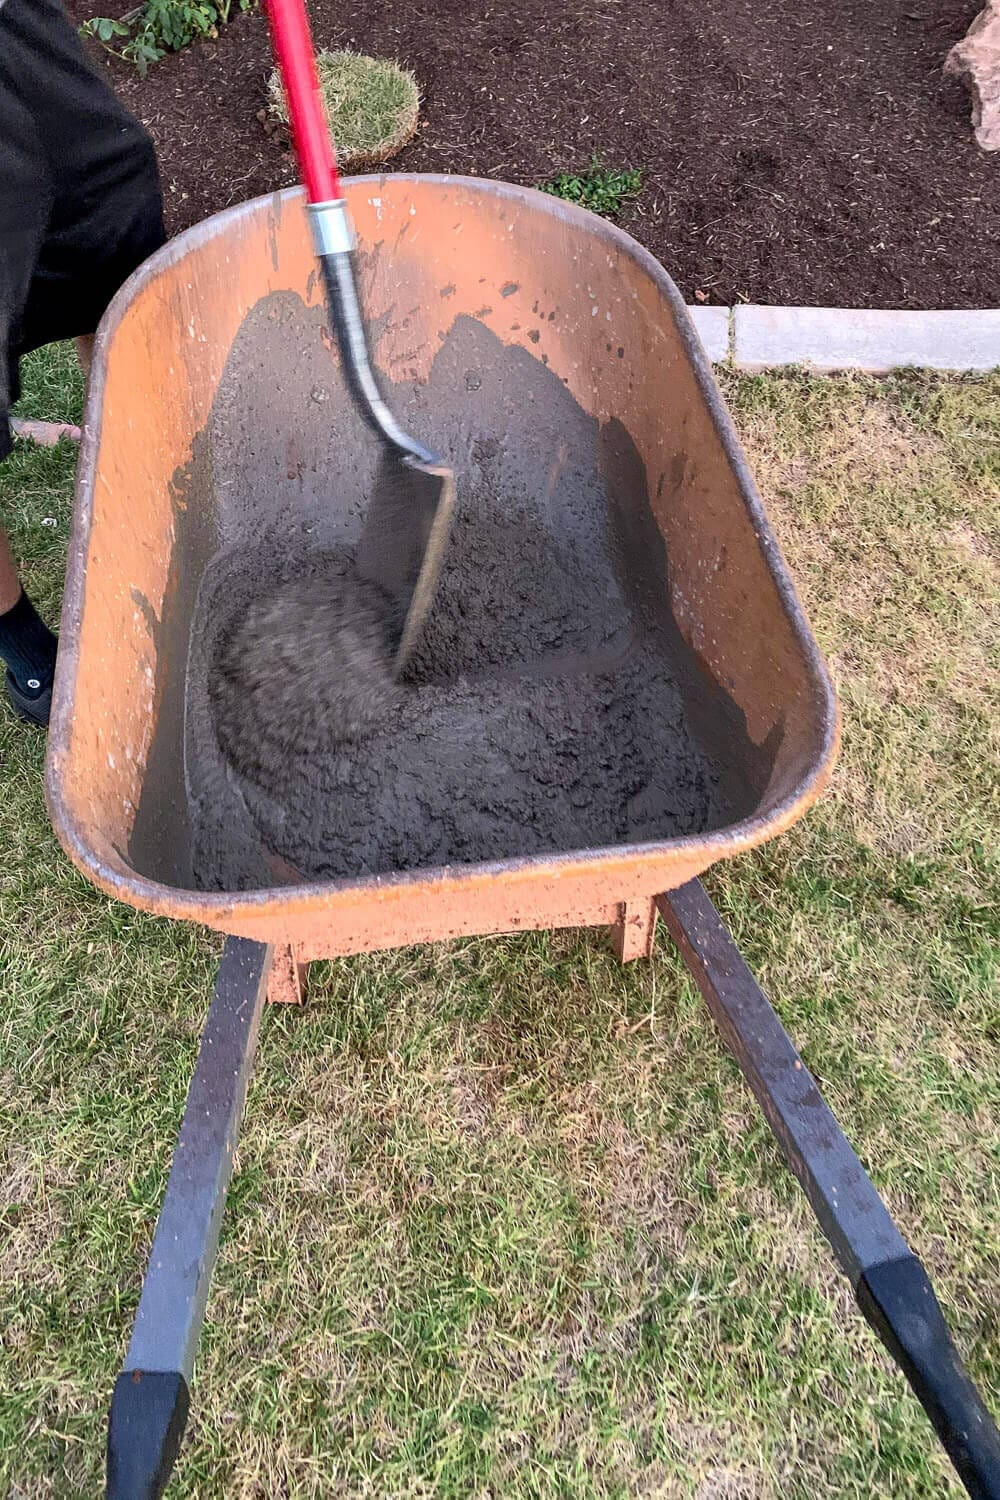
Step 5: Pouring Concrete Footings to Secure Porch Posts
This step is key if you’re learning how to pour concrete for porch posts or building a DIY porch post footing that will stand the test of time.
I used Quikrete and mixed it to a pancake-batter consistency, thick enough to hold form, but not too stiff to pour.
Pro tip: A couple of 50-pound bags of Quikrete per hole is usually plenty for a 4×4 post this size. Mix it wet enough to pour but thick enough to hold its shape.
We poured the concrete into each post hole while checking the frame constantly to make sure nothing shifted out of square. A level came in handy again to make sure the posts stayed perfectly plumb while the concrete cured. I let the posts set overnight before moving on.
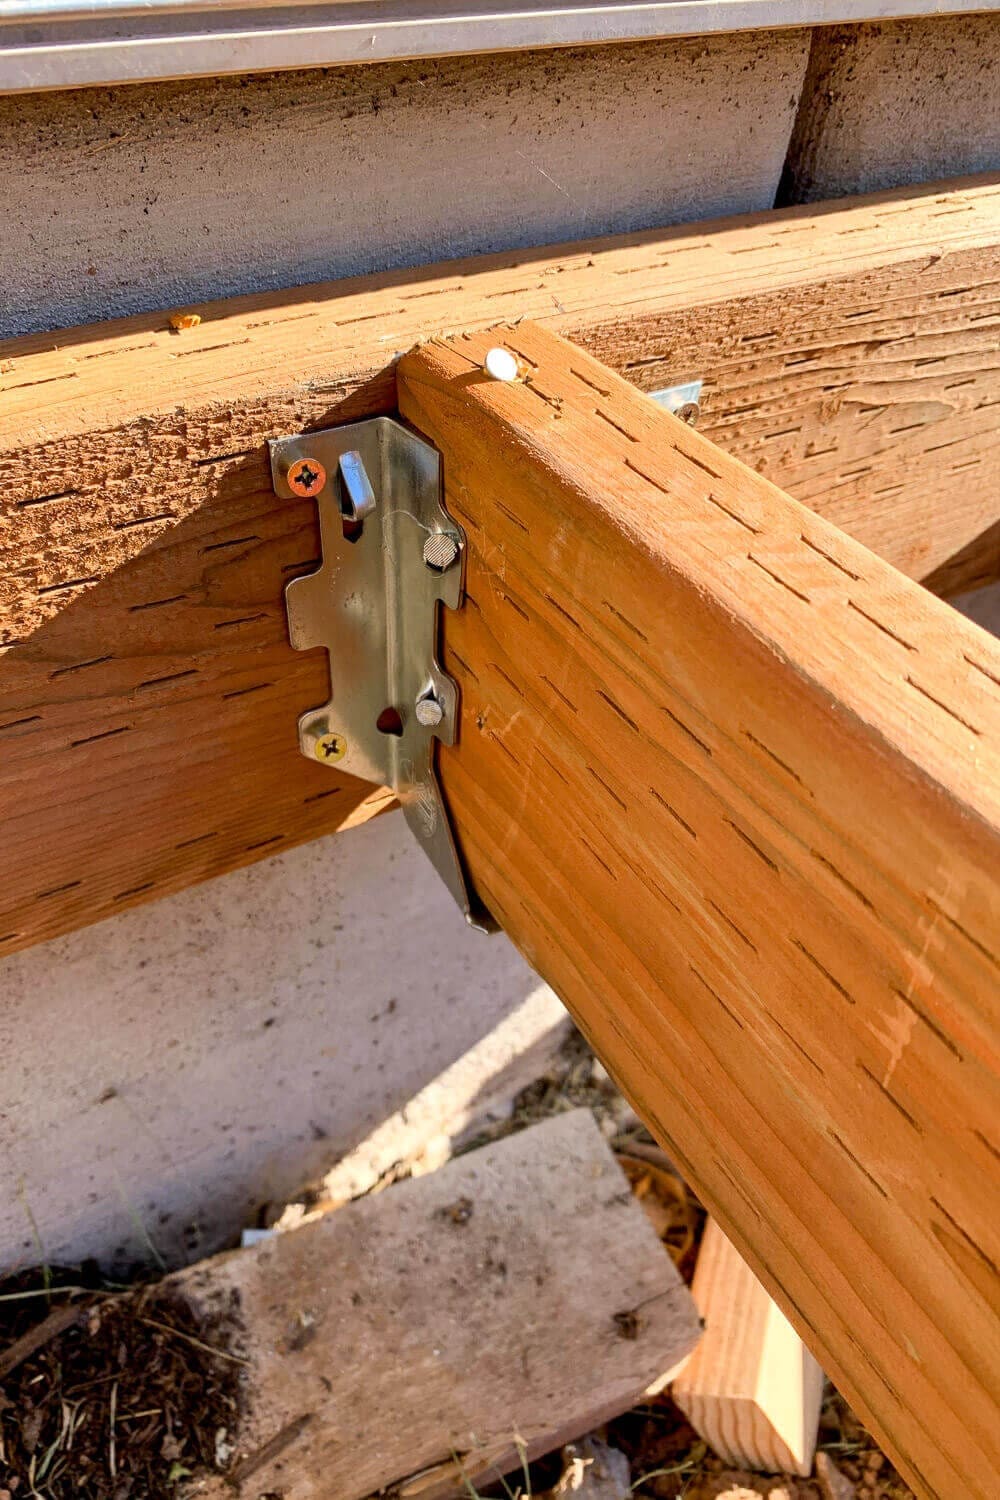
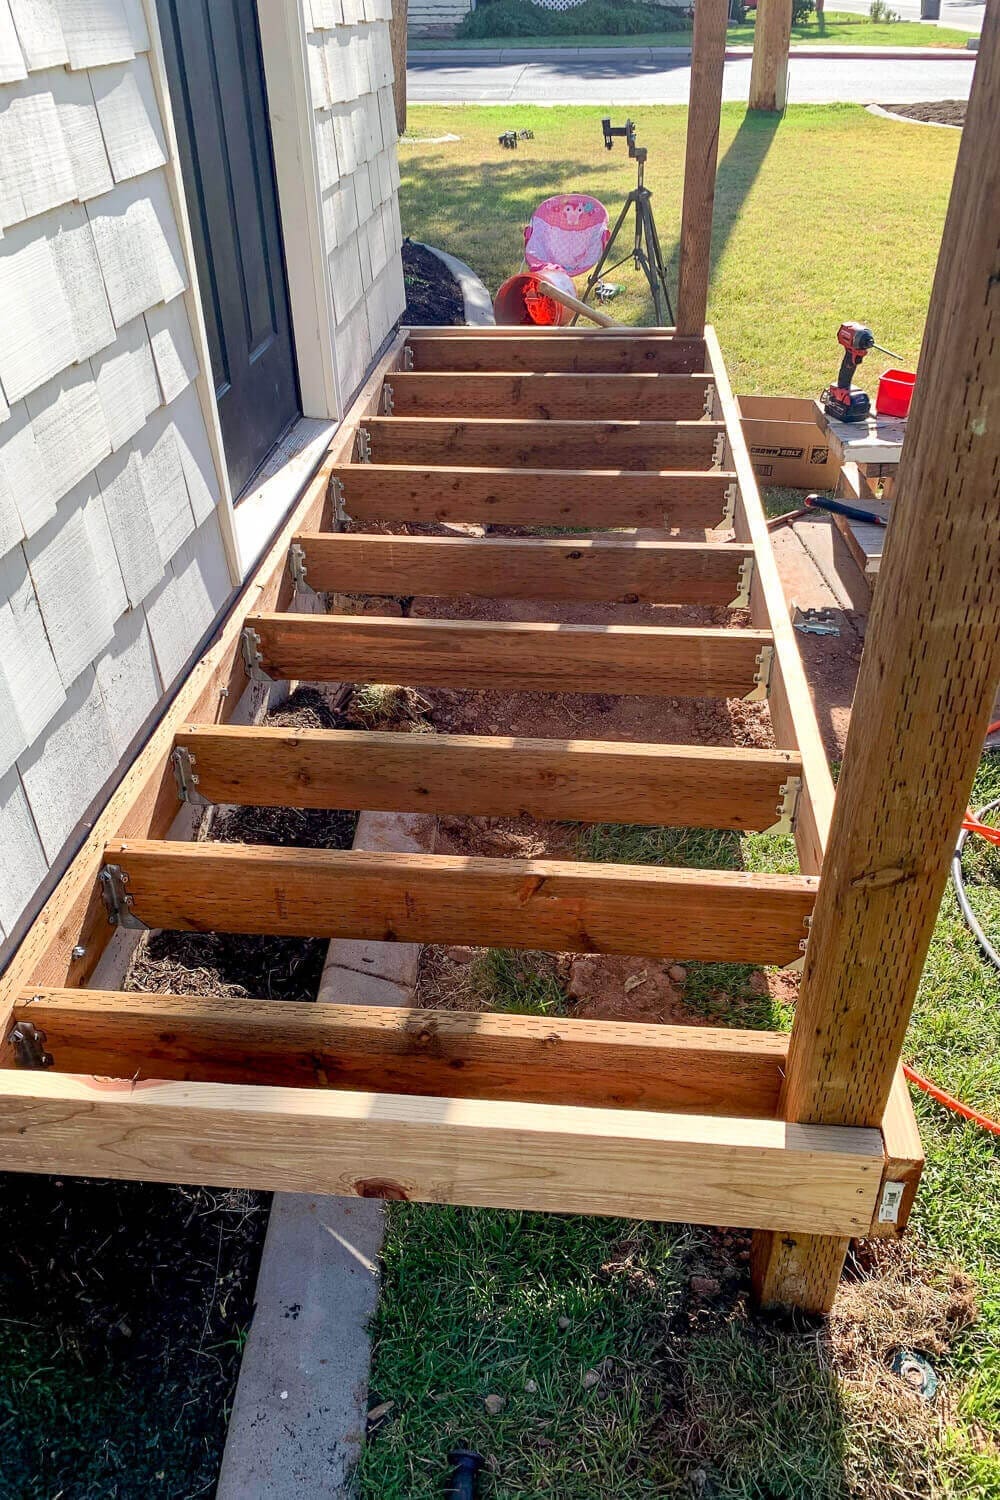
Step 6: Installing Deck Joists for a Strong Porch Frame
With the posts secured and concrete cured, it was time to give this porch a little backbone. My deck would be 12 feet wide, and without support joists, it would feel like you’re walking on a wooden trampoline.
I used pressure-treated 2×6 lumber for the joists. After measuring the interior width of the frame, I cut each board to fit snugly between the front and back rim joists. Using a speed square helped keep the cuts square and the ends flush.
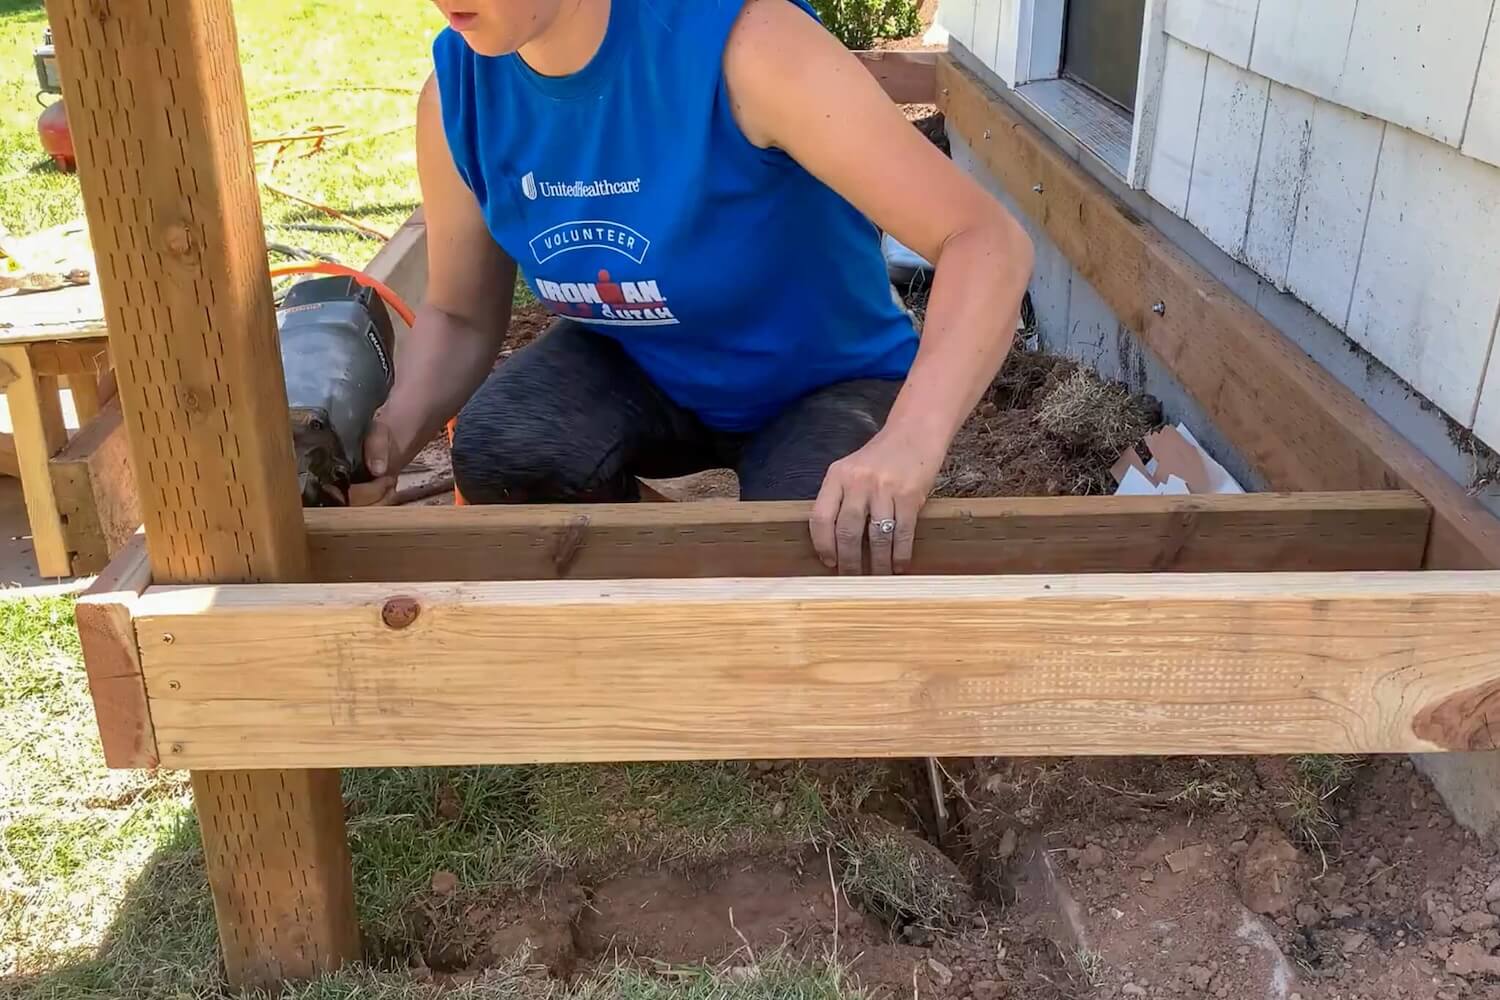
For spacing, I followed standard deck construction guidelines: 16 inches on center. That means I measured from the center of one joist to the center of the next. I marked each 16-inch increment across both the ledger and rim boards and made sure each joist landed precisely on those marks.
To install them, I toe-nailed each joist (driving nails in at an angle) into the ledger board and the opposite rim joist. This held everything in place temporarily while I worked my way across the frame. Once all the joists were installed and evenly spaced, I went back and reinforced each one with a metal joist hanger for long-term support and added stability.
This part is all about precision. Your joists need to be level, evenly spaced, and square. Once everything was in and secured, the frame felt solid and sturdy. No bounce, no flex, just a stable foundation ready for deck boards.

How Much Does It Cost to Add a Front Porch to a House?
A small DIY front porch like this one usually runs between $500 and $2,000, depending on size and lumber prices. The framing lumber, concrete, and hardware are the bulk of the cost at this stage, and whether you already own the tools makes a big difference.
For comparison, hiring a contractor to add a front porch typically runs $6,000 to $18,000, so doing the build yourself is where the real savings live. Splitting it into stages, like this series, also lets you spread the cost out over a few paychecks.
Front Porch Foundation and Frame Timeline
| Phase | Active hours | Notes |
|---|---|---|
| Check permit and sketch plans | 1-2 hrs | Confirm requirements with your city first |
| Attach the ledger board | 2-3 hrs | Getting it level and square is everything |
| Dig and stake the post holes | 2-4 hrs | About 18 in deep; check for buried pipes |
| Frame the deck and set posts | 3-4 hrs | A second set of hands really helps |
| Pour the concrete footings | 1-2 hrs, plus overnight cure | Keep every post plumb while it sets |
| Install the deck joists | 2-3 hrs | 16 in on center with joist hangers |
| Total (frame stage) | About a weekend | Not counting concrete cure time |
How Deep Should Front Porch Footings Be?
For this DIY front porch, I dug my post holes about 18 inches deep, which worked for our mild Utah climate. But footing depth really depends on where you live.
In colder regions, footings need to go below the frost line, which can be 36 to 48 inches down, so the ground freezing and thawing doesn’t heave your posts over the winter. Always check your local building code before you dig, because footing depth is one of the things inspectors care about most.
More Front Porch and Outdoor Projects to Try
- How to Start a Backyard Garden
- How to Build Raised Garden Beds
- DIY Wood Porch Column Wraps
- How to Paint a Concrete Porch
📌 Save this Project for Later
FAQs About Adding a Front Porch to a House
You add a front porch to a house by anchoring a pressure-treated ledger board to the wall, setting posts in concrete footings, then framing the deck with rim joists and floor joists. That frame is the foundation the rest of the porch builds on.
It depends on your local building codes. For this small porch addition I didn’t need one, but always check with your city or county first, since anything attached to your house often requires a permit.
You anchor a pressure-treated ledger board to the house with masonry anchors, then build the porch frame off of it. The ledger board is the structural connection between your home and the new porch.
I used pressure-treated pine for the structural parts and redwood for the parts that show. Redwood is rot resistant and looks great left unfinished or painted.
Around 18 inches works for shallow porch foundations in a mild climate, but it varies by region. Always dig below the frost line if you’re somewhere cold, which can mean 36 to 48 inches.
Yes. A front porch needs posts set on concrete footings so it stays level and doesn’t sink or shift over time. I poured concrete around each 4×4 post and let it cure overnight before framing on top.
Mine sits about 41.5 inches out from the house, a comfortable depth for a small entry porch. You can go deeper for seating, but check your setback rules and how far a future roof overhang will reach.
I used 4×4 pressure-treated posts, 2×6 pressure-treated lumber for the rim and floor joists, and redwood for the parts that show. Pressure-treated handles moisture and ground contact; redwood resists rot.
A small DIY front porch like this one typically runs between $500 and $2,000 depending on size and lumber prices. A contractor would charge $6,000 or more, so doing the work yourself is what keeps the cost down.
Yes. Adding a front porch to an existing house is a doable DIY if you’re comfortable with a drill, a saw, and a level. Take your time squaring the frame and setting the ledger board, and grab a helper for the heavy parts.
The Bottom Line on Adding a Front Porch
The foundation and frame are the least glamorous part of adding a front porch to a house – and the most important. This stage took us about a weekend, and the materials are a small slice of the $500 to $2,000 the whole porch costs. Be a perfectionist about two things: getting the ledger board level and the frame square, because everything in Parts 2 through 4 builds on them. And call 811 before you dig, so you don’t find a water pipe the hard way like I did.
Building the whole thing? This foundation-and-frame tutorial is Part 1 of my 4-part DIY Front Porch series. Keep going with Part 2: Trim and Deck Boards, Part 3: Building the Step, and Part 4: The Porch Roof.
Leave a comment if you have any questions about your own front porch build – I read every one, and I’m here to help!
About Crystel
I’m Crystel Montenegro, a stay-at-home mom of five turned home DIY expert. I share budget-friendly DIY projects, home design, garden, recipes, and lifestyle content from my own home, and every project here is one I actually built or made. Read more about me or follow along on Instagram.