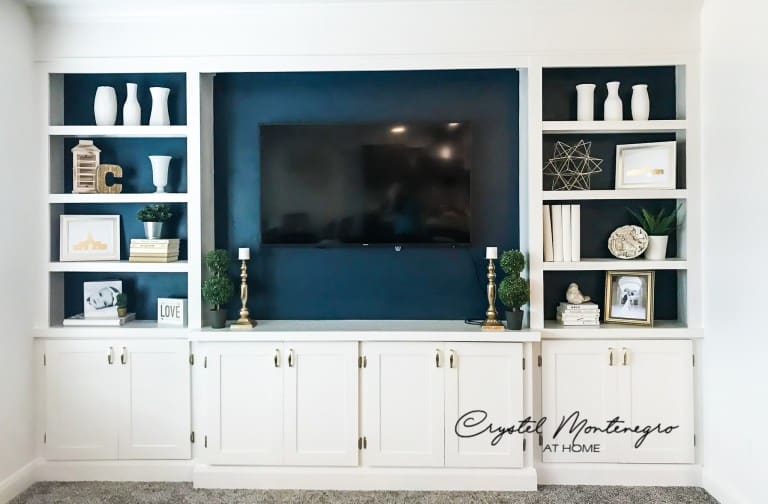
How I Built Custom Built Ins ALL BY MYSELF!


Updated May 9, 2026
In all my DIY projects, these custom built ins have by far my biggest endeavor—and I’m super proud of how it turned out! It took me about two weeks, though, if you count just the actual work time, it was about three or four days (because, stay-at-home mom life).
There’s something about custom built-ins that truly transforms a space. My niece asked if I could build some for her new house, and I jumped at the chance. Now I’m just counting the days until my husband and I can buy a home of our own so I can give it the DIY treatment!
Getting Started On The Custom Built Ins
I’ll admit, I was a little intimidated at first, but I decided to dive right in. I began by taking measurements of the wall and discussing the style of built-ins my niece wanted. I sketched everything out on graph paper—dimensions, materials, cuts—so I knew exactly what was needed. I recommend thinking through every little detail during this stage; it’ll save you time and headaches later. Despite a few minor hiccups, I managed to stay close to my estimated budget. The entire build cost around $430 (excluding paint).
This is one of the several graph pages I drew out that outlines how I needed to make my cuts on each piece of MDF. In this case, 1 square = 4 inches.

Materials
*Amount of materials are based off of my wall dimensions, which were 11 feet long by 9 feet tall. Yours may differ.
**Note: After more experience working with MDF, I only recommend it in certain circumstances. Paintable plywood would be a better option here for durability purposes.**
- 6 sheets MDF
- 5 – 2 x 4 x 8 boards
- 160” crown molding
- 3 – 2x12x8’s OR 1 2x12x8 and 2 2x8x8’s for counter top
- Paintable Caulk
- Wood Glue
- 1 1/2” screws
- 1 1/2” Brad nails
- Paint
- 1 sheet 1/4” plywood or more if you want to add backing to your shelves before installation
- 160” Decorative trim for header
Materials
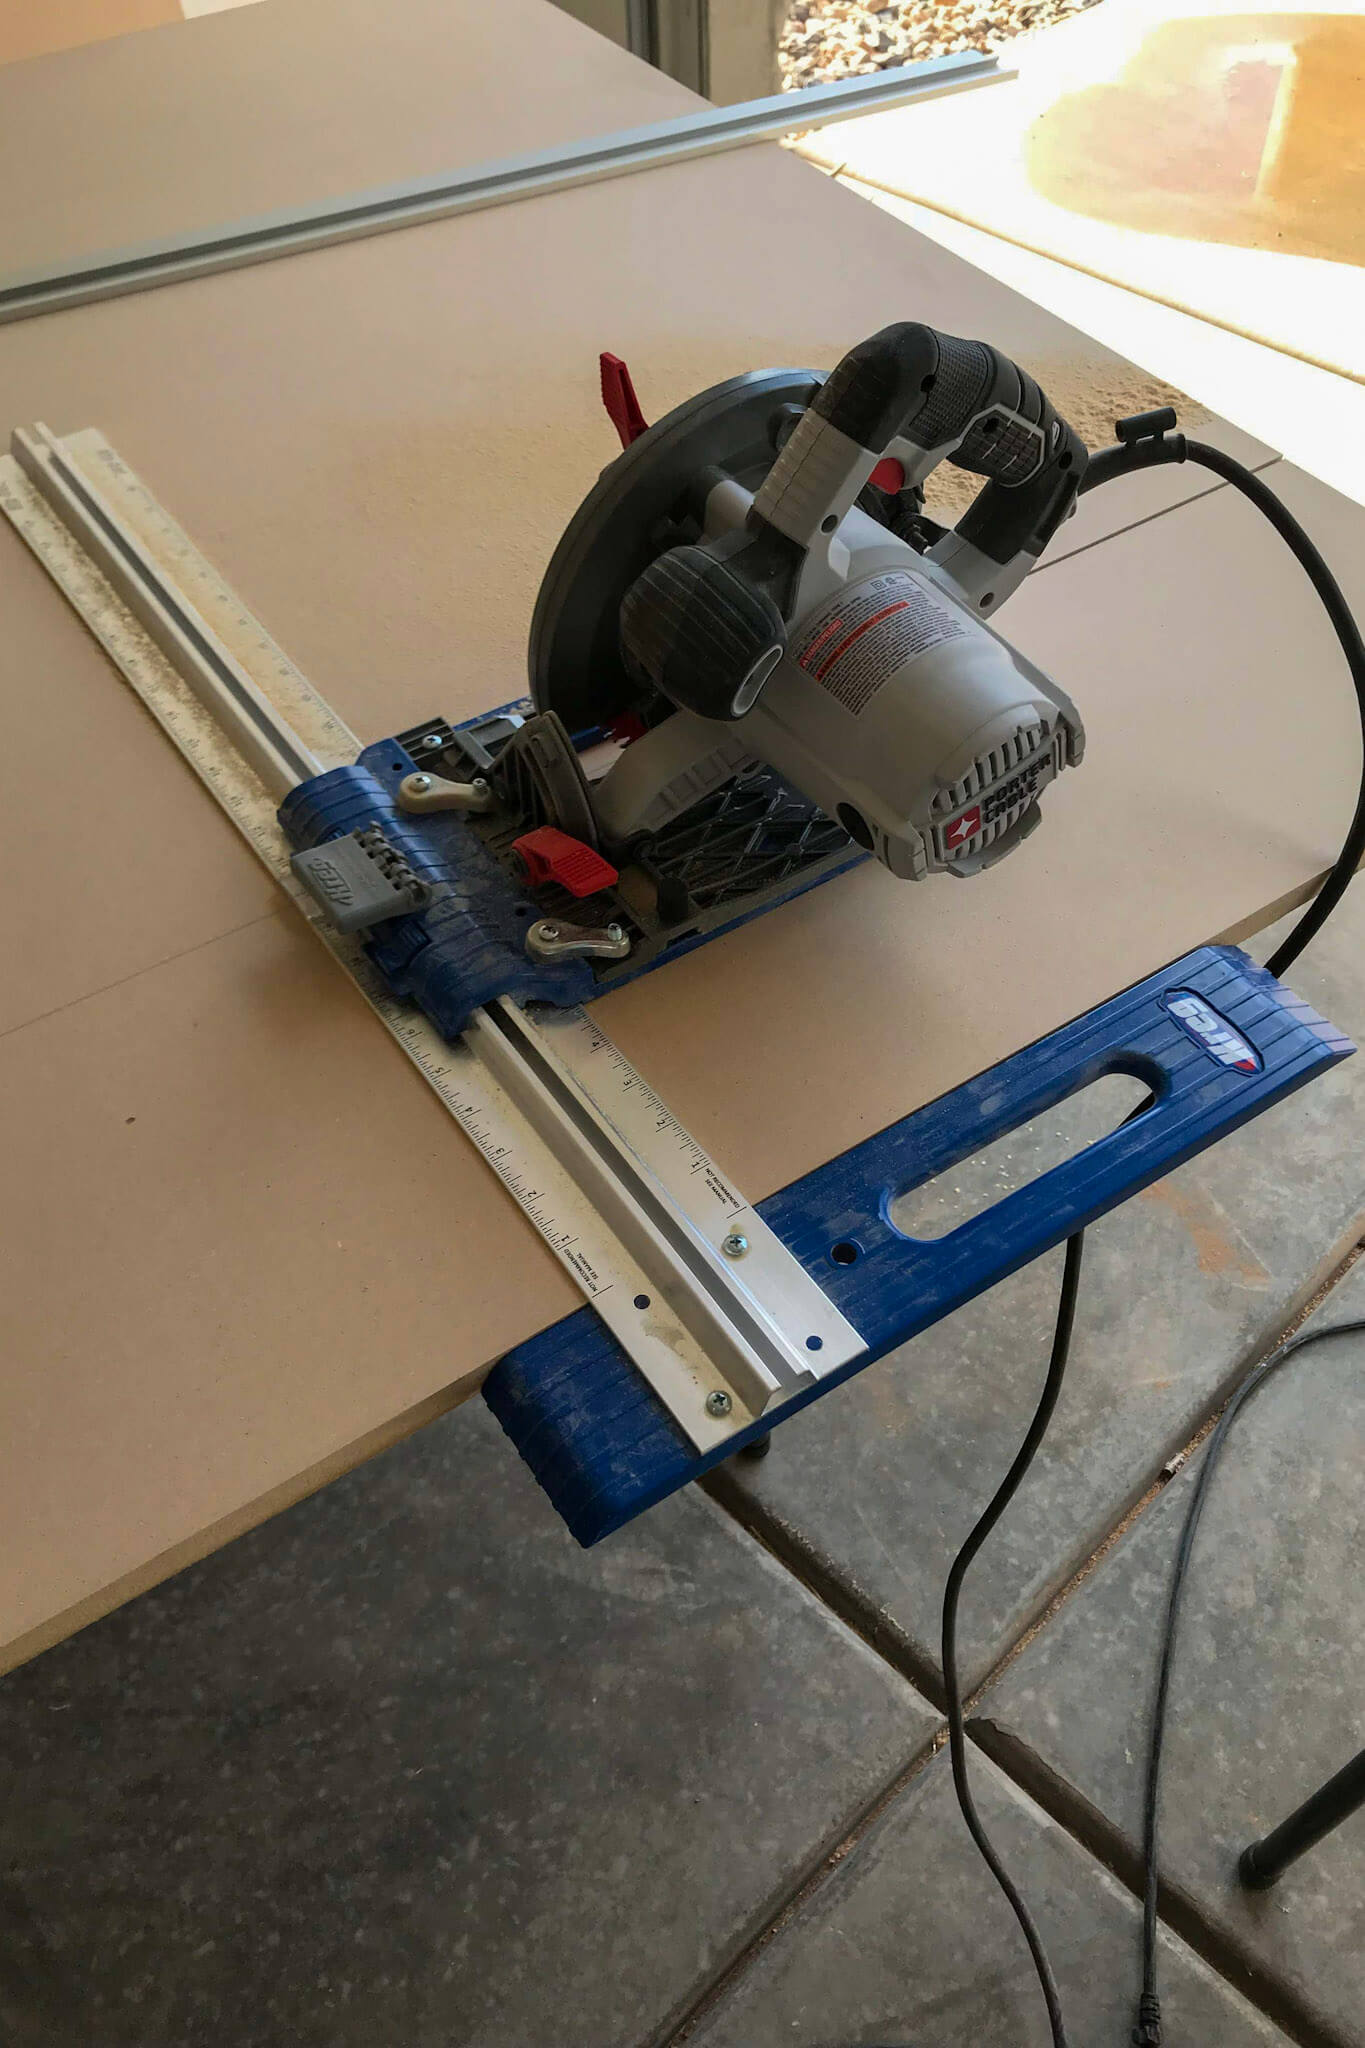
- Table Saw
- Circular Saw
- Miter Saw
- Saw Guide (if using circular saw)
- Brad Nailer
- Pocket Hole Jig
- Drill
- Level
- Speed Square
- Drywall Square
How To Begin Building DIY Custom Built Ins
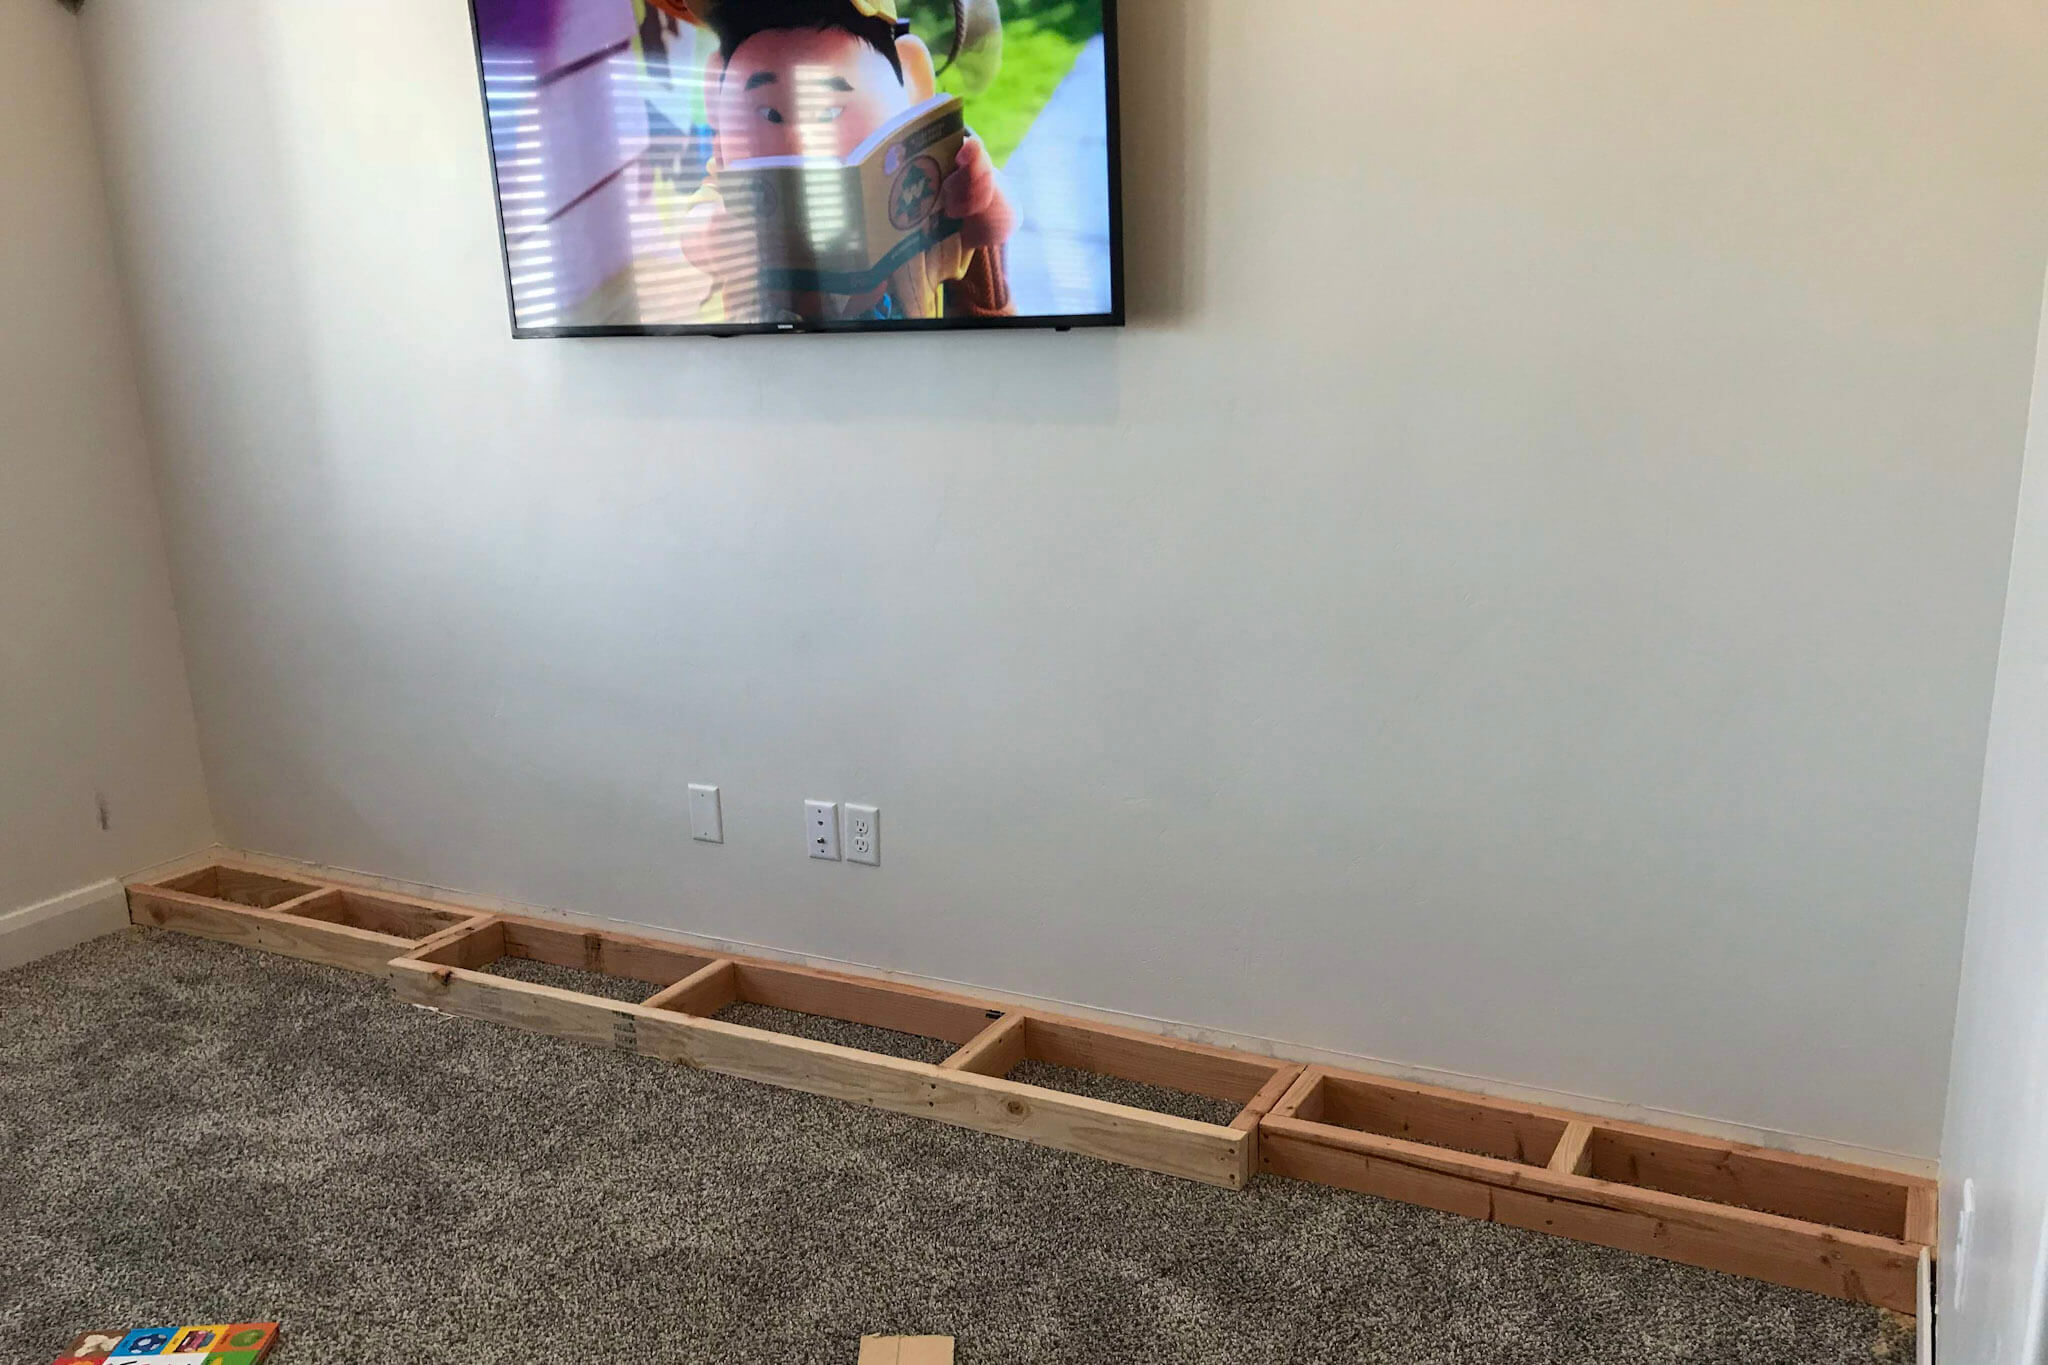
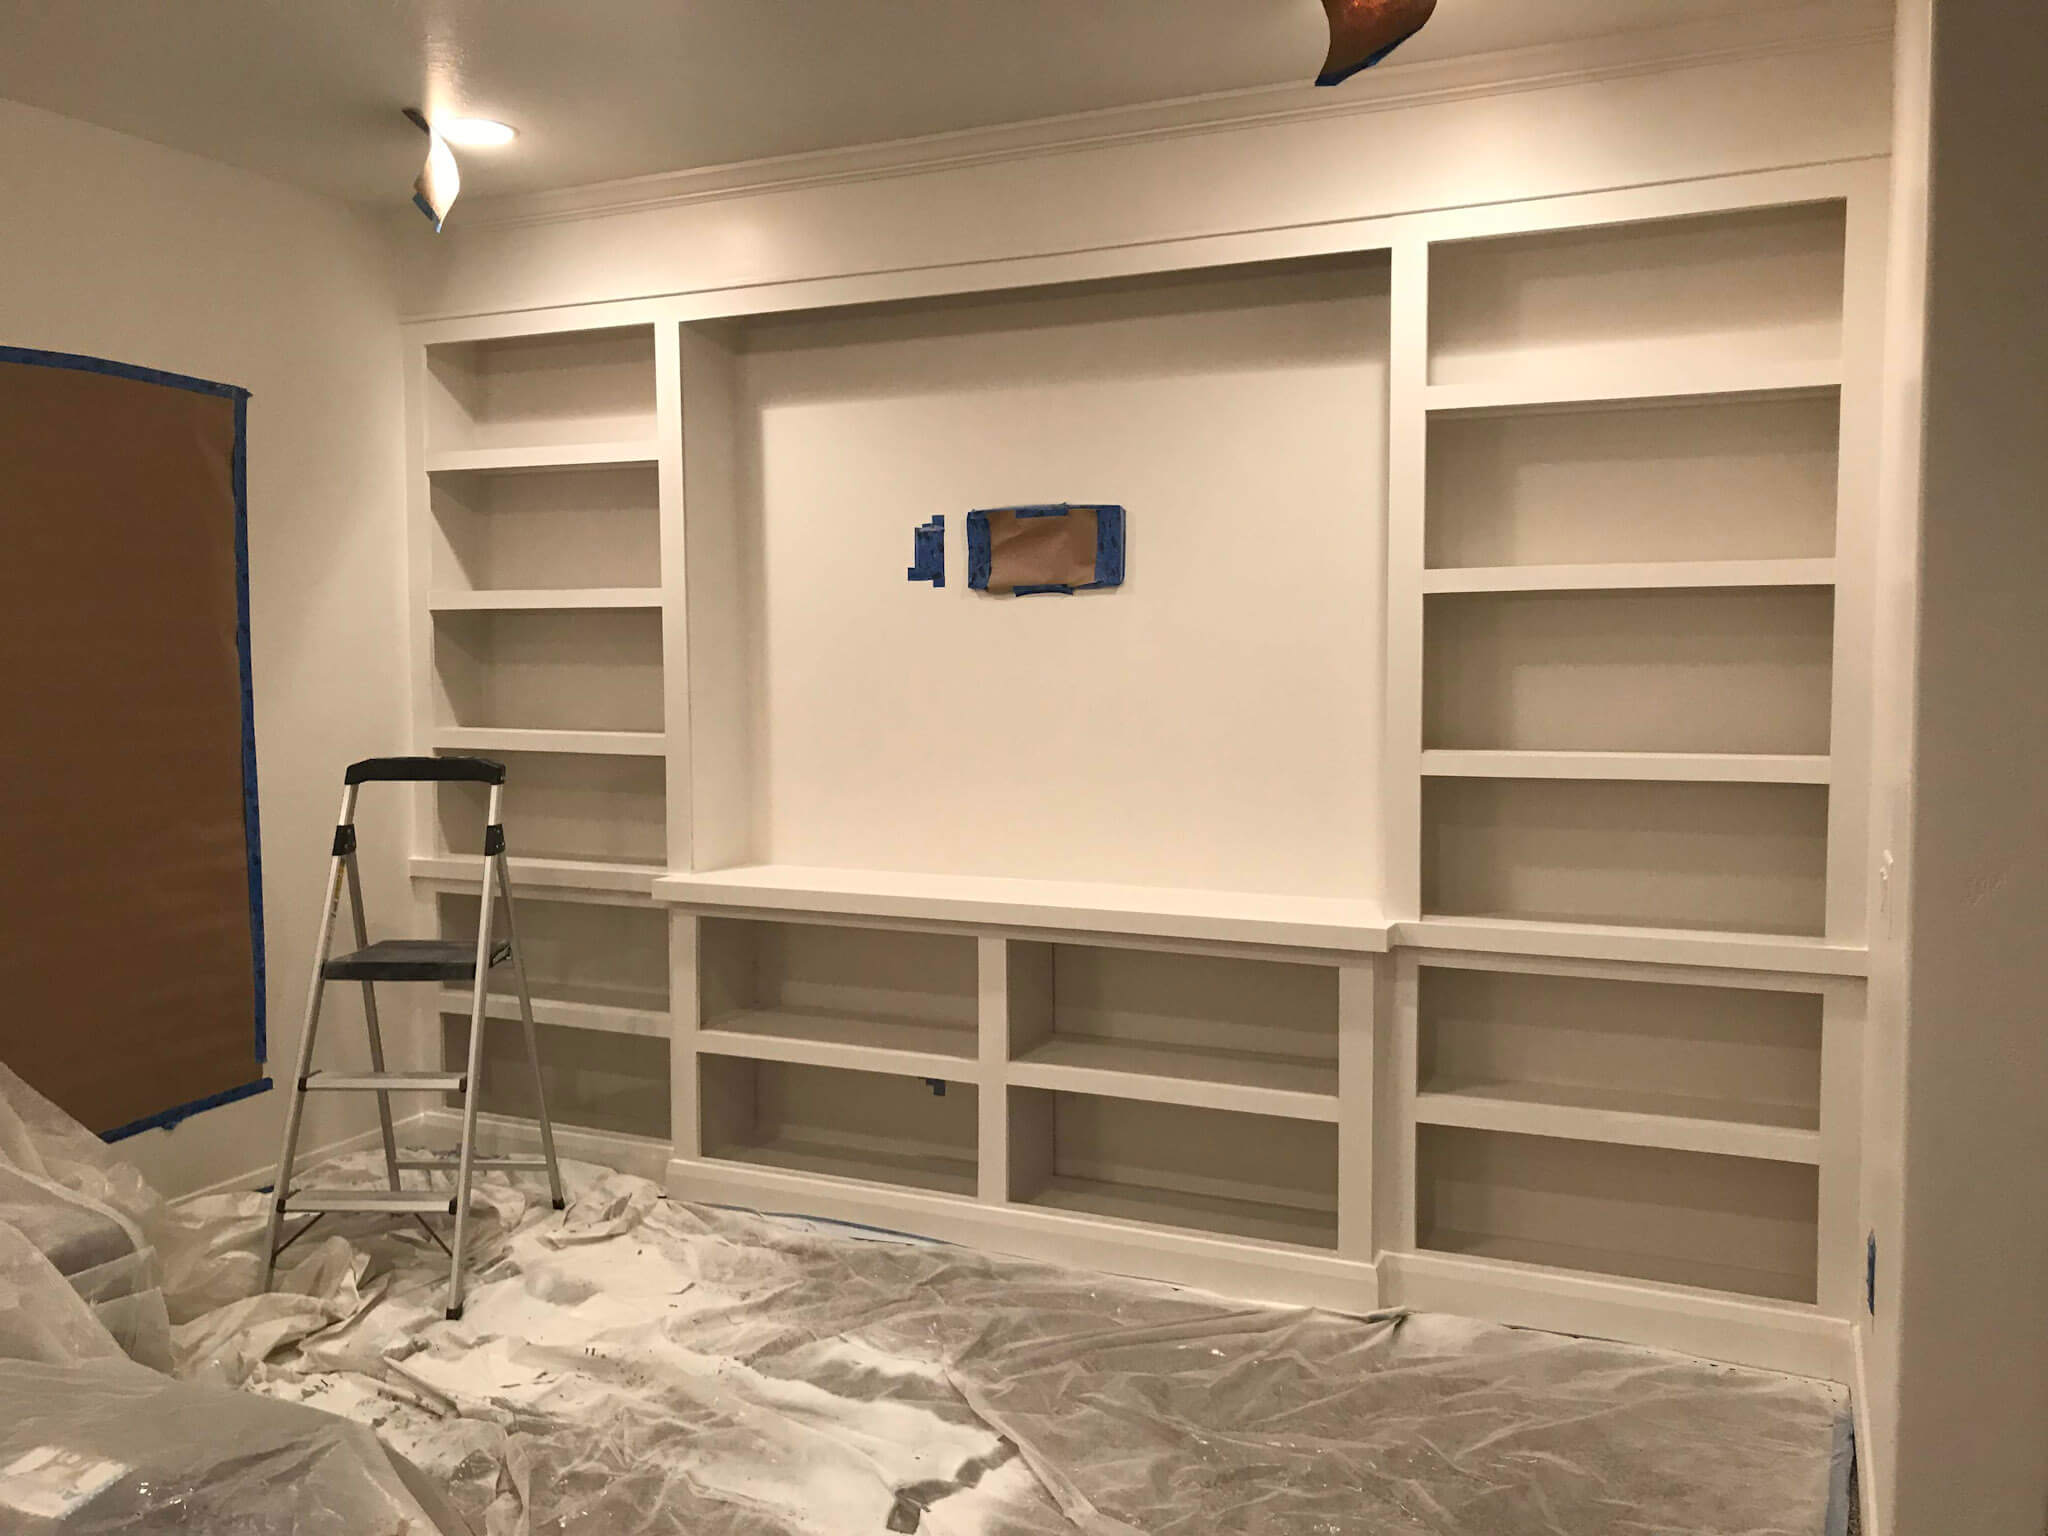
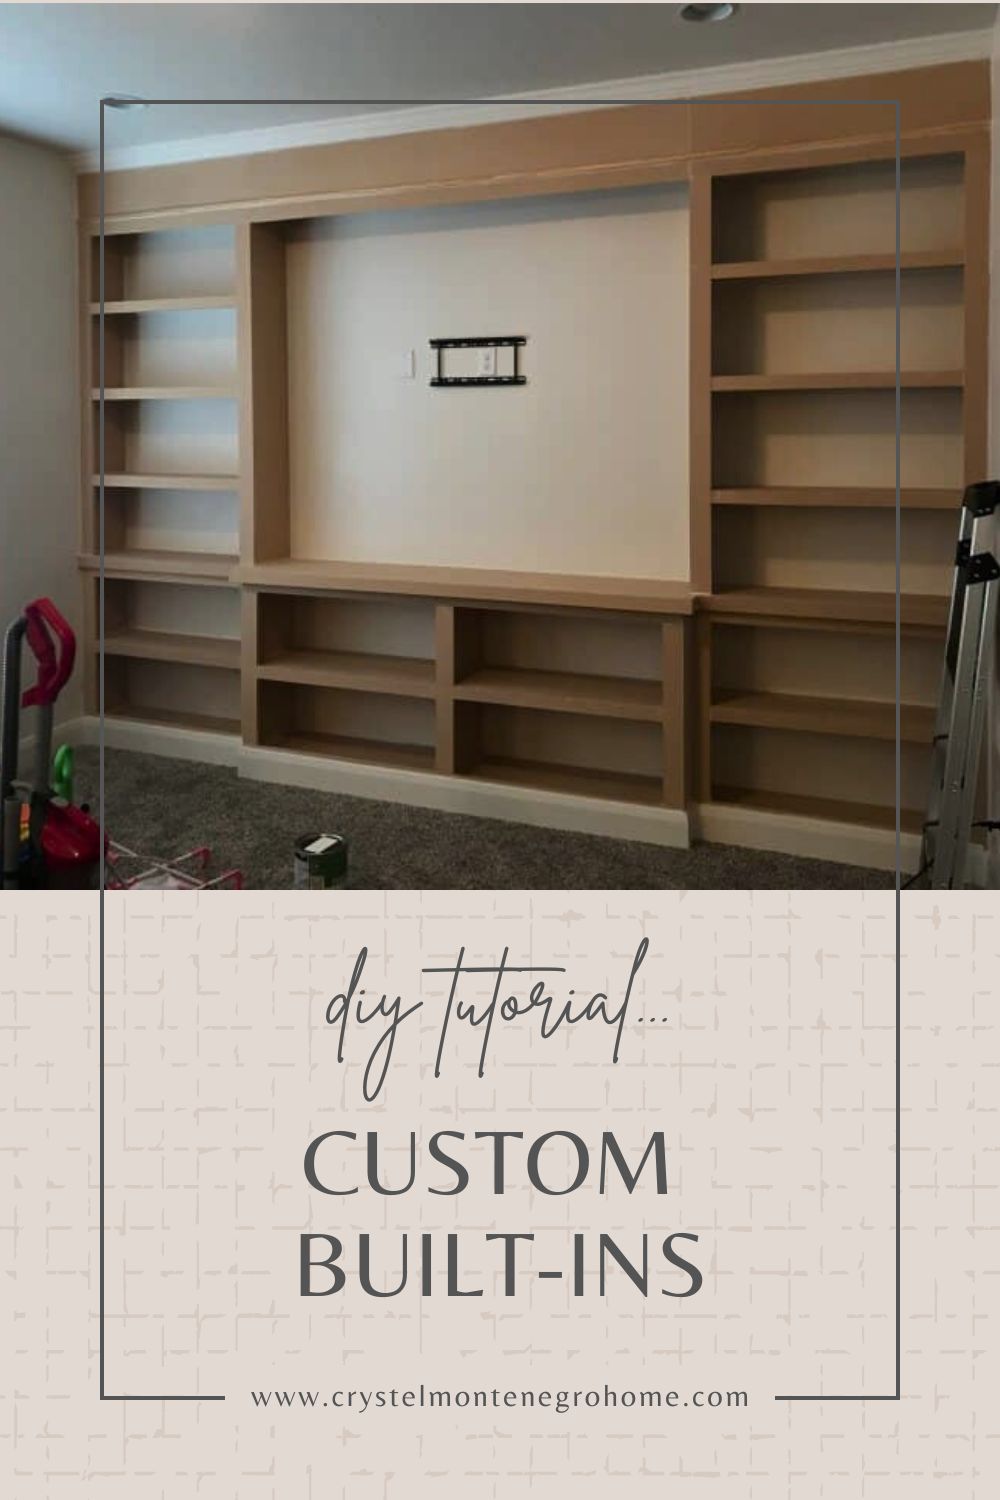
After removing the baseboard, I built simple boxes from 2x4s to create the base for the lower cabinets, adding an extra 4 inches for deeper shelving in the center. I secured these to the wall studs with 2 1/2″ screws.
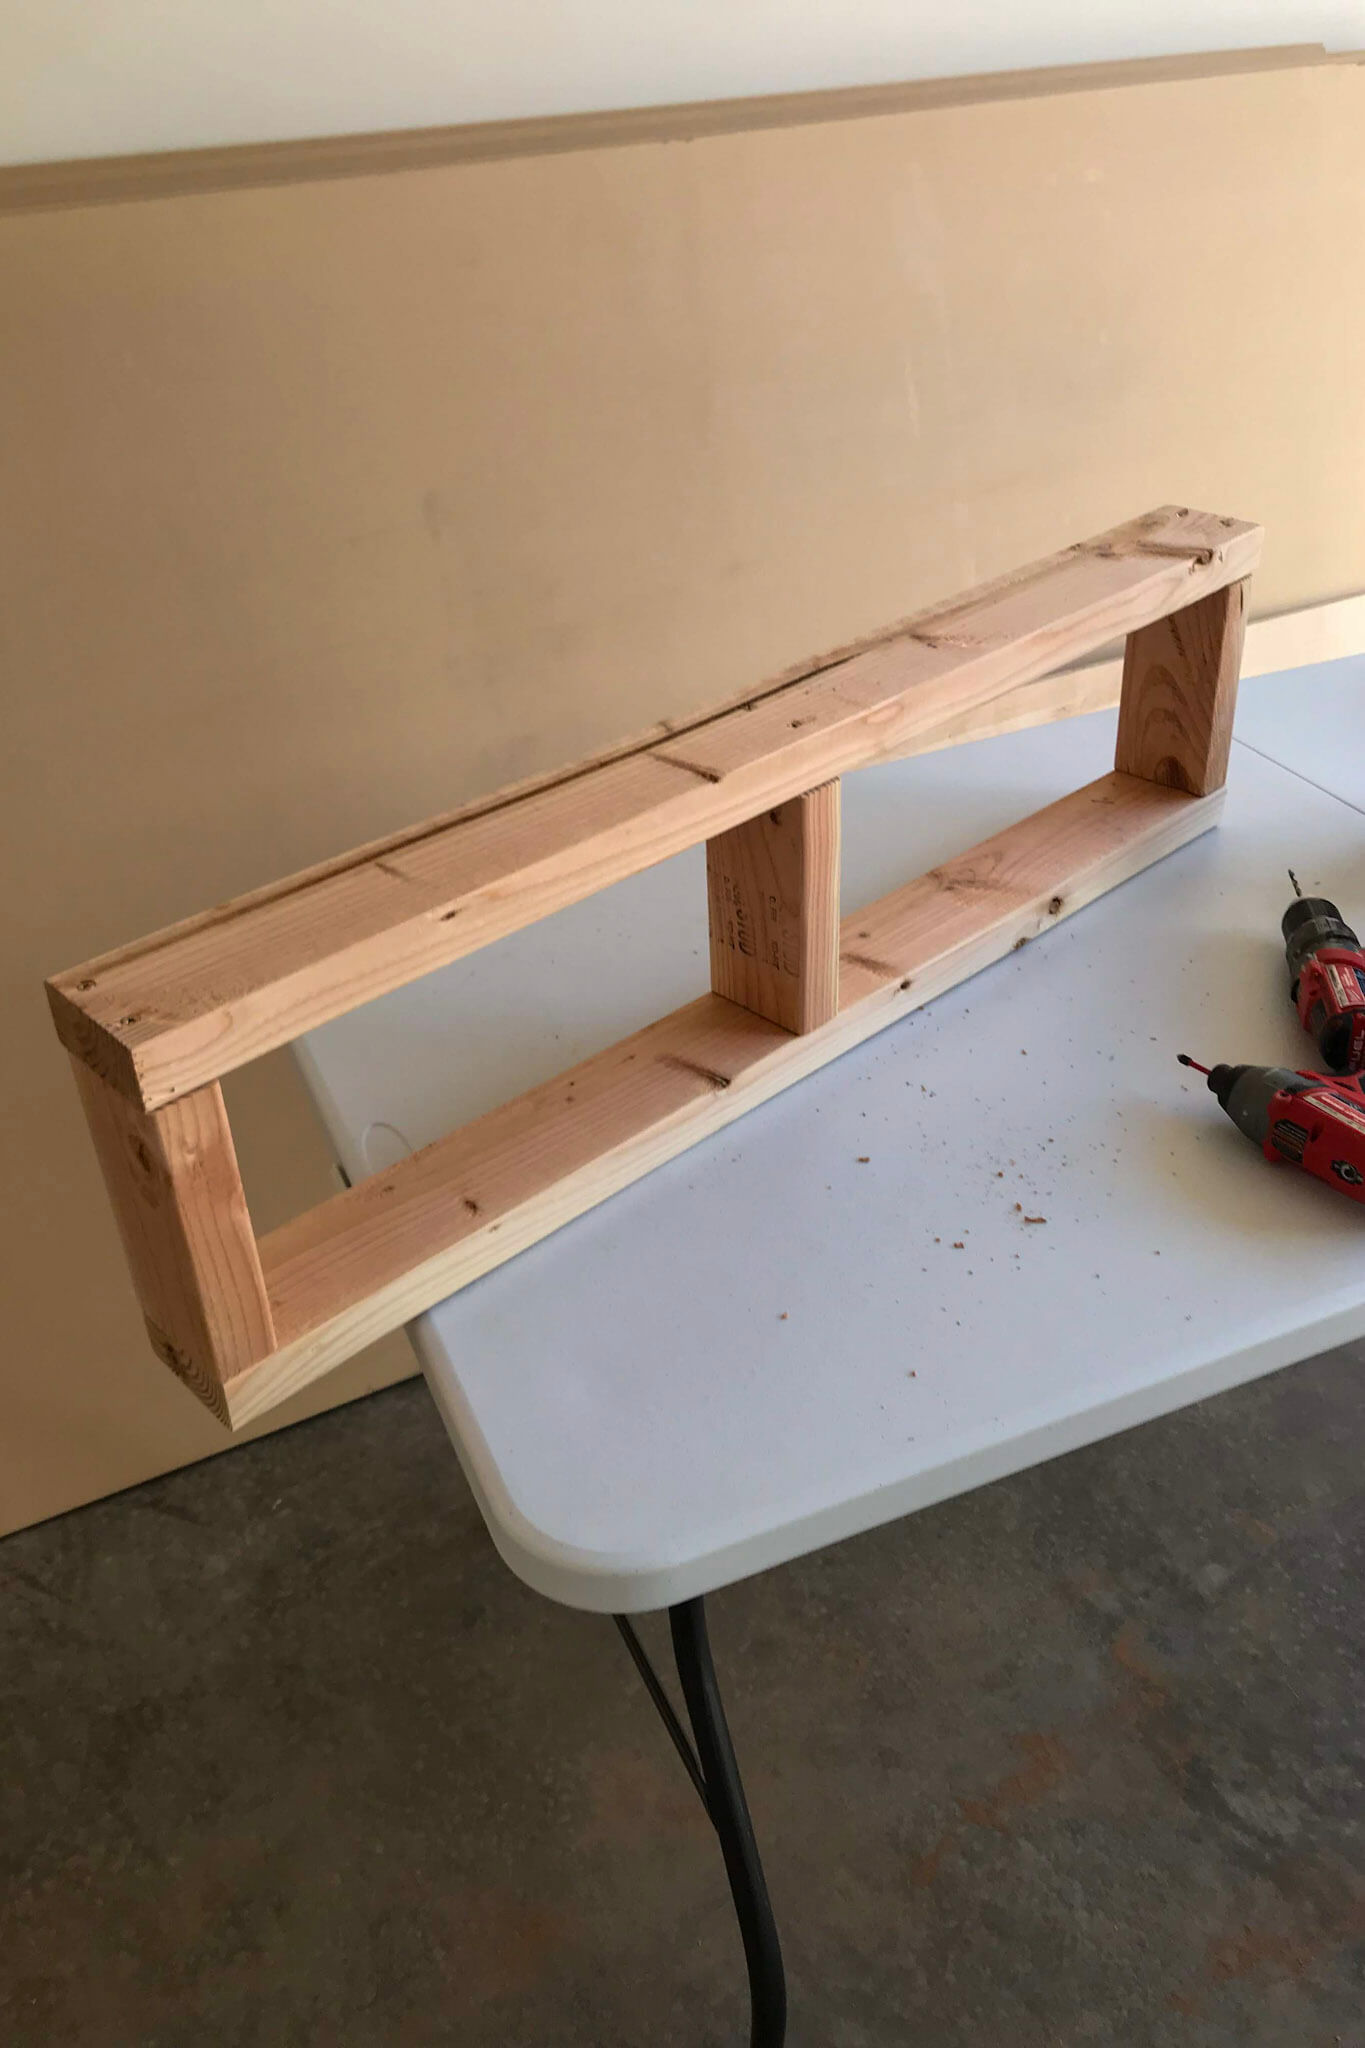
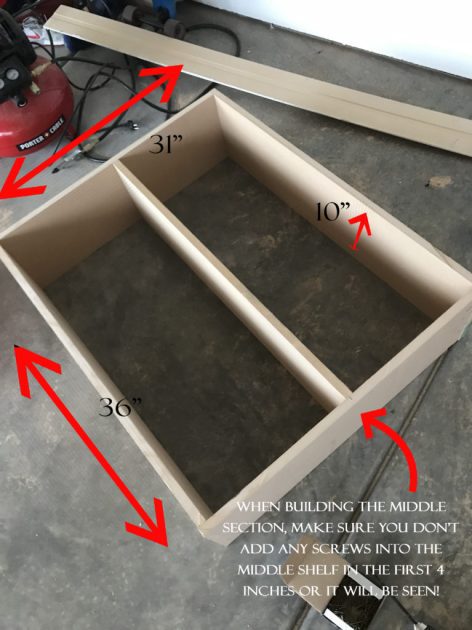
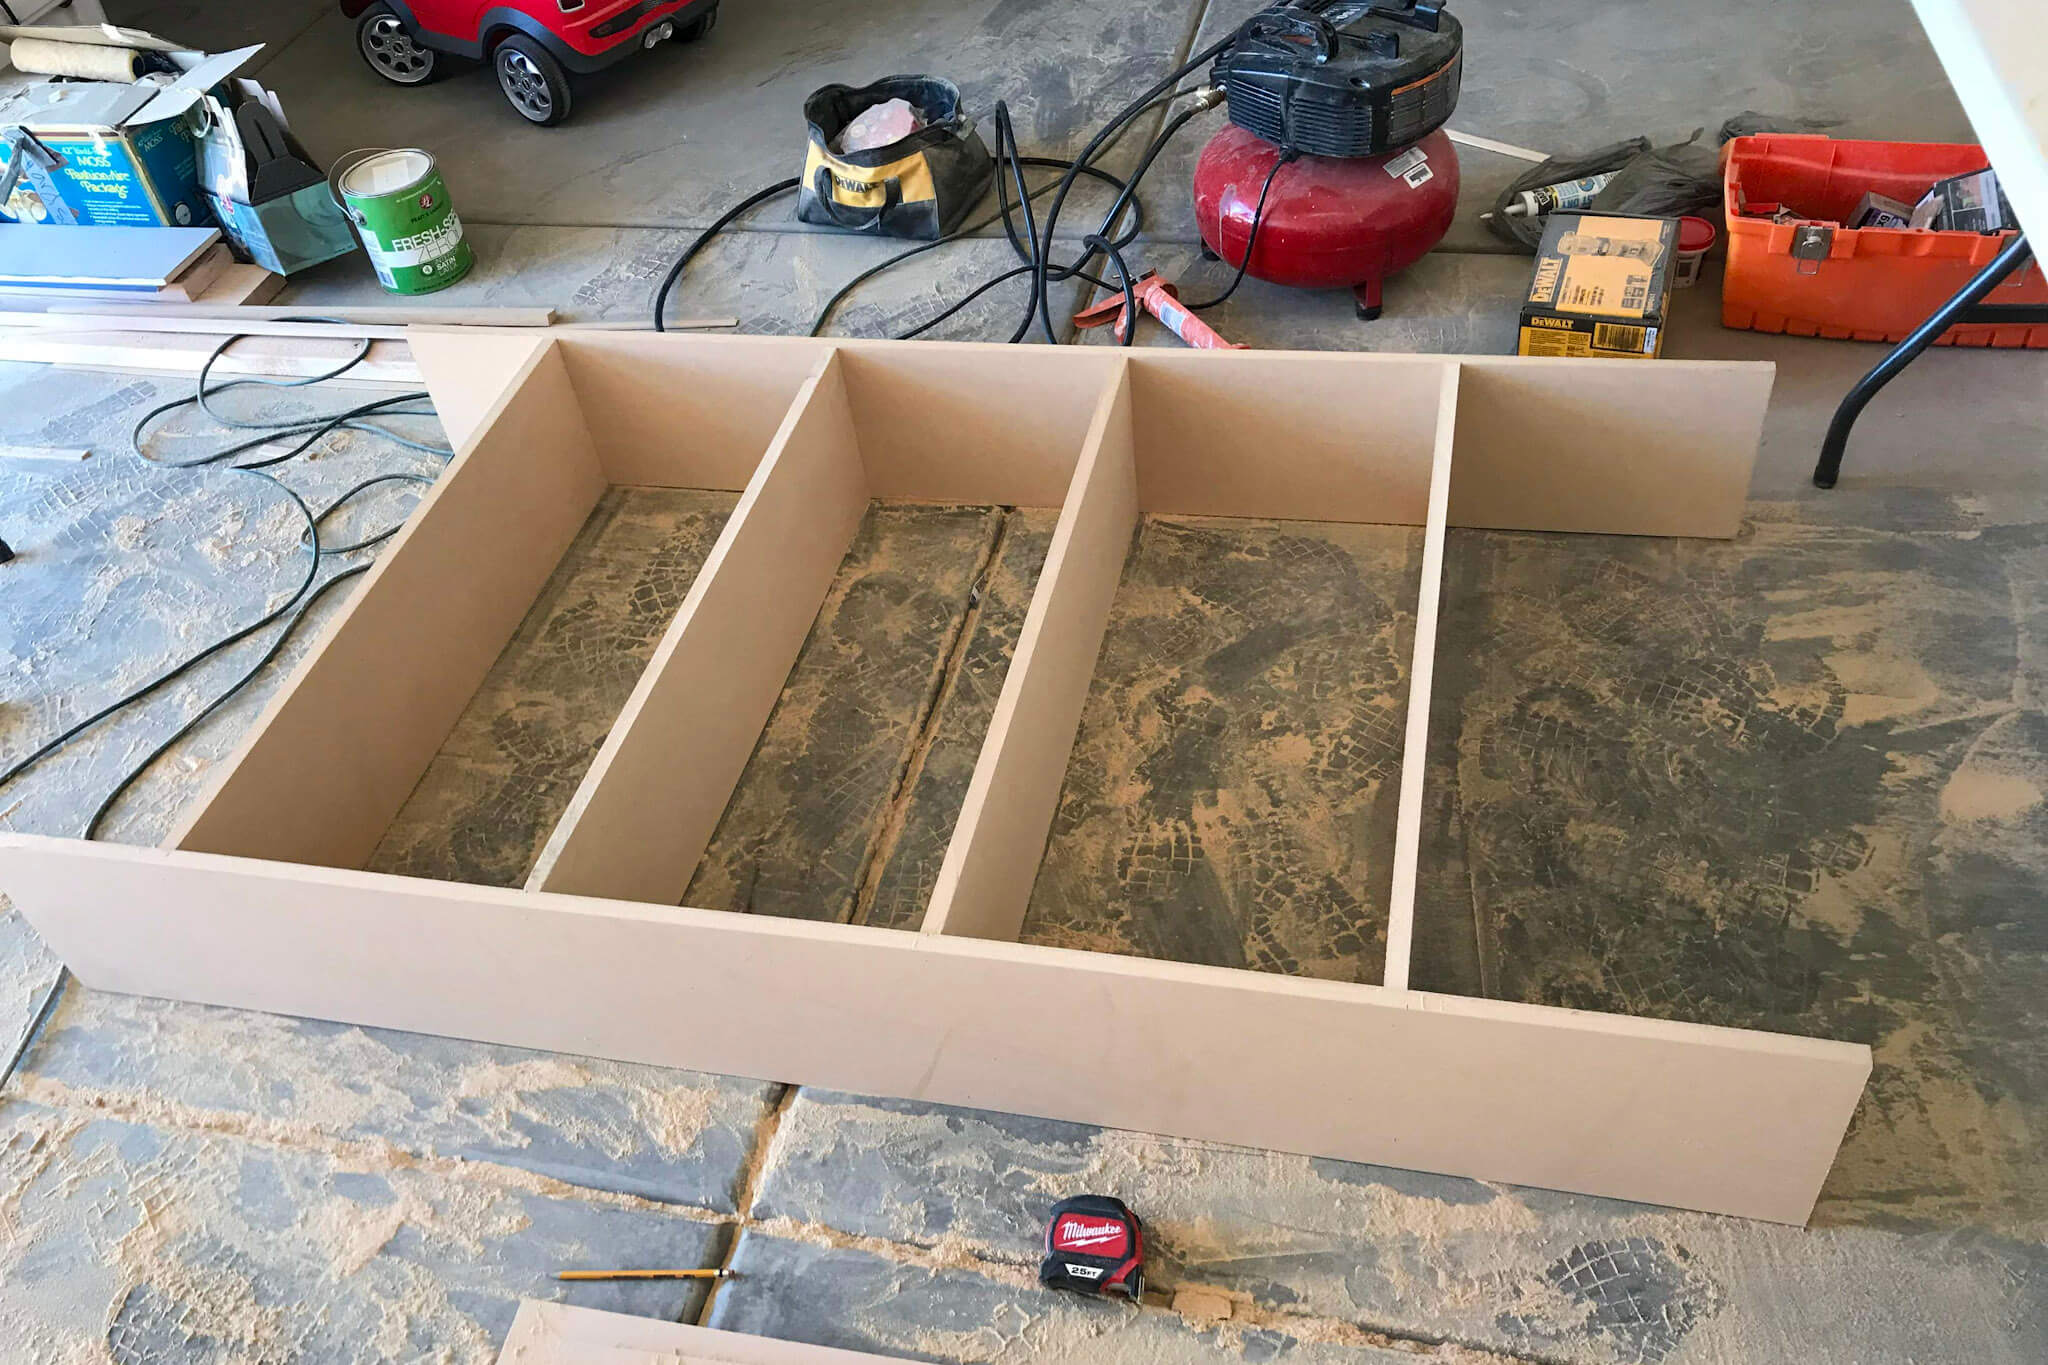
Next, I built the lower bookshelf structure from 3/4 inch MDF. Quick tip: if the shelves on your custom built ins are longer than 32 inches, MDF will bow without reinforcement. My shelves were 36 inches, so I included extra supports, which I’ll detail later.
Pro tip: if you have a table saw, this part goes a lot faster! I used a circular saw with a guide, which worked, but took longer. You can also have longer cuts made for free at Home Depot or Lowe’s when you buy your MDF there.
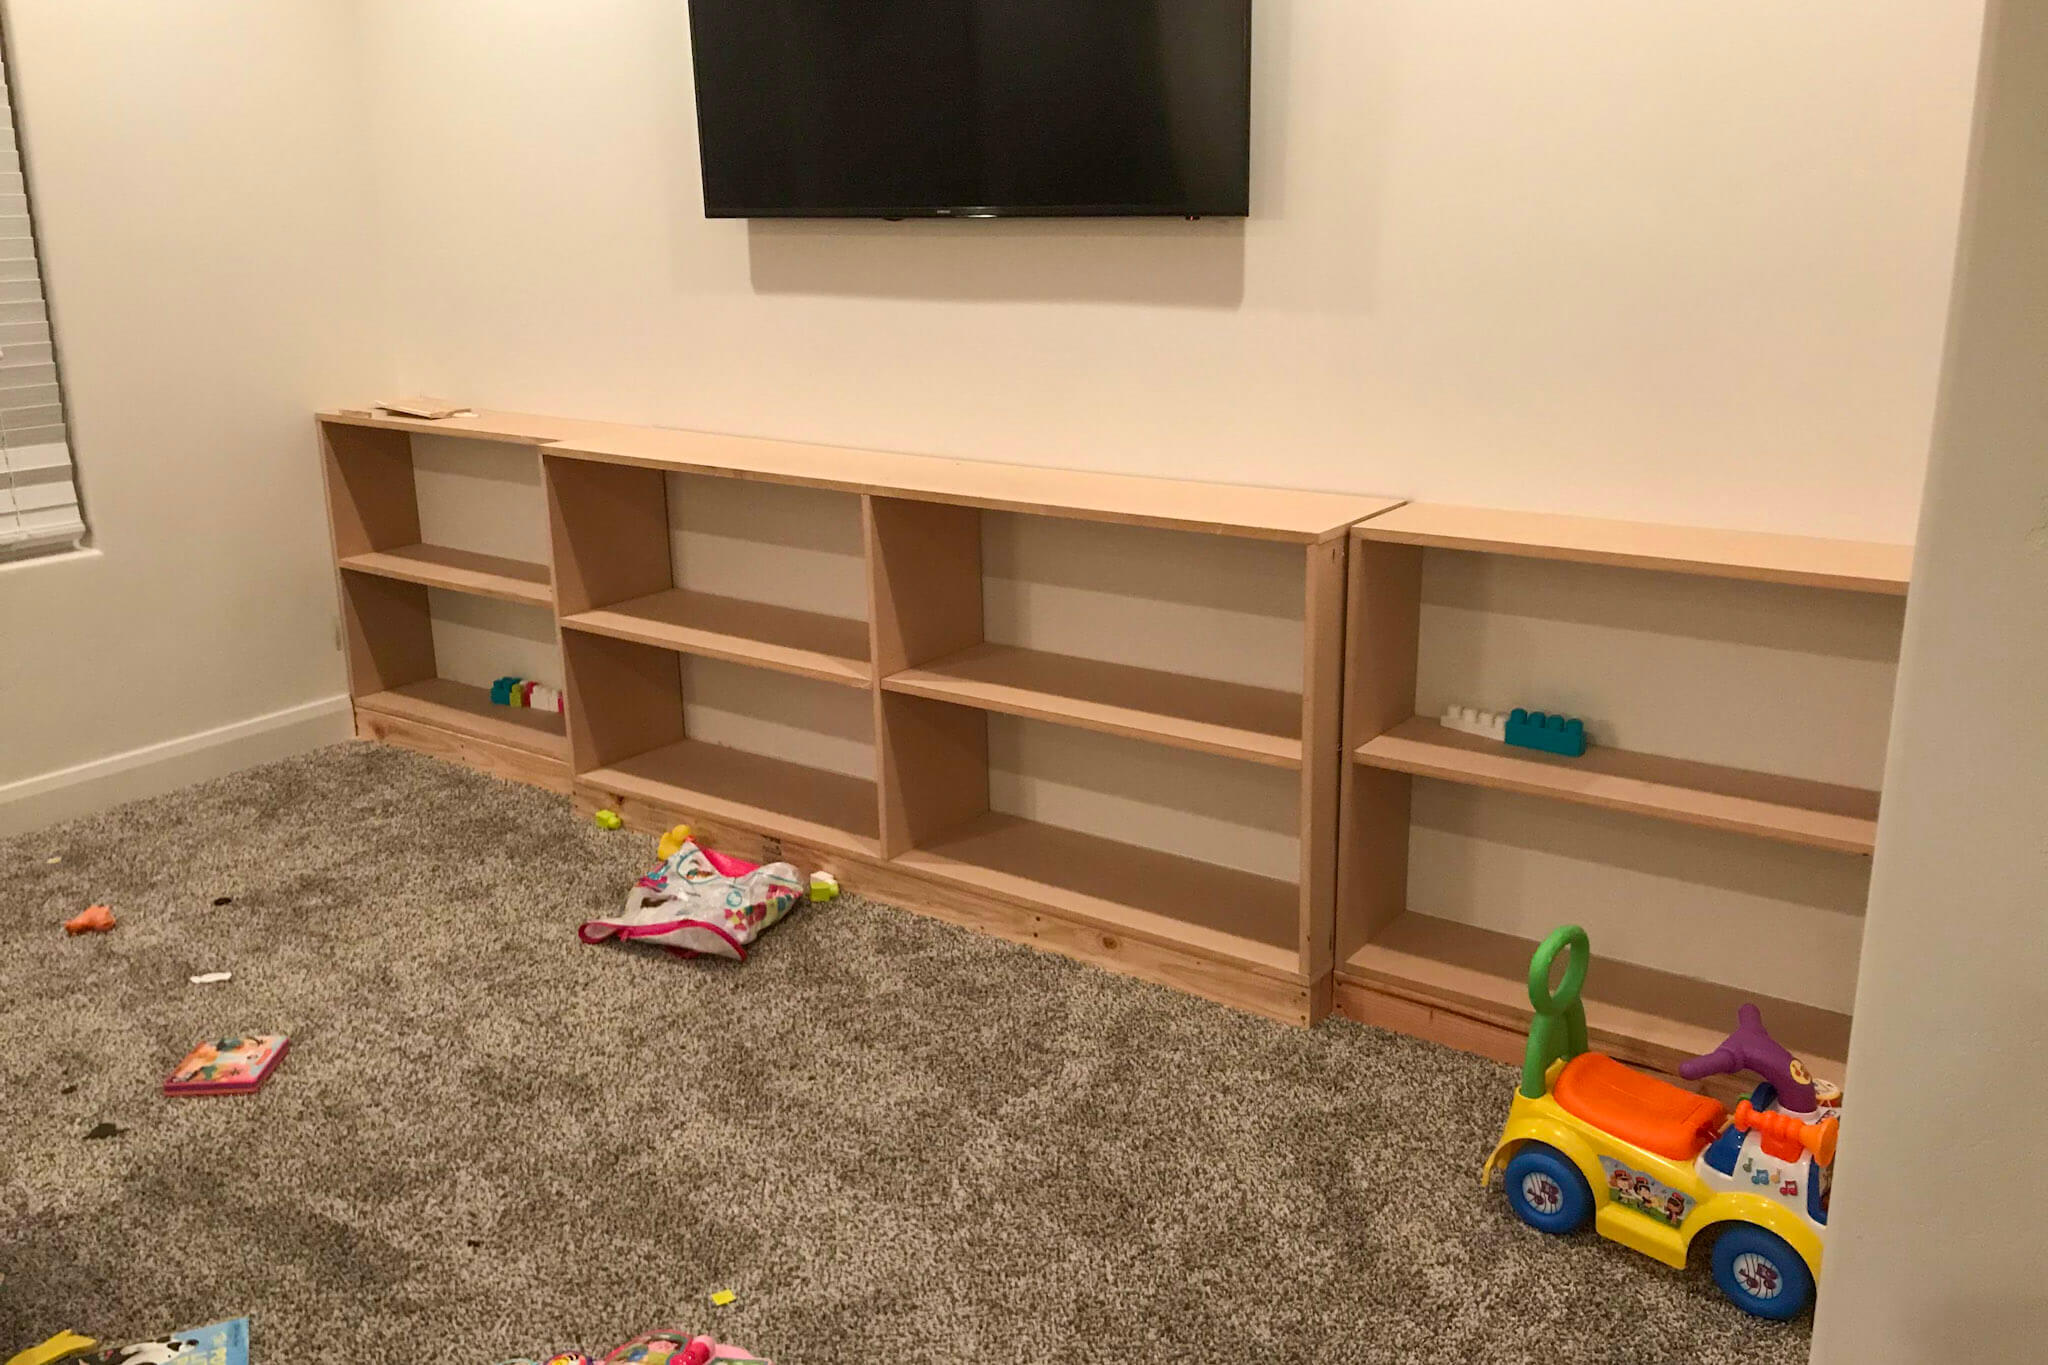
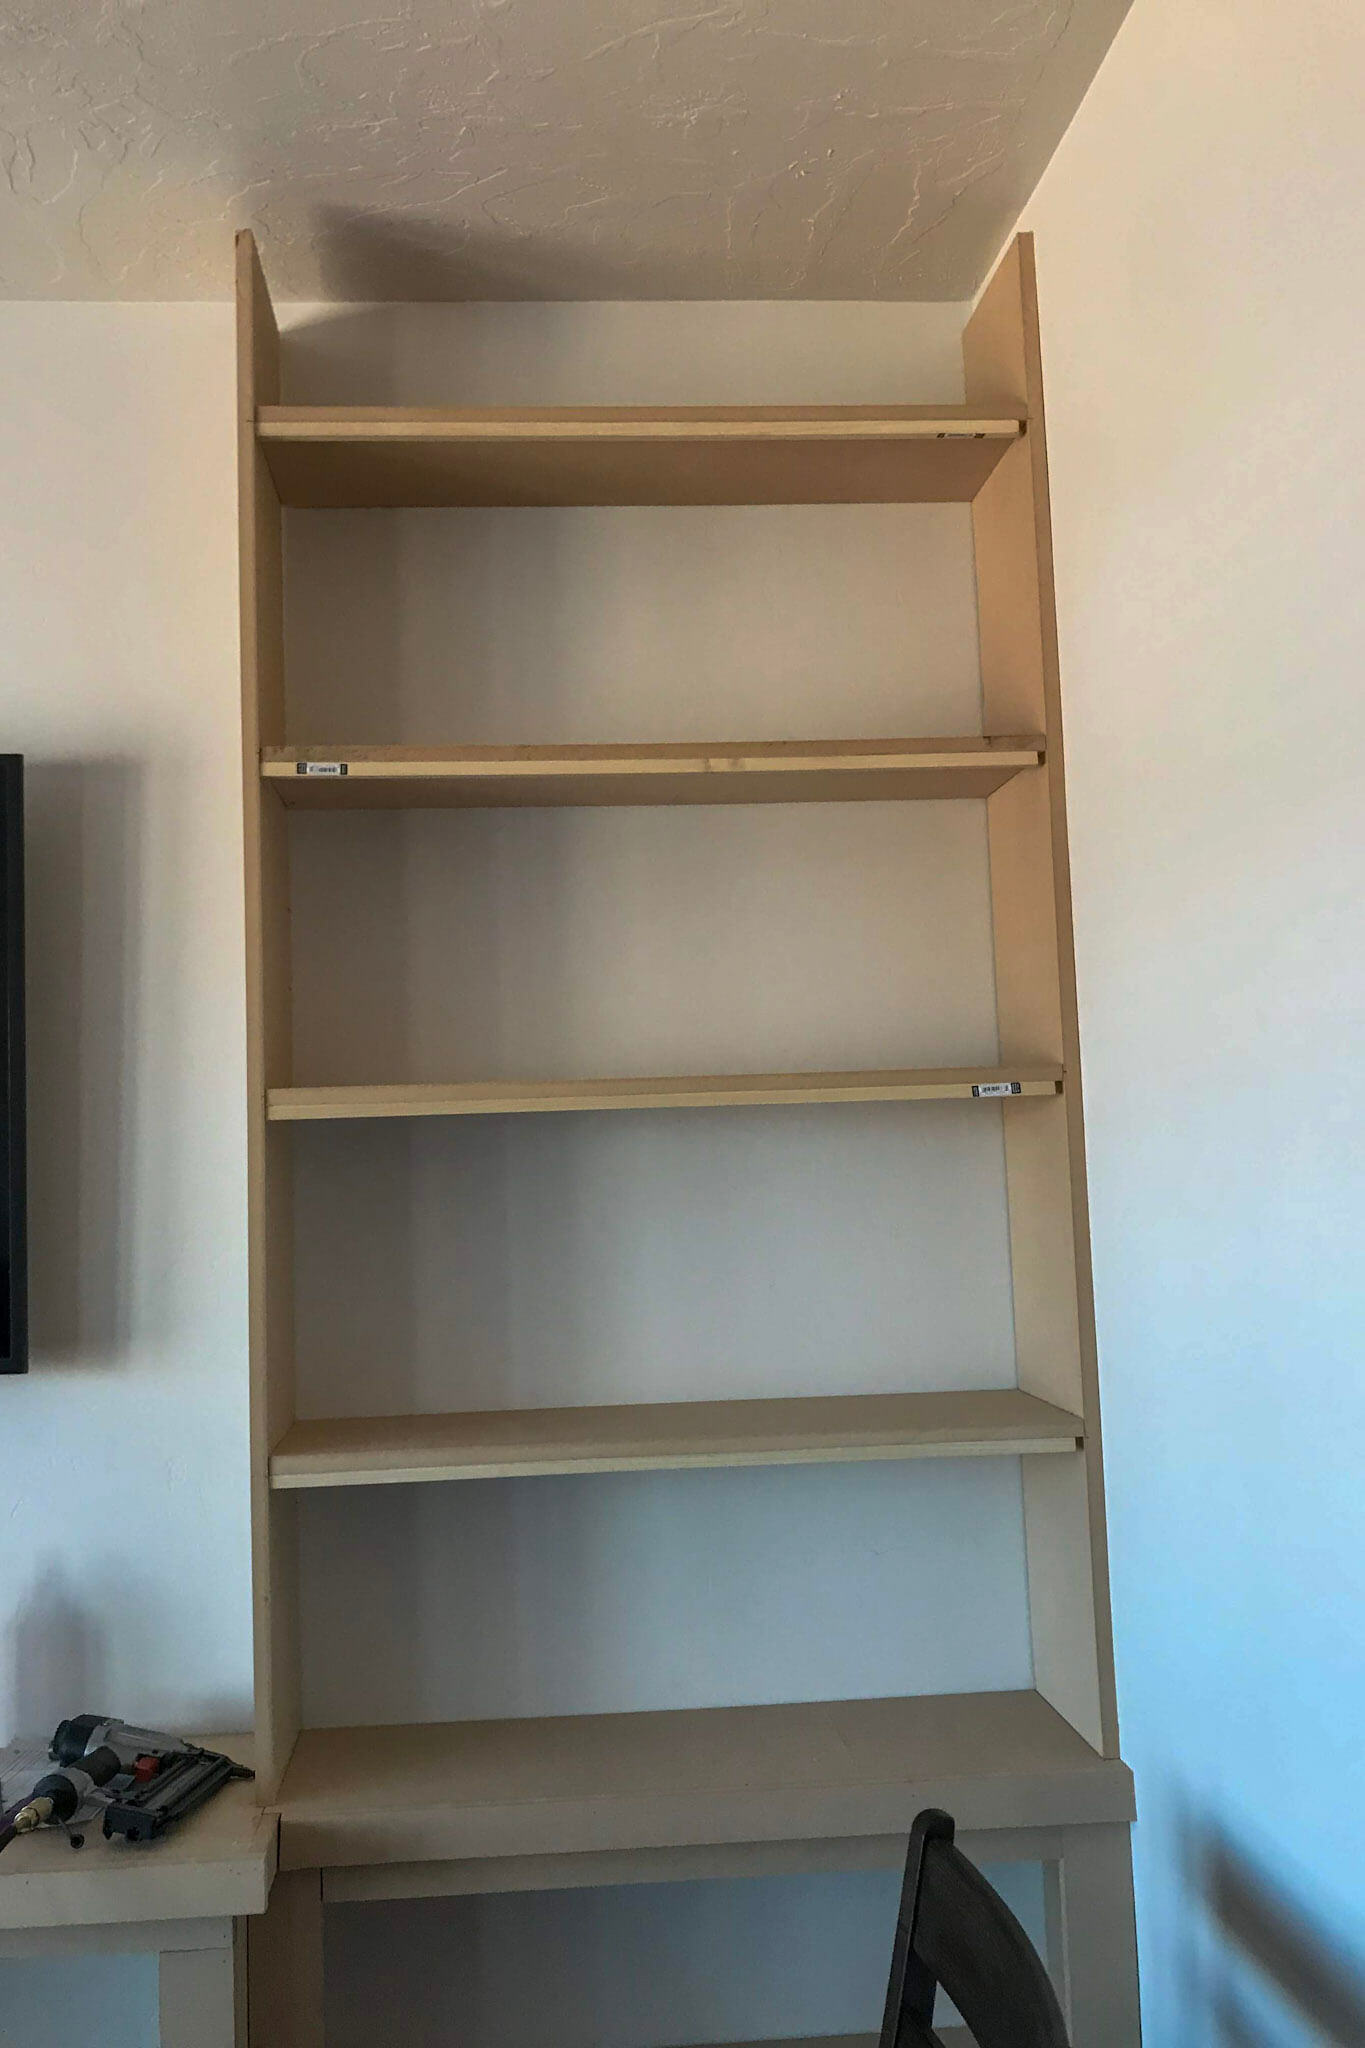
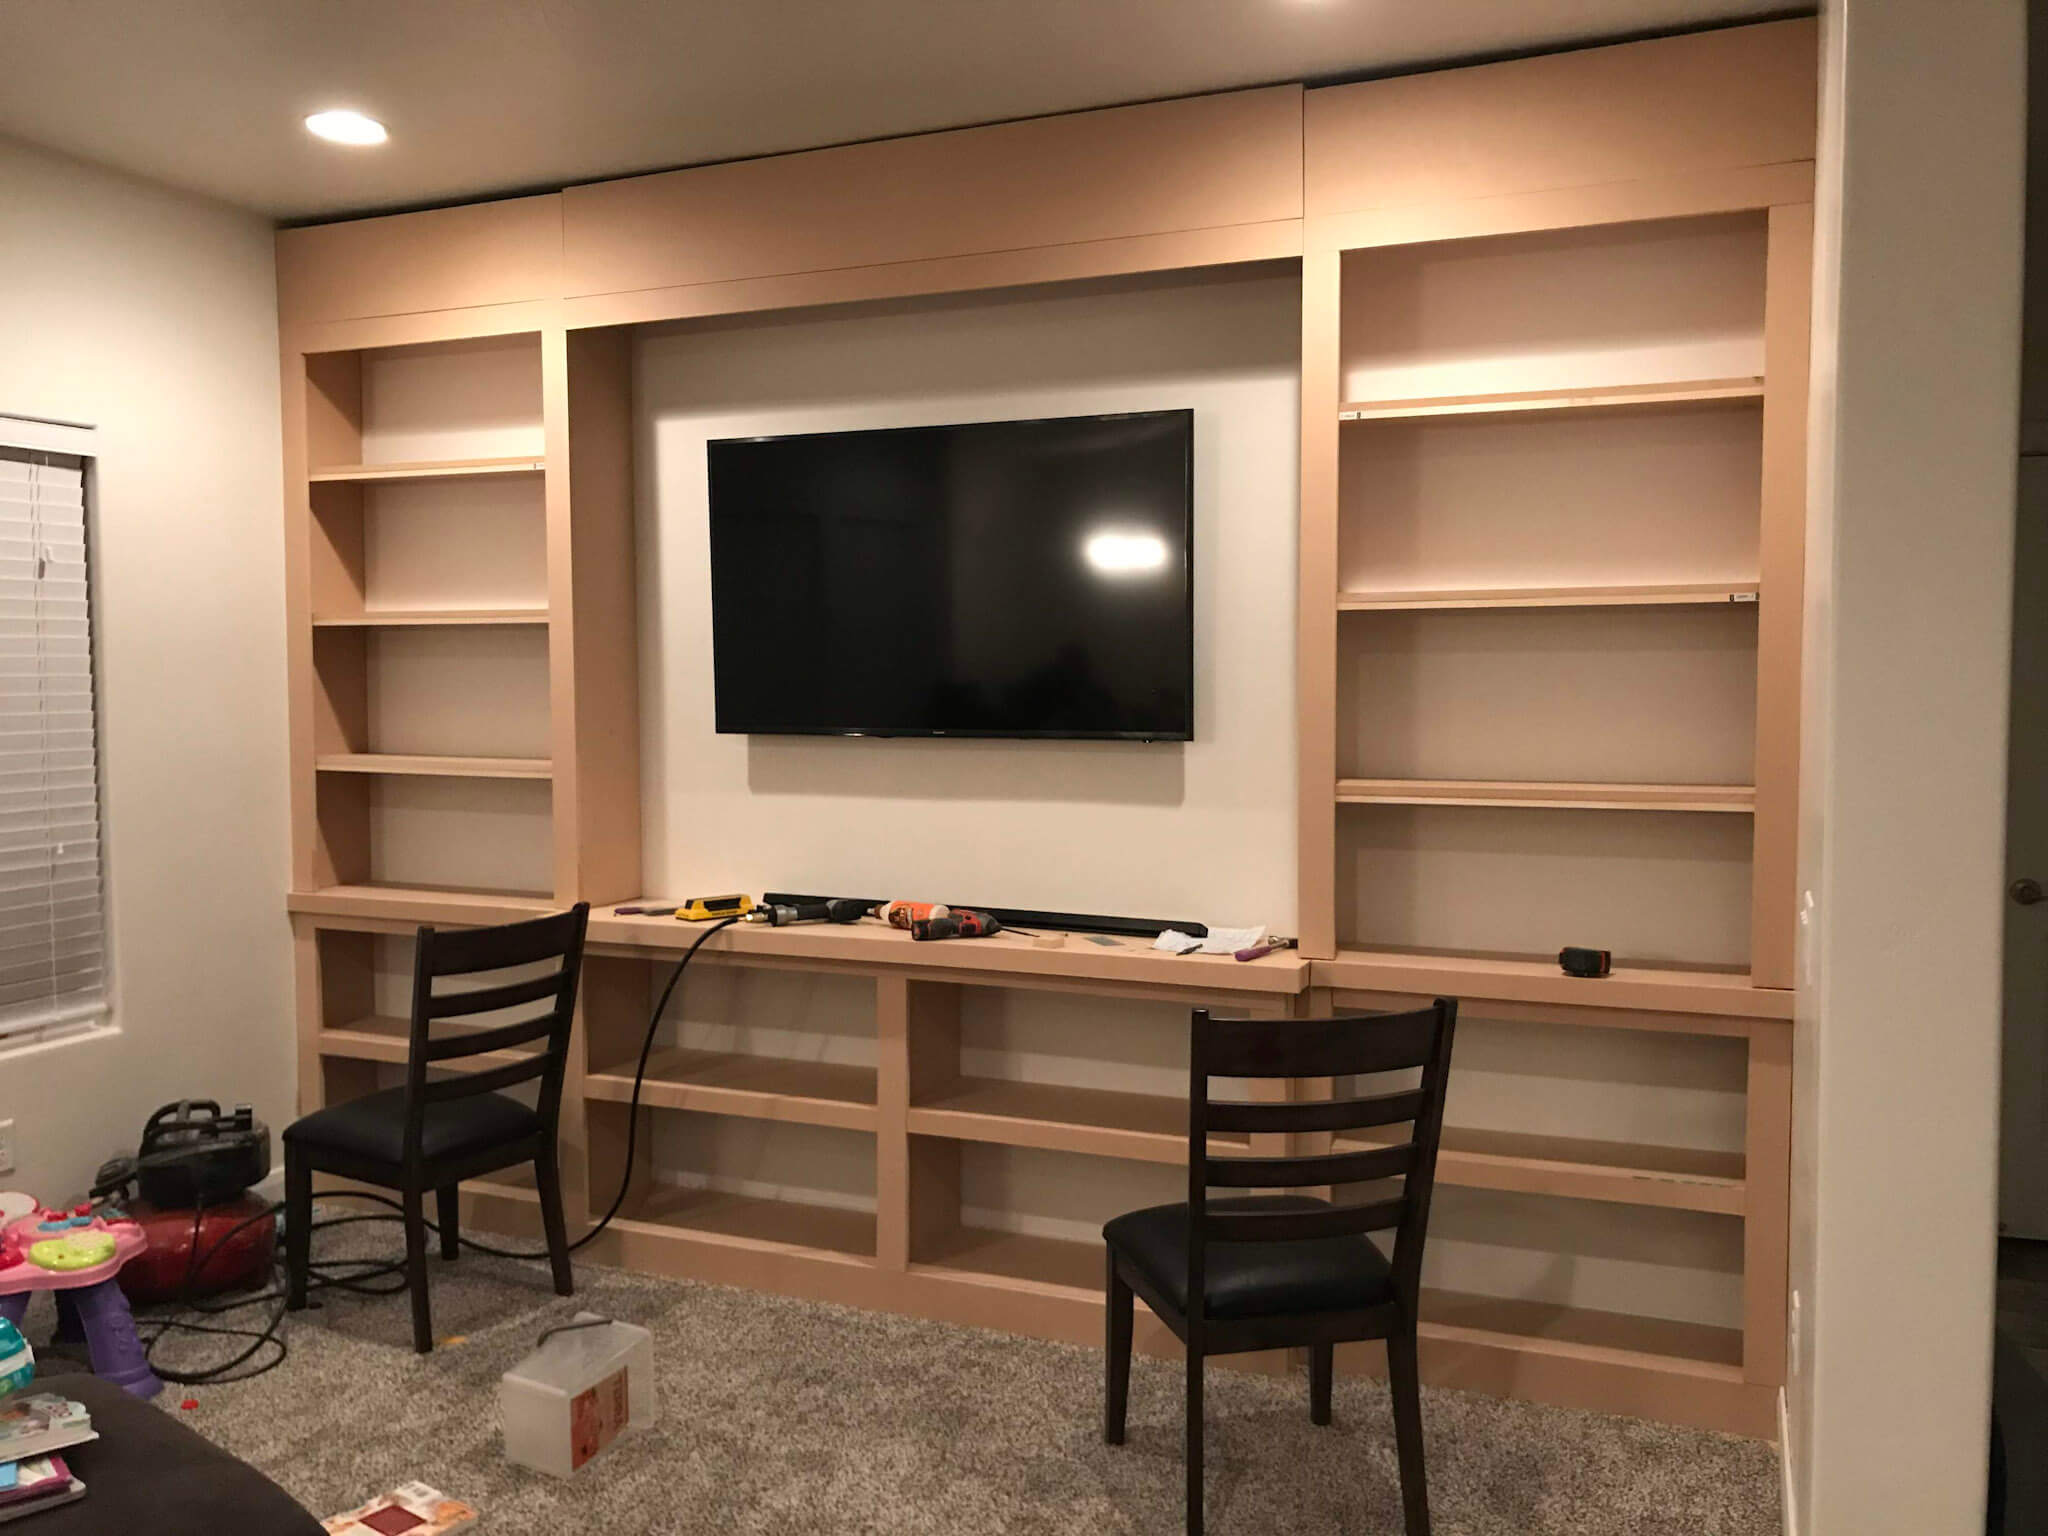
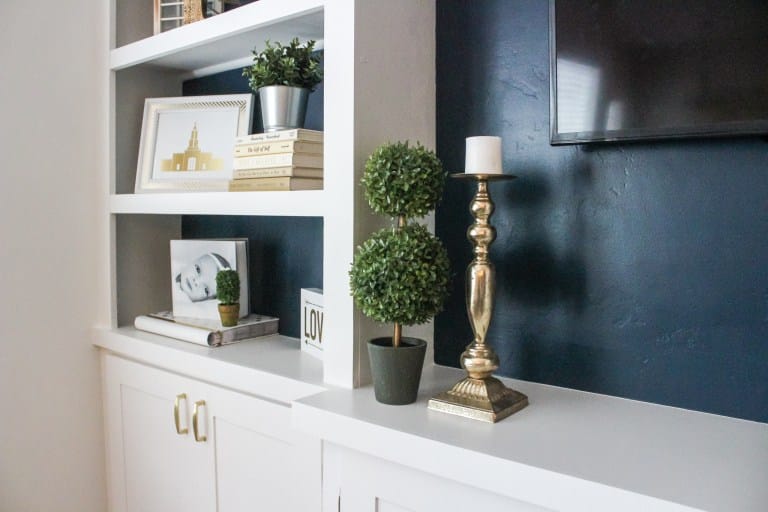
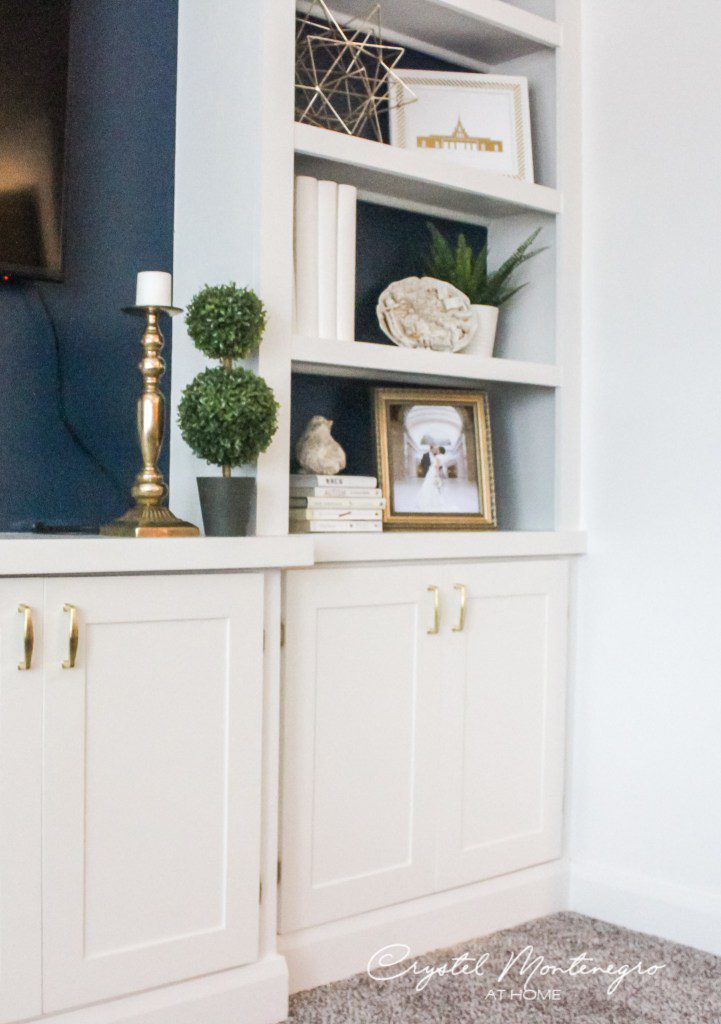
I built two identical shelving units for the sides of my custom built ins. The side sections were 10 inches deep, while the center section was 14 inches deep, with a total width of 72 inches. I attached the shelves with a combination of brad nails and screws, being mindful of screw placement to avoid visible marks—especially in the middle section.
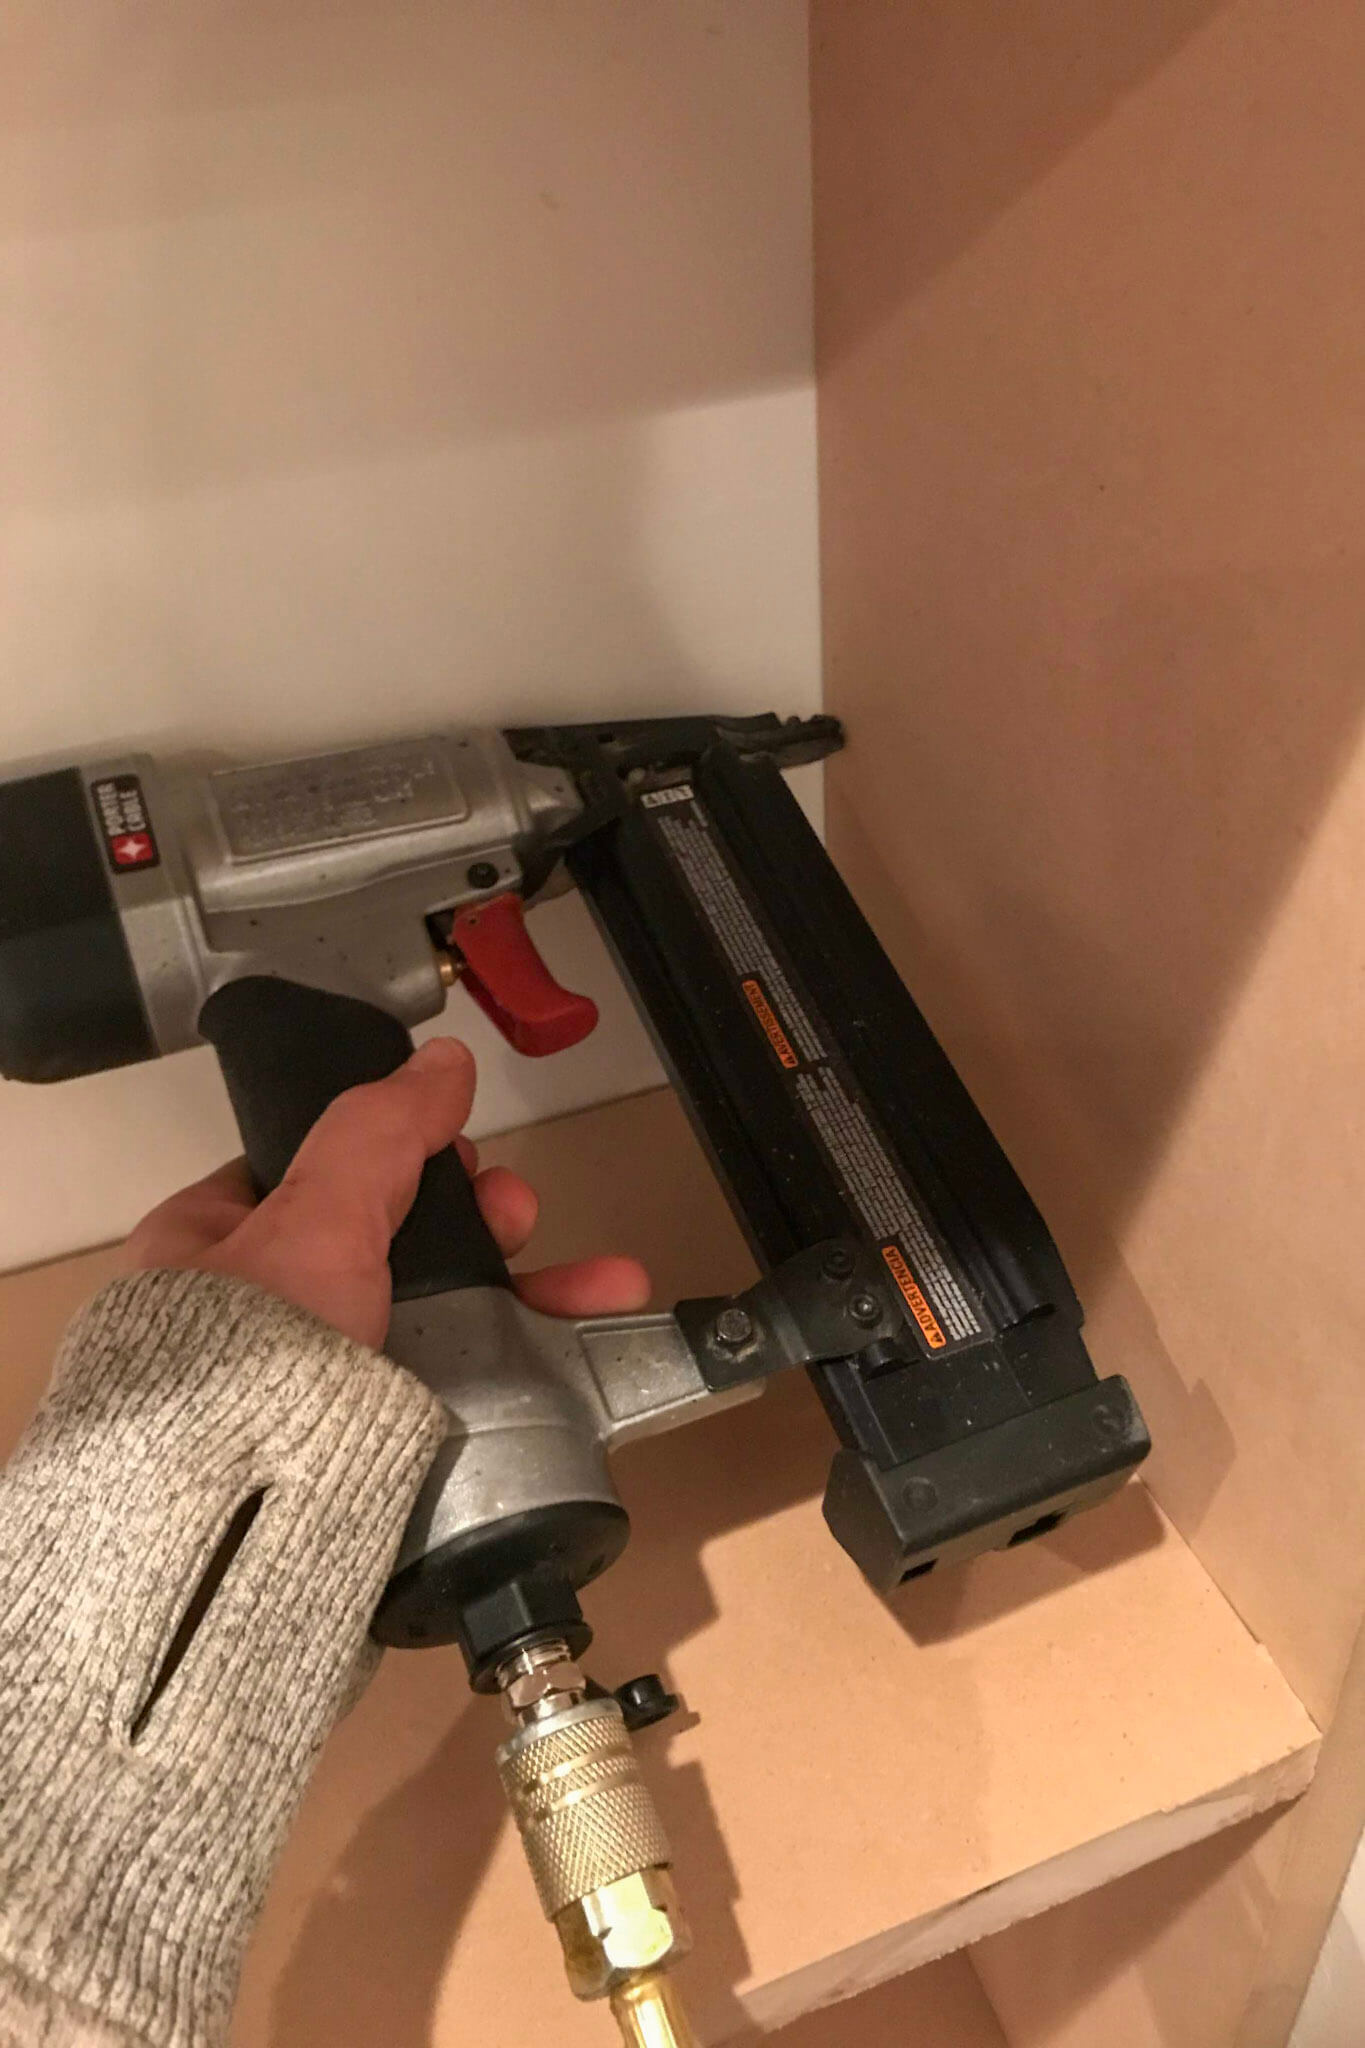
Next, I attached my shelving units to the wall using screws where they wouldn’t be seen in upper corners and brad nails everywhere else there was a stud in the wall.
Now looky here! Things are starting to get exciting! Also, don’t forget to attach the shelving units to EACH OTHER as well.
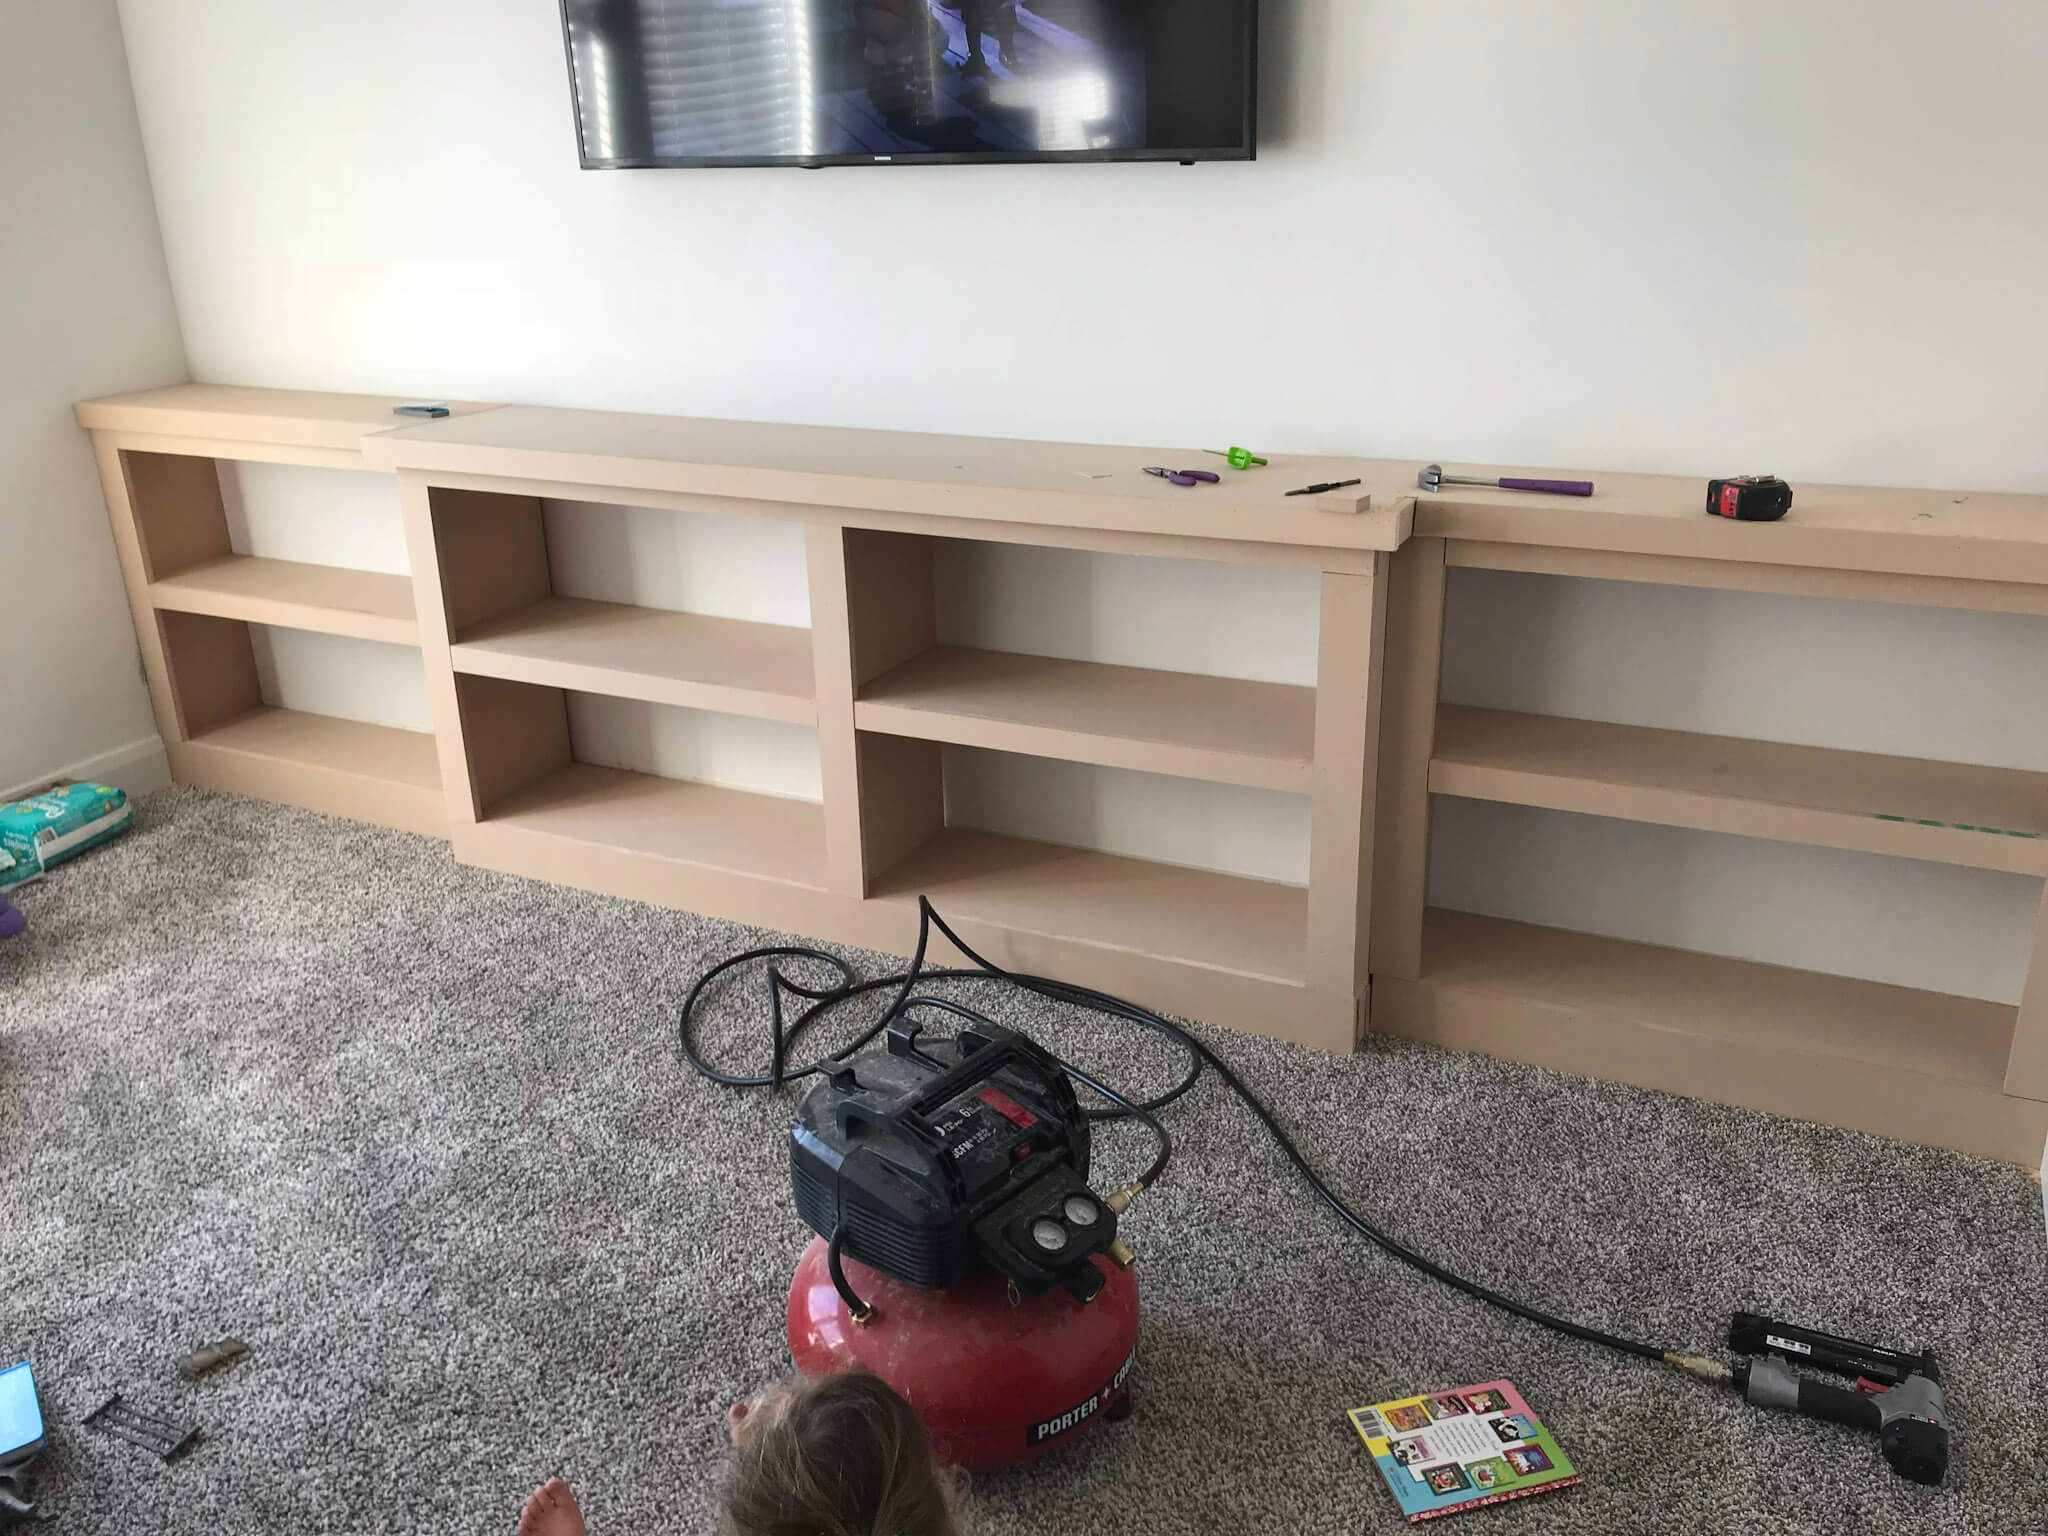
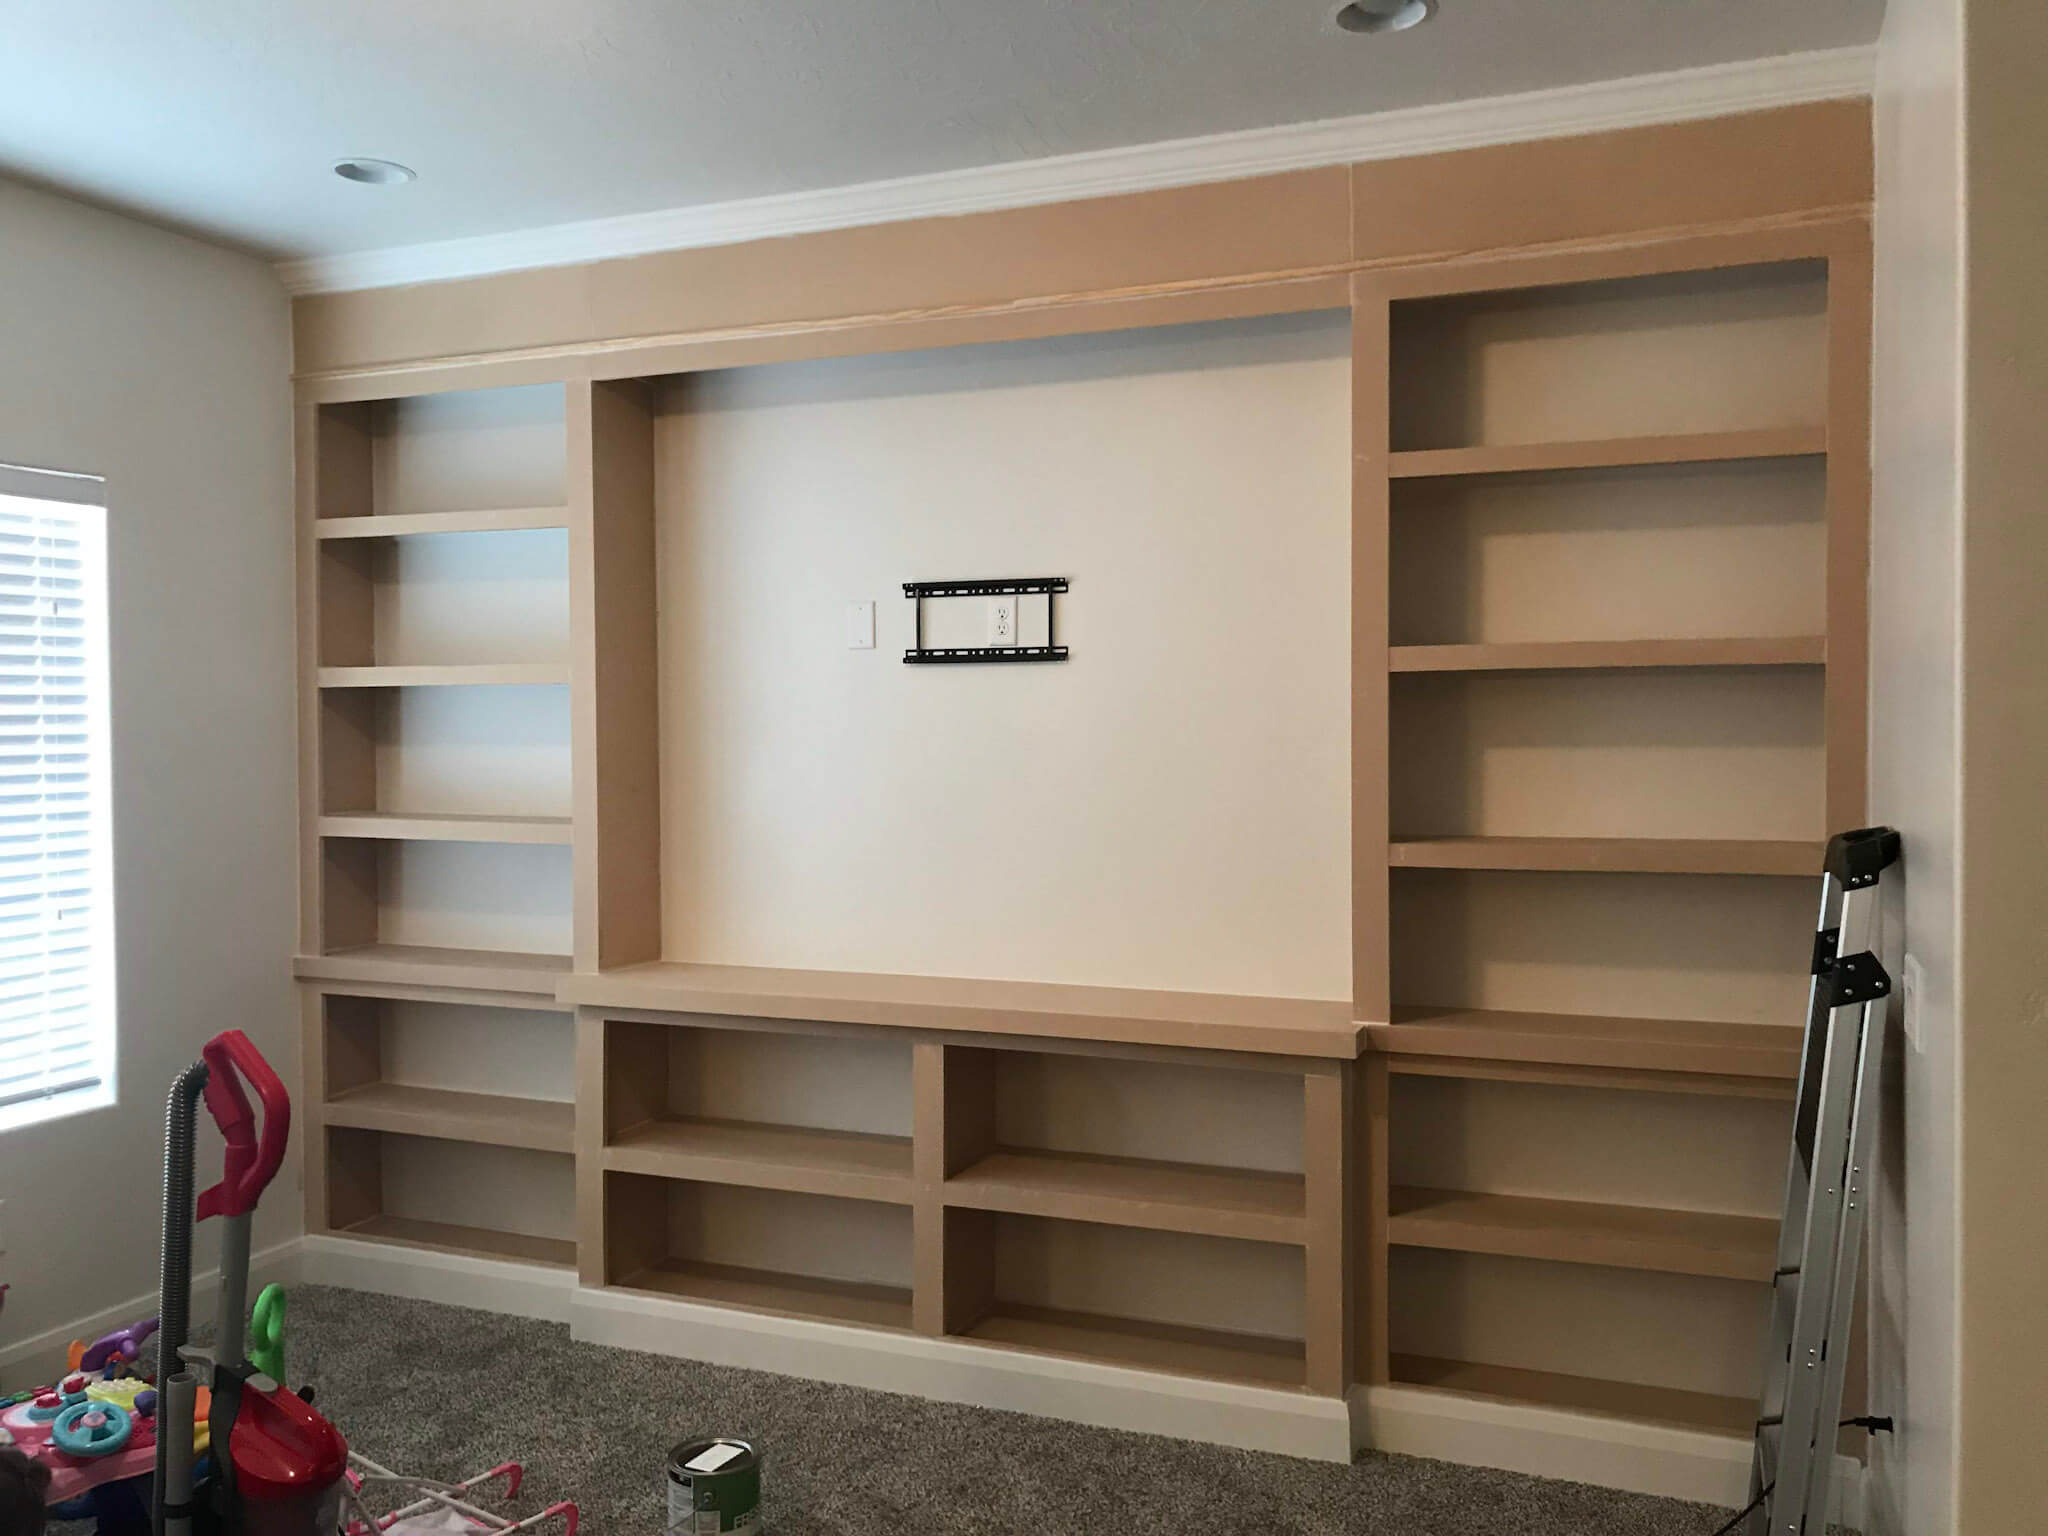
Before moving to the upper shelves, I trimmed the lower portion. I used 3-inch strips of MDF for the sides and brad-nailed and glued them to frame out the sides of the bookshelves. I used 2-inch strips for dividing the shelves, and 4-inch strips for the base where the baseboard would go.
For the countertop, I layered MDF and trimmed it out.
Note: MDF is NOT the best material to use for a counter top on custom built ins. If it gets wet (i.e. someone sets a cold glass of water on it) the MDF will swell. I used several layers of this clear coat to water-proof the counter top. If possible, the top should be made of solid wood or another sturdy material. Another option would be to use MDF that has been laminated.
PS Note: I would also NOT recommend building the face frame of custom built ins with MDF. This should be done with solid wood (which can be done inexpensively by using pine or whitewood). The MDF just isn’t solid enough to hold the hinges in place for very long, with the doors constantly swinging open and closed. Wood is much better suited for this and will last longer.
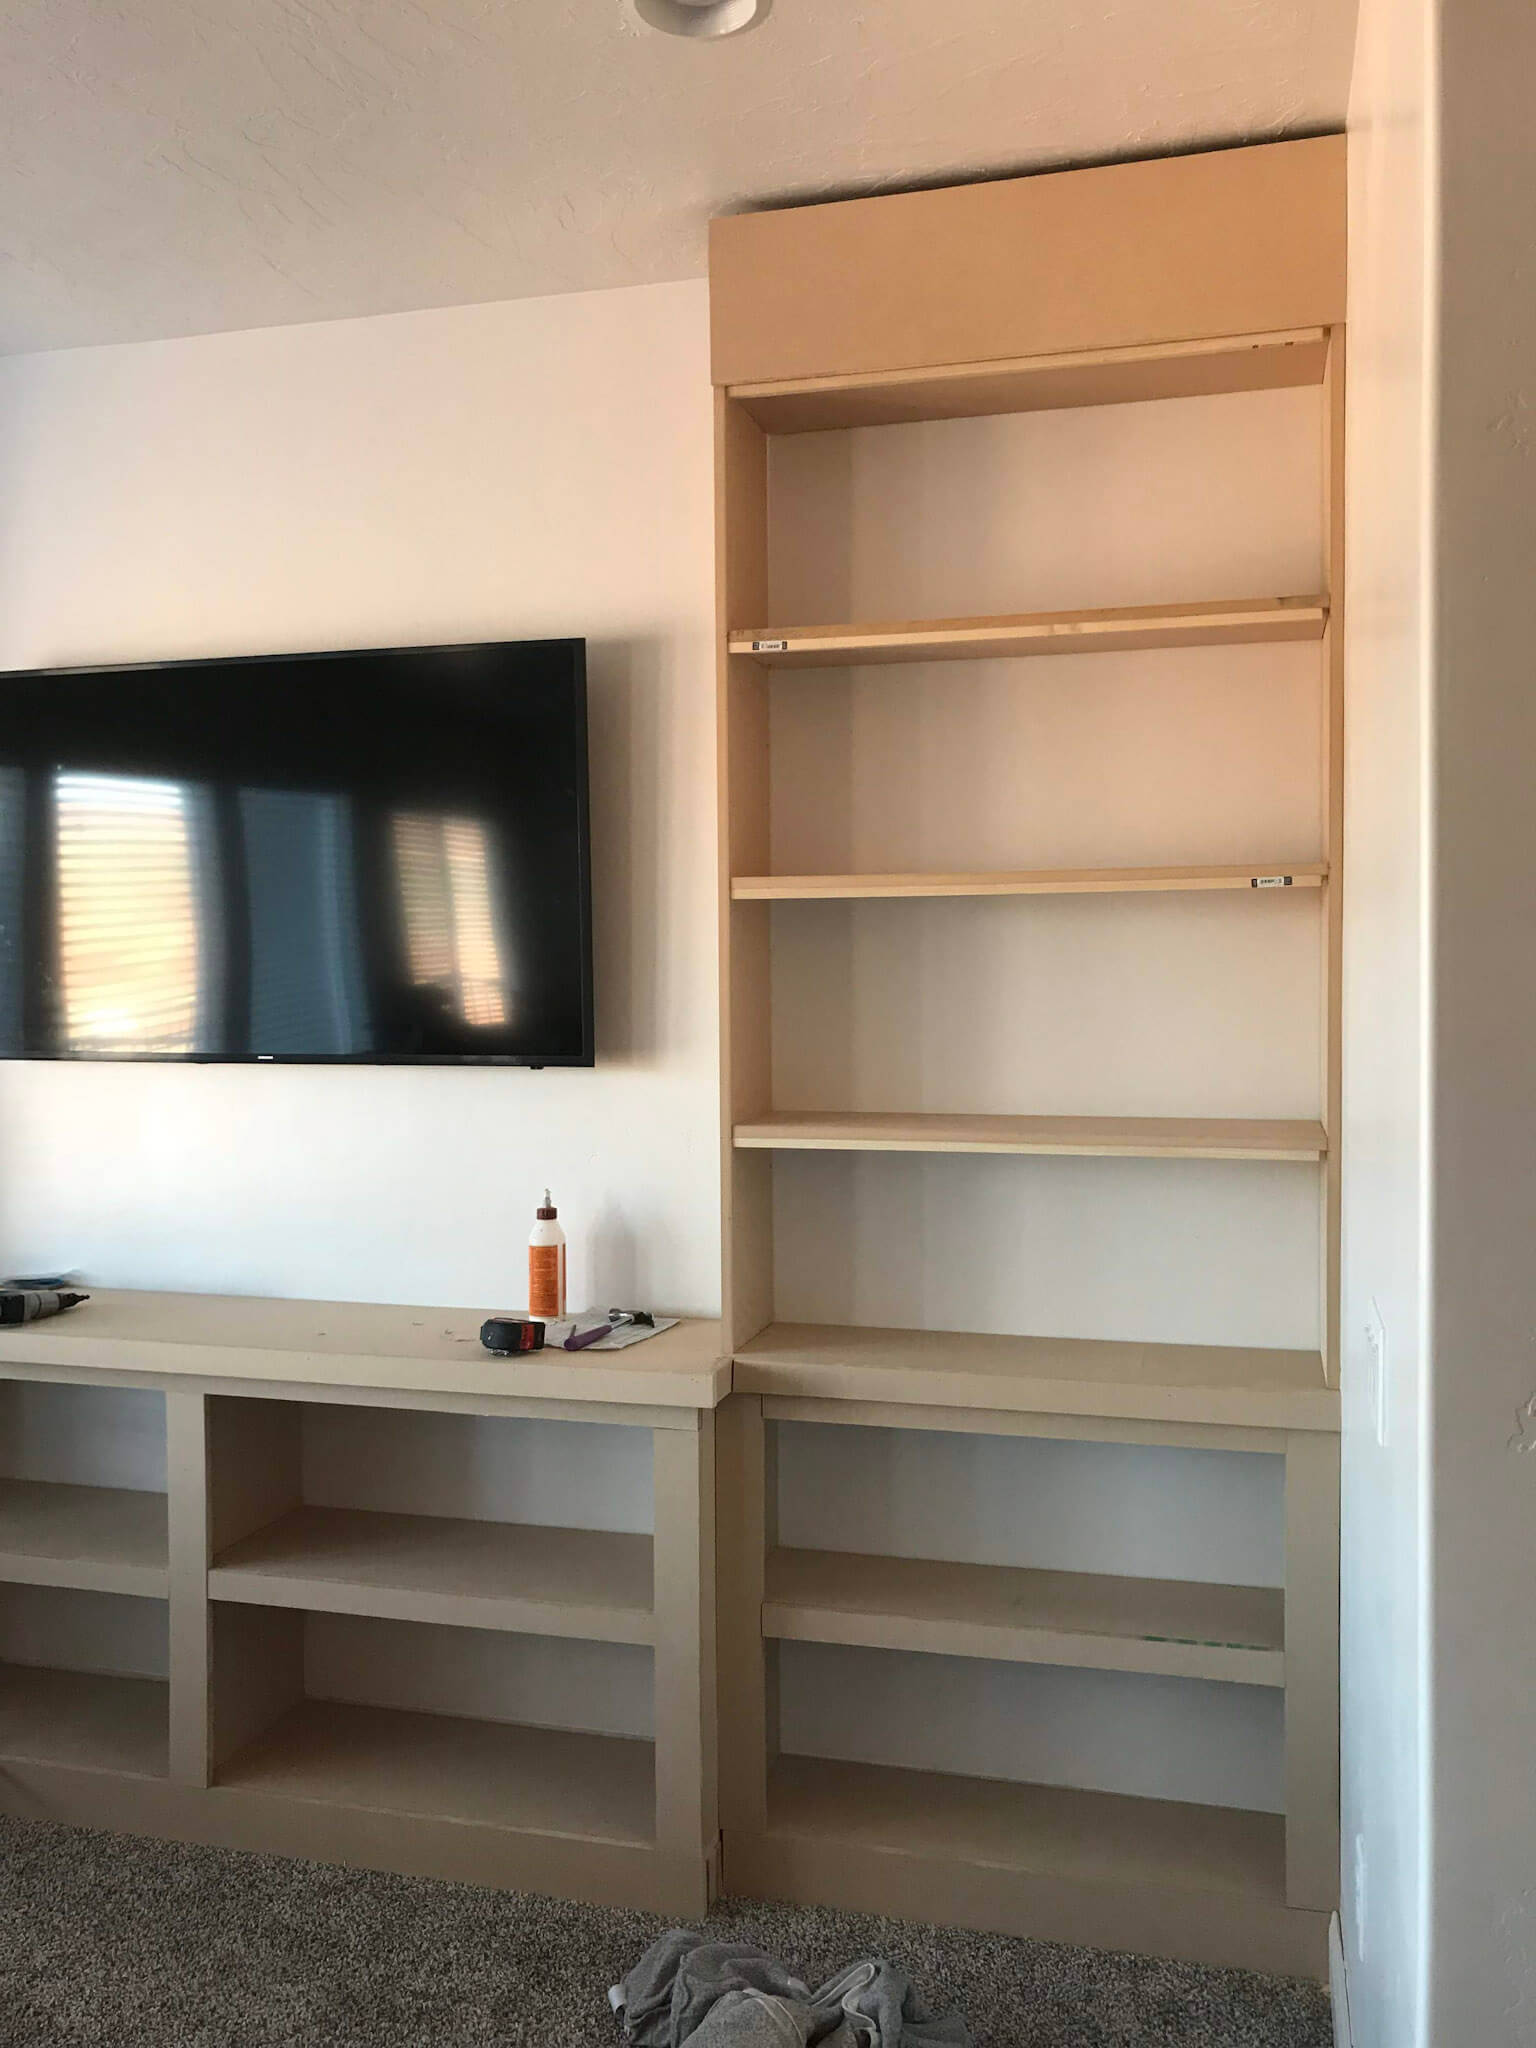
Upper Shelving in the Custom Built Ins
The upper shelving of the custom built ins followed the same process. I attached each unit to the wall and frame using screws on the sides that were going to be up against the wall. Along the way I ensured everything was level and square.
I attached these to the studs in the wall, this time only using long brad nails.
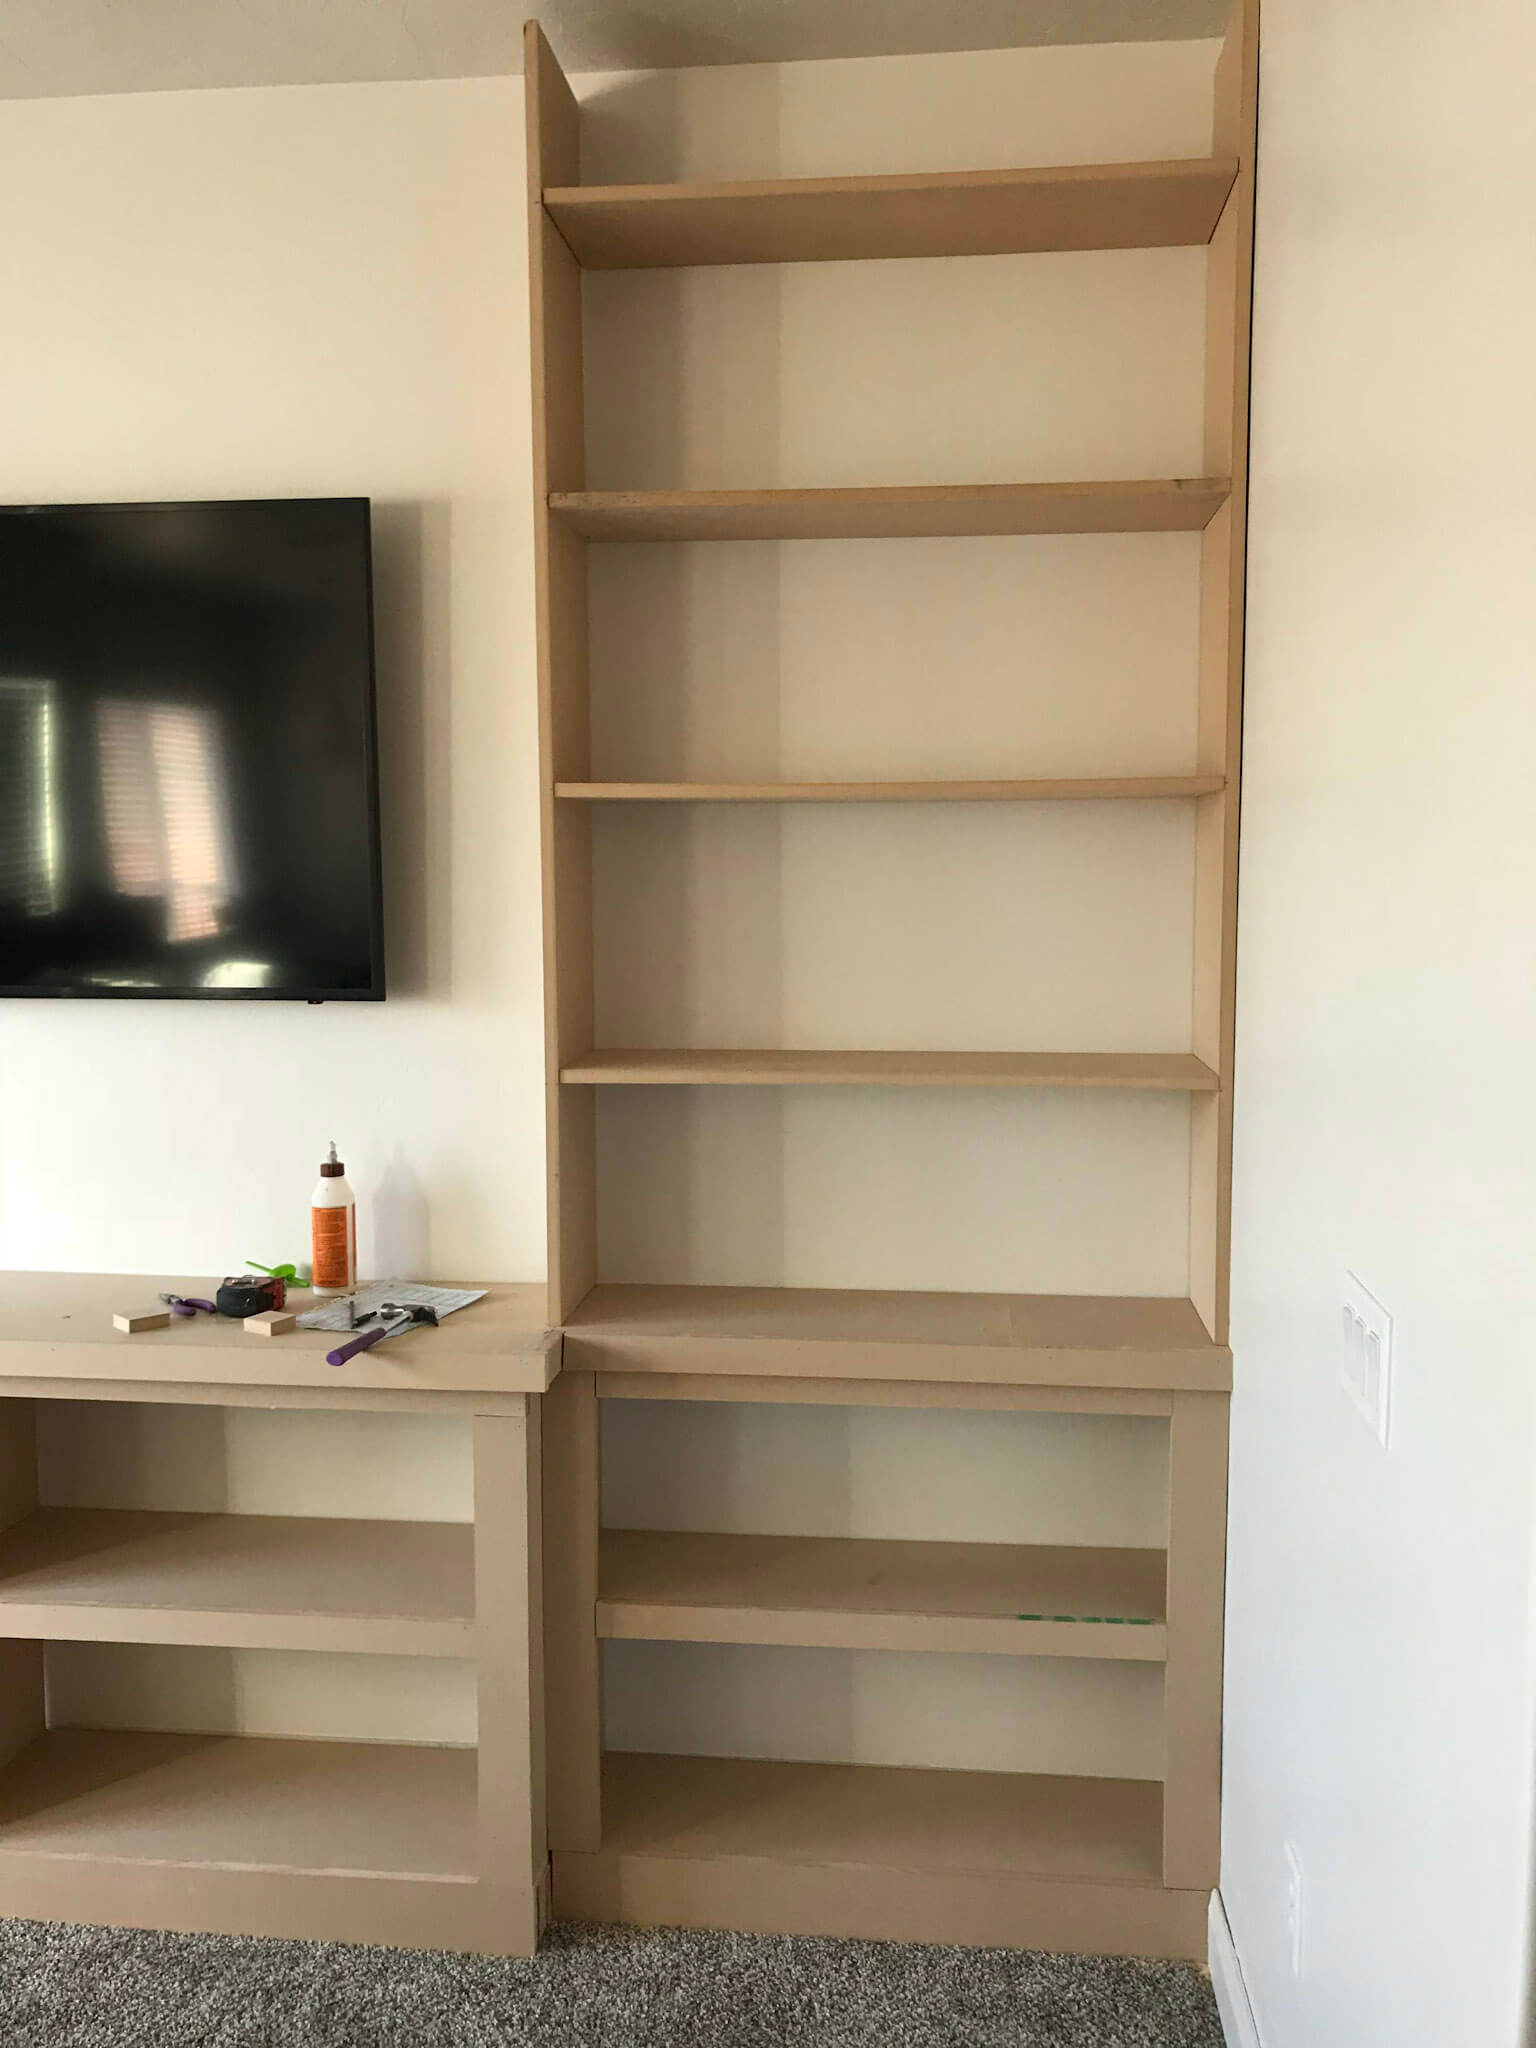
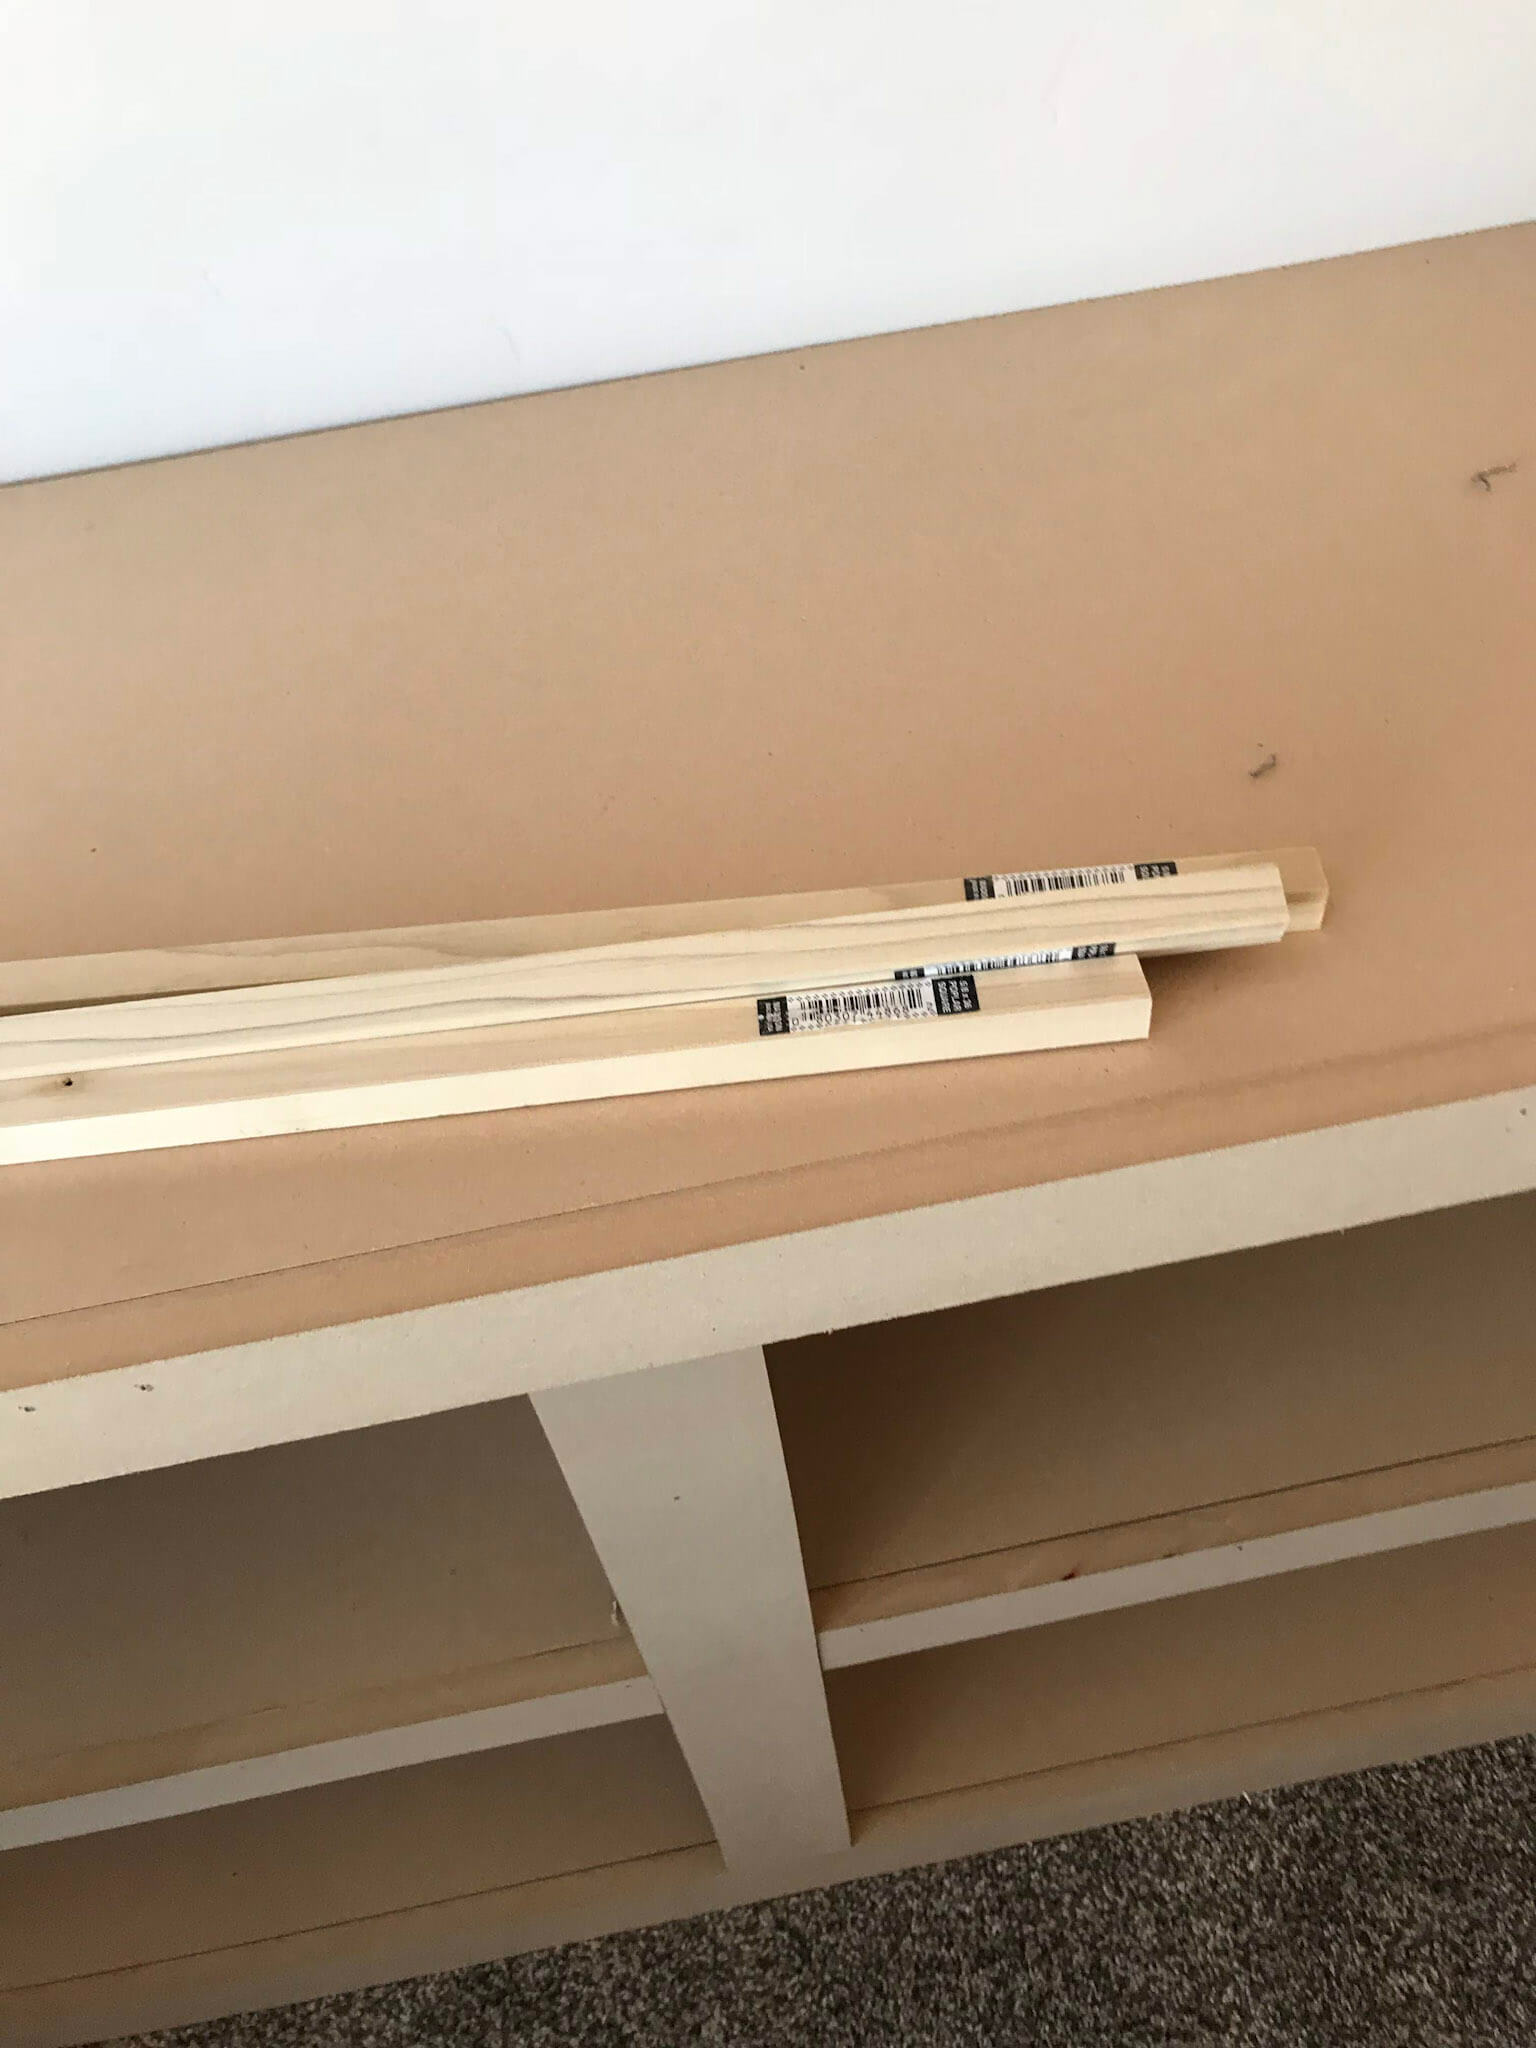
I used long square wooden dowels, lined them up underneath each shelf with the front of each shelf, and used brad nails to secure them. I also did this with the shelves in the lower portion that I had already covered with the frame.
I didn’t take a picture of it, but I also used strips of quarter-round to brace up the back of the shelves. I chose quarter-round because it would be seen, and it makes for a nice-looking trim on custom built ins.
Trimming Out My Custom Built Ins
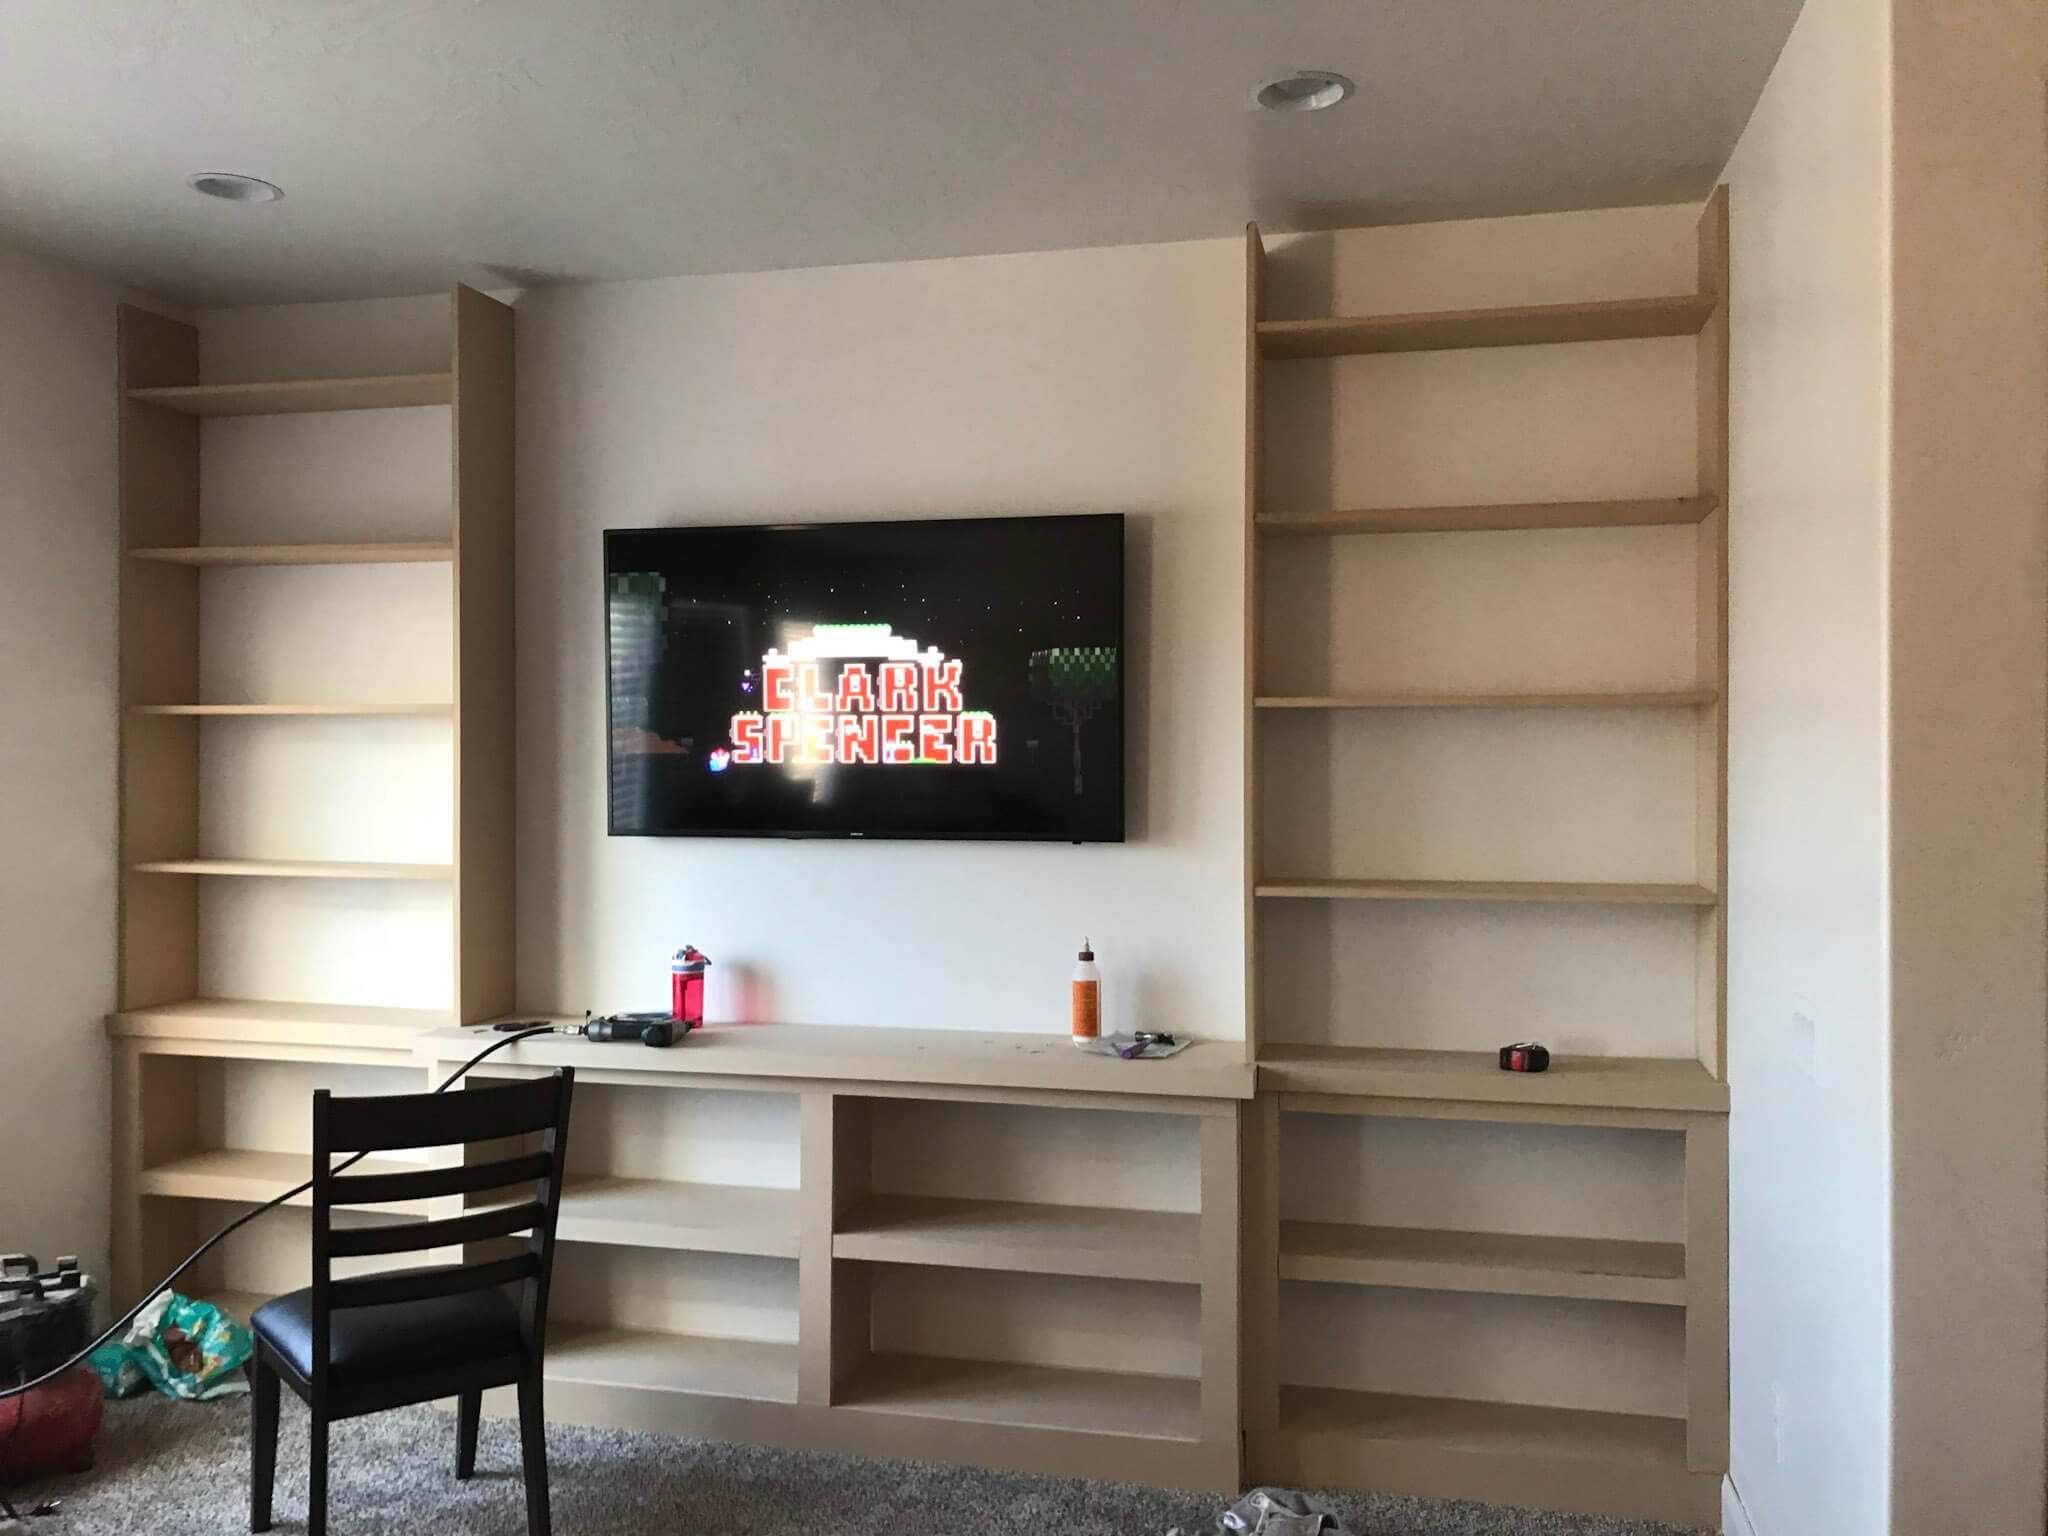
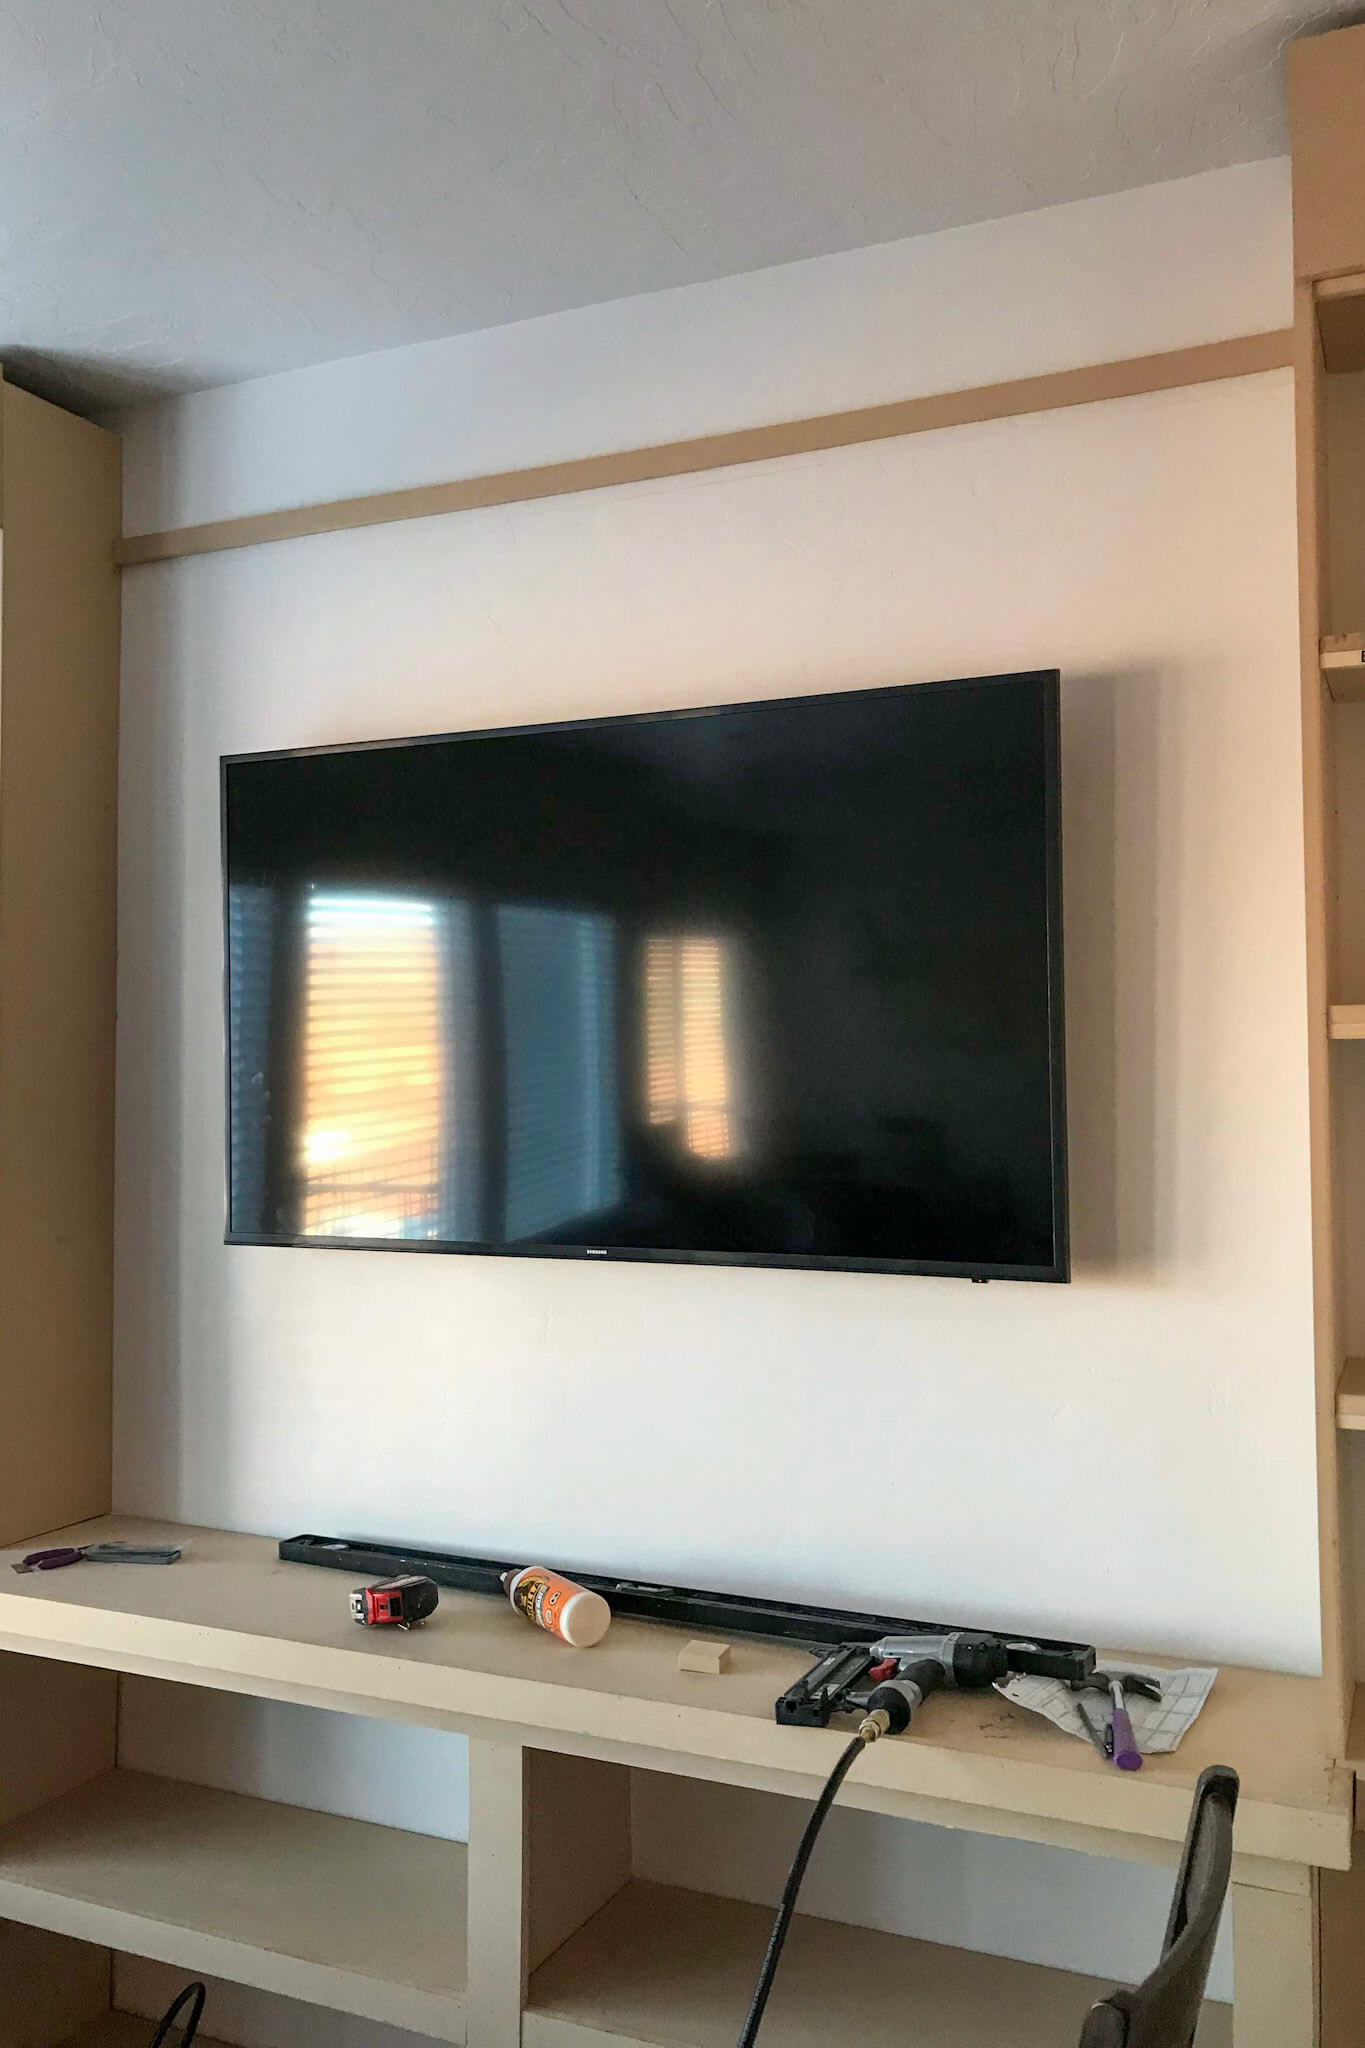
Next, I cut and nailed on my header boards. I wasn’t too concerned with getting them to the ceiling because I knew I’d cover the gaps with crown molding on these custom built ins.
Up until this point, my niece was undecided about extending the header across the entire length of the custom built ins. I thought it would add a nice touch, so I convinced her to go for it. If I had known we were going to do it from the start, I probably would have extended it across the tops of the side bookshelves for additional support. Instead, I improvised by running cleats along the wall and the sides of the bookshelves, securing them to the wall studs, and framing the header from there.
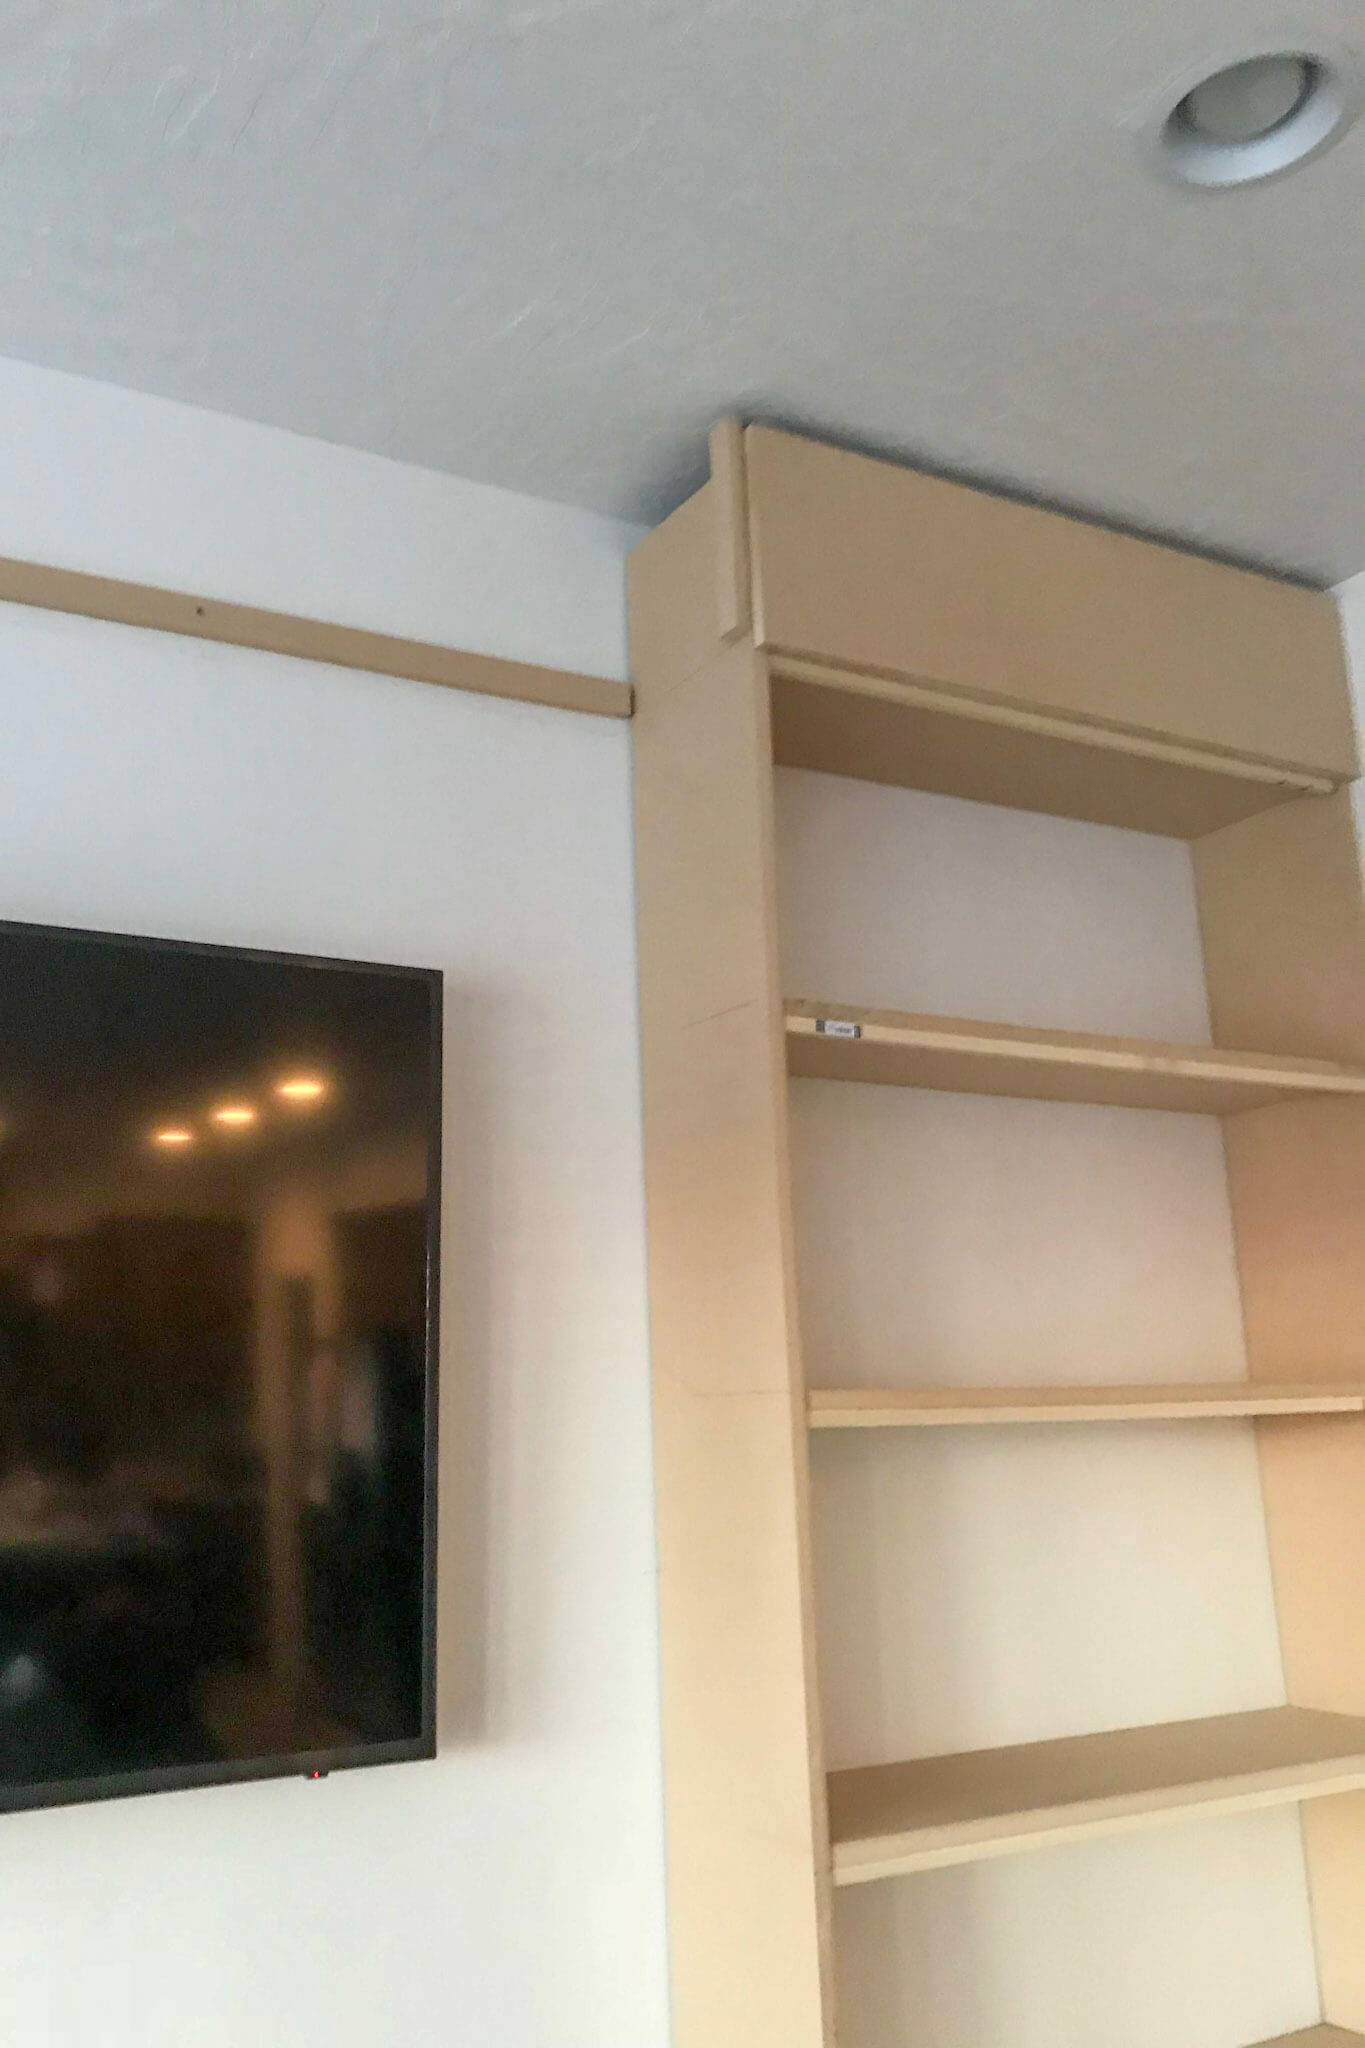
I didn’t show it in the pictures, but I also ended up adding cleats underneath the middle header after I nailed it up, just for added support. MDF is quite heavy and I didn’t want anything coming down over time.
The next step was to add the crown molding, a trim piece to cover up the seams (I also used putty to fill in the vertical seams and sanded it down so it wouldn’t show underneath the paint) and then put the baseboard back on.
Final Steps to Build Custom Built Ins
The length of the entire wall was longer than 8 feet, and I could only find trim in 8 foot sections (not the crown molding, that came in 12 foot sections). To join them together without butting them up to each other, I just cut them at opposite angles which hid the seam much better. Once I caulked and painted, you wouldn’t know where one started and the other began!
My least favorite part of the whole building process is caulking, but it must be done, and I will say that it makes the whole project look like a million bucks when it’s finished. Before I painted, I caulked, and caulked, and caulked! I think all the caulking took me a full day of work. I made sure to get every seam I could find that would show.
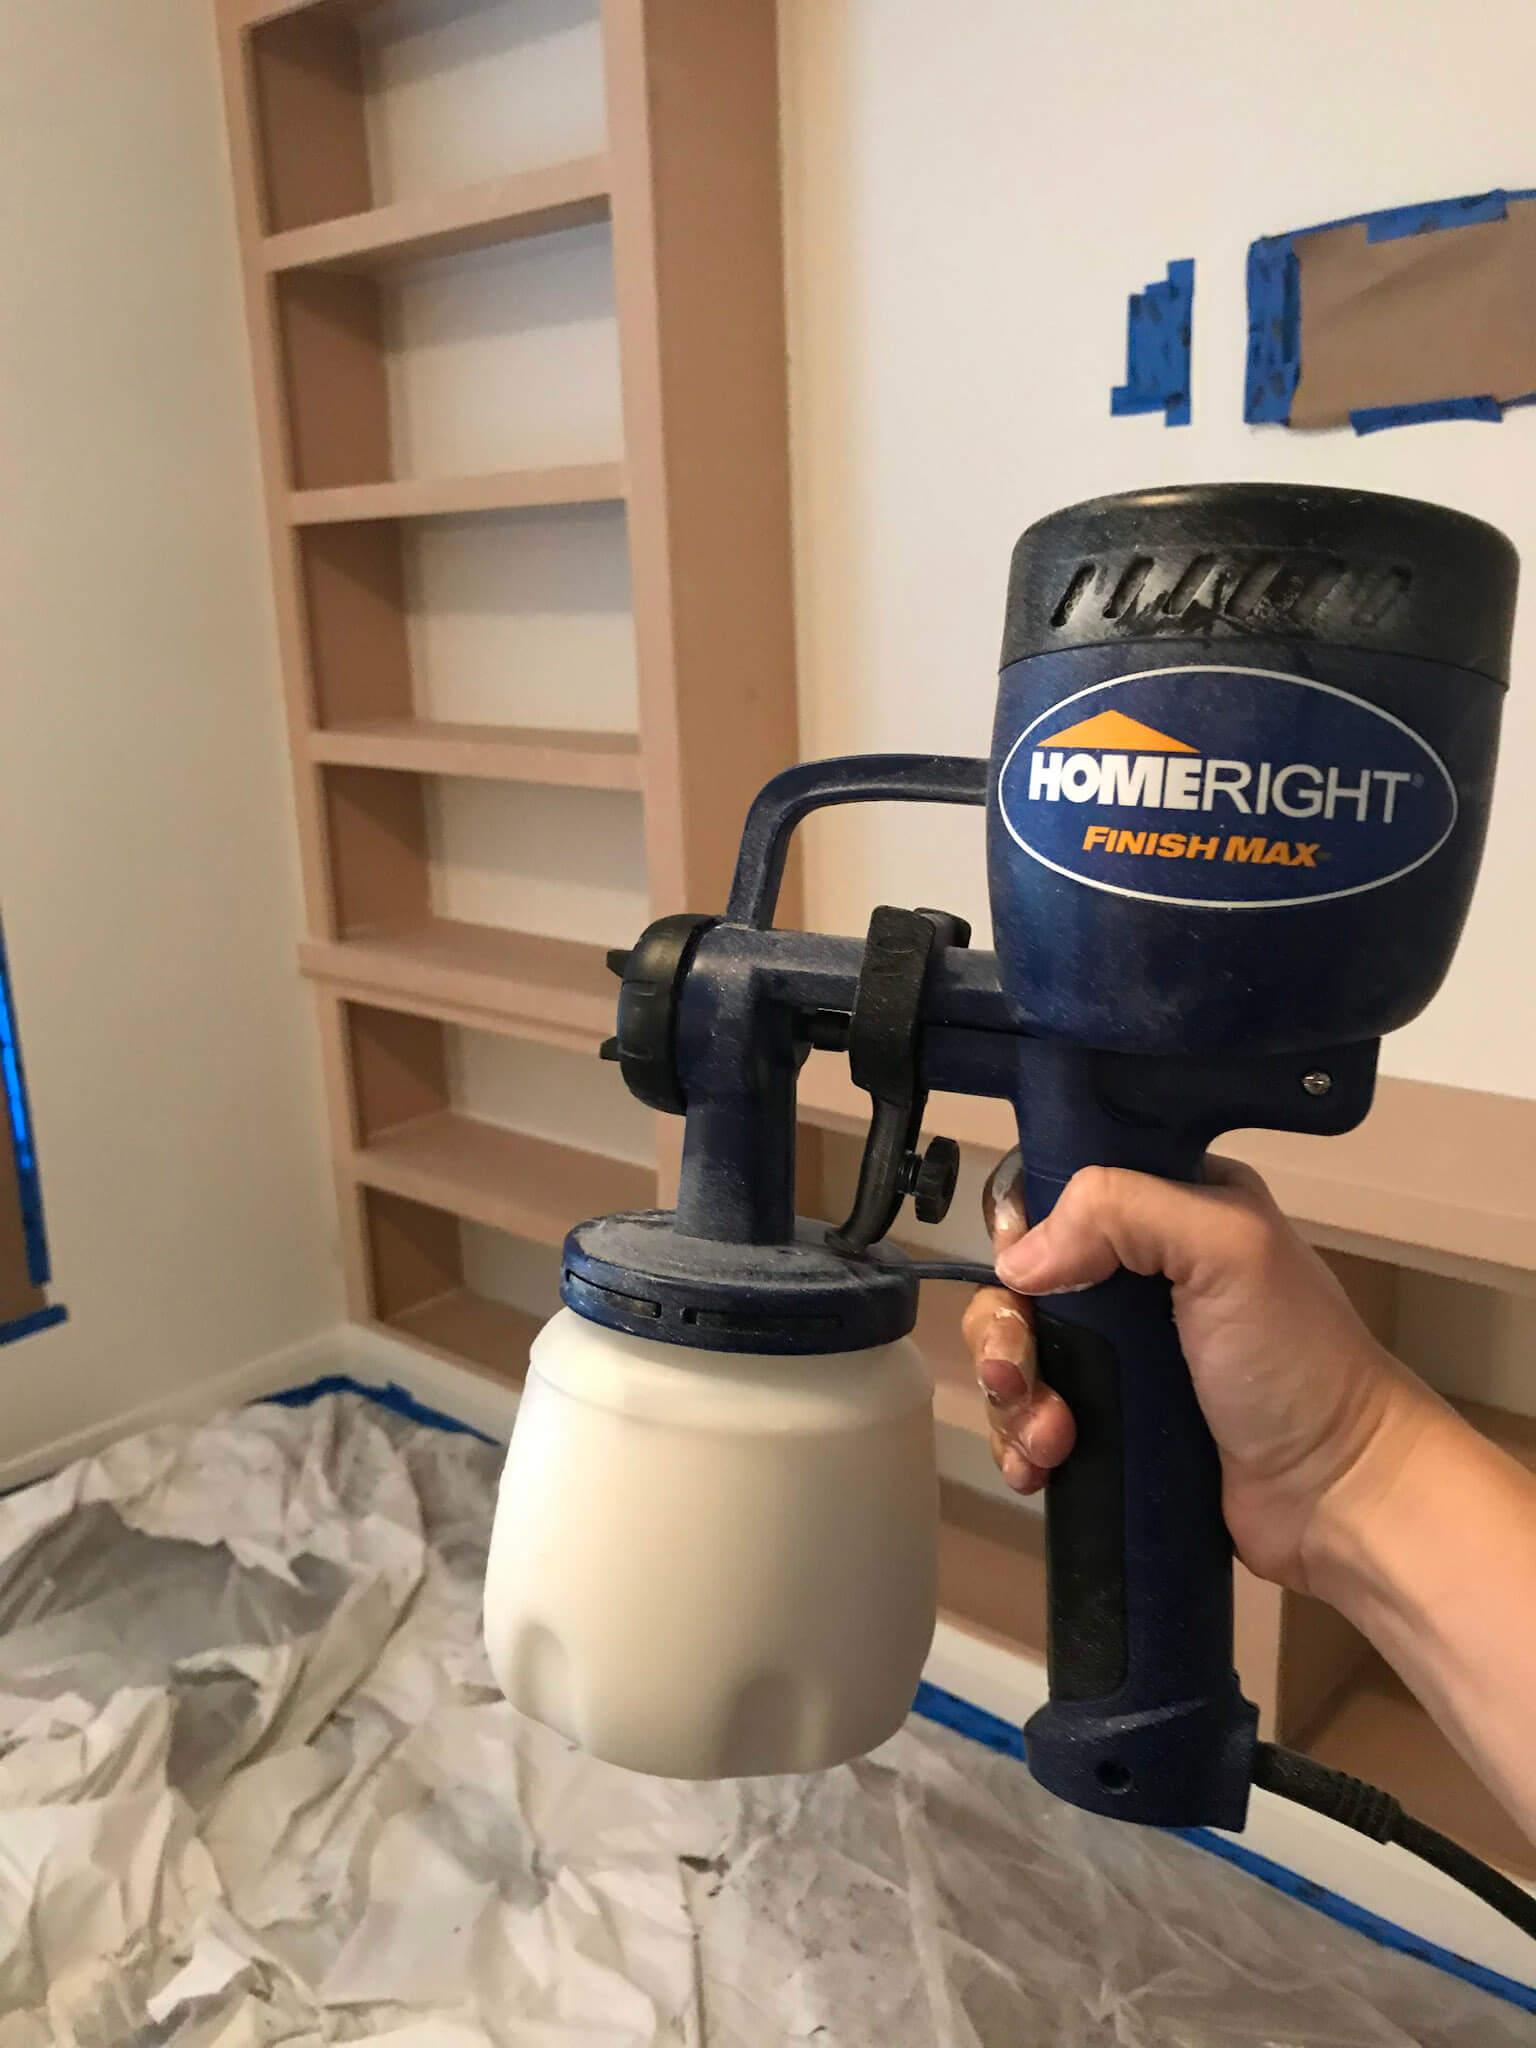
Painting Custom Built Ins
Now, on to the good stuff! It was time to paint! I used my HomeRight Finish Max paint sprayer, which I got for $60 off of Amazon. It’s a killer deal, and I love how simple and easy it is to use and clean! The air compressor is built in, so there’s nothing heavy to lug around. All you need is an extension cord, and you’re in business.
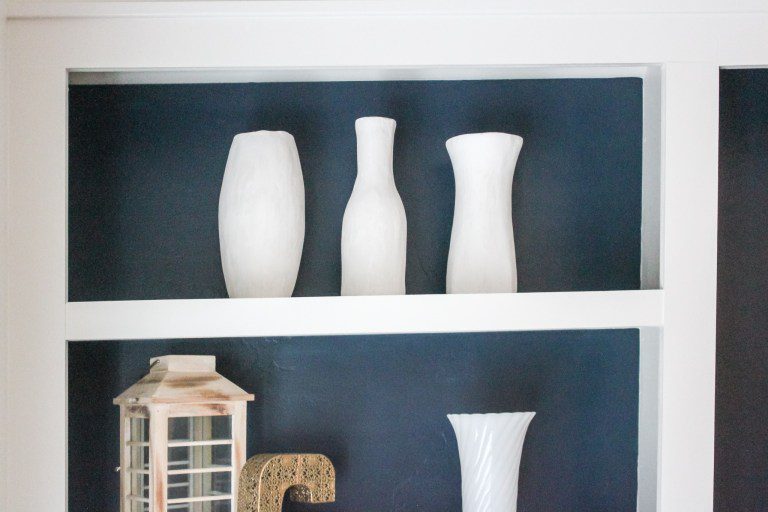
Ahhhh. It’s so satisfying to see days of hard work finally pay off! I removed the TV and started to paint behind the wall behind the shelves. The color is called Fly-by-night Blue by Valspar paint. It was perfect! I wanted a beautiful dark Navy color without being too blue. I also painted several coats of water based Polycrylic on the counter top portion after it was painted to water-proof it.
The last step of the building process was to build the doors, which I totally spaced getting pictures of. But I wrote up a full tutorial on how to build shaker style doors and it covers everything you need to know.
Isn’t it beautiful???
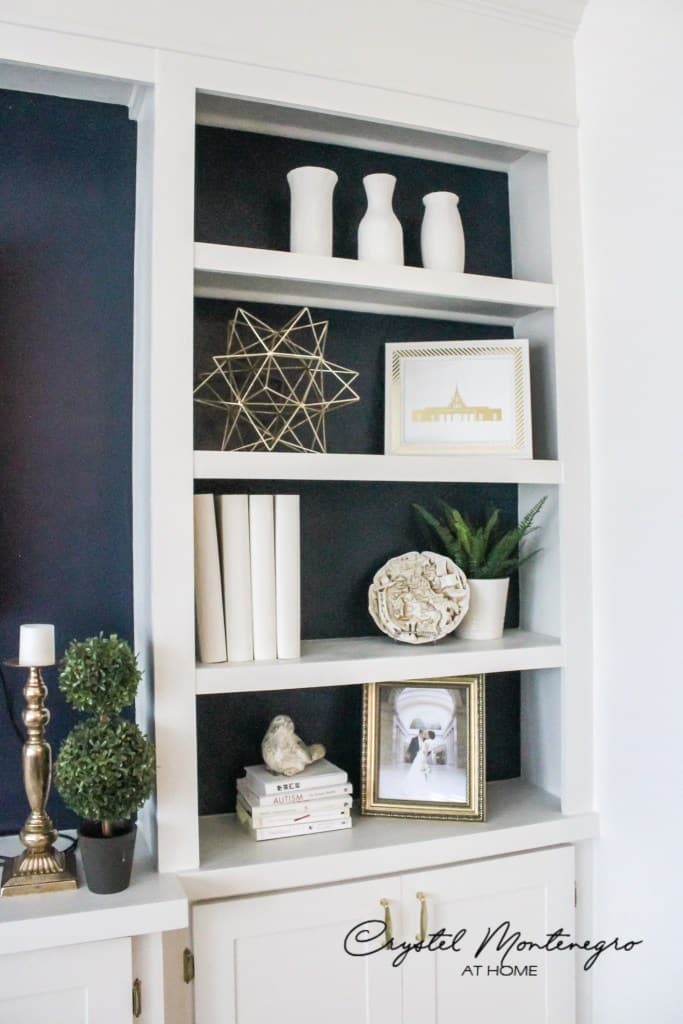
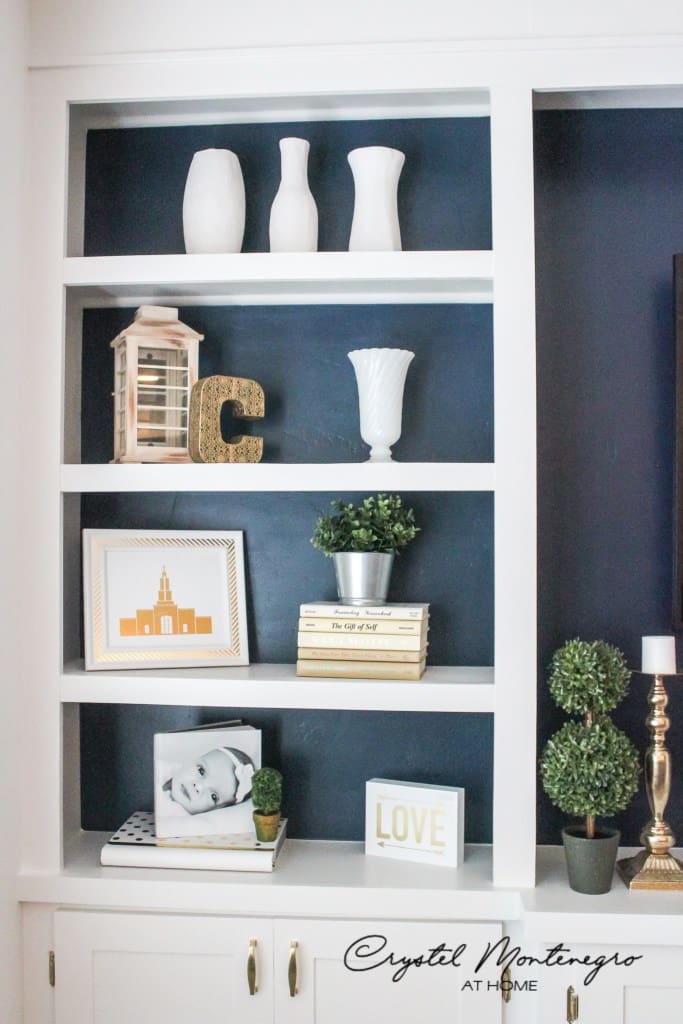
If you’ve been following me on Instagram, you might remember me doing a story on these little pottery-lookin’ guys right here. Those are another DIY that I’m really pleased with and you can find that tutorial here.
While my shelf decorating skills have improved quite a bit, the basic principles remain the same as they always have. If you want to learn how to style your own book shelves like a pro, check out an old post I wrote on how to do it!
Thanks for following along with me on this project. It was so much fun to do! I would love to see any projects you do that were inspired by this one! Be sure to tag me on Instagram so I can see, or just leave me a comment below!

I am in the process of doing some built ins now! Did you end up leaving the carpet underneath or did you cut out that section?
Hi Jessica – we left the carpet there. Thanks for asking!
Really nice job on this. So many ppl using IKEA cabinets or something, but you did it right. Great job.
I’m interested in how you built your base cupboard doors. Where do I find that if you’ve done it?
Hi Joslin – I never did get around to posting a follow up about how I built those doors, but I do have a video tutorial up on Youtube if you’d like to check it out. They’re shaker style doors and the youtube video is pretty thorough. Good luck!
https://www.youtube.com/watch?v=3Wtvqw0ePYI&t=6s
Thanks for your blog, nice to read. Do not stop.