
How to Sous Vide Chuck Roast for Fork-Tender Beef

Chuck roast is one of the more affordable cuts of beef, which makes it perfect for feeding a crowd or for a dinner that leaves you plenty of leftovers. The only catch is that it can turn out tough if you do not cook it right. That is exactly why a sous vide chuck roast is the way to go. It takes that budget-friendly cut and makes it fork-tender and delicious every single time.

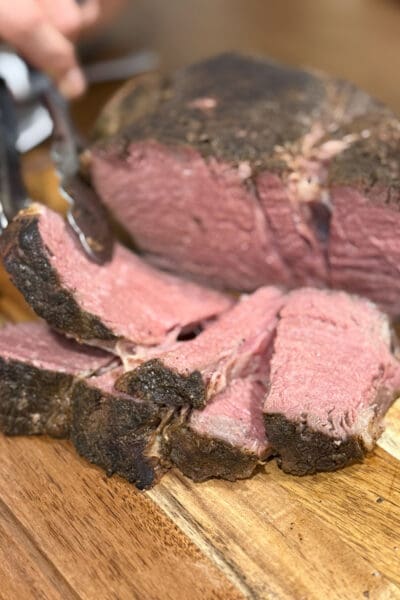
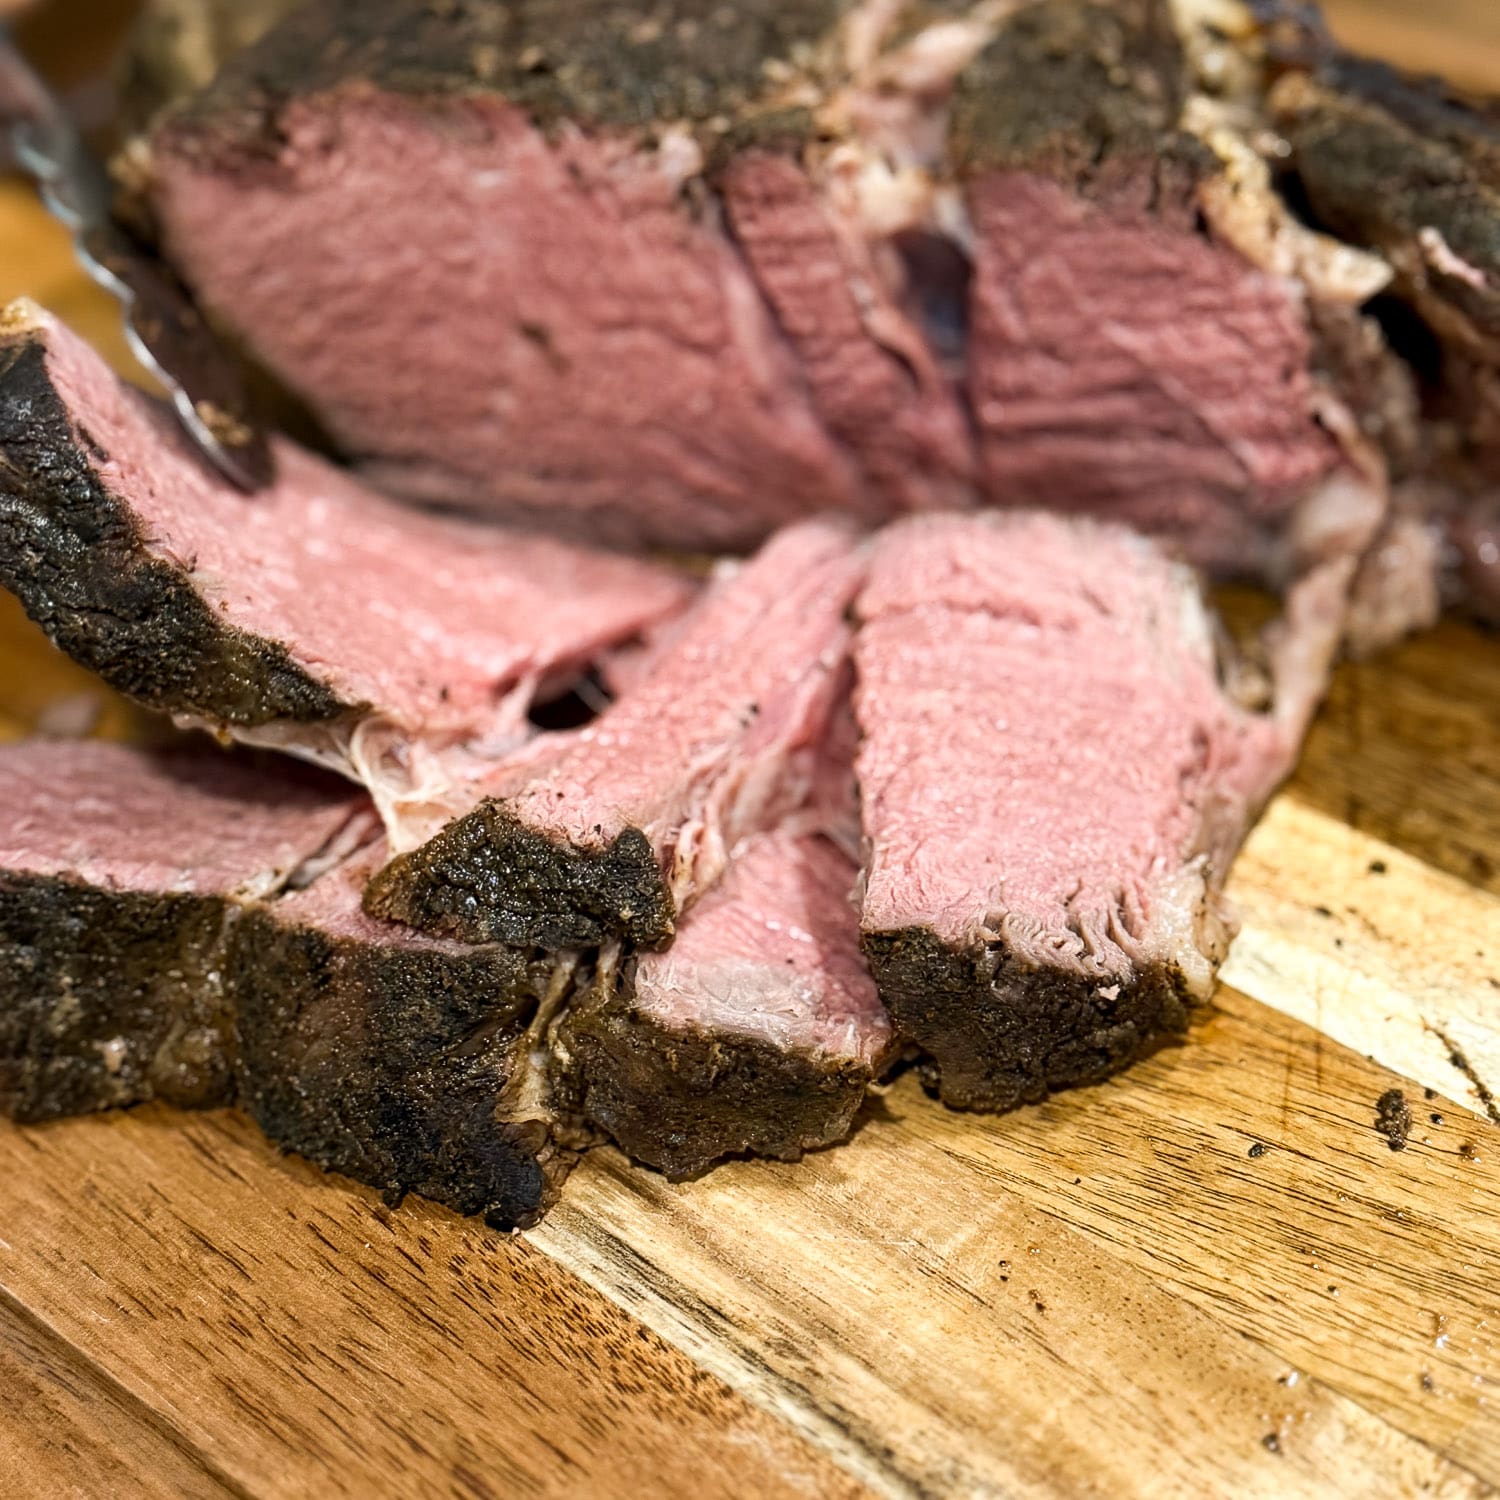
Close-up of sliced sous vide chuck roast on a wood cutting board with an even pink center and a well-seasoned seared crust

If you saw my sous vide steak post, you already know the drill, because I use the exact same method here. Same circulator, same water bath, same seasoning, same little bags I am obsessed with. The only real difference is time, and I promise it is worth every hour. Let me show you how.

What You’ll Need for Sous Vide Chuck Roast

Sous vide sounds fancy, but it really does not take much to get going. Once you have the equipment, I promise you are going to want to sous vide everything. Here is my short list:

Why Chuck Roast Is Perfect for Sous Vide

Every year, my husband and I buy a whole cow from a local rancher. It is the cheapest way to stock our freezer for the year, and it means we cook all kinds of cuts, including less glamorous ones like chuck roast. Chuck comes from the shoulder of the cow, so it is loaded with connective tissue. That is exactly why it can turn out chewy and tough with quick cooking methods, but it is also why it is a dream in the water bath.

When you hold a chuck roast at a steady temperature for a long, slow cook, all that connective tissue slowly melts down into rich, silky goodness. The result is a roast that is tender all the way through, evenly cooked edge to edge, and full of flavor. No gray ring, no dry spots, no guessing. It takes the cut everyone thinks of as “cheap” and makes it taste like something expensive.

My Step-by-Step Sous Vide Chuck Roast Process

Grab your chuck roast, fresh or frozen, and let’s get going.

Step 1: Season It All Over

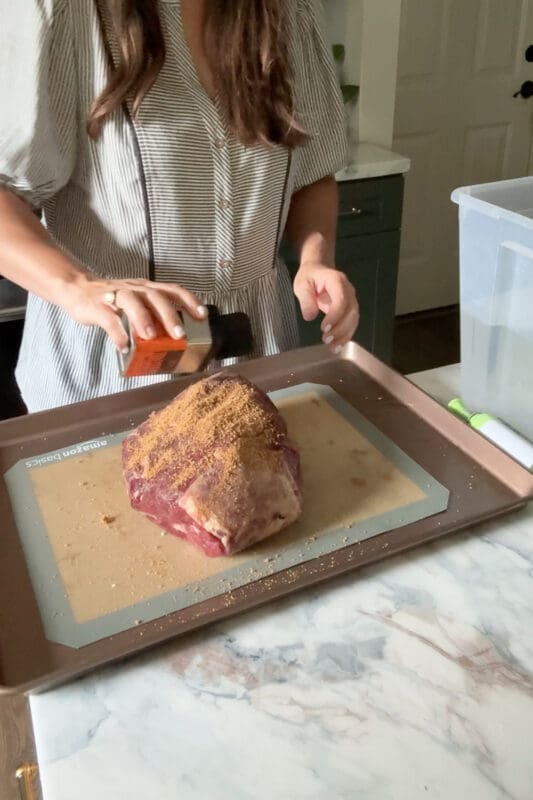
Coat the chuck roast all over with Traeger Rub. And I do mean all over, top, bottom, and all the sides. Be generous here, because this seasoning is what builds that flavorful crust when we sear at the end. Do not hold back.

Step 2: Bag It and Seal It Up

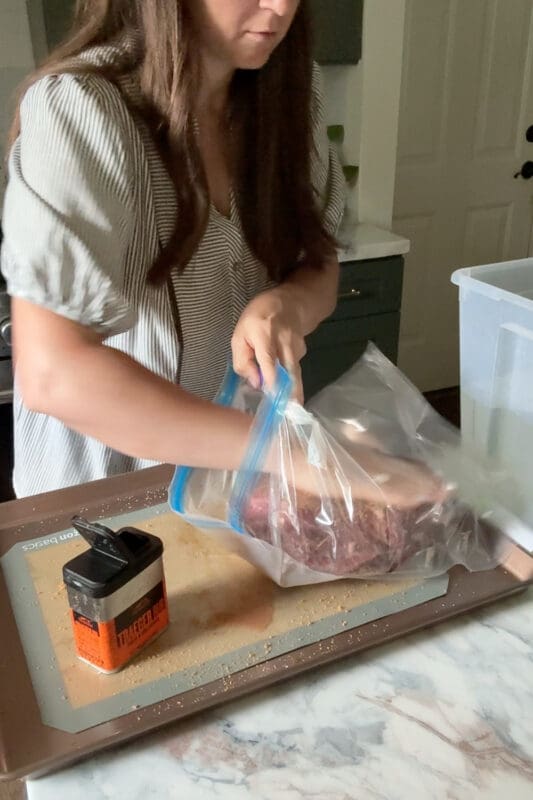
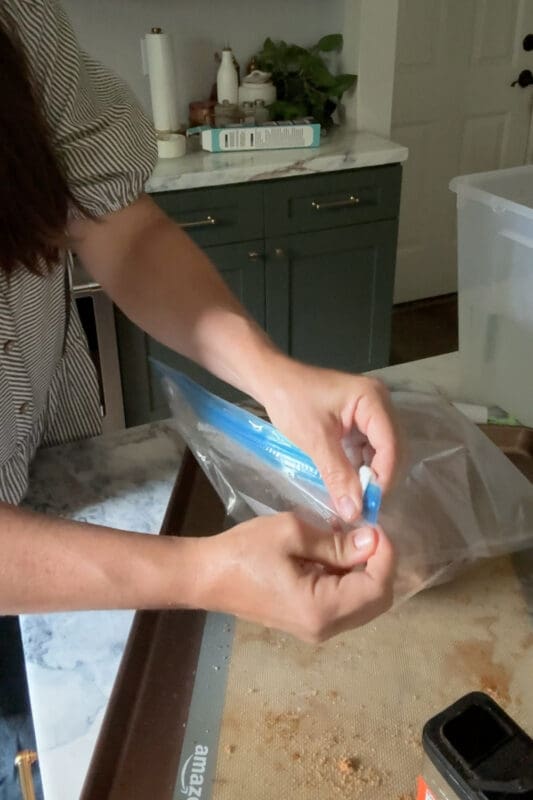
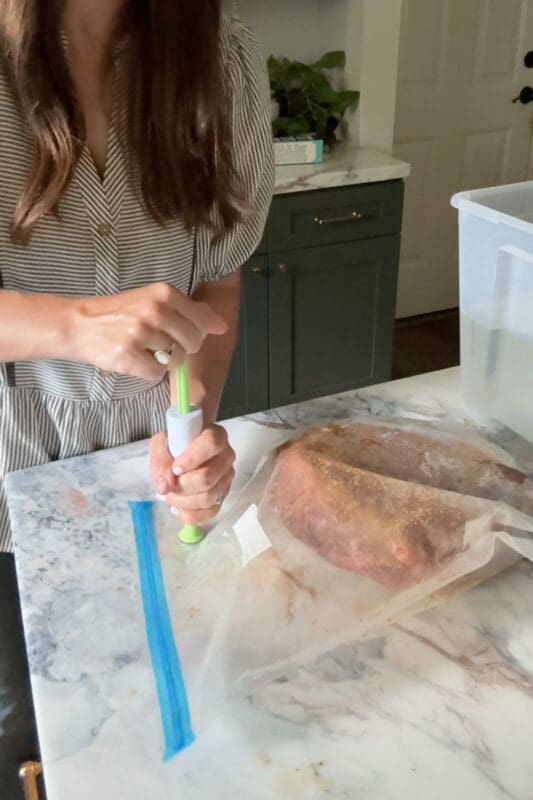
Okay, here is where I have to talk about these bags, because I genuinely love them. Slide the seasoned chuck roast inside, then run the little clip along the top of the bag. That clip seals it up really well and gives me such peace of mind that nothing is going to leak into my water bath.

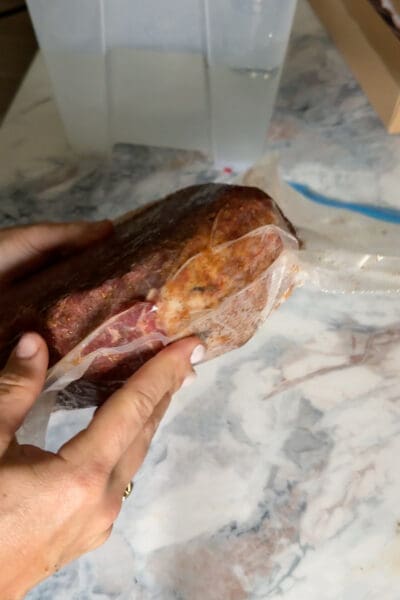
Then comes my favorite part. Each bag has a little valve built right in, and the set comes with a hand pump that attaches to it. A few quick pumps and it sucks all the air right out of the bag, so it hugs the meat nice and tight. That snug, airtight seal is a big part of why the chuck roast comes out so tender and delicious. The water can do its job with nothing getting in the way. No expensive vacuum sealer, no fuss, just a clip and a little pump.

Hands holding a seasoned chuck roast vacuum-sealed tight in a bag with the air removed, ready to sous vide

Step 3: Into the Water Bath

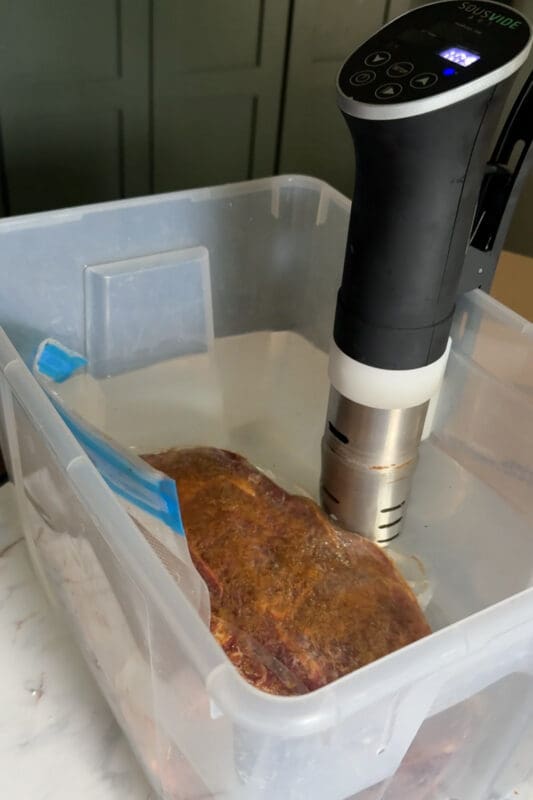
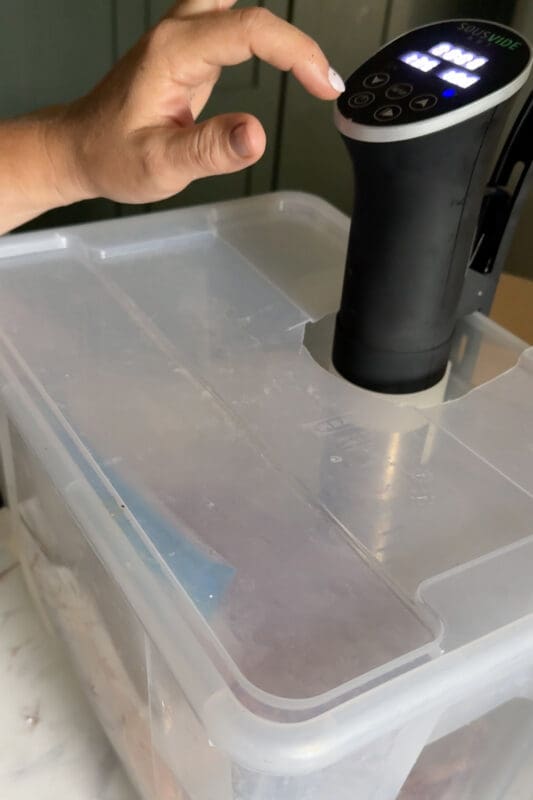
Lower the bag into your container and make sure the whole roast is fully submerged. My “container” is just a plastic tote with a hole cut in the lid, but anything that holds enough water and fits your circulator works great.

Step 4: Set It and Let It Go

I set my circulator to 135°F, the same temperature I use for my sous vide steak, and I let the chuck roast go for 24 to 36 hours. I know, I know, that sounds a little wild the first time you hear it. But that long, gentle cook is the whole secret. It is what breaks down all that connective tissue and leaves you with a sous vide chuck roast that is unbelievably tender.

The beauty is that it is completely hands-off. You are not babysitting anything. I usually start mine the day before I want to serve it and just let it do its thing on the counter overnight. One quick tip: over a cook this long, some water will evaporate, so peek in now and then and top it off if the level gets low, keeping that roast submerged.

Step 5: Sear to Finish

Once the time is up, pull the roast out, take it out of the bag, and pat it dry. Then give it a quick sear on a screaming hot cast iron grill, just a couple of minutes per side, until you get that deep brown crust. This step happens after the water bath, never before, and it is what takes your sous vide chuck roast from “perfectly cooked but a little pale” to downright restaurant-worthy.

Step 6: Slice and Serve

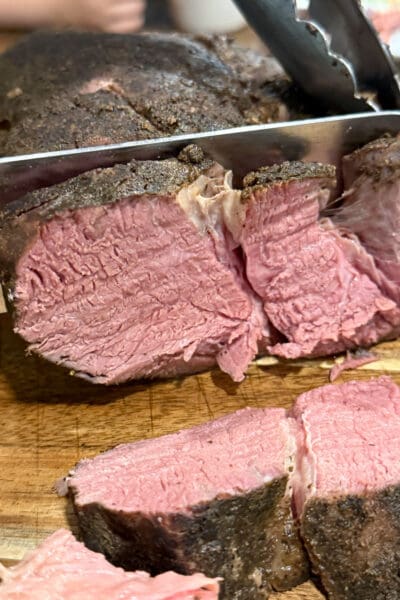
Slice your chuck roast against the grain and serve it up right away. That is it! It is so tender and flavorful, and it is such an easy way to feed a hungry crowd without heating up the whole house. We had ours with roasted veggies and warm rolls, and it did not last long.

Knife slicing into a finished sous vide chuck roast on a cutting board, revealing a tender, evenly cooked pink interior and dark seasoned crust

Here are a few of my favorite sides to serve alongside it:

Why I Love This Method for Chuck Roast

Sous vide is my favorite trick for the tougher, more affordable cuts that fill up our freezer after we buy our cow. It takes something inexpensive and a little intimidating and turns it into a meal that tastes like you fussed for hours, when really you just let the water bath do all the work. It is budget-friendly, it is basically foolproof, and it does not heat up the whole kitchen the way a long oven roast does.

Honestly, once you try a sous vide chuck roast, you will never look at that cut the same way again. If you have not already, go check out my sous vide steak post too, because the method is so easy you will want to sous vide everything.

Print
clock clock iconcutlery cutlery iconflag flag iconfolder folder iconinstagram instagram iconpinterest pinterest iconfacebook facebook iconprint print iconsquares squares iconheart heart iconheart solid heart solid icon
Tongs lifting a slice from a sous vide chuck roast on a wood cutting board, showing the pink interior and dark seasoned crust

Sous Vide Chuck Roast

5 Stars 4 Stars 3 Stars 2 Stars 1 Star No reviews
  • Author: Crystel Montenegro Home
  • Prep Time: 10 min
  • Cook Time: 24 hrs
  • Total Time: 0 hours
  • Yield: 8 servings 1x
  • Category: Dinner
  • Method: Sous Vide
  • Cuisine: American

Description

The easiest, most foolproof way to turn a tough, budget-friendly chuck roast into fork-tender, flavorful beef. Cooked low and slow in a water bath, then seared for a gorgeous crust.


Ingredients

Scale
  • 1 chuck roast (about 3 lbs), fresh or frozen
  • 3 to 4 tablespoons Traeger Rub (garlic and chili pepper), or your favorite beef seasoning
  • 1 to 2 tablespoons butter, for searing


Instructions

  1. Fill your container with water and set the sous vide circulator to 135°F. Let it come up to temperature.
  2. Coat the chuck roast all over with the Traeger Rub, covering every side generously.
  3. Place the roast in a vacuum seal bag. Slide the clip across the top to seal it, then use the hand pump on the valve to remove all the air.
  4. Lower the bag into the water bath, making sure the roast is fully submerged. Cook for 24 to 36 hours, topping off the water level as needed so the roast stays covered.
  5. Heat a cast iron grill or skillet over high heat. Remove the roast from the bag and pat it dry.
  6. Sear the roast 1 to 2 minutes per side, until a deep brown crust forms. Add butter at the end and baste if you like.
  7. Slice against the grain and serve right away.

Notes

  • Texture: At 135°F you get a tender, sliceable roast with a steak-like texture. If you prefer a softer, more shreddable pot-roast style, cook at a higher temperature (around 165°F to 175°F) for 18 to 24 hours instead.
  • Cooking from frozen: No need to thaw. A frozen roast just needs a little extra time in the water bath.
  • Long cook tip: Some water will evaporate over 24 to 36 hours, so check the level occasionally and top it off to keep the roast submerged.
  • Equipment needed: Sous vide immersion circulator, large container or plastic tote for the water bath, vacuum seal bag with hand pump, cast iron grill or skillet.

📌 Pin This: Sous Vide Chuck Roast

Loved this recipe? Pin it to your favorite dinner or beef recipes board so you can find your sous vide chuck roast again later! Just hover over the image below and click the Save button.

Frequently Asked Questions About Sous Vide Chuck Roast

What temperature should I sous vide a chuck roast?

I set mine to 135°F, which gives me a tender, sliceable roast with a lovely steak-like texture. If you would rather have a softer, shreddable pot-roast style, bump the temperature up to around 165°F to 175°F. Whatever number you choose, the water bath holds it there, so your chuck roast can’t overcook.

How long does it take to sous vide a chuck roast?

Plan on 24 to 36 hours. Chuck is a tough cut with lots of connective tissue, and it needs that long, gentle cook to break all of it down. It sounds like a lot, but it is completely hands-off, and the fork-tender result is so worth it.

Can I sous vide a chuck roast from frozen?

Yes! You do not have to thaw it first, which is a lifesaver when dinner sneaks up on you. A frozen roast just needs a little extra time in the water bath and comes out just as tender.

Do I need a fancy vacuum sealer?

Nope, and this is one of my favorite things about the method. The bags I use come with a little clip that seals the top really well, plus a valve and a hand pump that pull all the air out. No expensive vacuum sealer needed. My water bath is just a plastic tote with a hole cut in the lid.

Is it safe to cook a chuck roast for that long?

It is, because the circulator holds the water at a steady, controlled temperature the whole time, and the roast stays sealed in its airtight bag. Just keep an eye on the water level over the long cook and top it off so the roast stays fully submerged.

Share the ♥︎

Leave a Reply

Your email address will not be published. Required fields are marked *

Recipe rating 5 Stars 4 Stars 3 Stars 2 Stars 1 Star