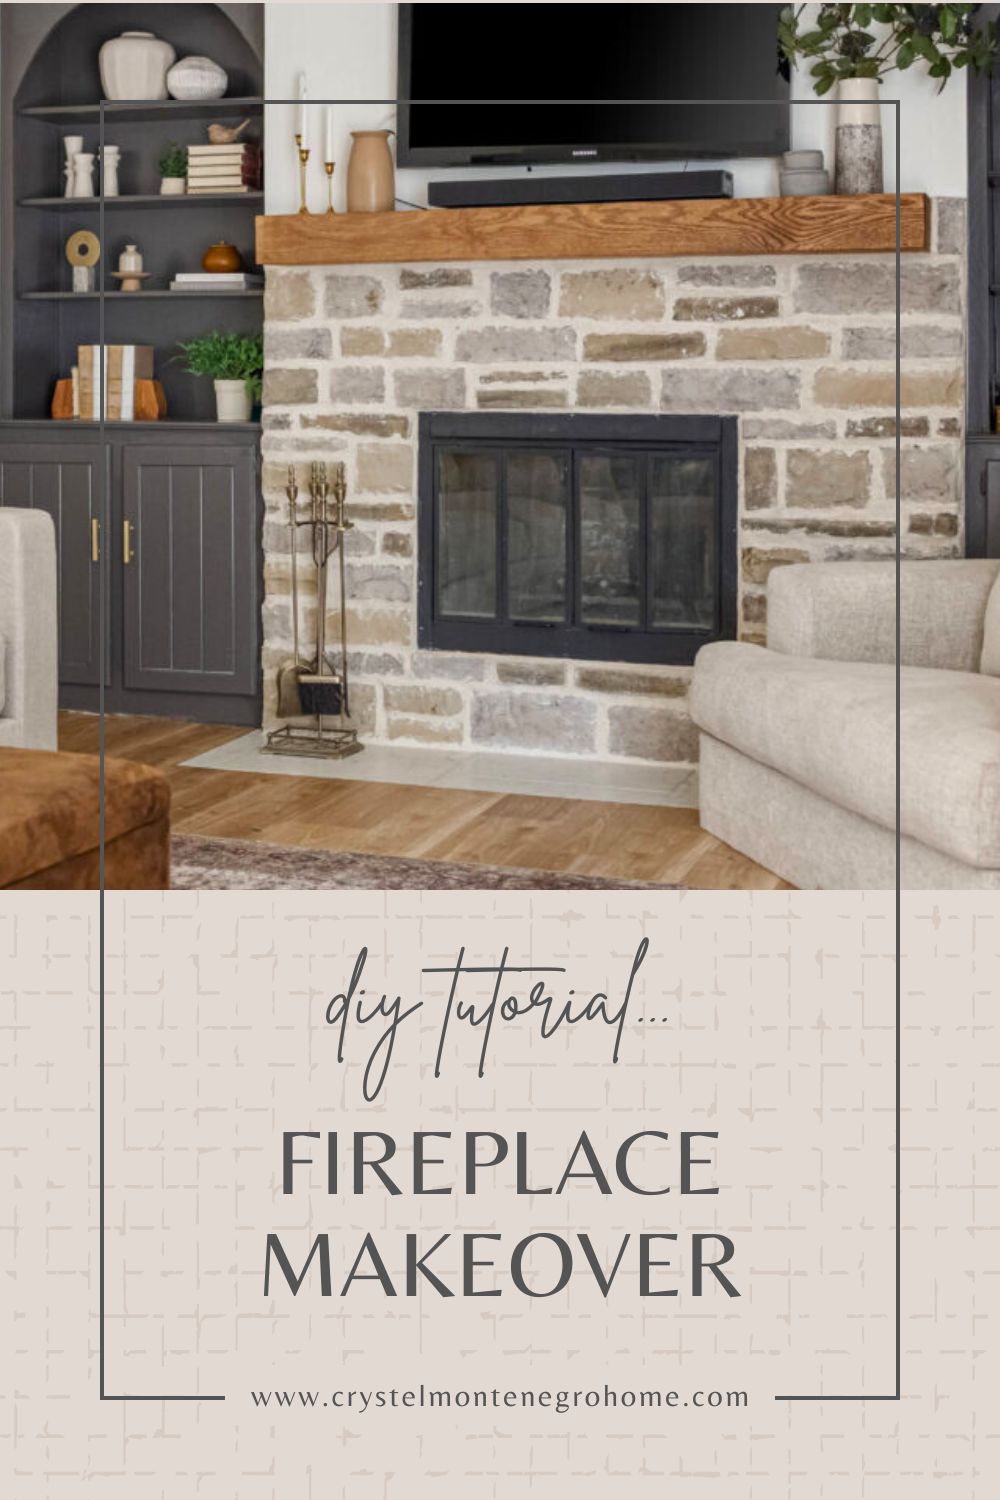
Updating An Ugly Rock Fireplace


Updated March 5, 2025
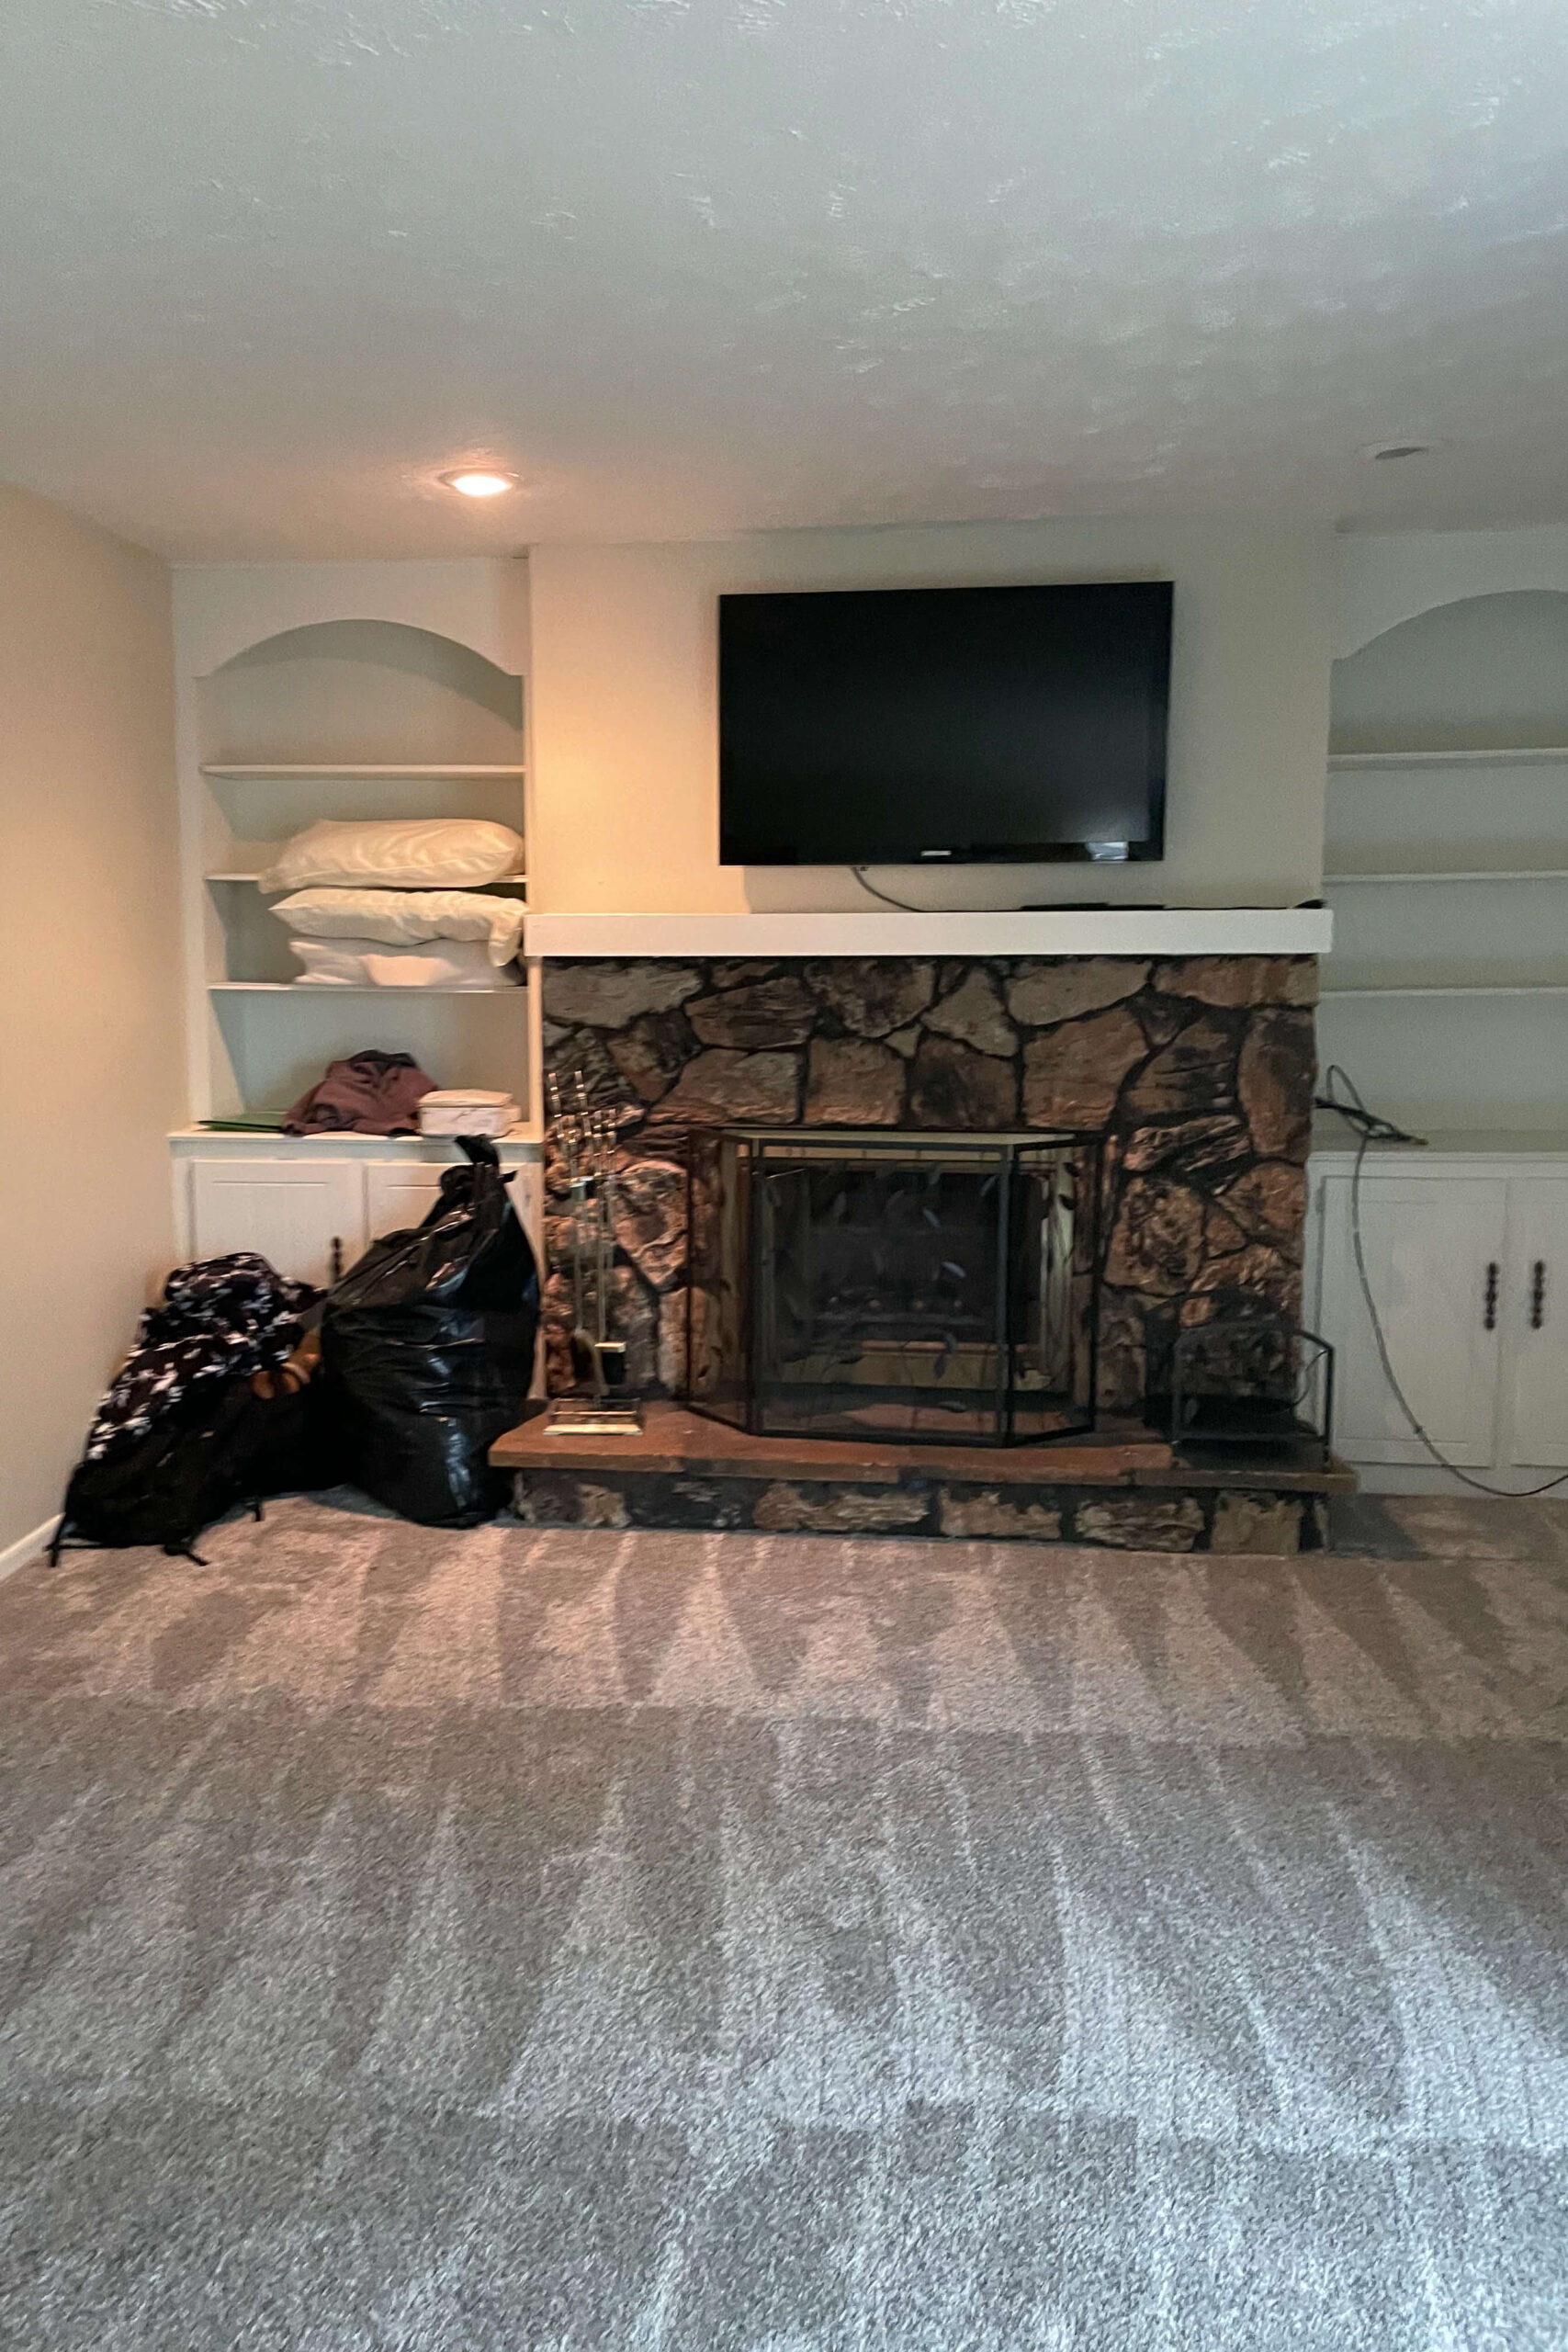
Is your rock fireplace a relic from the past that desperately needs a modern touch? When we bought our fixer-upper in April 2022, the living room featured an old, 1970s-style rock fireplace that screamed for a makeover. Despite its dated appearance, I saw the potential for a stunning transformation.
When we moved in, the living room greeted us with carpet, outdated built-in shelving, and an unsightly rock fireplace. Despite the immaculate vacuum lines on the carpet, I was eager to start making changes, beginning with the fireplace.
Tools
Materials
- Plastic drop cloth
- Painter’s tape
- High-heat spray paint
- Wood
- Wood glue
- Stain
- Concrete screws
- Concrete board
- Masonry blade
- Stone
- Mortar
- Mortar bag
Demoing the Old Rock Fireplace
Demolishing the old rock was messy. I prepped the area by covering the shelves with plastic drop cloths and protecting our newly installed flooring with scrap plywood.
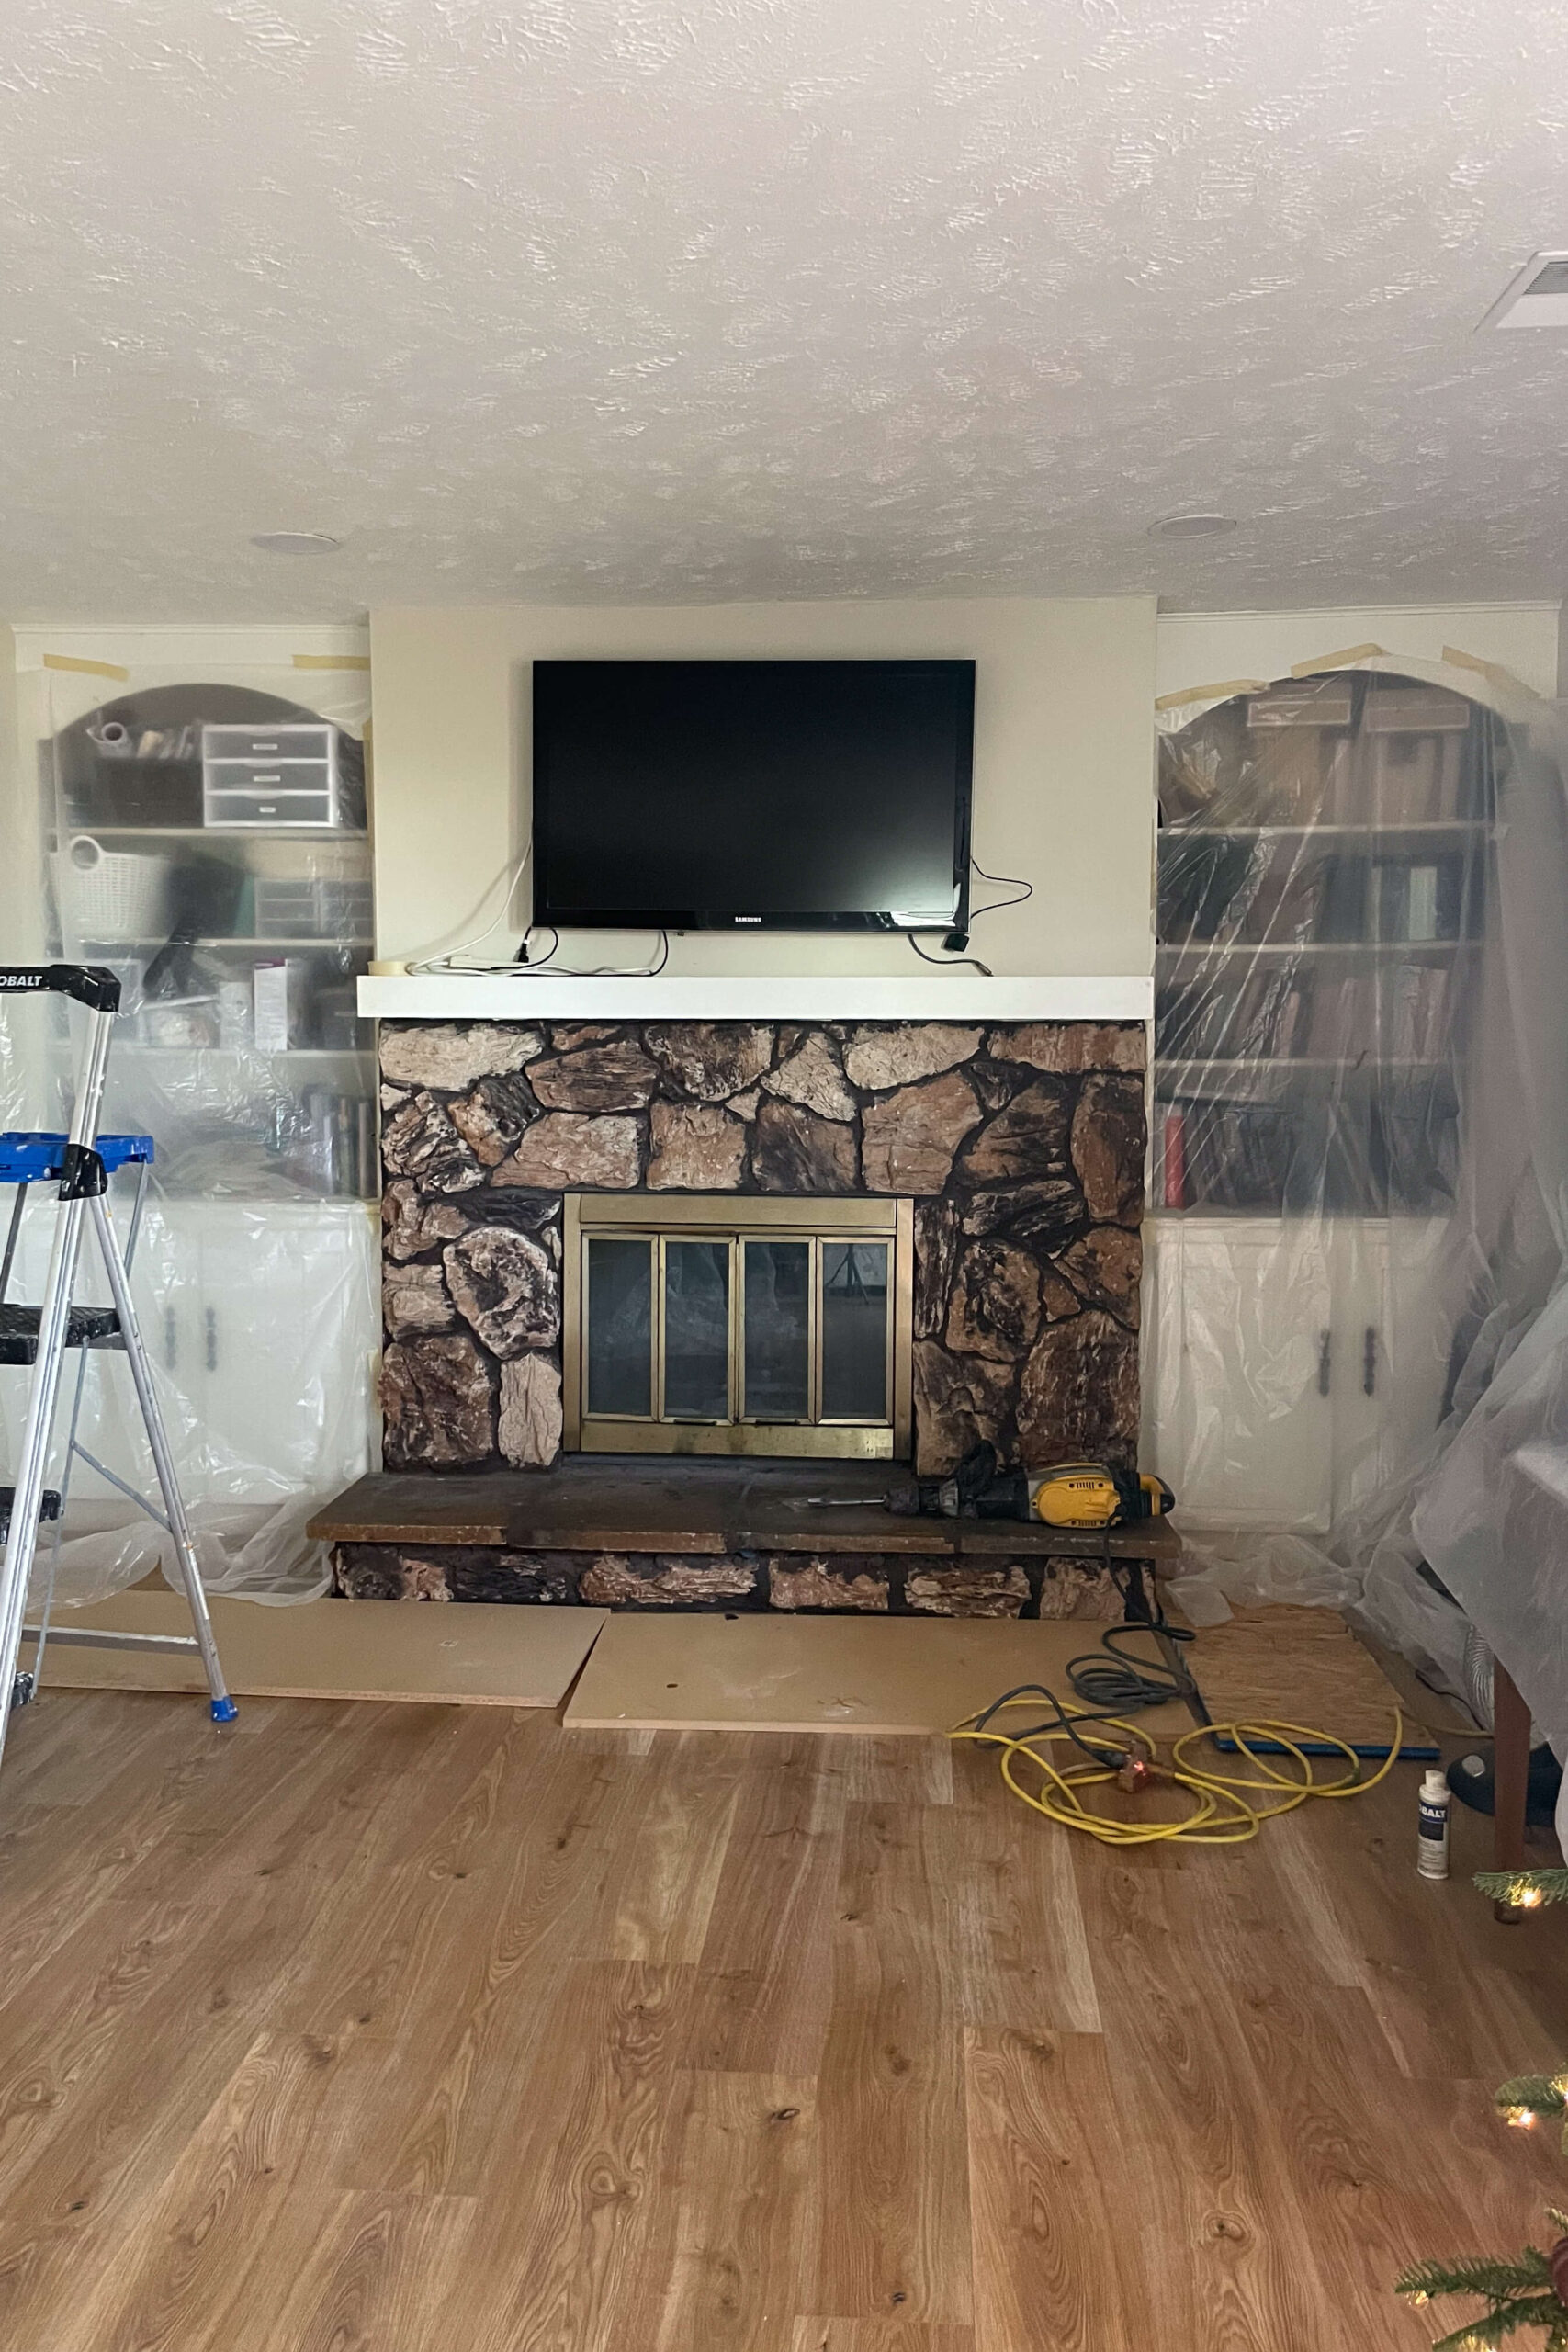
Armed with a demolition hammer, I chipped away at the old rock. If you don’t own a demolition hammer, renting one can make this job much faster and easier than doing it by hand.

After removing the old mantel and hearth, the dated rock was finally gone, leaving me with a blank slate to create a modern rock fireplace that would suit our home.

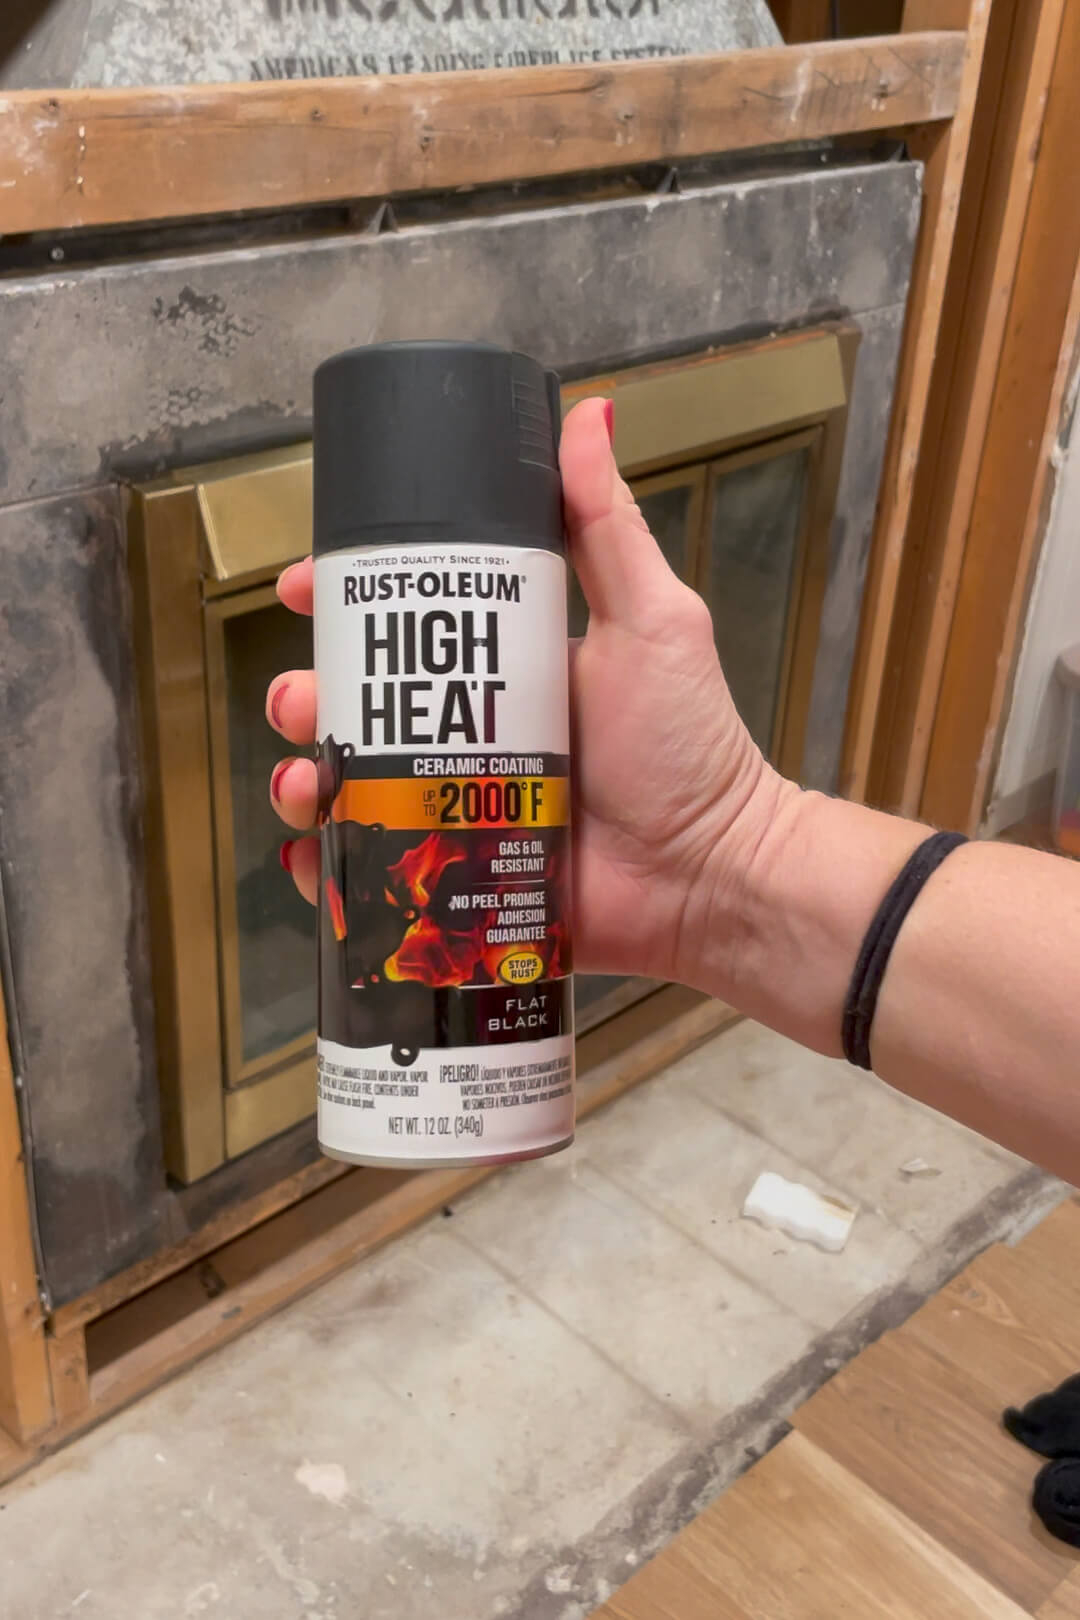
Painting the Fireplace Insert Black
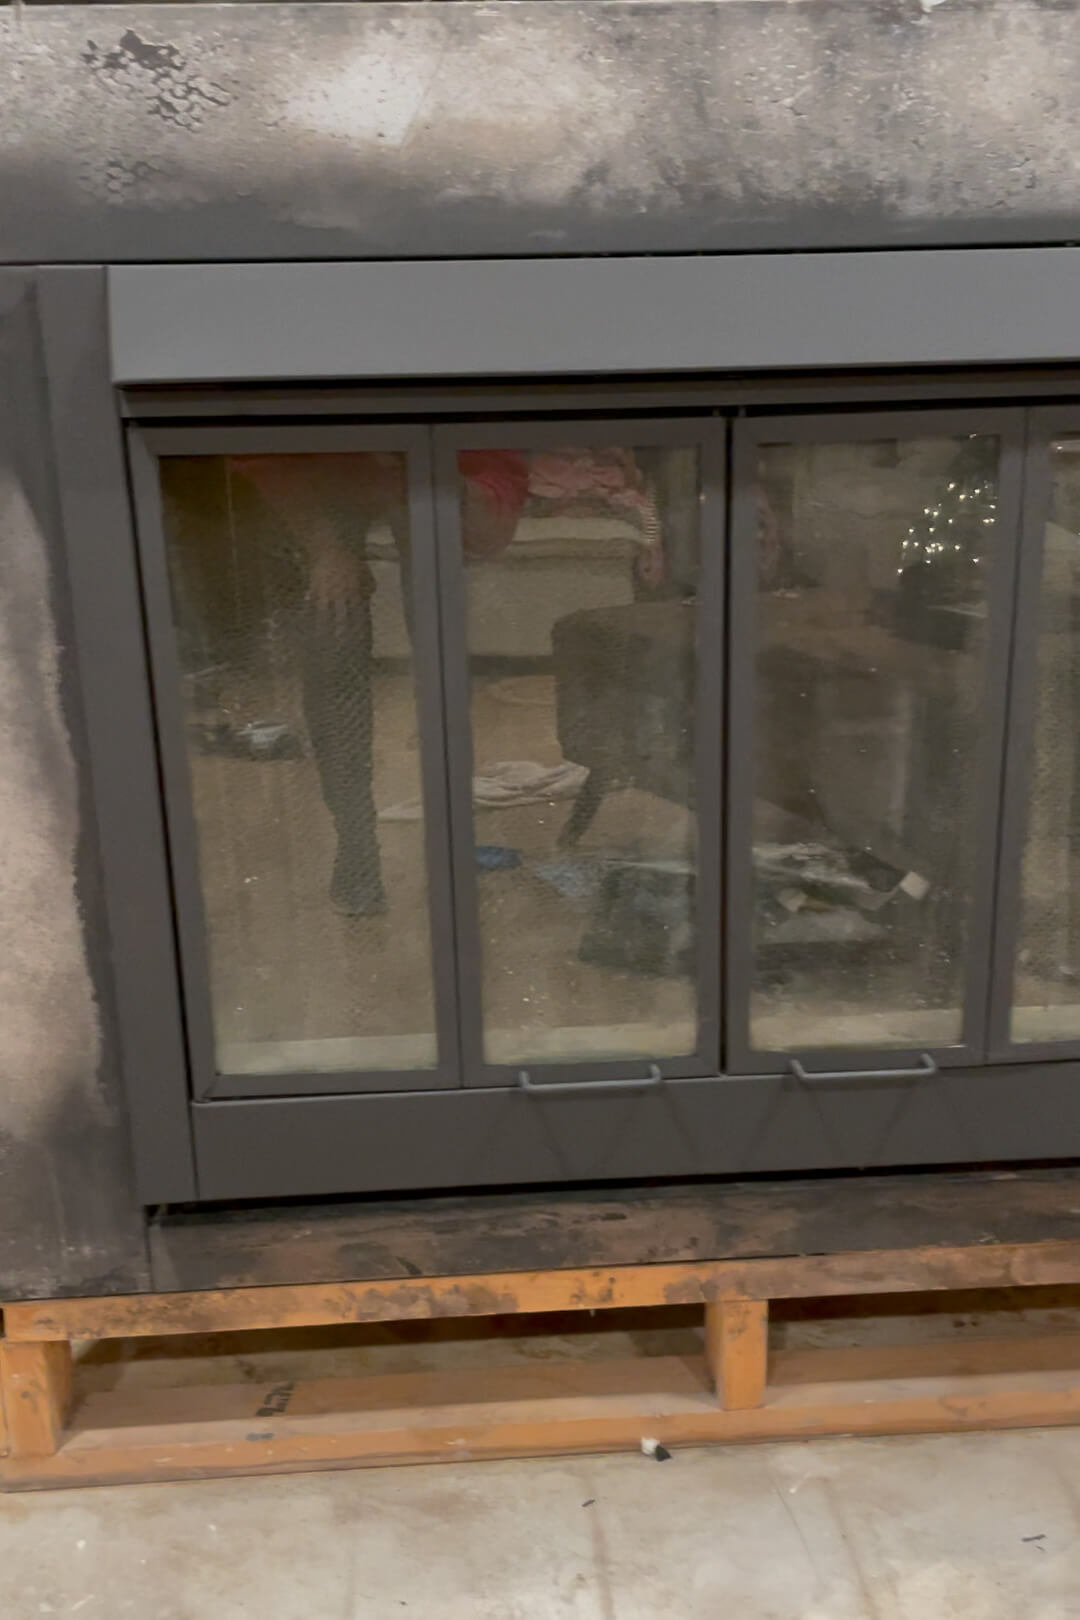
The original gold fireplace insert clashed with my vision for a modern stone fireplace surround. Opting for a more cost-effective solution than replacement, I used high-heat spray paint to update it to a sleek matte black finish.
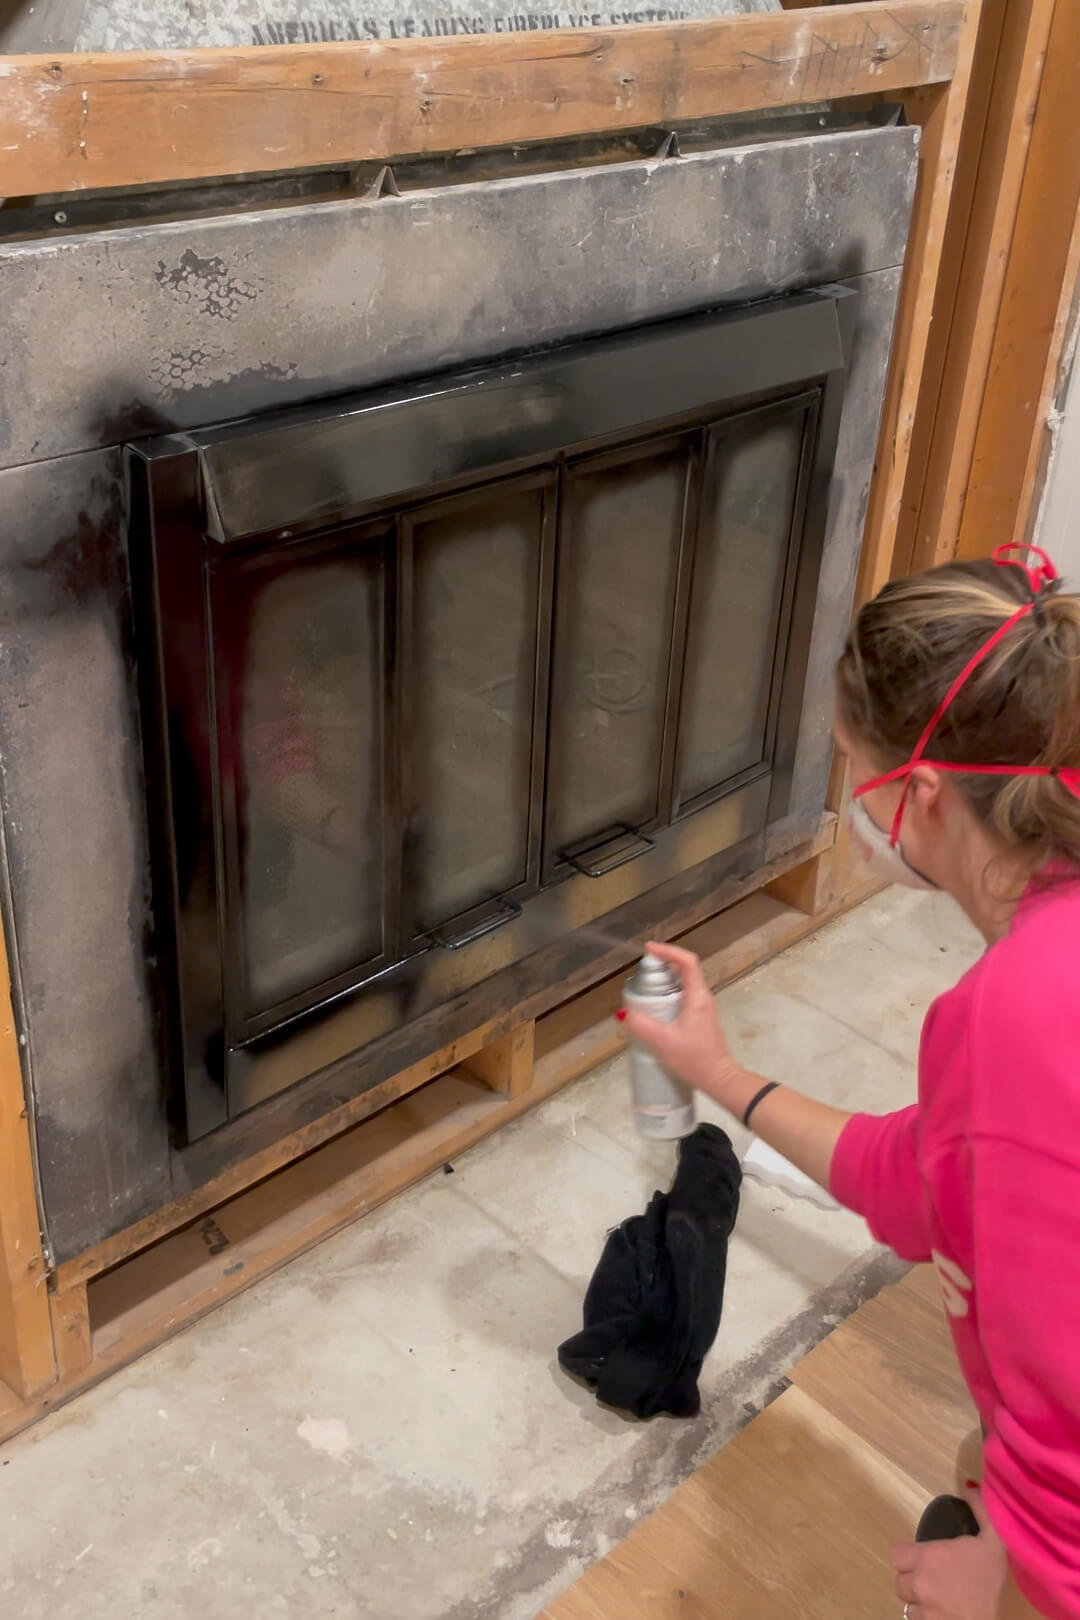
I didn’t mask the glass; instead, I scraped off any overspray with a razor blade afterward—much like I painted the window frames in my kitchen.
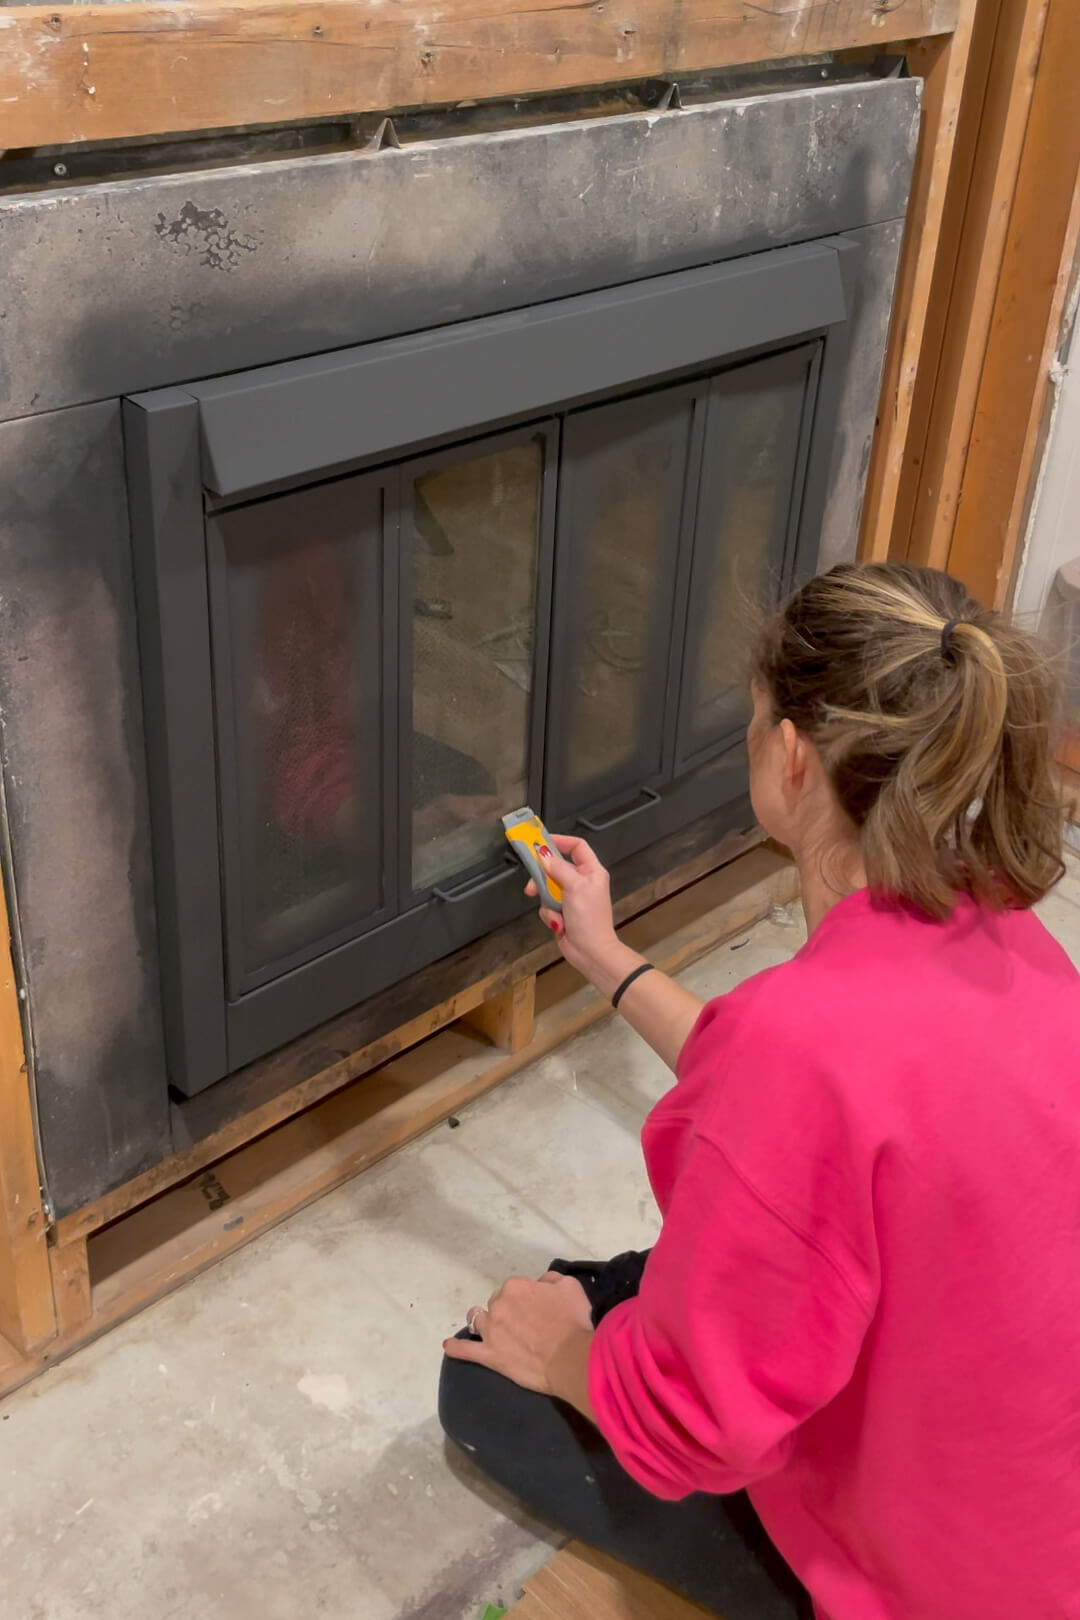
Look how much better that matte black finish looks. It’s amazing what a can of spray paint can do!
Building a DIY Fireplace Mantel
When I revamped the old rock fireplace in our Provo home, I salvaged the old mantel, but this time, the mantel was just cheap MDF and not worth saving.
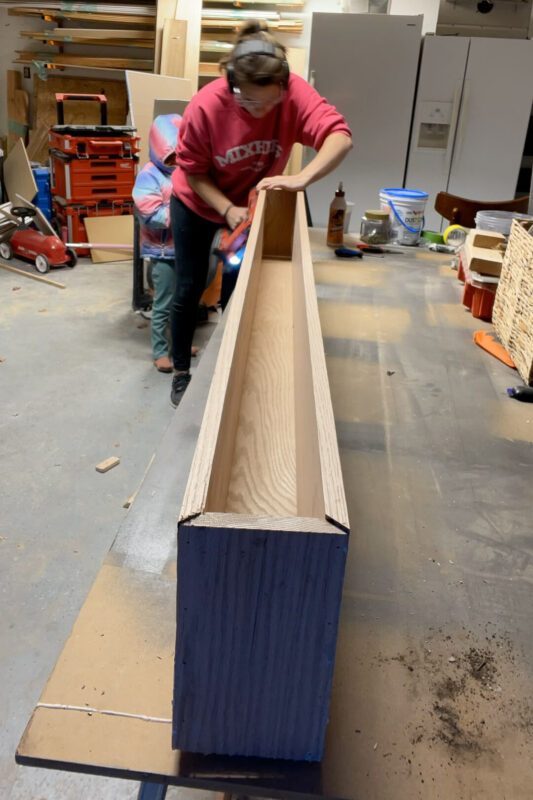
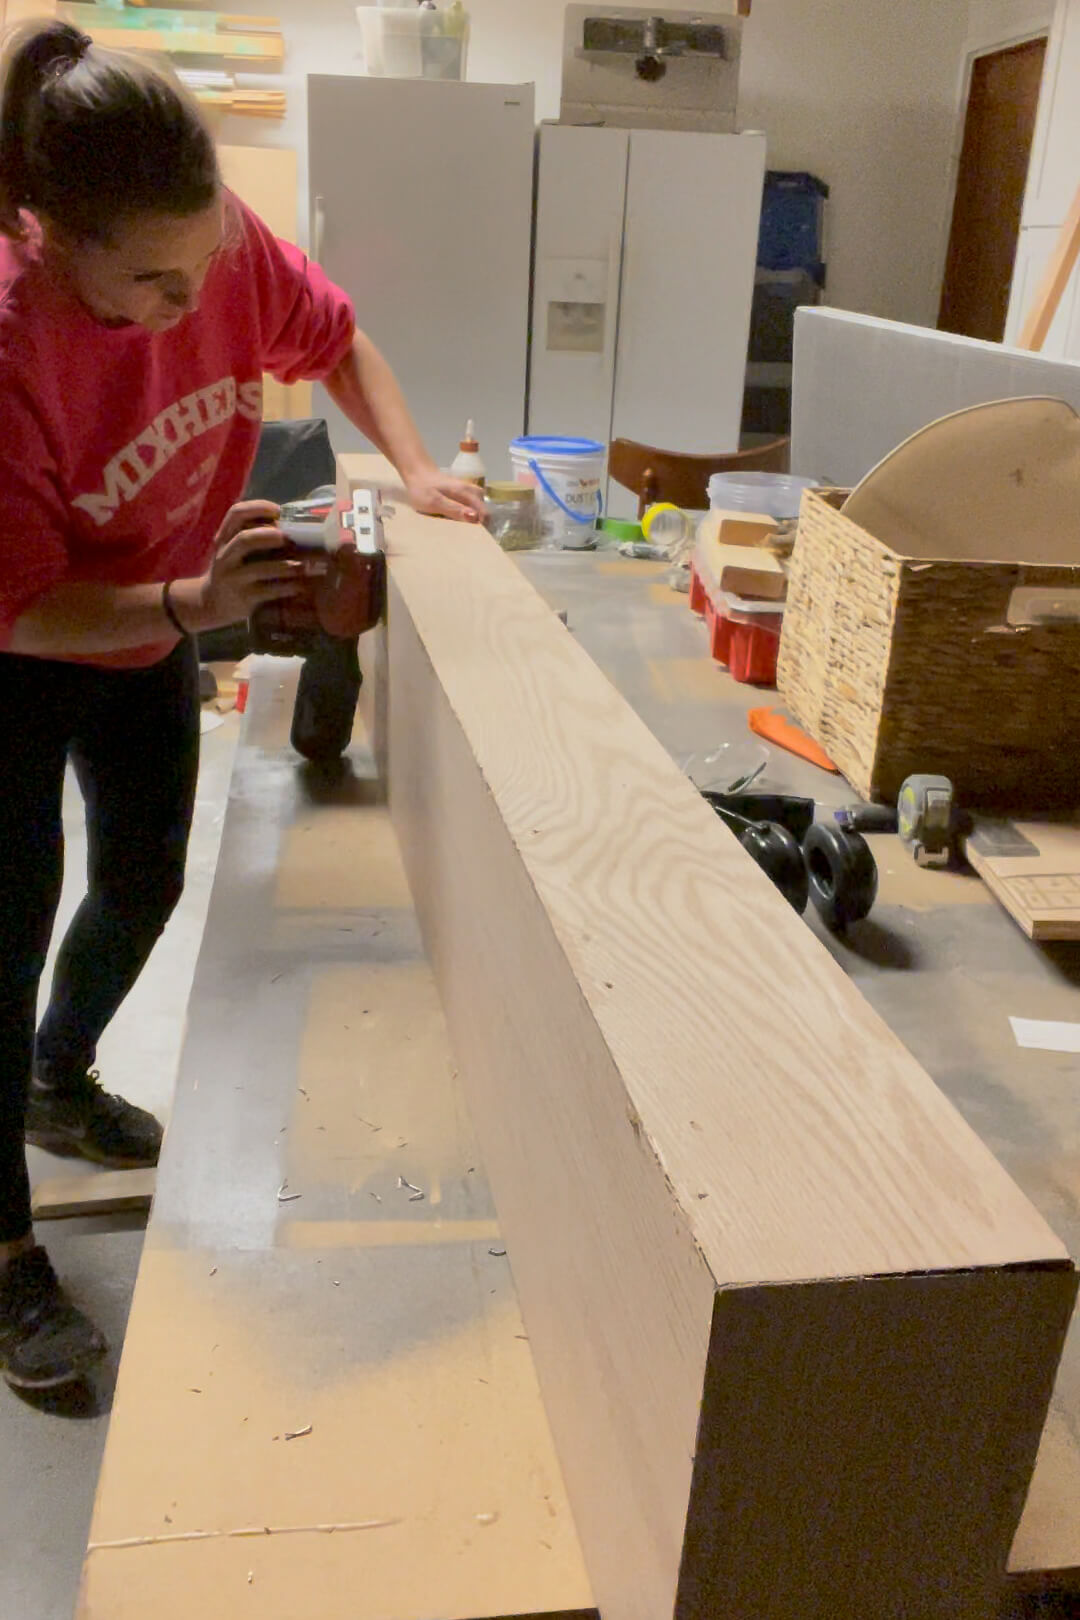
I decided to DIY a new one to resemble a solid beam without the heavy weight and cost. I cut the wood with beveled edges at a 45° angle using my table saw, assembled the pieces into a box shape with wood glue and a brad nailer.
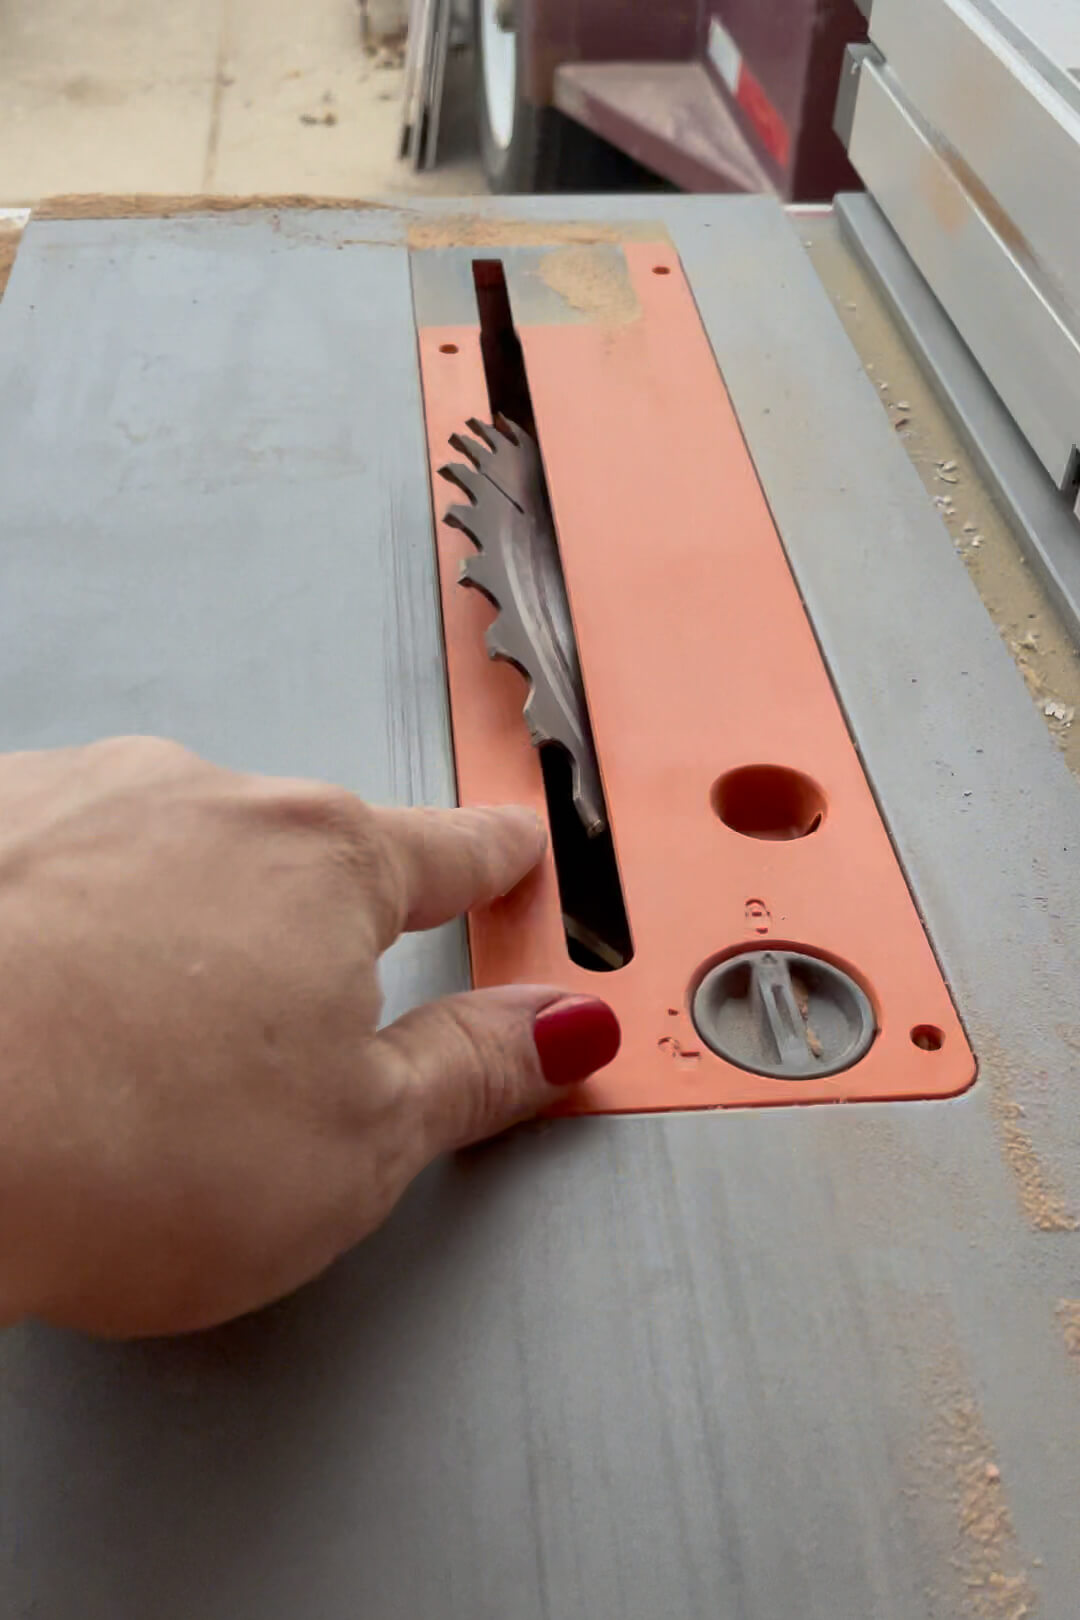
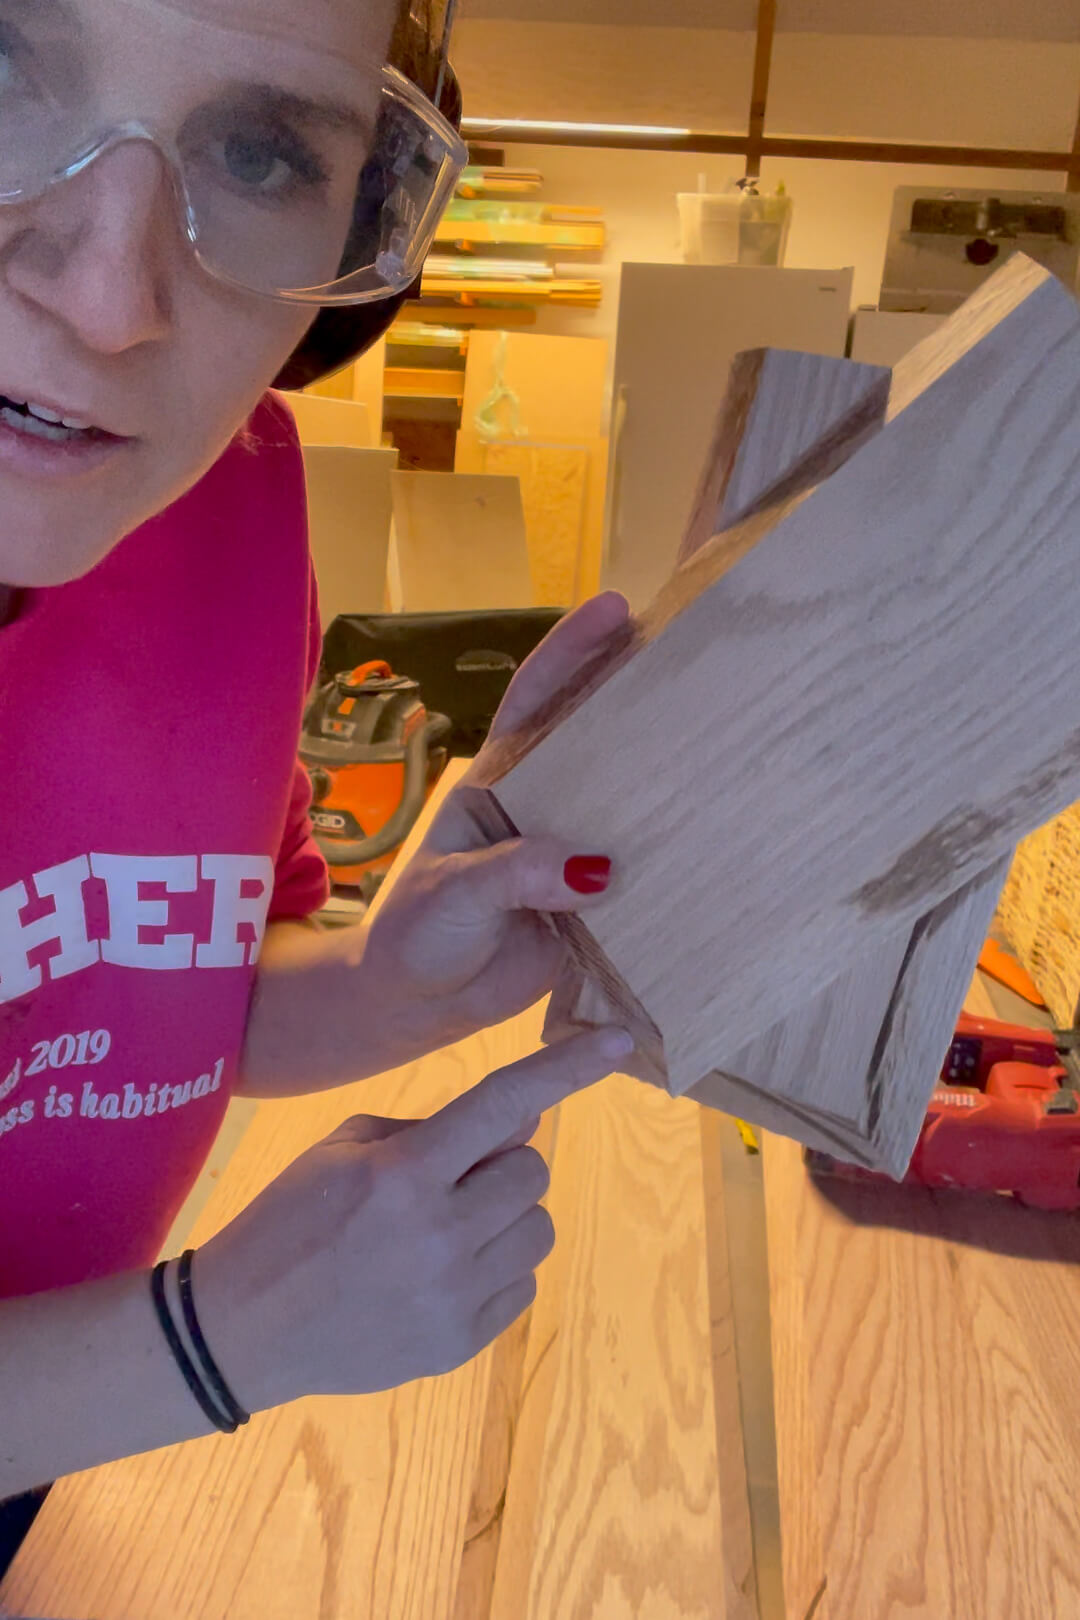
The beveled edges made the corners meet perfectly, giving the illusion of a single piece of wood. My DIY mantel was really coming along! Now all it needs is a good sanding and a little bit of stain.
I’m frequently asked if the brad nail heads show and if I use wood filler to cover them. Whether it’s on my stained board and batten wall, the floating shelves in my guest bathroom, or this rock fireplace mantle, I haven’t taken the time to use wood filler over the brad nails. I could, but I’m not that patient. You can see here that the nails are so tiny and barely visible against the stained mantle.

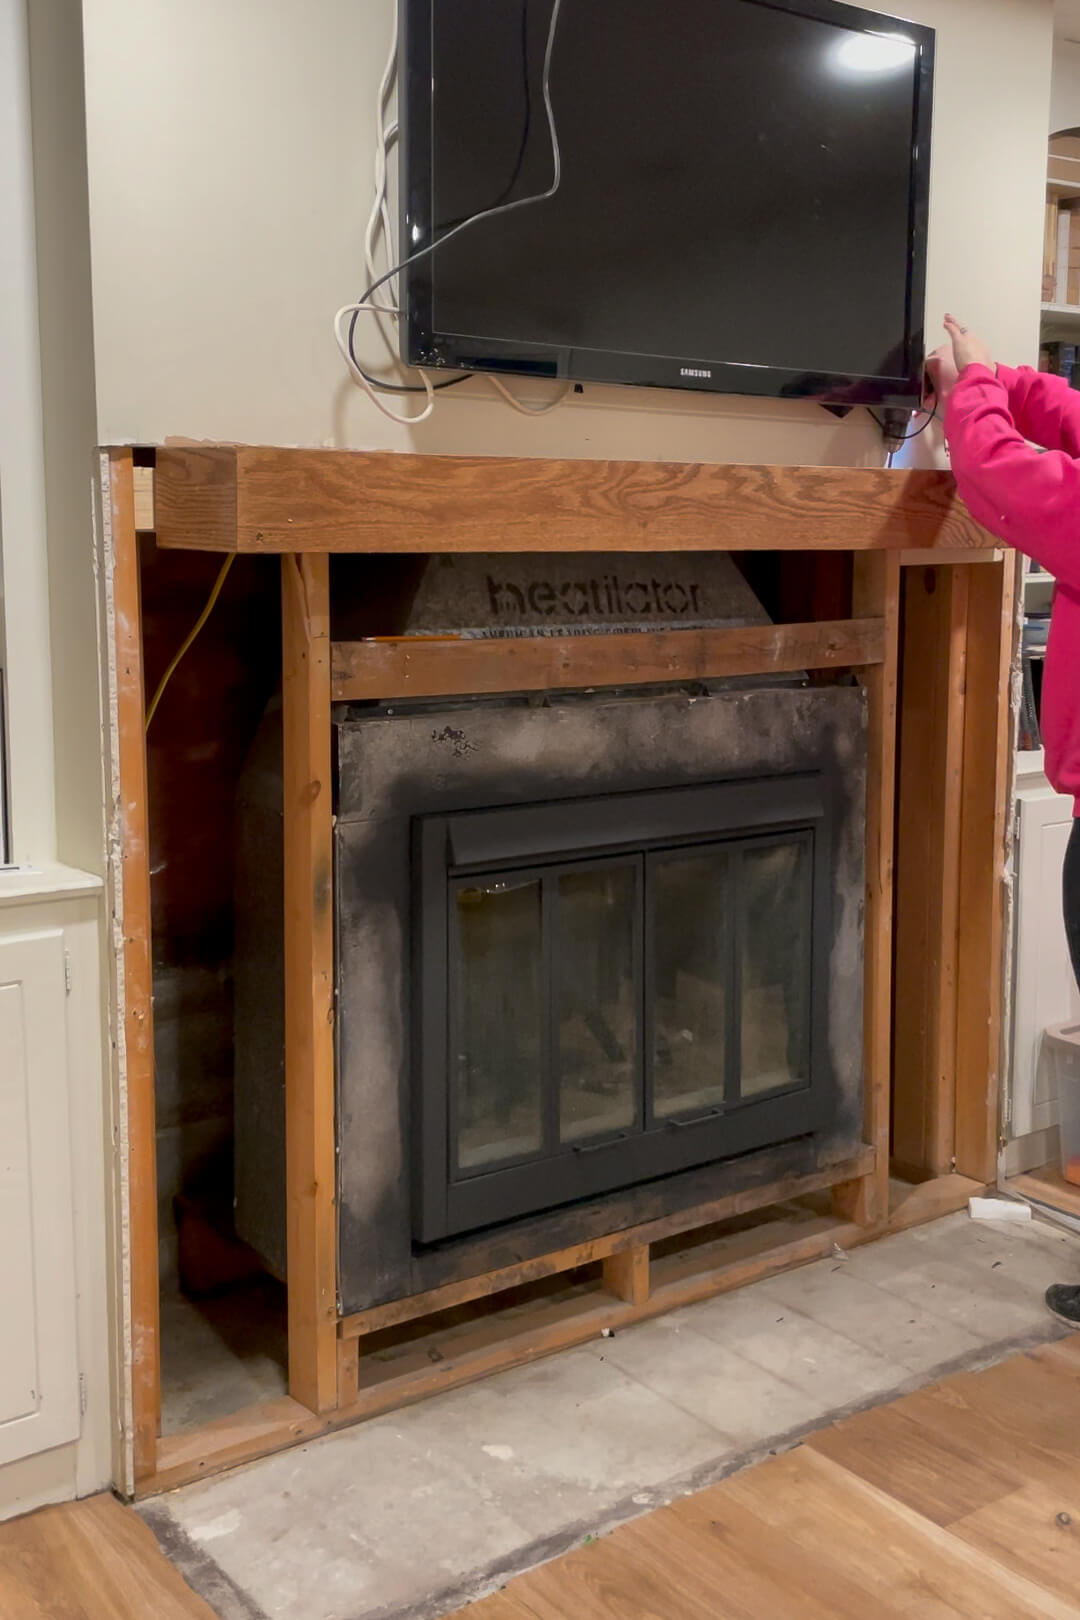
Before installing the mantel for my new rock fireplace, I had to add a little extra blocking in the framing, and then add a 2×4 for the mantel to sit on.

The back of the mantel is open so it slides right onto the 2×4, then I attach it permanently with a few screws.
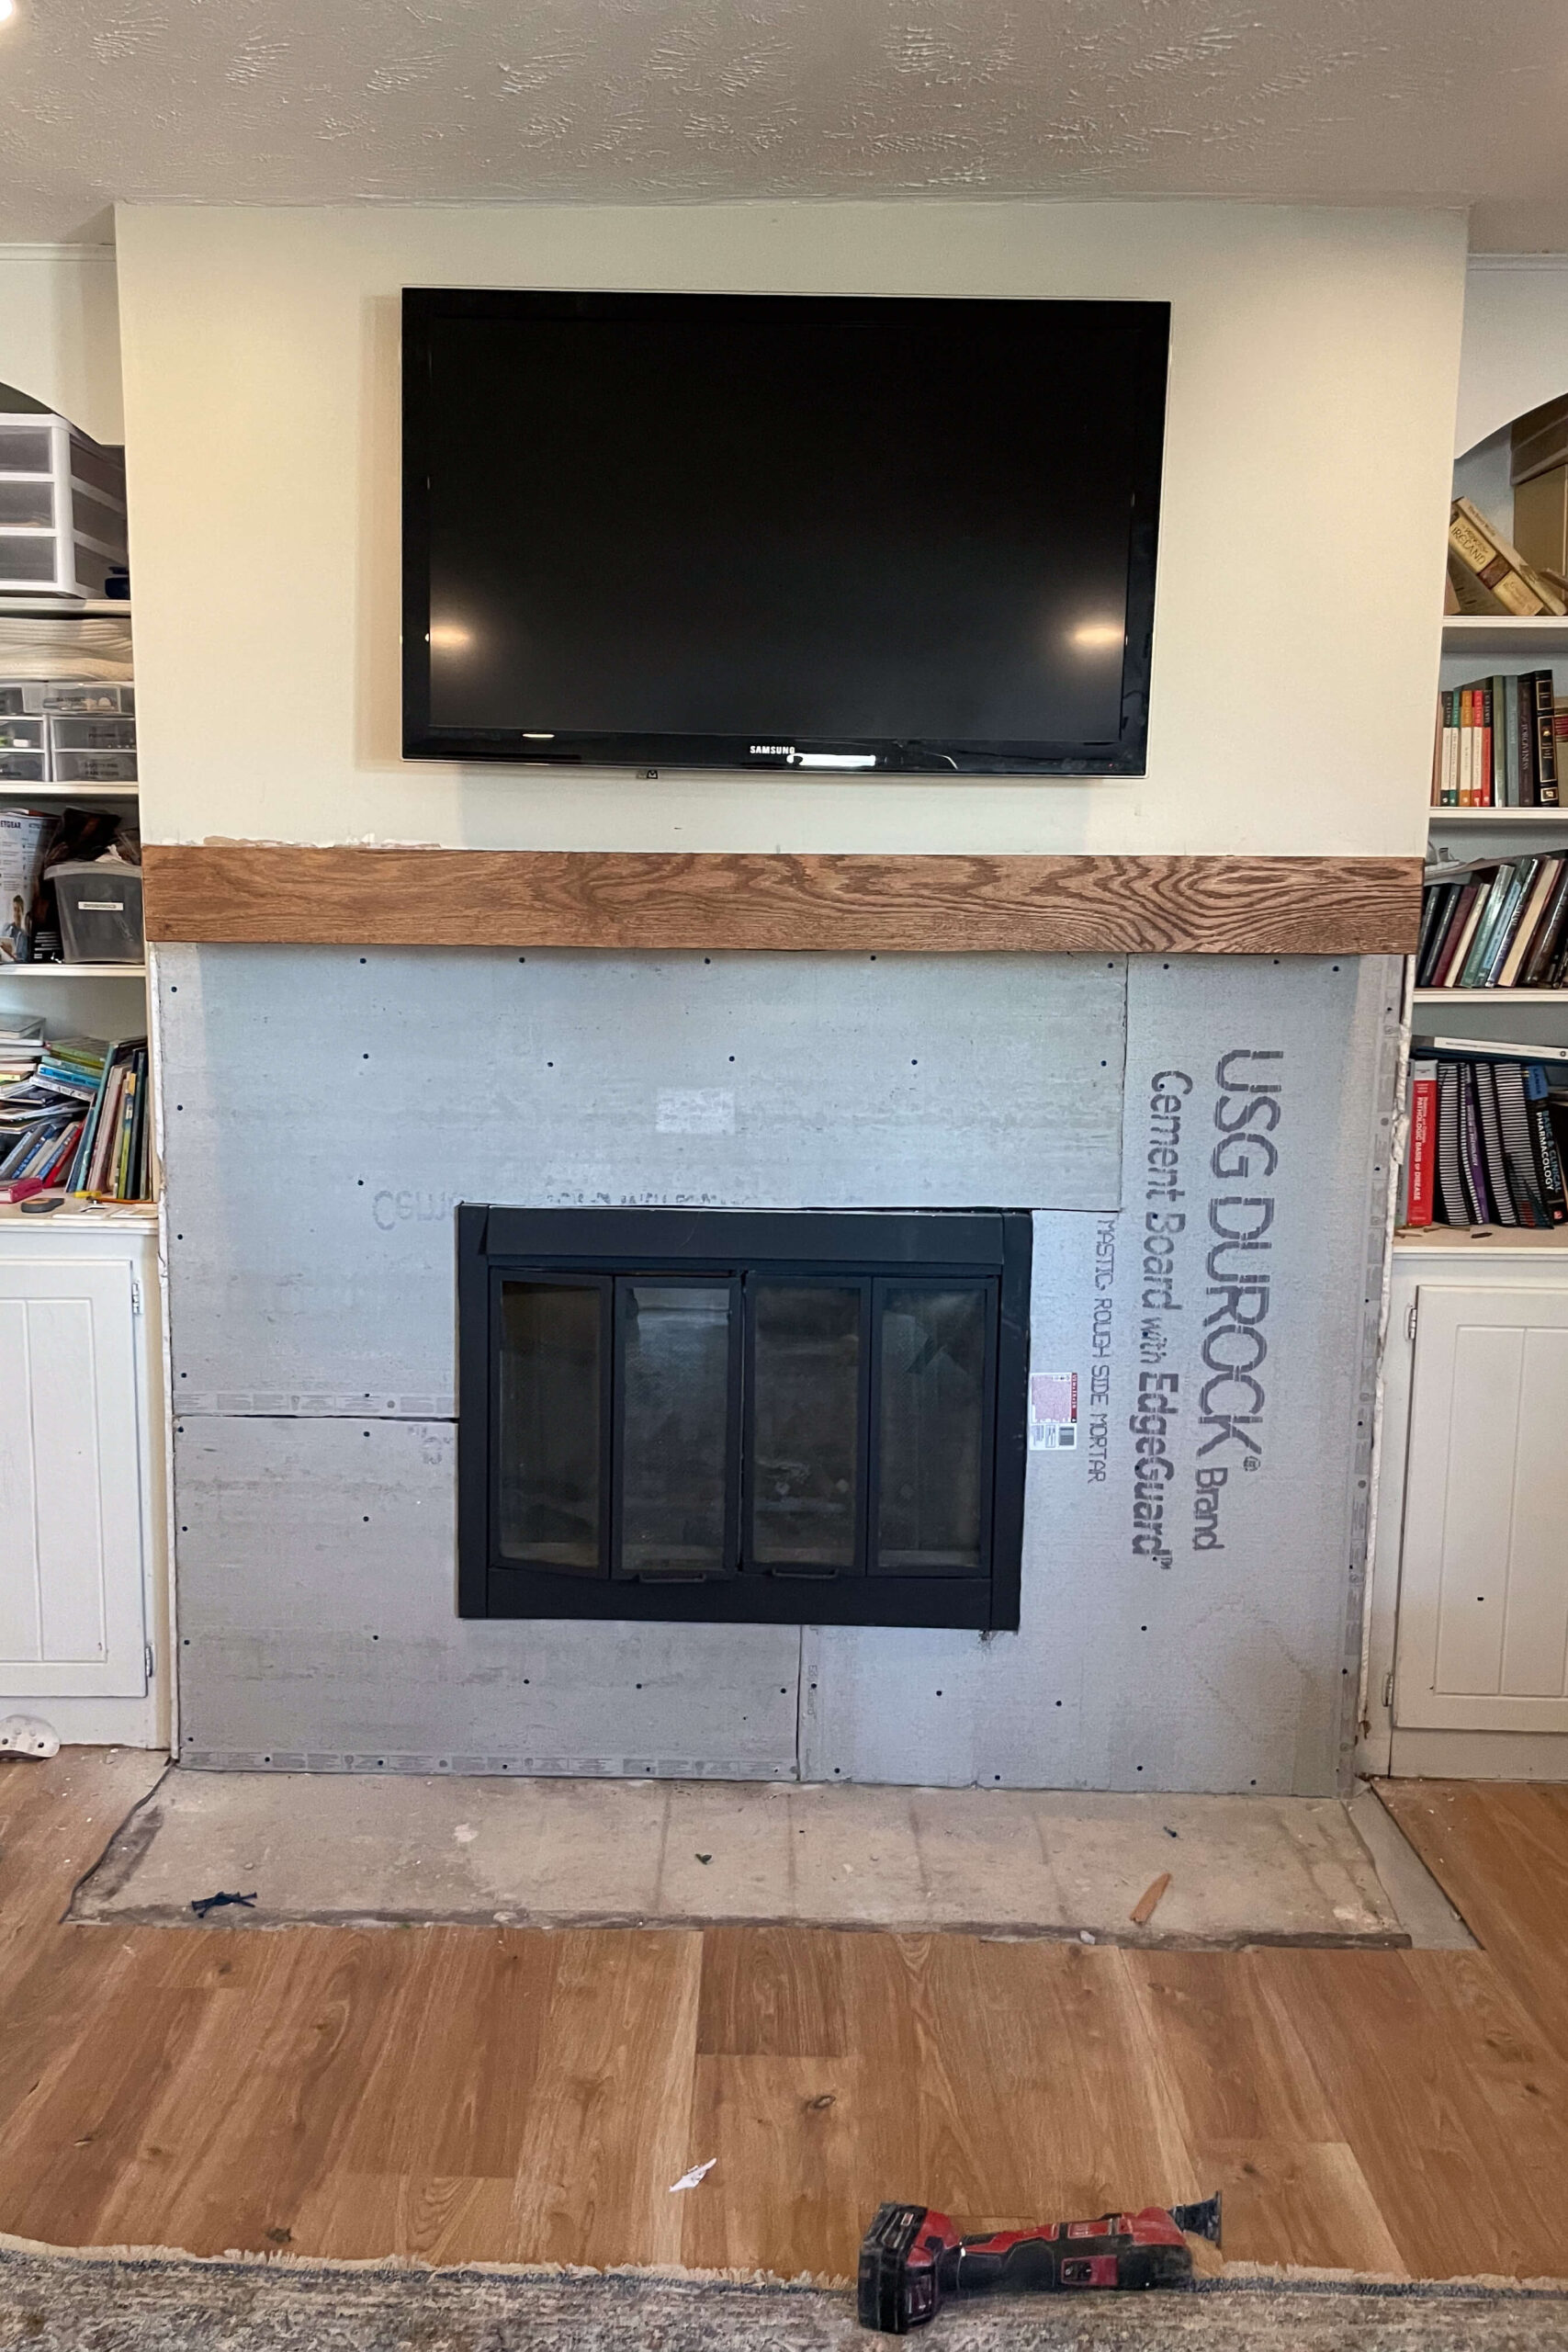
Installing New Stone
With the mantel in place, I prepared to install new stone. I first installed a non-combustible cement board as a backing for the stones. Using an angle grinder with a masonry blade, I made the necessary cuts to fit the cement board around the mantel and insert.


Then you attach it straight to the framing with a drill and concrete screws.
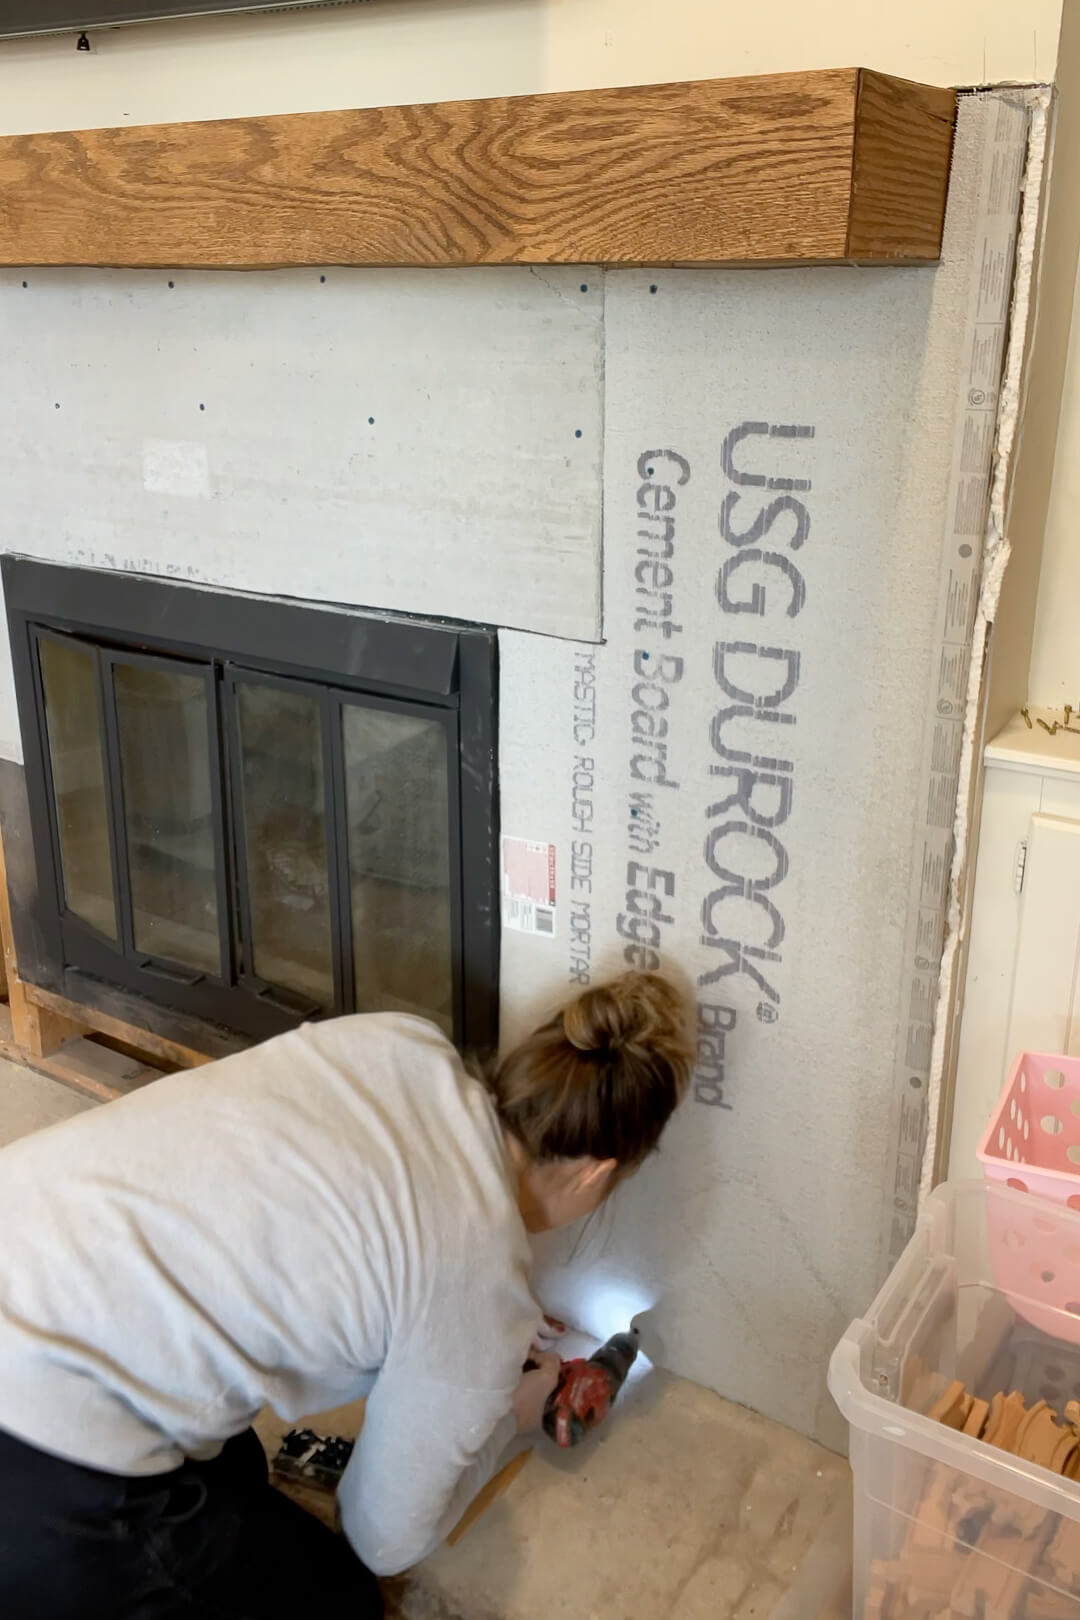
It’s already looking so good! Time for stone!
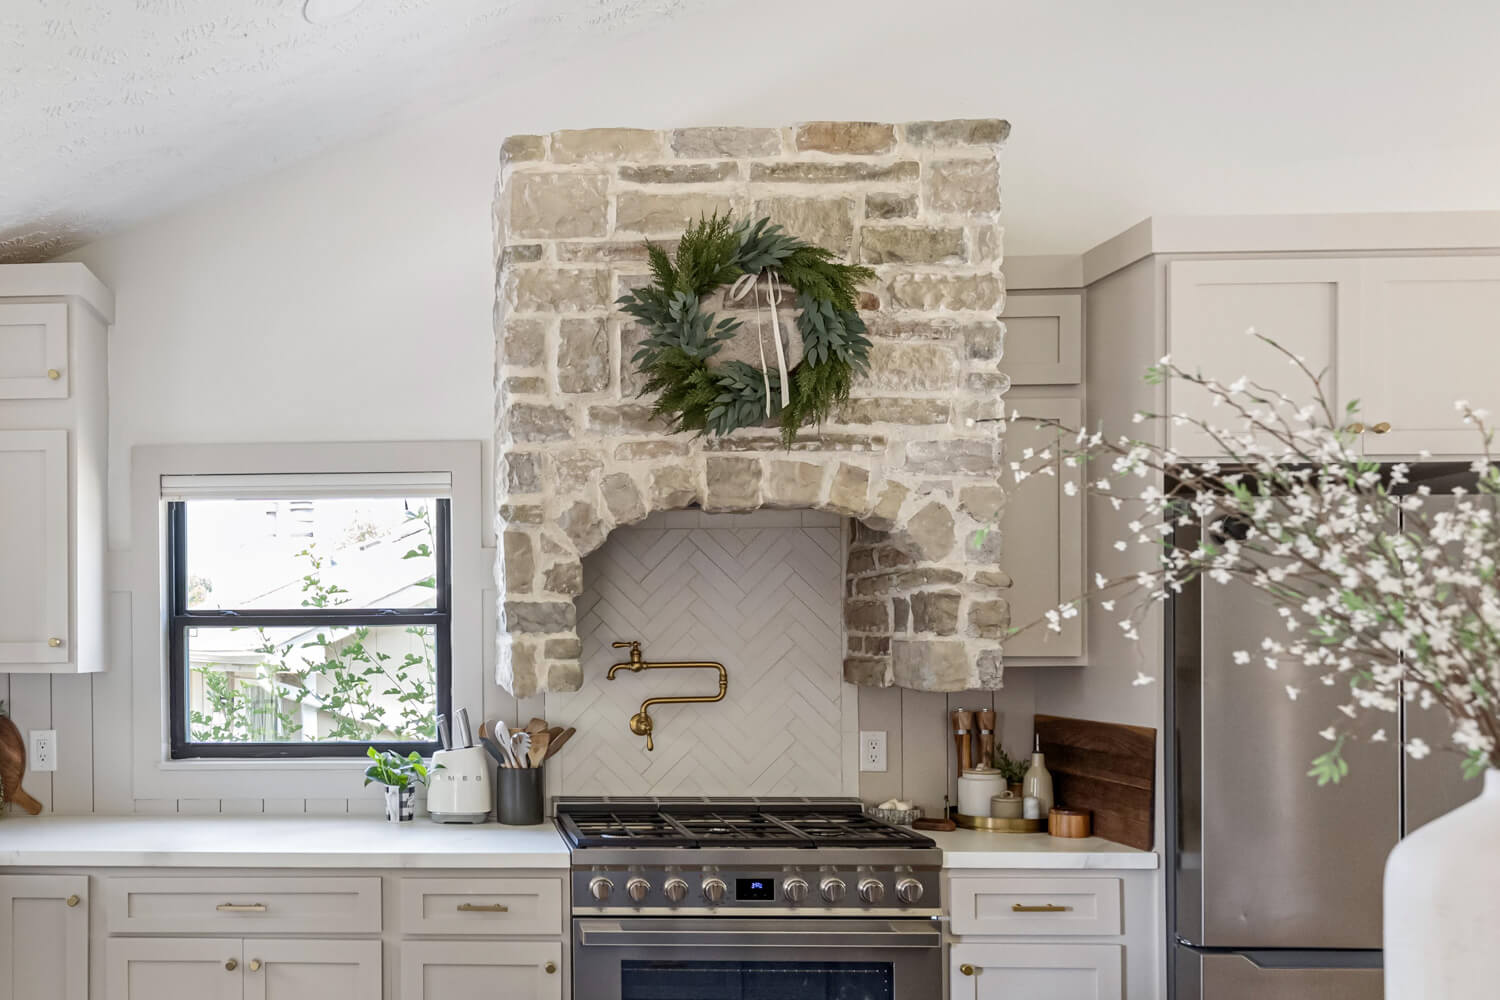
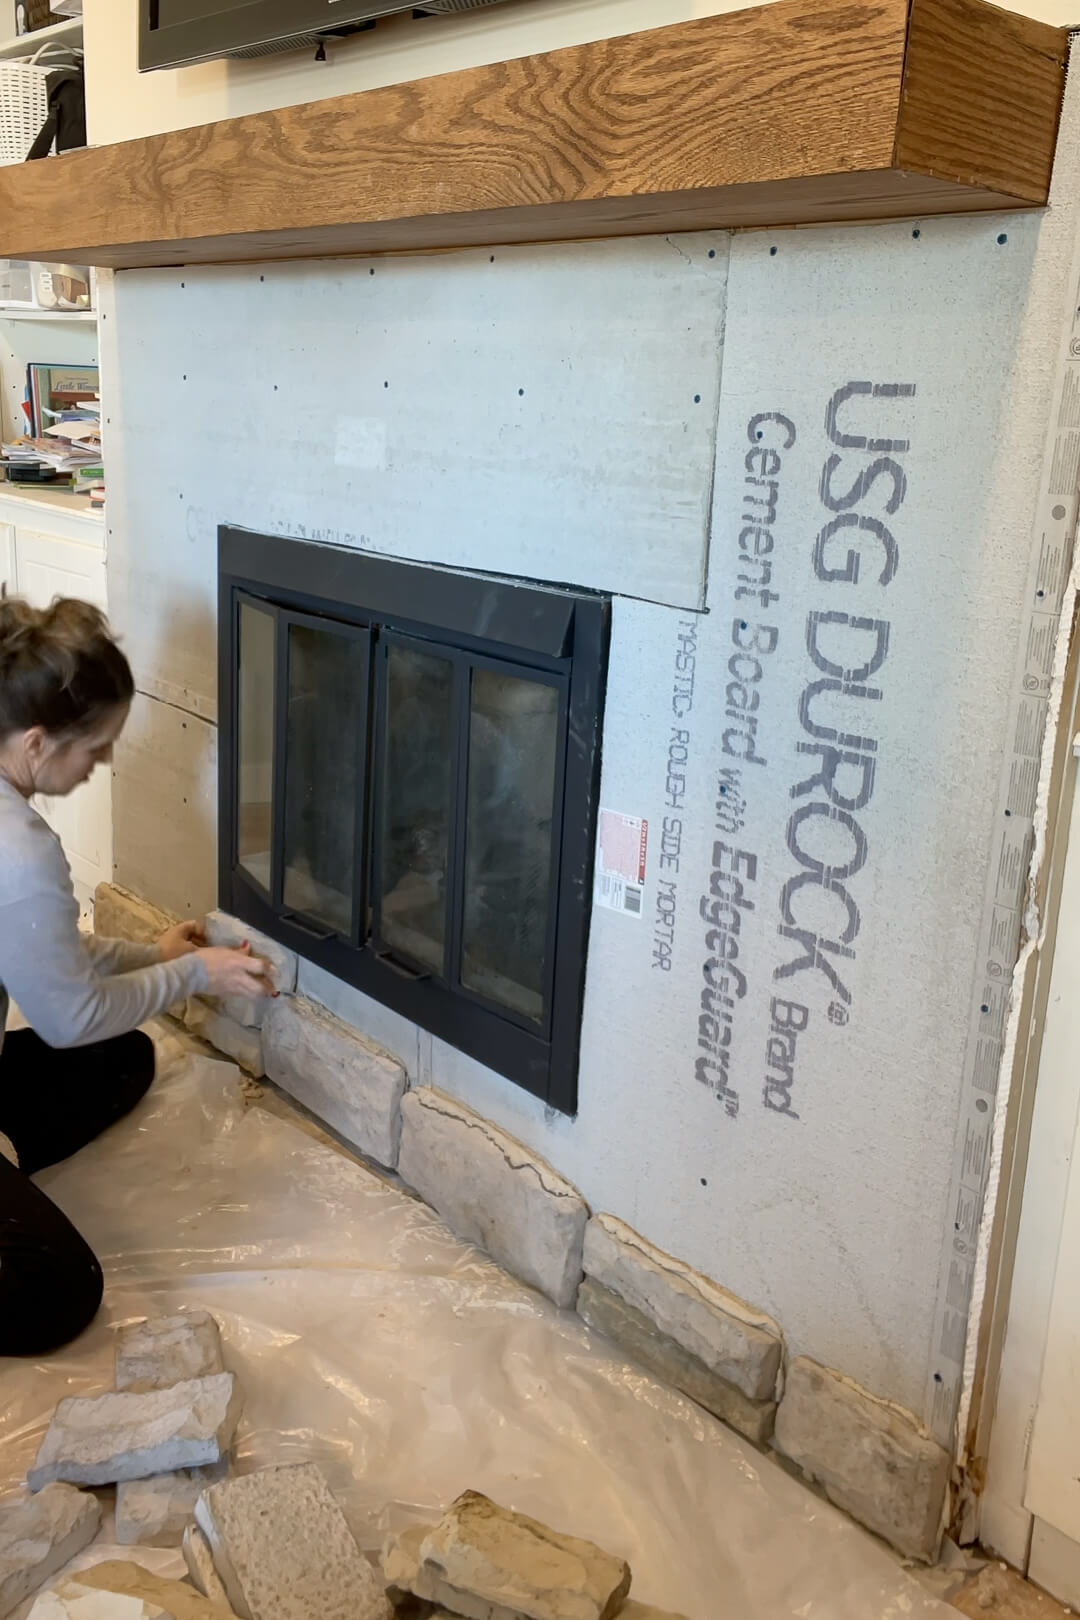
For a consistent aesthetic throughout the house, I chose the same type of stone sourced from for my kitchen range hood.
Starting at the bottom, I began the meticulous process of fitting each stone into place, much like solving a funky puzzle. Each stone had to be carefully selected from the pile to ensure it fit perfectly into the designated gap.
Before setting each stone, I applied a layer of mortar to its back (a technique known as back-buttering), ensuring a strong bond when pressed onto the cement board.
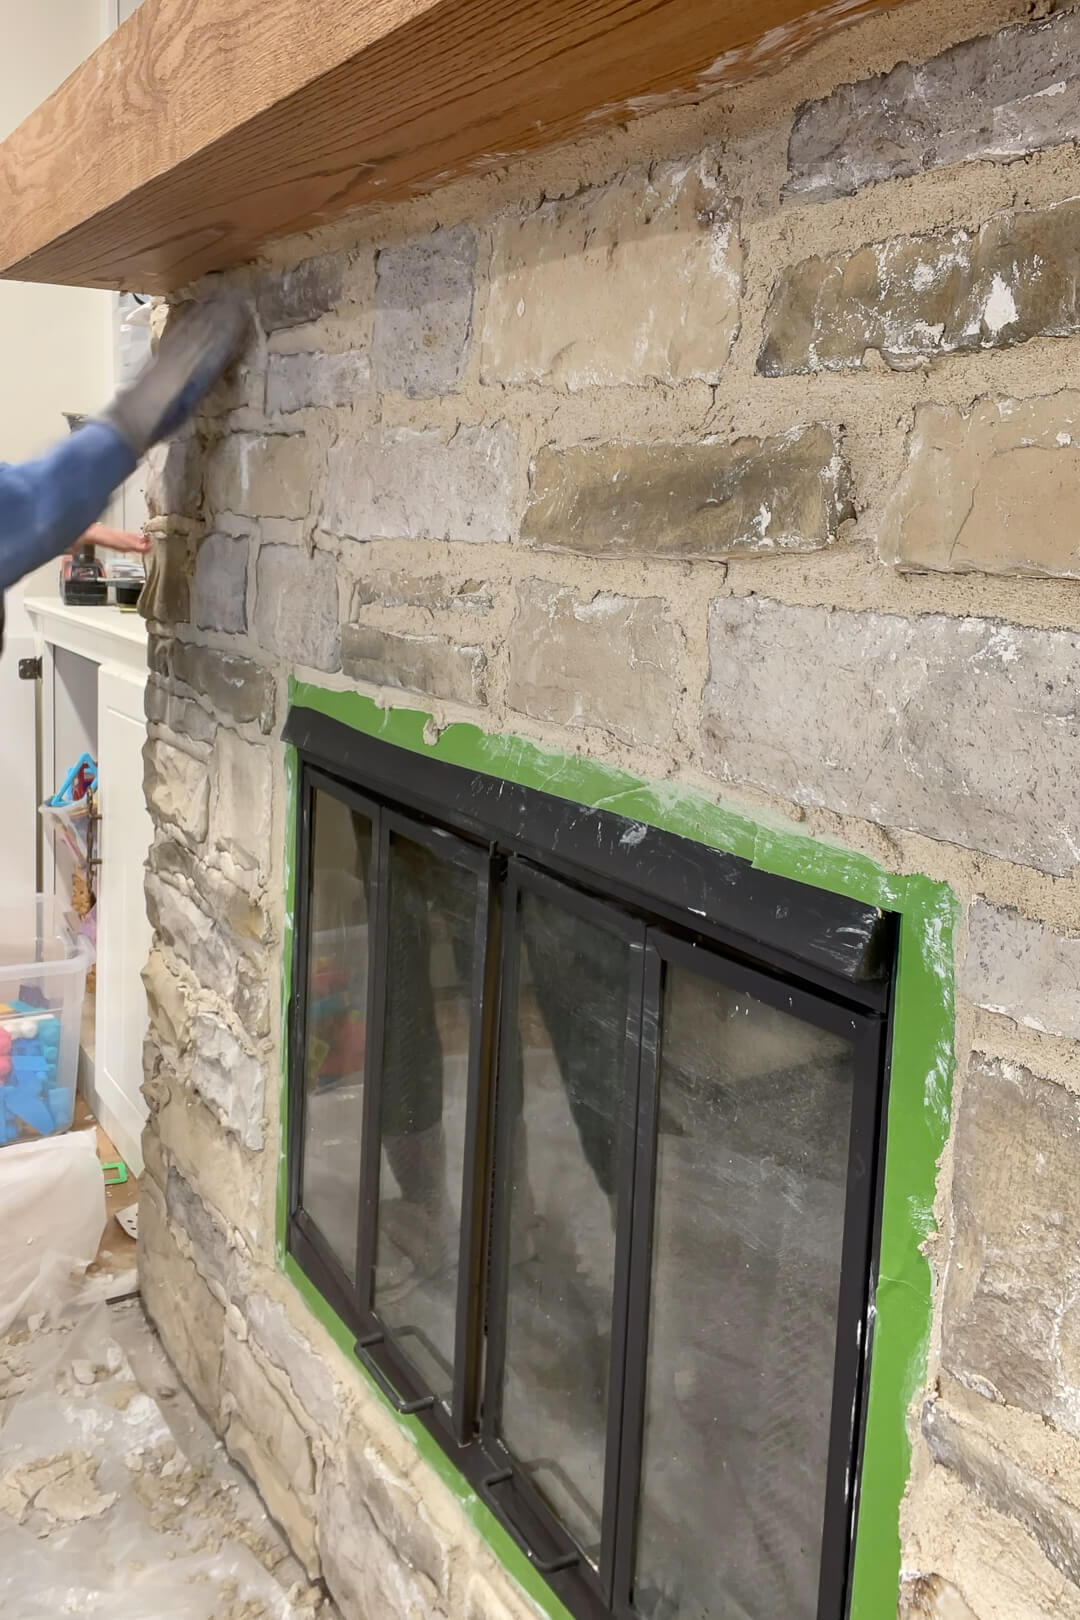
Once all the stones were securely in place, I allowed them a day to set and dry. Following this, I began the process of filling in the grooves. Using a mortar bag—similar to icing a cake—I carefully squeezed the mortar into all the gaps between the stones and around the mantle.
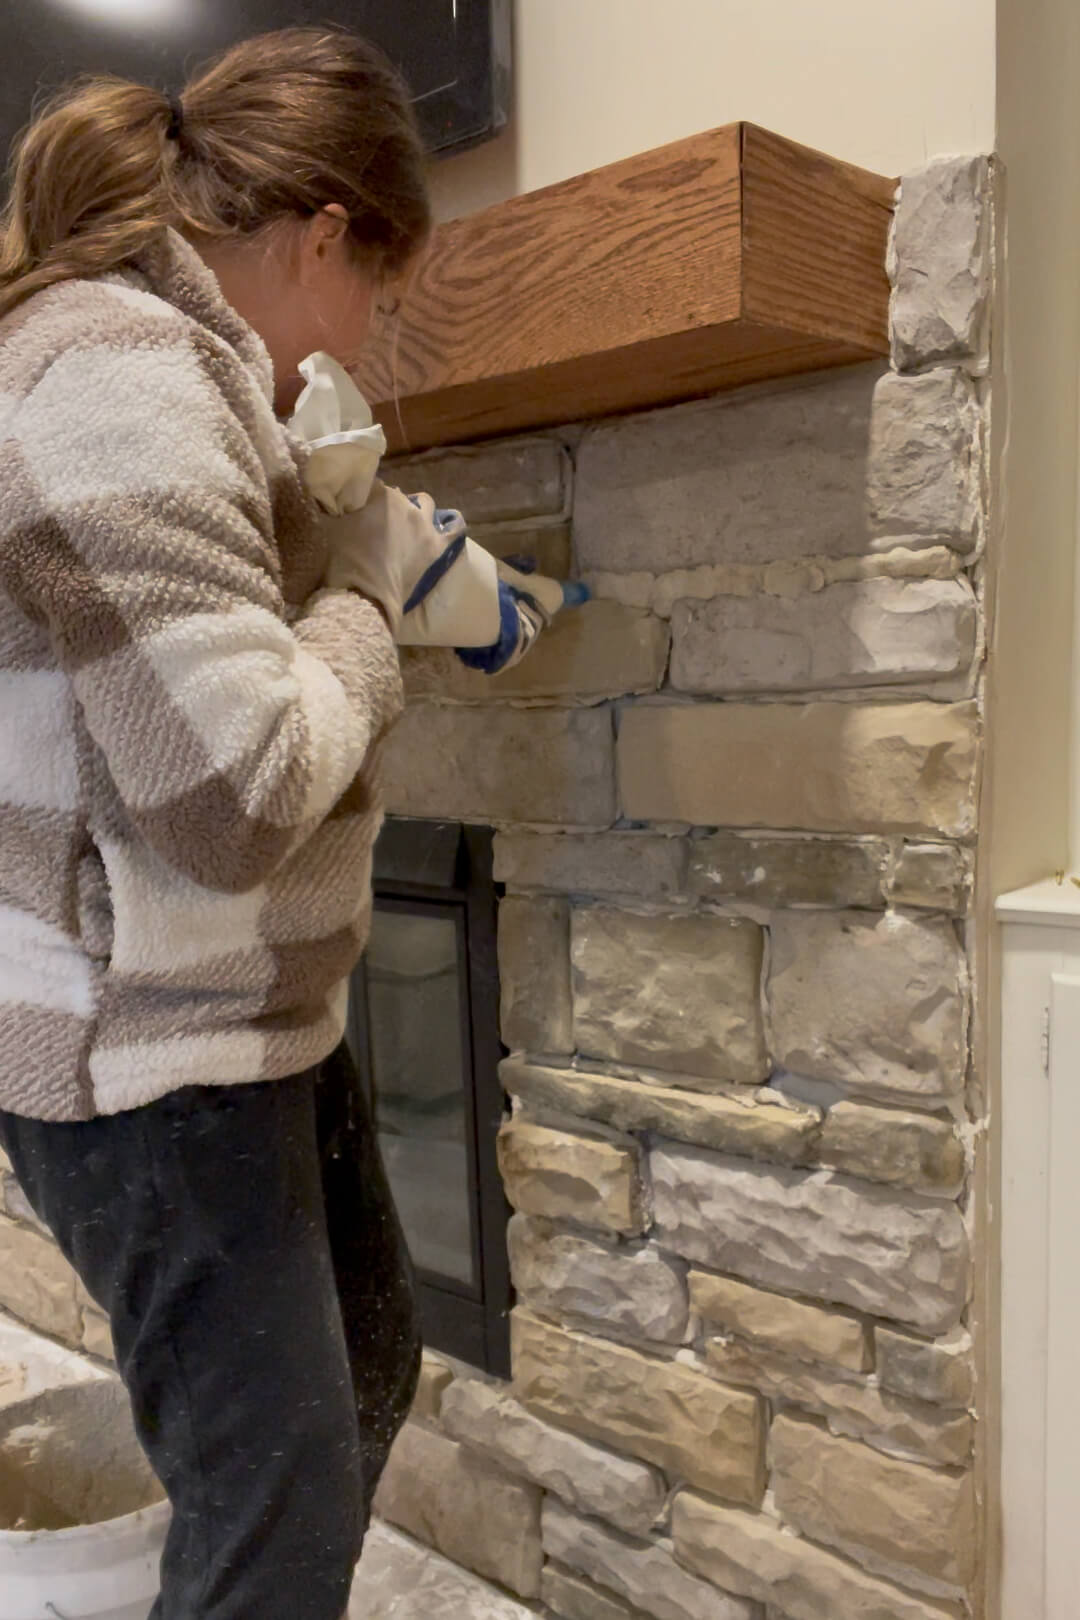
I started smoothing the mortar with a gloved hand, working section by section. The transformation was visible immediately. The smoothed areas contrasted sharply against the unfinished bumpy mortar.
You have to work fast because if the mortar is left too long, it hardens and becomes difficult, if not impossible, to smooth out. I applied the mortar incrementally so I could manage to smooth each section effectively before moving on to the next.
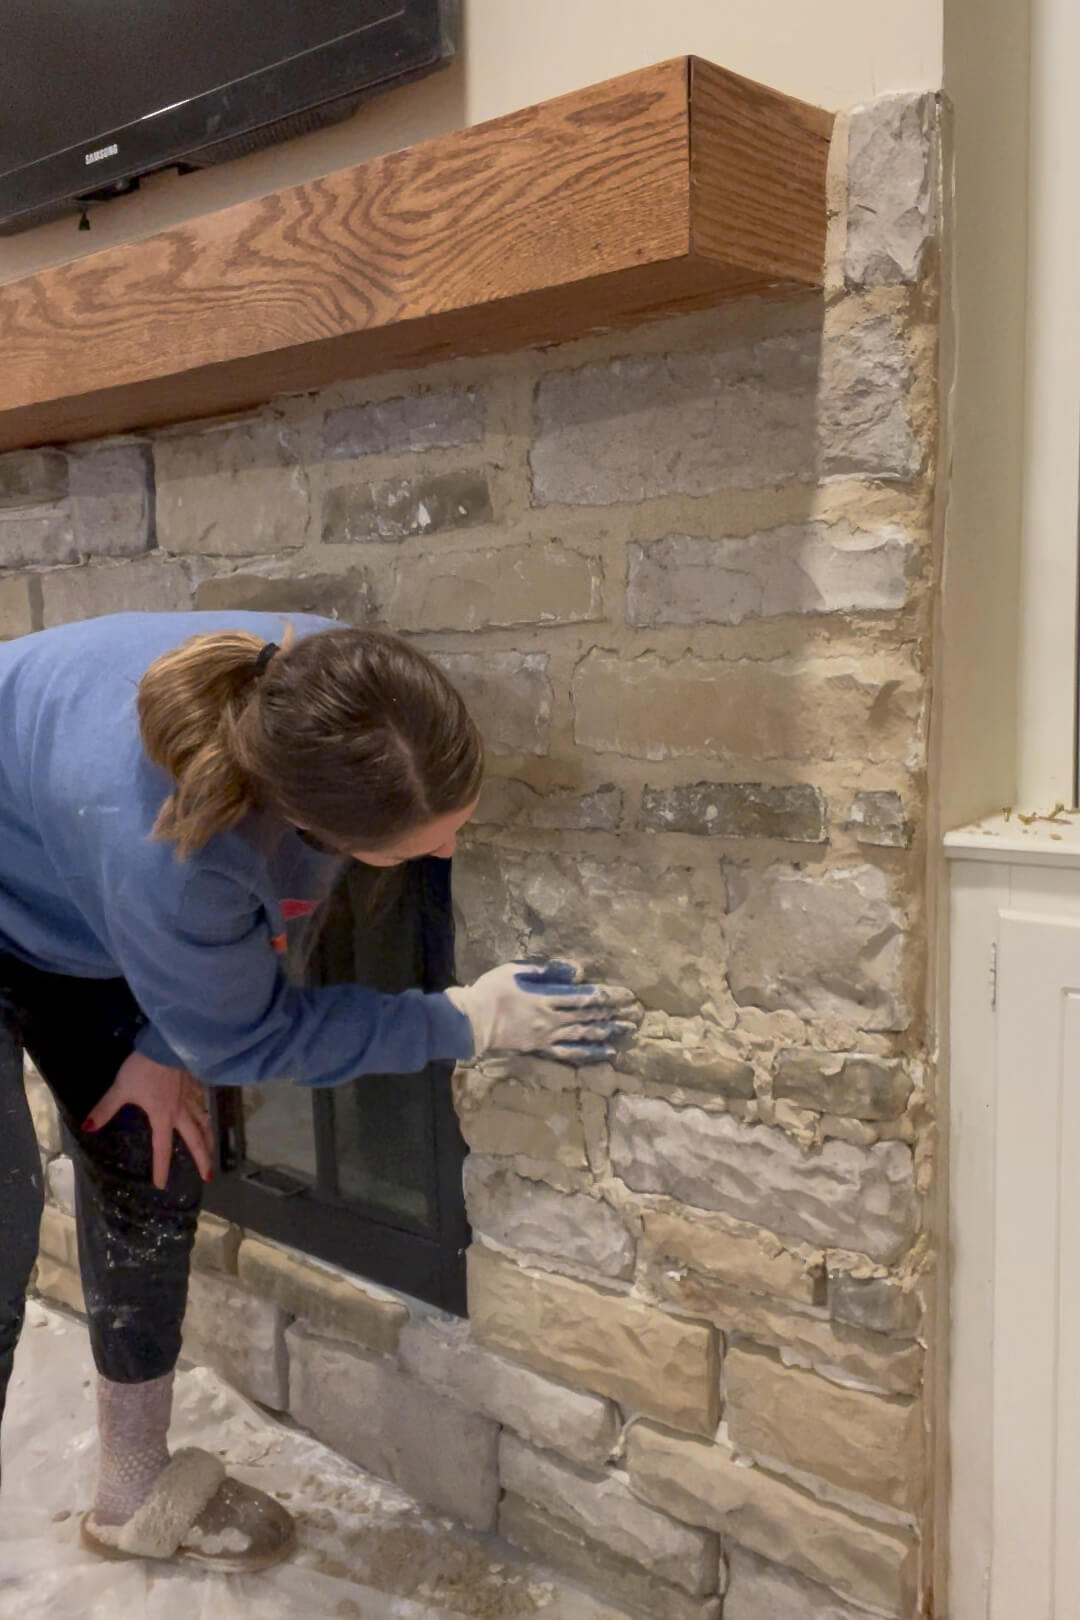
When you get near the insert, it’s a good idea to protect it with a little bit of painter’s tape. Also use plastic drop cloths around the floor because this does get messy.
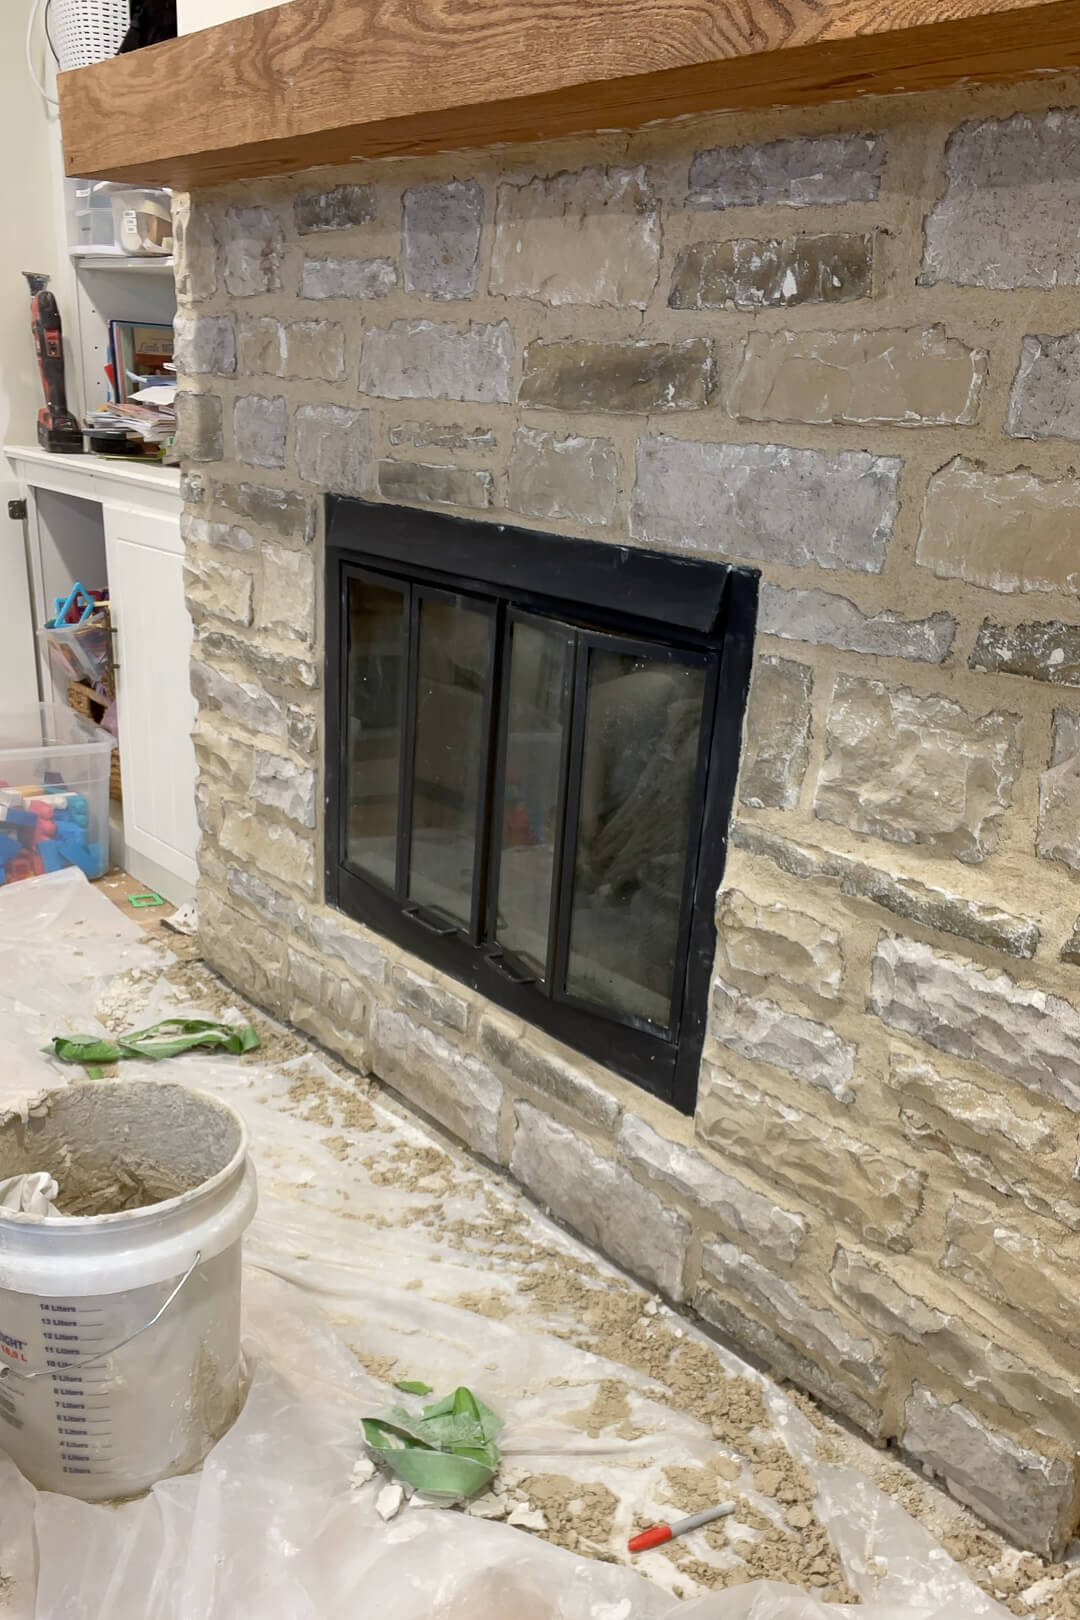
And finished! I just need to let this all dry and get everything cleaned up.
c
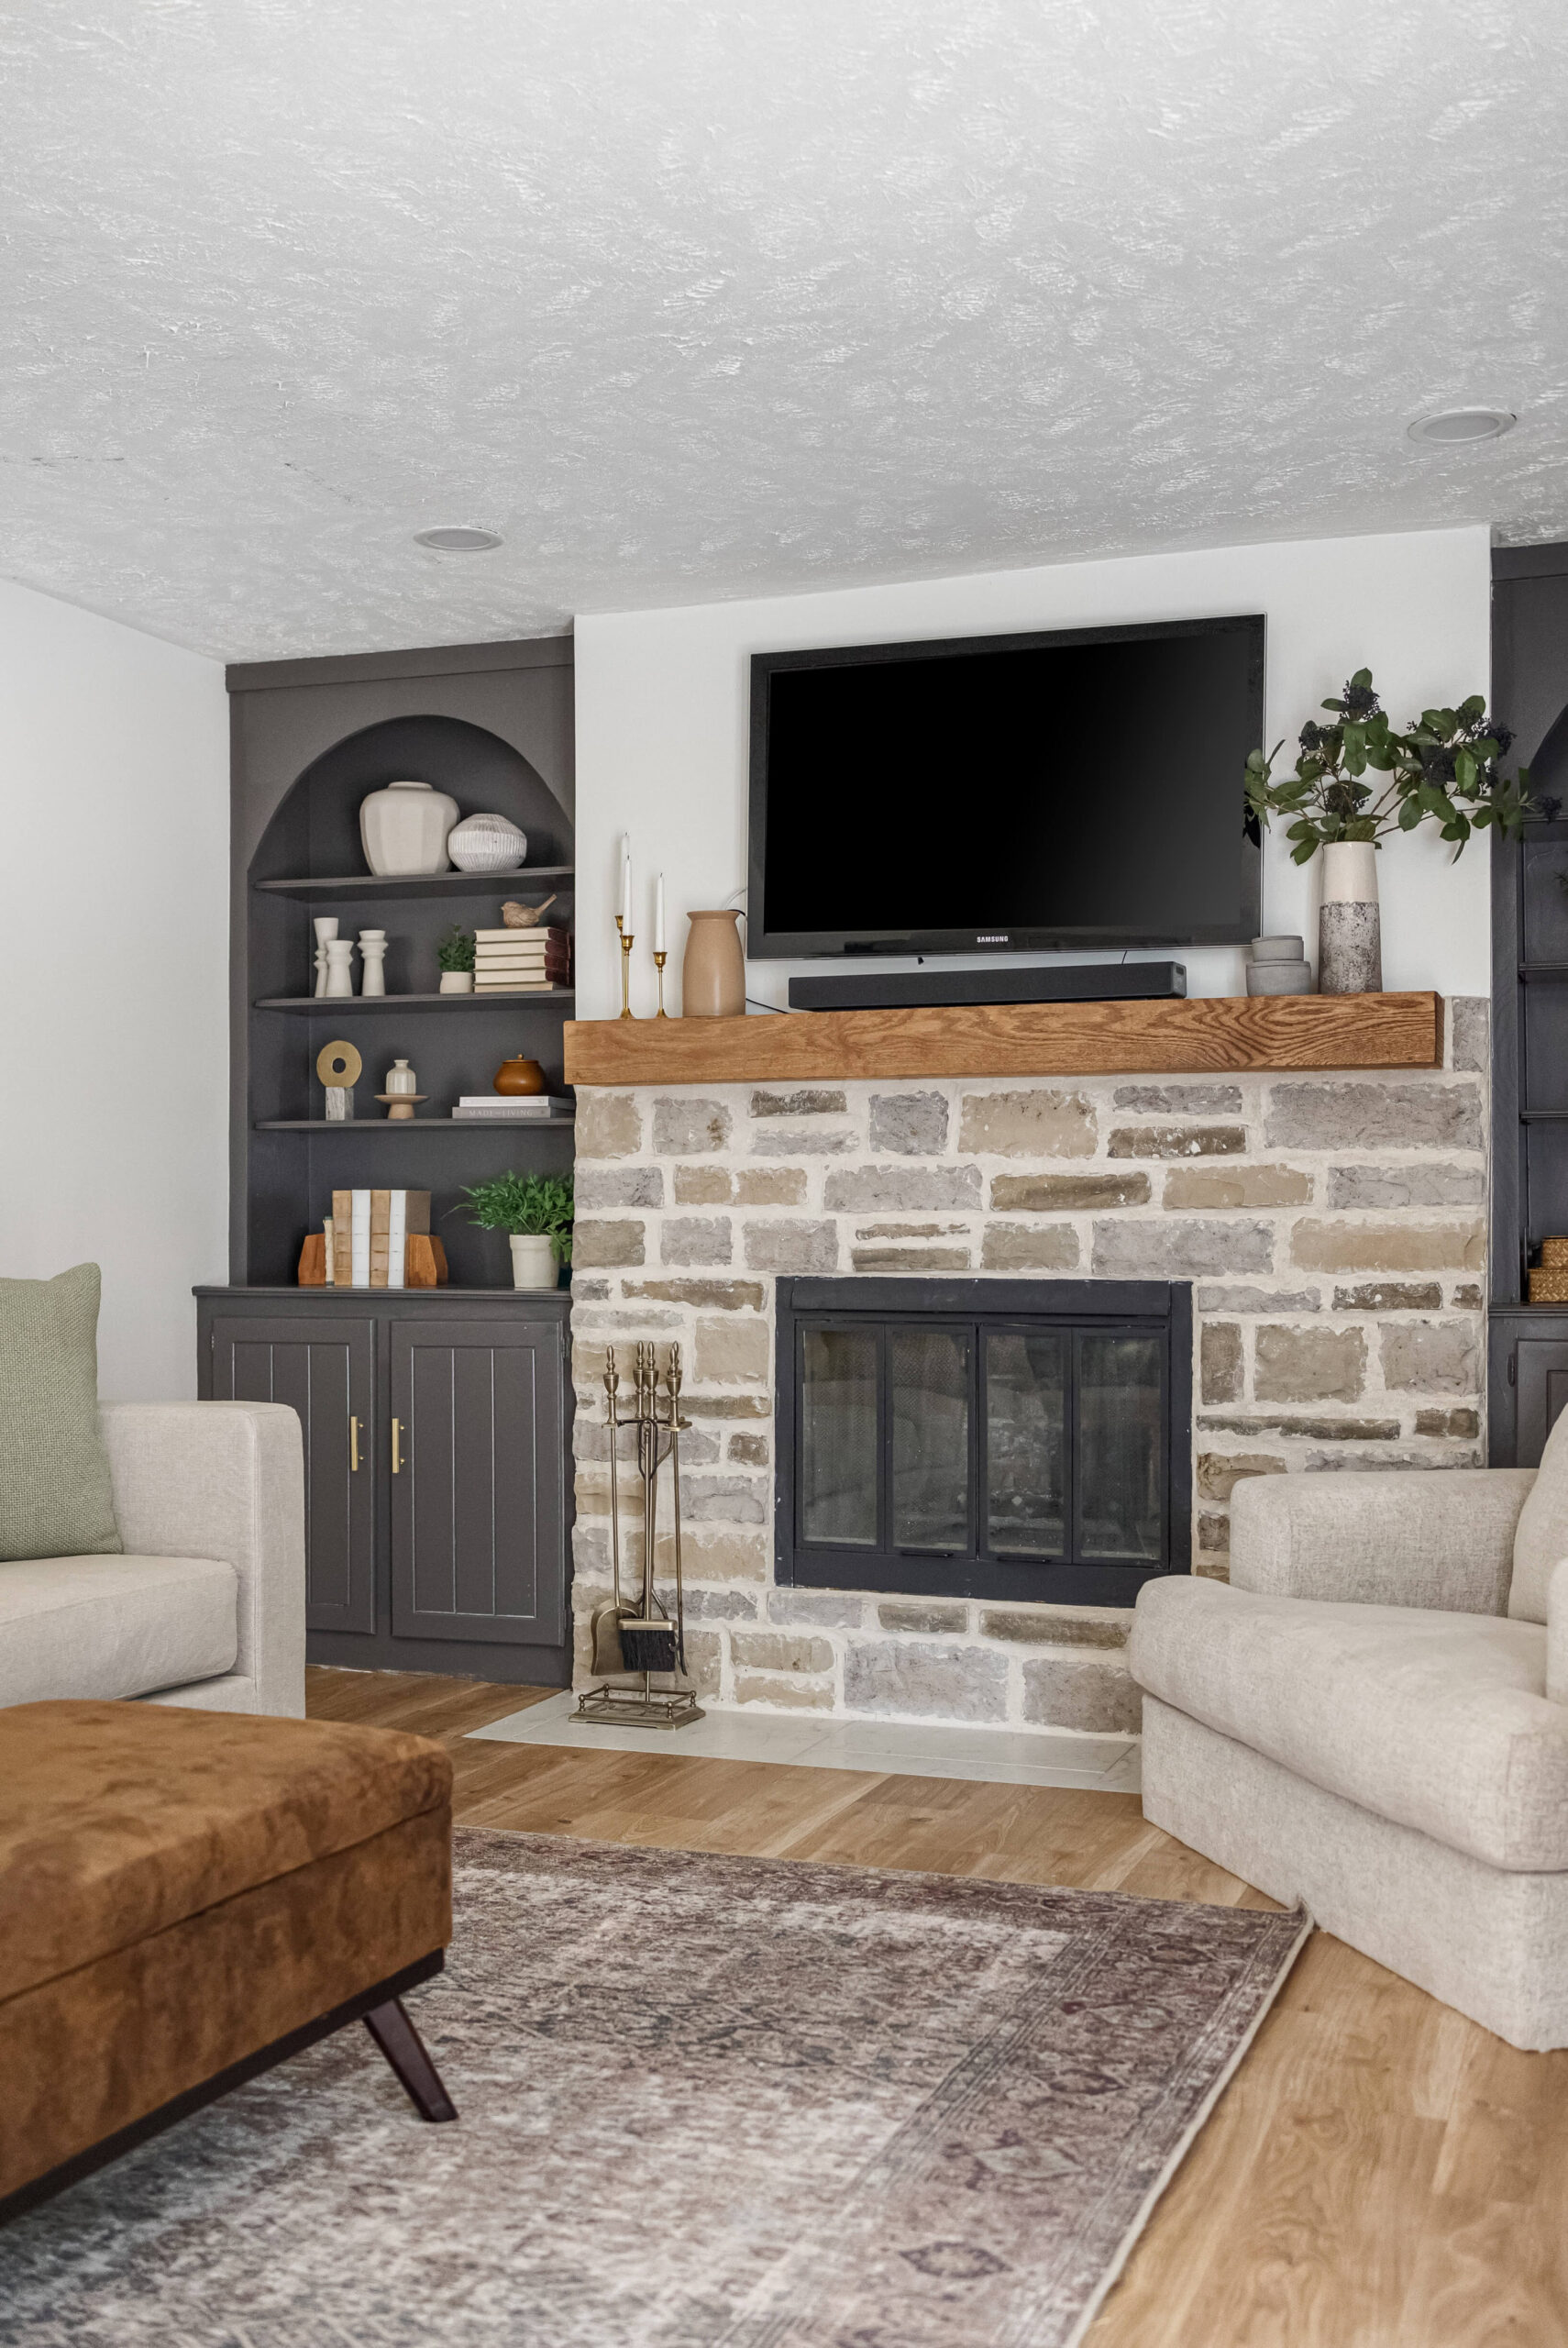
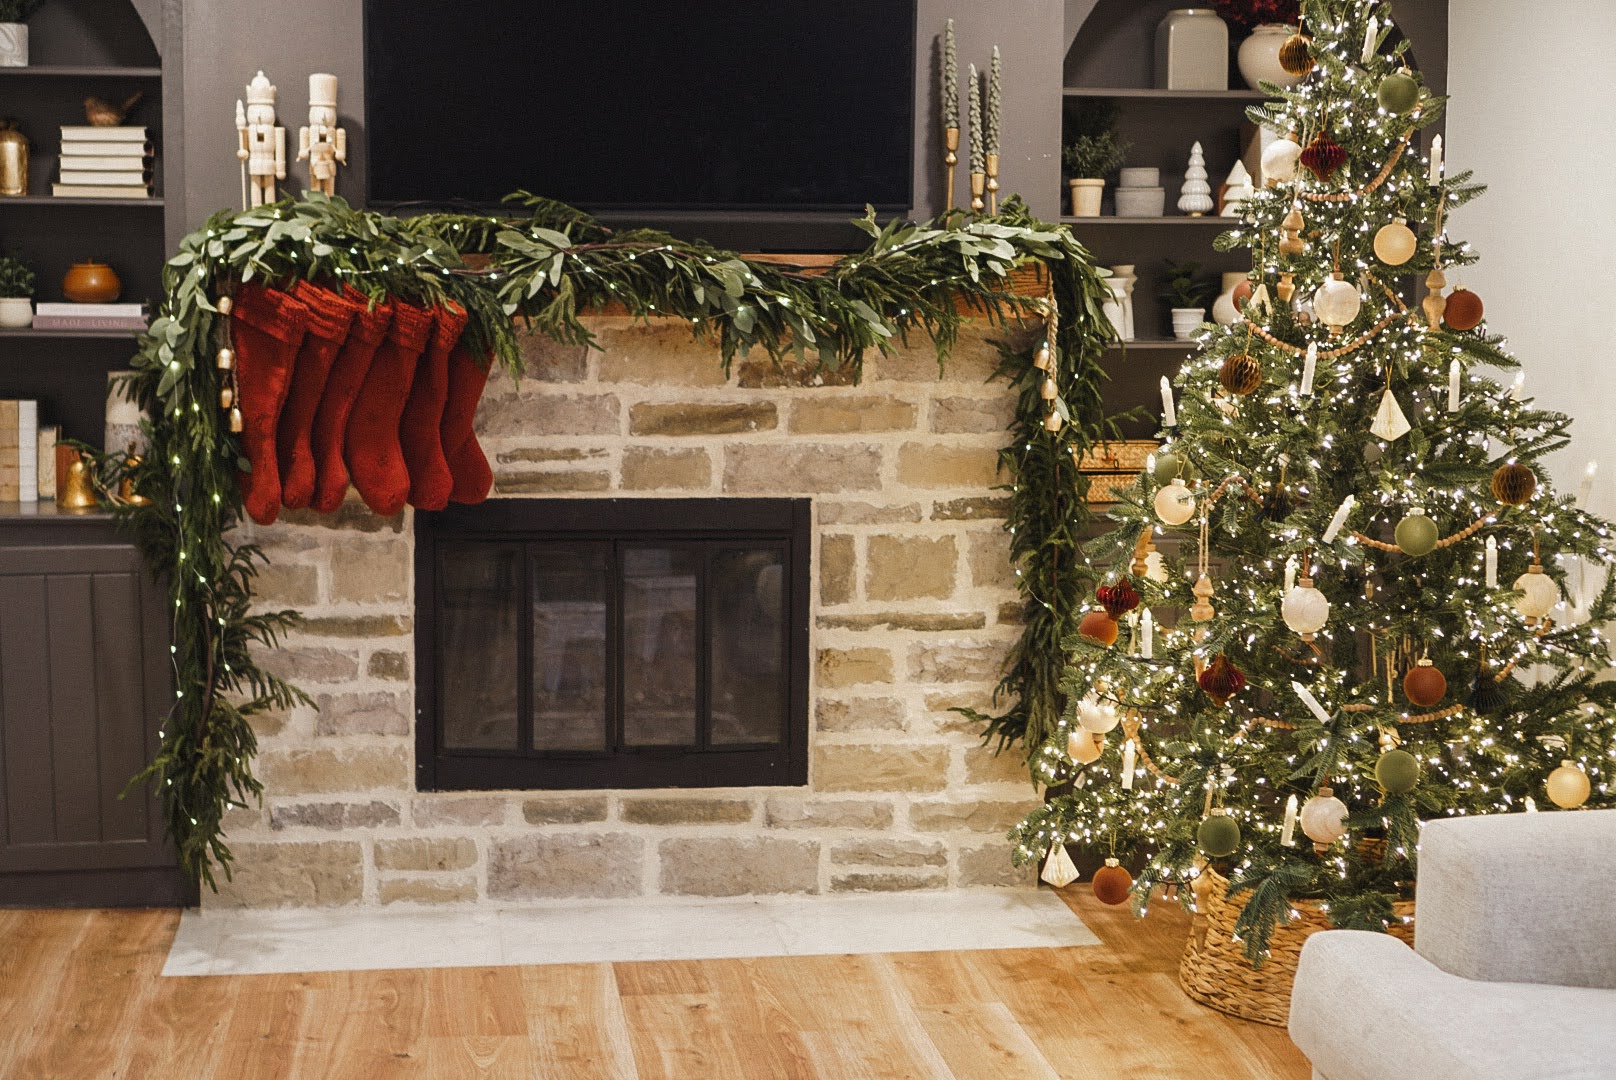
And the after photo! I can’t believe the transformation in this room. In addition to completely redoing the rock fireplace, we replaced the flooring, tiled in front of the fireplace, and gave the built-ins a modern makeover by altering the arch and painting them the same color as my kitchen island.
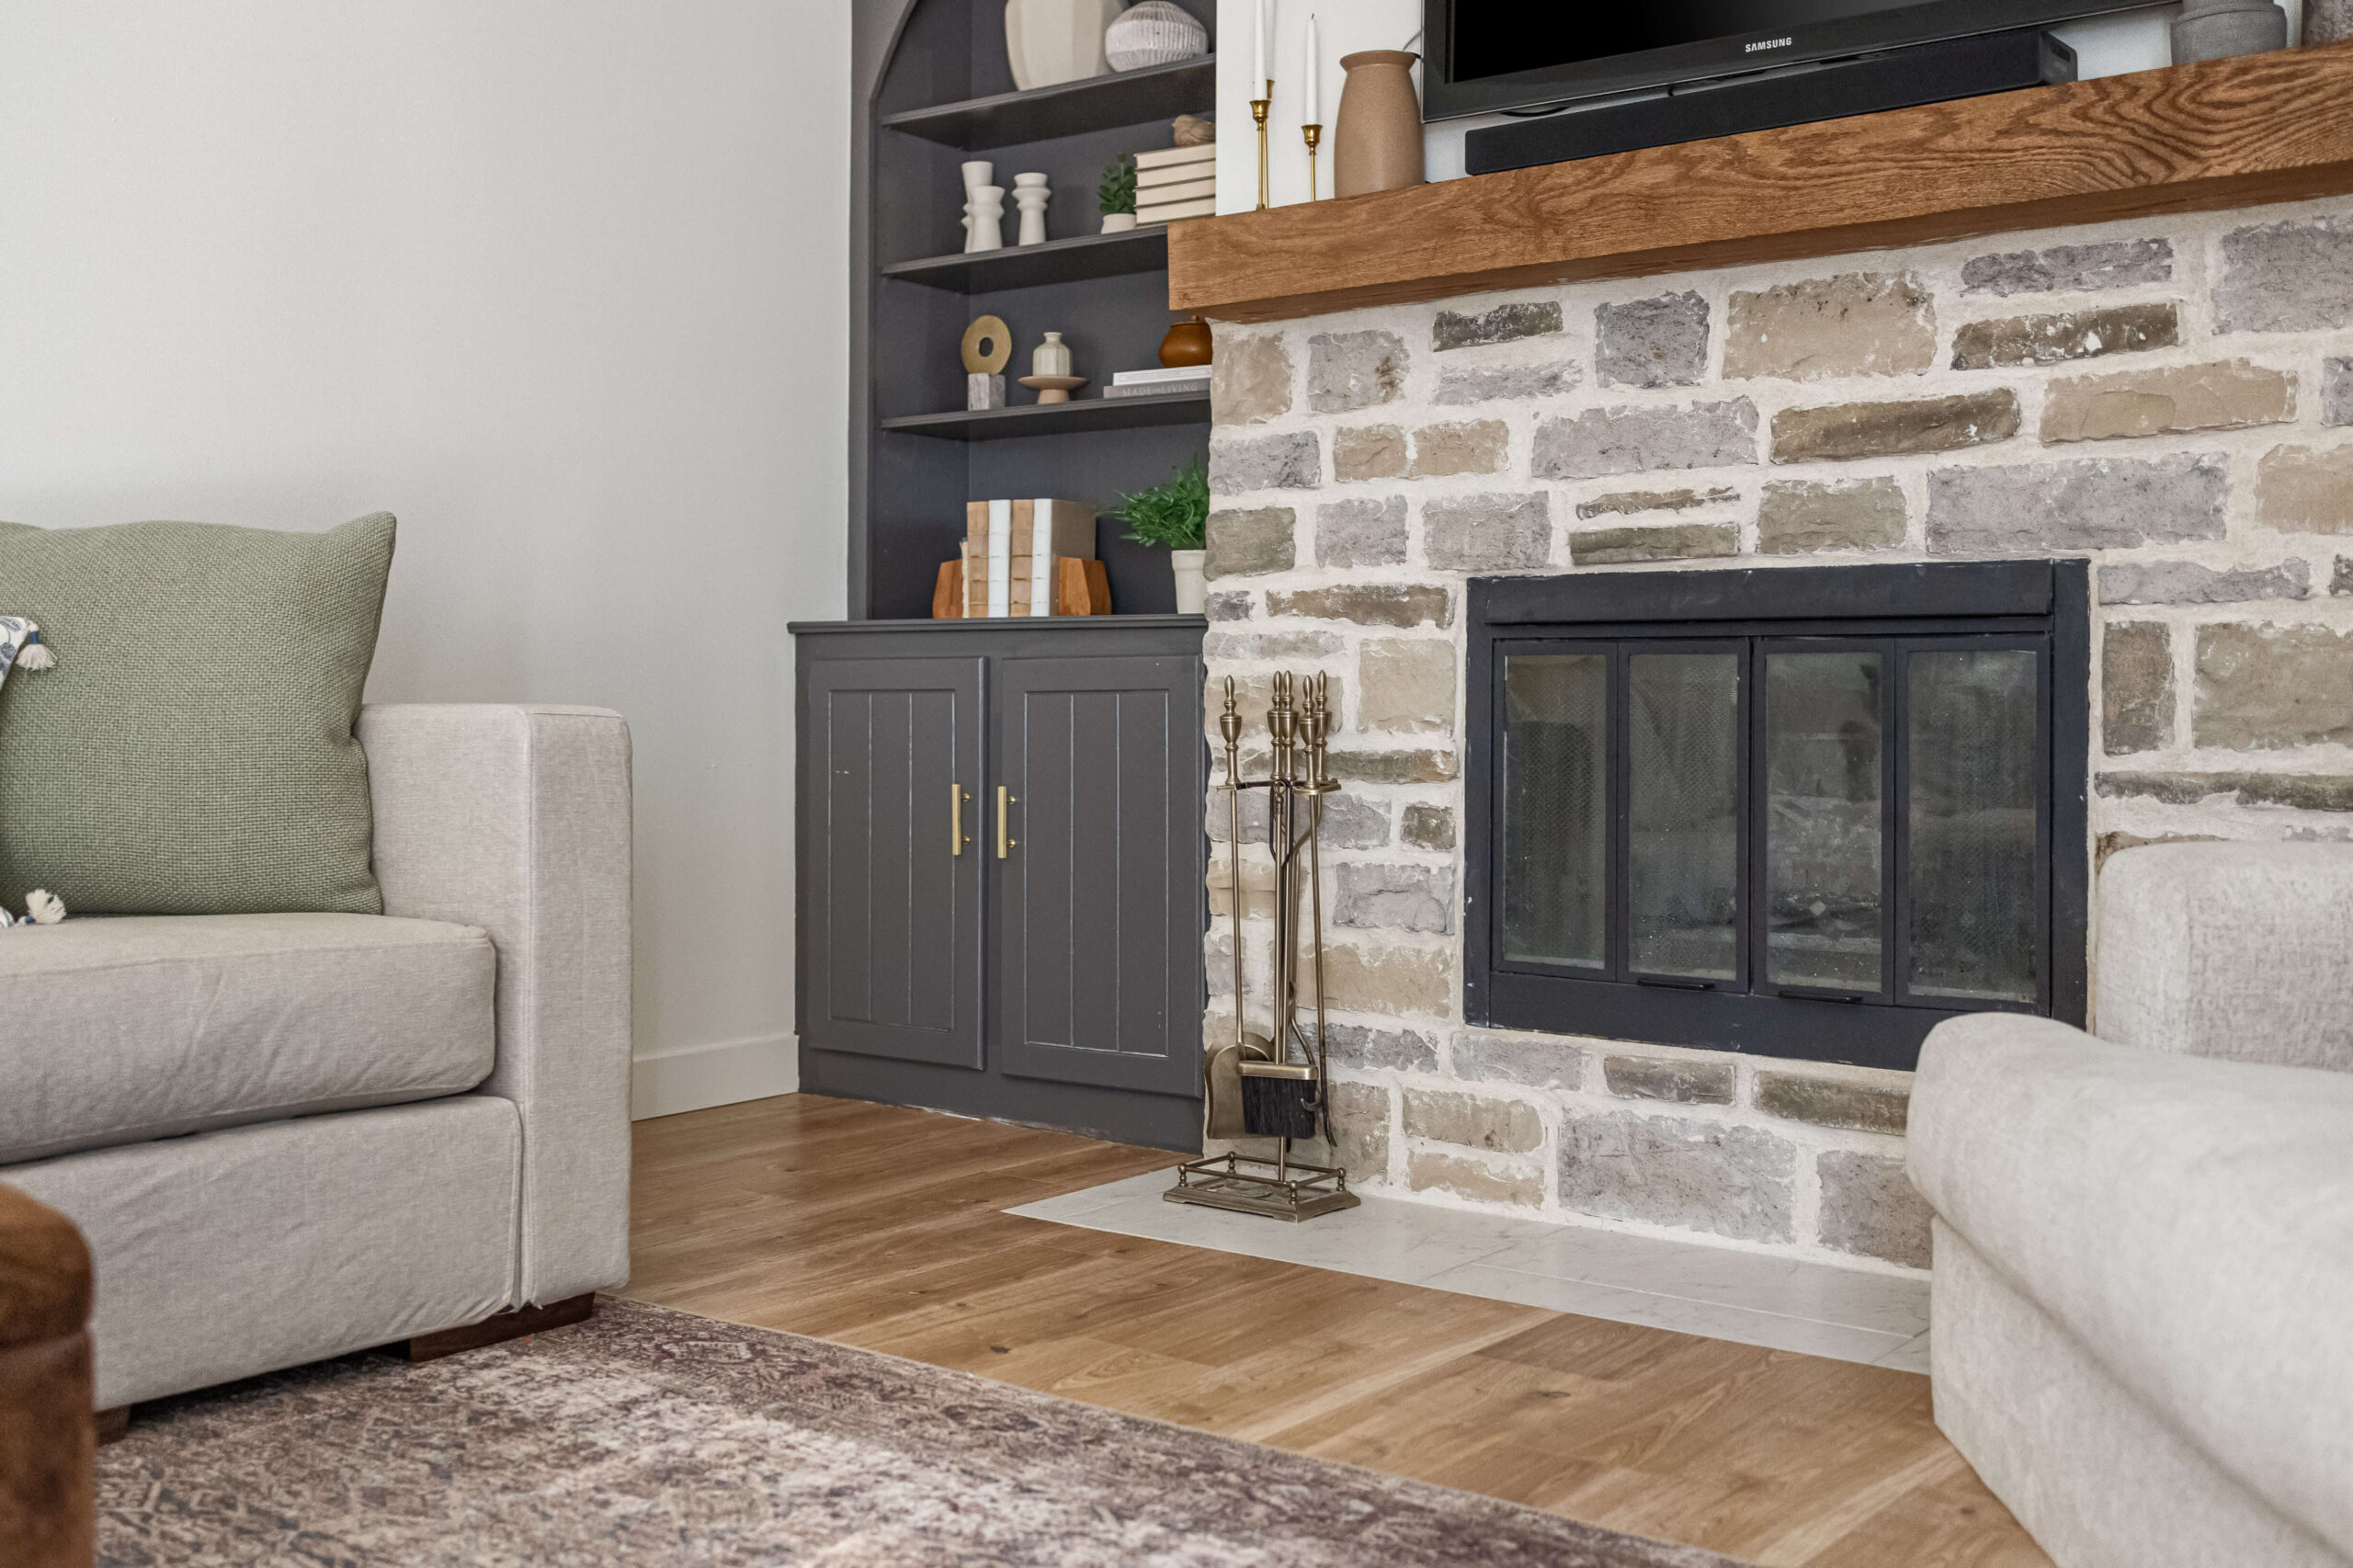
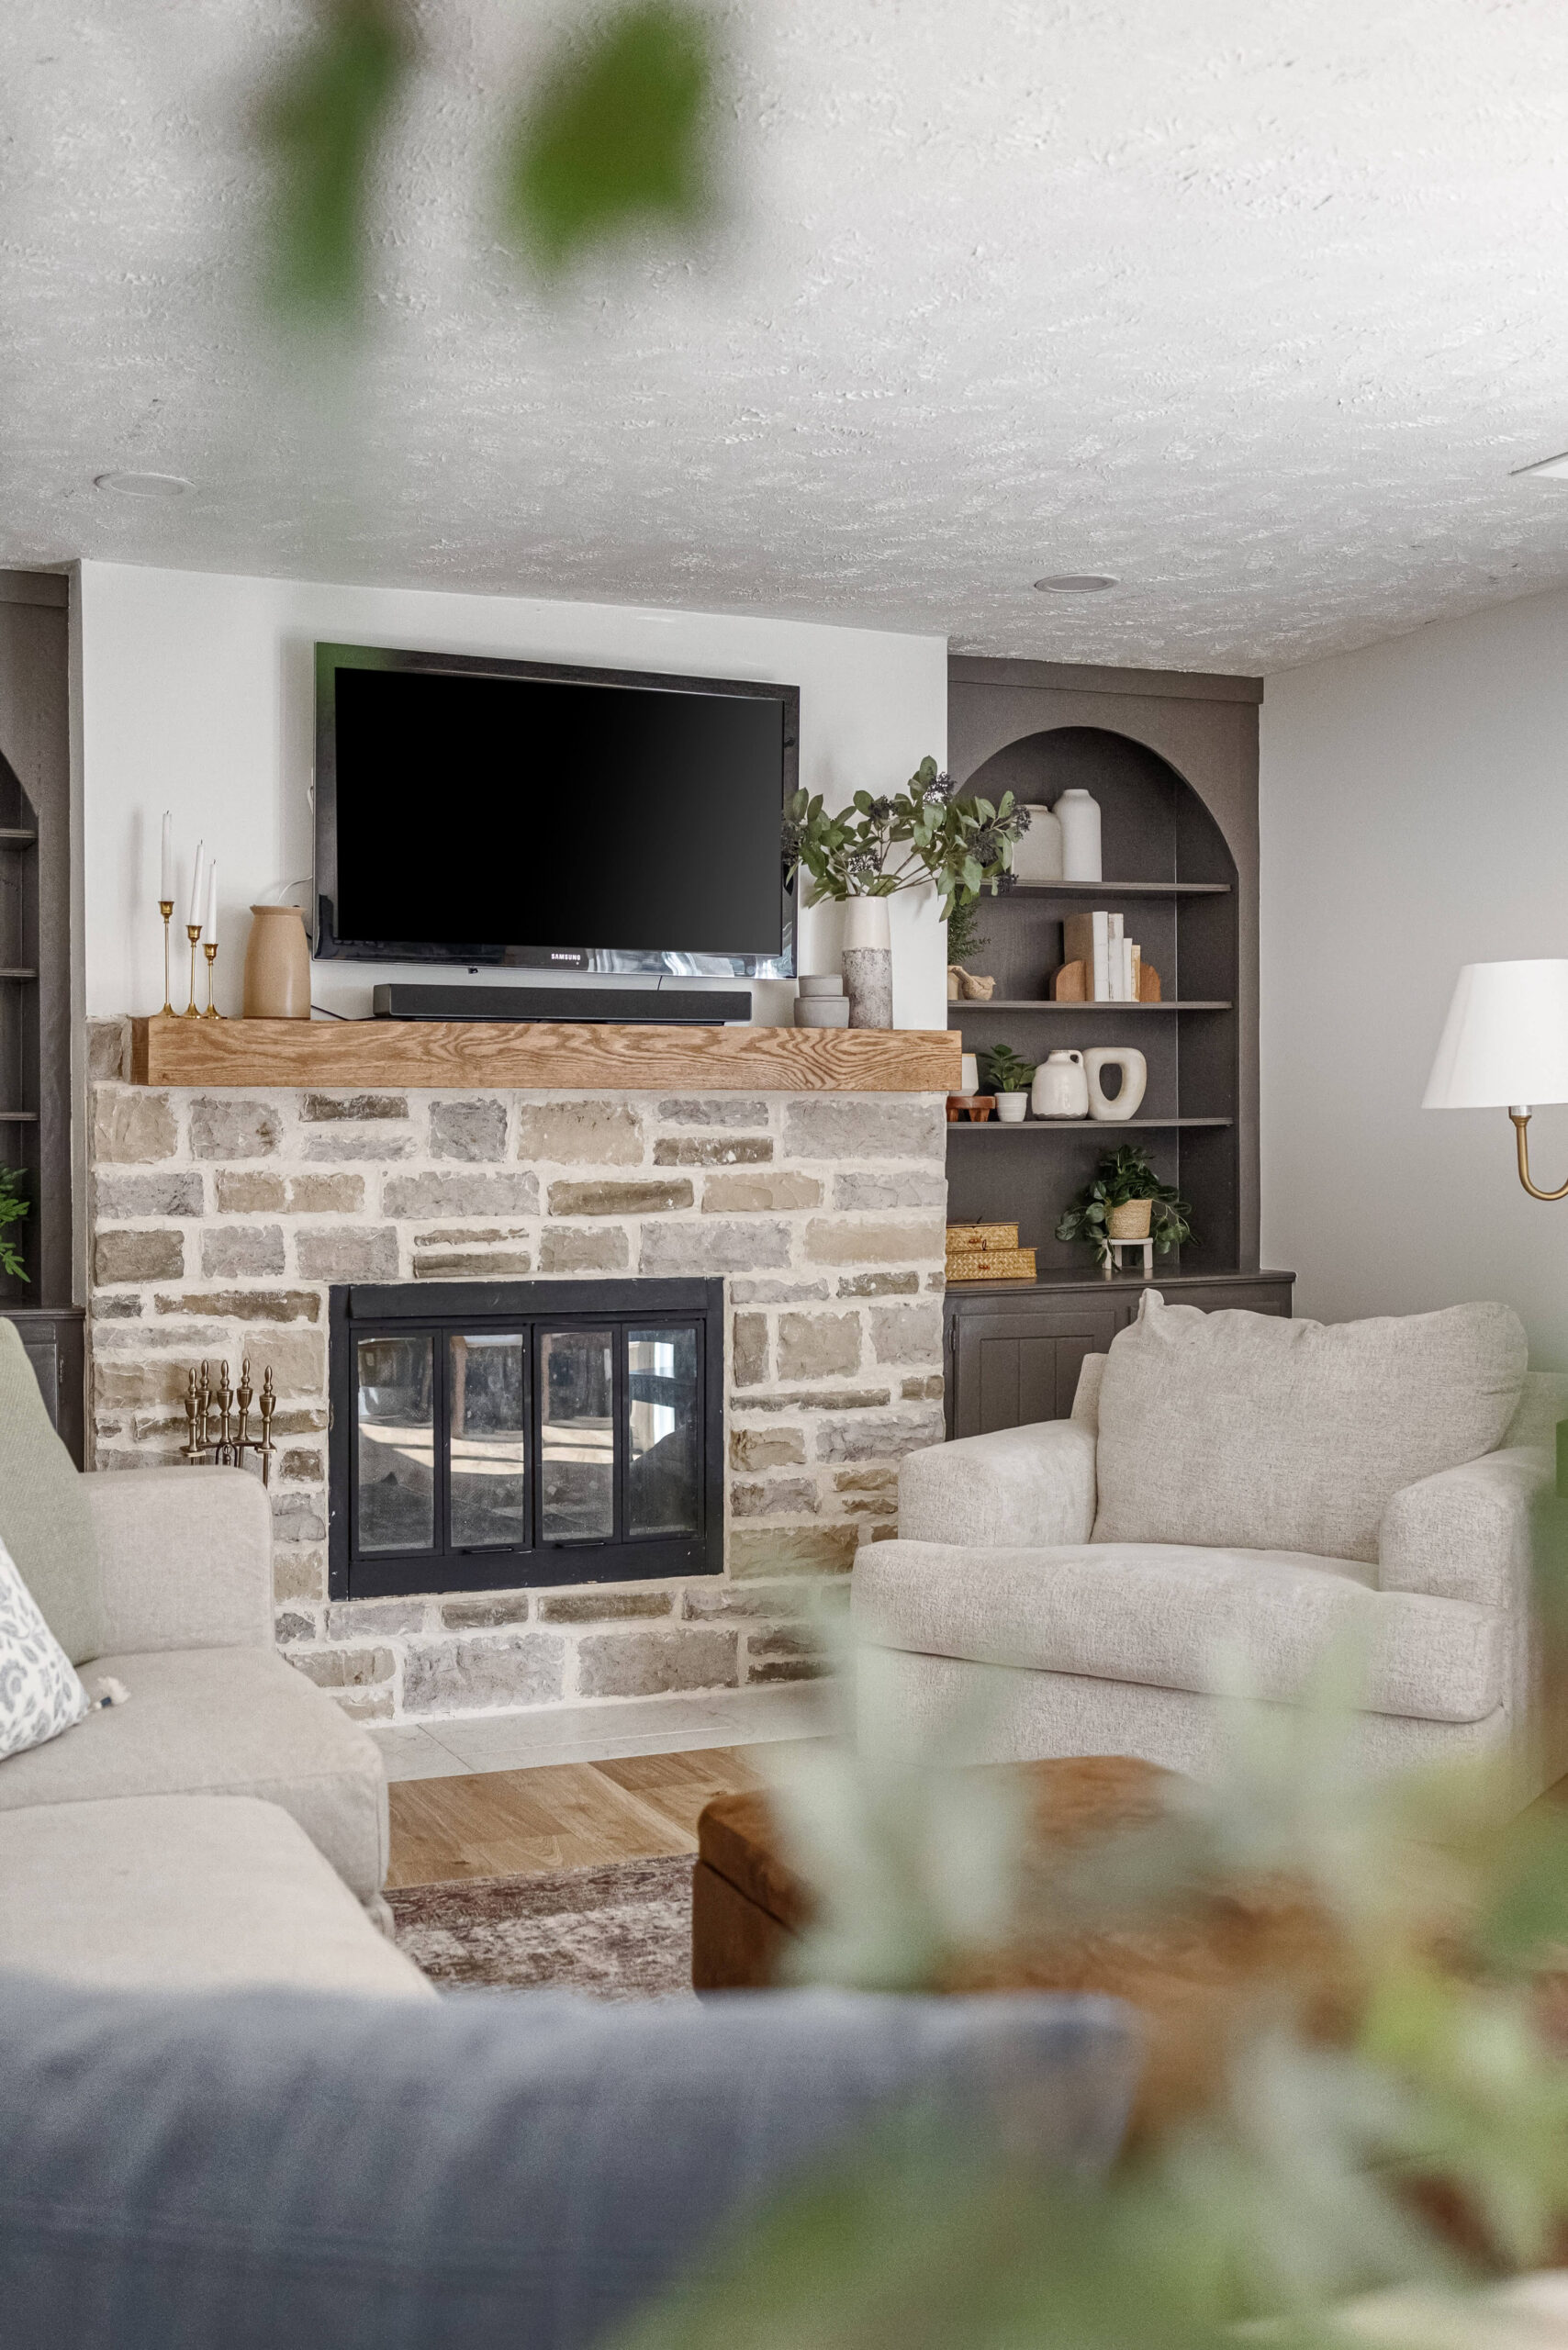
Our living room is so cozy and comfortable now. It feels way bigger too! I love how this whole room turned out, but I’m especially proud of the fireplace. Knowing I built that mantel and placed each of those stones by hand is part of what makes doing DIY projects so special and cool!
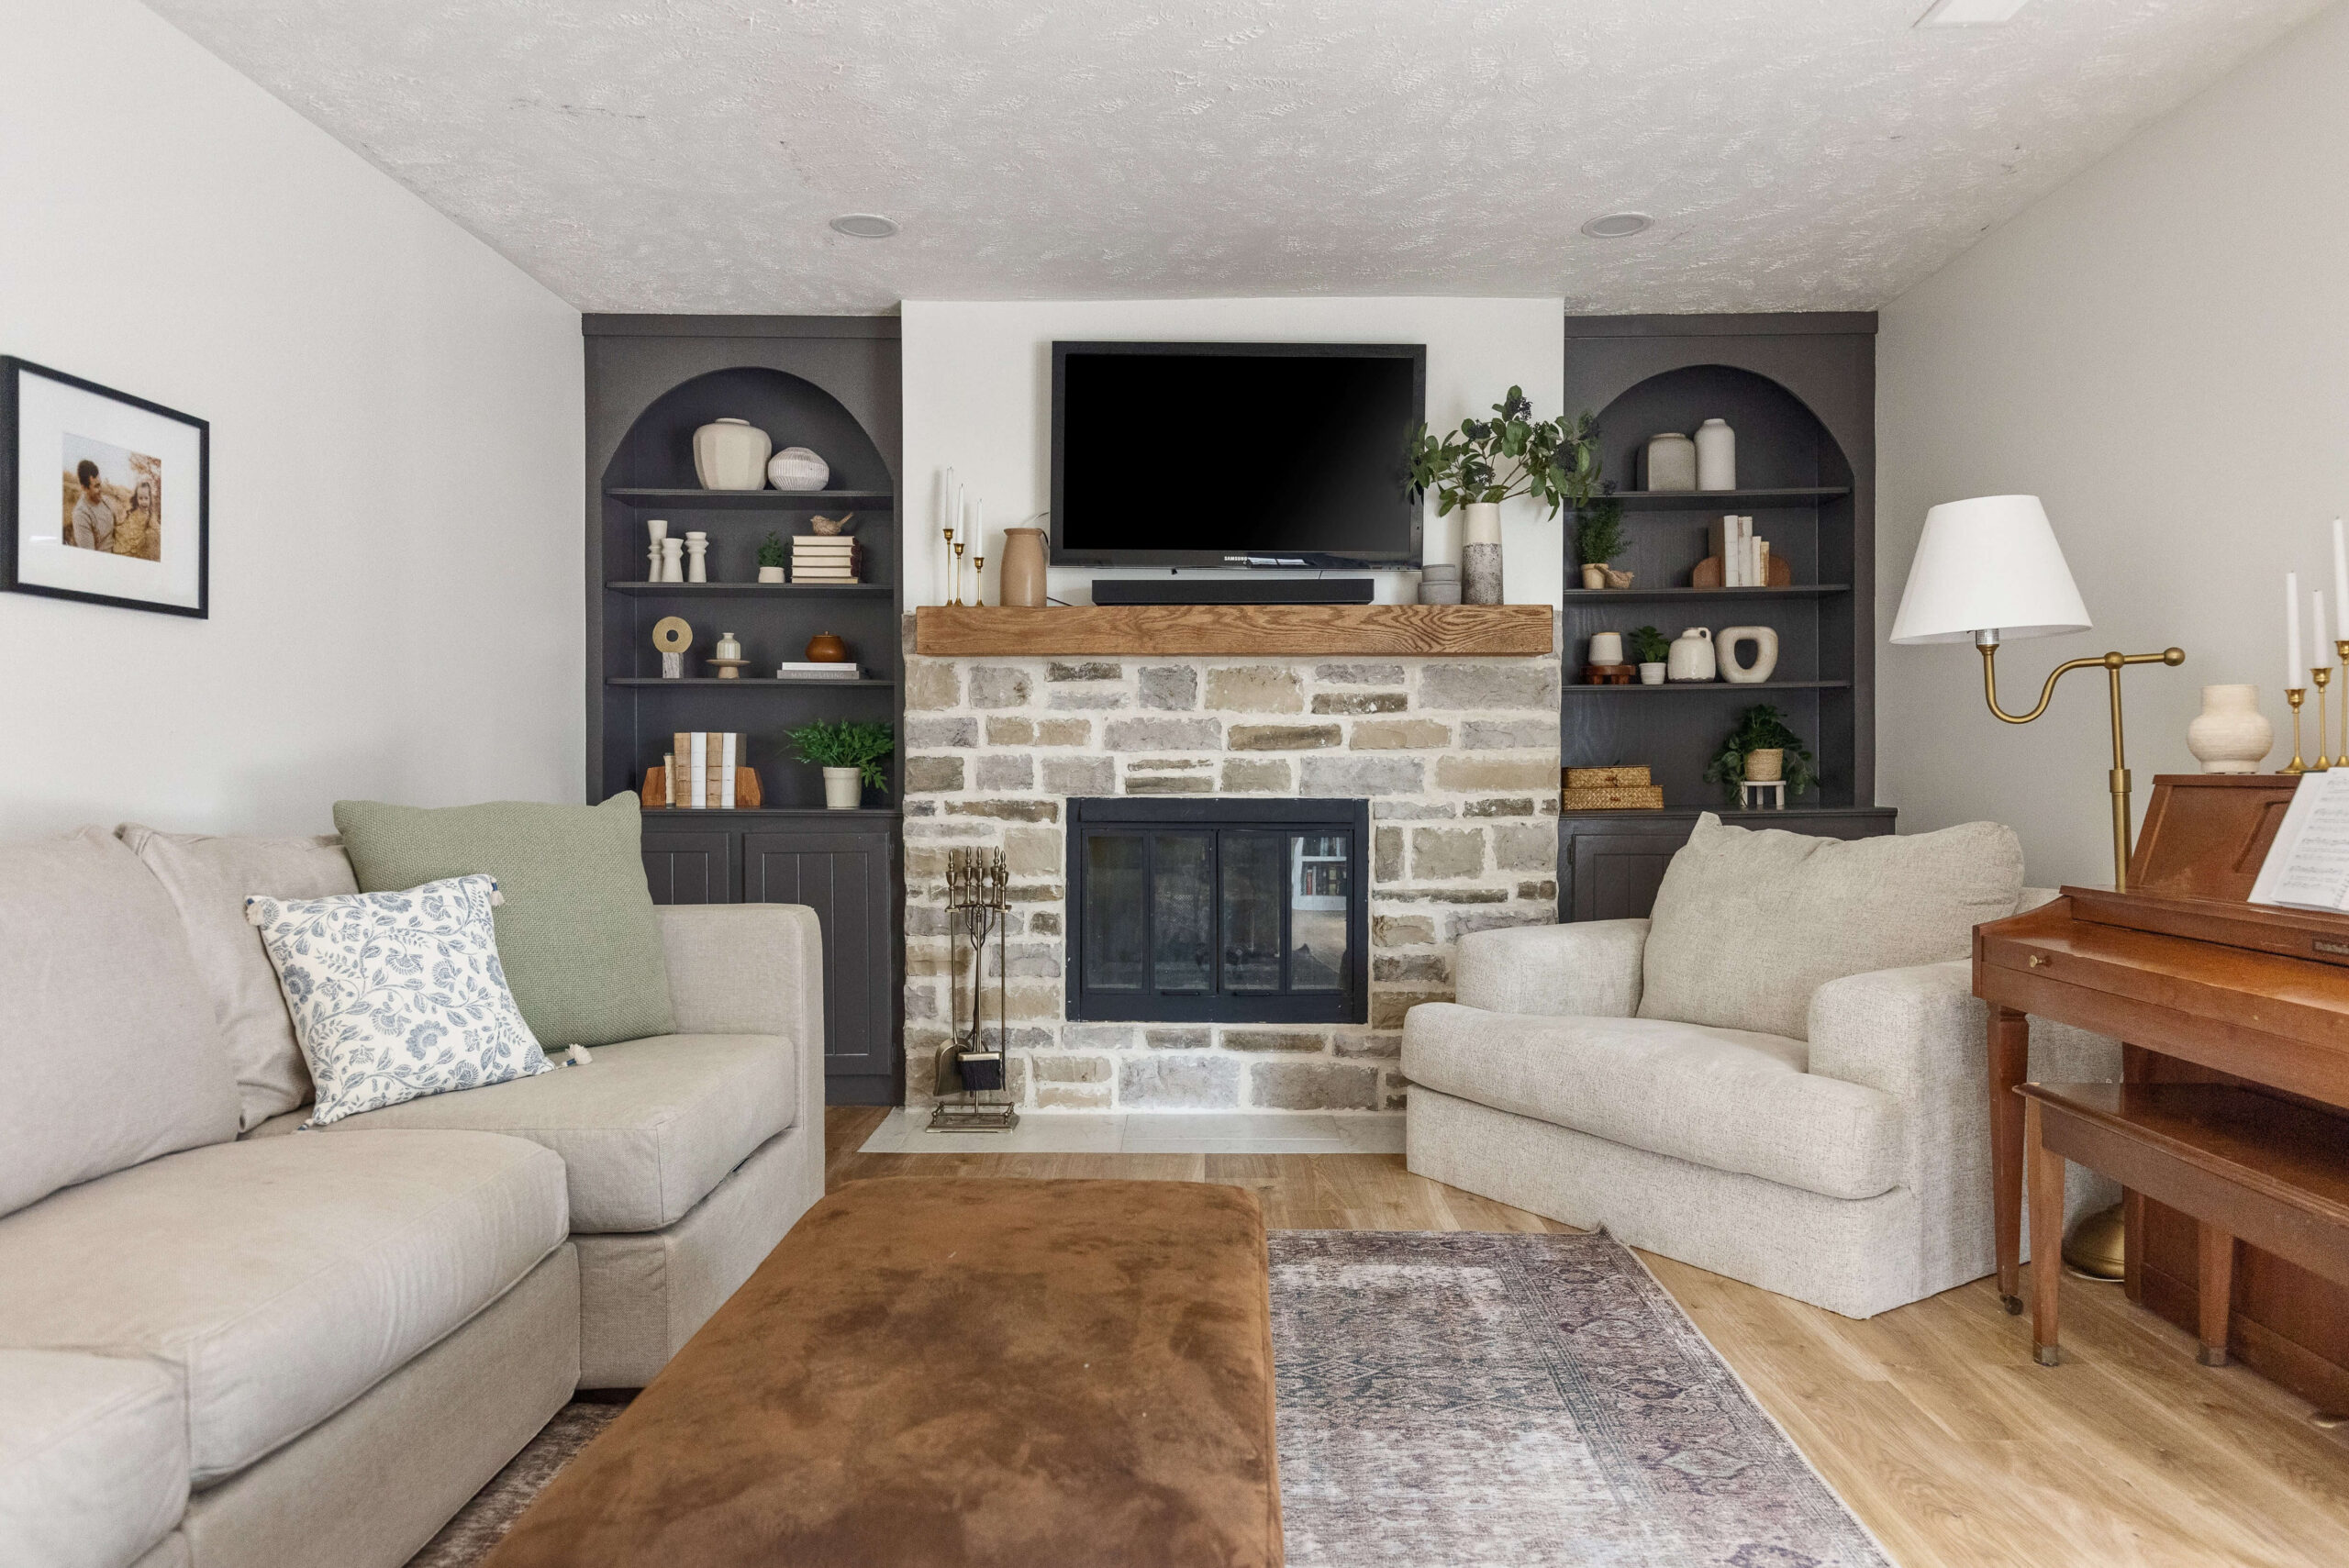
I can’t tell you enough how much I love decorating this area for Christmas! So dreamy and gorgeous! I can hear The Nutcracker soundtrack by just looking at this photo.
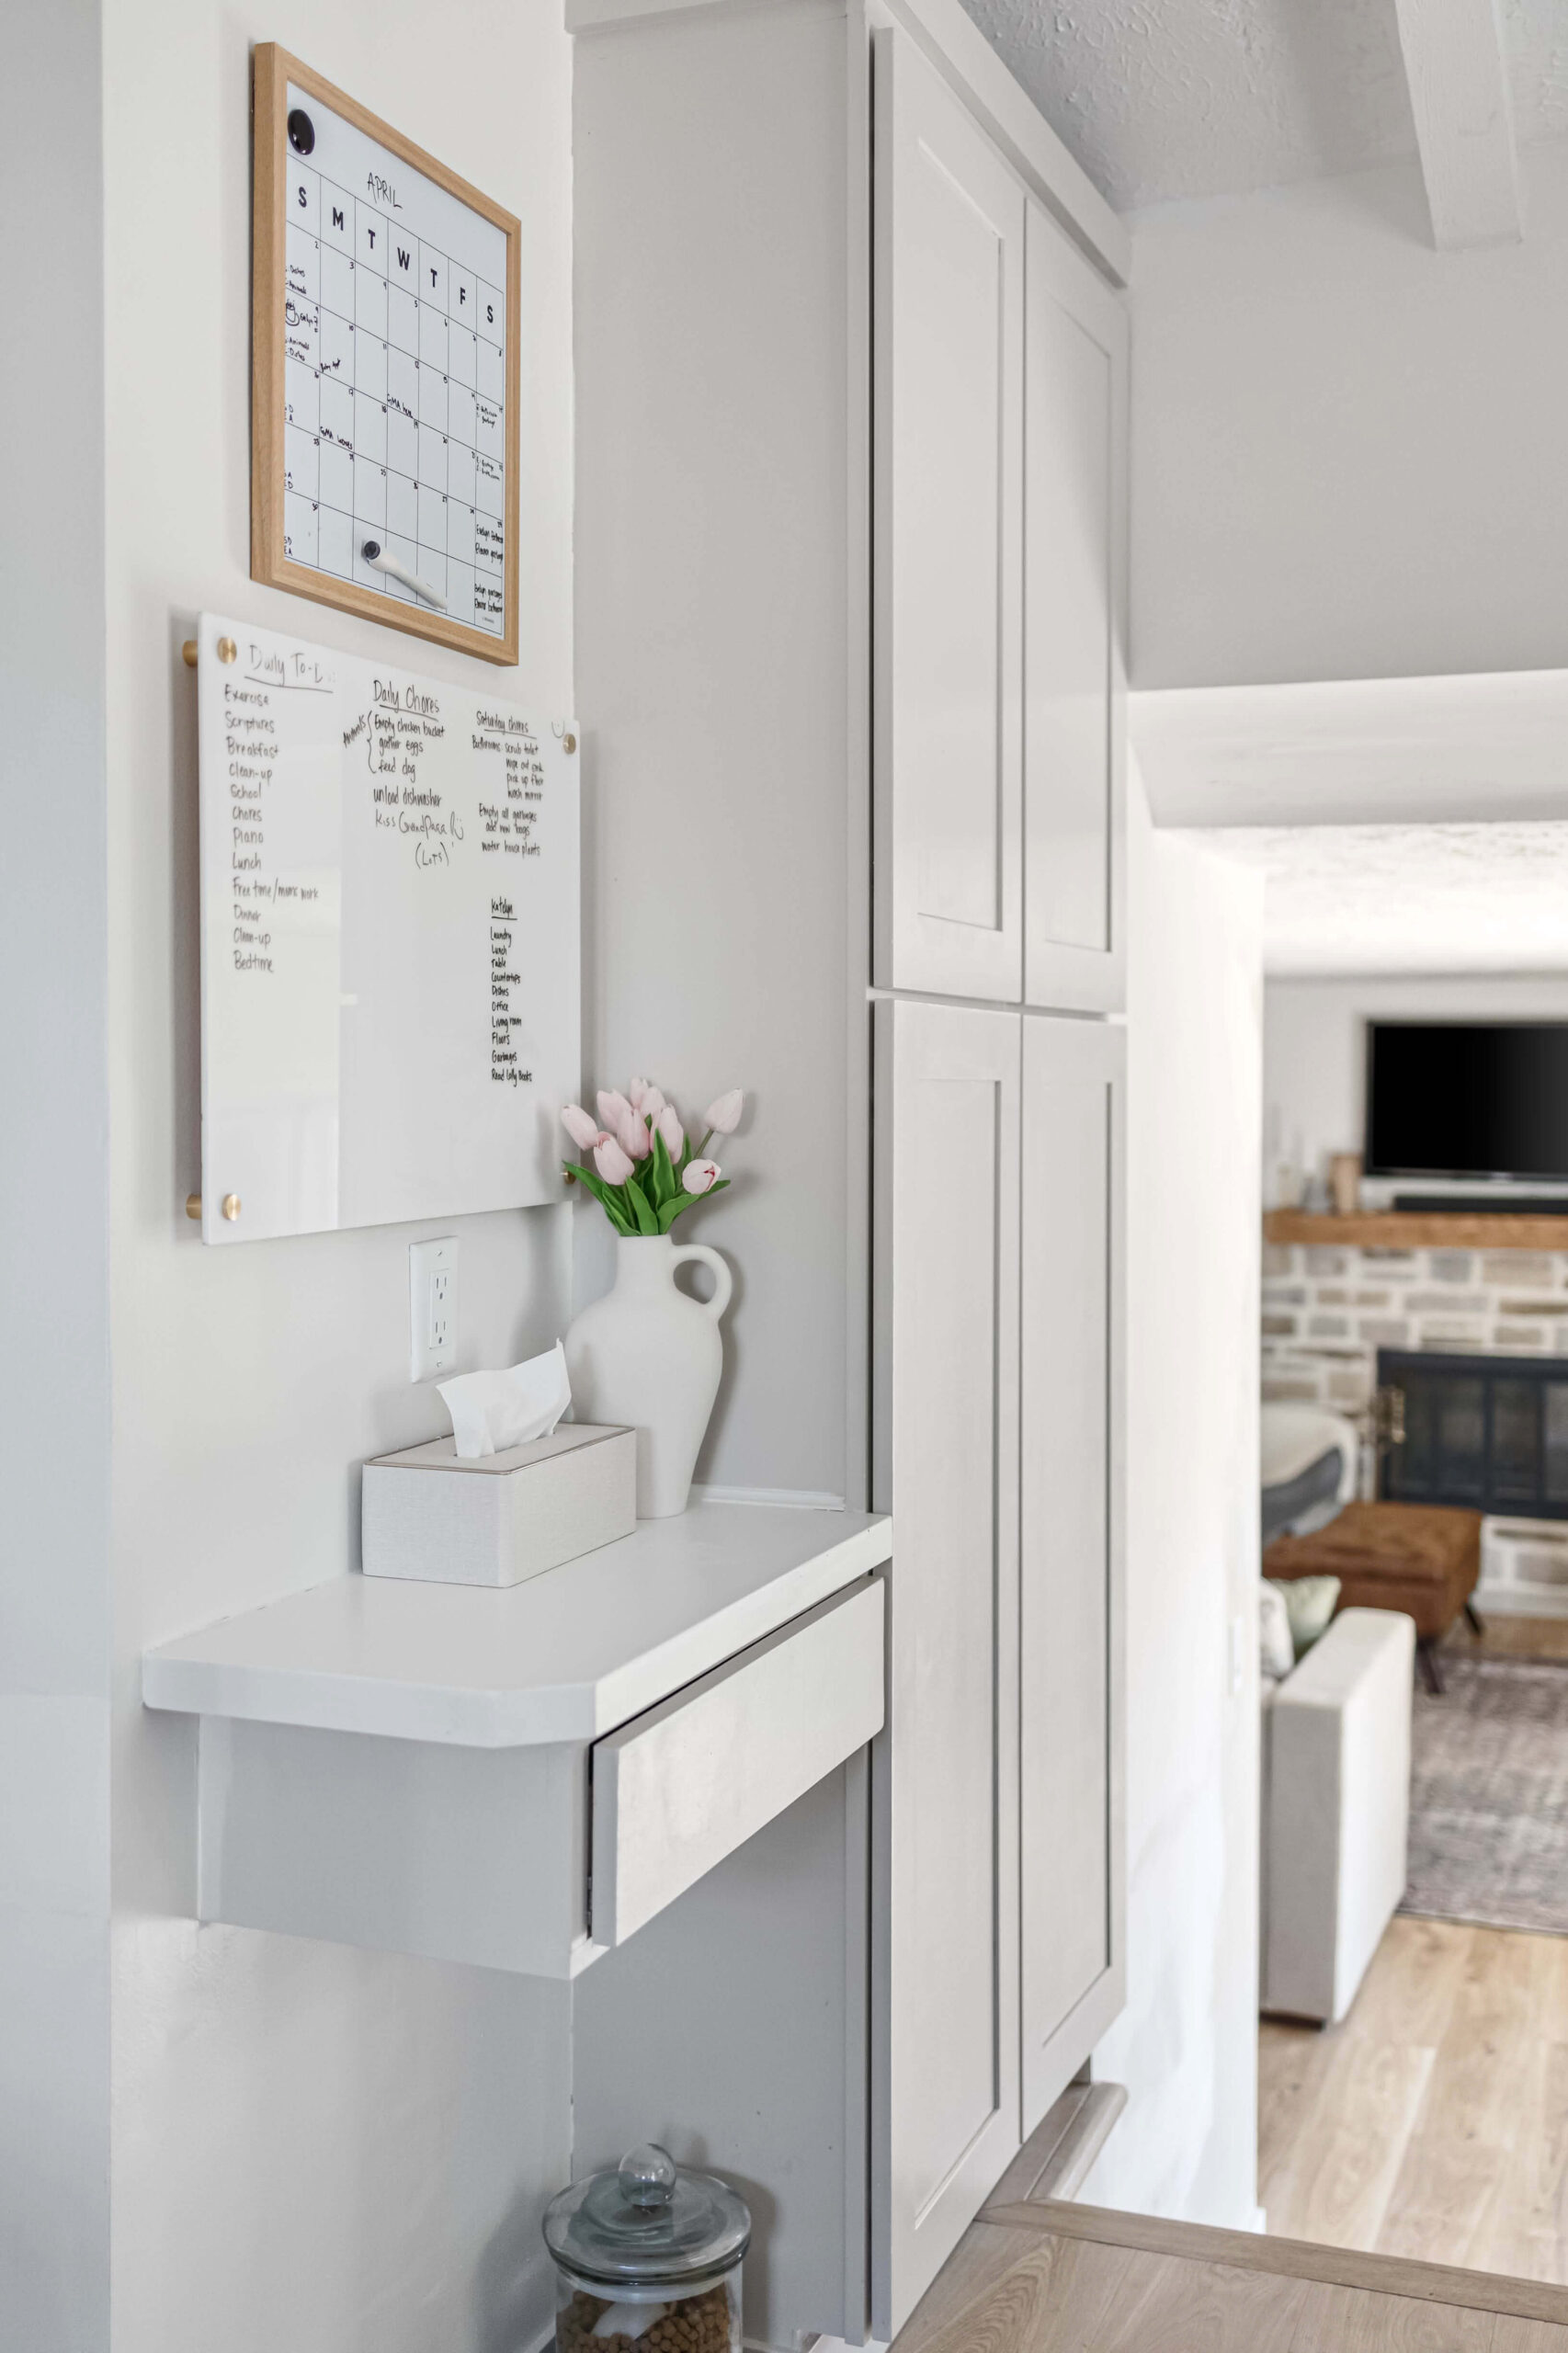
In case you’re wondering where the living room is in our home, it’s just off the kitchen past our family command center. I love how good the new modern stone surround looks with the rest of my house. Way better than that ugly, old rock fireplace ever could.
Interested in a link to anything you see here? From the paint colors, to the furniture, and of course decor, I have links for everything in the living room listed here for you.
When redoing this rock fireplace, we used the same stone and technique for the range hood in my DIY kitchen remodel. You can read more about that project and read my full tutorial for the range hood here.