DIY Box Molding Wall Trim Tutorial (Step-by-Step Guide)


Updated January 21, 2026
If you’ve ever looked at those dreamy, custom trim work walls and thought… yeah, ok, that’s probably expensive, I’m here to ruin that excuse for you. Box molding is one of those projects that looks high-end, feels classic, and is surprisingly doable with basic tools and a little patience. The secret is that it’s just trim, laid out in a clean grid, then finished the right way so it looks built-in and intentional.
This post guides you through the exact process of installing box molding on a wall, from the first board at the bottom to the final paint stroke.
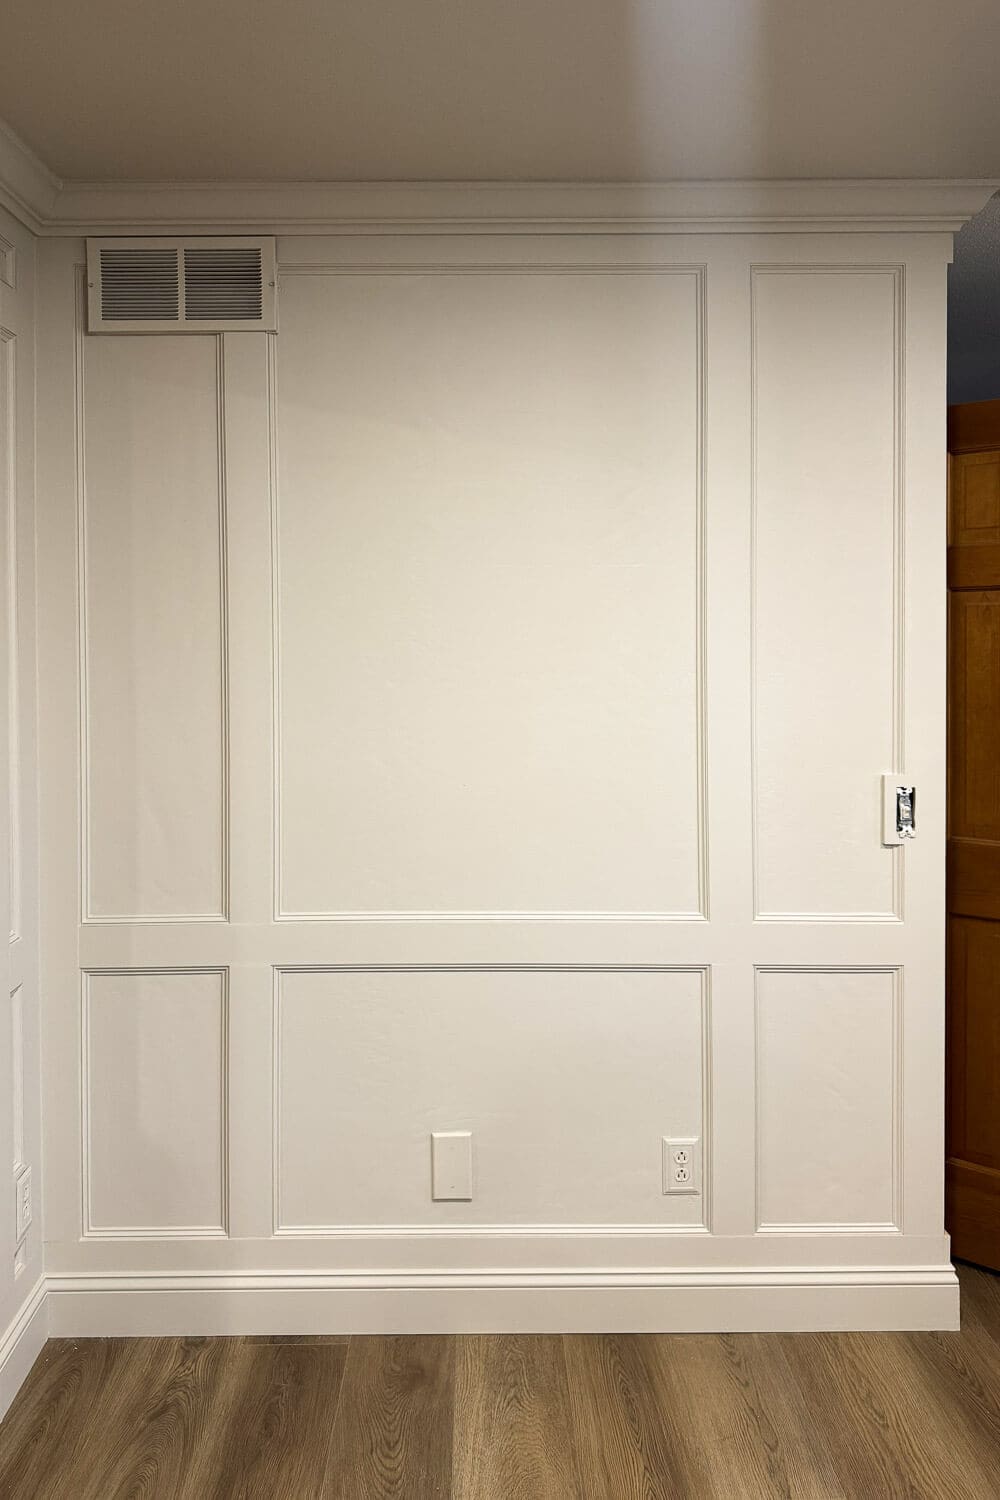
Table of Contents
- Tools and Materials for Box Molding
- Before: The Plain Wall Situation
- What Type of Trim Boards to Use for Box Molding
- Step 1: Install the Lower Horizontal Trim Board (Start at the Bottom)
- Step 2: Add the Top Horizontal Board and Crown Molding
- Step 3: Install Vertical Boards on Both Edges of the Wall
- Step 4: Install the Chair Rail
- Step 5: Add Vertical Boards to Create the Box Molding Grid
- Step 6: Trim Around the Light Switch, Outlets, and Vent
- Step 7: Add the Inner Trim Detail (The “Coved” Look)
- Step 8: Wood Filler for Seams and Nail Holes
- Step 9: Time to Caulk
- Step 10: Prime and Paint the Box Molding
- The Reveal: Finished Box Molding Wall
- More Wall Trim Projects I’ve Done (If You Want More Ideas)
- 📌 Save This Box Molding Tutorial for Later
- FAQs About DIY Box Molding Wall Trim
Tools and Materials for Box Molding
Box molding is basically trim + layout + a clean finish. Using the right tools and materials will be faster and leave you with gorgeous trim that looks like it’s always been there.
Tools
- Miter saw
- Brad nailer + brad nails
- Laser Level
- Measuring tape
- Nail punch + hammer (for those stubborn nails)
- Multi-tool (for trimming shims)
- Caulk gun
- Handheld sander and sanding discs
- Putty knife
Materials
- MDF sheets or trim boards for box molding (main boards)
- Small trim for the inner edge detail (the “coved” look)
- Baseboard
- Crown molding
- Wood shims
- Wood filler
- Paintable caulk
- Primer
- Paint (I used Sherwin-Williams Accessible Beige)
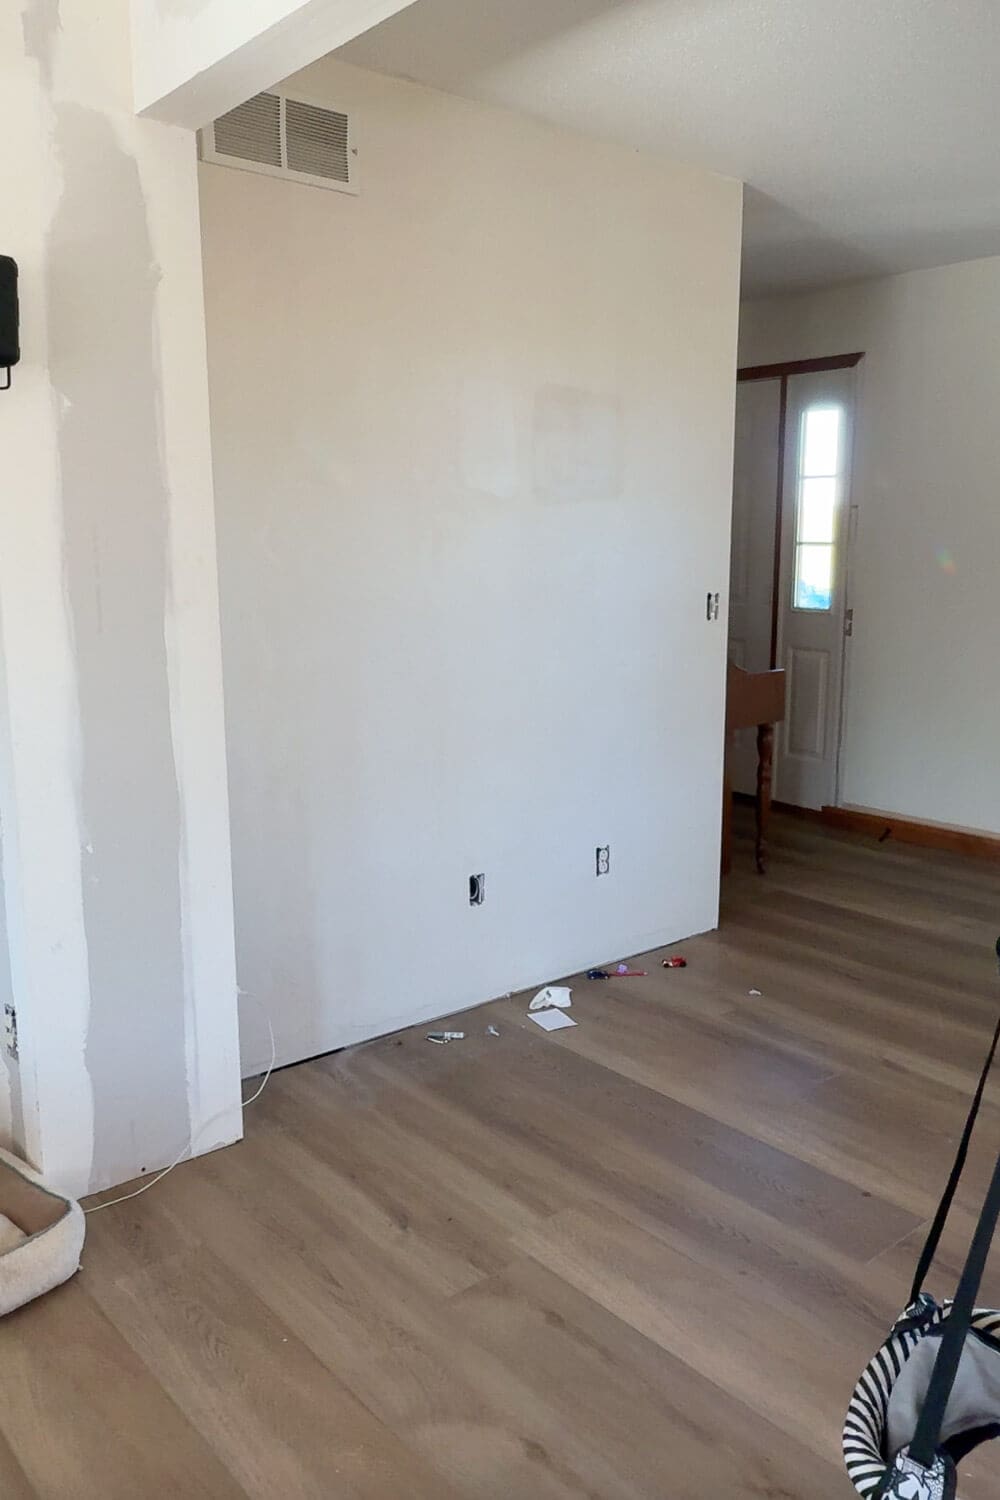
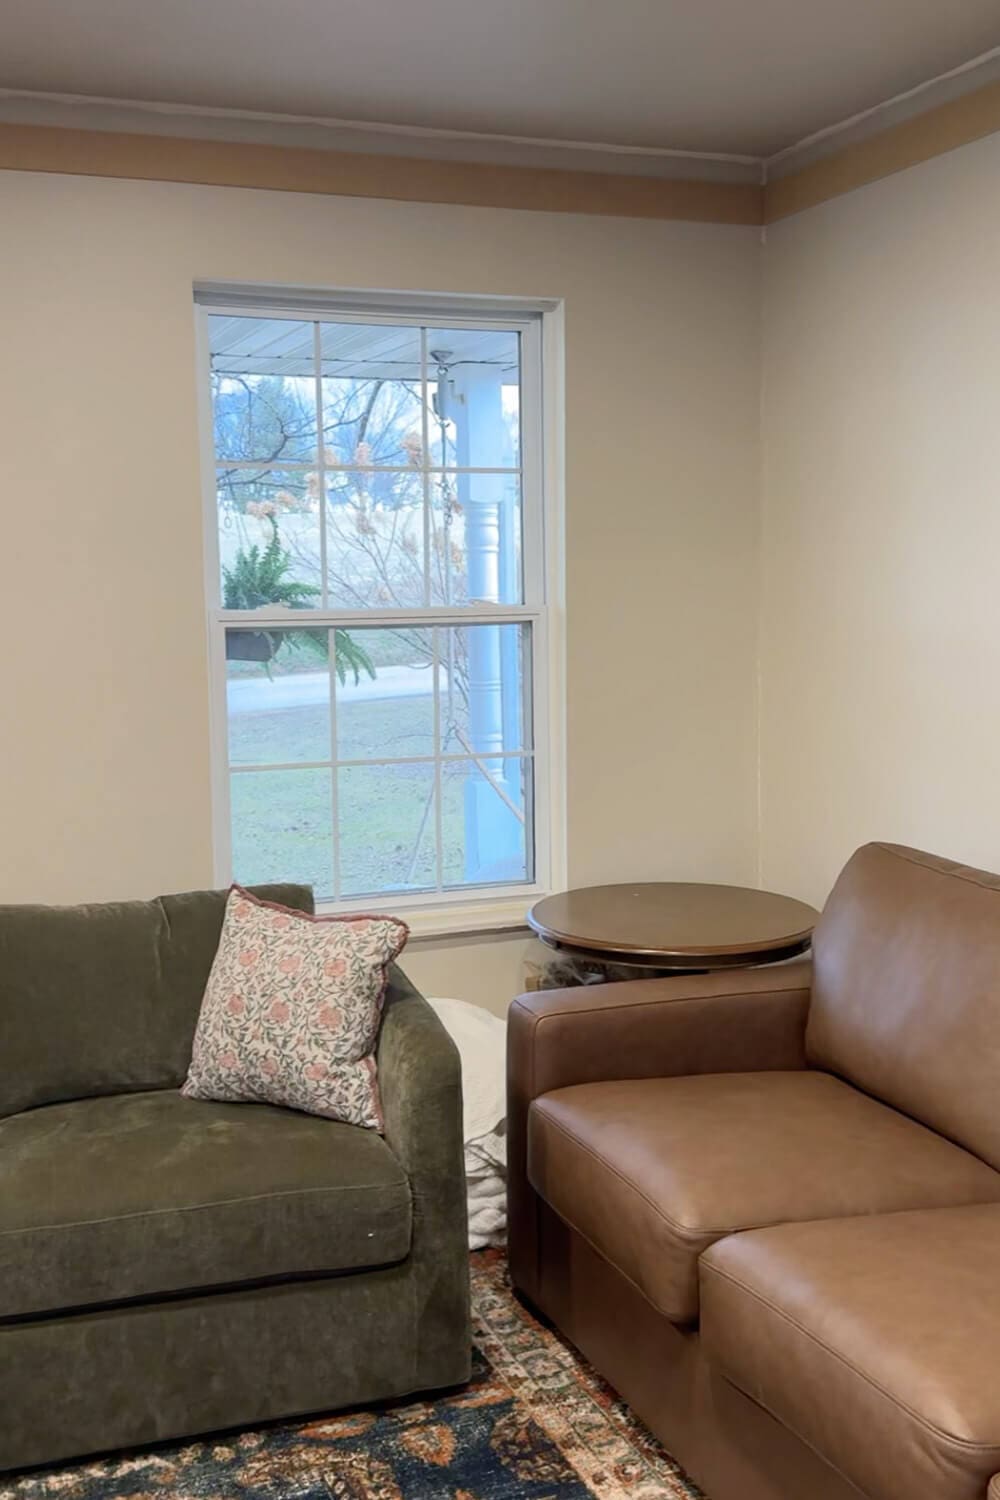
Before: The Plain Wall Situation
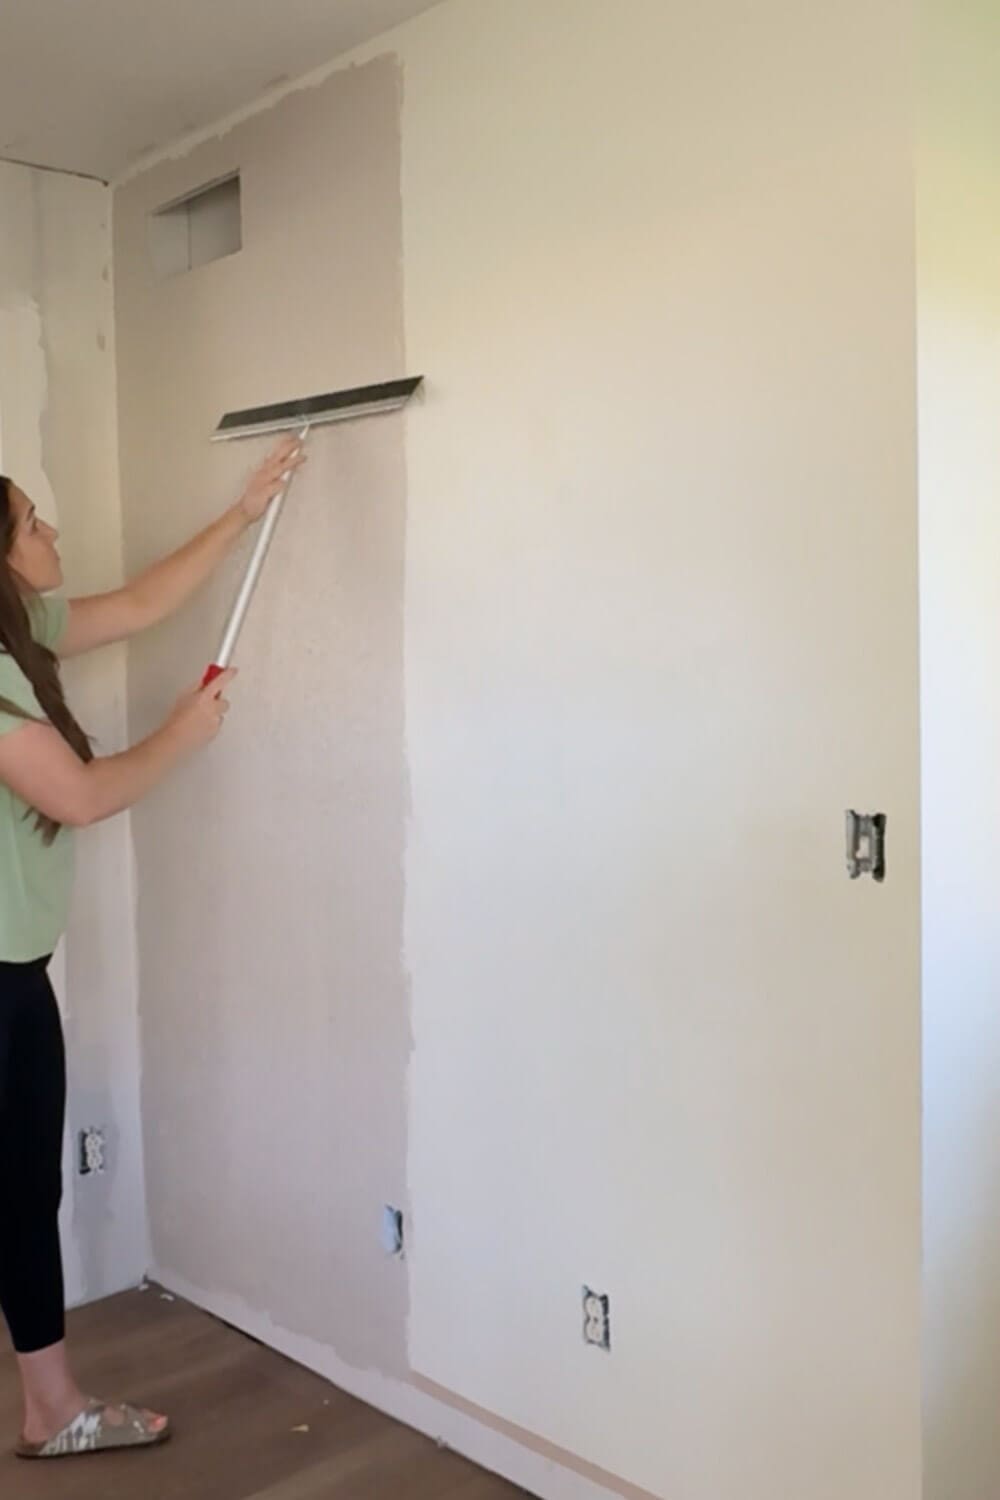
Before the box molding, this wall was just… there. Fine. Boring. Adding box molding will instantly give the room structure and that built-in, finished look. To prep for my box molding, I skim-coated to remove the texture, then painted the wall Sherwin-Williams Accessible Beige.
For a full tutorial on how to skim coat a textured wall, check out the post here – How to Skim Coat a Wall to Remove Texture (No Sanding Mess)
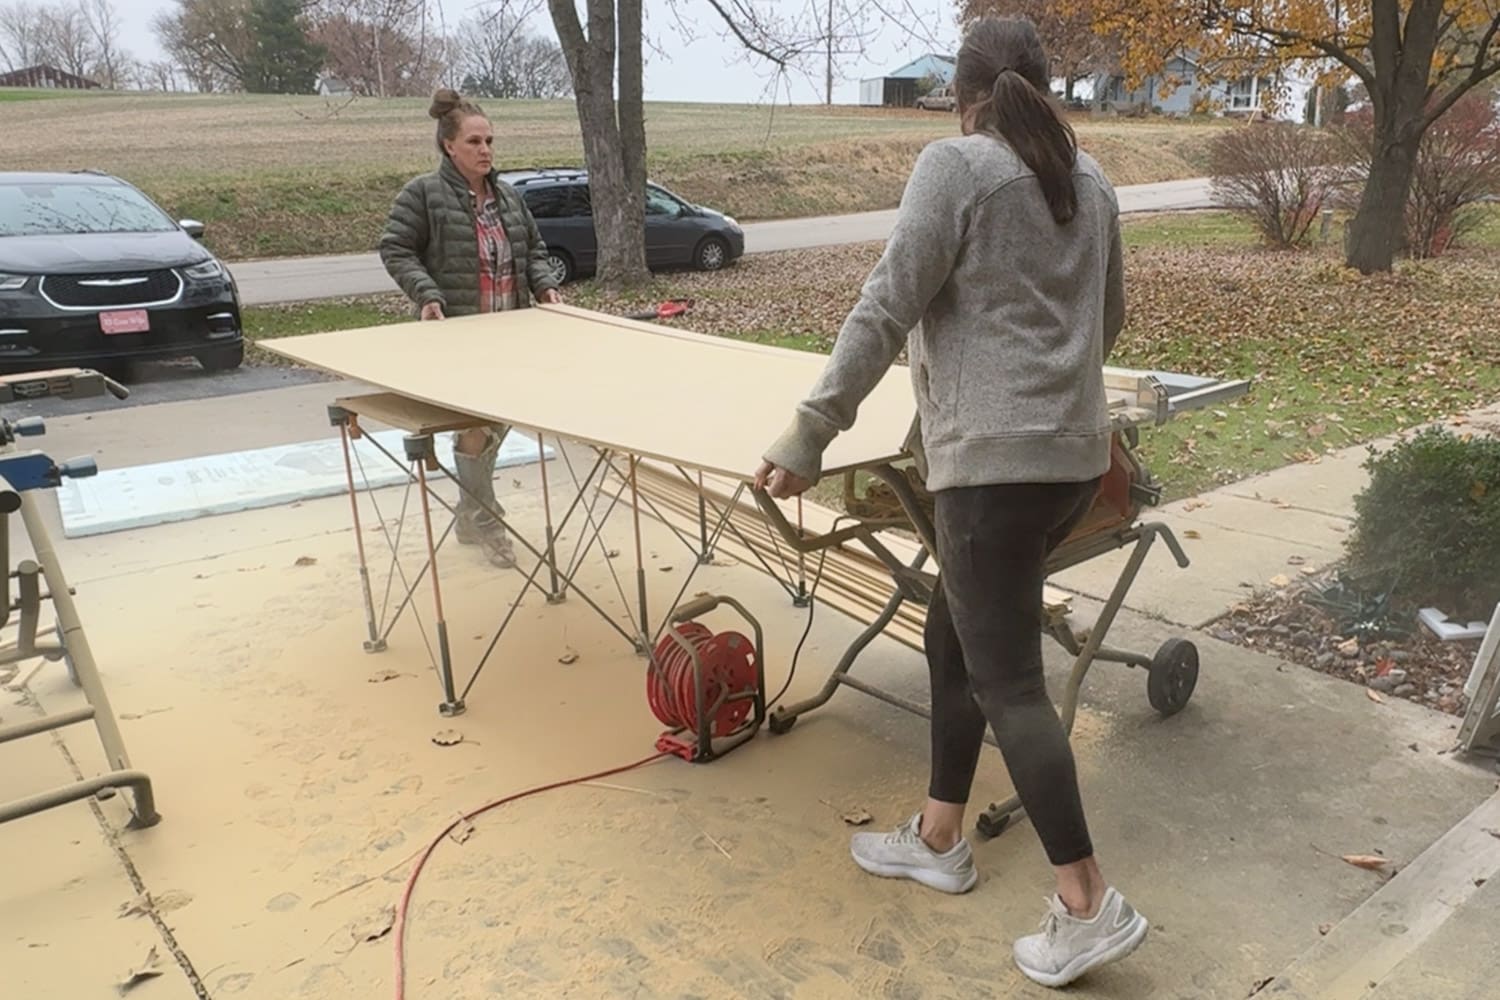
What Type of Trim Boards to Use for Box Molding
You can use pine trim boards for box molding, but MDF trim is usually the cheaper option and paints really well. I went even more budget-friendly and bought 1/2-inch MDF sheets, then ripped them into trim boards on my table saw. The sheets are heavy and floppy, so you’ll want a friend to help handle them. A little bit of extra work, but with huge savings.
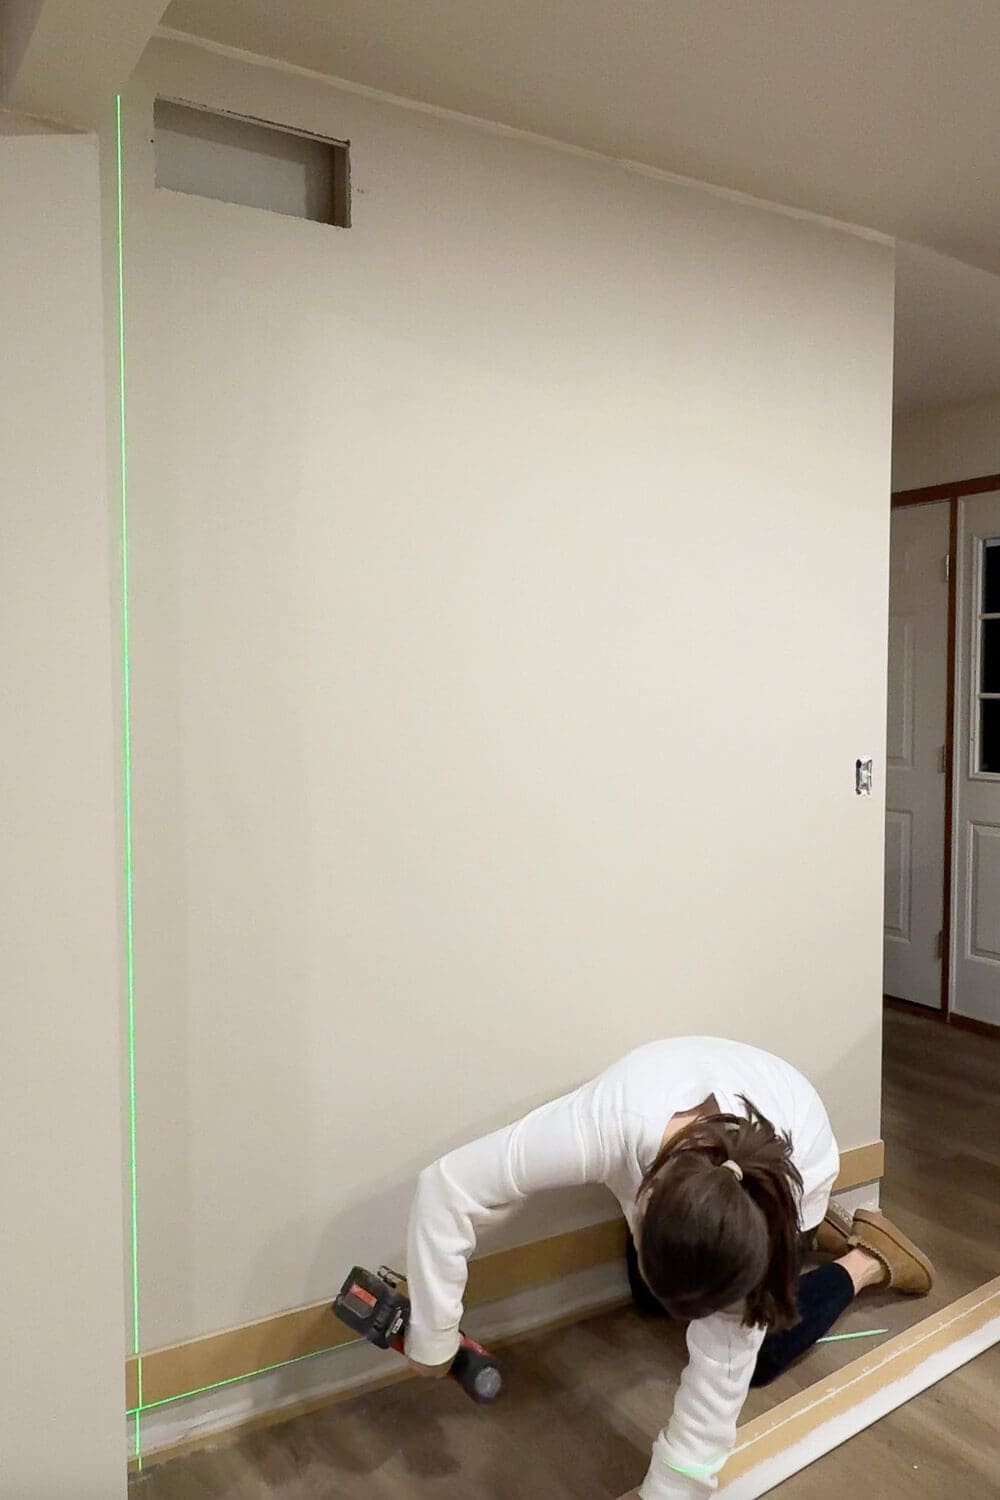
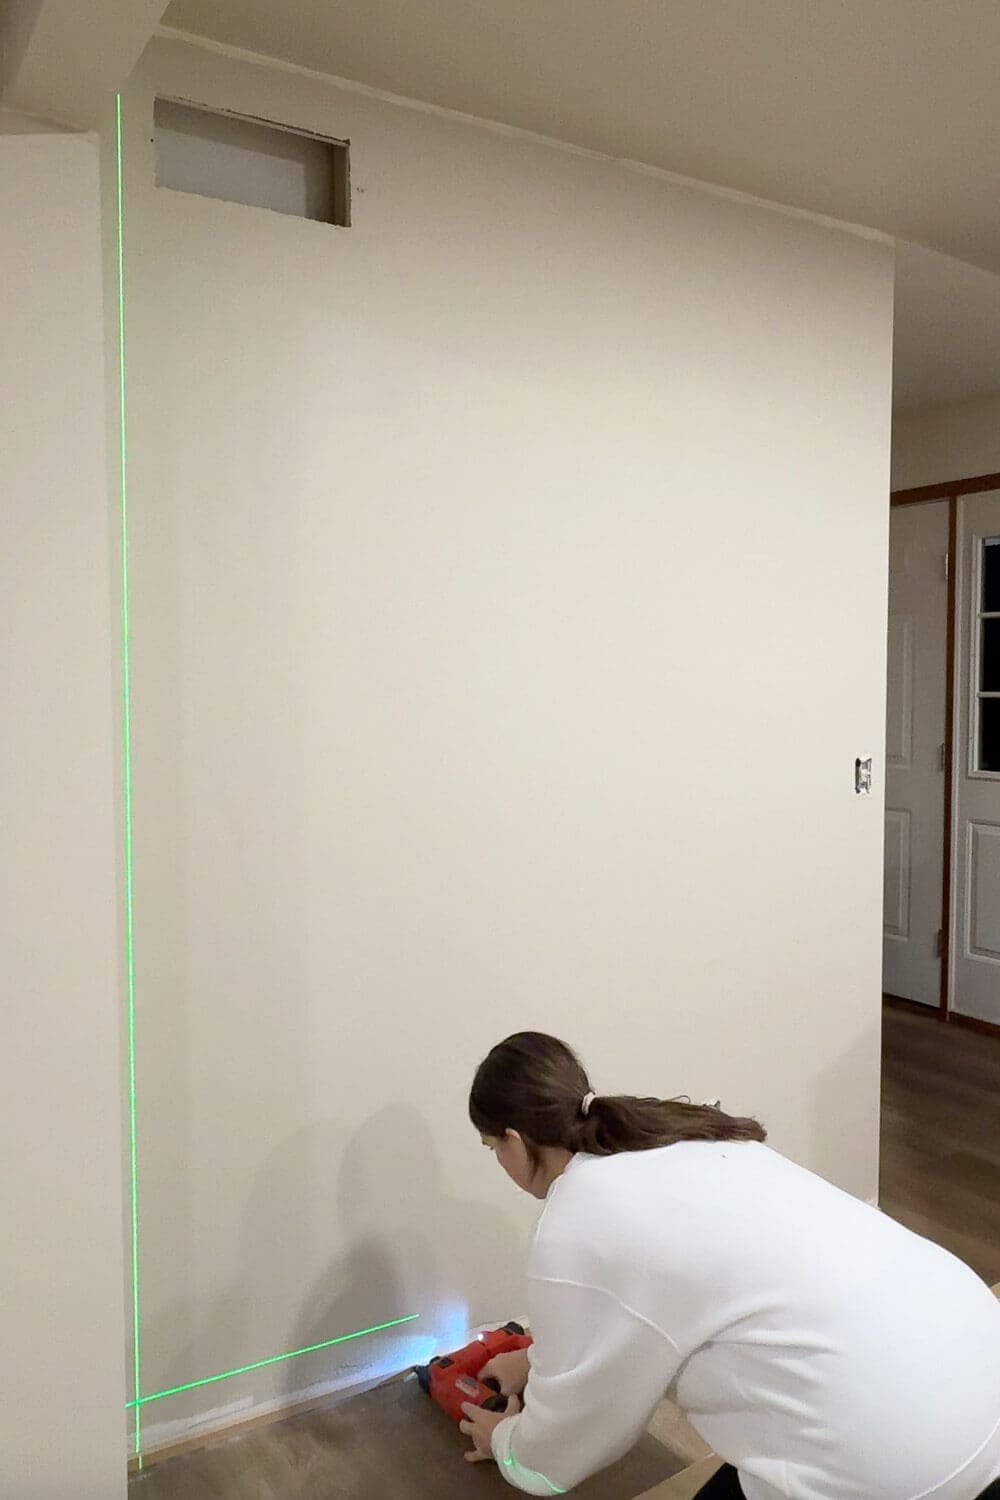
Step 1: Install the Lower Horizontal Trim Board (Start at the Bottom)
I started at the bottom of the wall first, because everything builds off that line.
- Decide how high you want your lower horizontal trim board to sit from the floor (or even on the floor in place of baseboard)
- Mark that height across the wall using a level or laser level.
- Cut your board to length and nail it into place.
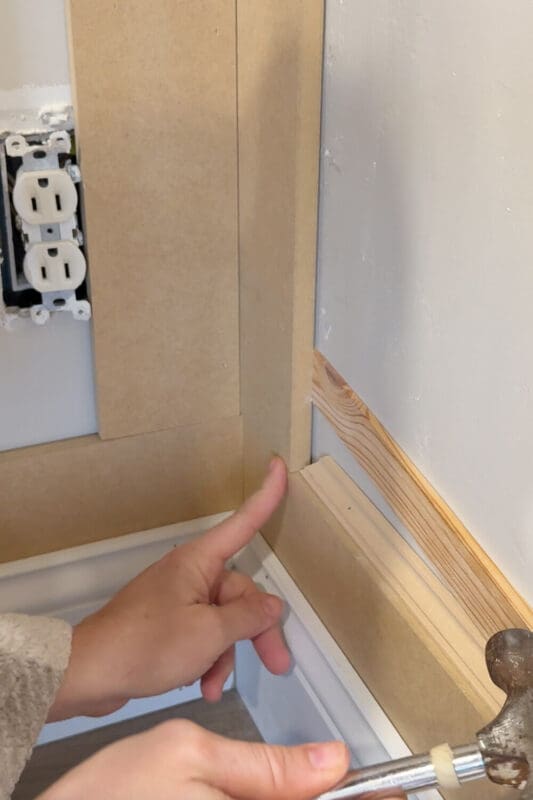
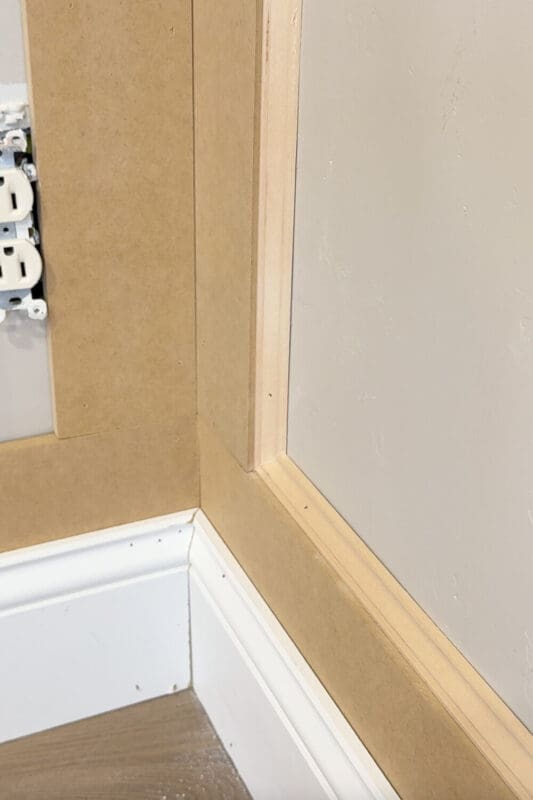
The baseboard trick (so everything layers correctly)
Since my baseboard was going to layer just slightly over that lower board, I also added a strip of wood at the very bottom of the wall that was the same thickness as my trim boards. This creates a “popped out” area for the baseboard to sit nicely against.
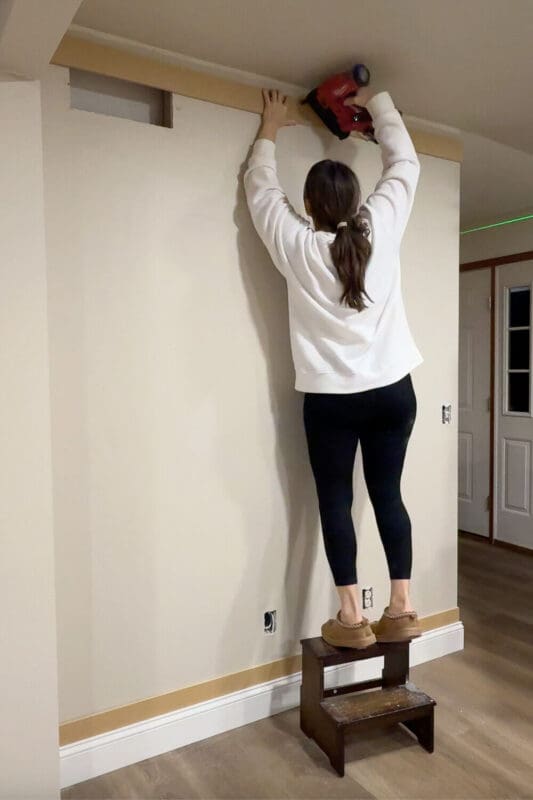
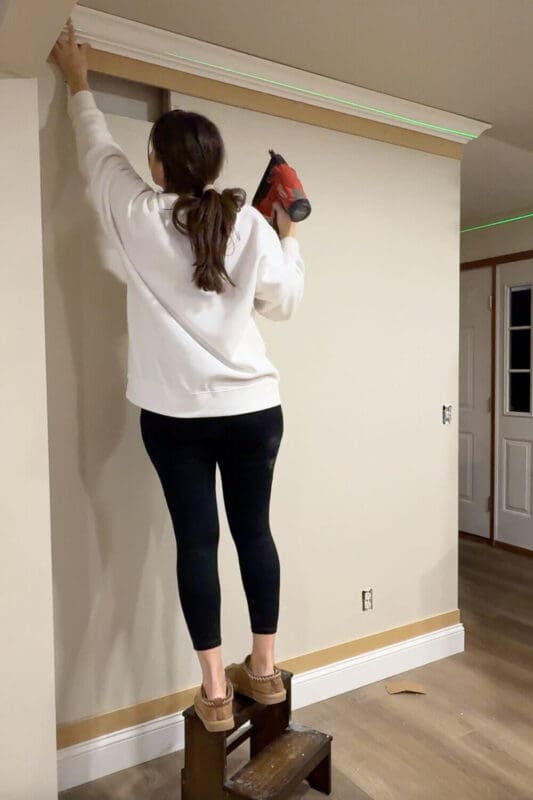
Step 2: Add the Top Horizontal Board and Crown Molding
Now we jump to the top.
- Install your top horizontal board across the wall.
- Once that’s in, add crown molding on top of it.
Crown molding is optional. You can run the top board flush to the ceiling, but the crown is what really sells that classic look.
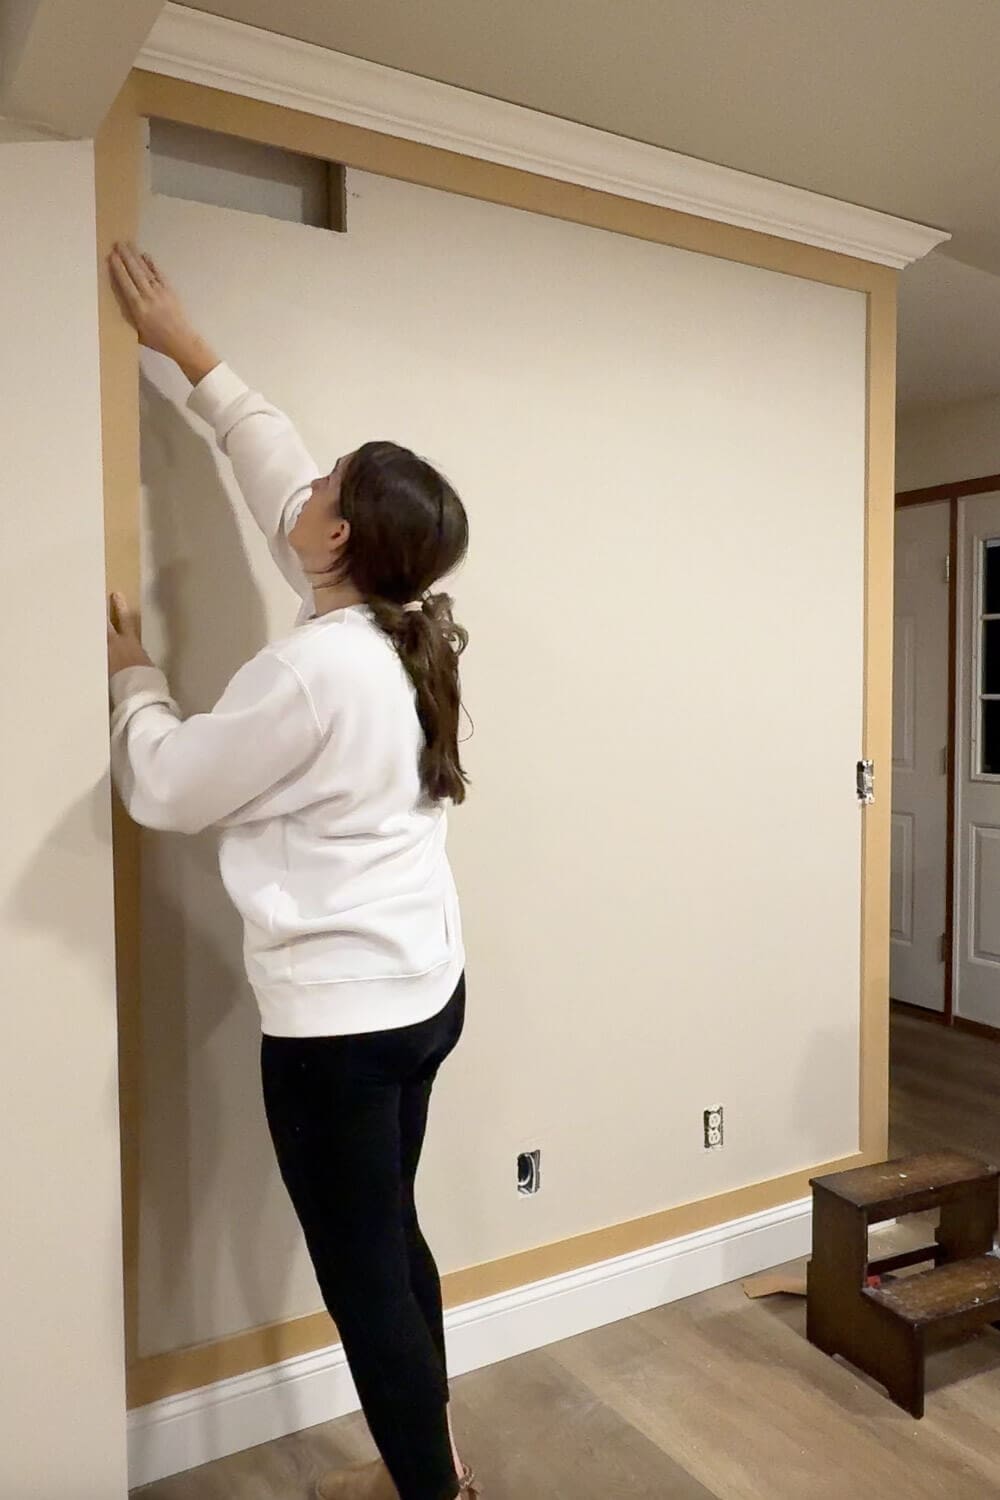
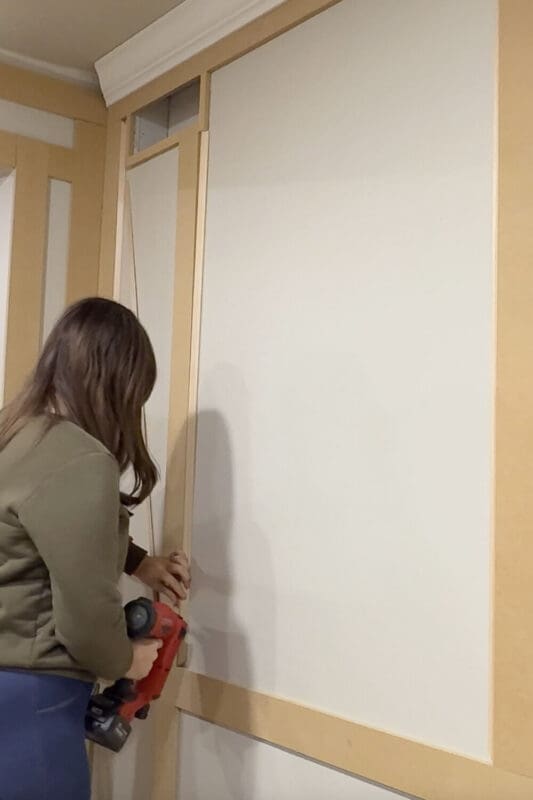
Step 3: Install Vertical Boards on Both Edges of the Wall
With your top and bottom boards installed, you’ve started the “frame”; now we need to finish it. Next, install vertical trim boards on both outer edges of the wall. This gives your box wall trim layout clear boundaries.
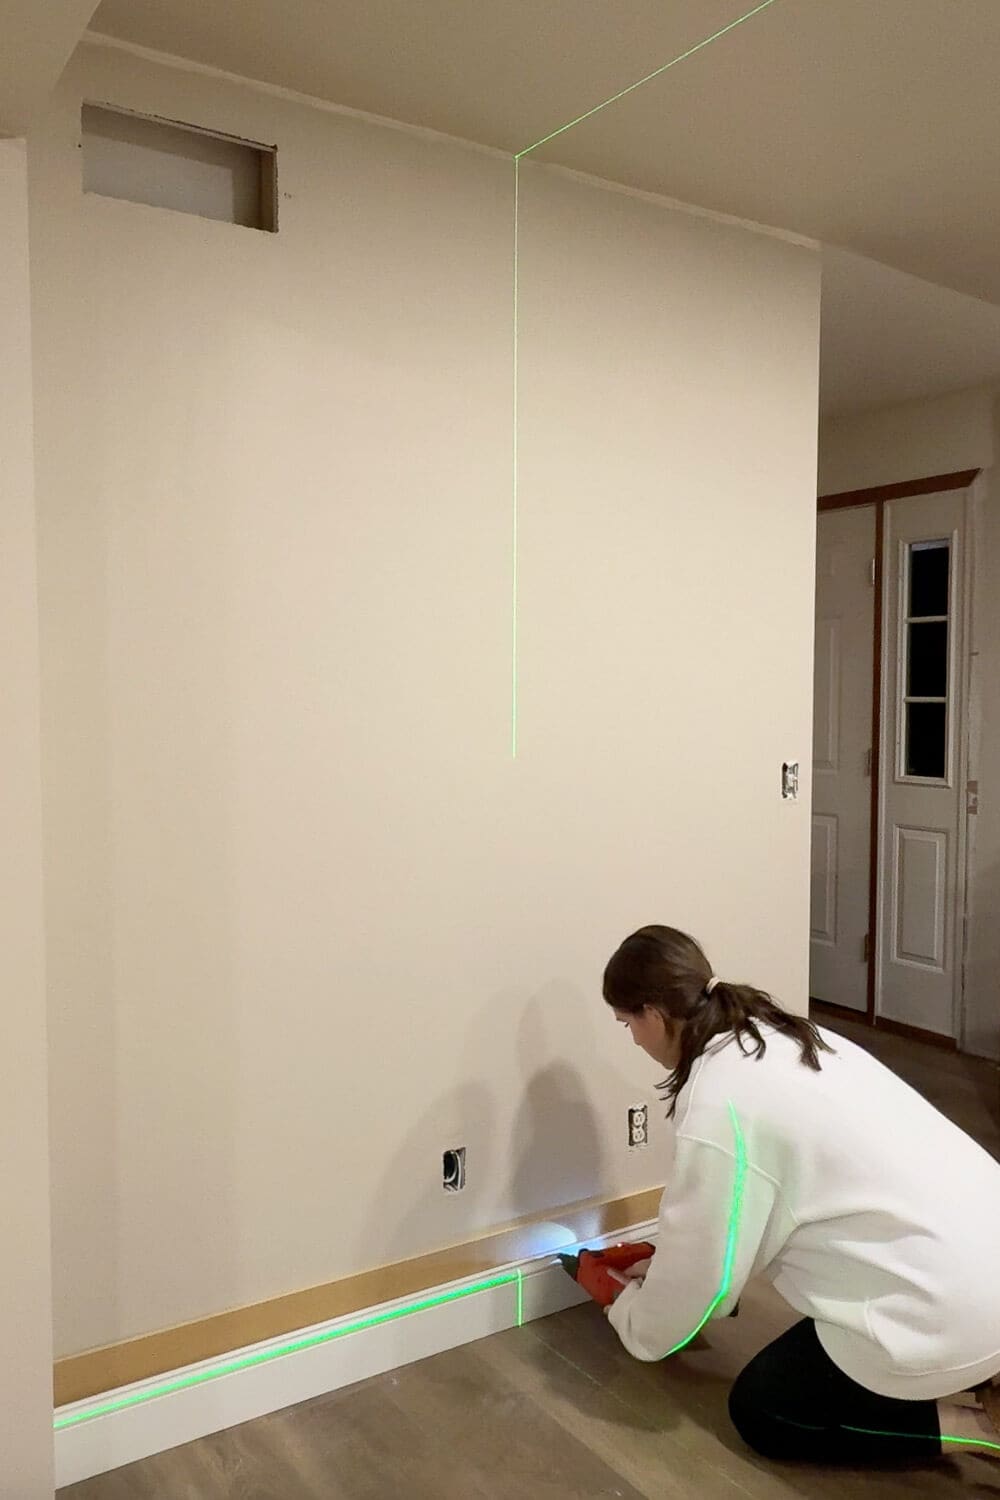
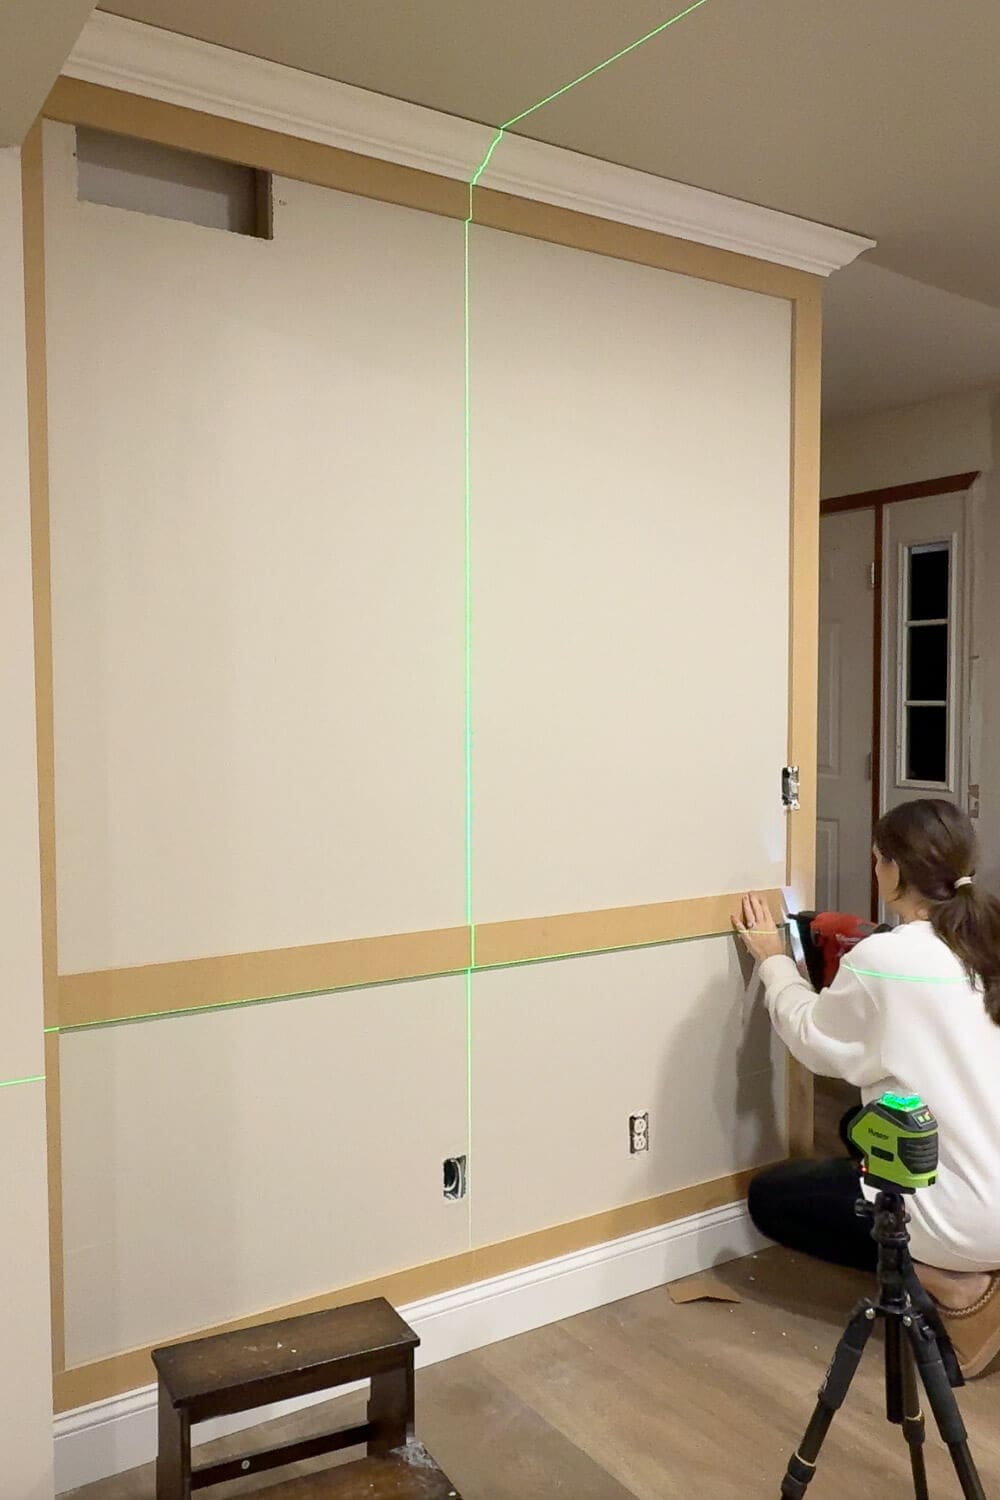
Step 4: Install the Chair Rail
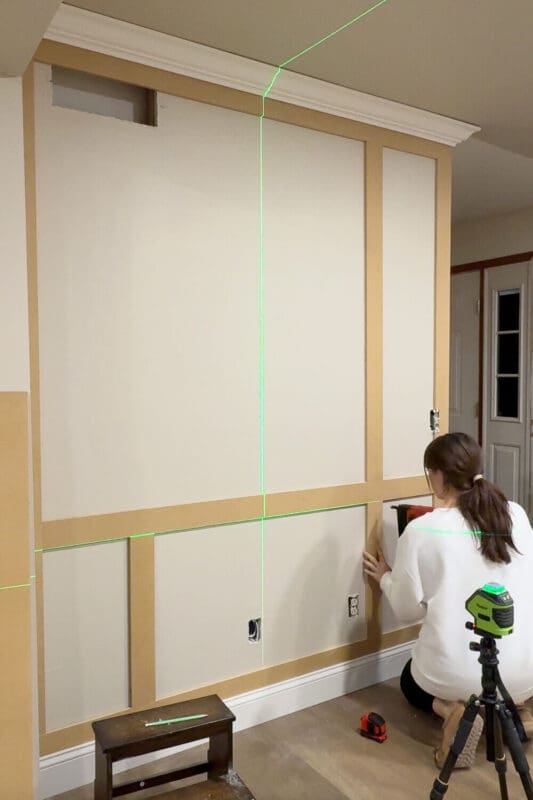
Now add the chair rail. This piece separates the top section from the bottom section and becomes the anchor point for the box molding layout.
Make sure it’s level. Even if your ceiling isn’t. Even if your floor isn’t. The chair rail needs to be level, so your box molding looks right. A laser level will be your best friend when installing this type of wall trim.
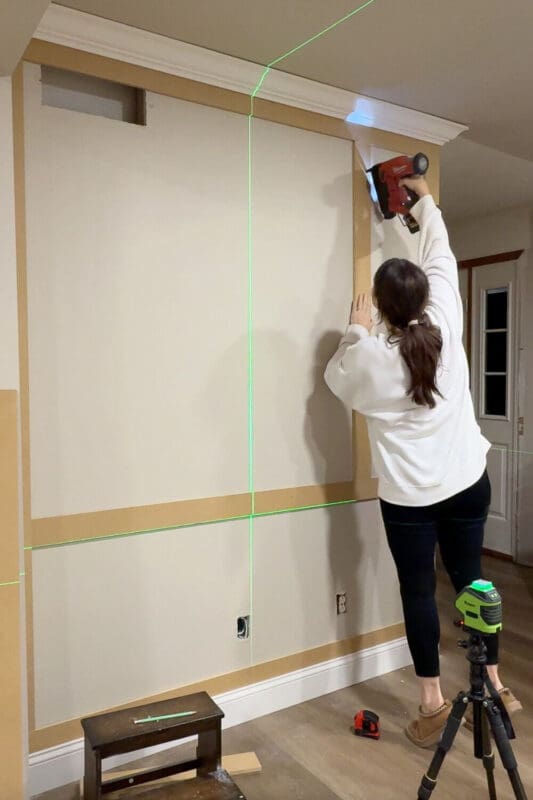
Step 5: Add Vertical Boards to Create the Box Molding Grid
Now the fun part: the boxes.
Once your chair rail is installed, you can start adding the vertical boards above and below the chair rail to create your box molding pattern.
- Measure and mark where each vertical board will go.
- Double check spacing before you cut anything.
- Cut boards with a miter saw and use a brad nailer to set them in place.
- Repeat above and below the chair rail.
Box Molding Layout Tips: How to Choose Proportions That Look Right
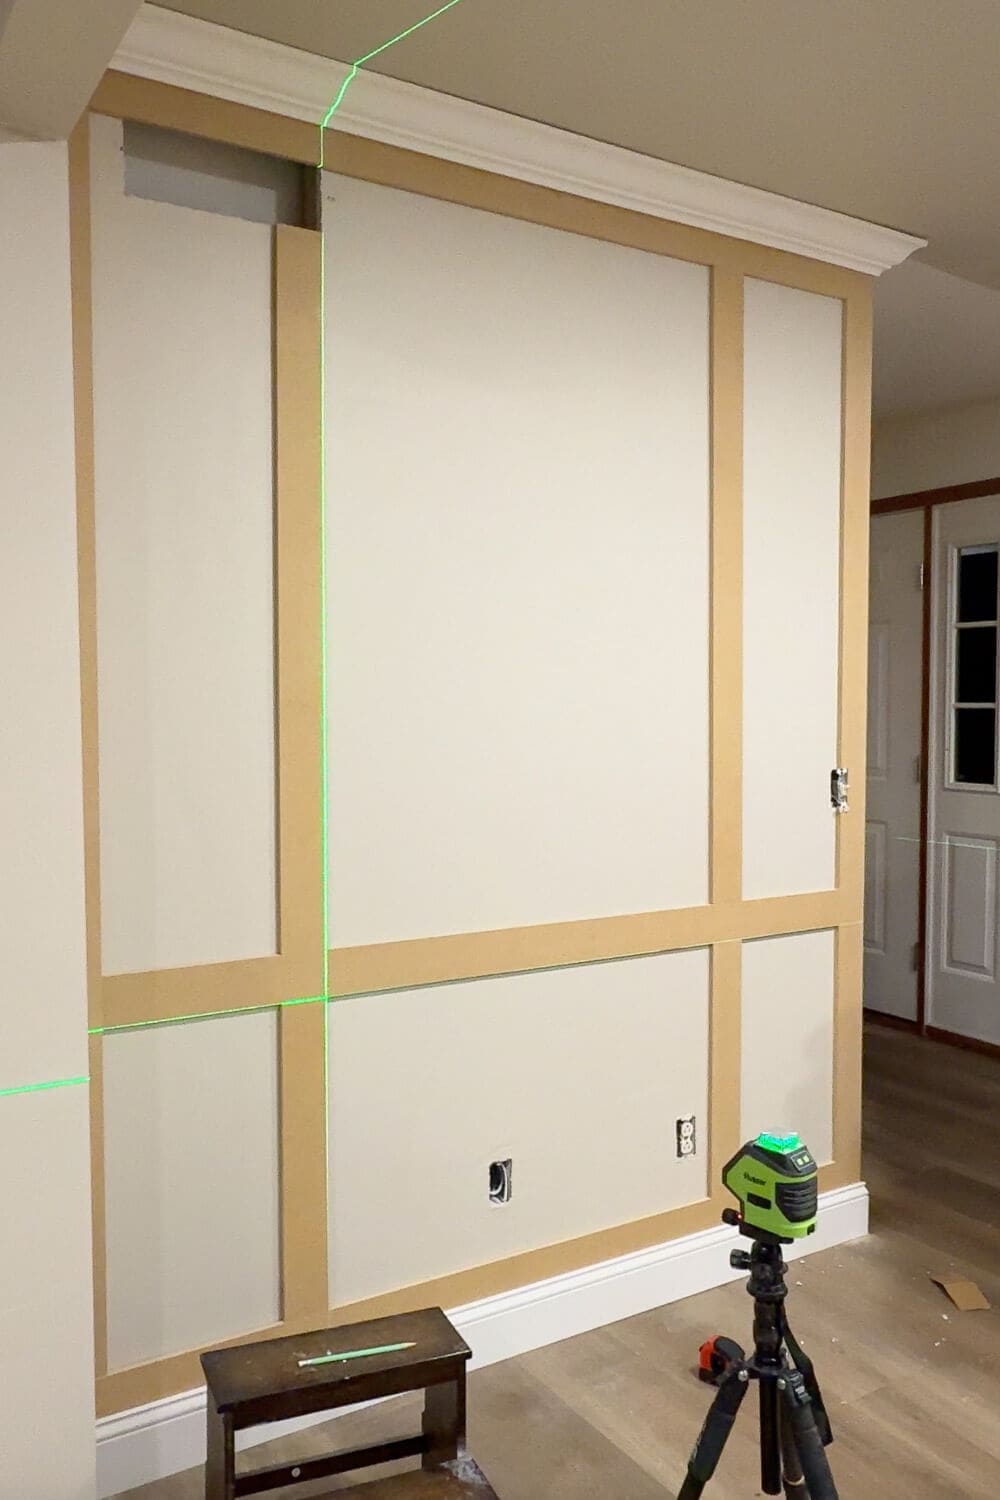
Here’s the truth: your box molding does not have to be all equal-sized sections. Even spacing is one option (and it’s a solid one), but I didn’t do that here, because I wanted an open section in the center for our frame TV.
In light of that, I treated the big center panel as the star and let the side panels be narrower.
A few layout tips that help no matter which route you take:
- Start with what has to stay (vents, switches, edges of the wall, TV, etc.) and work around it.
- Decide what look you want, like a larger middle box with slimmer side boxes, or perfectly symmetrical wall panels.
- Keep your spacing consistent within each section (like both narrow boxes the same size)
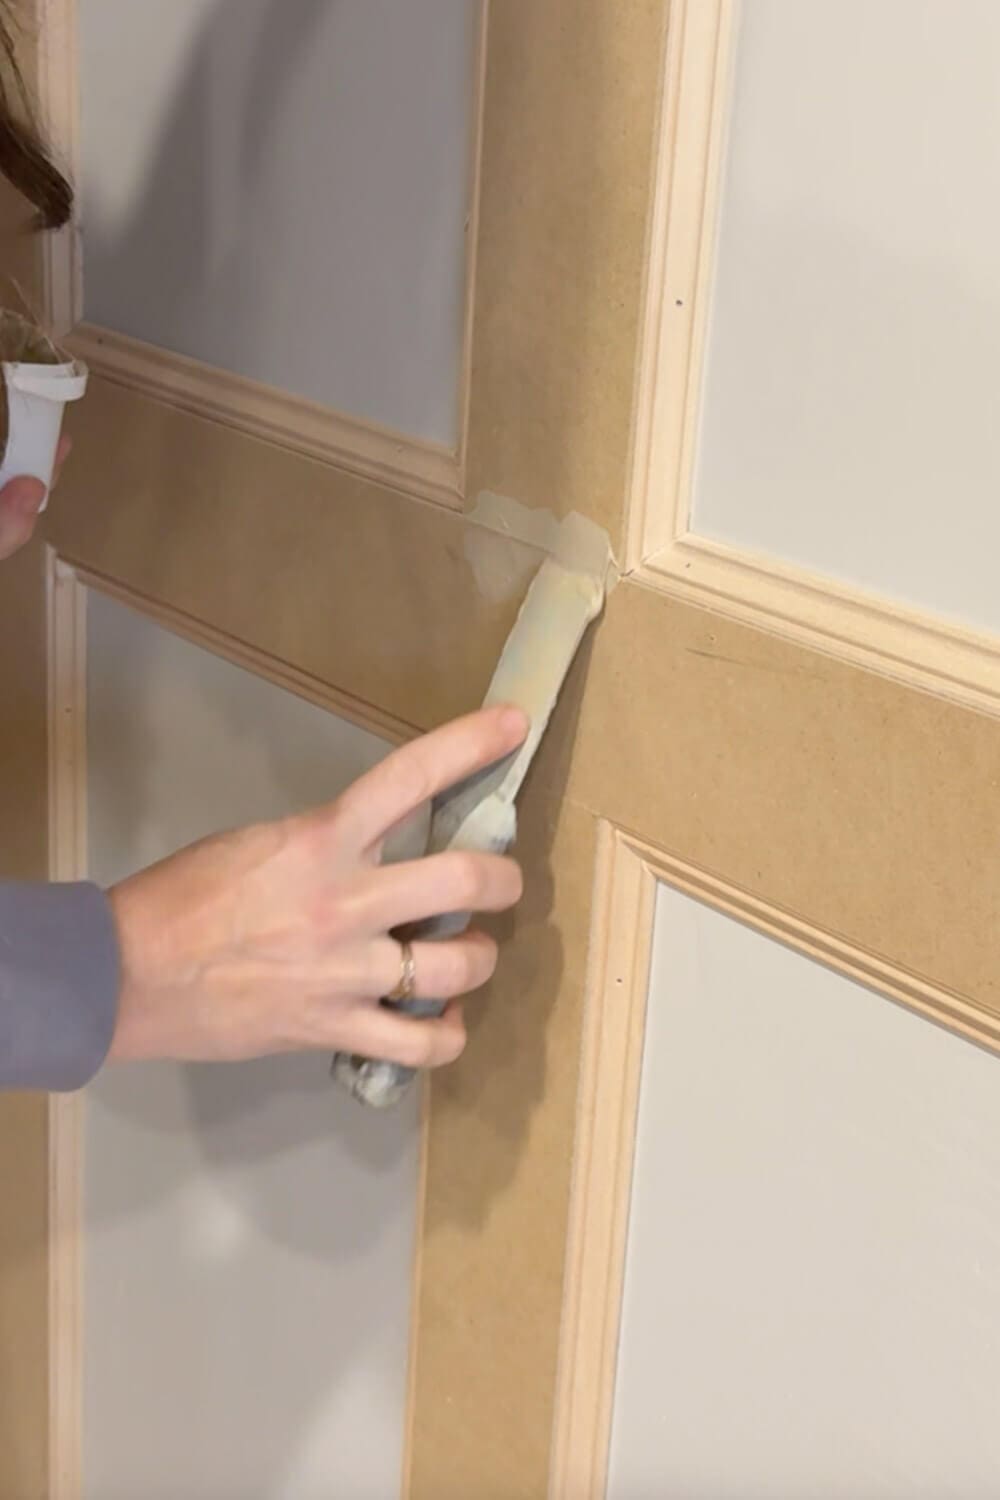
- Use painter’s tape to map it out first so you can step back and make sure it looks balanced from across the room.
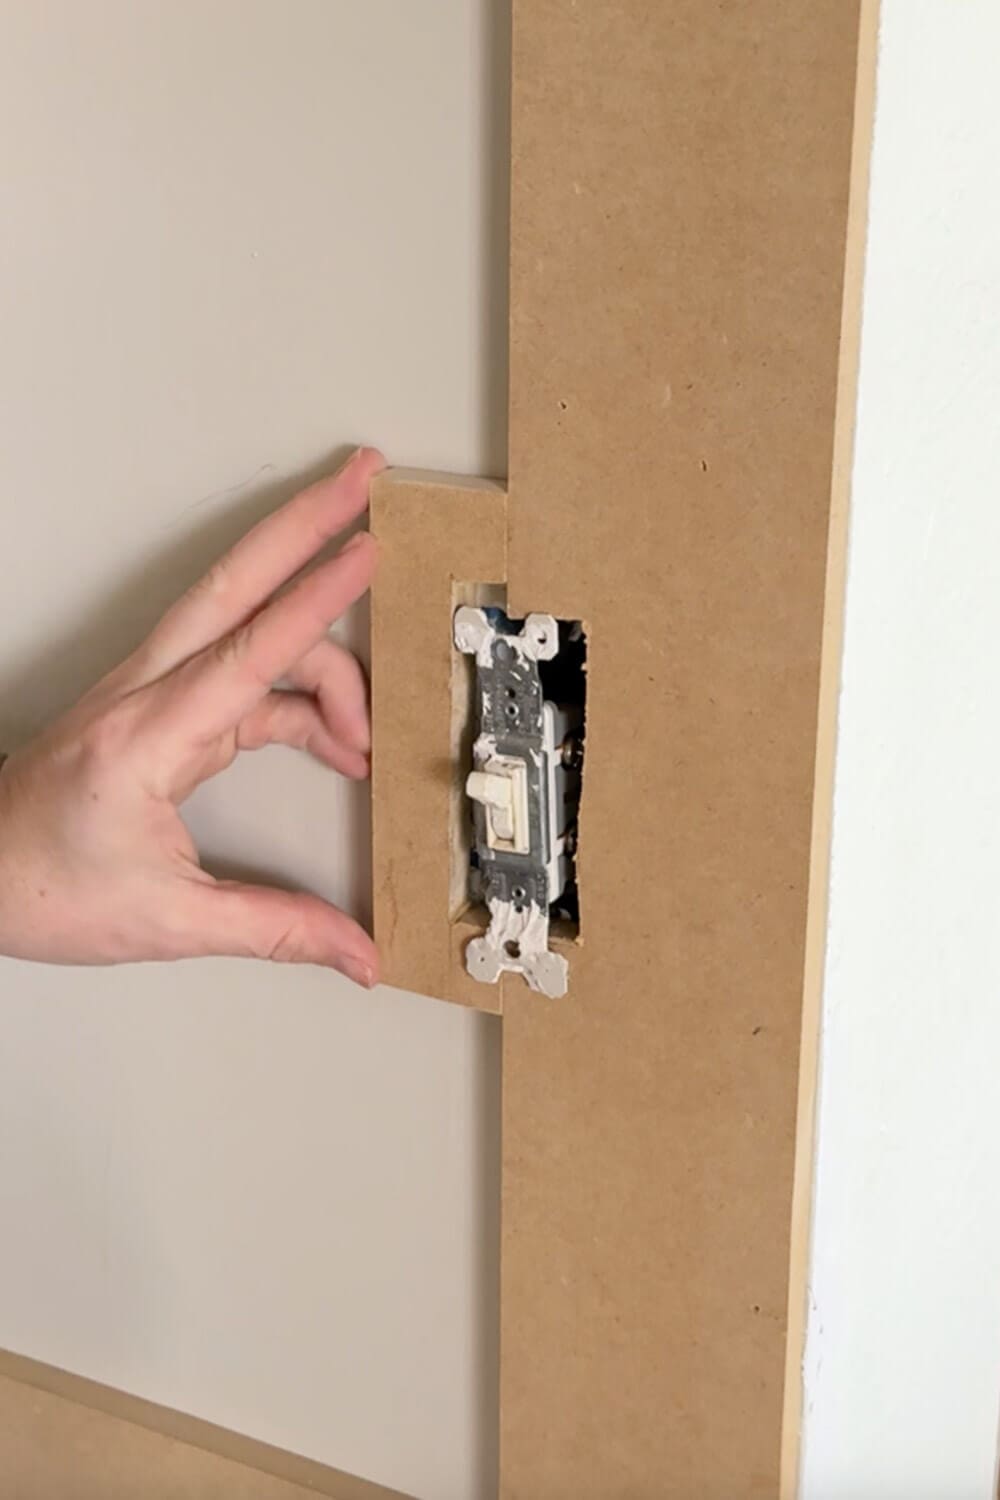
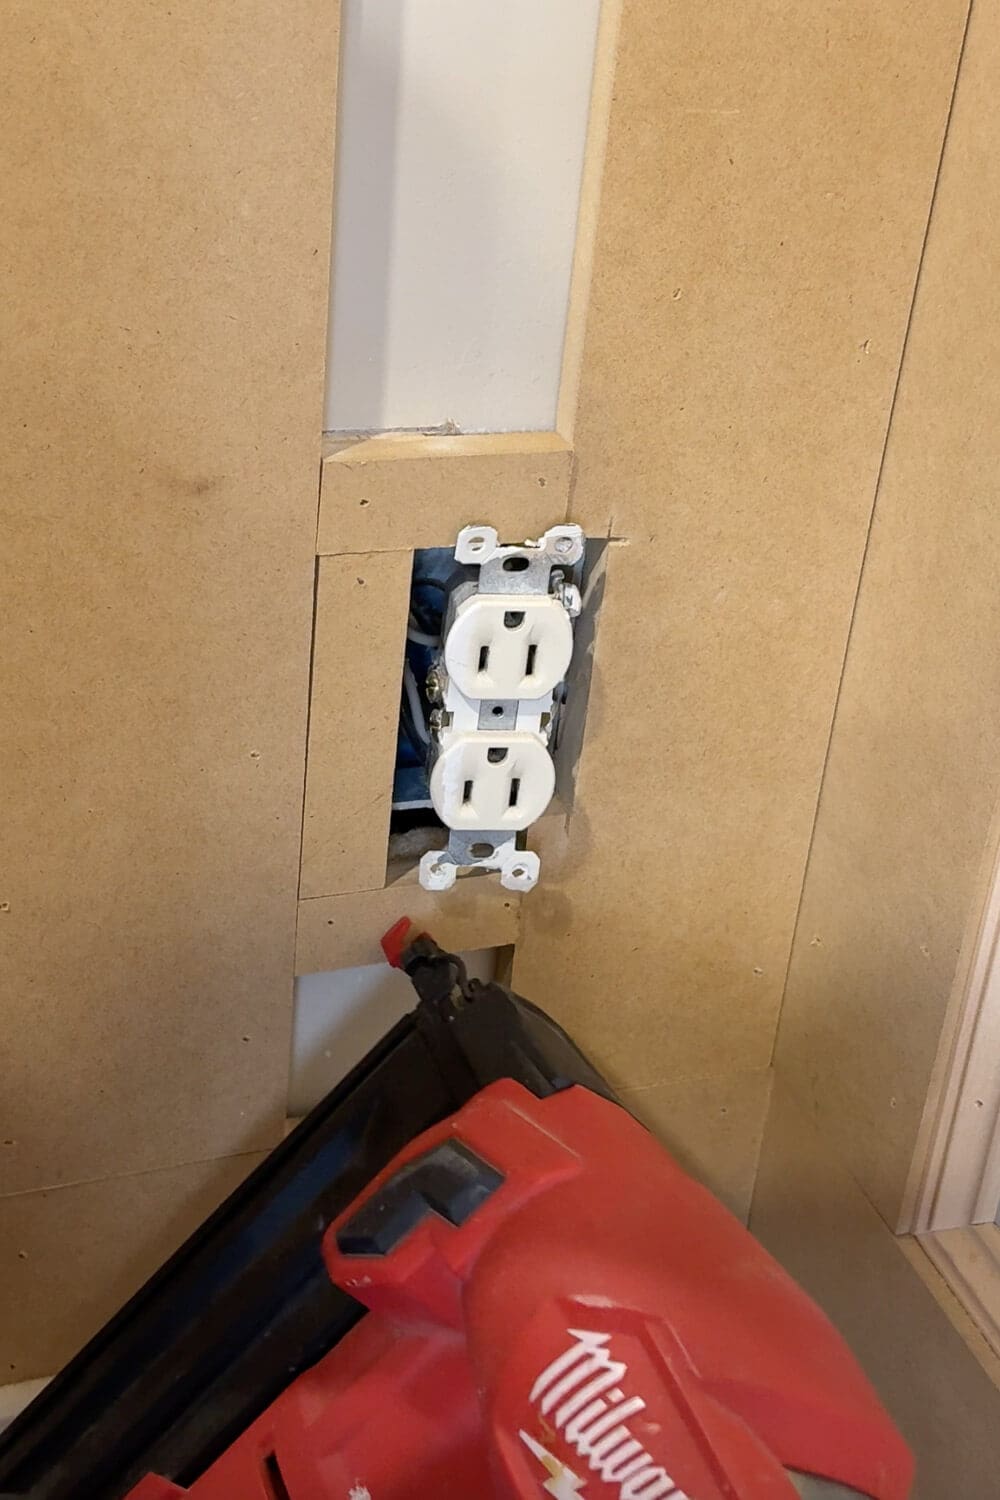
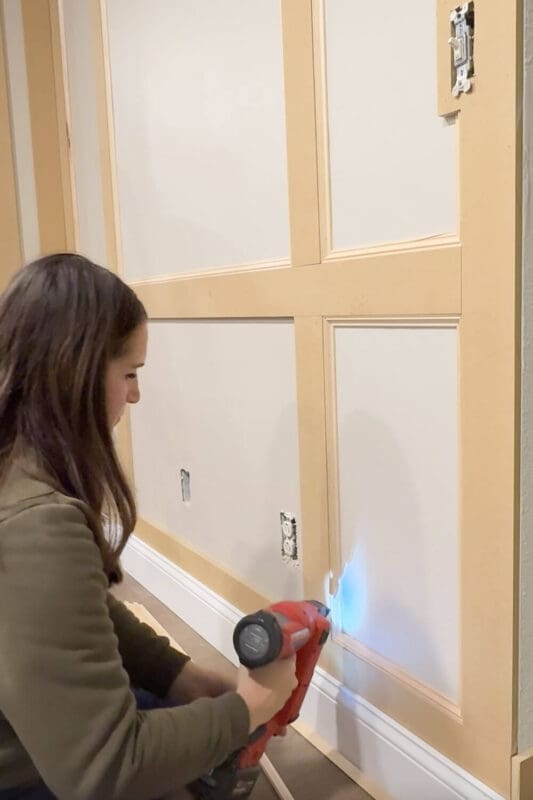
Step 6: Trim Around the Light Switch, Outlets, and Vent
Once the main box molding layout was done, I added a little trim around the light switch, outlets, and the vent, but only when they were touching (or really close to) the box molding. If an outlet or switch landed in a plain, flat section of wall, I left it alone.
Step 7: Add the Inner Trim Detail (The “Coved” Look)
Last molding step: I added a small trim piece around all the inside edges of each box. This gives that subtle, classic “coved” look inside the panels. Could I have skipped it? Yes. But I didn’t want “nice feature wall.” I wanted “why does this look like custom millwork” energy. This tiny detail is what sells it.
Troubleshooting Box Molding: Walls Are Rarely Straight
Here’s the part nobody warns you about: your walls are probably not straight. At all. What matters is that your trim boards sit flush against each other where they meet. If one board sits slightly recessed compared to the other, you’ll notice it later, especially after paint.
How to fix uneven spots with shims
If needed, use wood shims to bring a section of trim out.
- Slide a shim behind the trim where it needs to come forward
- The shim is wedge-shaped, so hammer it in as far as you need until the two trim pieces sit flush
- Use a multi-tool to cut off the excess shim sticking out
And, once you add that small inner trim detail, you’ll never see the shim. It’s completely hidden.
Step 8: Wood Filler for Seams and Nail Holes
Now, to make this box molding look like one solid built-in wall, we’re going to use wood filler for:
- seams and joints between boards
- nail holes from the brad nailer
Apply it with a putty knife, then once it’s dry, you can sand it smooth.
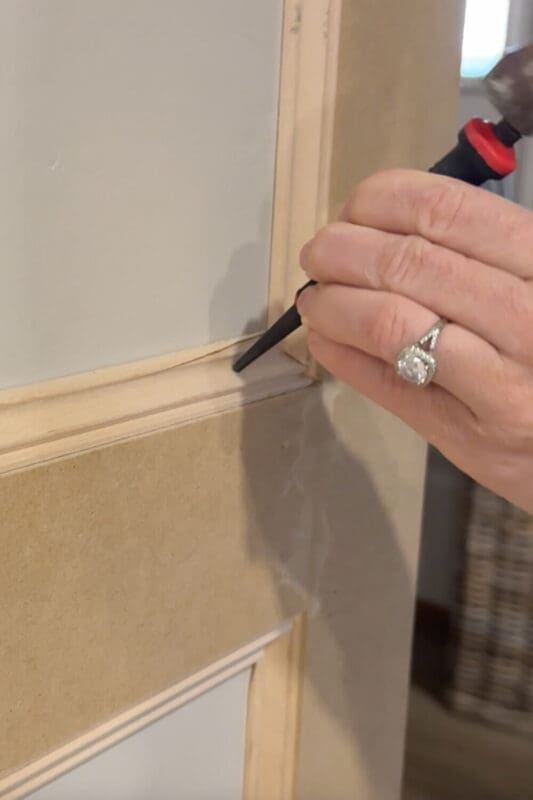
Troubleshooting – When a Brad Nail Is Poking Out
Every once in a while, a nail doesn’t sink in quite far enough, but it needs to be just slightly under the surface of the trim.
Here’s what I do:
- Place a nail punch on the nail head
- Tap it gently with a hammer to sink the nail slightly below the surface
- Cover the nail hole with wood filler
Let the wood filler fully dry, then sand it smooth.

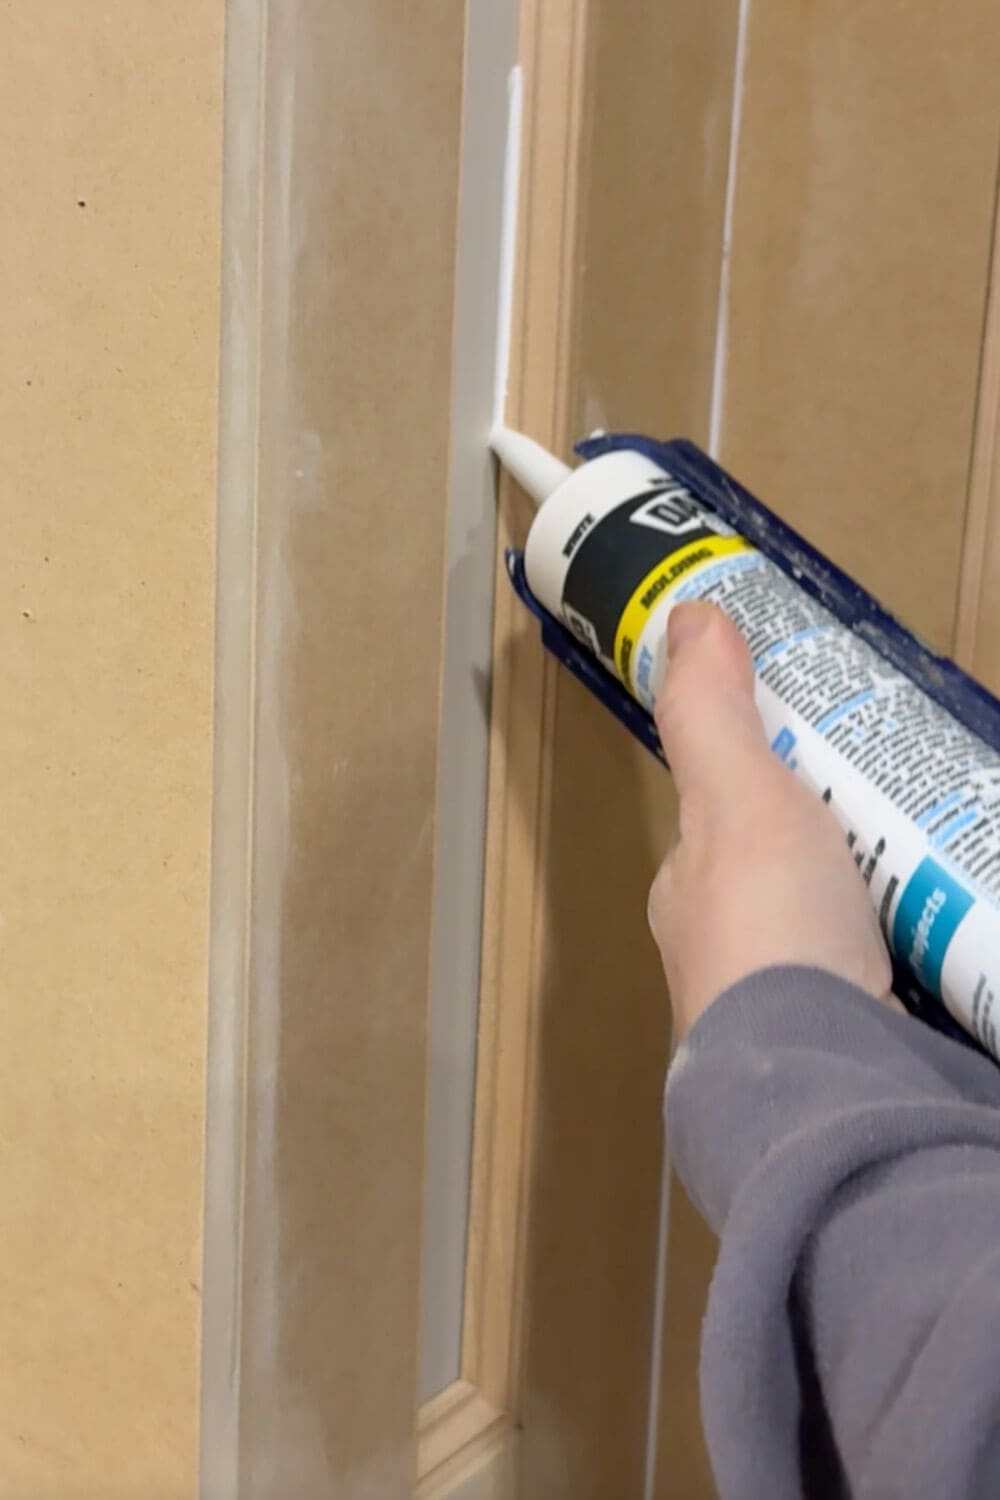
Step 9: Time to Caulk
After sanding the wood filler, it’s time for caulk. This is the step that makes box molding look finished and “tight.”
Use caulk:
- along the edges where trim meets drywall
- in corners where trim meets trim.
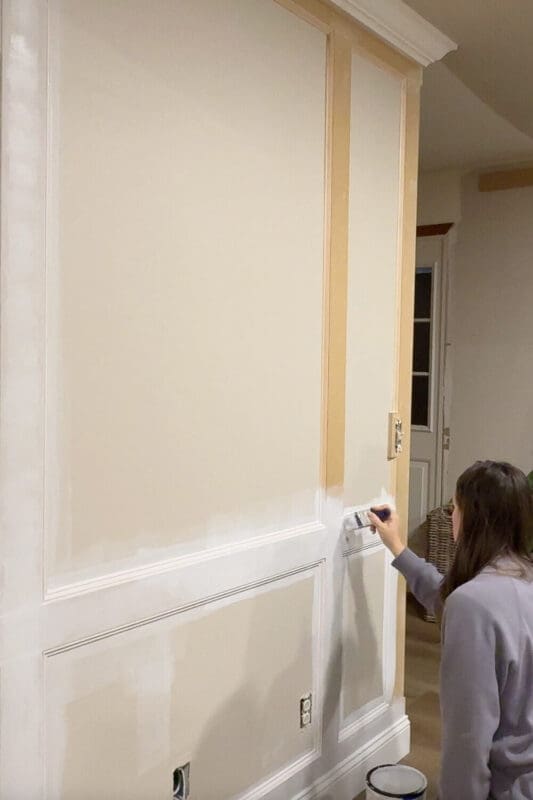
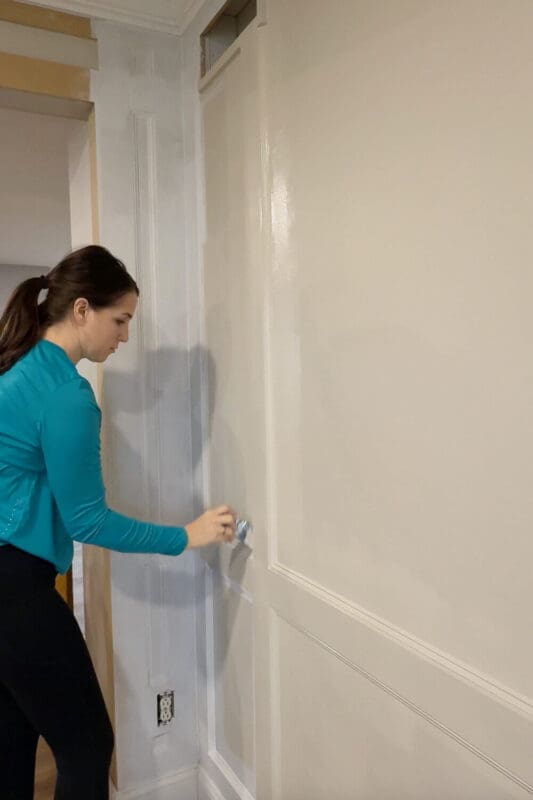
Step 10: Prime and Paint the Box Molding
MDF always needs a quality primer before paint. If you skip it, it can soak up paint unevenly and look blotchy. So I primed all the trim first, using a good, angled paintbrush for the grooves and corners and a small foam roller to keep everything smooth.
For paint, I’m using the same color on the wall and trim (Sherwin-Williams Accessible Beige). Since the wall was already painted, I just painted the box molding and trim, switching between the brush for detail and the roller for an even finish.
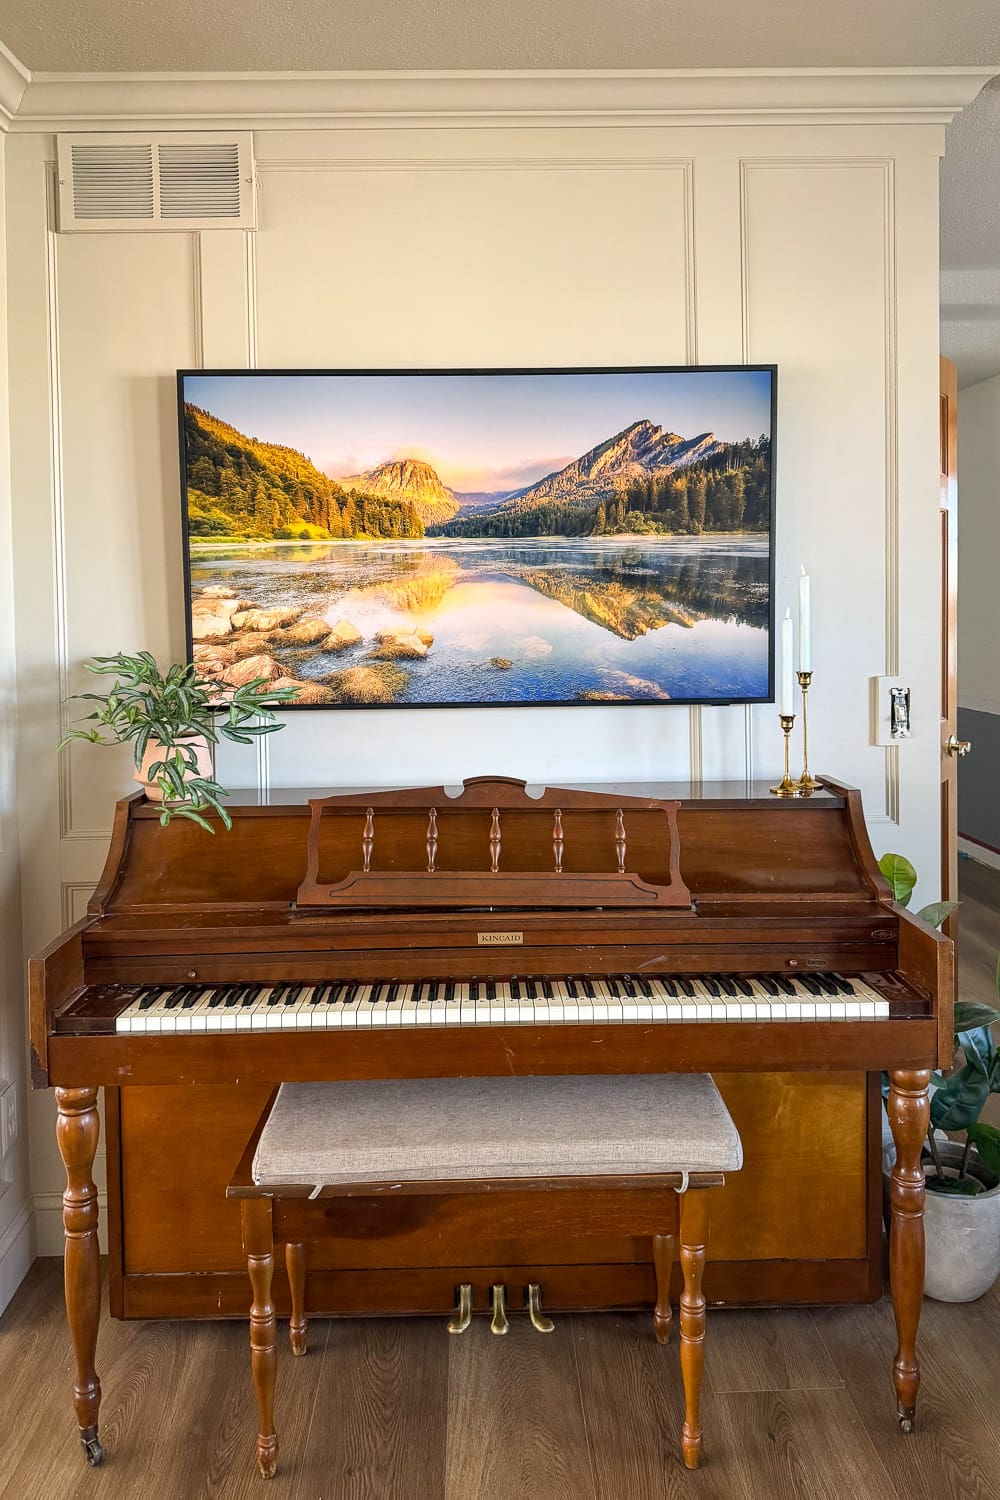
The Reveal: Finished Box Molding Wall
Once the paint is dry, it’s wild how much box molding changes the whole room. The wall instantly looks taller, cleaner, and way more custom. It’s one of those projects that makes everything else in the space look more expensive, even if nothing else has changed.
I moved all the furniture back in, and my husband mounted our Frame TV. I love how it turned out. Now I just need to grab a light switch plate to fully finish it off.
I’ll be continuing this box molding wall trim around the whole living room soon. Follow along on Instagram for the rest of my living room progress.
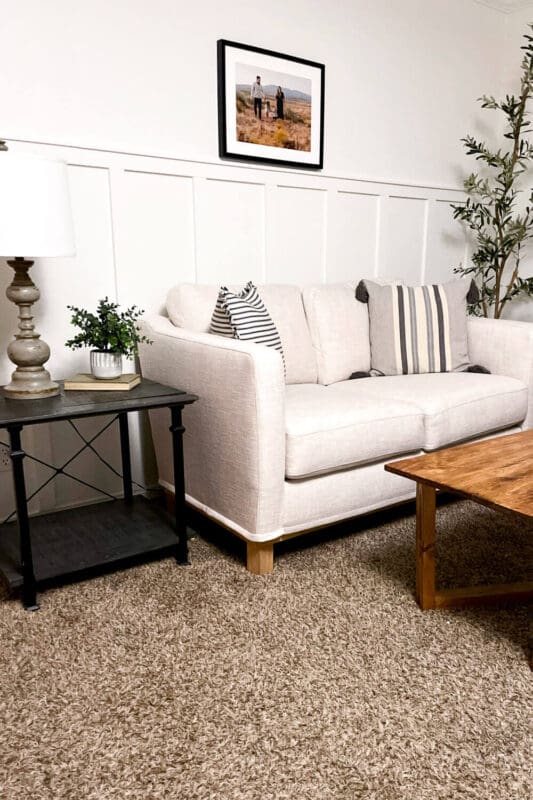
More Wall Trim Projects I’ve Done (If You Want More Ideas)
This box molding wall trim moment is not my first rodeo. I love that classic wall trim look, and I’ve done a few different styles before. If you want more inspo, check out How to Build a DIY Board and Batten Wall in One Day and DIY Guest Bath Upgrade with Picture Frame Molding.

📌 Save This Box Molding Tutorial for Later
If you’re even thinking about adding box molding to a room, save this post to Pinterest so you can pull it up when you’re ready to measure, cut, and start nailing. It’s one of those projects that looks custom and expensive, but it’s totally doable once you have the steps in front of you (and trust me, you’ll want the layout tips + troubleshooting section handy).
FAQs About DIY Box Molding Wall Trim
Box molding wall trim is a grid of trim boards installed on a wall to create “boxes” (panel shapes). It’s also called picture frame molding or wall panel molding, and it gives a classic, custom wainscoting look without rebuilding the wall.
Box molding is beginner-friendly if you take your time with measuring and keeping your lines level. The actual install is repetitive: cut, level, nail, repeat. The finishing work (wood filler, sanding, caulk, paint) is what makes it look professional.
You don’t need a laser level, but it makes box molding layout way easier and faster. A standard level works fine too, especially if you’re patient and double-check your marks.
Start by deciding how many boxes you want across and up/down, then aim for consistent spacing between each box. The key is keeping the margins at the edges balanced so you don’t end up with skinny, awkward boxes at the ends.
I used Sherwin-Williams Accessible Beige for the finished look.
