Easy DIY Bathroom Mirror Frame


Updated July 13, 2026
Spruce up your basic, builder grade mirror with my easy-peasy, DIY bathroom mirror frame tutorial! This simple project can be done in one afternoon with very few materials. You can upgrade your bathroom mirror and impress your guests without even breaking a sweat!

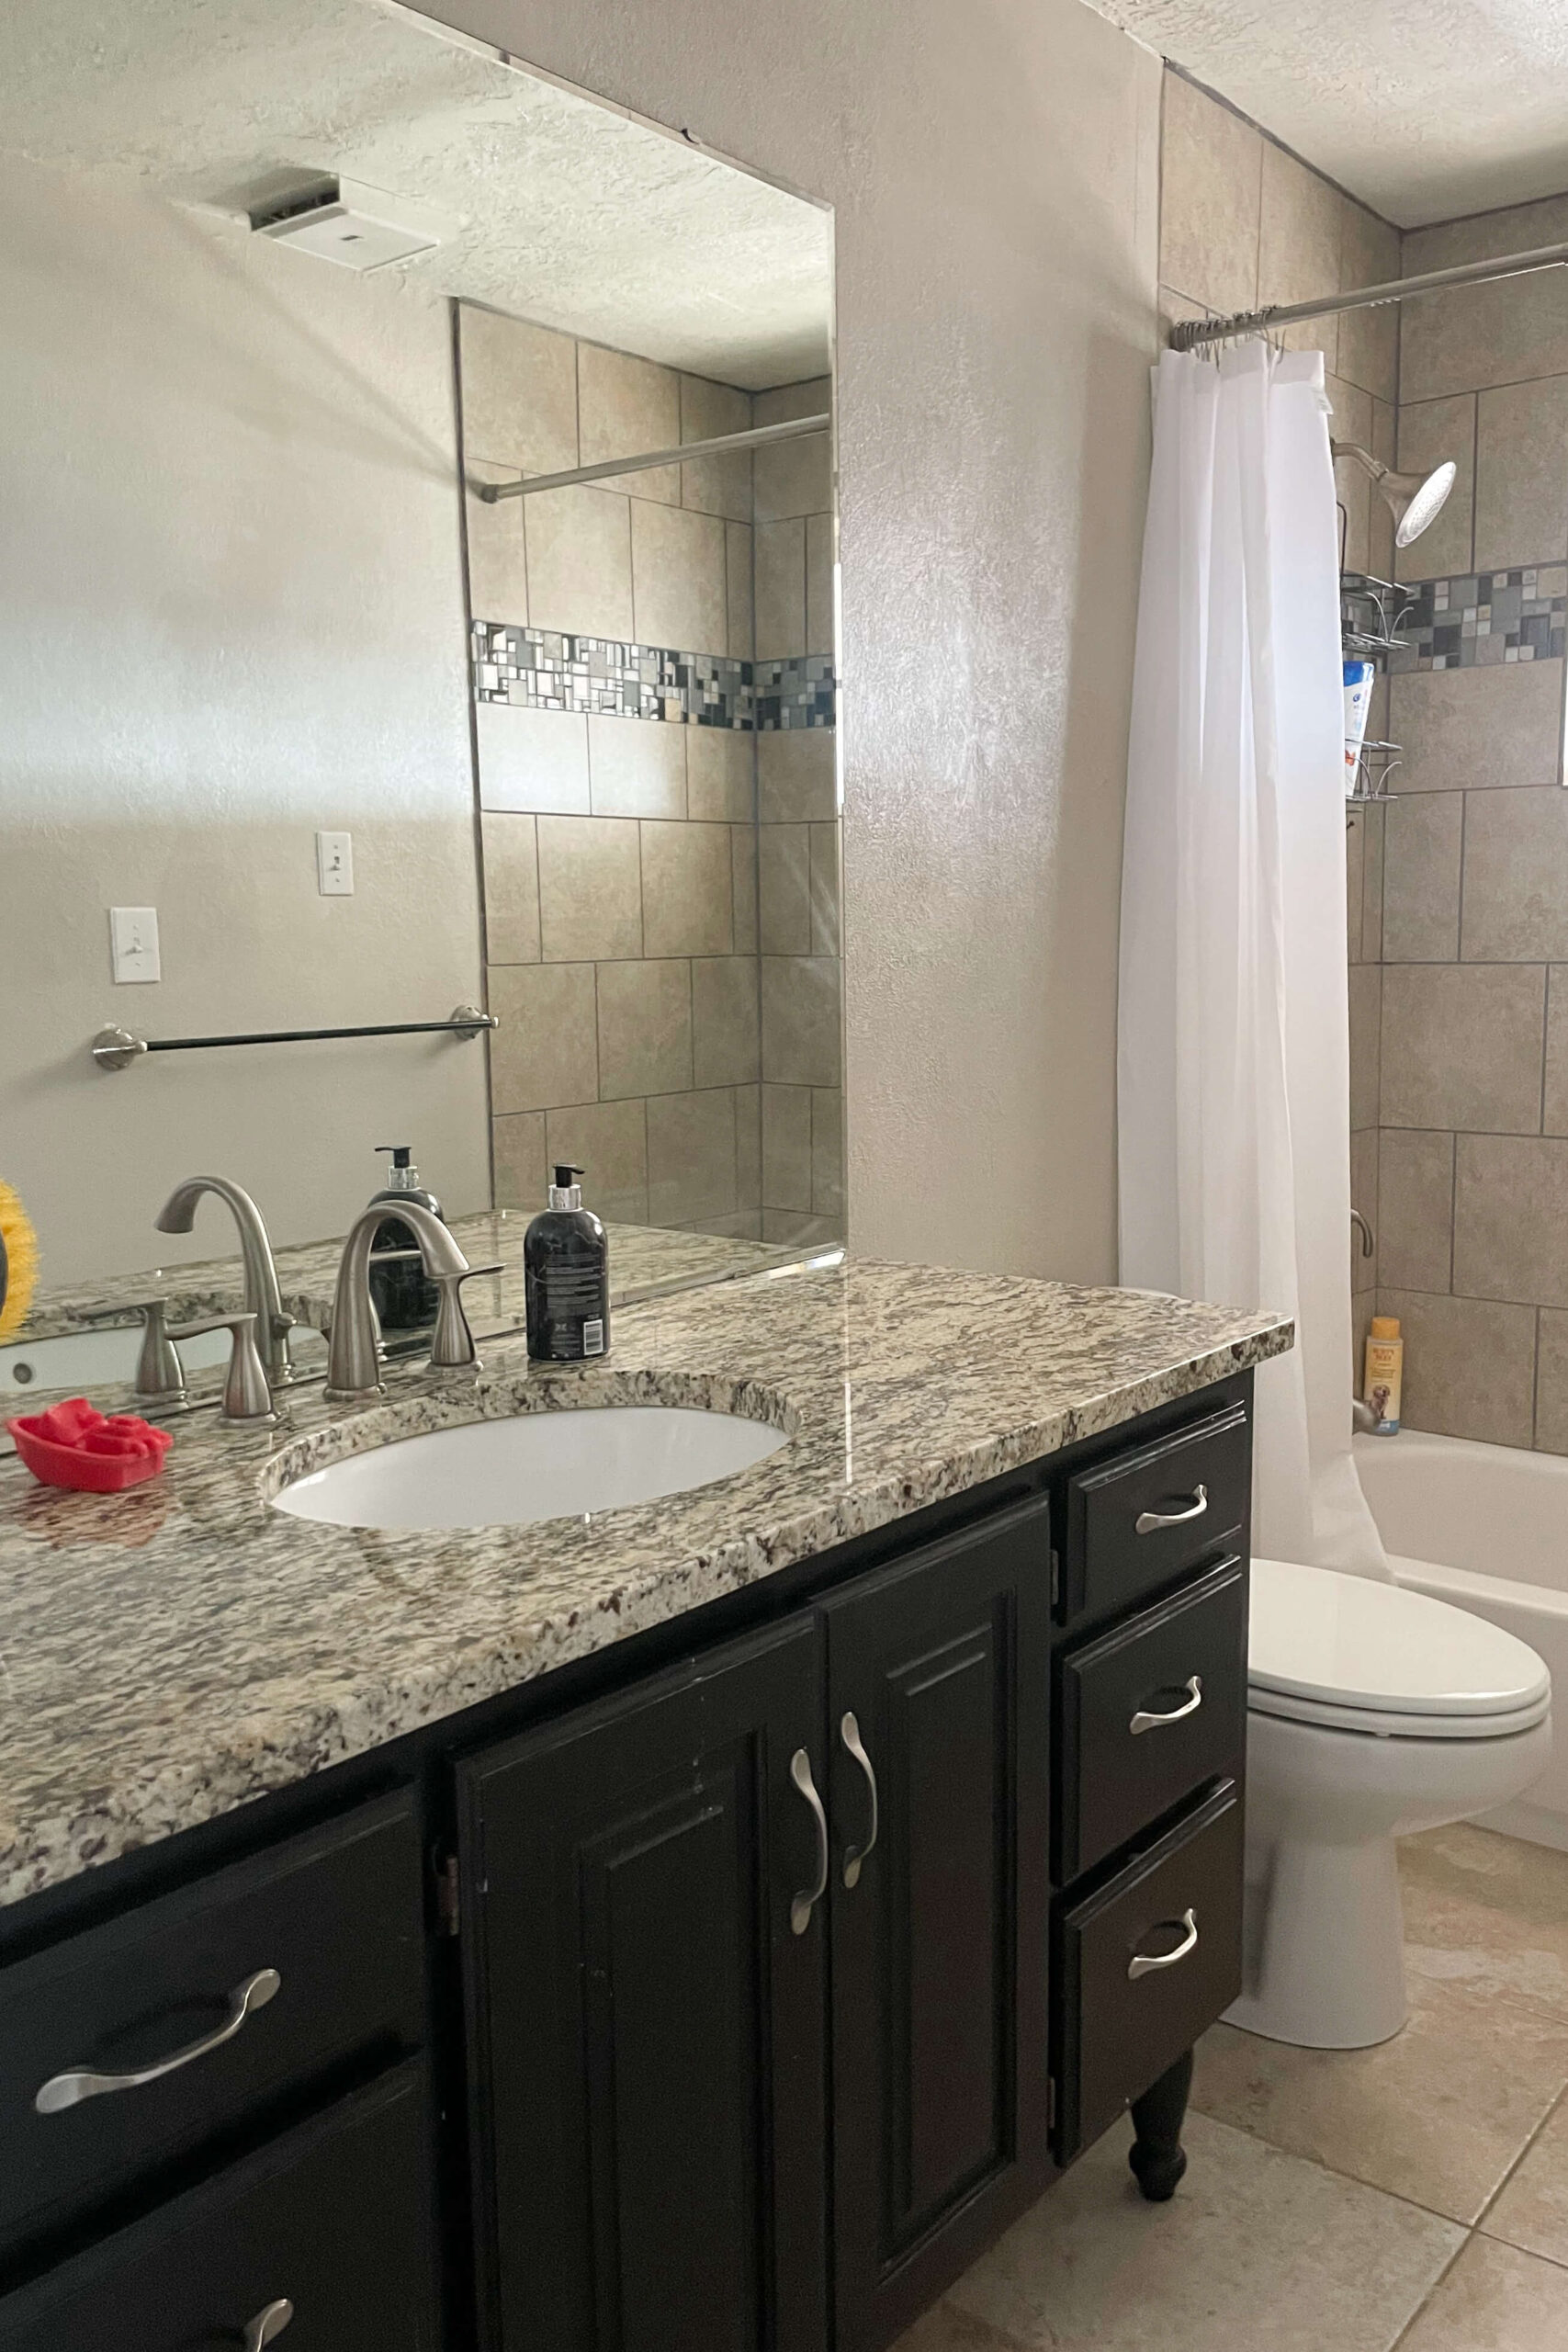
Before we left our home in Utah to move to Omaha, Nebraska, I took on many projects. The last one before moving day was this bathroom remodel. I challenged myself to do this project on a strict budget and can’t believe how much I was able to get done. Here is what we looked at before I took on this bathroom renovation.
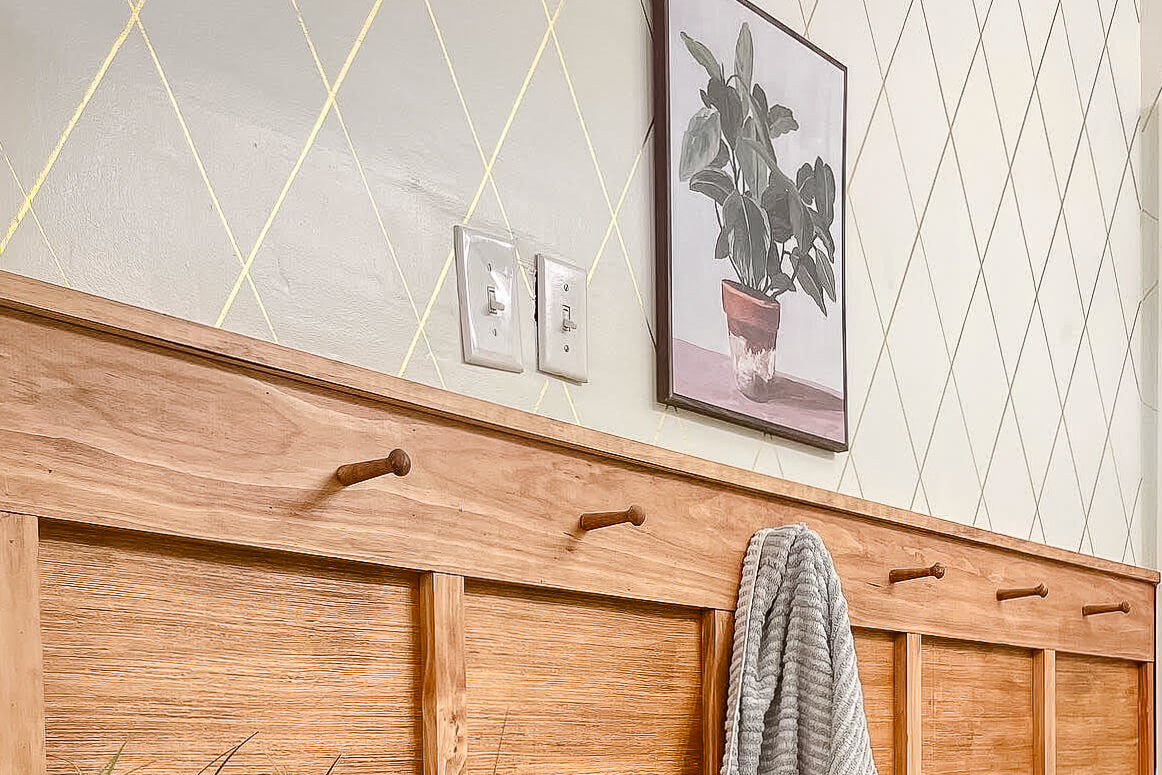
Throughout this small budget bathroom makeover, I painted the shower tiles, made a faux marble counter over the existing granite countertop, used a gold sharpie to mimic wallpaper, and added a wood feature wall. But the quickest and easiest project was my DIY bathroom mirror frame.
Tools
Materials
- Trim
- Stain
- Paper towels
- Wood glue
- Brad nails
- 3 – screws
- 3 – washers
Cutting and Staining the Trim Pieces
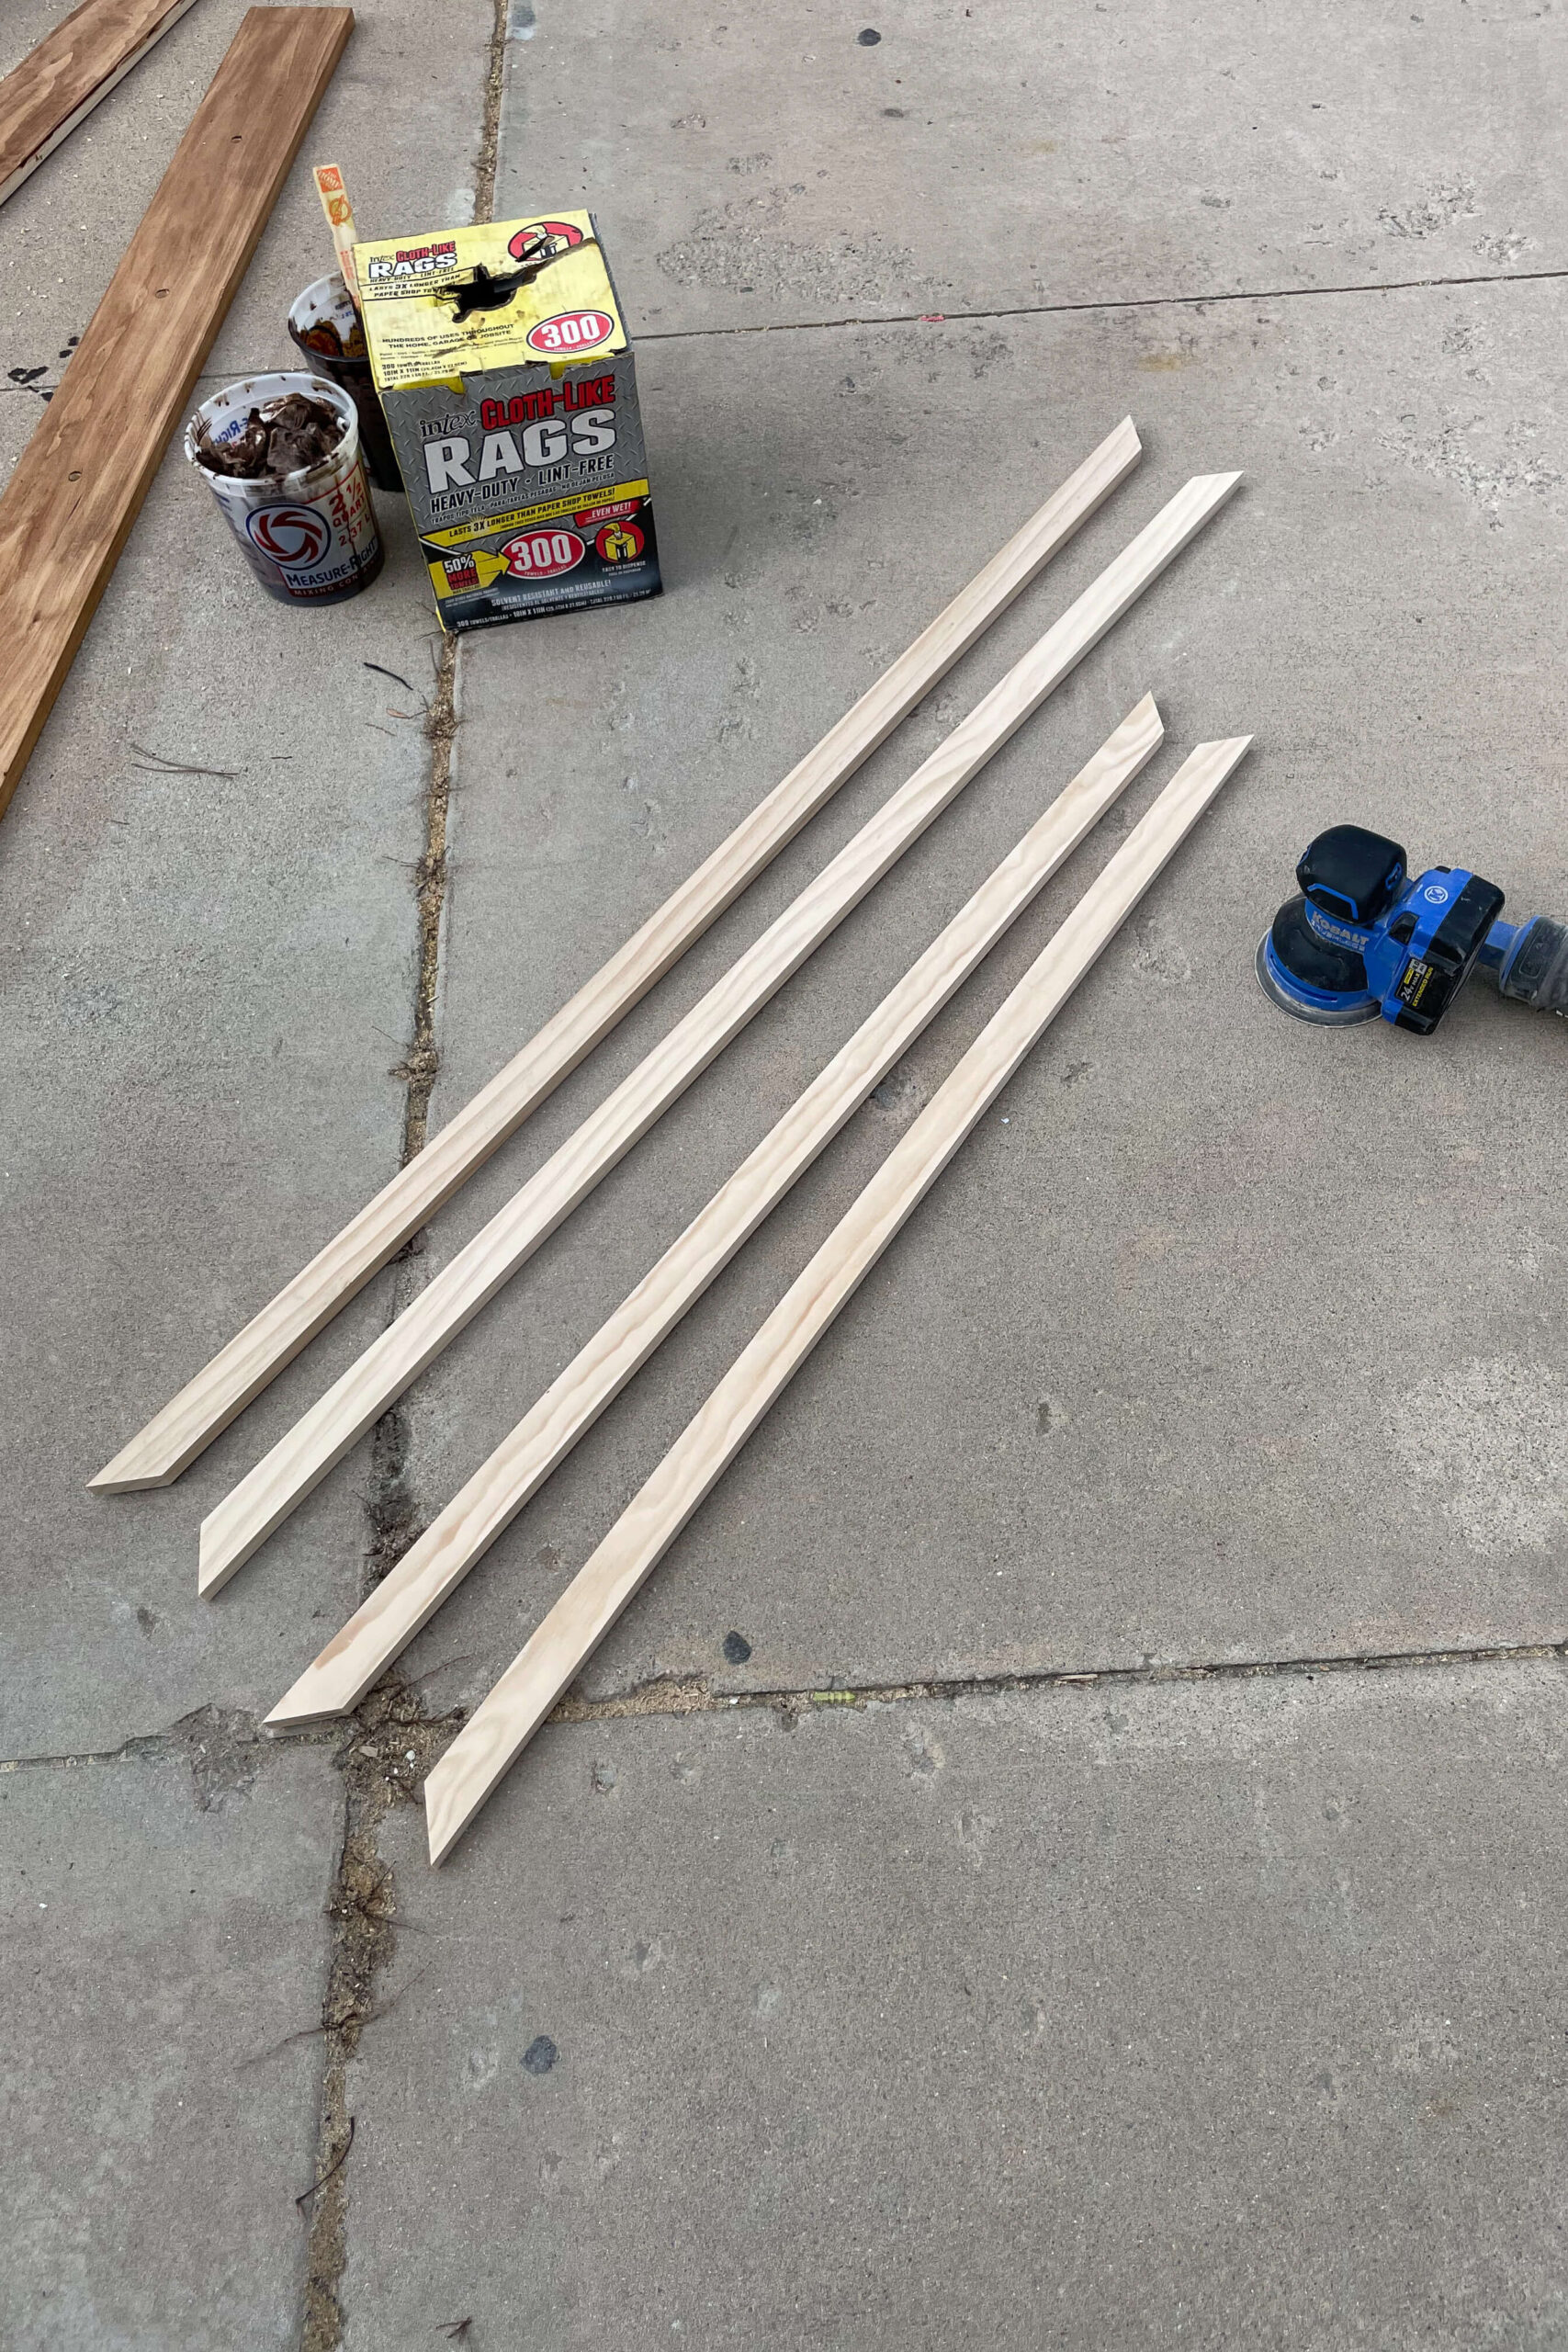
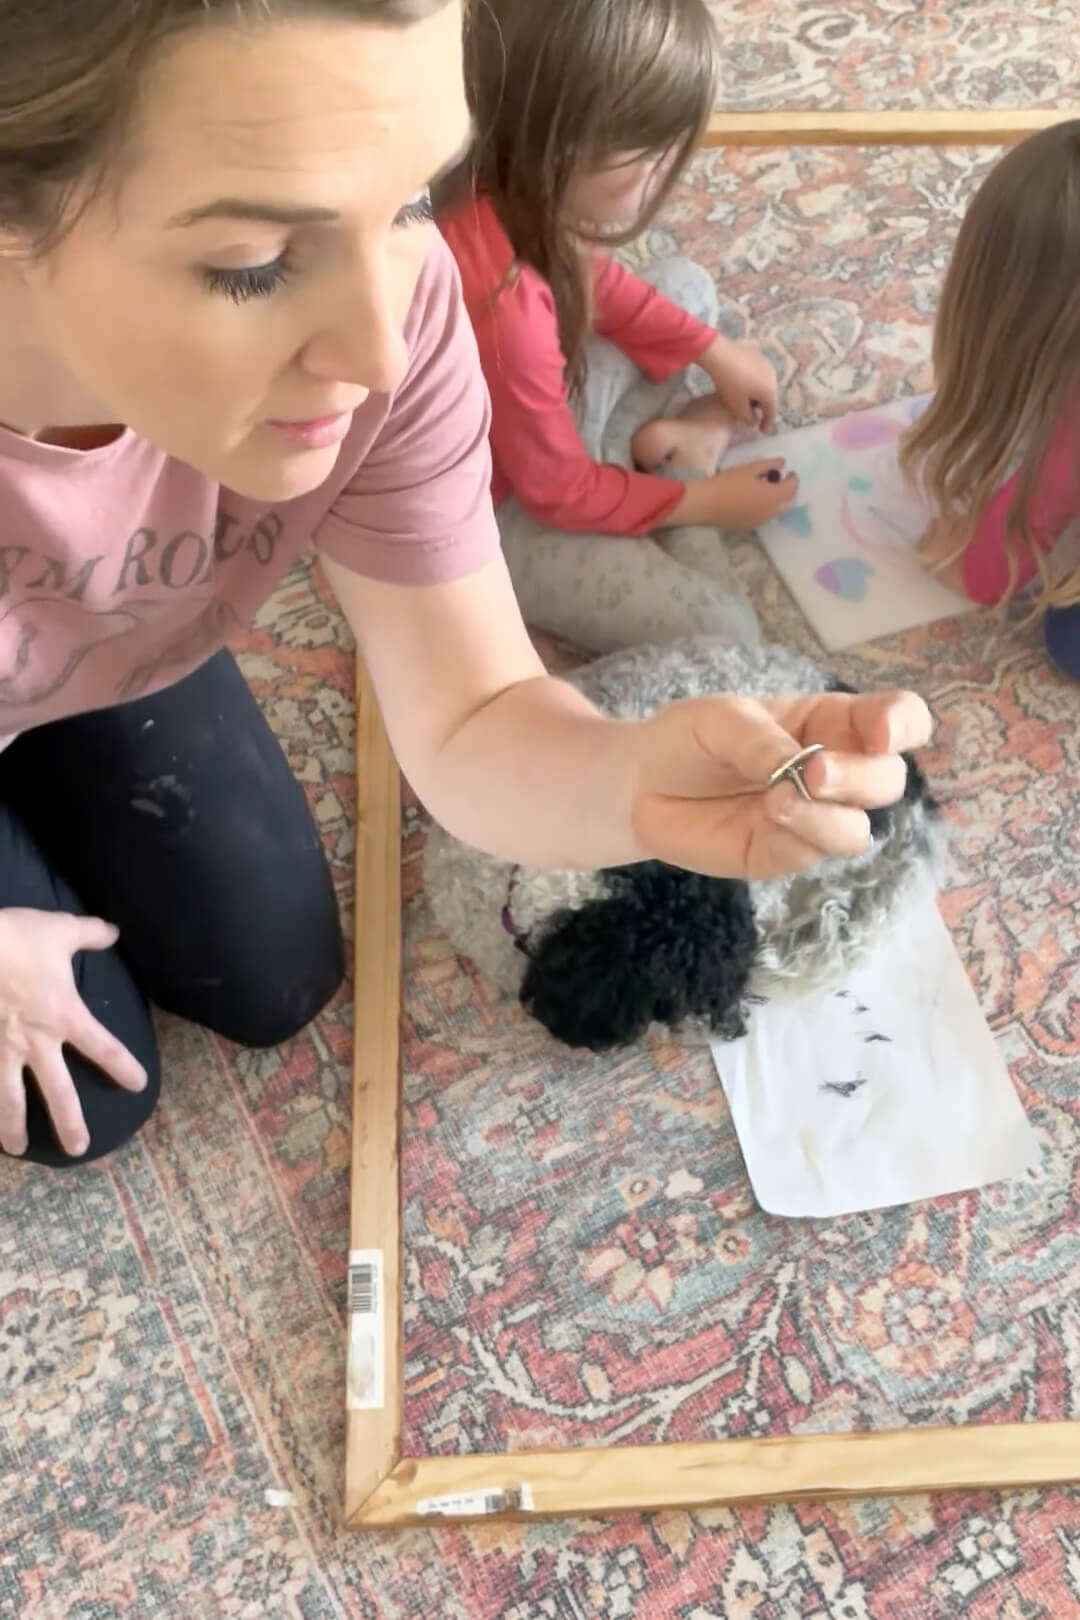
First step was to cut four pieces of trim into the sizes that I needed to frame my bathroom mirror. I used my miter saw to cut the edges at a 45° angle, then I sanded the trim with my orbital sander until they were nice and smooth.
The stain color I am using is called Early American by Minwax. I chose this color to match the plywood feature wall I added during this bathroom makeover.
To apply the stain, I used a basic paint brush to cover the trim with the stain.

Then, I gave it a good wipe with some paper towels. Repeat these steps until you are happy with the color and coverage.

Assembling the DIY Bathroom Mirror Frame
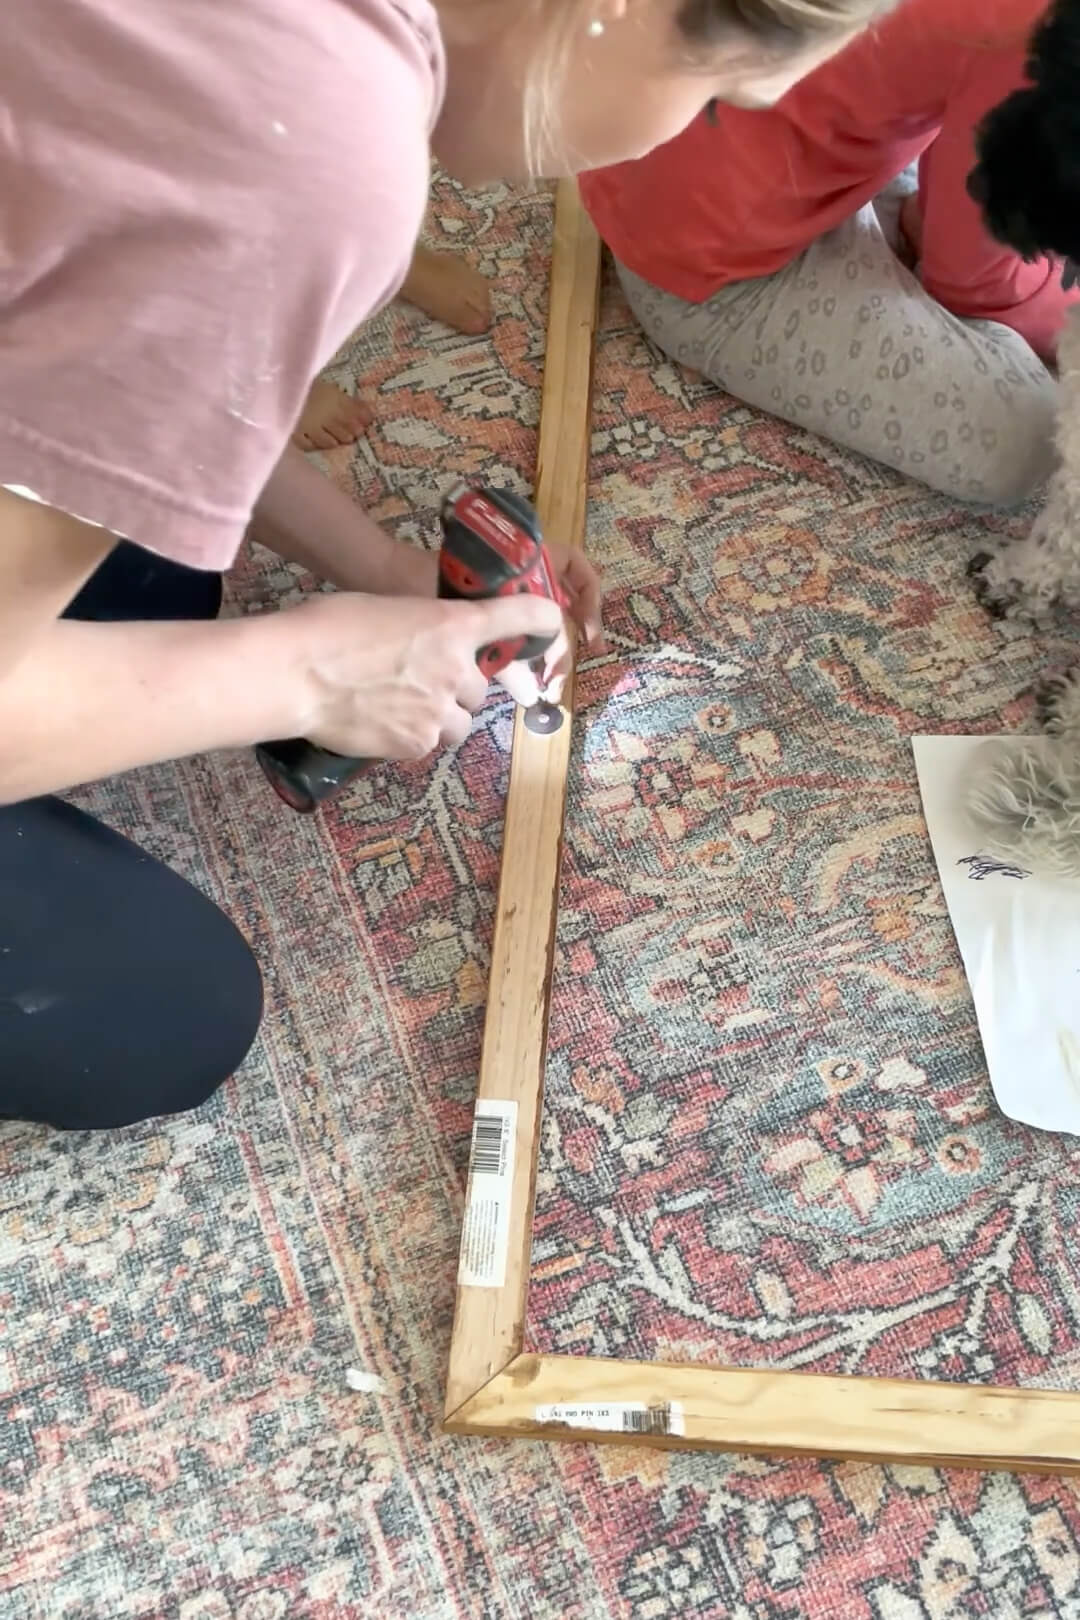
To assemble the frame I laid out all four pieces of the DIY bathroom mirror frame onto my living room floor. I applied wood glue to the edge of the wood where my two pieces of trim would meet, smearing the glue just a bit with my finger before pressing the two corners together. Then, using my brad nailer, I nailed the trim pieces together, adding 1 1/4″ bad nails on both edges of the frame.


The magic in this DIY bathroom mirror frame is these washers. You will need three washers that are smaller than the trim you are using and three screws that have a head bigger than the hole of the washer.
You will be doing two washer/screw combos on the top of the frame and one washer/screw combo near the bottom of the frame.
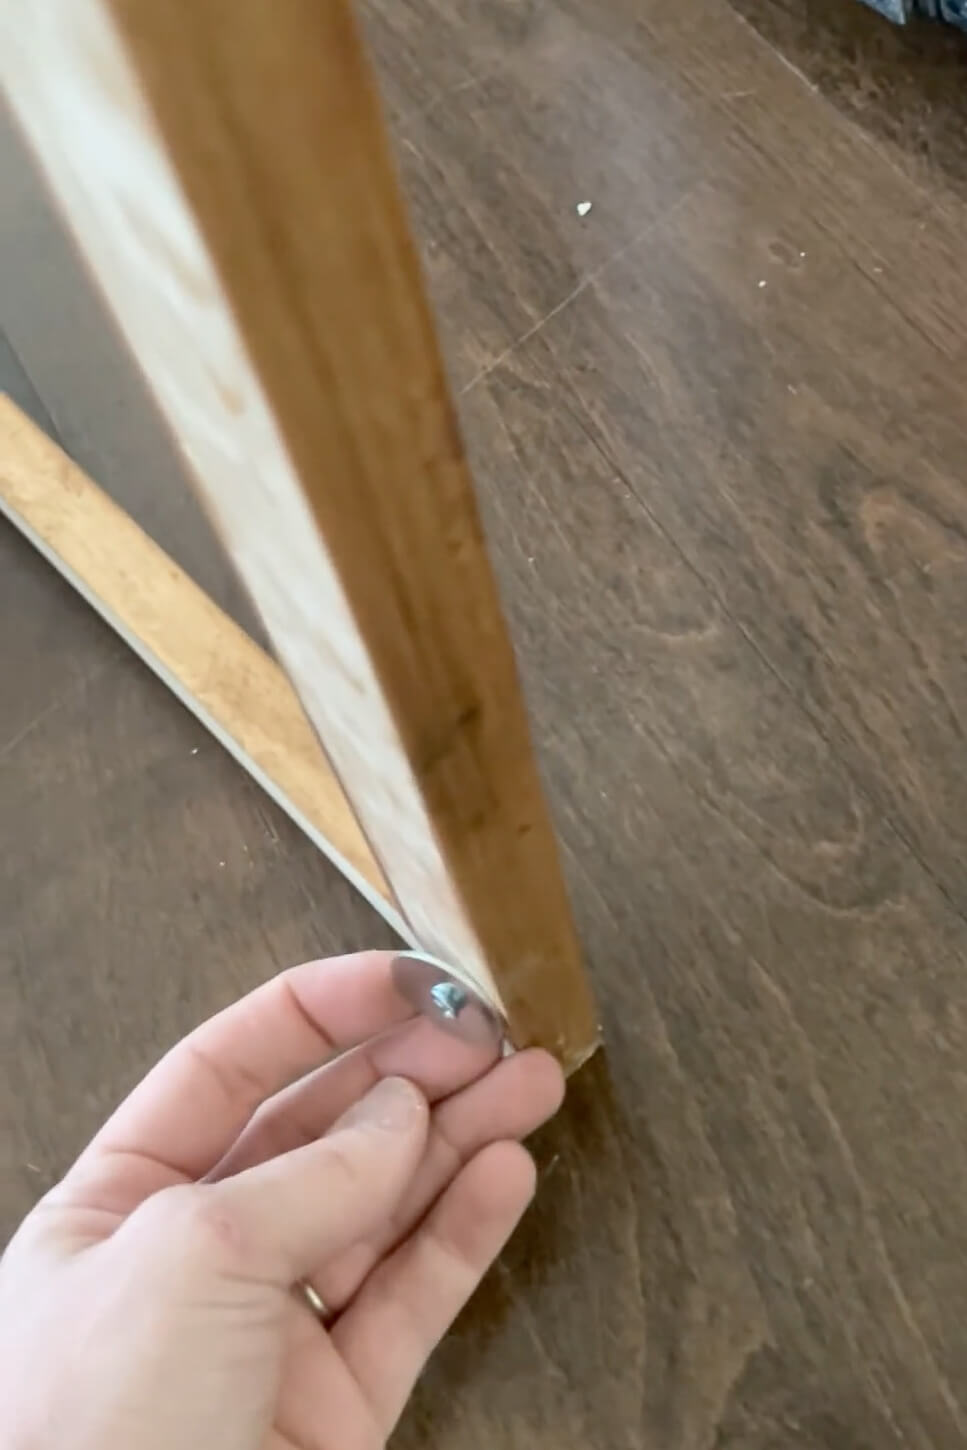
I placed the washer onto the back of the frame, then added a screw through the hole of the washer using a drill. Do not screw it in all the way. If you do, use your drill to back the screw out a bit.
When you attach the screw through the washer, you are going to leave just enough of a gap behind the washer for your mirror to be sandwiched between the back of the frame and the washer. This washer/screw combo is going to act as an inexpensive clip for our DIY bathroom mirror frame.
I have two washer/screw combos on the top that will be resting on the mirror.
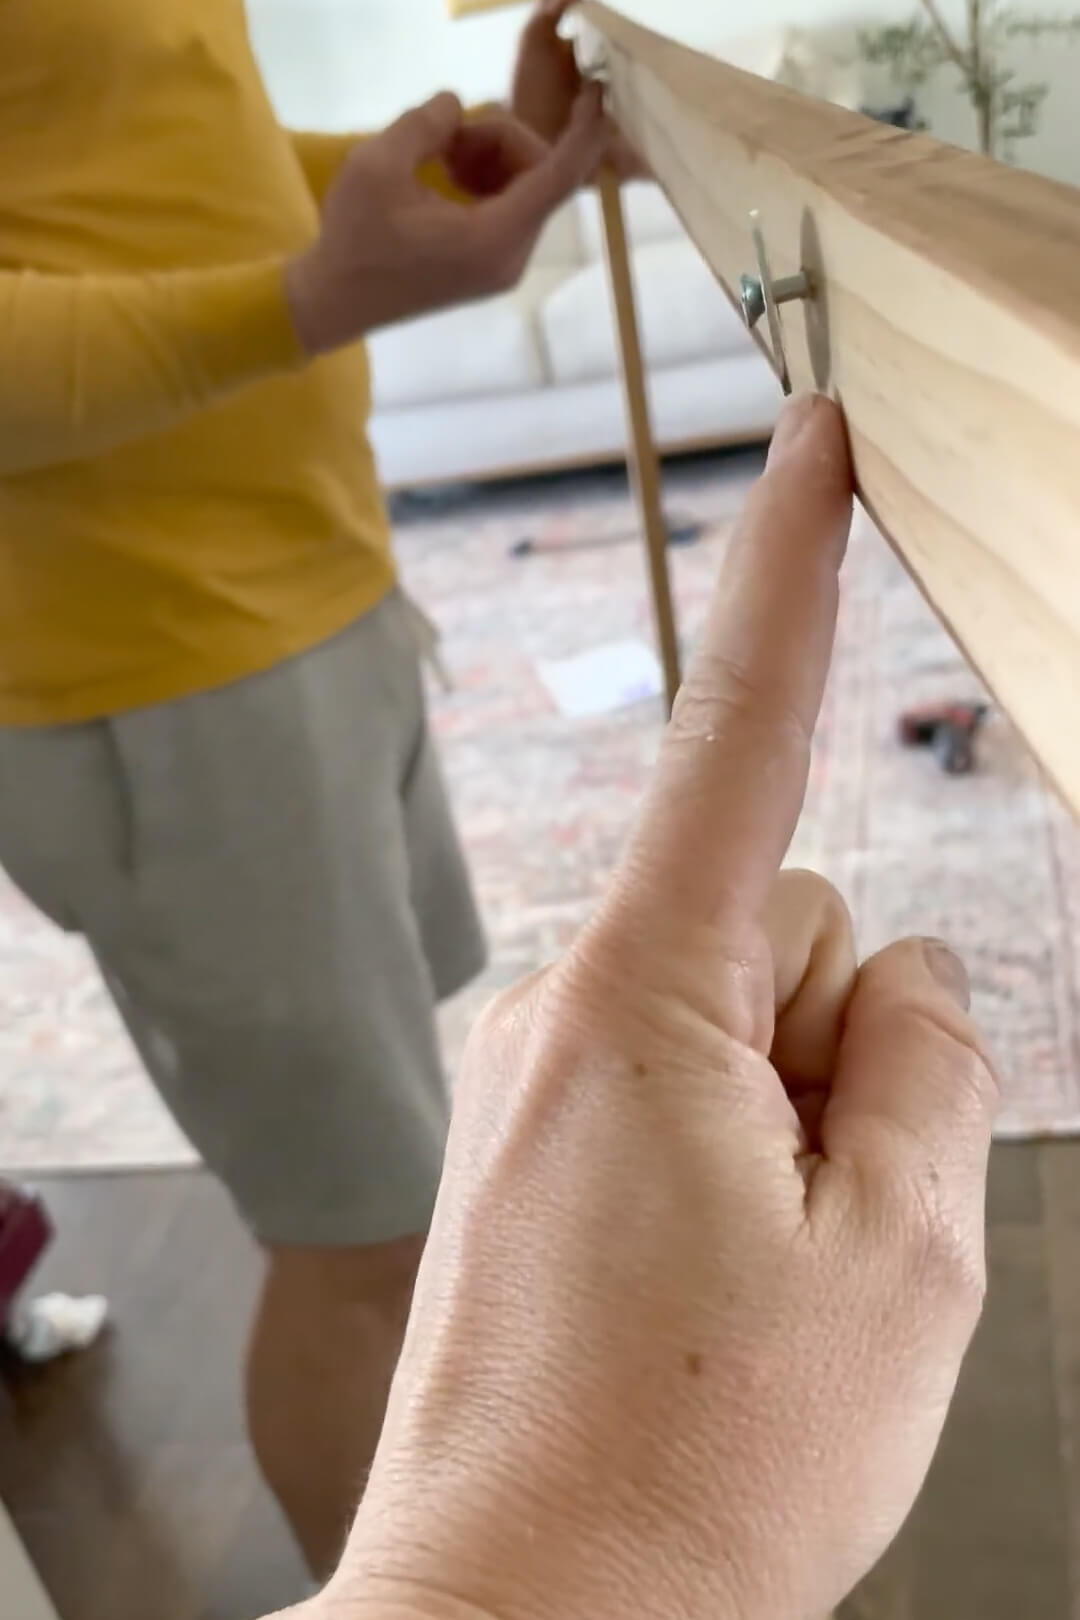
And I also put another washer/screw combo near the bottom of the frame, but only on one side. This one will help hold the frame tight against the mirror.
Hanging the DIY Bathroom Mirror Frame
My basic, builder grade bathroom mirror is attached with these simple mirror clips. I have them at the bottom and the top of the mirror.
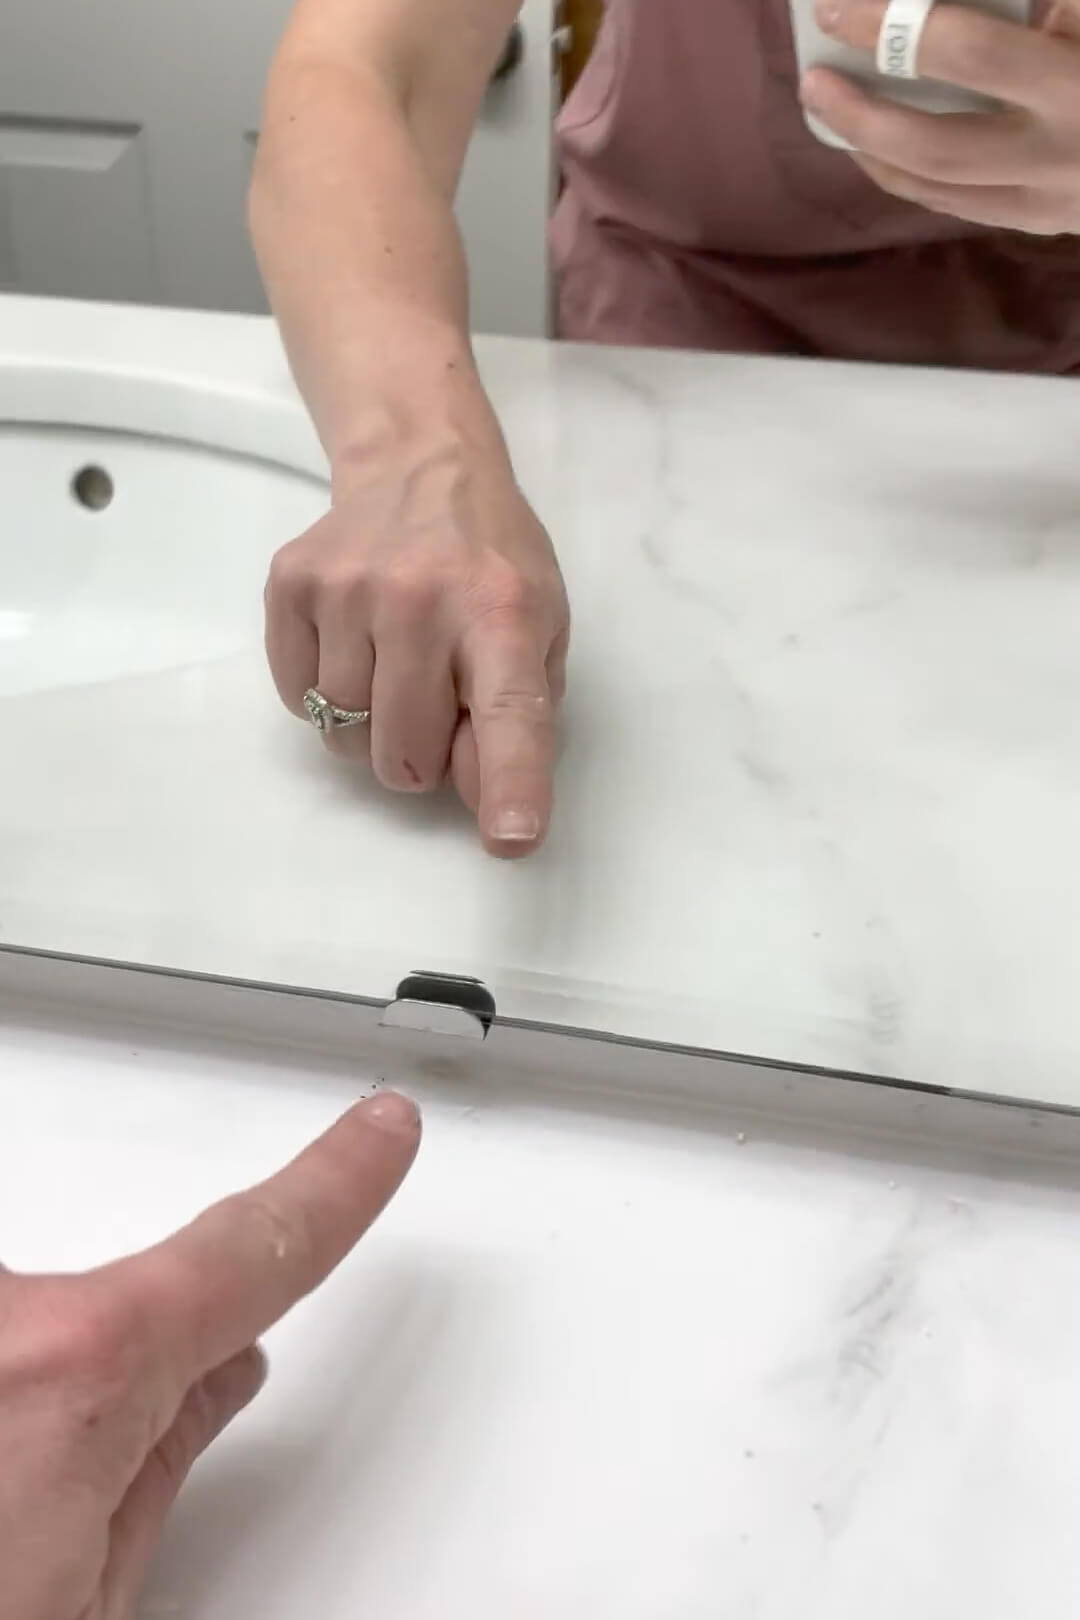
You can see that they leave just a bit of a gap between the wall and the mirror. This is where the magic with the washers happens.
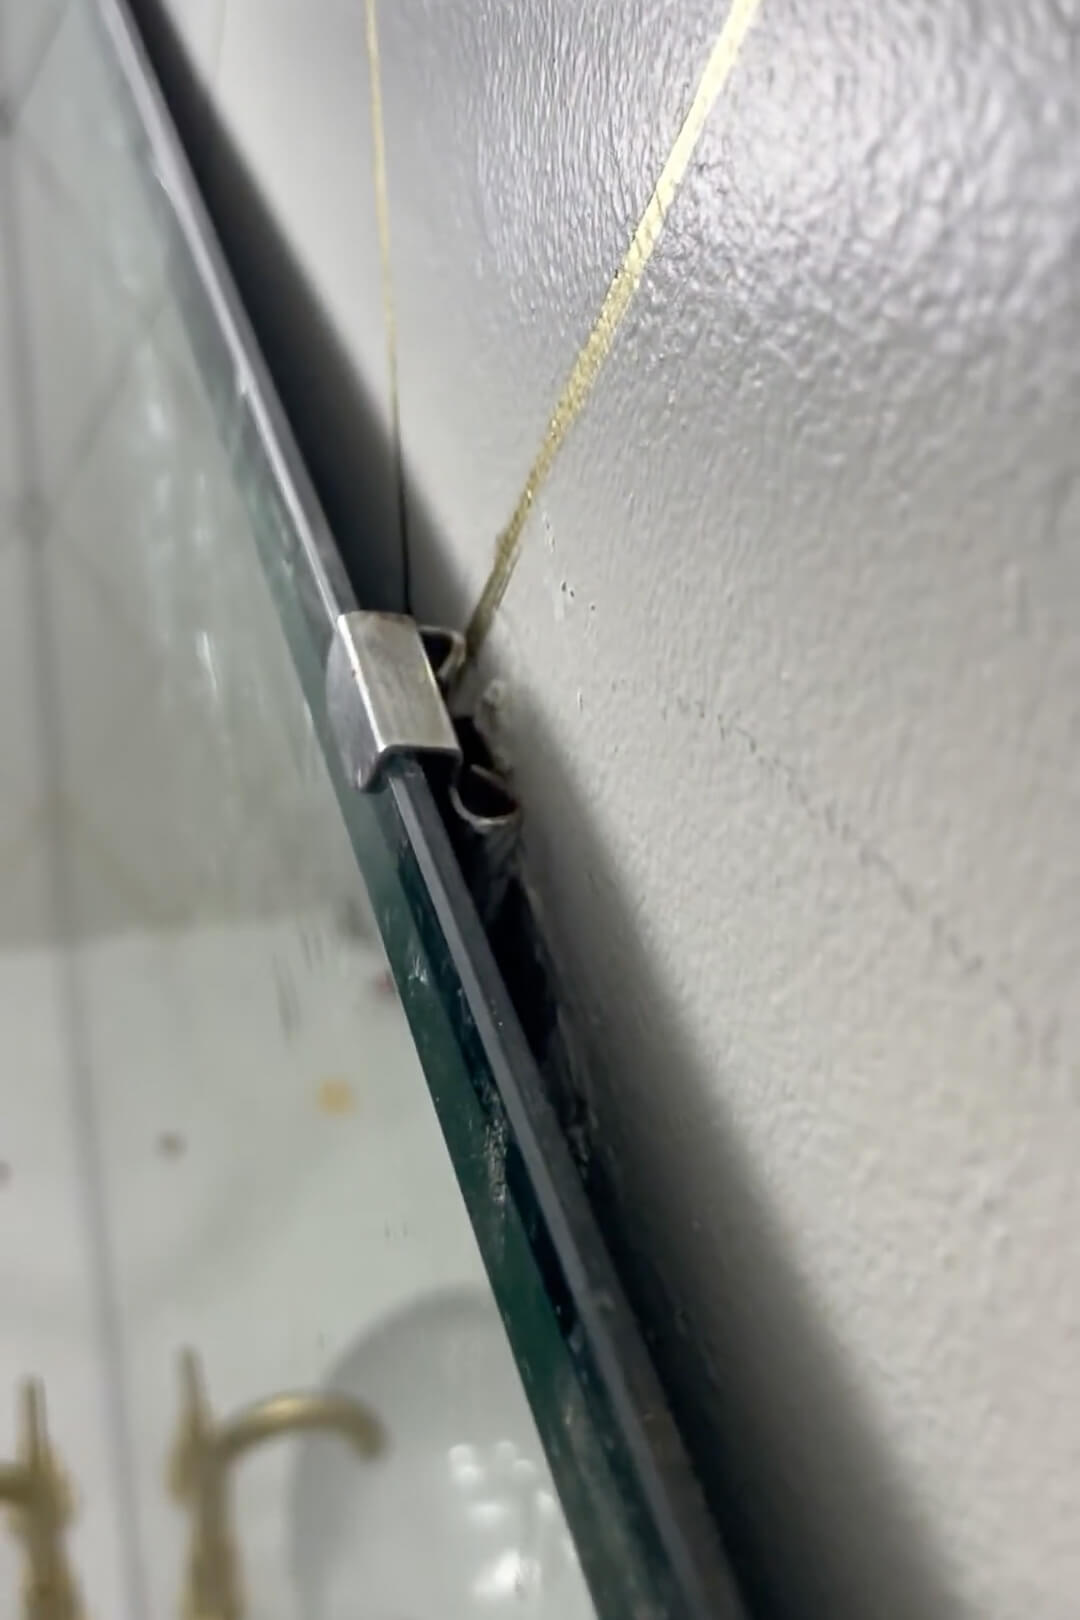
When hanging your DIY bathroom mirror frame, you first want to get the washers at the top of your frame resting behind the mirror. Then you can slide the frame along the mirror until you have successfully sandwiched the side of the mirror between the frame and that third washer screw/combo that we added on the lower outside edge.

And that’s it! So easy!
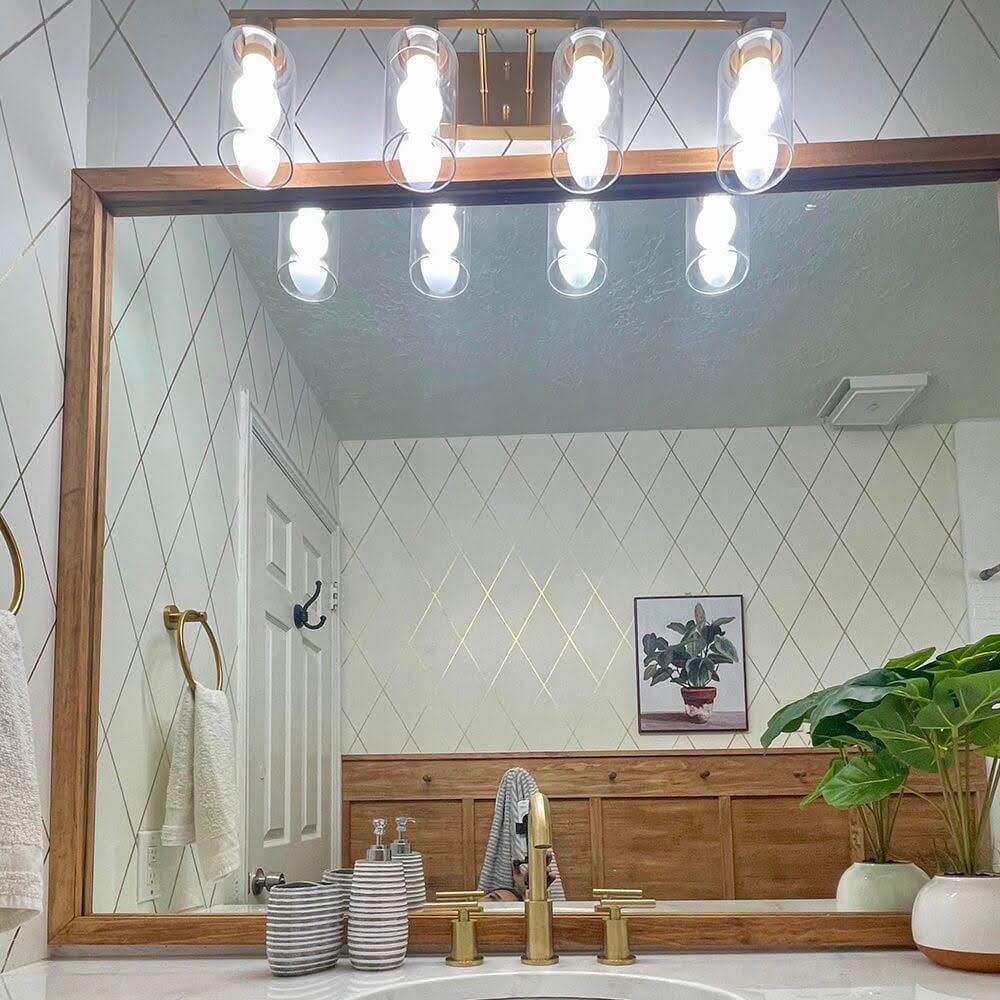
Ignore my dirty mirror here and look at how tight and clean the fit is. You would never know that this frame is only hooked on this mirror with basic washers. You would think that this frame was permanently affixed to the mirror or that the mirror had been purchased like this.

Adding this DIY bathroom mirror frame was the perfect finishing touch for my bathroom makeover and improved my bathroom style. It looks so much more finished and high end with a frame.
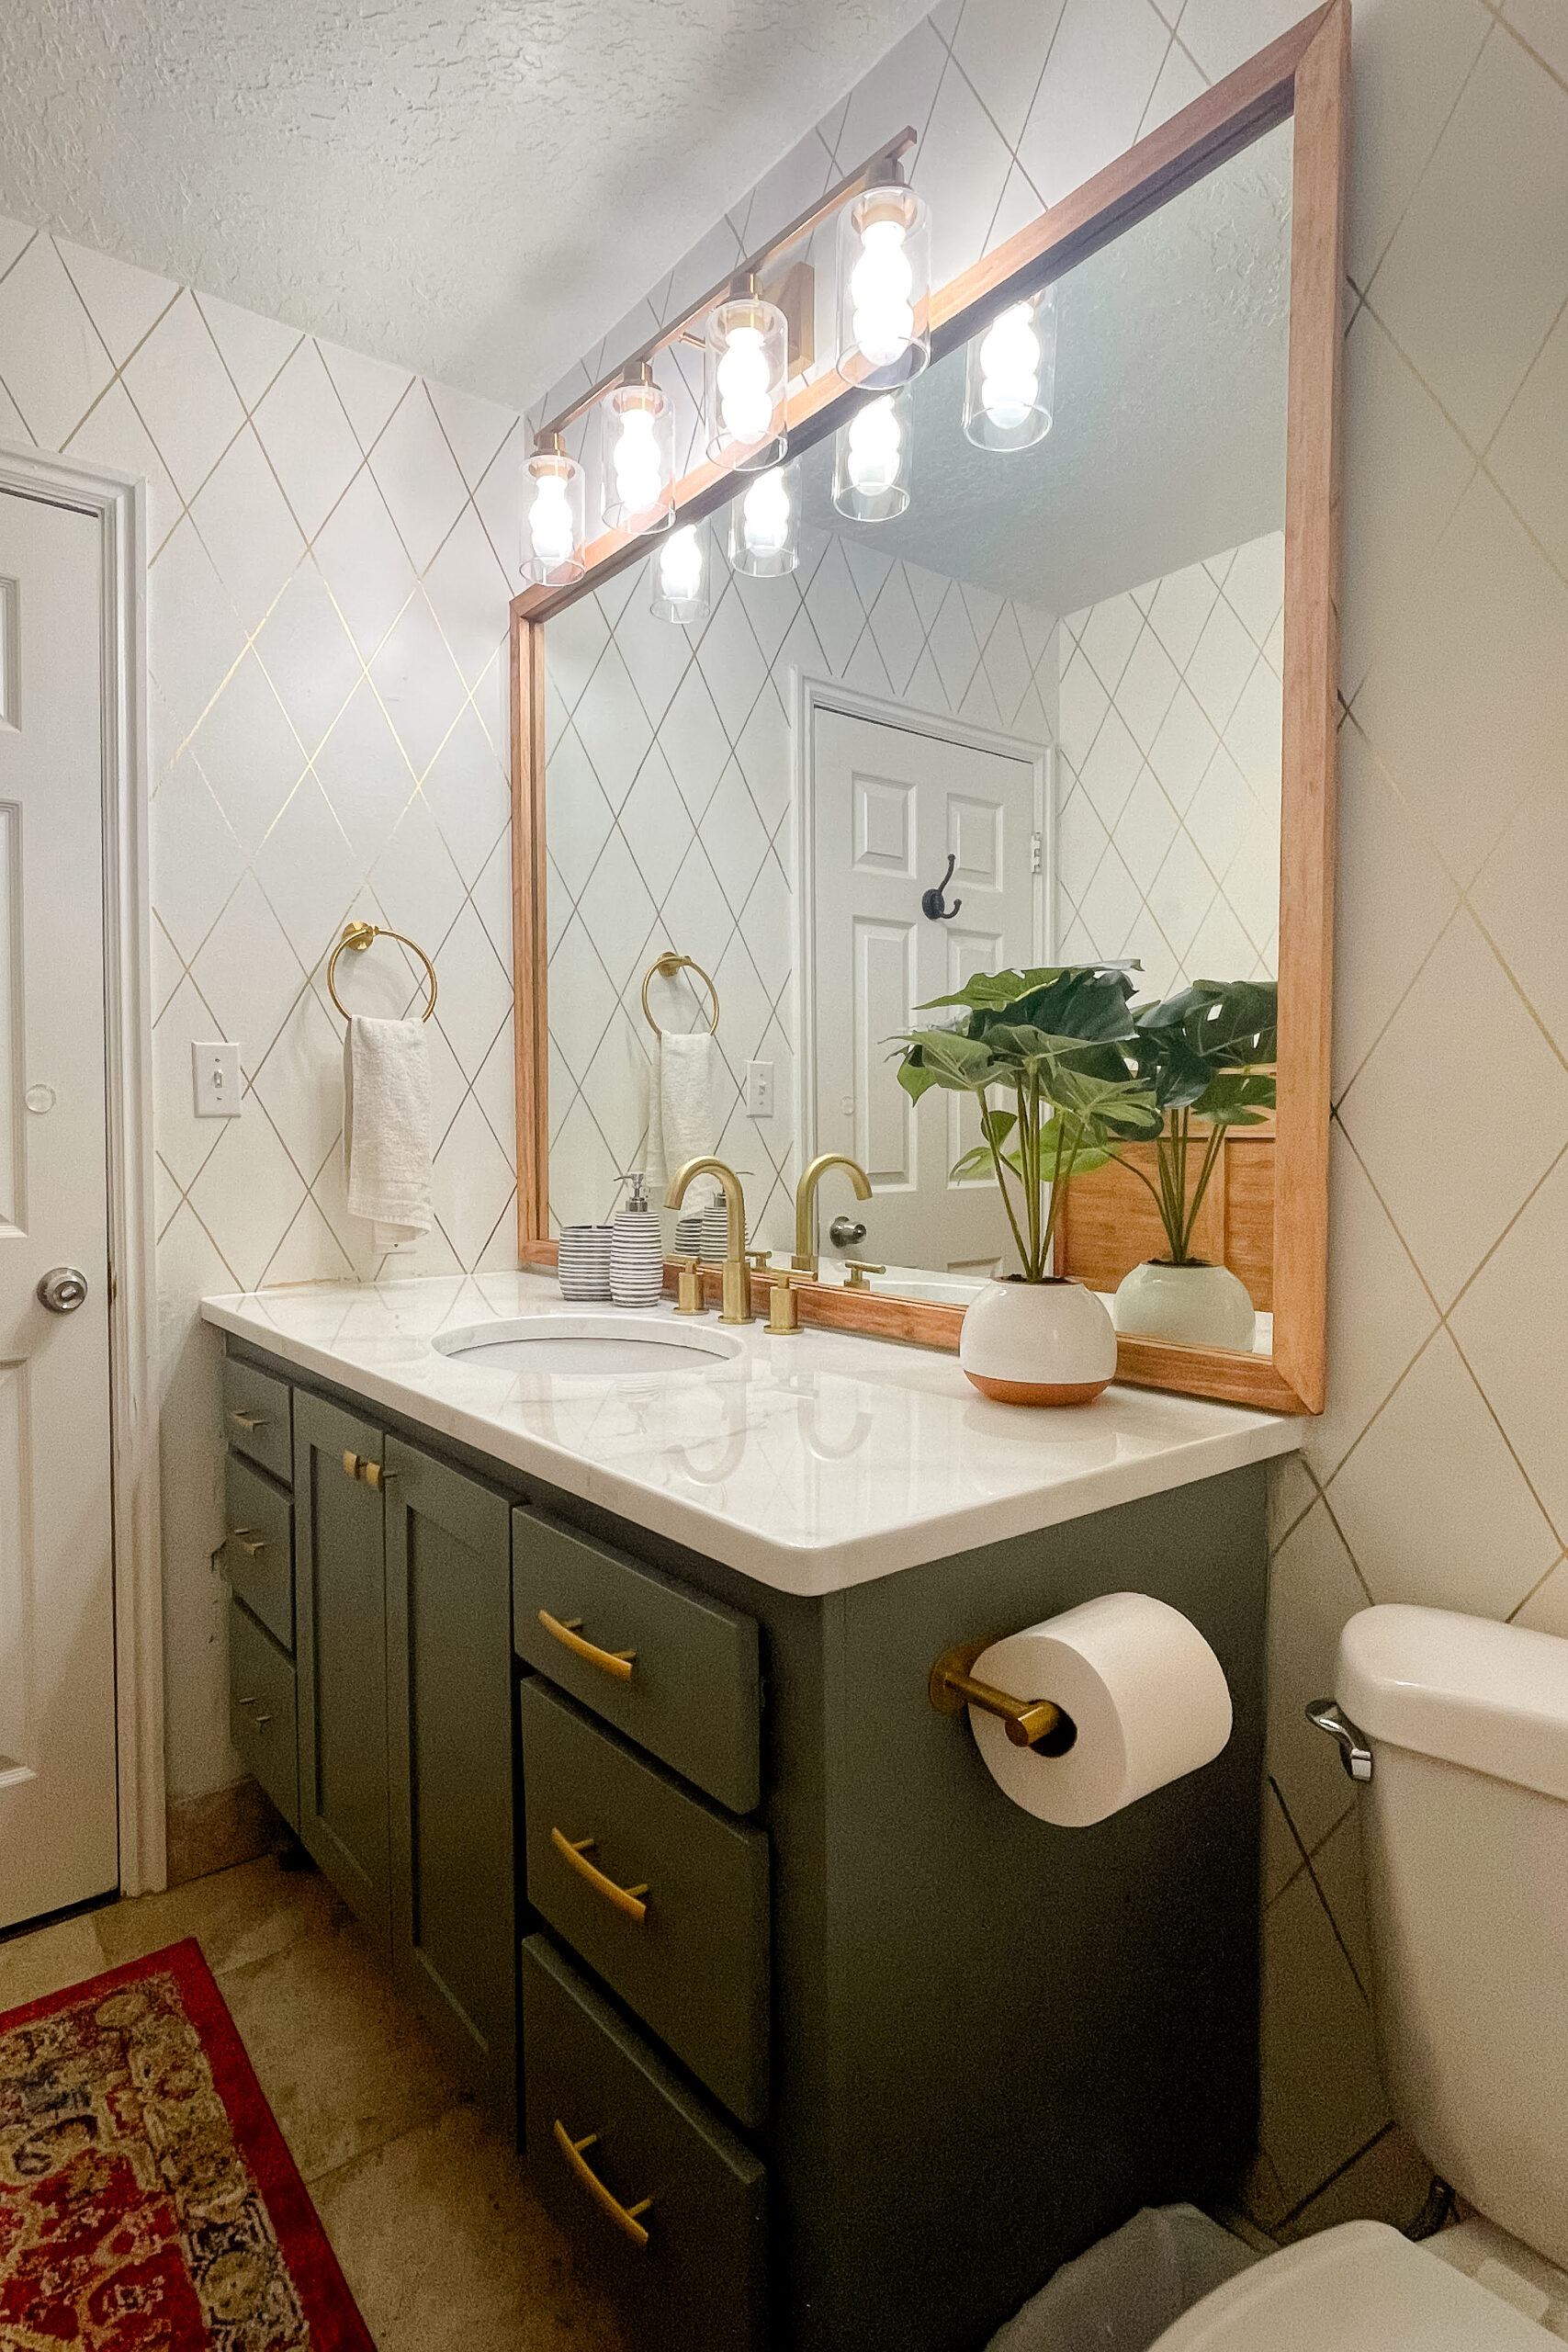
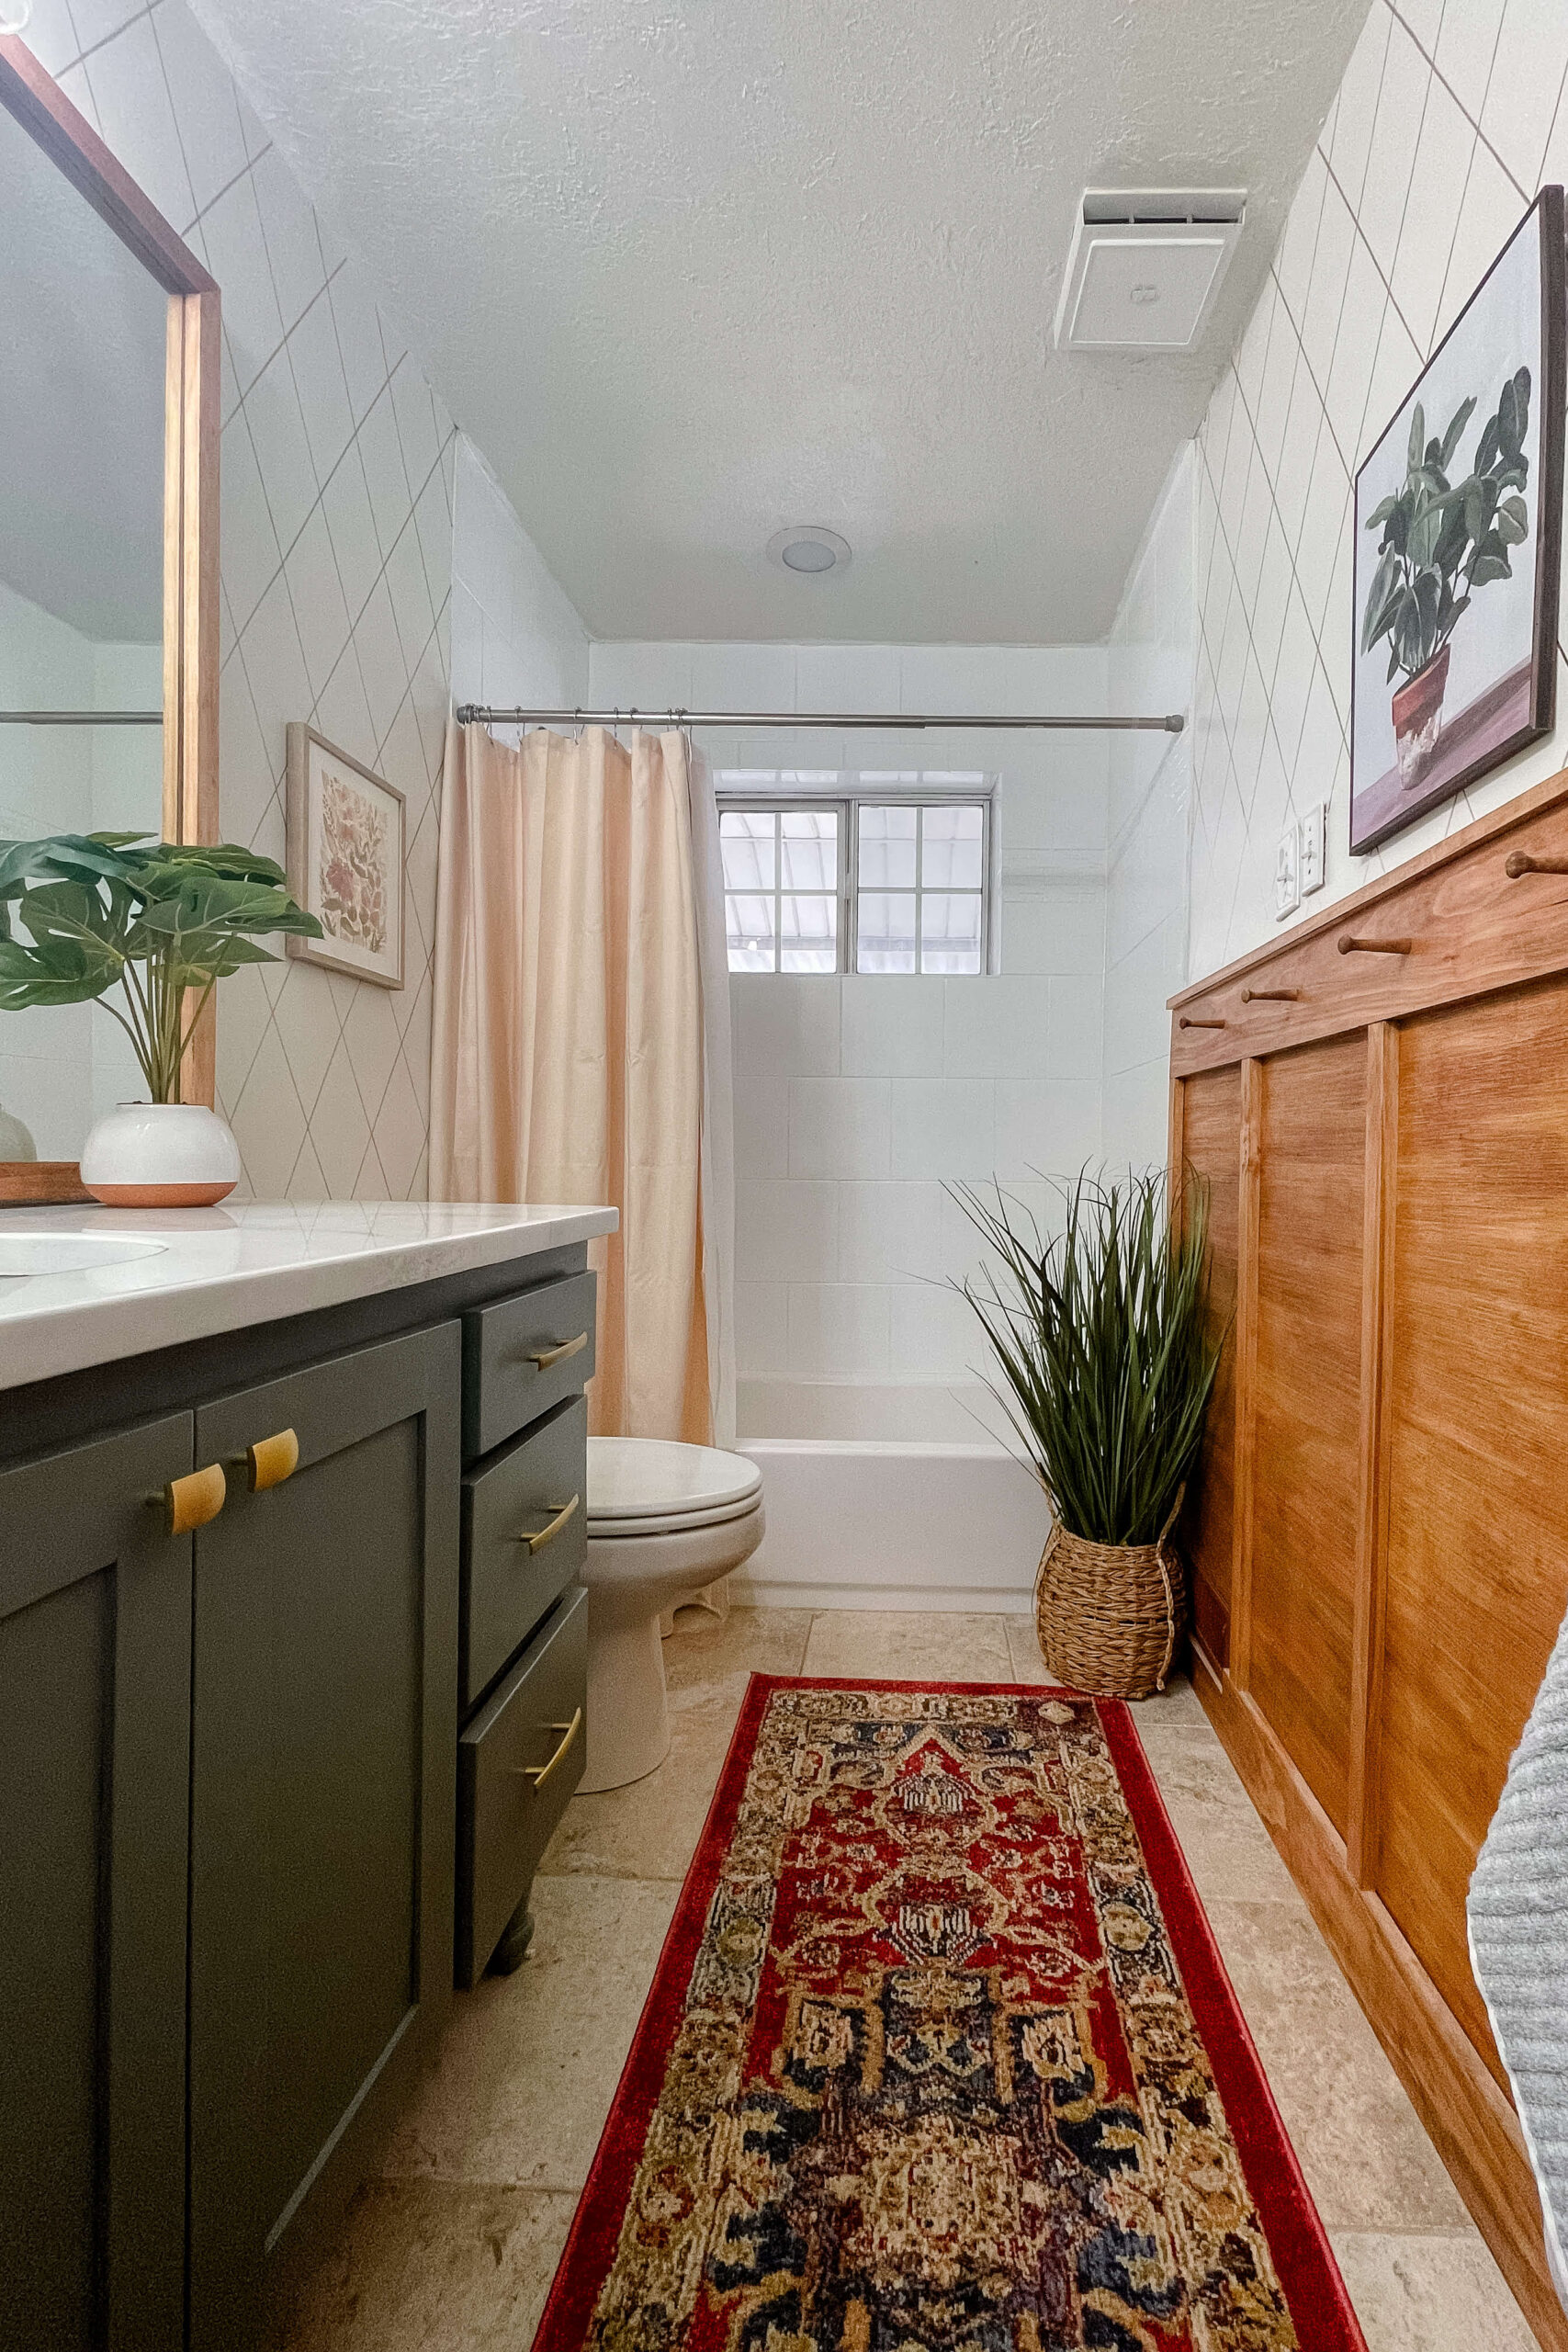
And here is an after of the whole bathroom! Unbelievable what you can do with a small budget and a lot of hard work.
Want links to other tutorials from this bathroom renovation? I have full tutorials for projects like how to replicate wallpaper with a sharpie or creating faux marble countertops.