How to Build a Wood Range Hood Cover (Step-By-Step)


Published January 21, 2026
A wood range hood cover is one of those projects that instantly makes the kitchen feel more finished, even when everything else is still mid-chaos. It adds that custom, built-in look, hides the insert, and gives you a big moment right over the stove, which is basically the kitchen’s main stage.
Here’s exactly how I built this wood range hood cover, step-by-step, and a list of everything you’ll need to build your own.
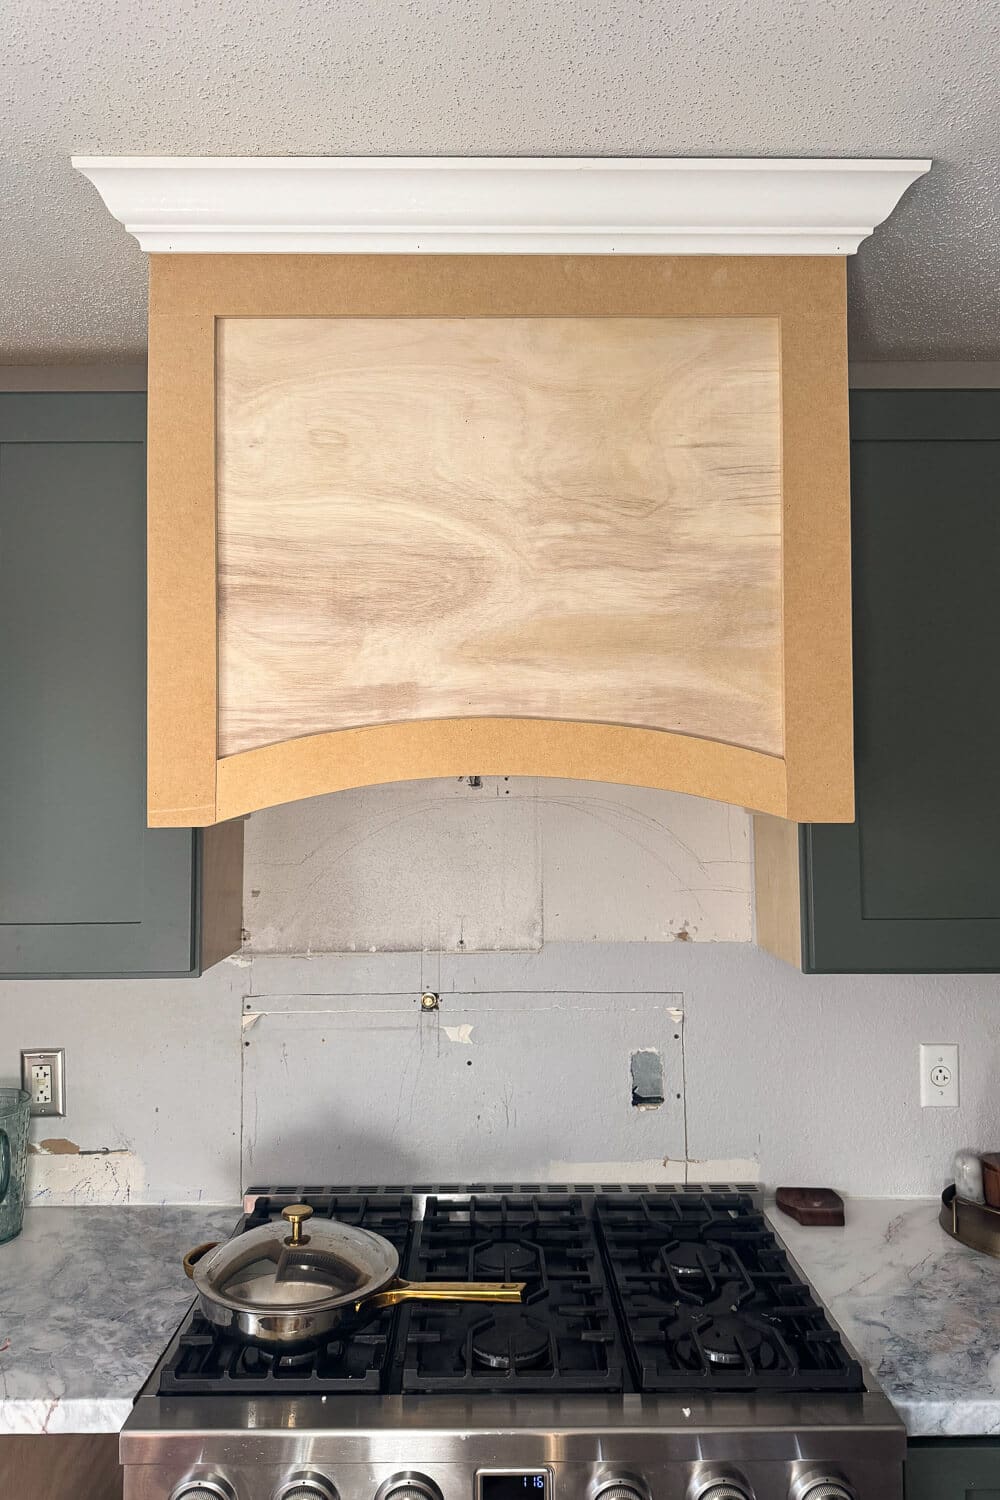
Table of Contents
- Tools and Materials for a Wood Range Hood Cover
- Prep Work Before Building the Wood Range Hood Cover
- Step 1: Build the Frame for the Wood Range Hood Cover
- Step 2: Install the Framing
- Step 3: Add the Cross Bracing
- Step 4: Install the Range Hood Insert and Connect the Ducting
- Step 5: Wrap the Wood Range Hood Cover Frame with Plywood
- Step 6: Add Trim and Crown to Finish the Wood Range Hood Cover
- Done… For Now (Help Me Decide)
- DIY Kitchen Remodel Progress (What We’ve Finished So Far)
- More Range Hood Cover Ideas
- 📌 Save This Wood Range Hood Cover for Later
- Wood Range Hood Cover FAQs
Tools and Materials for a Wood Range Hood Cover
Having your supplies ready makes this whole project move way faster, and trust me, anything that keeps a build from dragging out is a win.
Tools
- Miter saw
- Circular saw or table saw
- Hole saw
- Drill/driver
- Jigsaw
- Handheld sander
- Tape measure
- 24-inch level
- Stud finder
Materials
- 2x4s (for the frame)
- Wood screws
- 1/4 inch plywood
- MDF (for trim)
- Crown molding
- Expanding foam sealant (around ducting gaps)
- Range hood insert + ducting
Prep Work Before Building the Wood Range Hood Cover
Before you start building the wood range hood cover, you’ve got to prep the wall and get the functional stuff handled. First, I installed an outlet in the range hood area so the insert would have power.
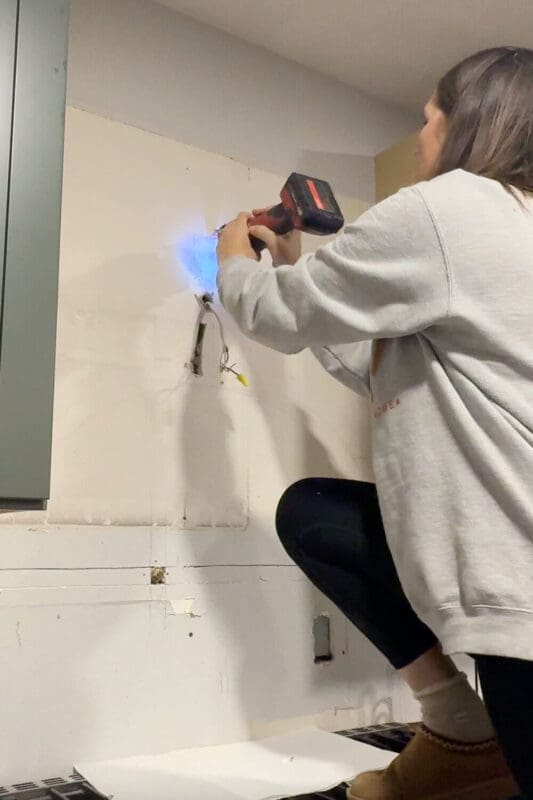
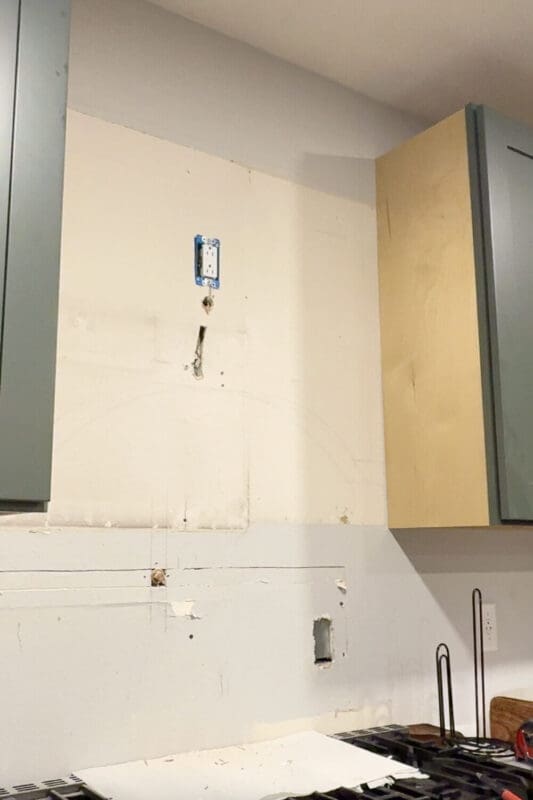
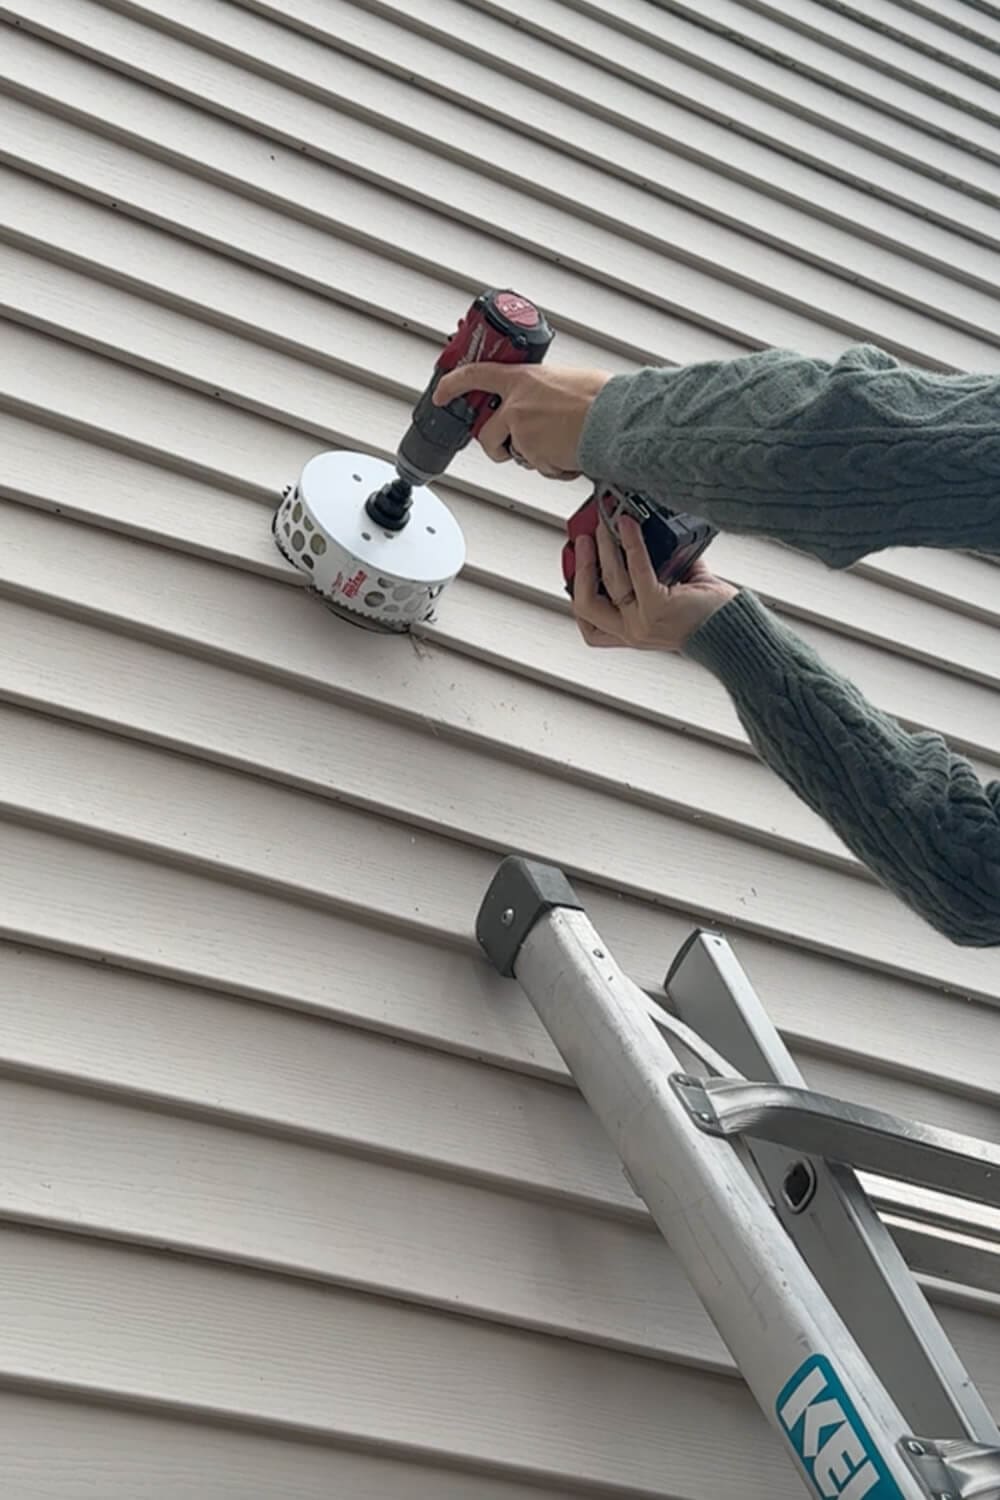
Then you’ll need to use a hole saw to cut the hole in your wall for the ducting so the vent can exhaust outside like it’s supposed to. My personal opinion, don’t go ductless. Take the time to vent the exhaust from your fan.
PS… Ignore the wood you see here; I got ahead of myself.
Now, you’ll also need a matching hole on the exterior of your house.
You can do it at the same time you cut the interior hole (which is the simplest). But if it’s winter in the Midwest, like it was while I was working on this, you can absolutely wait. I built and installed the wood range hood cover first, and then I waited to cut the exterior opening later, once I was ready to hook up the ducting.
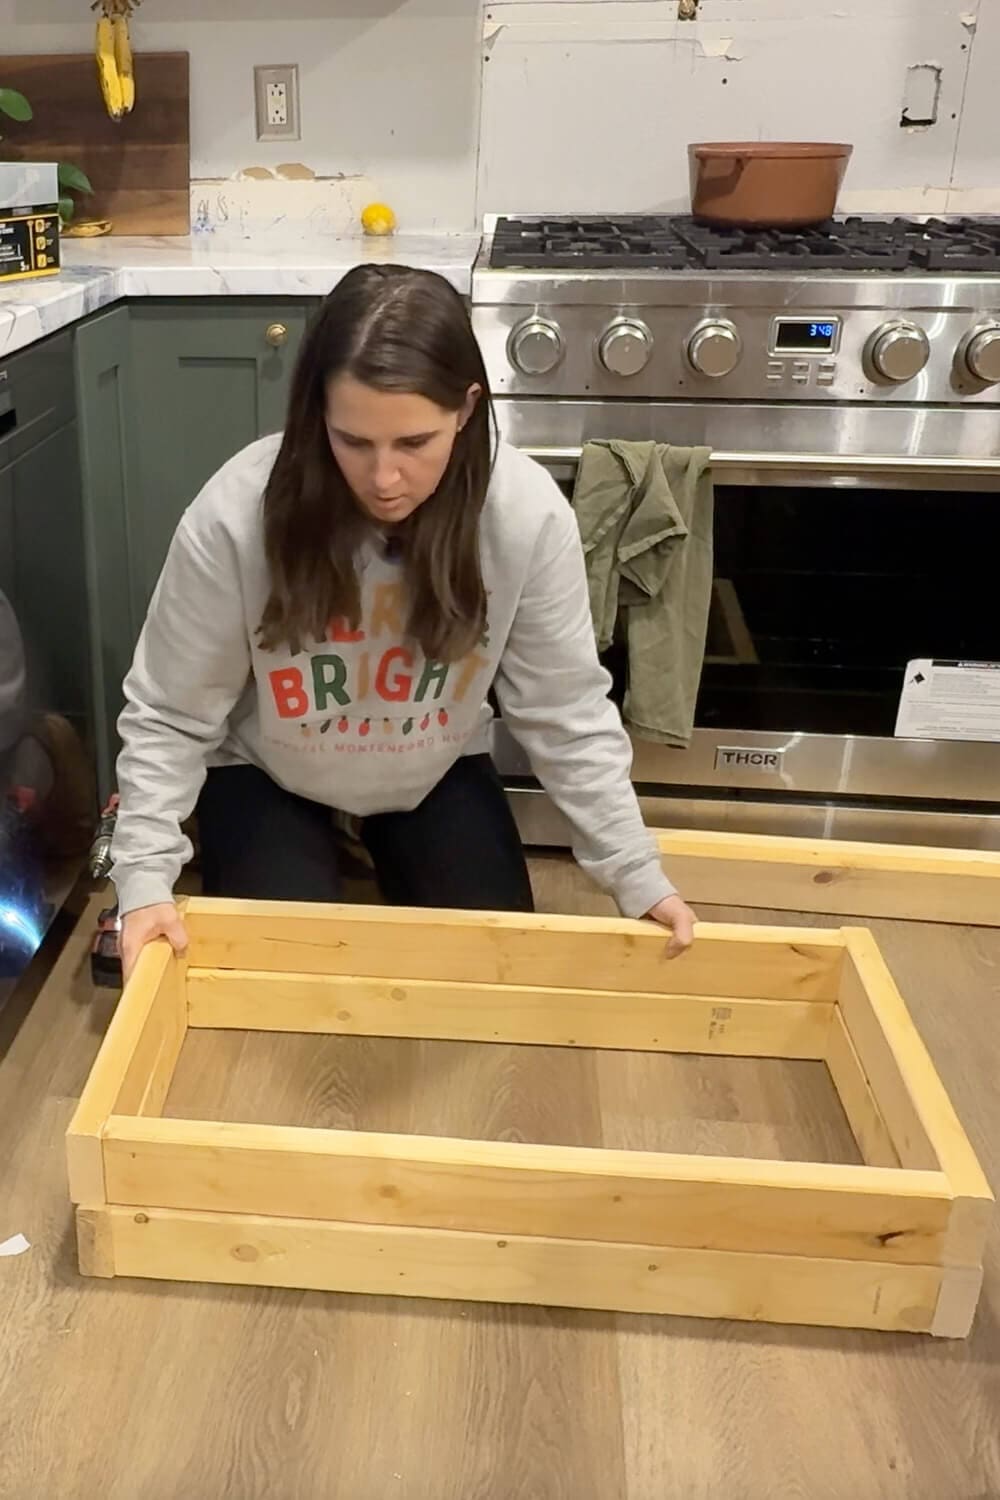
Step 1: Build the Frame for the Wood Range Hood Cover
For the frame of my wood range hood cover, I used all 2x4s and pre-cut my pieces with my miter saw.
You’ll build two rectangles:
- One rectangle for the top
- One rectangle for the bottom
The rectangle size will depend on:
- The size of your opening
- The size of the range hood insert you’re installing
Once your pieces are cut:
- Pre-drill the holes
- Use wood screws and a drill to assemble the rectangle
- Repeat for the second rectangle
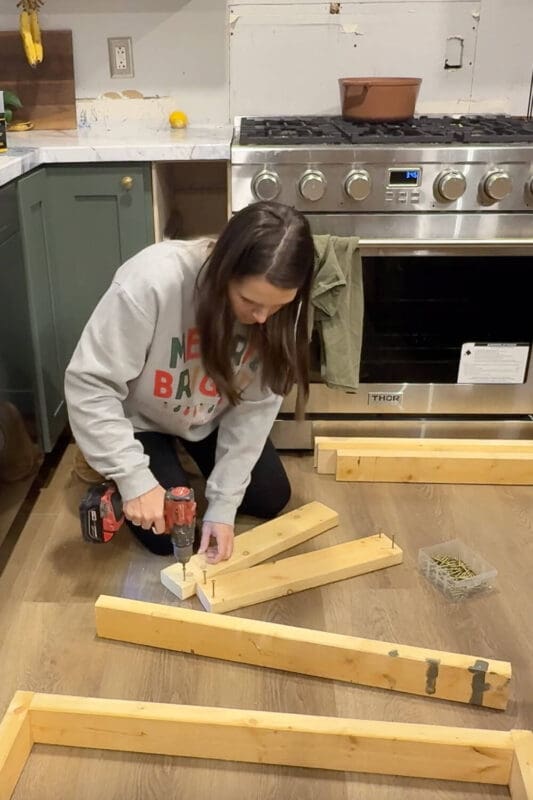
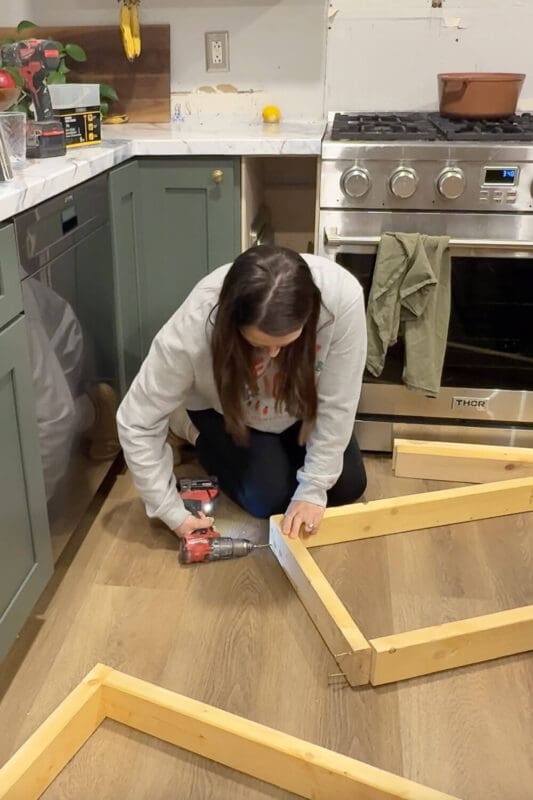
This frame is what gives your wood range hood cover its shape and strength, so take your time and keep everything square.
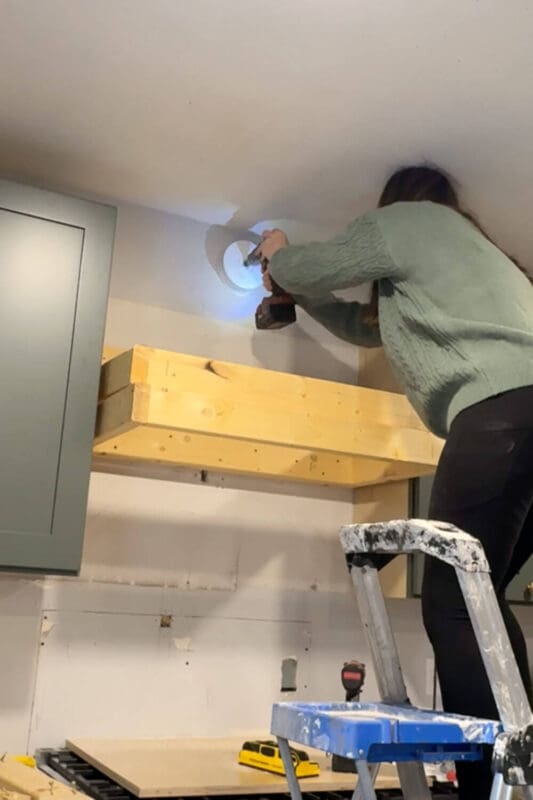
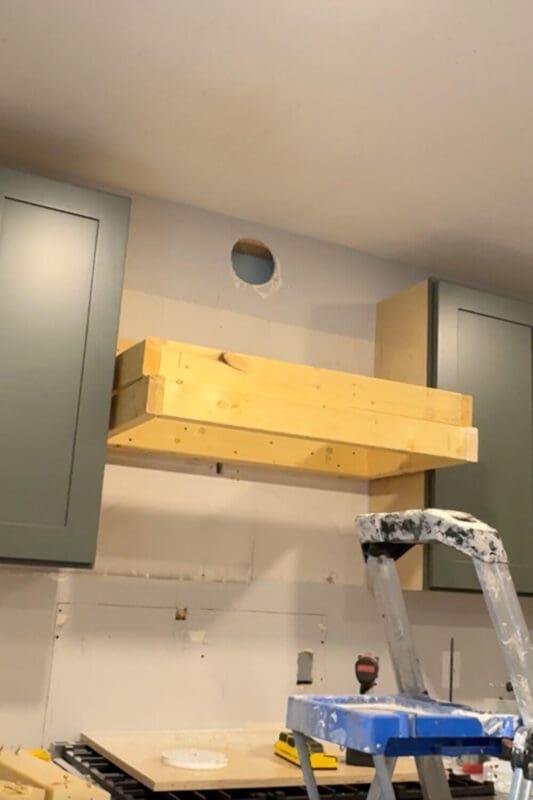
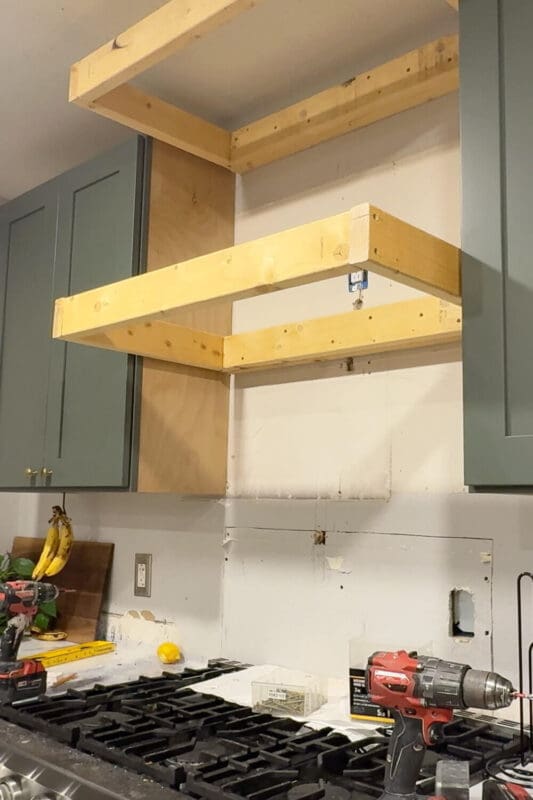
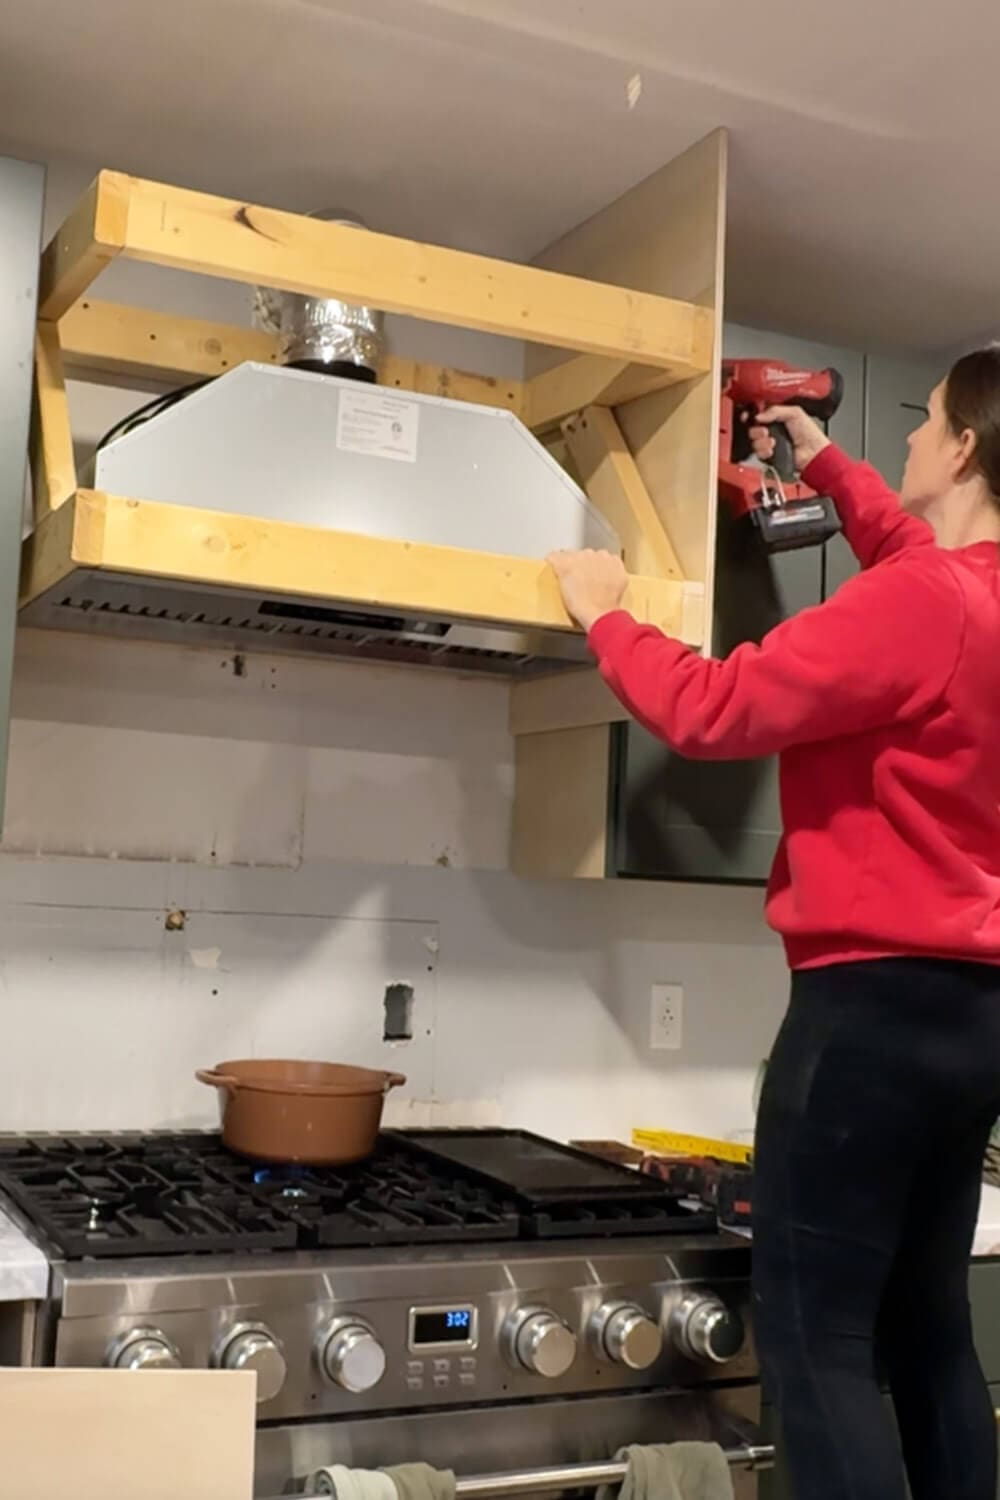
Step 2: Install the Framing
First, use a stud finder to know where your wall studs are. Next, I installed blocking(using a level to keep them straight), screwing them right into the wall studs.
One important detail: make sure the top rectangle will sit below the duct hole so you’ll have room to connect your venting later. I missed that part and ended up having to move everything down.
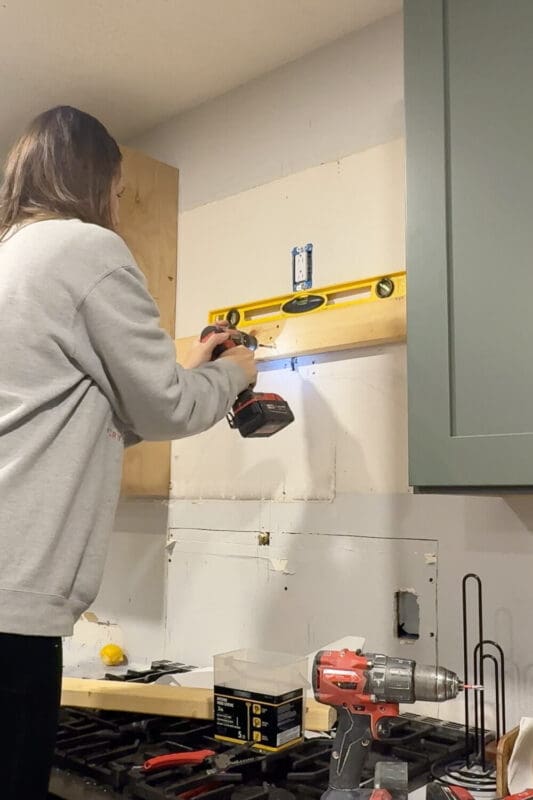
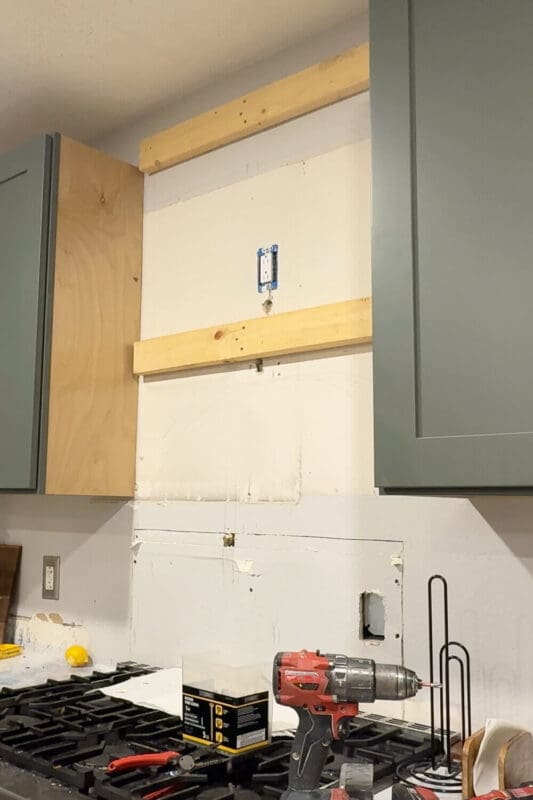
The rectangles from Step 1 will attach straight to that blocking. Predrill your holes first to help prevent splitting, then drive screws through the back of each rectangle right into the blocking. It’s also a good idea to do some screws angled from the bottom of the rectangle into the blocking for extra strength.
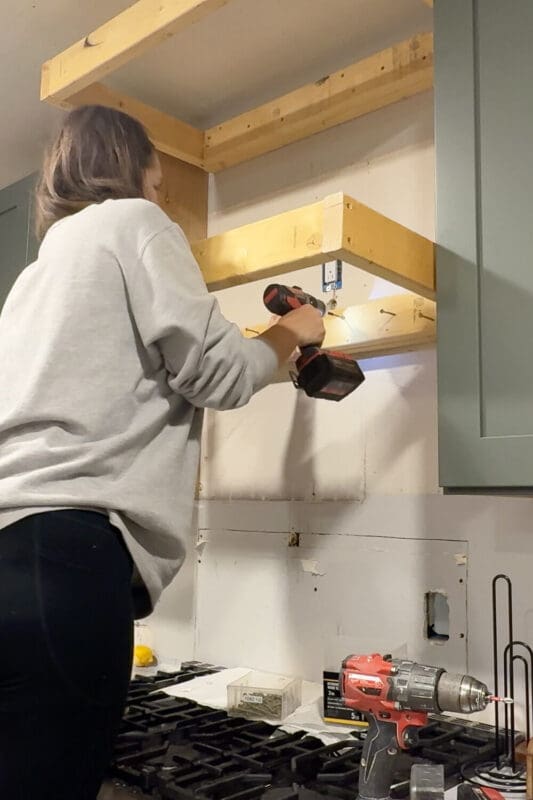
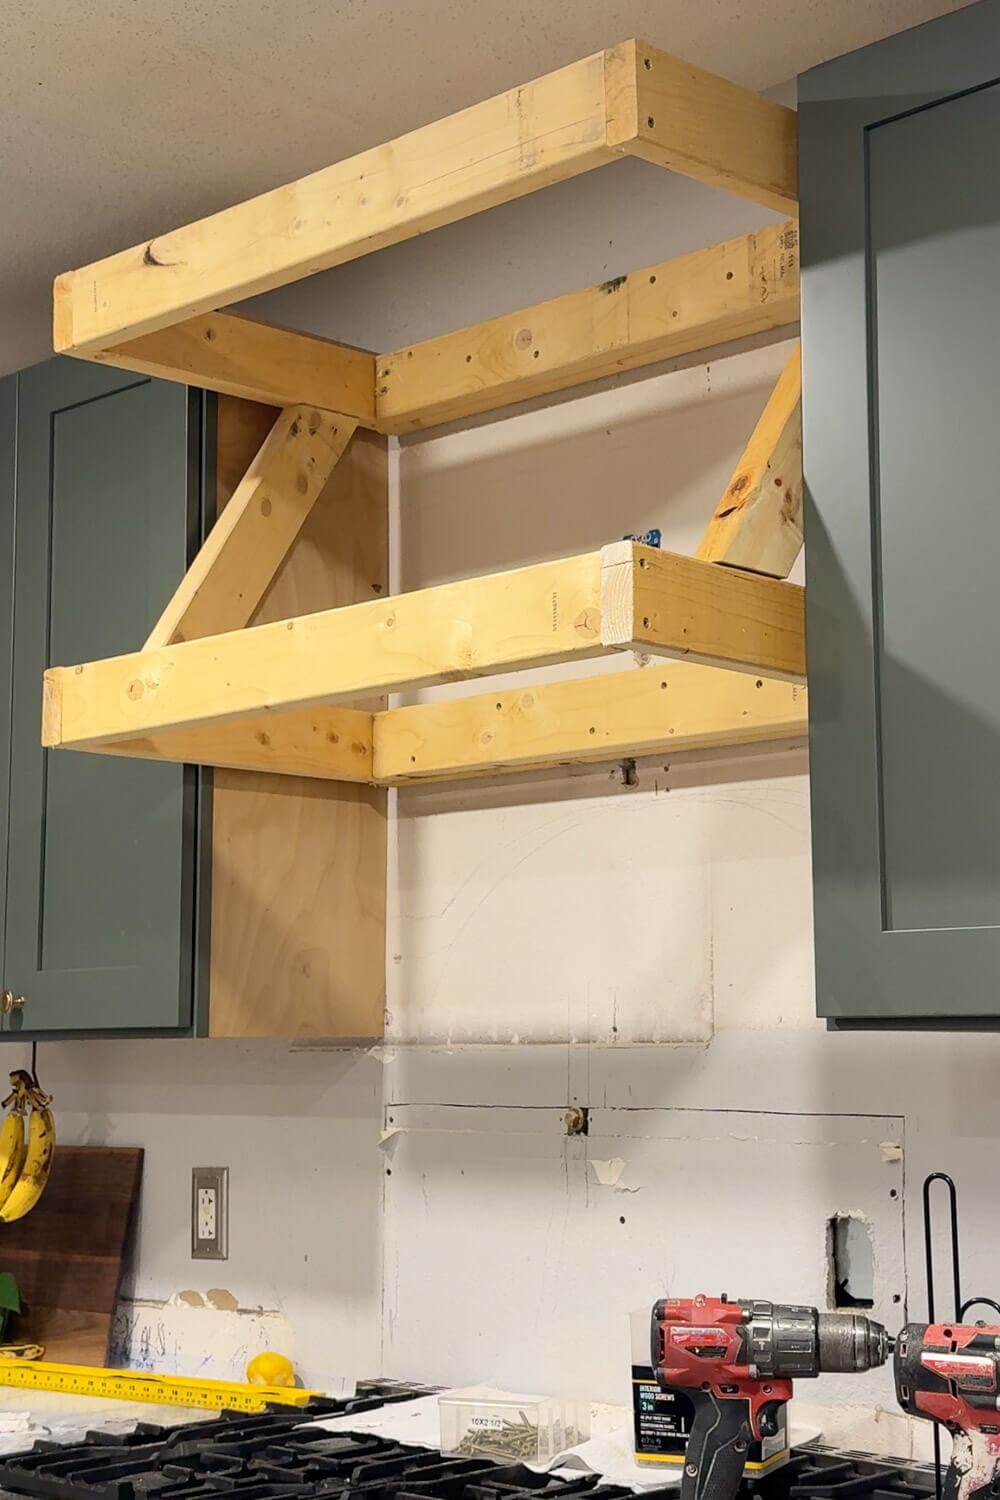
Step 3: Add the Cross Bracing
This is where the frame stops feeling like “two rectangles floating in space” and starts feeling like a real structure.
I don’t like doing angle math, so I do this the easy way:
- Hold up the 2×4 where you want it to go
- Mark your cut lines
- Cut with your miter saw
- Pre-drill holes, and install with screws
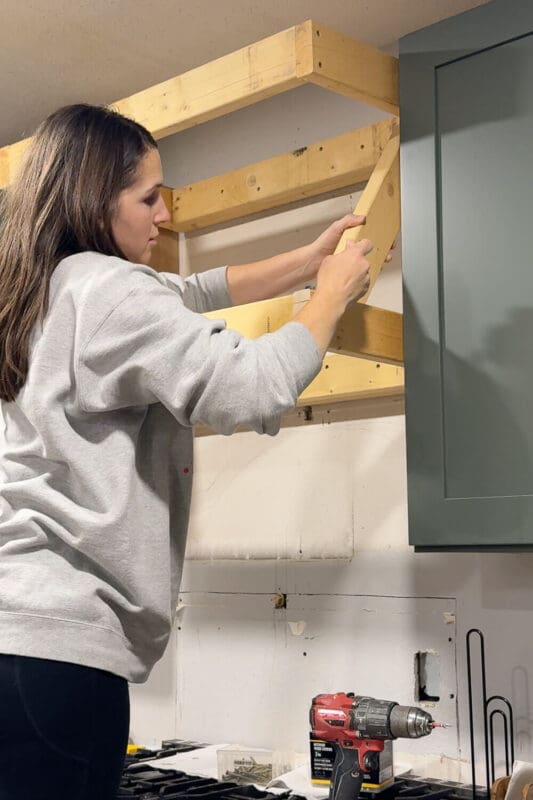

I added one brace on each side, and once those were in, the frame for the wood range hood cover was done.
Step 4: Install the Range Hood Insert and Connect the Ducting
I love the insert I bought. We used it in our last house, and it worked so well that we bought it again for this house. It’s easy to install (just follow the included directions). And yes, don’t forget to plug it in.
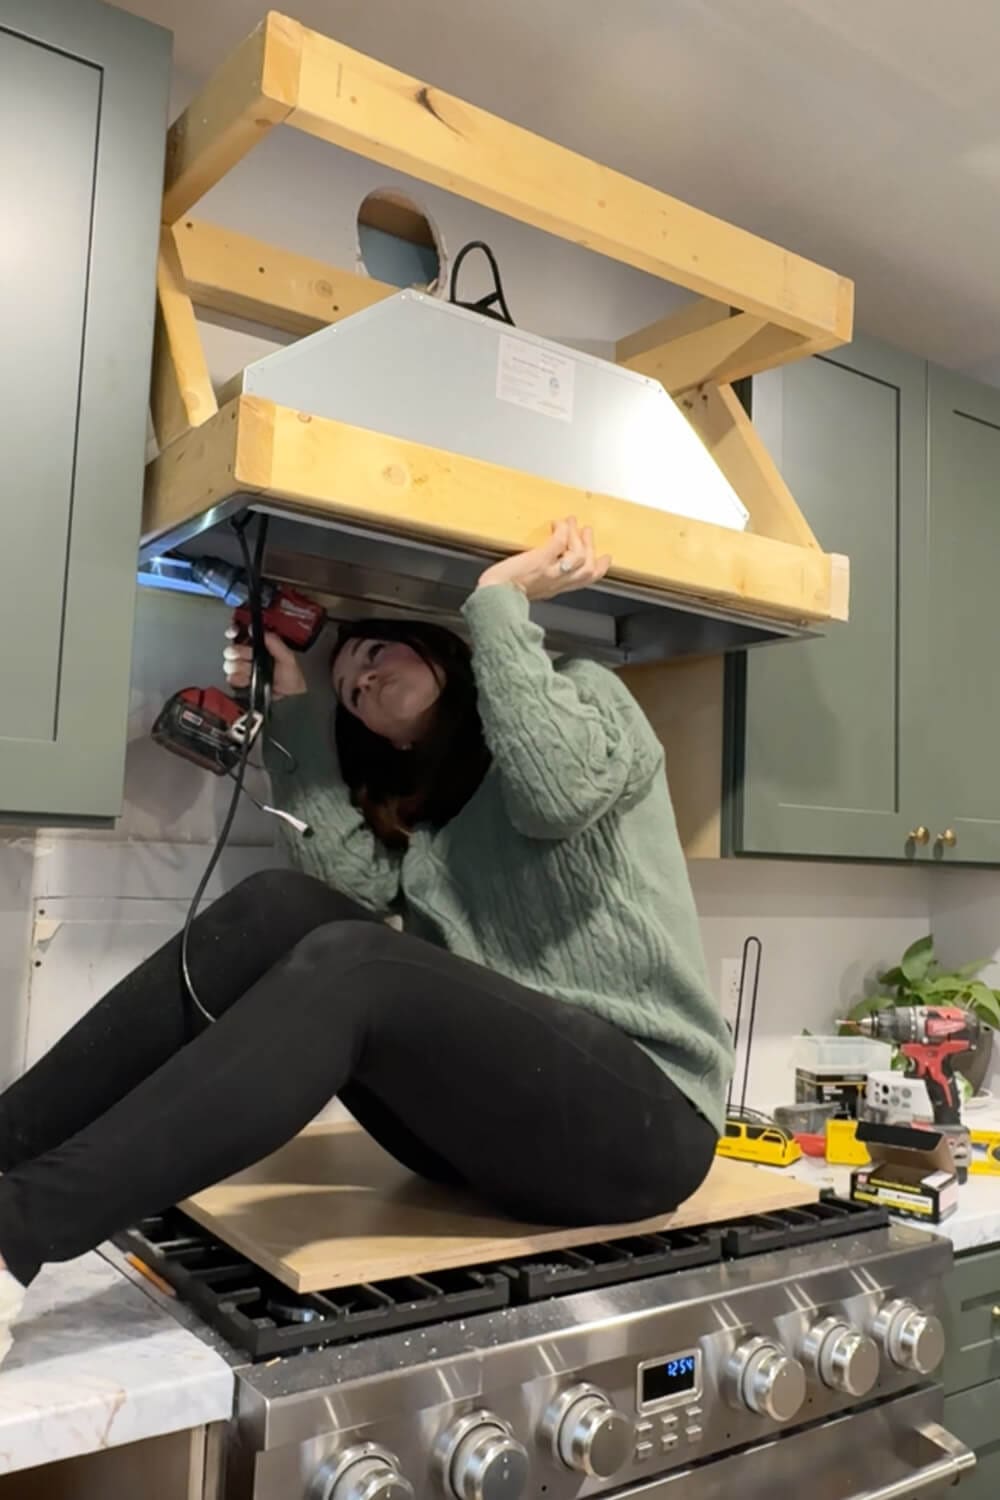
Next up: ducting.
- Drill/cut the outside part of your vent hole (if you didn’t do it already)
- Connect and install your ducting
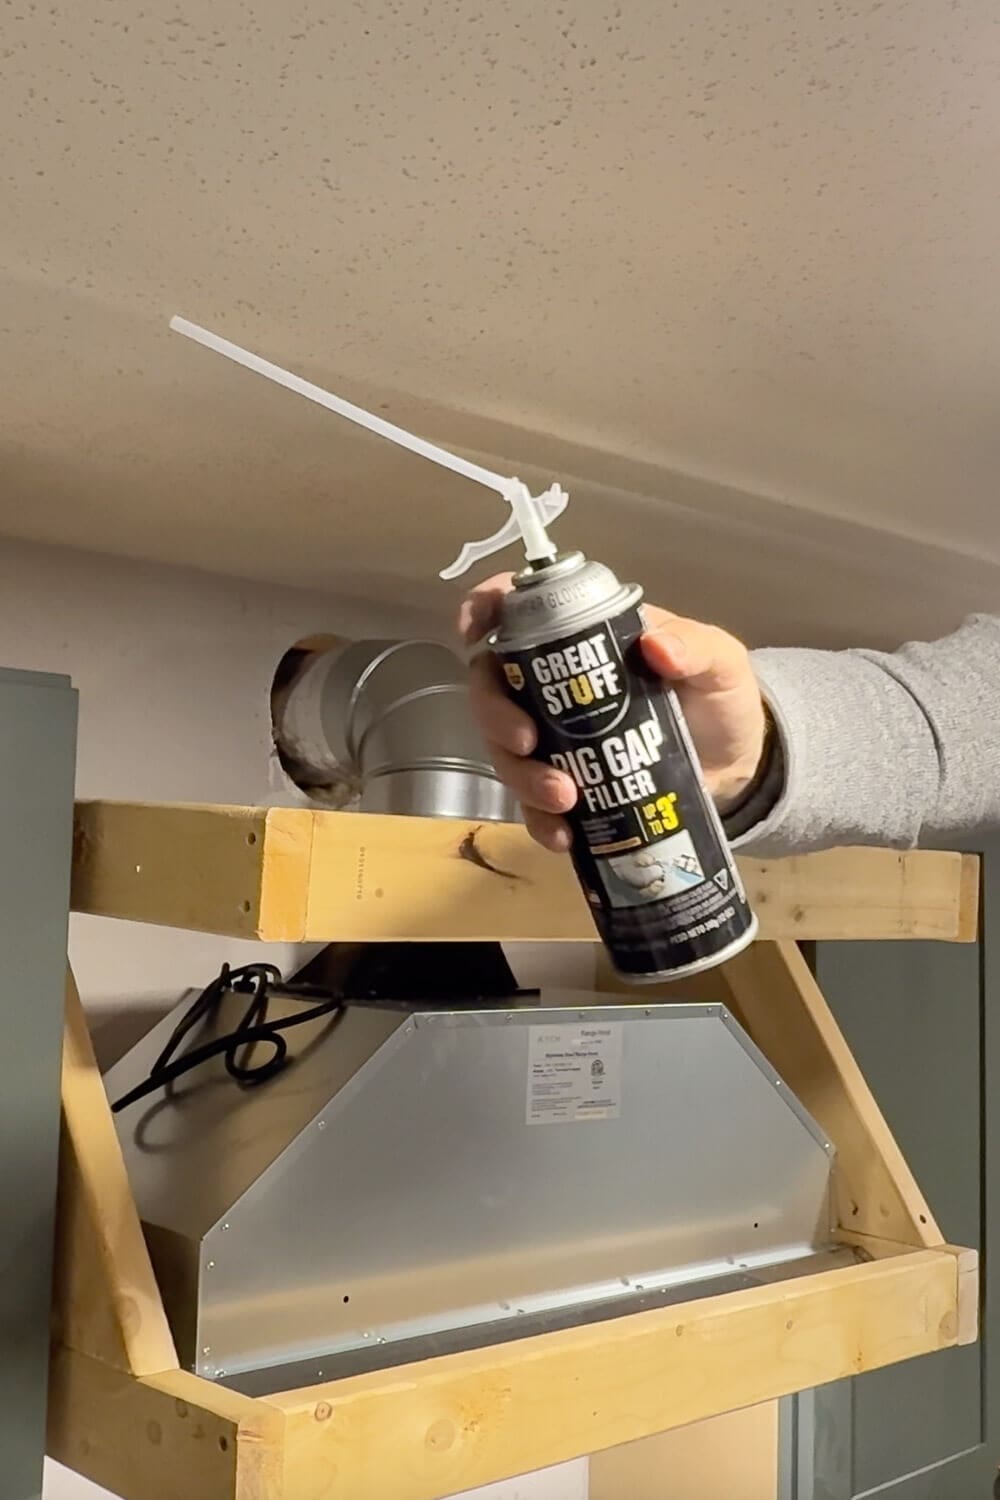
Then we filled the gap around the ducting with expanding sealant foam. If you skip this step, you’re basically leaving a welcome mat for outside air, bugs, and even rodents. Hard pass.
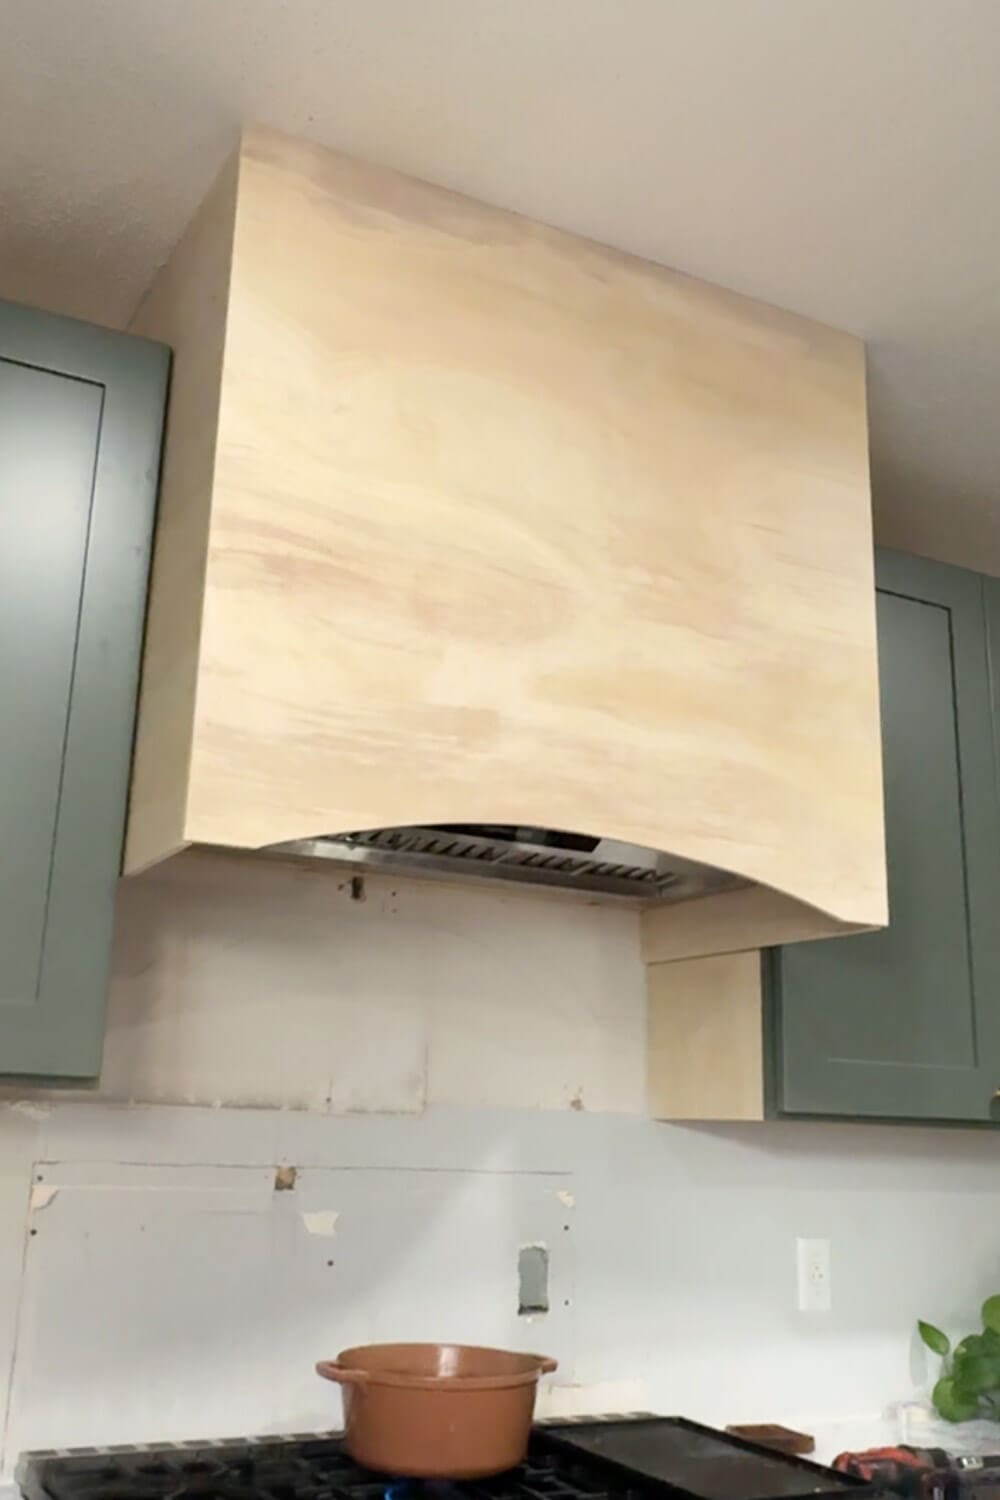
Step 5: Wrap the Wood Range Hood Cover Frame with Plywood
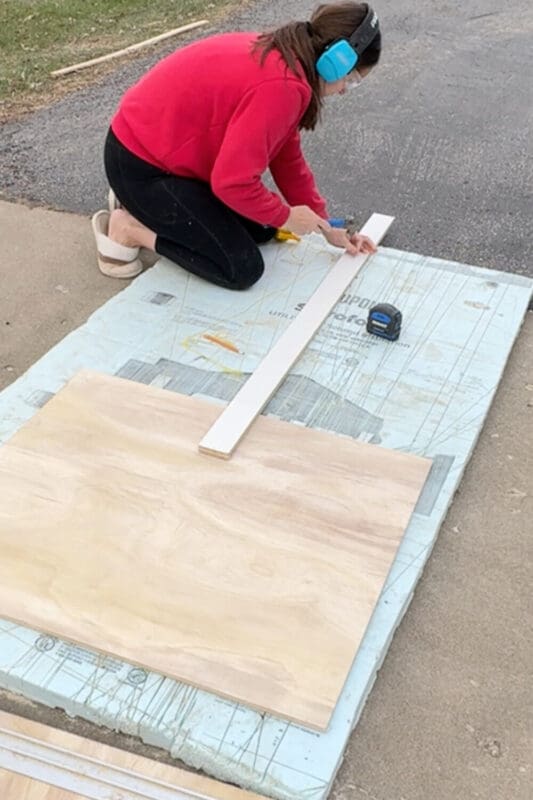
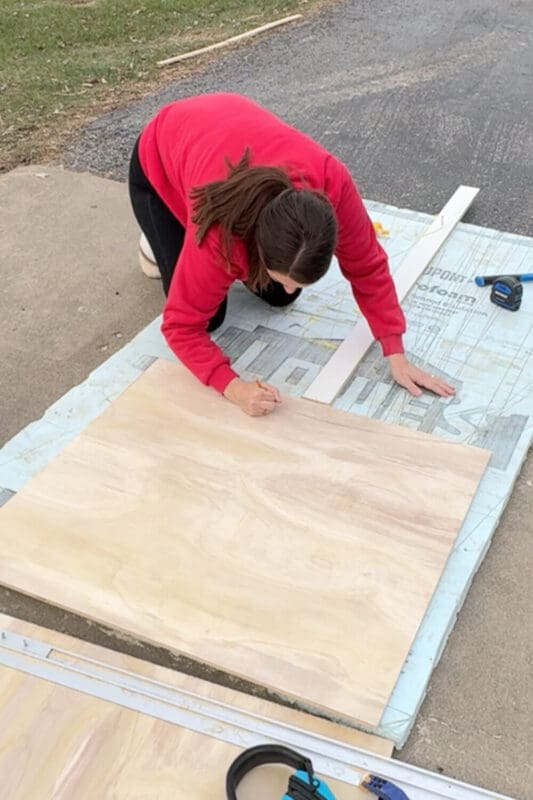
To cover all the framing on my wood range hood cover, I’m using 1/4 inch plywood because it’s inexpensive, easy to work with, and will look great stained or painted.
Start by covering the sides first. You’ll use either a table saw or a circular saw to cut the panels to the size you need. Side note… big box hardware stores will even cut them for you if you don’t own a saw.
When I built my frame, I left just enough of a gap so I could slide the 1/4 inch plywood between the cabinet and the wood range hood cover frame. Then used my brad nailer to attach the plywood.
Once all three sides were covered, the wood range hood cover was already looking so good.
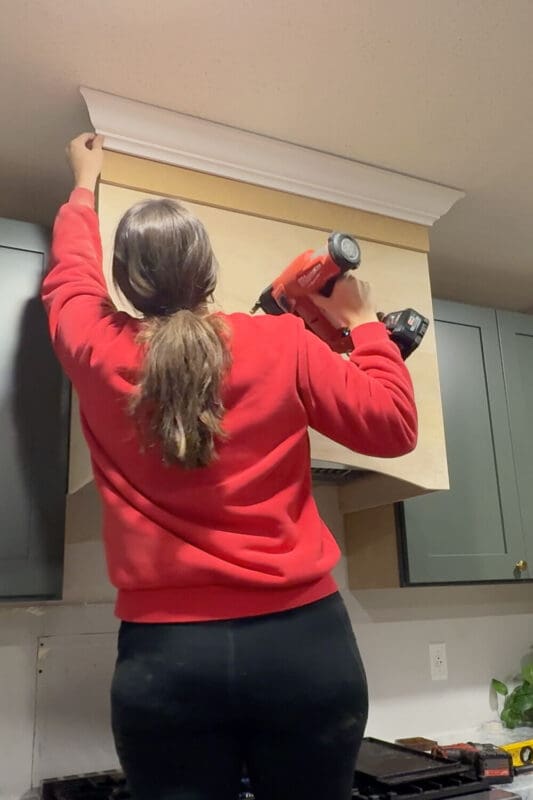
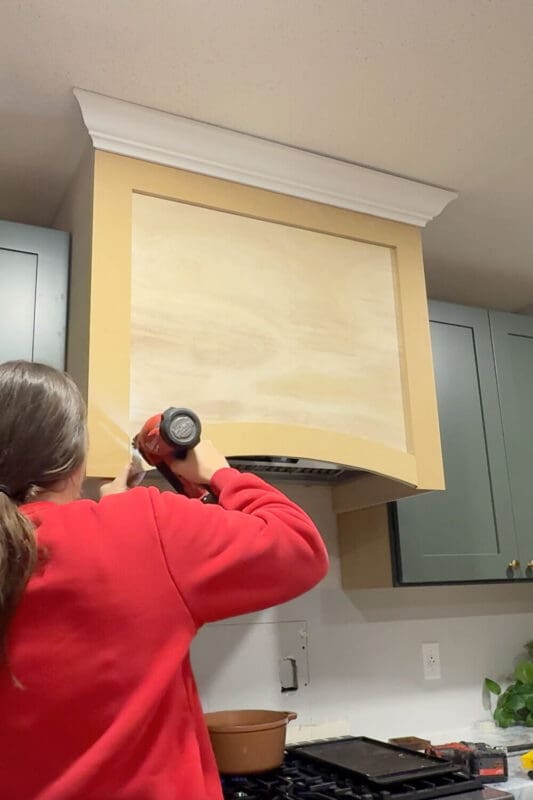
Step 6: Add Trim and Crown to Finish the Wood Range Hood Cover
Right now, we’re renovating our entire first floor at the same time, and when rooms all flow together with an open concept, it’s important that the design feels cohesive.
One of the easiest ways to do that is to repeat details like trim.
I’m doing classic box trim and crown molding around my living room (check it out here – DIY Box Molding Wall Trim Tutorial (Step-by-Step Guide)). Repeating those same trim elements on the wood range hood cover helps the whole first floor feel like one cohesive space.
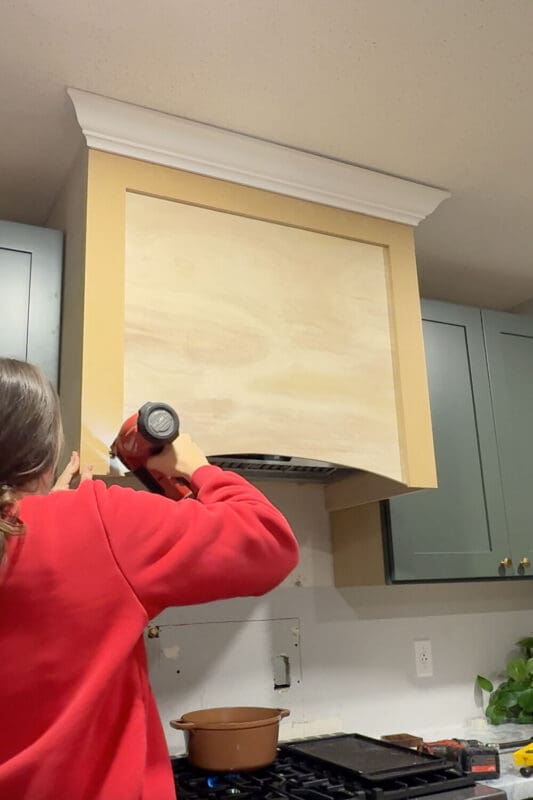
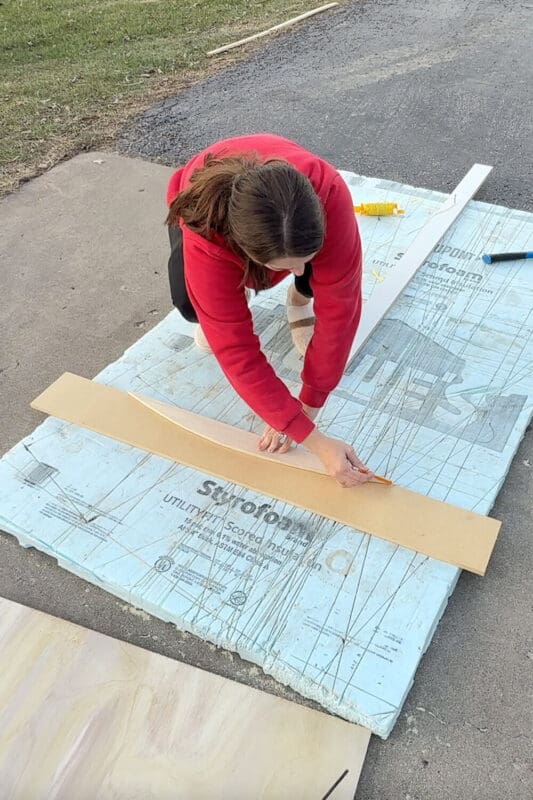
Make a Custom Arched Trim Piece for the Bottom
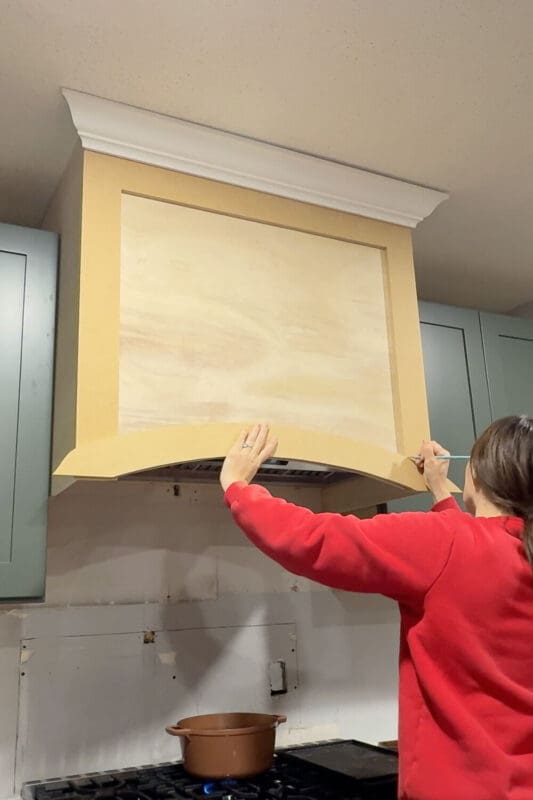
To trim out the bottom front of the wood range hood cover, I had to make a custom trim piece.
Using a piece of MDF, I traced the piece I cut out from the bottom of the front panel, so I had a template to repeat that curve exactly. Then I measured 4 inches to make the trim the same width as the rest of the MDF trim I’m using.

Once the piece was cut and sanded, I held it up to the wood range hood cover and marked where to trim off the sides so it fit perfectly between the vertical trim pieces.
Done… For Now (Help Me Decide)
The wood range hood cover is built, wrapped, trimmed, and fully functional… which is the important part. But I still need to decide what finish I’m going with.
I could:
- Paint it the same green as my cabinets so it blends in
- Stain it to match the island for more contrast and warmth
What would you do? Paint to match the cabinets or stain to match the island?
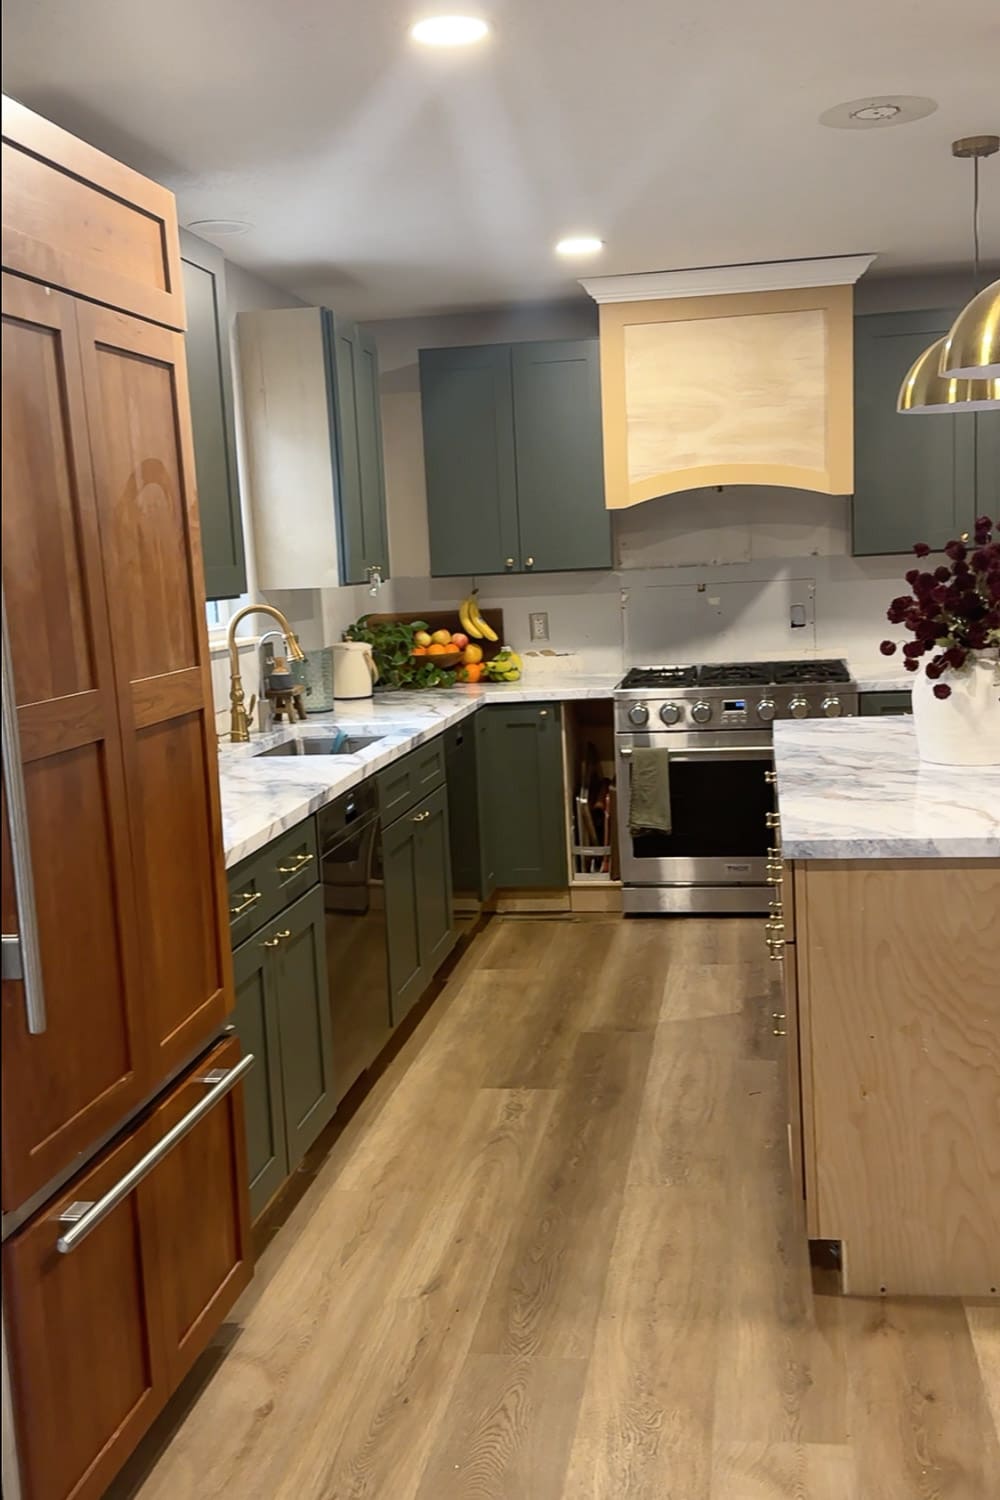
DIY Kitchen Remodel Progress (What We’ve Finished So Far)
We’ve lived here for 6 months now and progress can feel slow, but we’ve actually gotten a ton done in this kitchen already:
- Demo and changing the layout
- Putting in two dishwashers (a must for our big family)
- Installing our cabinets + organizational inserts
- Faux marble countertops
- Building an island
- And now the wood range hood cover
Coming soon:
- Backsplash
- Painting our Facebook Marketplace fridge to match the cabinets
If you want the behind-the-scenes chaos and progress in real time, come hang out with me on Instagram. This wood range hood cover is just one piece of the puzzle, and there’s a lot more goodness coming.
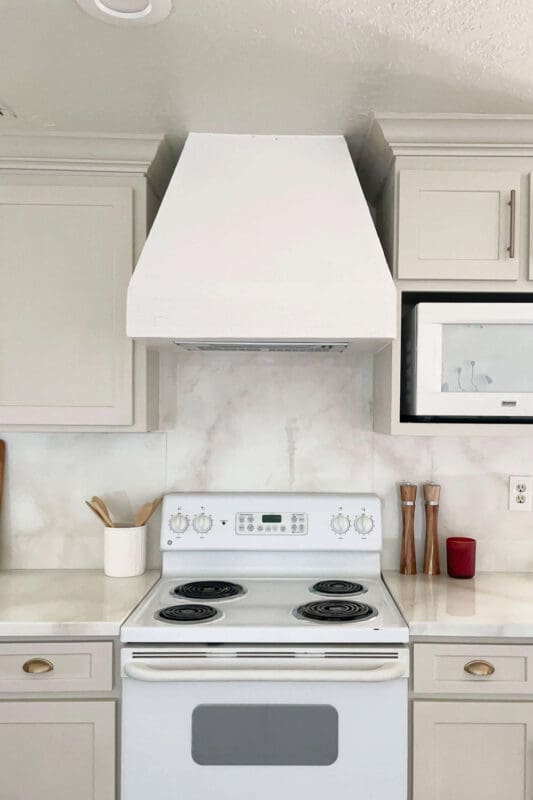
More Range Hood Cover Ideas
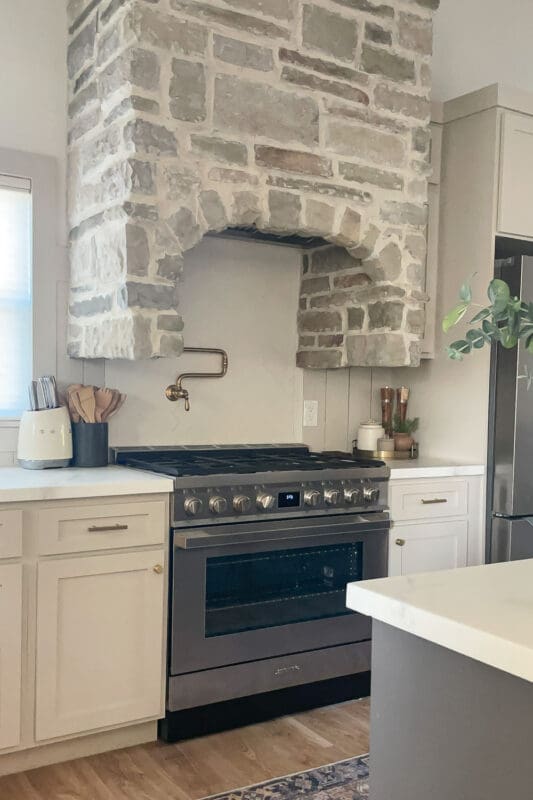
If you want more range hood cover inspiration, I’ve done a couple of totally different styles in our previous homes. One was a bold stone surround with an arched opening, and the other was a sleek, classic white hood that felt clean and modern. I’ll link both tutorials here for you.
- Modern White – How I Built My DIY Range Hood Cover on a Budget
- Arched Stone – DIY Stone Range Hood for Your Kitchen
📌 Save This Wood Range Hood Cover for Later
If you’re planning a kitchen remodel (or you’re already living in the chaos), save this wood range hood cover tutorial to Pinterest so you can pull it up when you’re ready to build. It’s one of those projects that makes the whole kitchen feel custom fast, and you’ll want the steps, tool list, and measurements handy.
Wood Range Hood Cover FAQs
Build a wood range hood cover by framing a top and bottom rectangle from 2x4s, attaching them to the wall blocking, adding cross bracing, installing the hood insert, connecting the ducting, then wrapping the frame with plywood and finishing with trim.
2x4s work great for the internal frame, and 1/4 inch plywood is an easy, affordable option for wrapping the outside. MDF is also a solid choice for trim details if you plan to paint.
If your insert is ducted, yes, it needs outside venting through the wall or roof. Some hoods are ductless/recirculating, but for real odor and smoke removal, venting outside is usually the better option.
After the duct is installed, use expanding foam sealant around the gaps to block air leaks and keep out bugs and rodents. Just don’t overfill, because expanding foam grows a lot as it cures.

Looks great, paint it to match the cabinets. I would like to do this, but I have a microwave in that spot and do not have another place to move it to.
Bummer! Yeah the layout can make it a problem sometimes.