

Updated July 18, 2025
Alright, everybody. So my husband and I have been prepping for medical school to begin this summer, meaning that we are just planning on having $0 to our name for the next 4+ years. So, in an effort to save a little moulah we moved into my sister’s unfinished basement and in exchange for rent are providing most of the labor to finish it. When we first moved in a couple of months ago, this basement was studs. I could literally see through the walls. So my handy dandy know-how-to-do-everything hubby and I threw up the sheetrock (with some help from my sister and brother-in-law, of course), the paint, the wood floors, the baseboard, the doors, built the closet shelves, installed the cabinetry and appliances in the kitchen, built and tiled the shower and all of those little details that you wouldn’t think about unless you were building a house. The only thing that was hired out was the tape and texture on the walls since that’s not something you can really fake and installing the carpet. It has been A. LOT. OF. WORK. To say the least.
So I’m finally in the stages where there isn’t a whole lot of grunt work to do, mostly just me, myself and I painting things and doing other various projects while baby girl is napping. So this week’s project was pretty exciting. In celebration of my husband getting into medical school I was just doing a little surgery on the kitchen table. There isn’t really a dining room in this little three-bedroom basement and the table down here was HUGE. There is a small space in the kitchen area of just flooring between the cabinets and the couch, and ain’t nobody got the money to buy a smaller kitchen table. So, I decided to downsize the one we had. Here she is. And perhaps the photos won’t do her justice, but compared to the size of the room she’s in she’s a doozy.
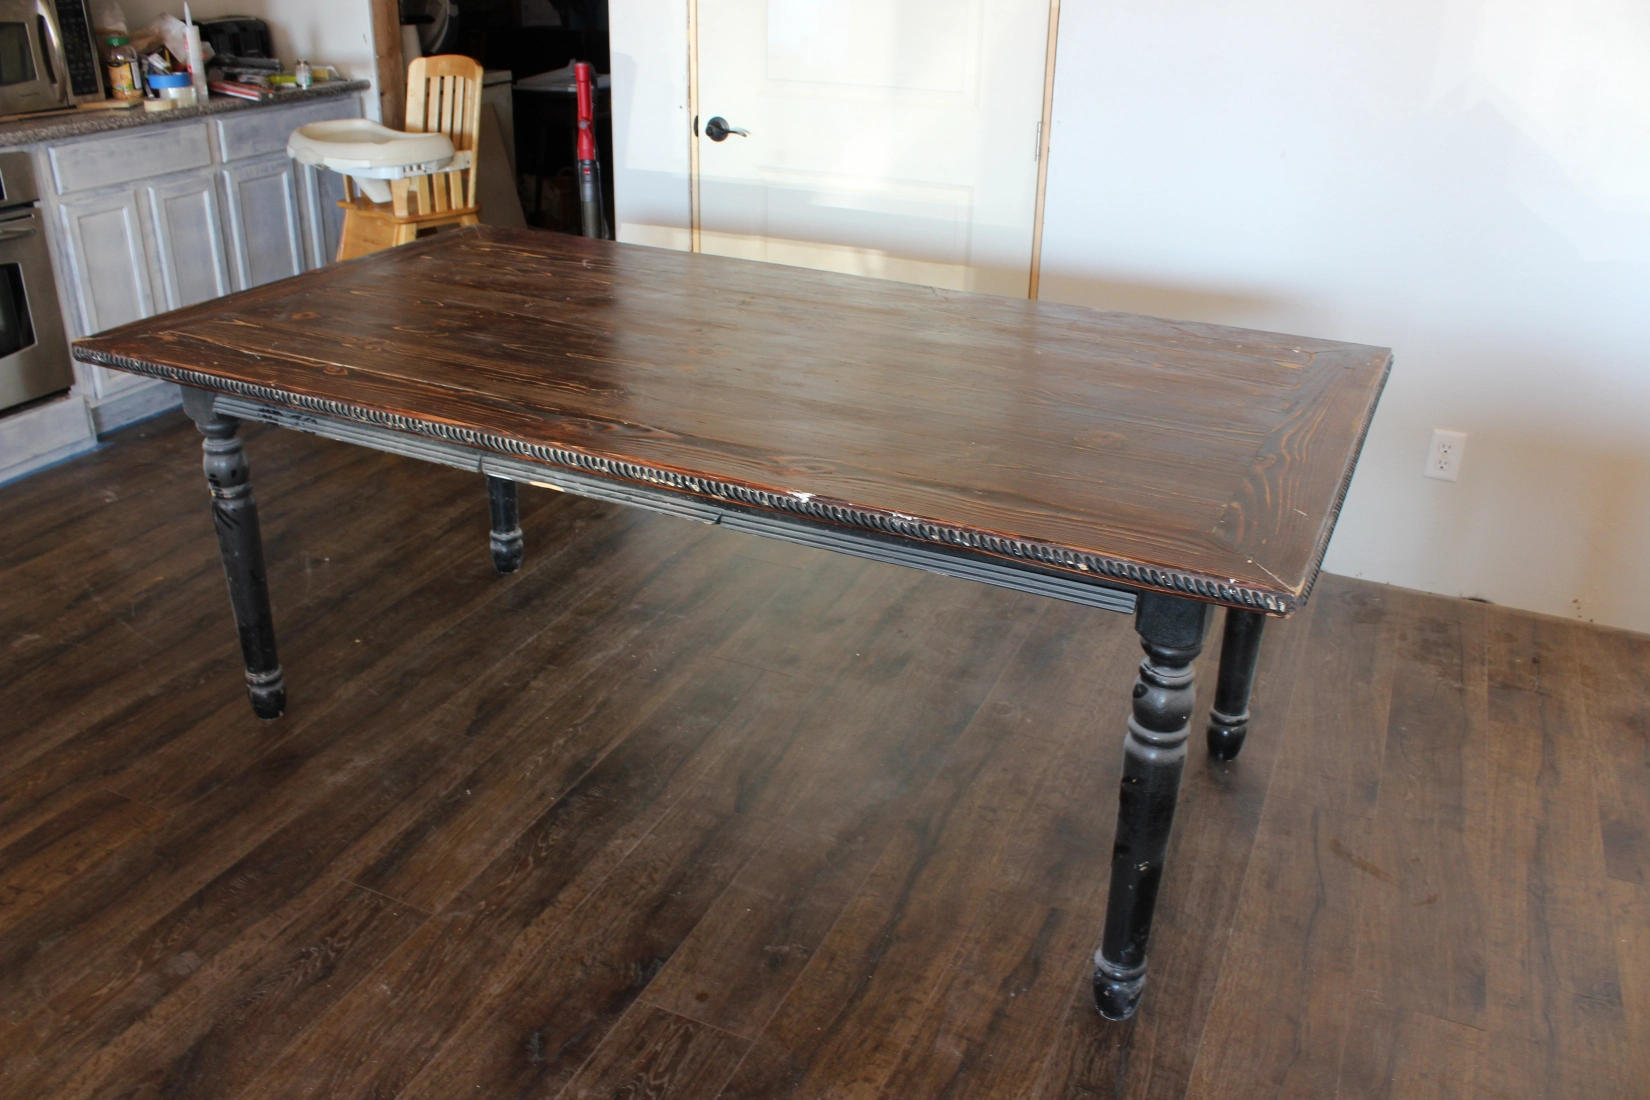
So, I began by taking her apart. Now, if you’re interested in UPSIZING your kitchen table this post will probably help you out as well. Really the only thing you’d need to do is buy some 1×6’s from The Home Depot or Lowes or your choice of lumber store (and border them with 2×6’s if you’re feeling fancy) and build yourself a new table top. This is actually a table that used to be a square 4 foot table with a leaf insert that my sister had upsized, so I didn’t have to build a new tabletop. I just downsized the one my sister had made and used the existing legs. But the process is pretty simple.
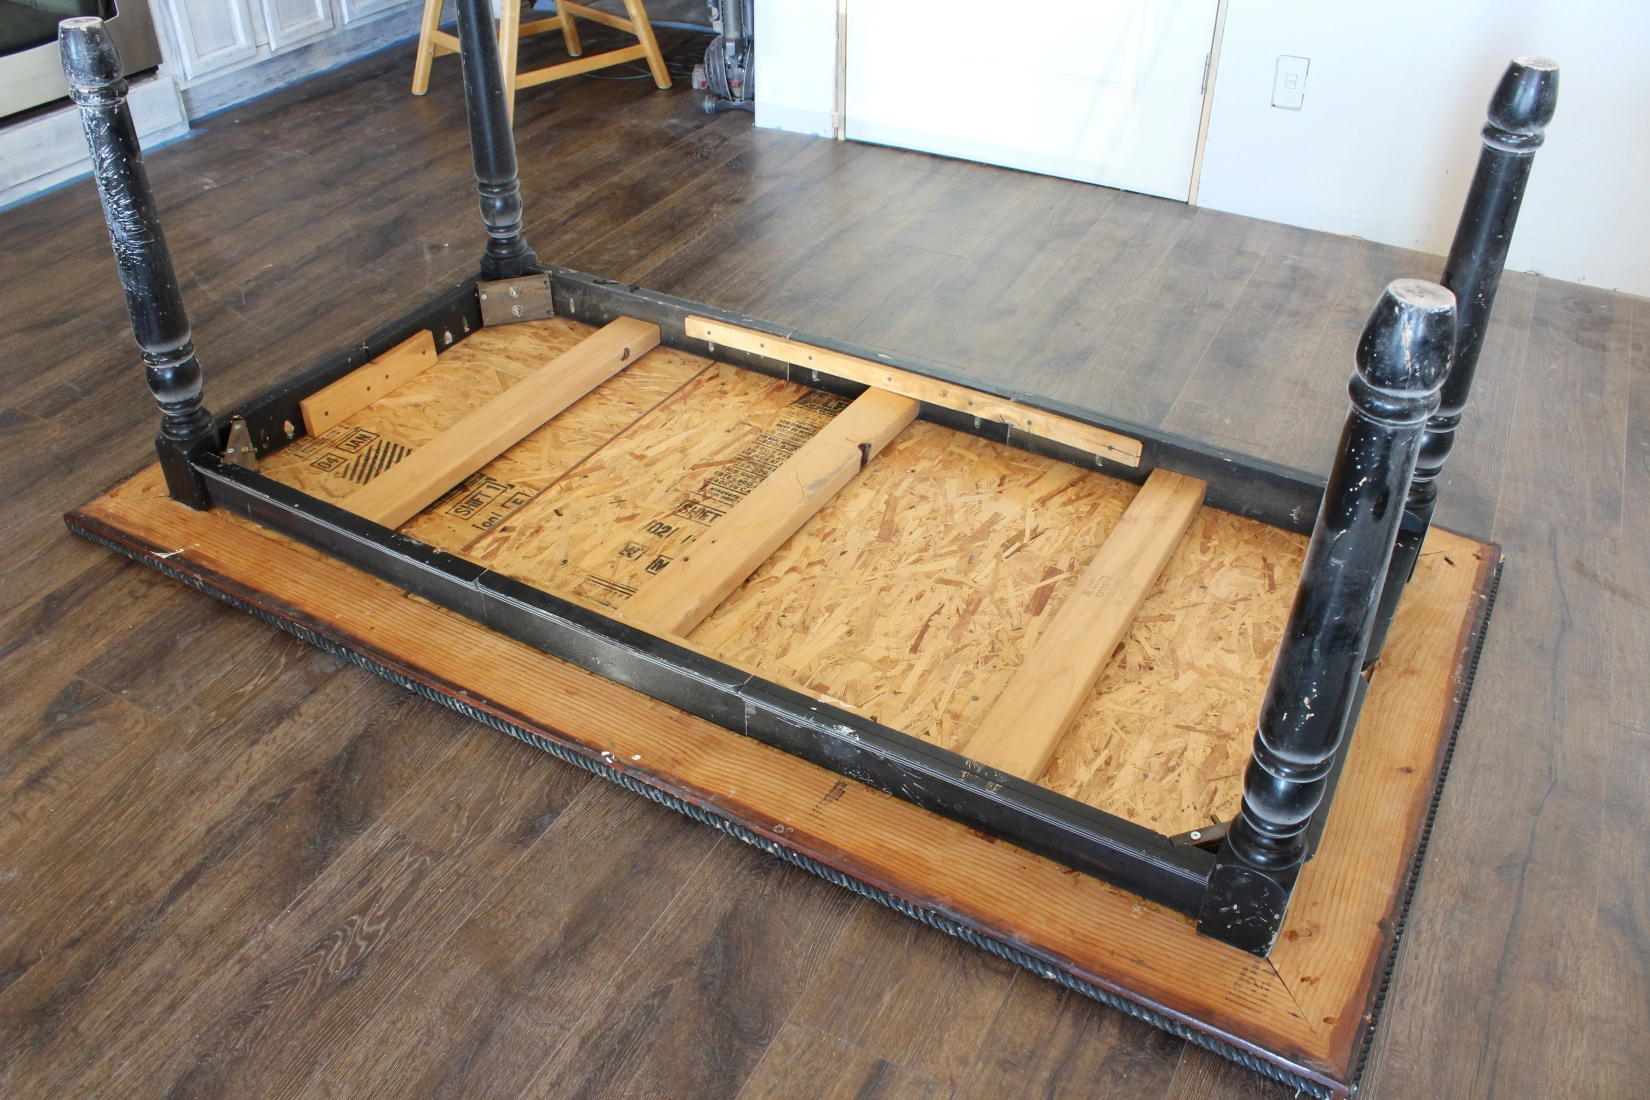
First, you’re gonna unscrew the frame from the tabletop. This should be pretty standard for all tables whether they’ve been rebuilt or not. You’ll usually find some pocket holes holding the tabletop to the frame.
You’ll see here that my sister had taken the leaf of the table and inserted it permanently between the two leg sections for added length. When I disassembled it I took that leaf part out and just used the original end leg pieces for my length.
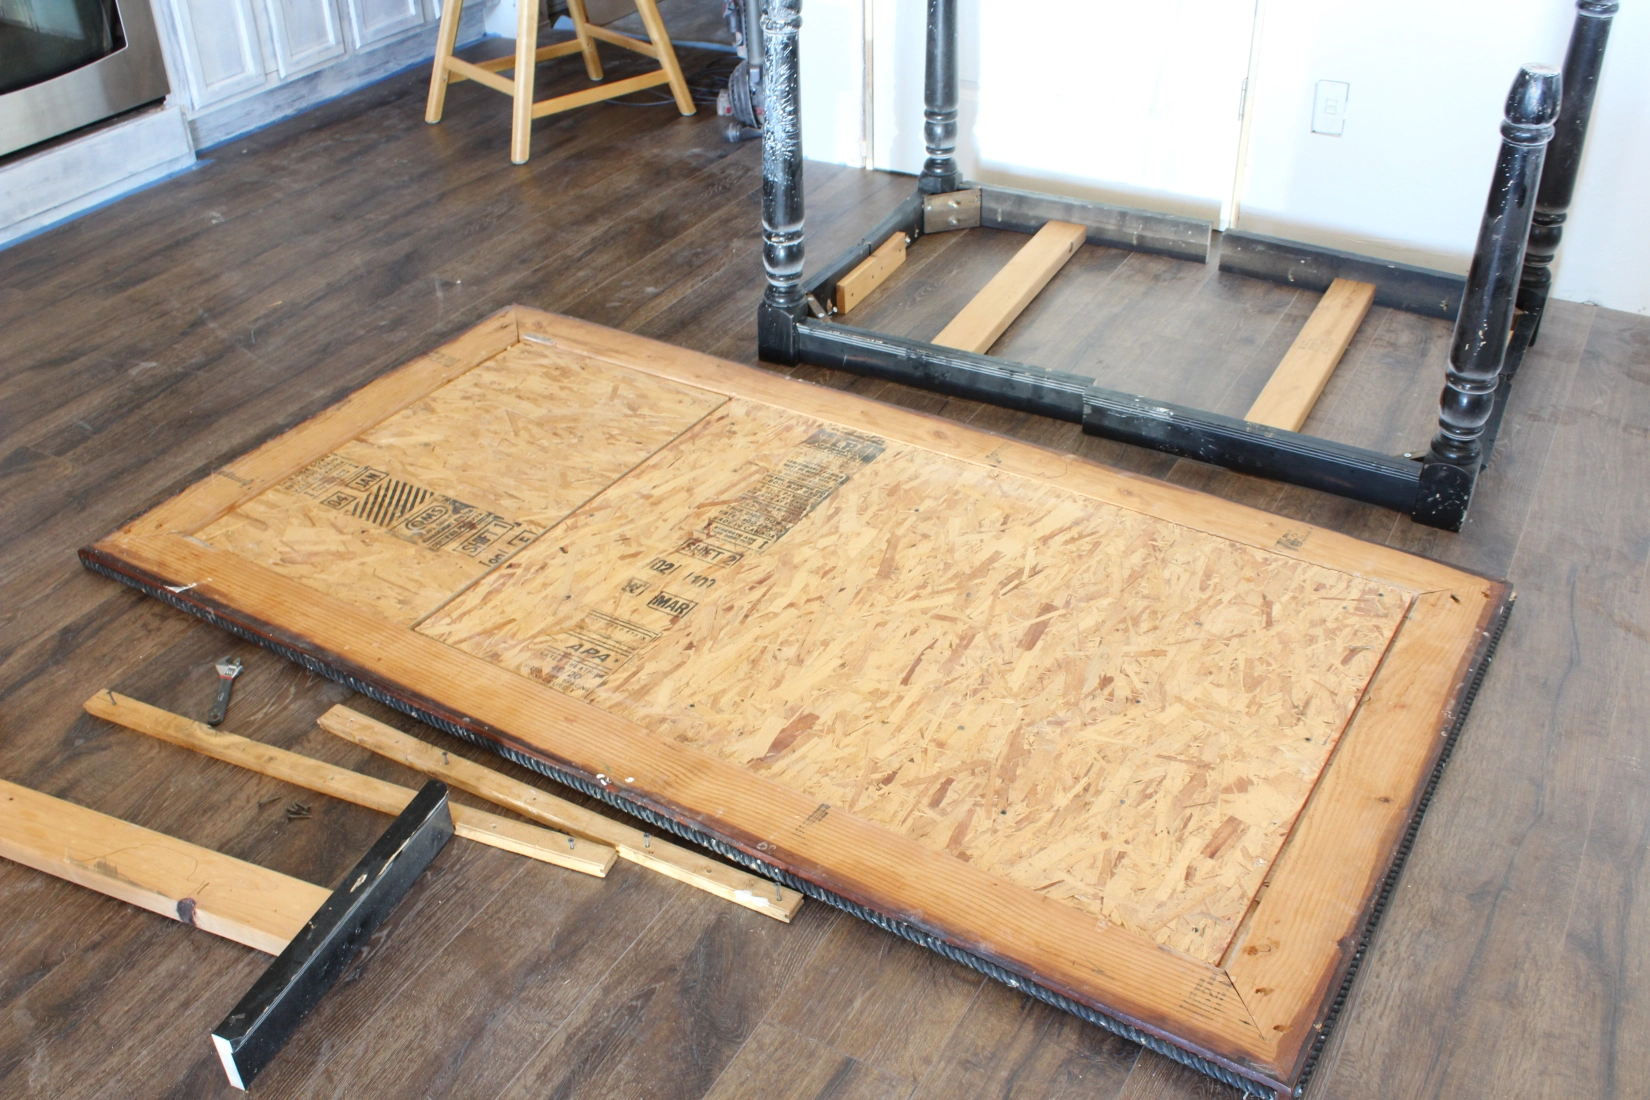
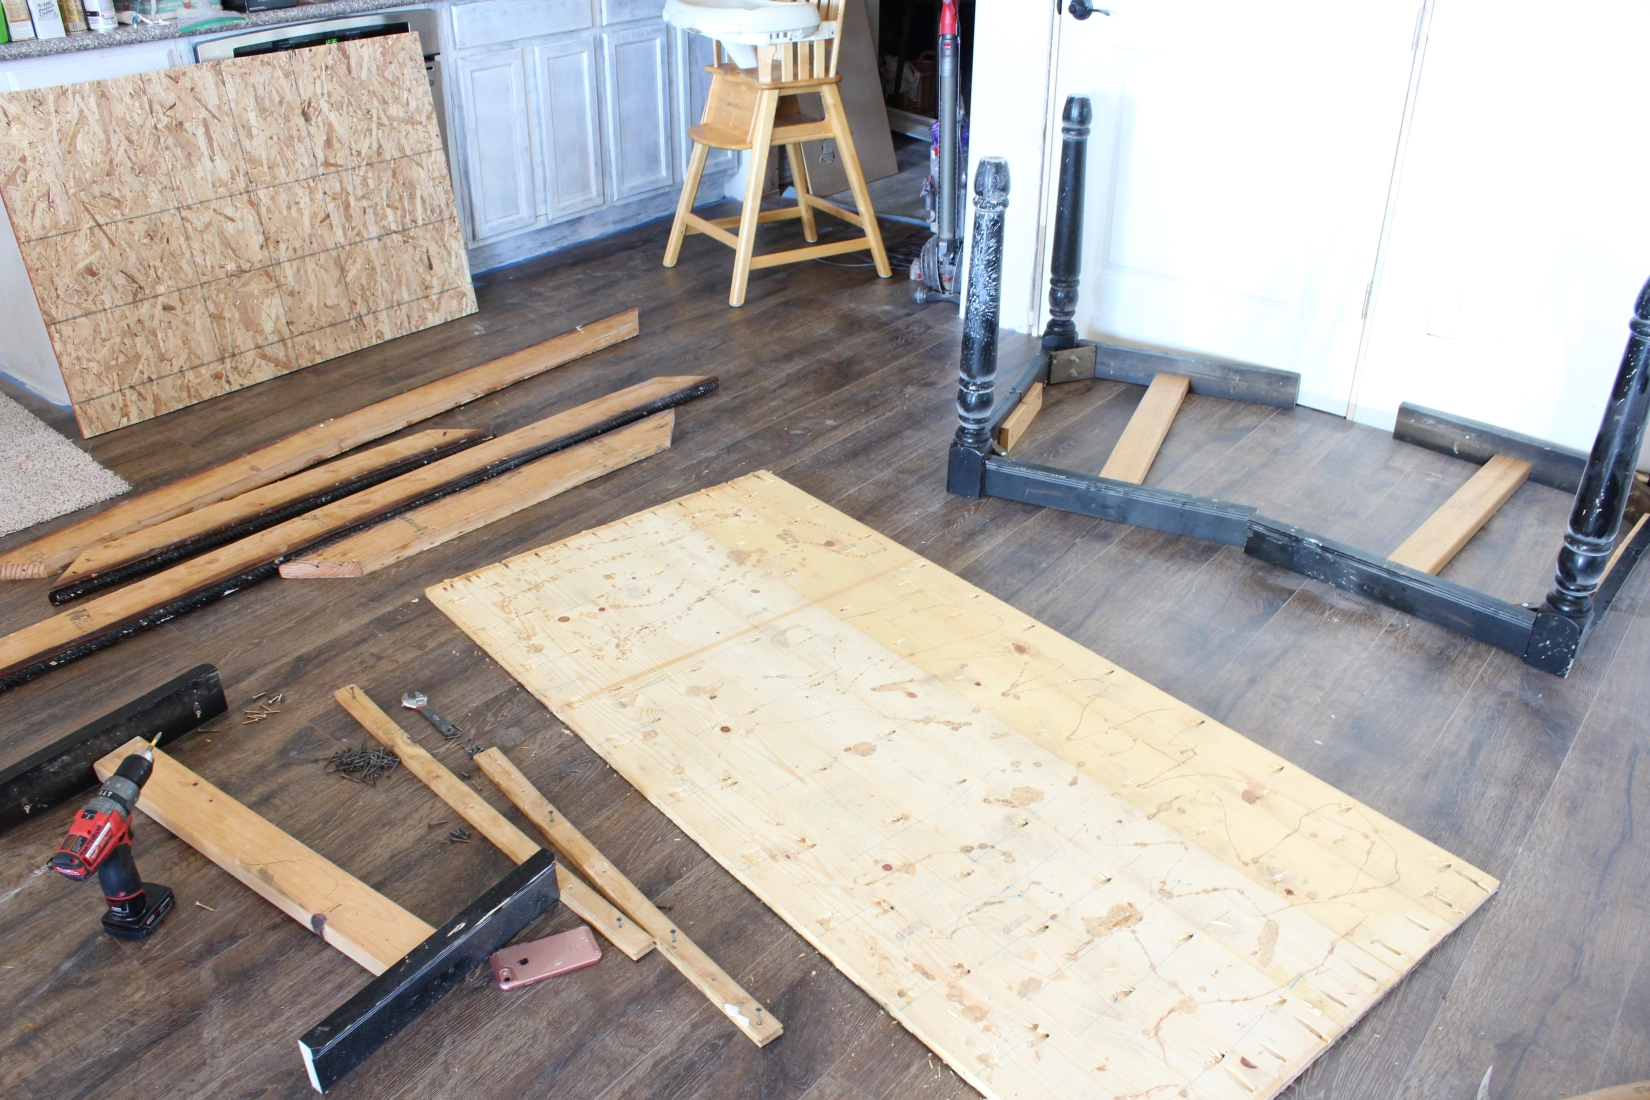
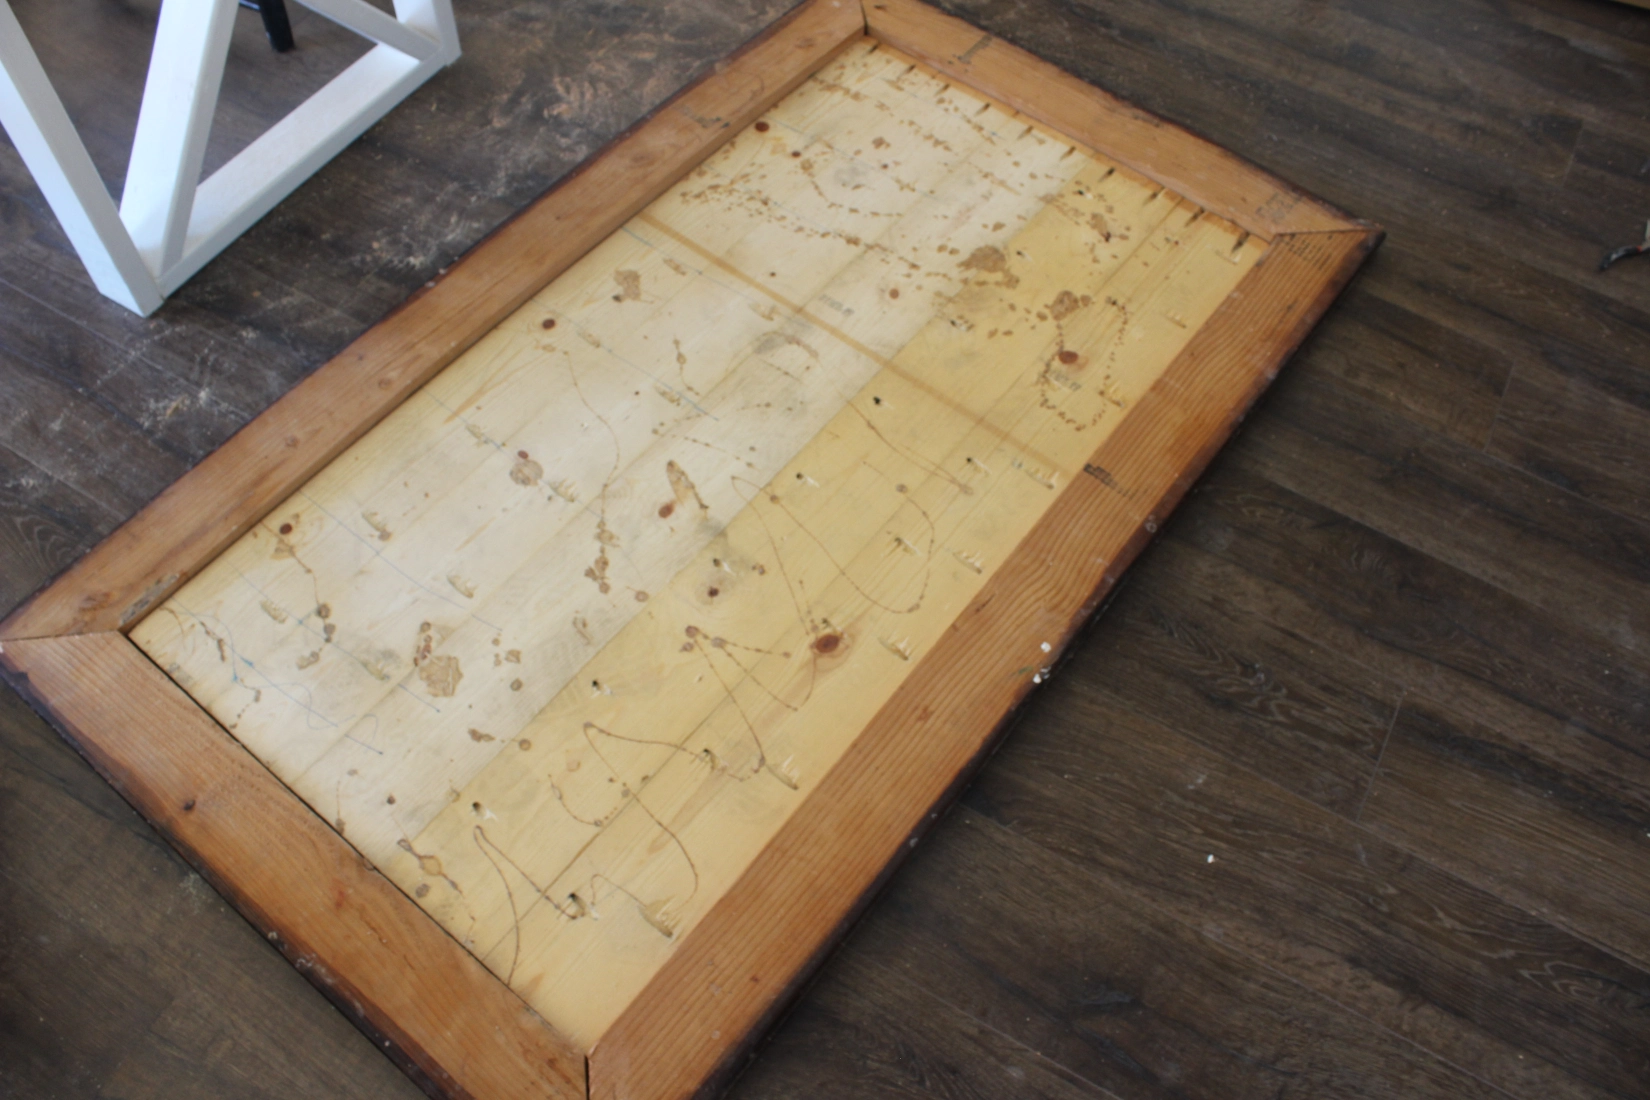
She built the tabletop out of several 1 x 6’s and then framed them with some 2×6’s. With the inch difference she cut and screwed in some plywood so there would be something to screw the frame to. Here I am taking the plywood out.
And here it is totally disassembled. So, the legs I just left as they were after I took the leaf out. I was more interested in cutting down that tabletop. I measured the space between my cabinets and the couch, and decided on the size of table that could reasonably fit. The table was roughly 7.5 x 4, and I wanted it to be about 3 x 5.
Next I took off one of the 1×6’s that made up part of the middle section of the tabletop.
And then I cut what was remaining down to size, taking into account that I would be adding the 2×6 frame back on. I had to be sure to factor that into my measurement.
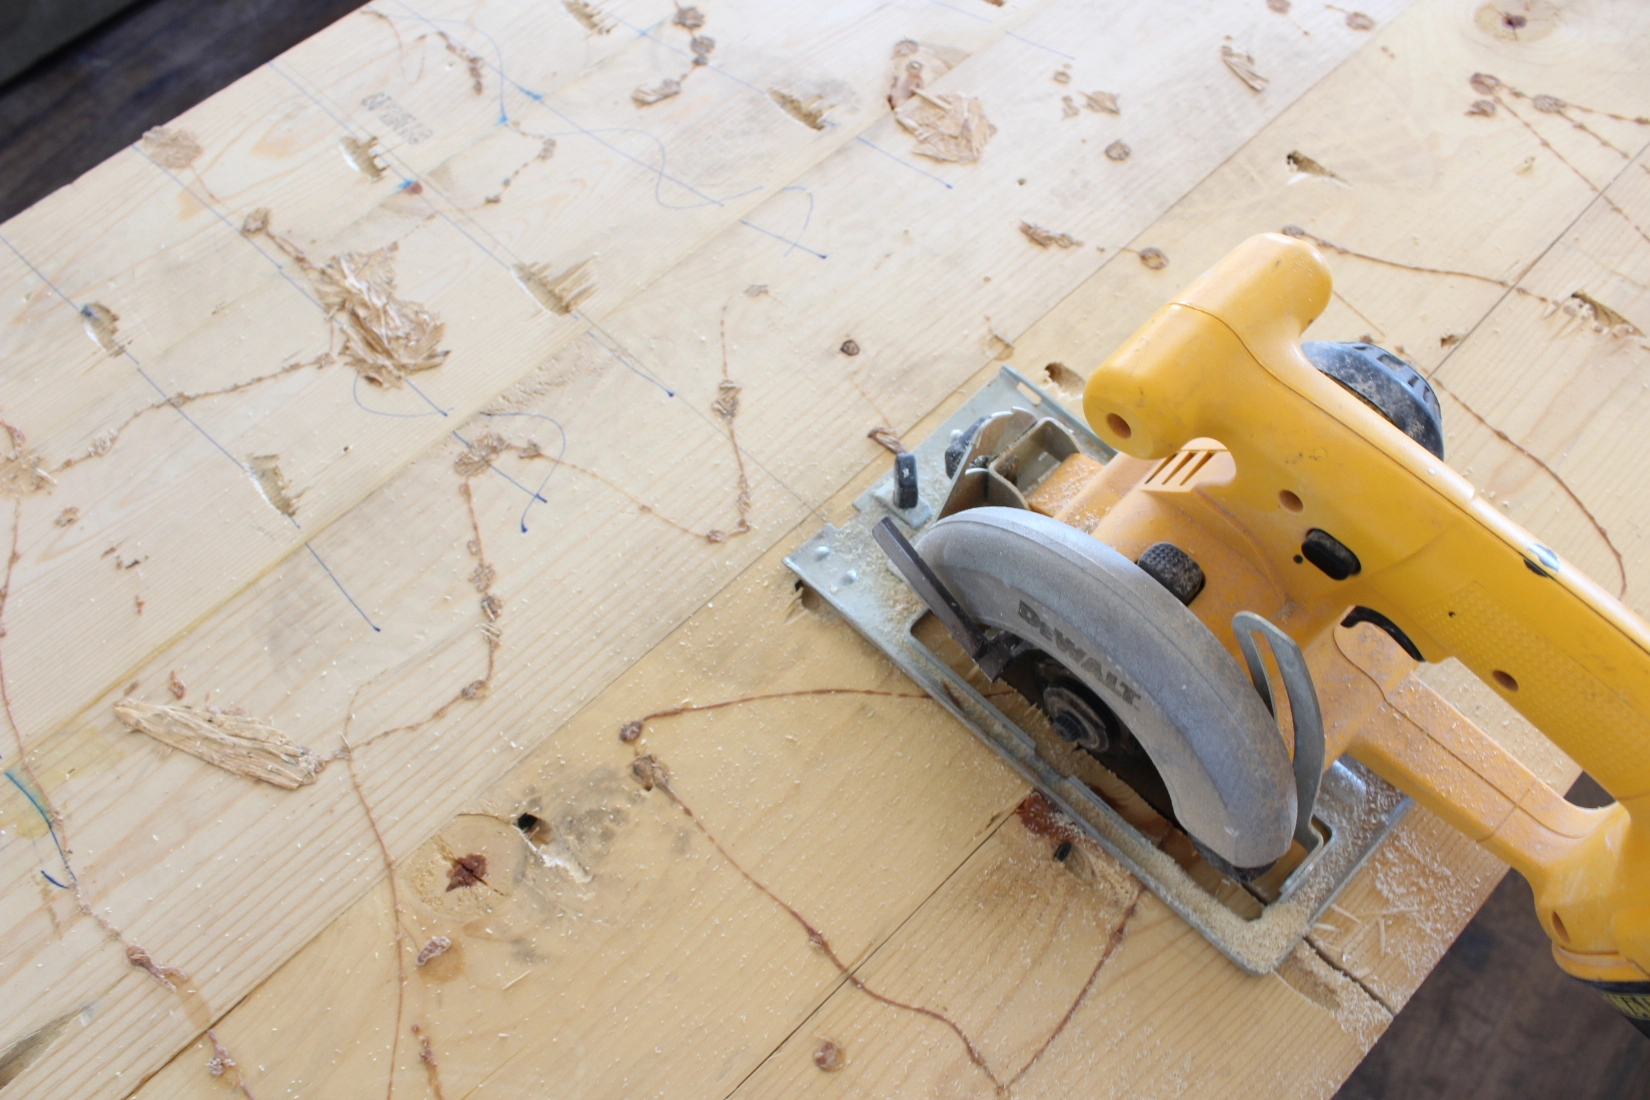
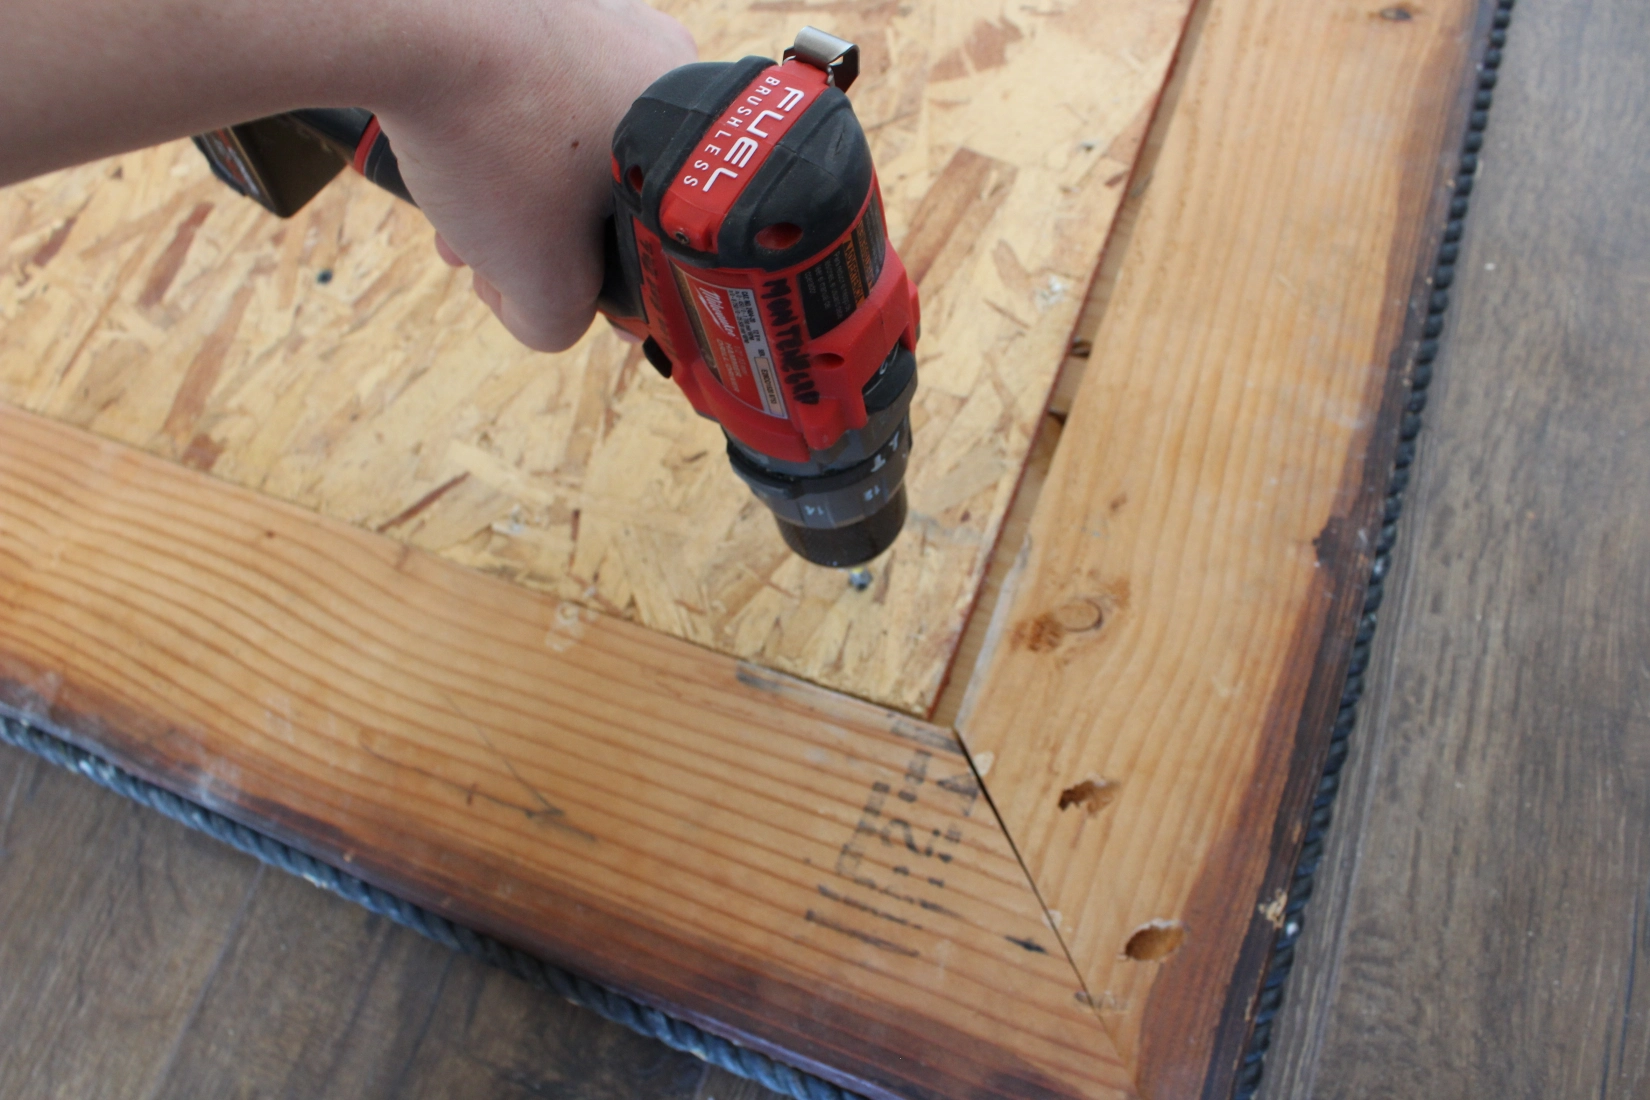
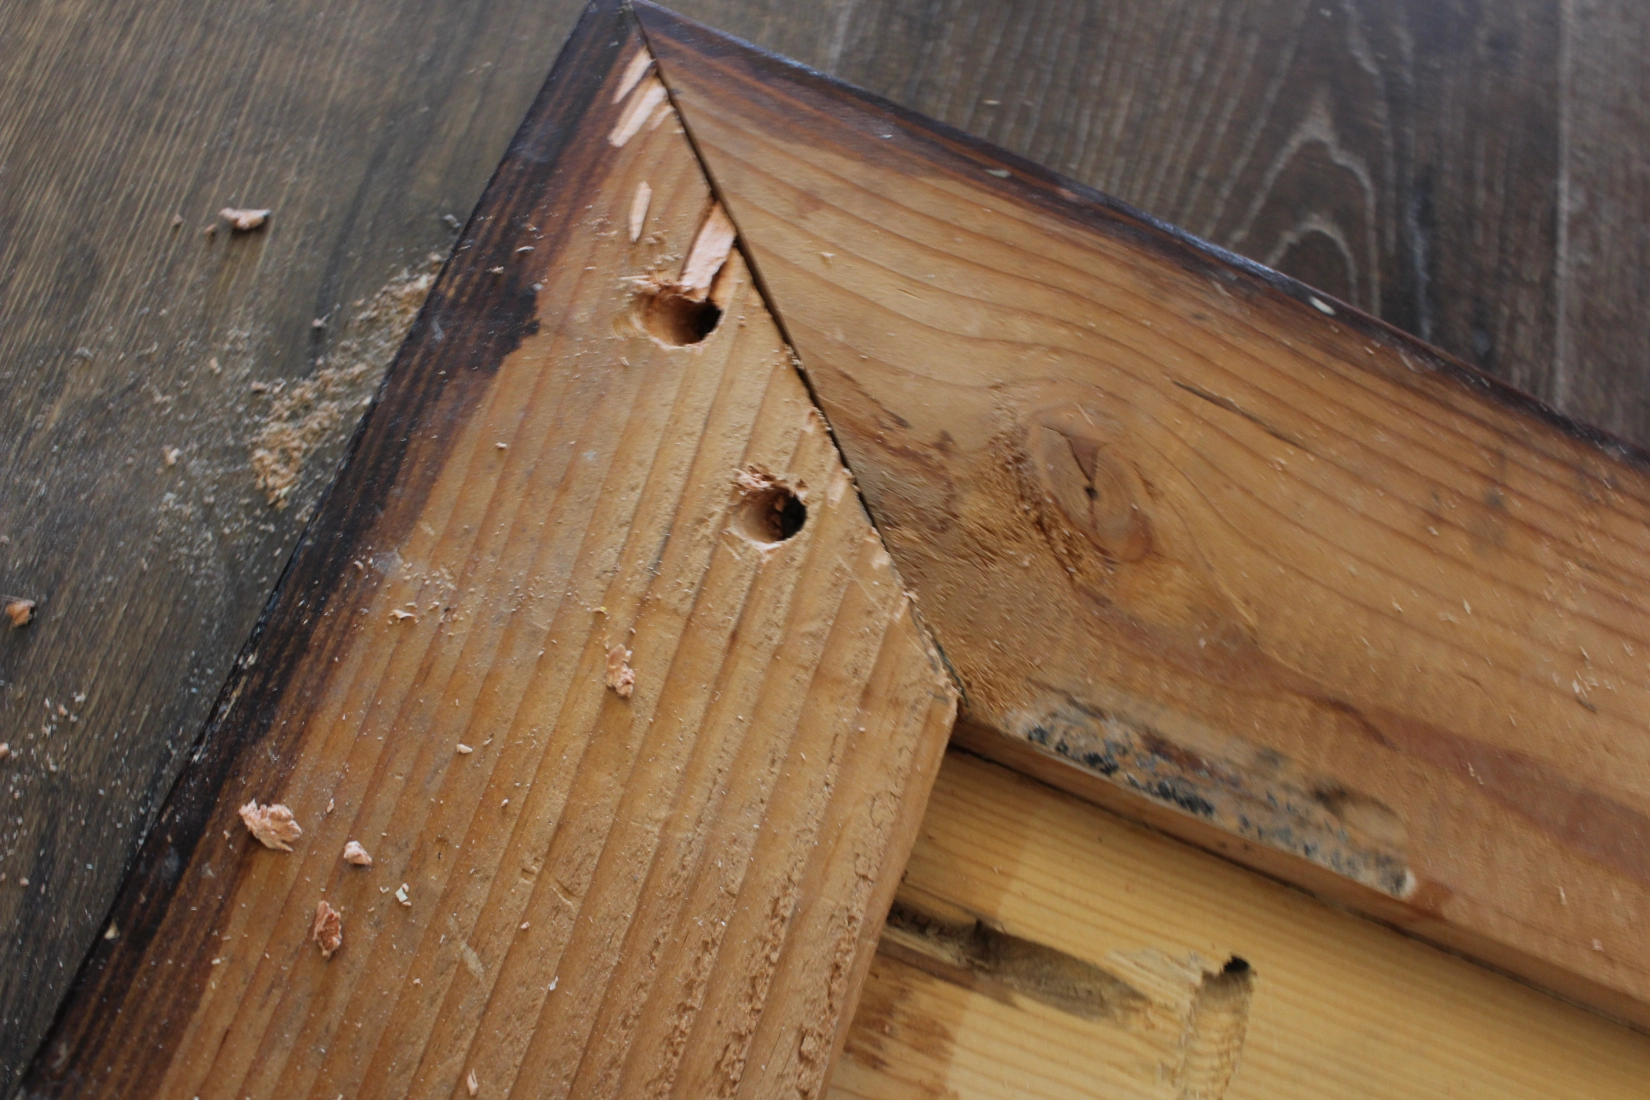
Next I cut down the frame to size. This was the tricky part since I didn’t have a miter saw to work with, only the circular saw.
I knew the angles fit perfectly already, so I mimicked the exact angle by cutting a template with some paper and moving it several inches in to the length I wanted it, then tracing again where I needed to cut.
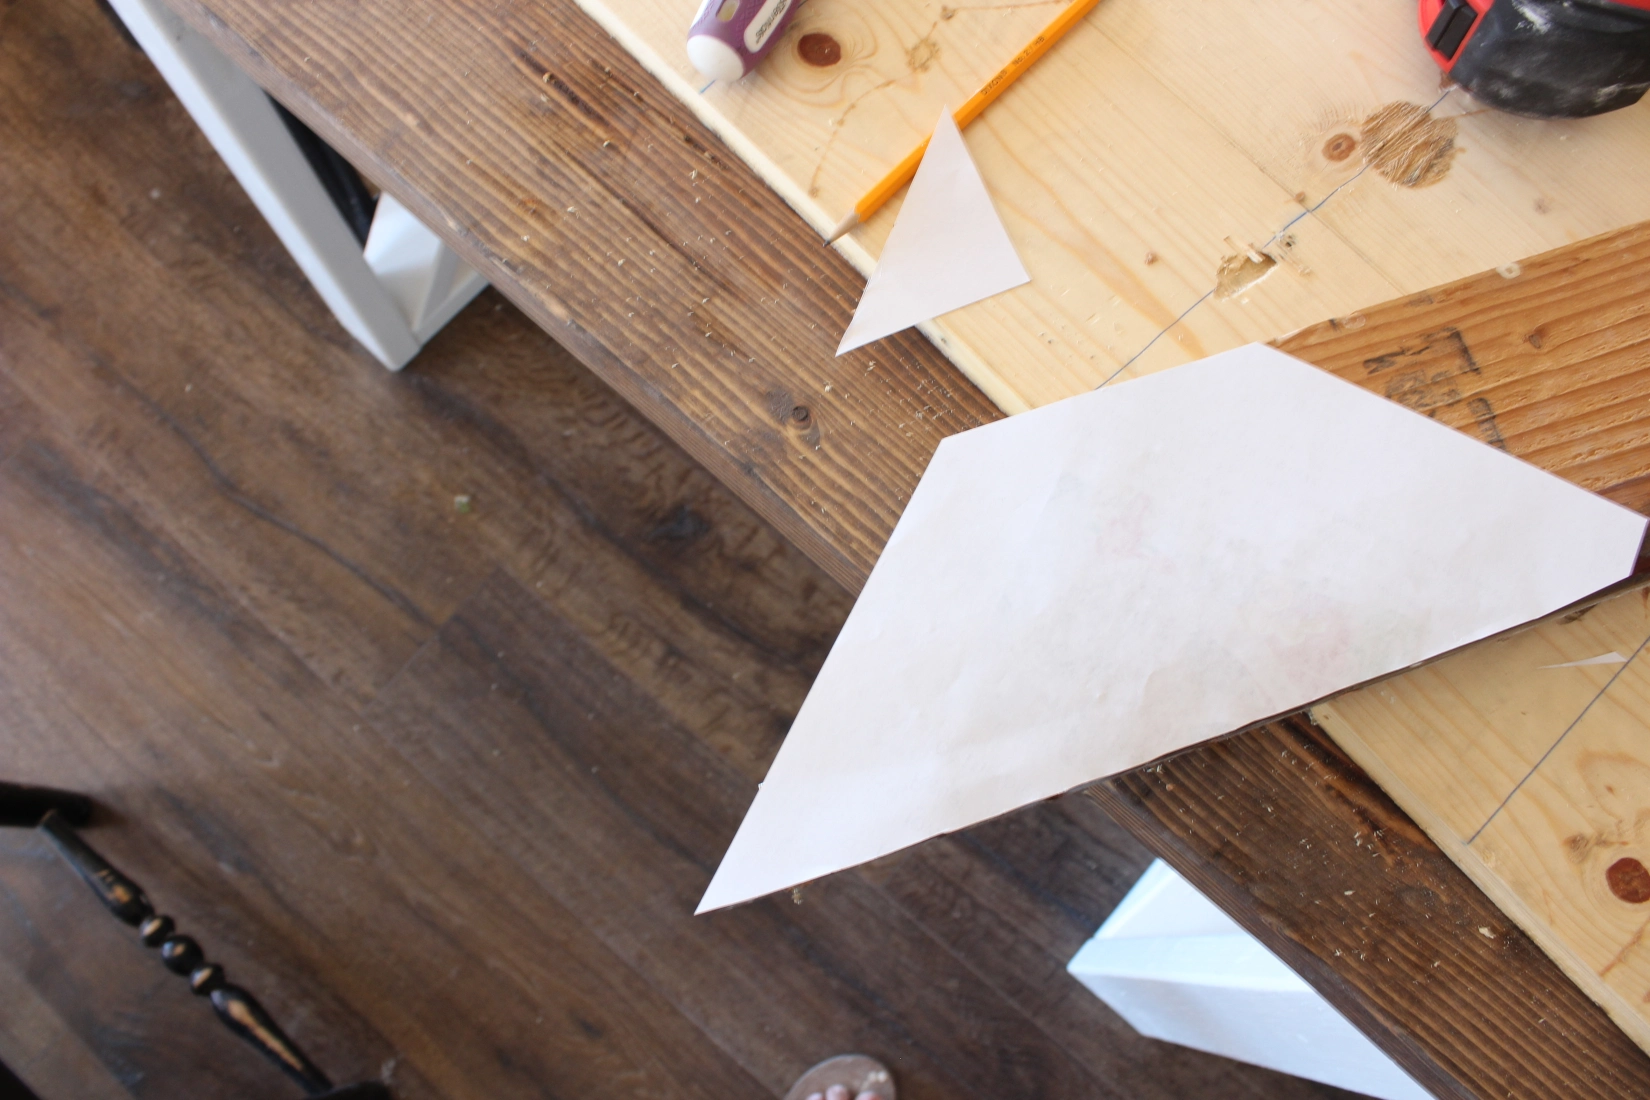
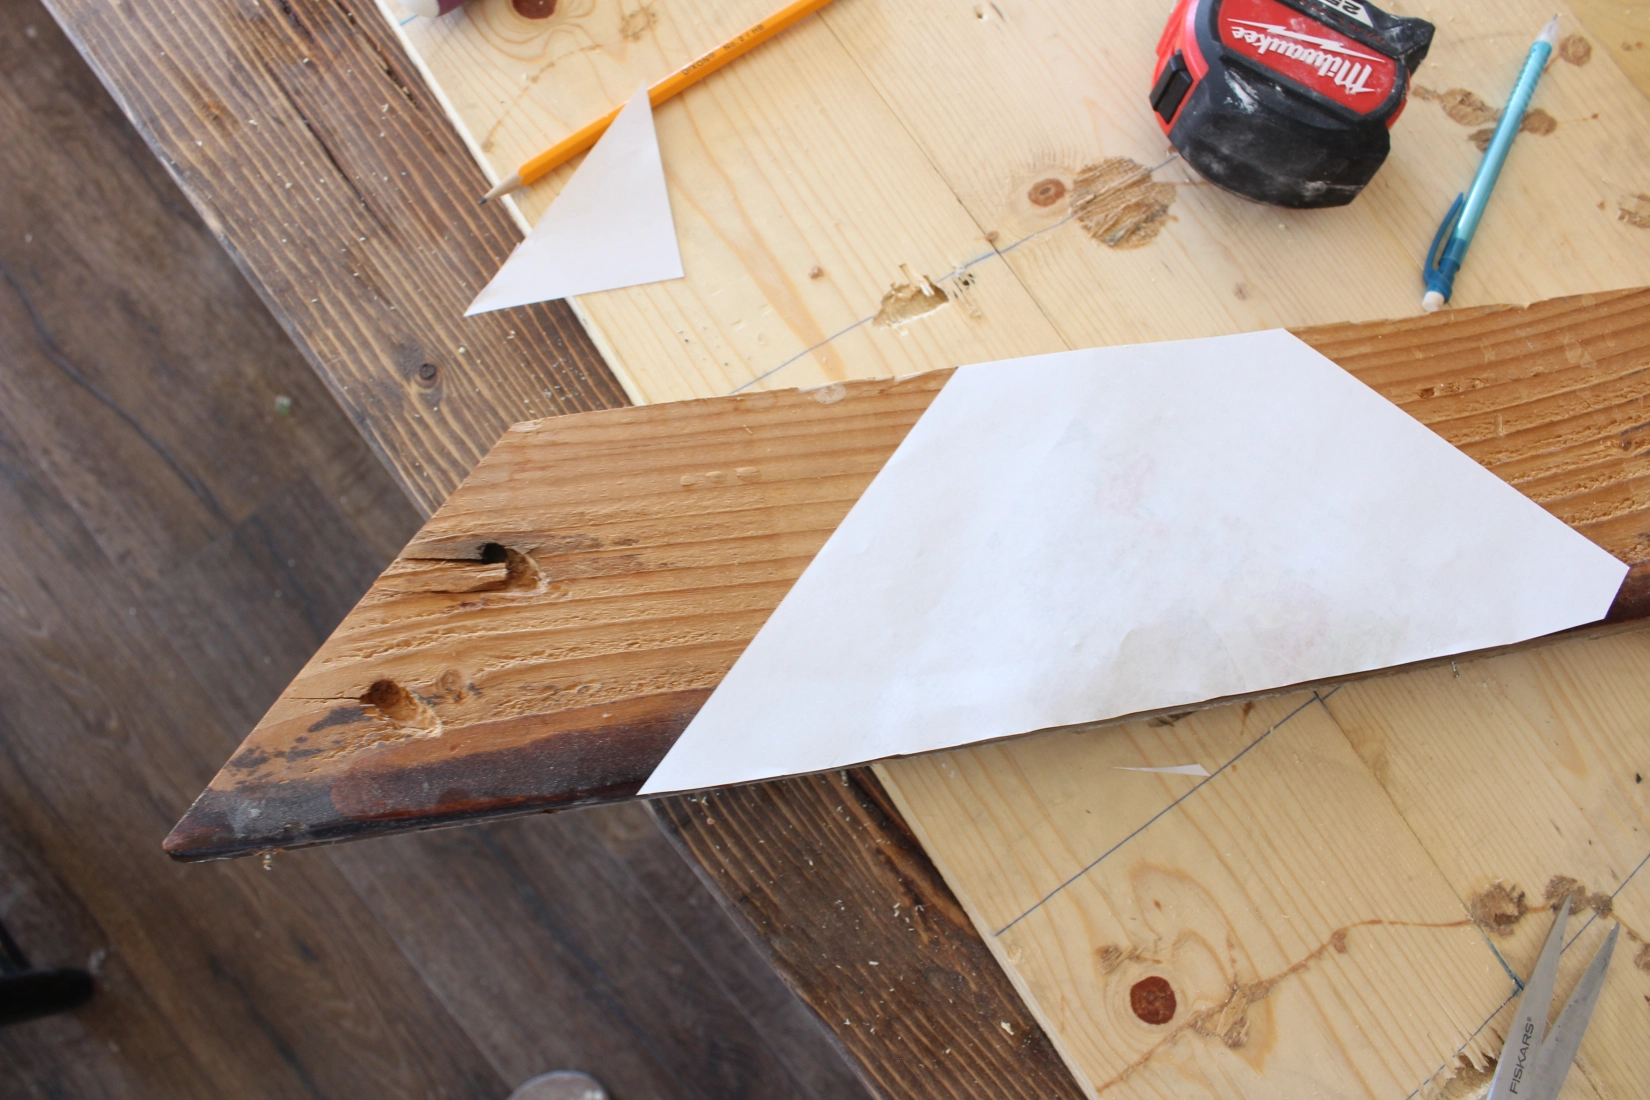
I did this with all 4 boards and set it back together to make sure it fit.
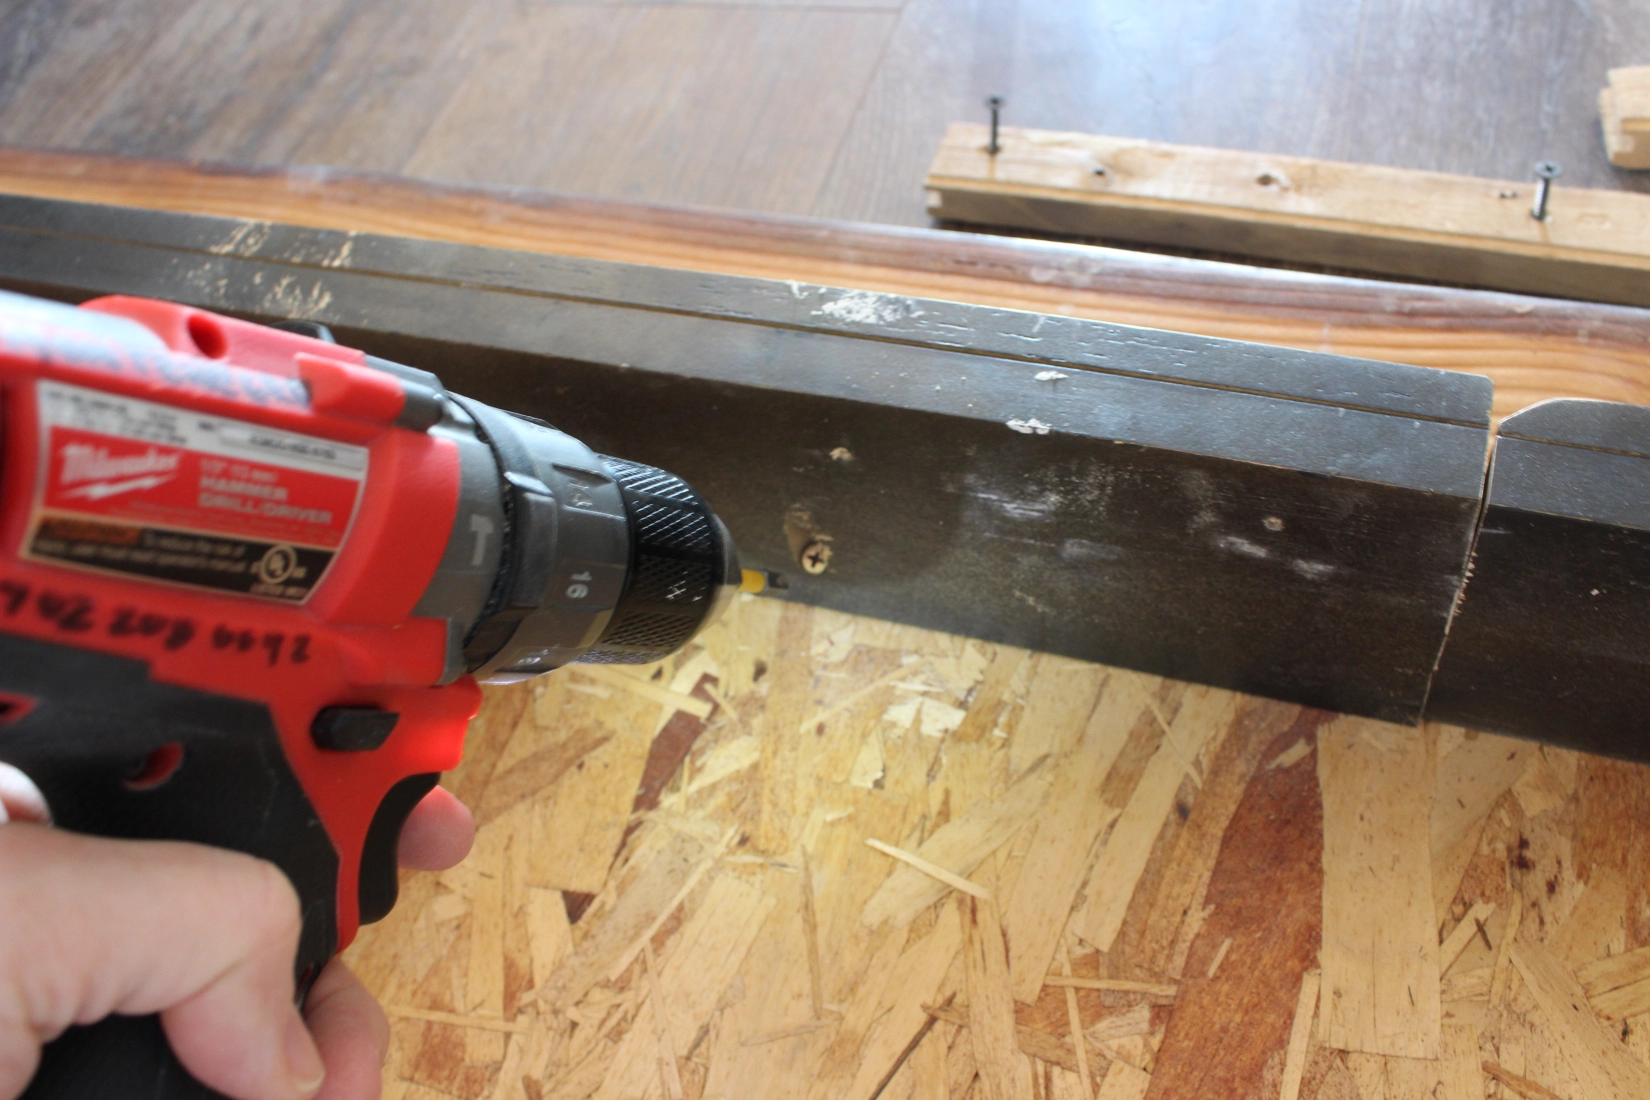
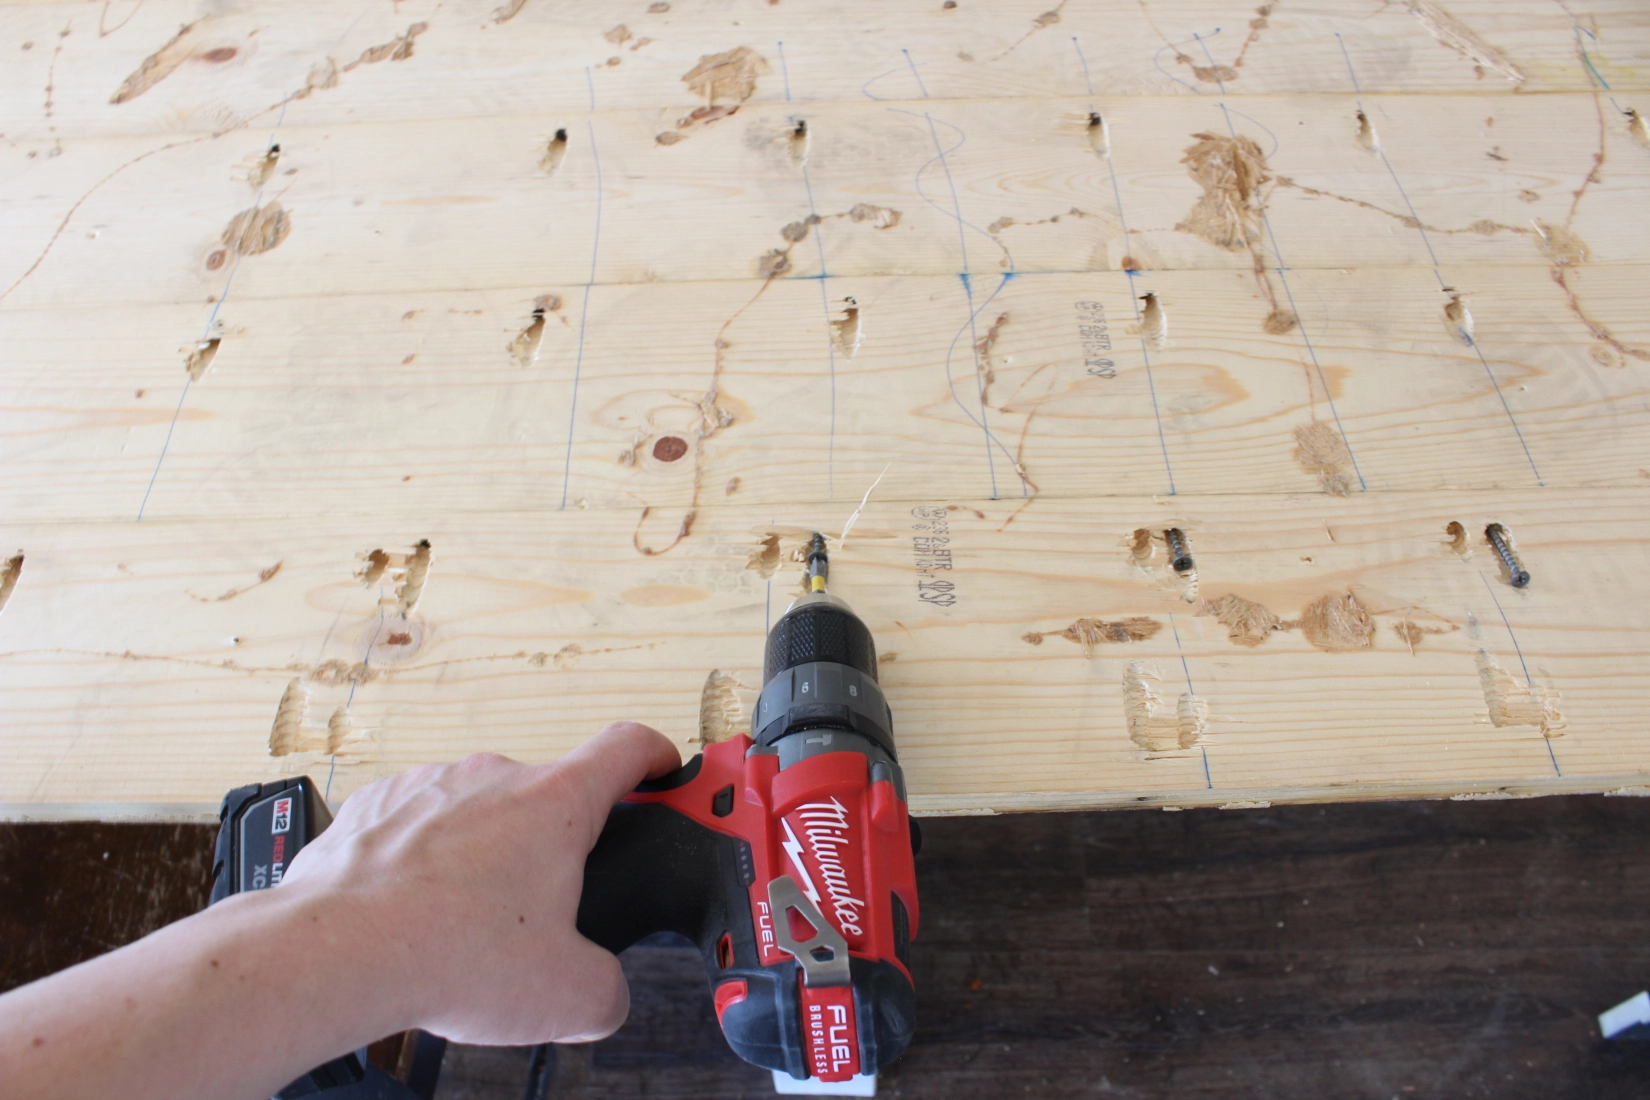
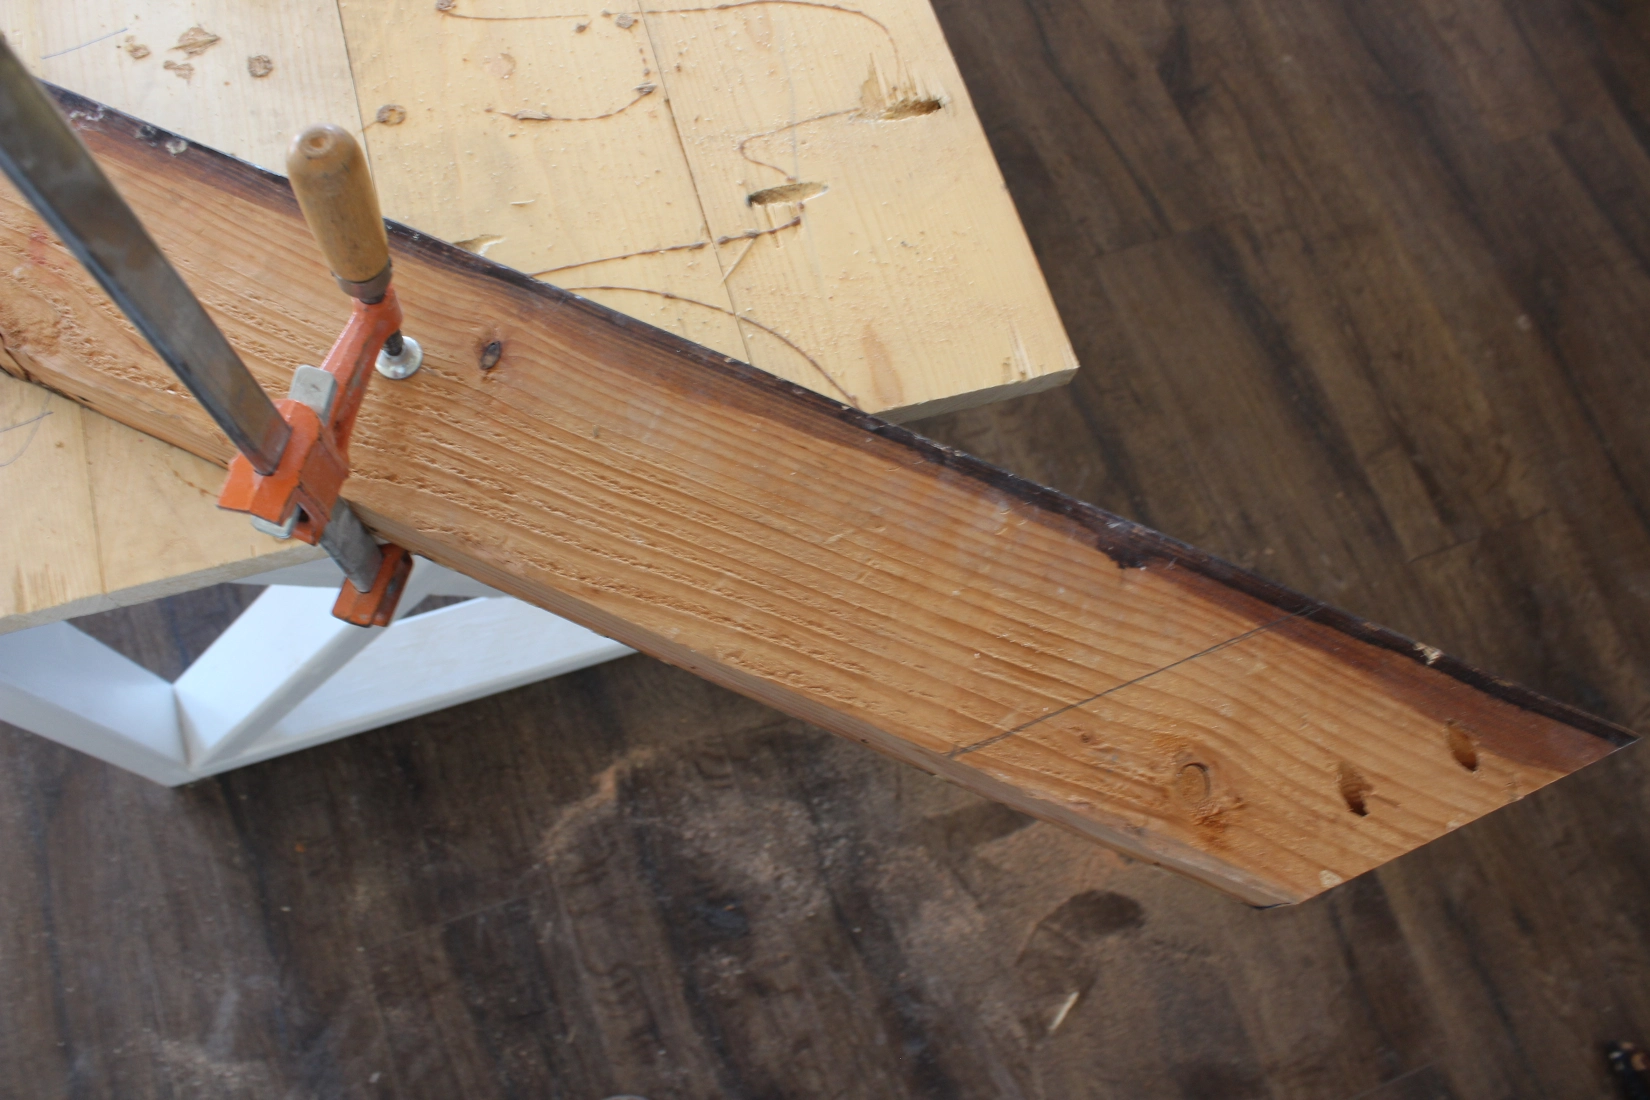
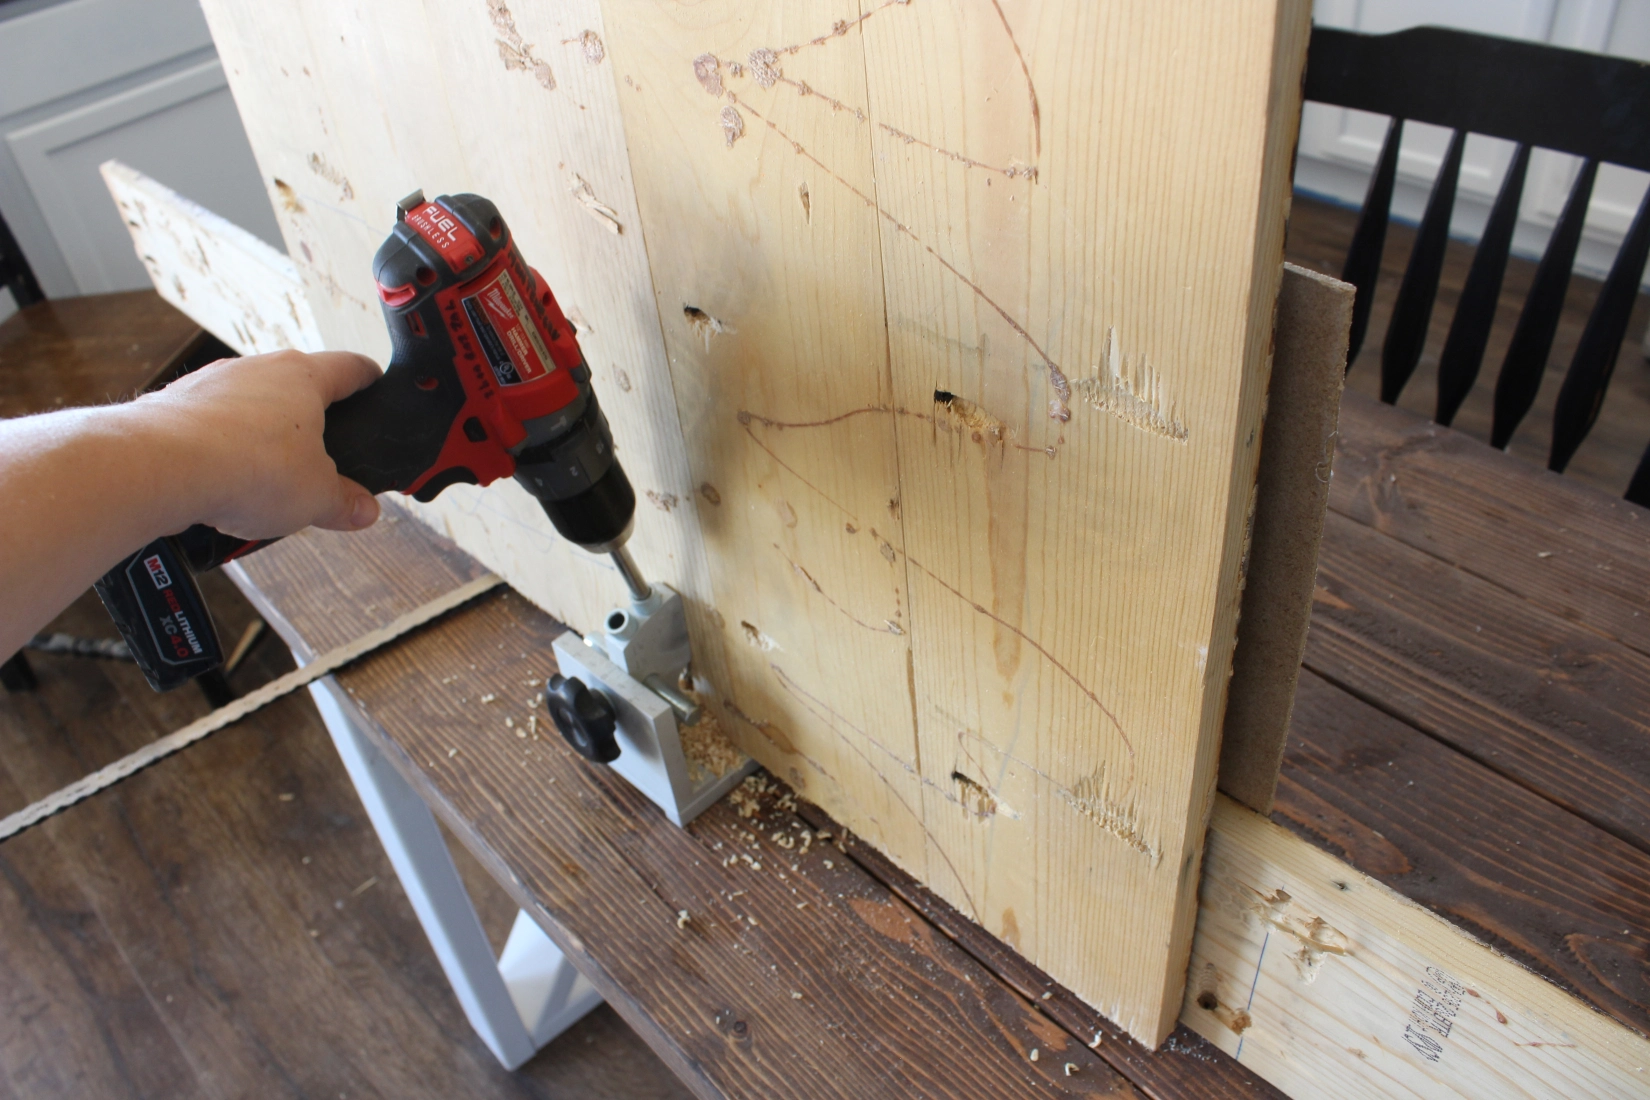
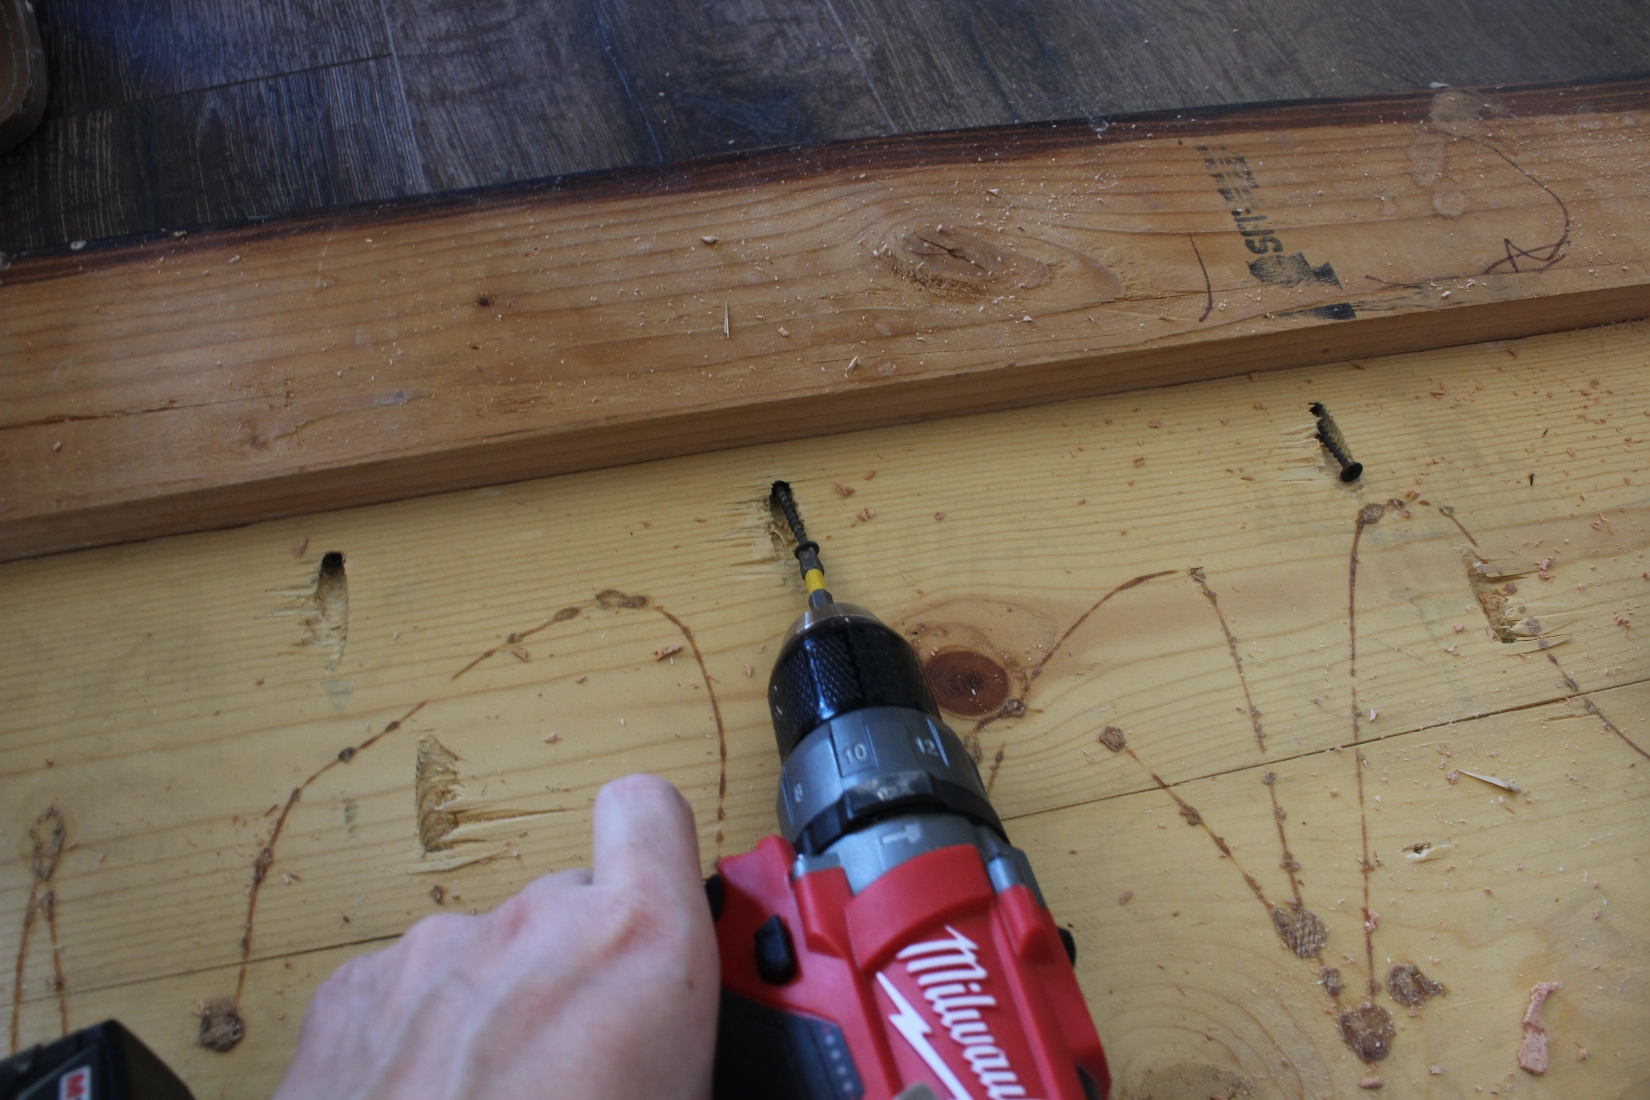
Since I took off two sides of the tabletop I needed to drill new pocket holes so I could attach it to the frame. Guys, I’ve said this before. If you’re serious about building you need to get your hands on a kreg jig like this one. Technically you could drill a pocket hole without it — I’ve done it. But it’s risky because you could drill too far or at the wrong angle. Basically the idea is to attach two flat boards together by screwing them together, and the pocket hole allows you to hide the head of the screw within the wood so it all lays flat. I’ve got my keg drill bit in my drill and I’m drilling the hole at the angle that I can stick the screw into.
Then, screw it to the frame board.
Then, screw the corners together.
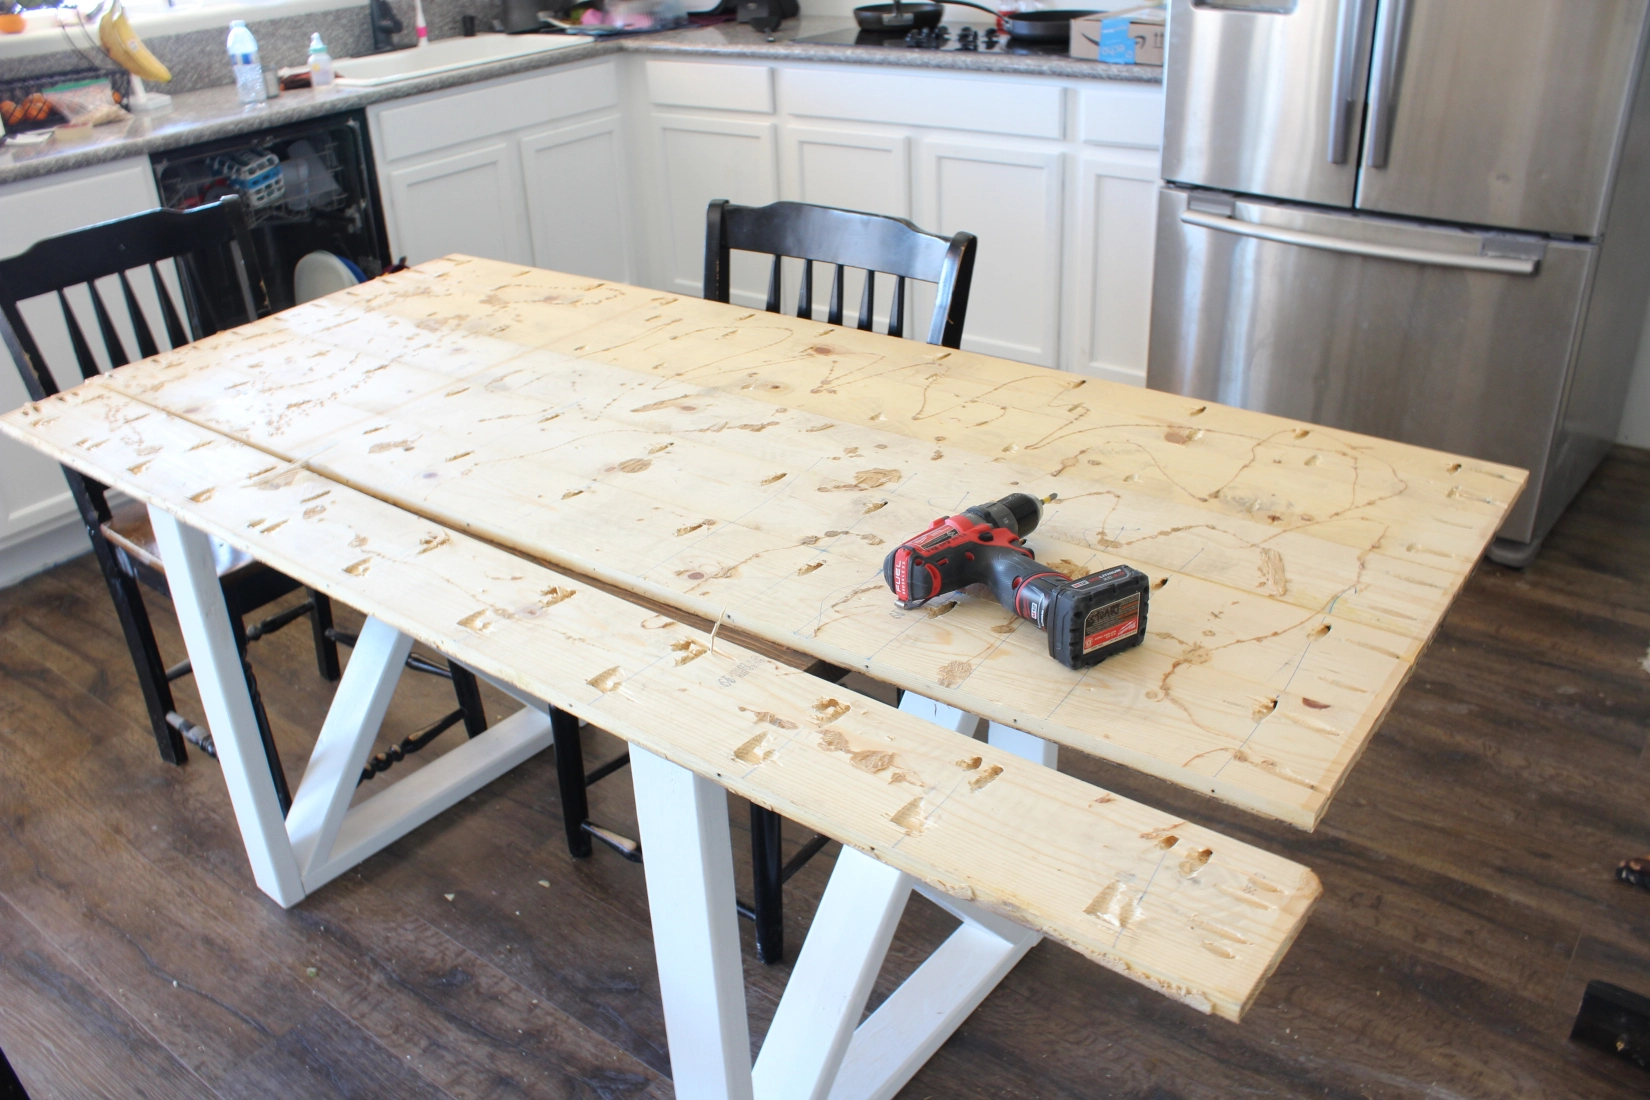
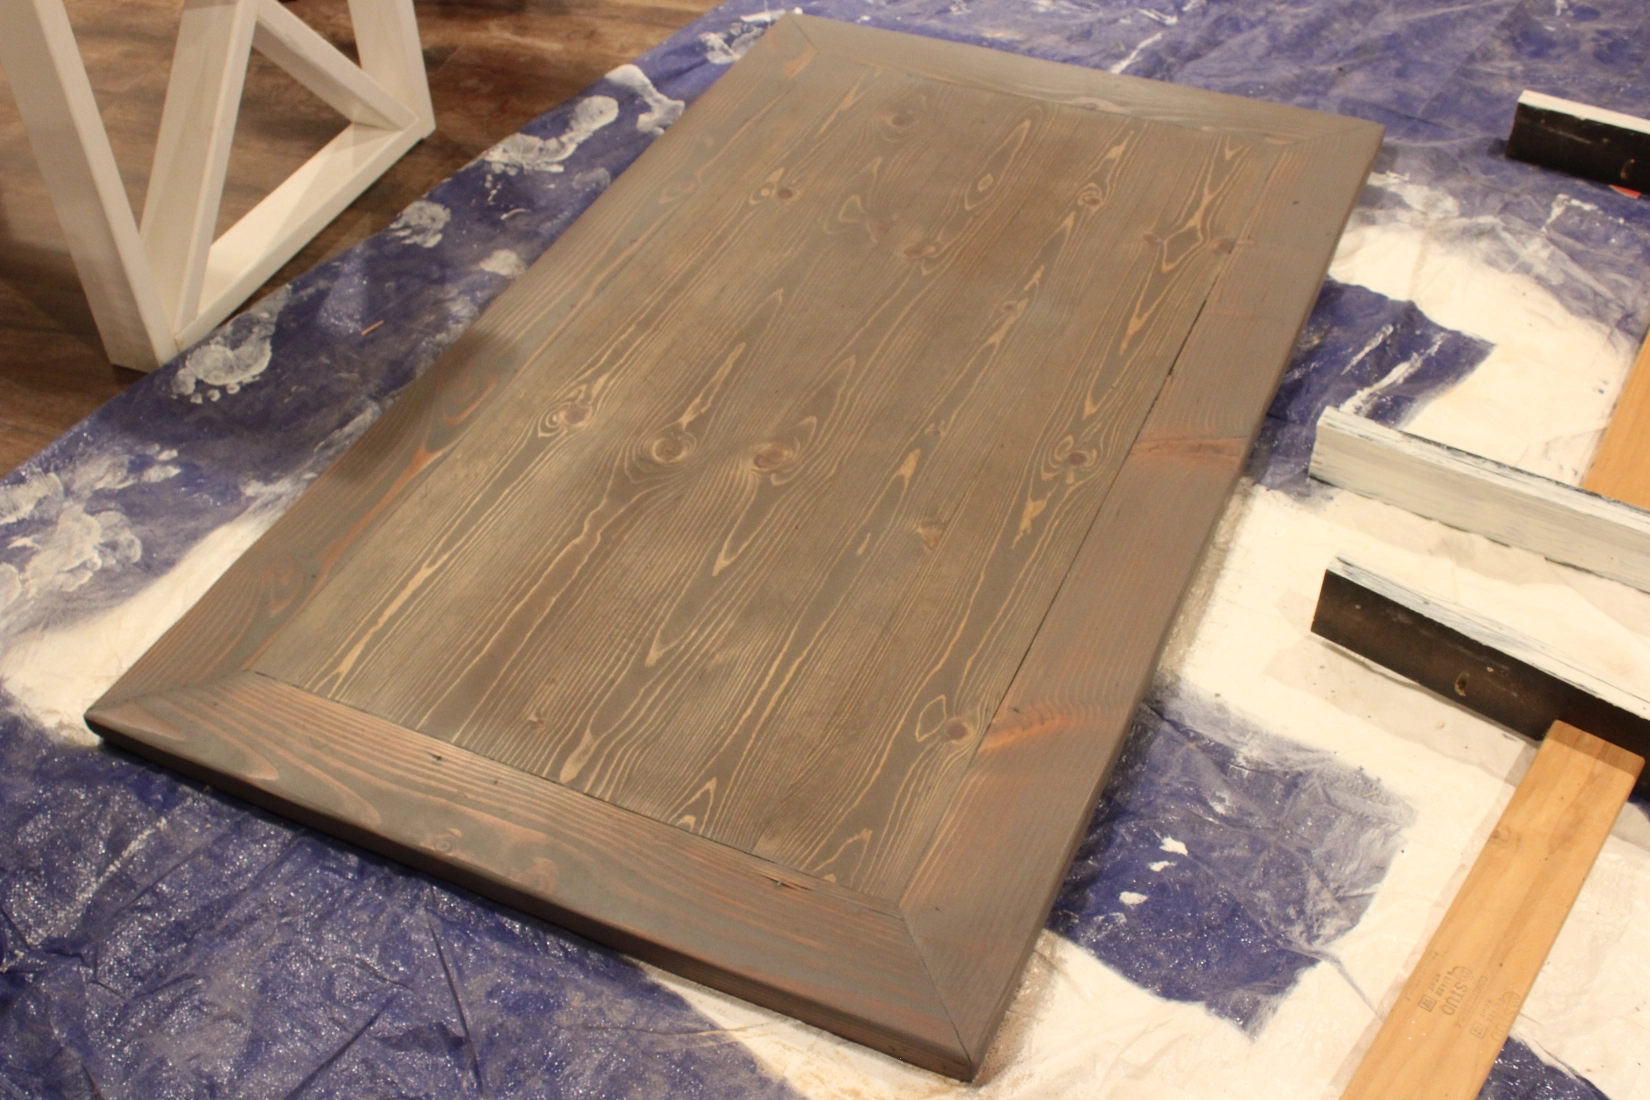
At this point I flipped my tabletop over and sanded it down to the bare wood. If you’re using new wood you’ll still want to do this, although you won’t need to sand as much.
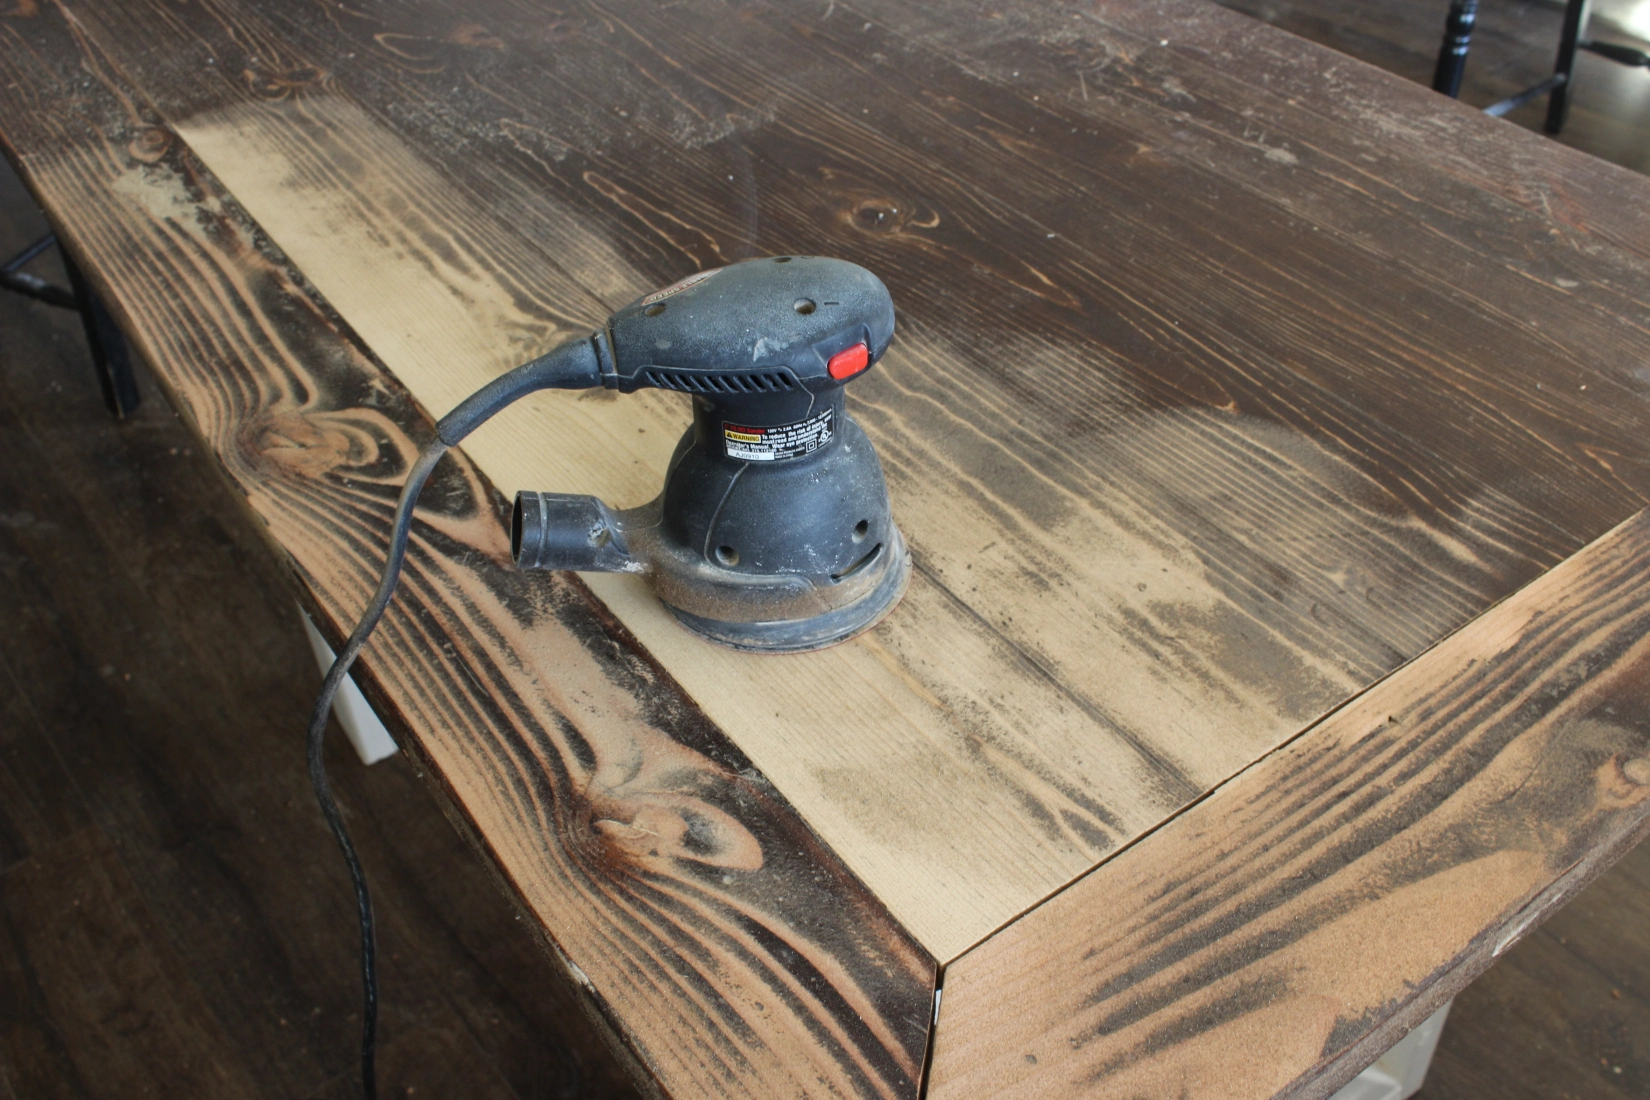
And then, add the stain. I’ll show you the method I used to paint/stain the table in another post when I makeover the kitchen chairs that go with the table.
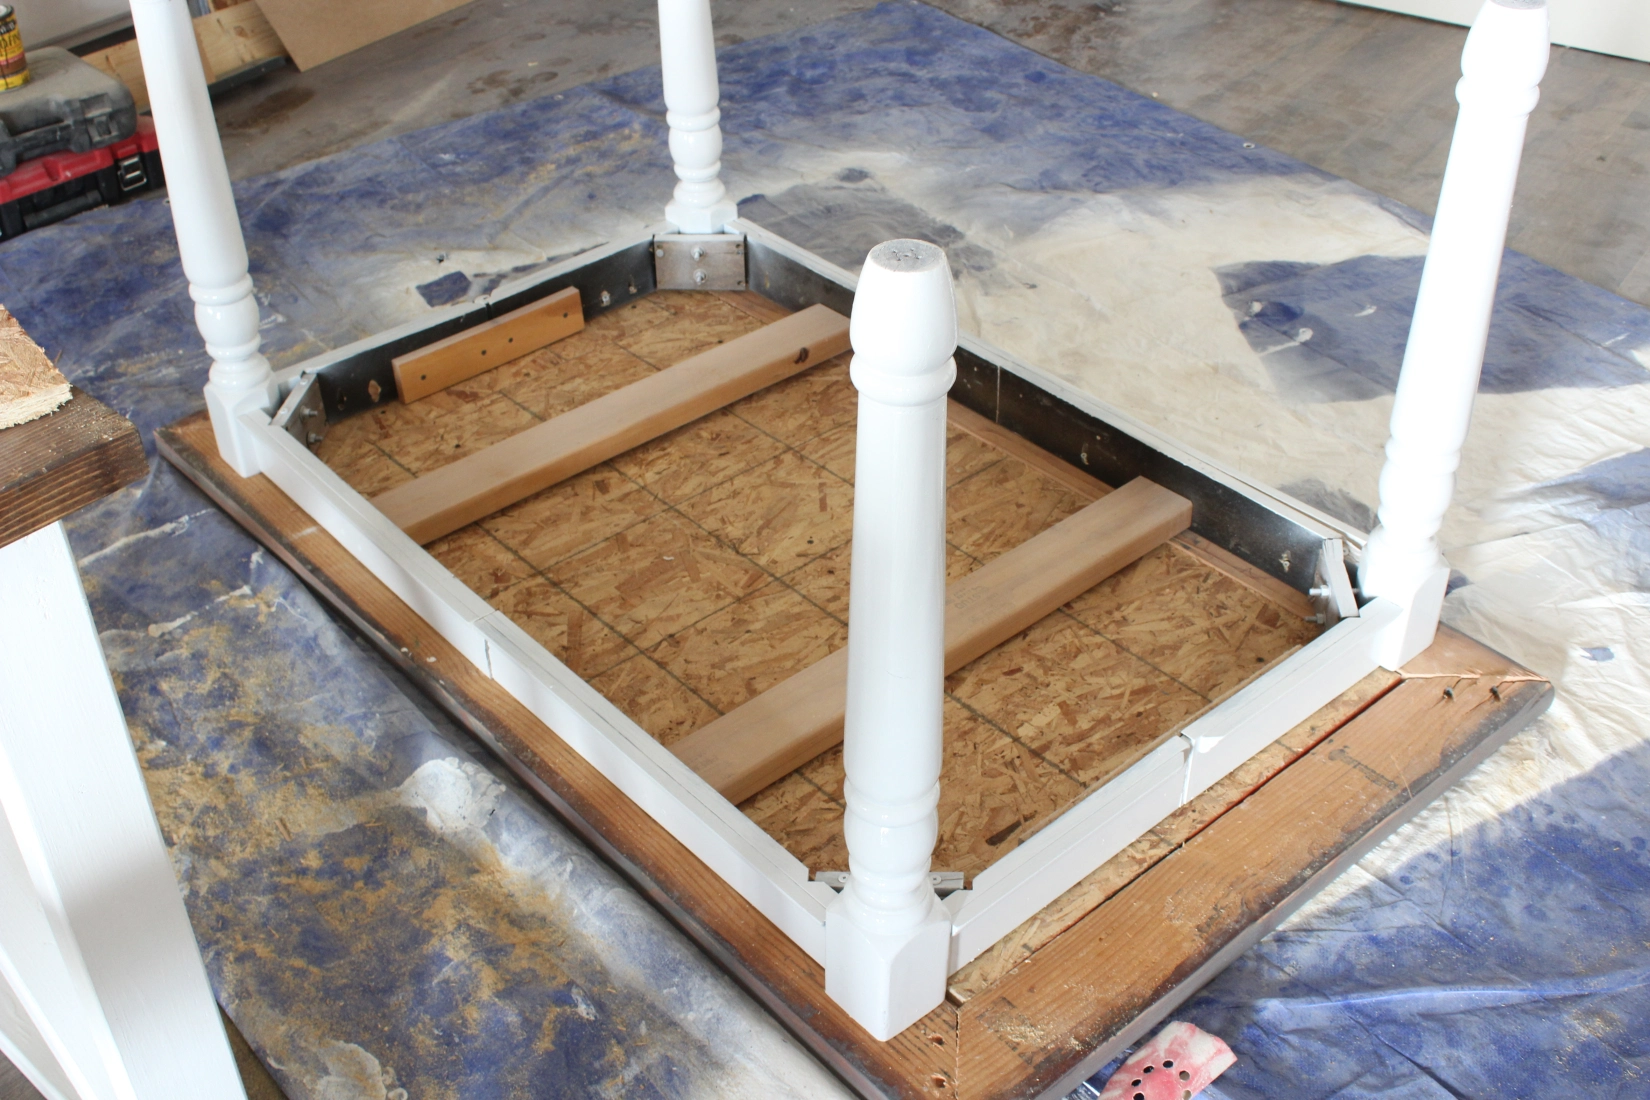
We are finally ready to attach! I used the same pocket holes that were already in the legs to attach the frame back onto the table top.
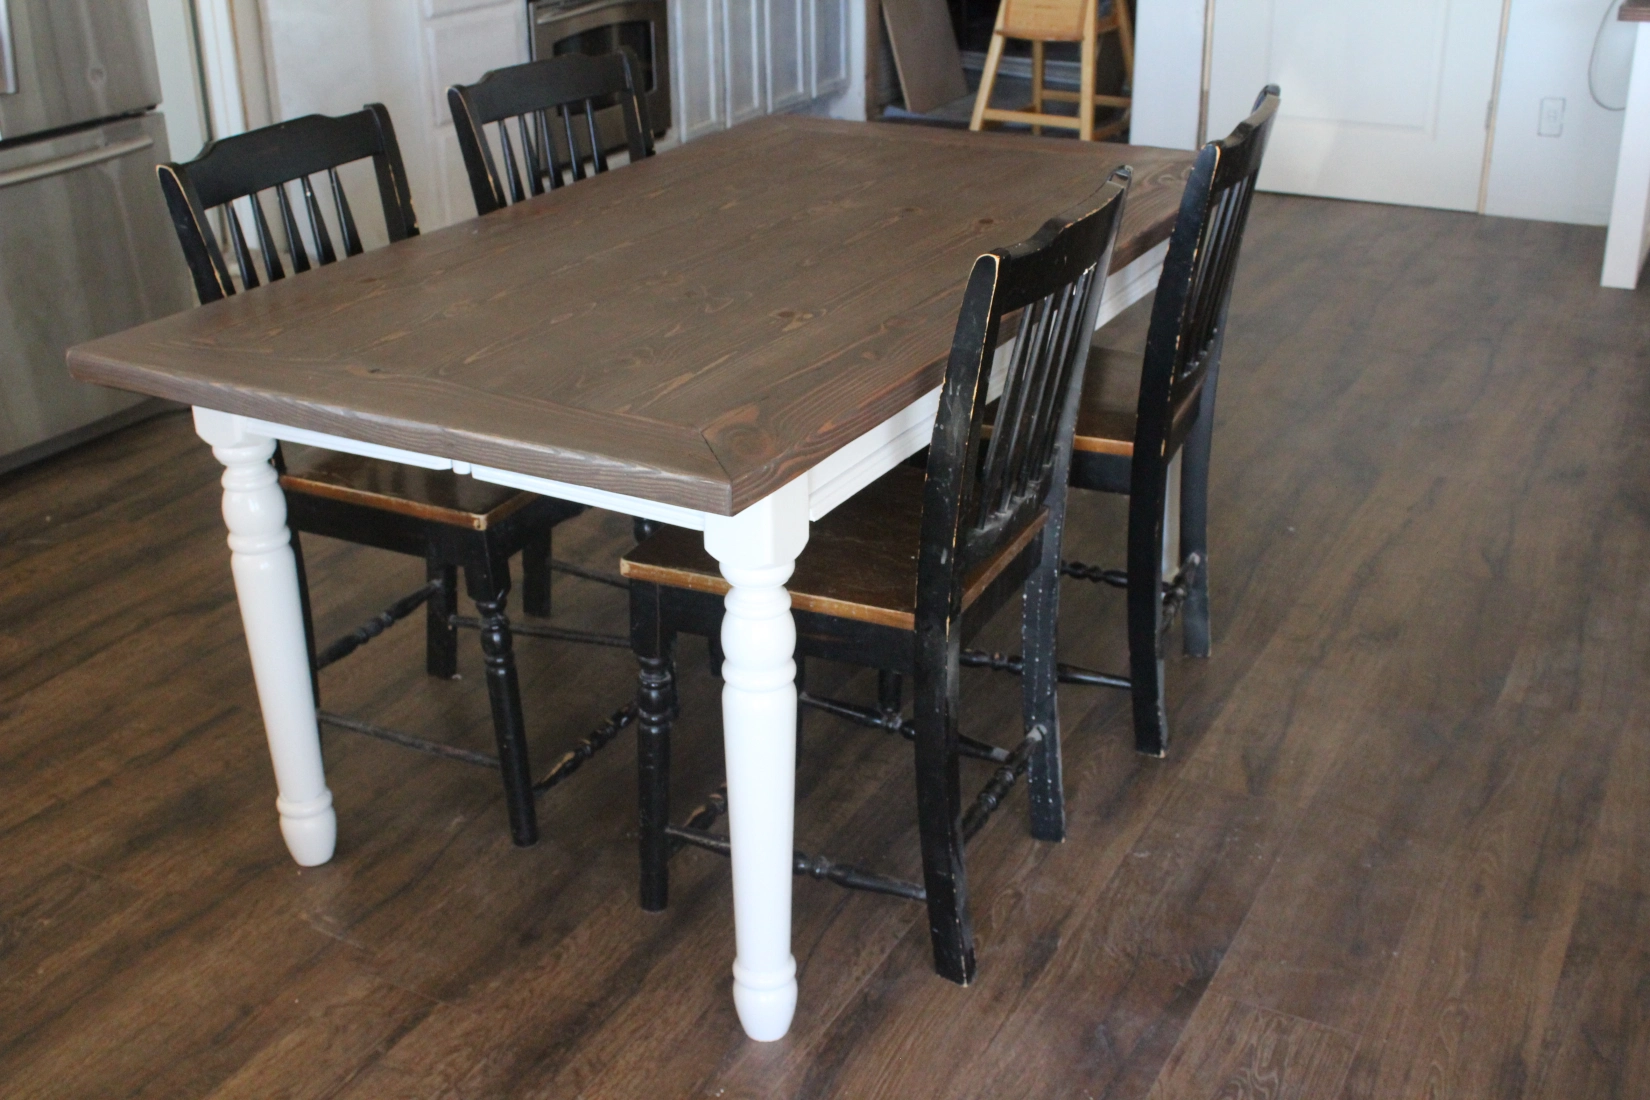
And there she is! Now just go right on ahead and check out how I refinished my kitchen chairs!
Tell me what you think!! I’d love to hear your feedback. I’m also in need of some good ideas for centerpieces for my new table. Please comment if you can think of anything cute and practical! And cheap, of course.
Thanks for reading!
XOXO
~Crystel


