

Updated March 2, 2026
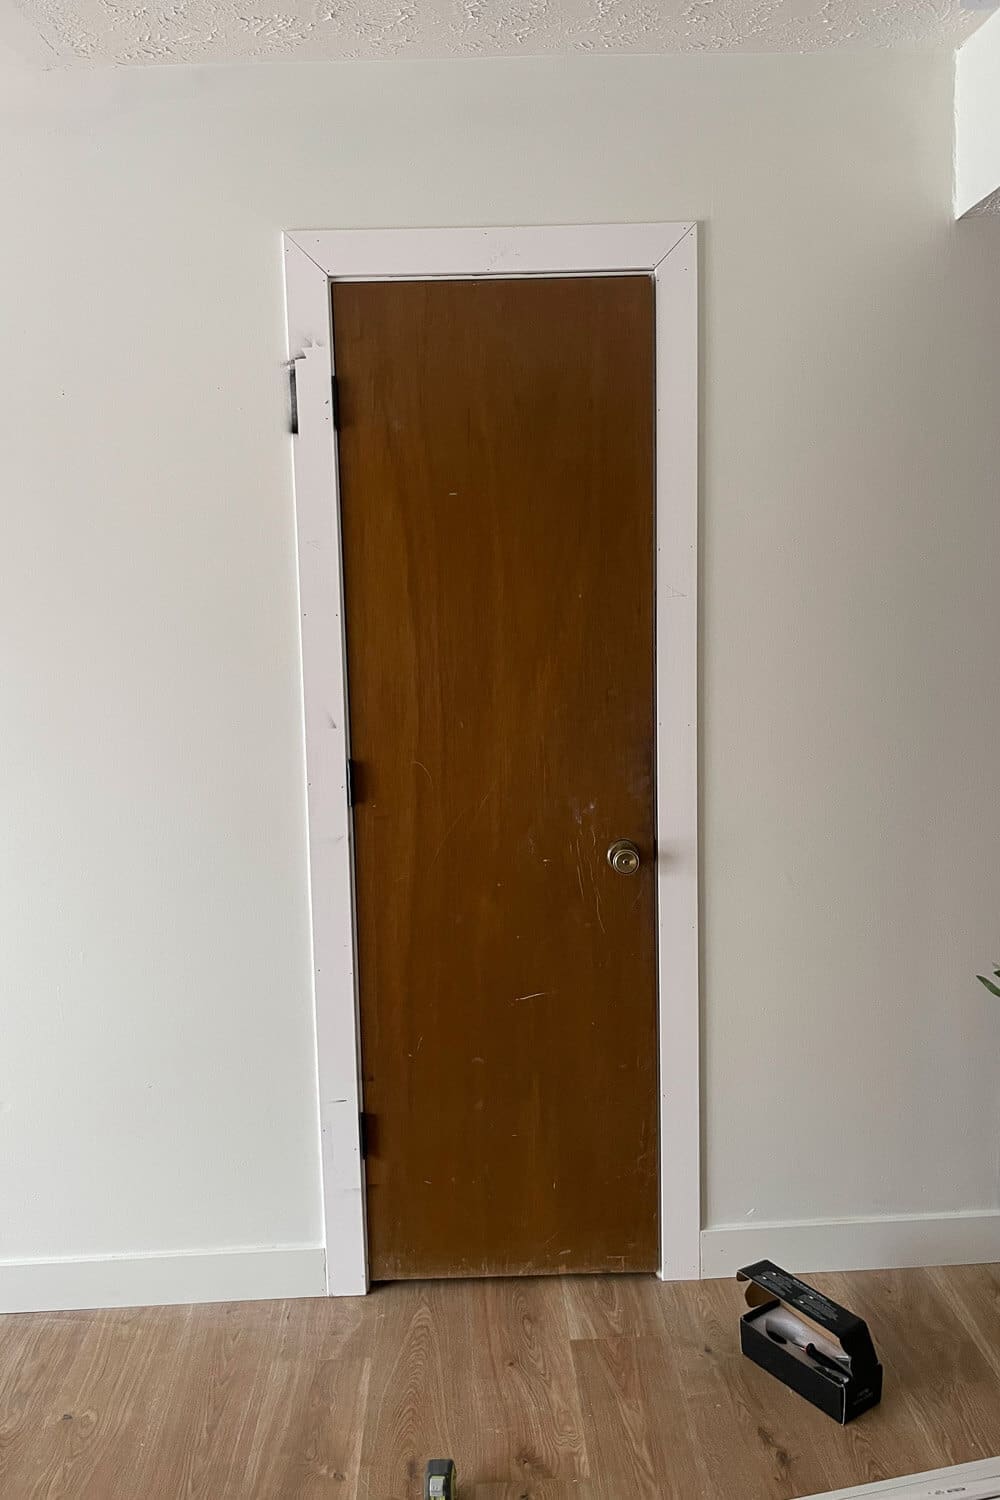
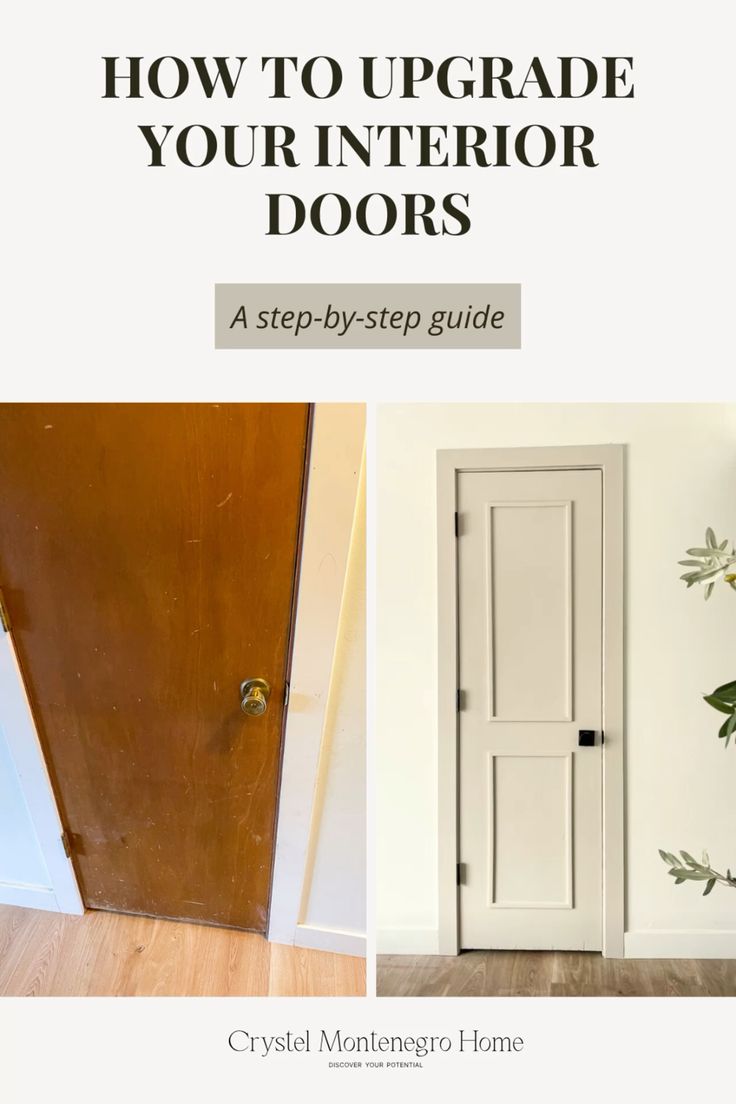
Have you ever looked at your doors and thought, “These belong in a time capsule, not my house”? Same. I had 1970s hollow core doors throughout my entire home, and I finally did something about it. This DIY door upgrade uses trim, paint, and a new doorknob to completely transform tired old doors – no door replacement required. If you want to upgrade interior doors on a budget, you’re going to love how simple (and satisfying) this is.
If you’re tackling a bigger space refresh at the same time, check out how I turned my dysfunctional coat closet into something actually beautiful – the door makeover and the closet overhaul happened in the same project.
Watch the Full DIY Door Upgrade
Table of Contents
- Watch the Full DIY Door Upgrade
- Supply and Product Links for This Interior Door Upgrade
- Step 1: Prep Your Old Interior Door for the Upgrade
- Step 2: Spray Paint the Hinges to Upgrade Interior Doors on a Budget
- Step 3: Prime the Door for the DIY Door Makeover
- Step 4: Measure and Mark the Trim Placement for Your DIY Door Upgrade
- Step 5: Cut and Nail the Trim for the DIY Door Upgrade
- Step 6: Caulk the Trim Seams on Your Interior Door Makeover
- Step 7: Fill Nail Holes and Paint Your Upgraded Interior Door
- 📌 Save This Interior Door Upgrade for Later
- More DIY Door and Home Upgrade Projects
- FAQs About How to Upgrade Interior Doors
Supply and Product Links for This Interior Door Upgrade
Lumber
- Trim – Available at Lowe’s; used to create the decorative framed panels on the door
Tools
- Trim Puller – For prying off mirrors or existing trim without wrecking the door
- Brad Nailer – Nails lightweight trim to the door without splitting it
- Tape Measure – For marking trim placement on the door
- Miter Shears – Cuts trim at 45-degree angles for clean mitered corners
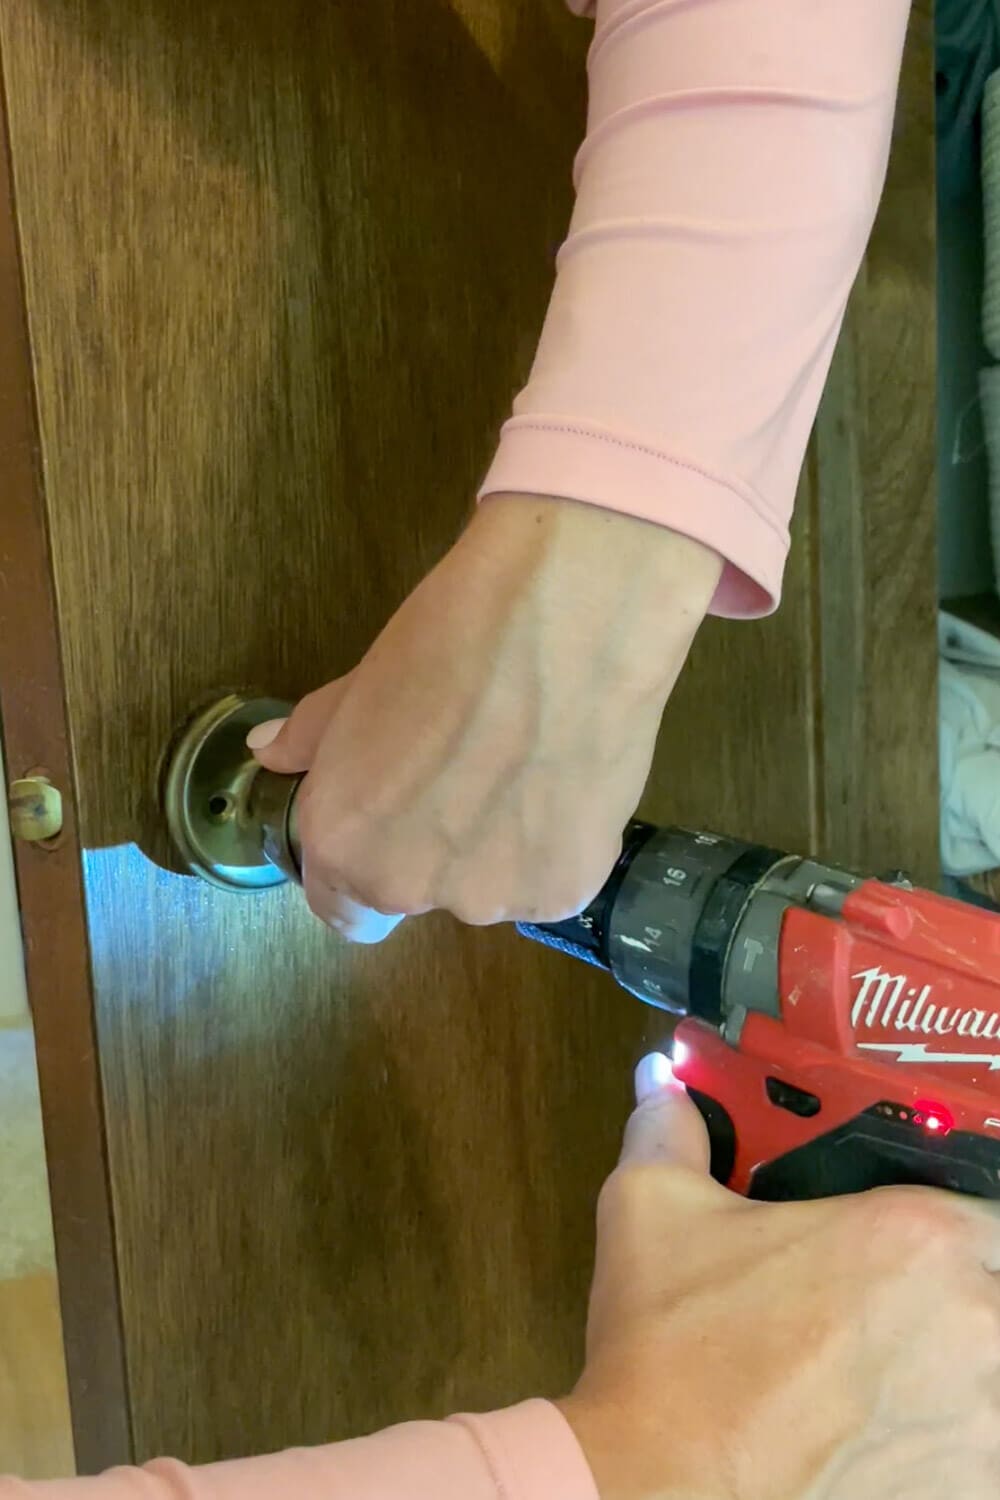
- Milwaukee Drill Combo Set – For removing and installing the doorknob and latch mechanism
- Small Level – Ensures trim pieces are straight before fully nailing
- Small Paintbrush – For cutting in around hinges, trim edges, and the door frame
- Mini Paint Roller – Applies primer and paint to the flat door surface with a smooth finish
- Caulking Gun – For applying caulk neatly along the trim seams
Supplies
- Brad Nails 5/8″ – Short nails sized right for lightweight trim on hollow core doors
- Painters Tape – Masks hinges before spray painting and supports mirrors during removal
- Black Rust-Oleum Satin Paint and Primer in One – Used to spray paint hinges from gold to black
- BIN Ultimate White Primer / Stain Blocker – Primes the door and frame before painting
- Caulk – Seals the seams between trim and door for a seamless built-in look
- Dap DryDex Spackling – Fills brad nail holes with no sanding required; lazy DIYer approved
- Wood Filler – More durable alternative to spackling for nail holes; requires drying and sanding
- Bondo – Two-part filler for a permanent, hard finish on higher-quality doors
- Door Knob – Fresh hardware makes a huge difference in the final look
- Paint: Accessible Beige by Sherwin Williams – warm neutral that works beautifully with black hardware
Step 1: Prep Your Old Interior Door for the Upgrade
Before anything else, you need a clean, smooth door surface to work with. Here’s how to prep depending on what you’re starting with.
If you’re starting with a normal door:
This part is easy. Remove the doorknob and latch mechanism, then wipe down both sides of the door with a damp cloth to remove any dust or grease. If the surface feels rough or has any texture, give it a light pass with 150-grit sandpaper on your Handheld Electric Sander, then wipe it down again. That’s it -you’re ready to prime.
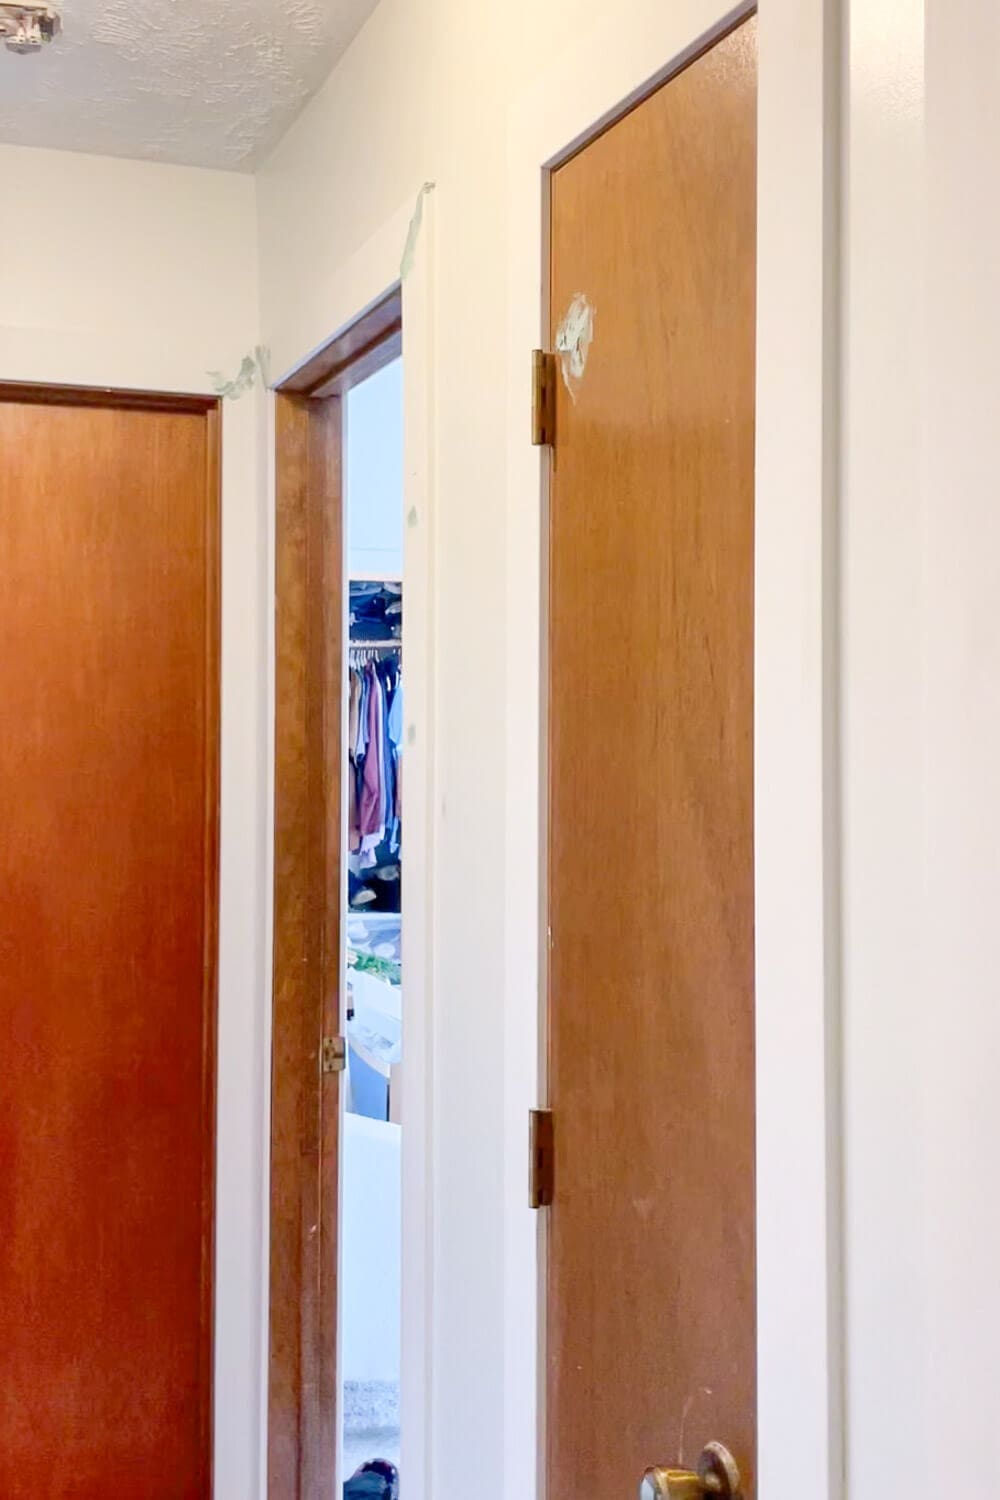
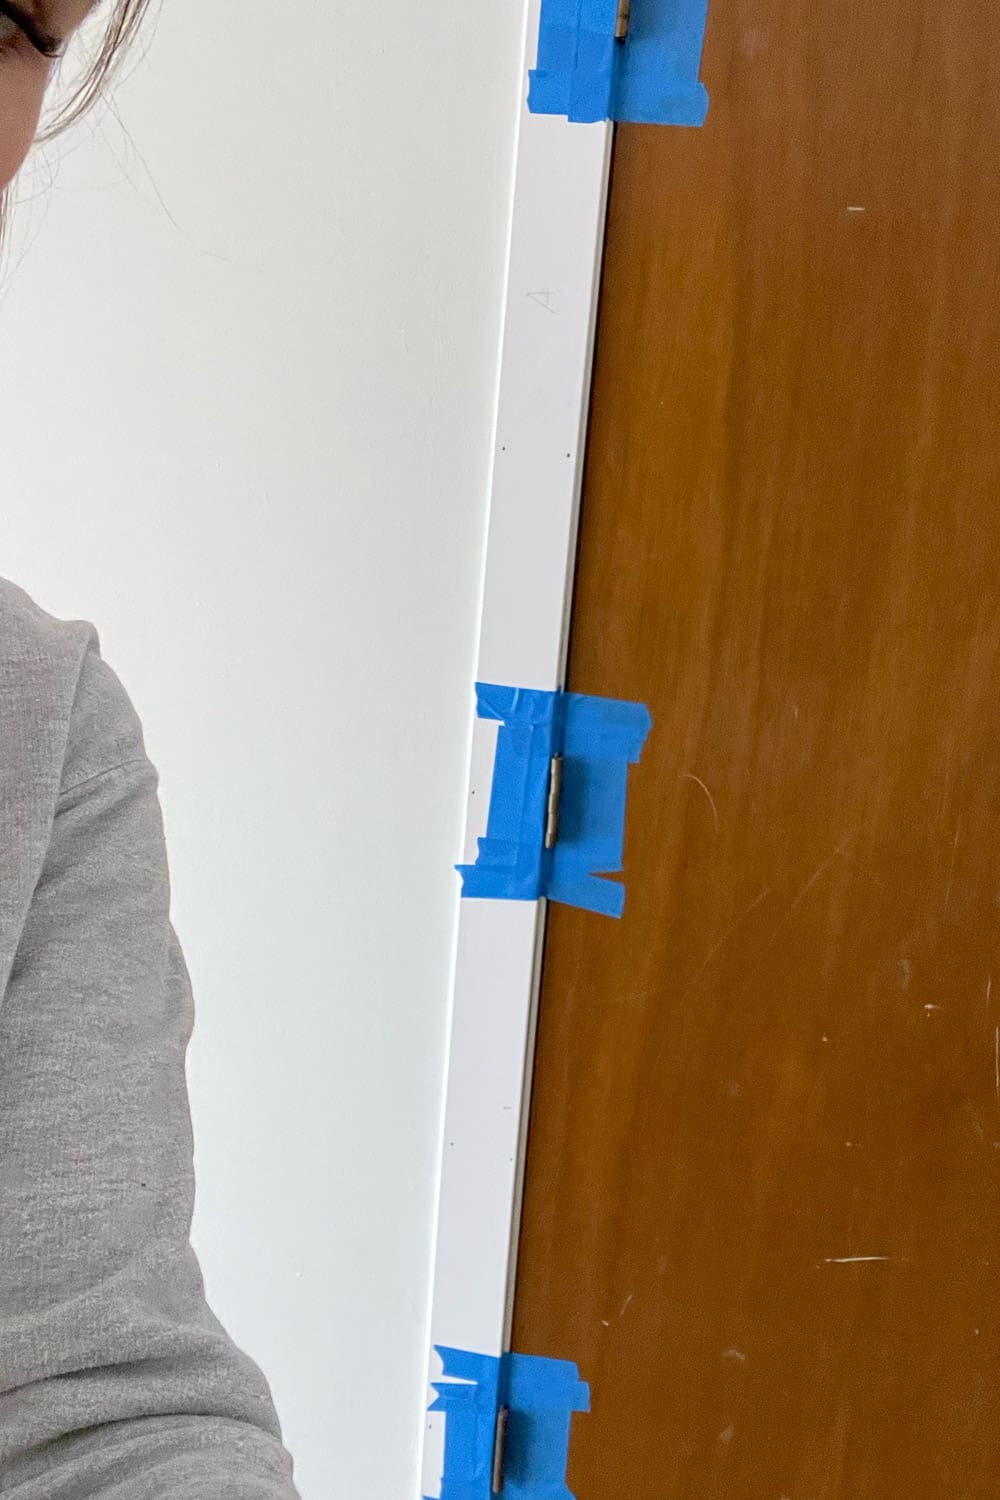
If your door has a mirror on it (like mine did):
Here’s where it gets fun. My closet door had a full mirror glued to the inside, which had to go. One attempt with the trim puller made it clear this wasn’t going to be graceful. Here’s what worked:
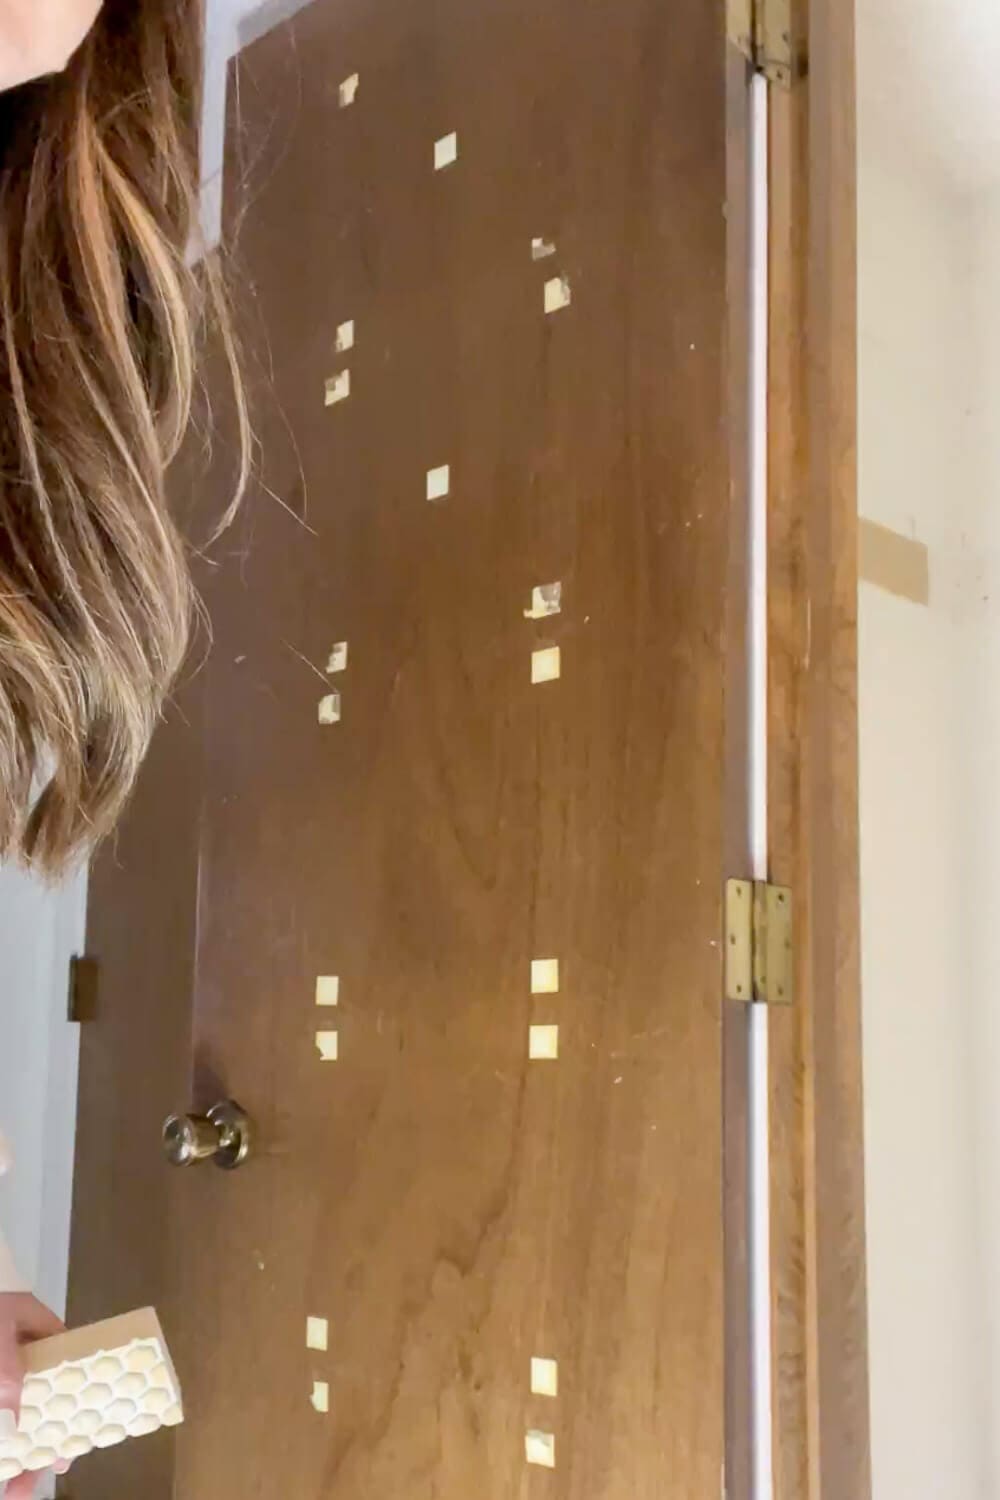
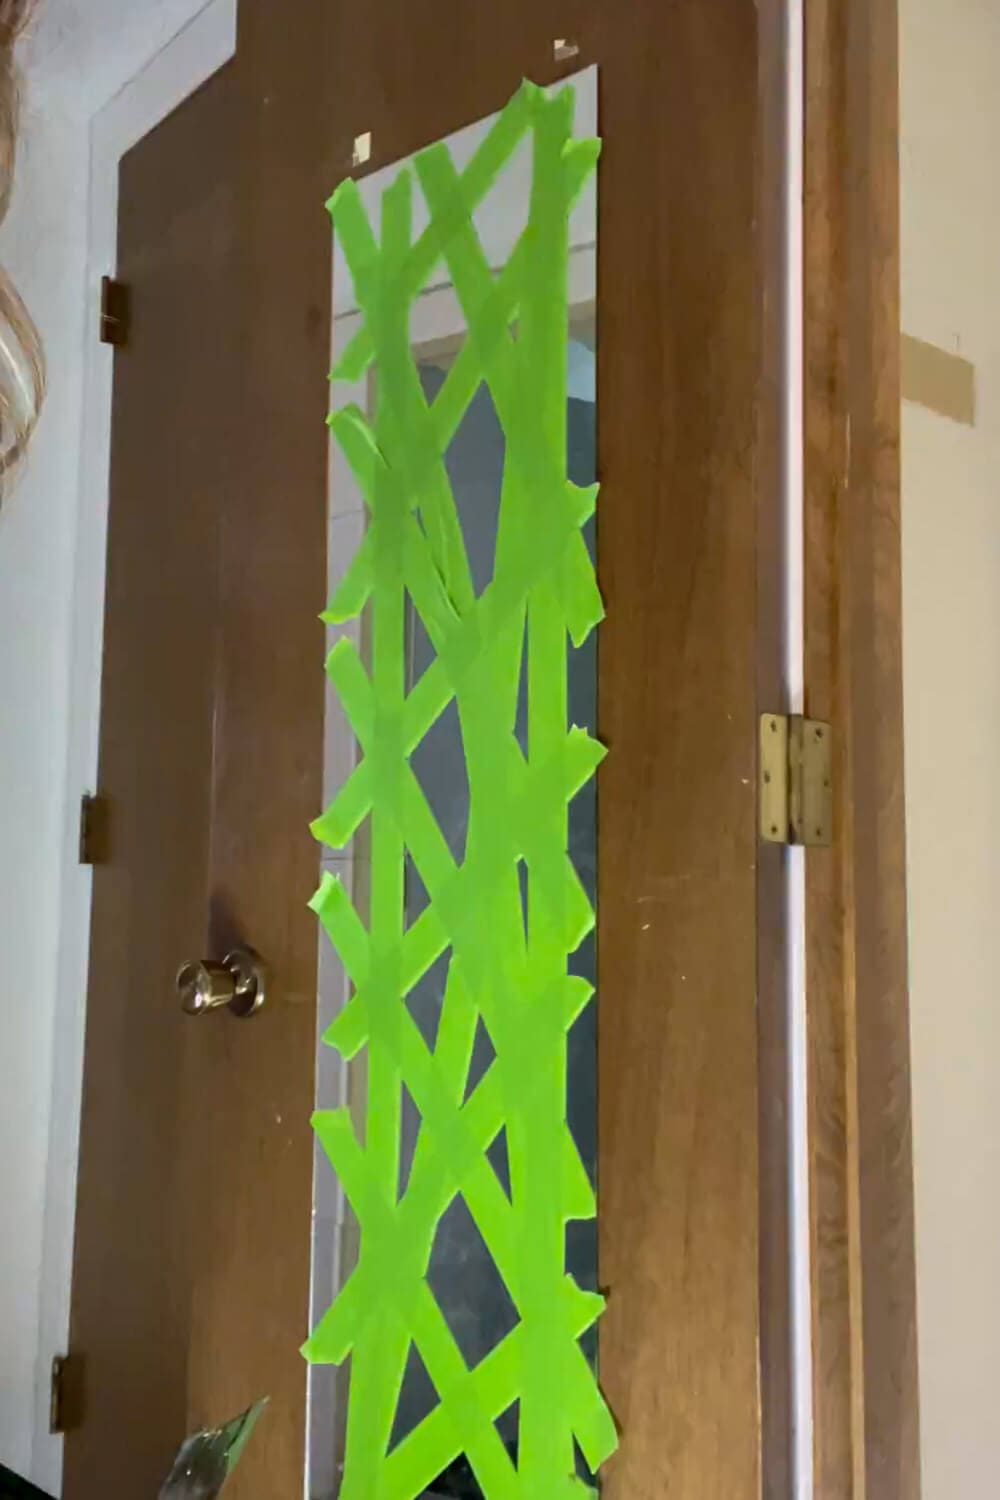
- Tape the mirror heavily with painters tape in multiple directions so if it breaks, the tape catches the pieces.
- Tap the trim puller slowly and carefully behind the mirror using a hammer to separate it from the door. (Mine had 5 adhesive squares per section – fun surprise.)
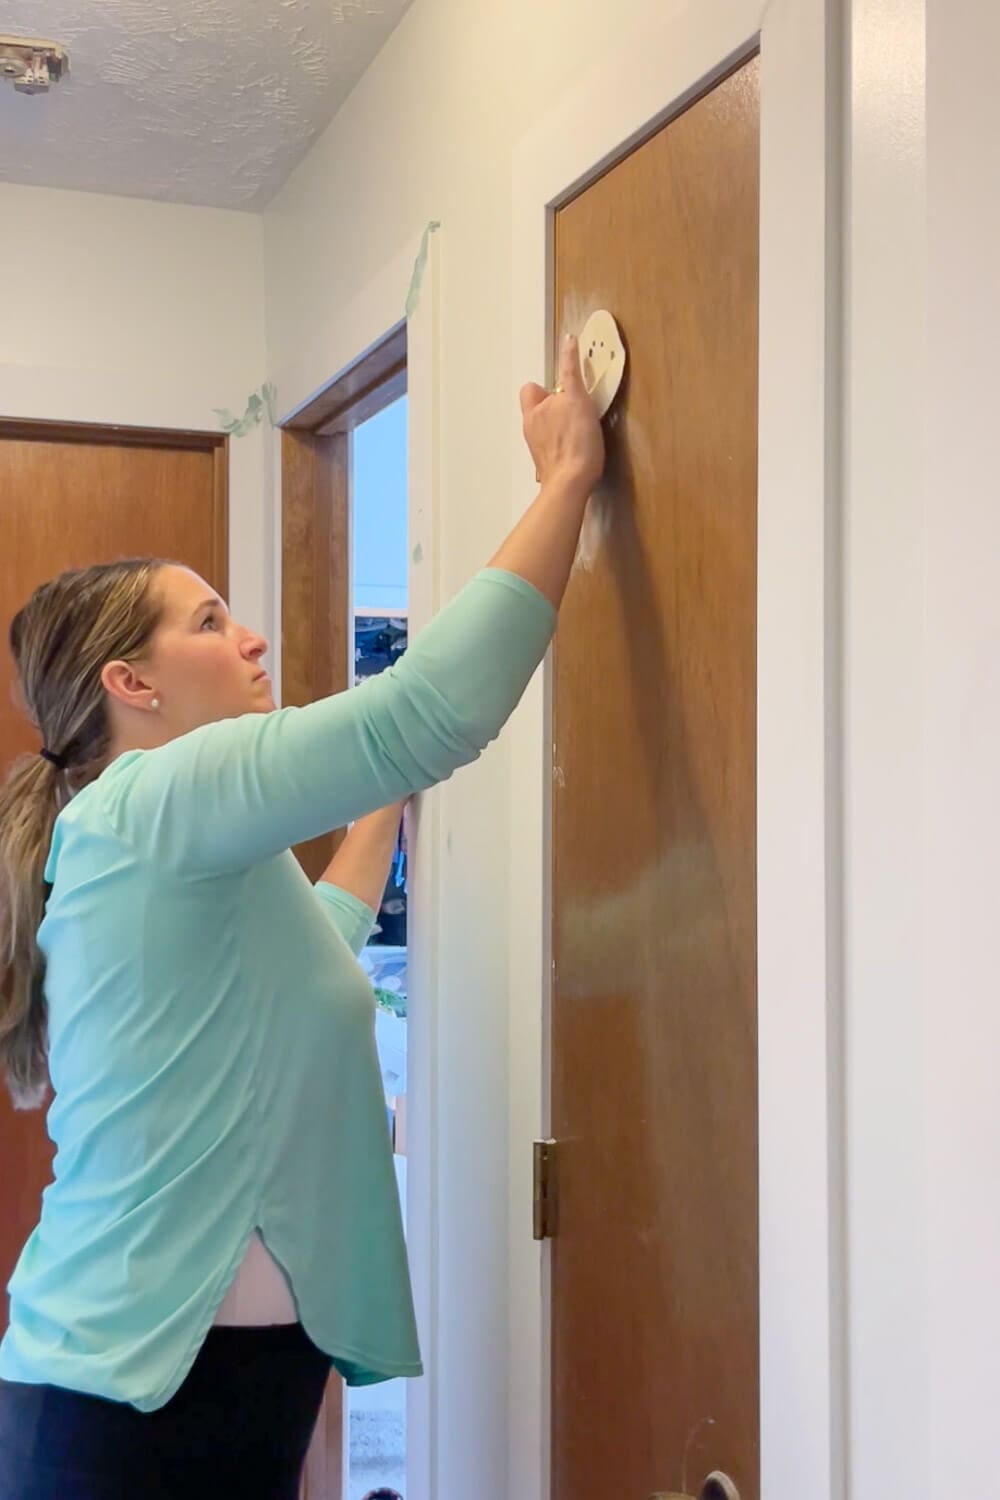
- Sand off the adhesive residue with a handheld electric sander with fresh 150-grit sandpaper. I tried sanding by hand and lemon essential oil first. The sander won.
- Wipe down both sides of the door with a damp cloth to remove sanding dust.
- Remove the doorknob and latch mechanism.

⚠️ Important: Tape the mirror generously before prying. Even with tape, mine still broke a little. Better safe than a pile of mirror shards.
Step 2: Spray Paint the Hinges to Upgrade Interior Doors on a Budget
This step alone makes such a difference. All my hinges were builder-grade gold – and I painted them black in minutes. Seriously, this might be the easiest upgrade interior doors trick that exists.
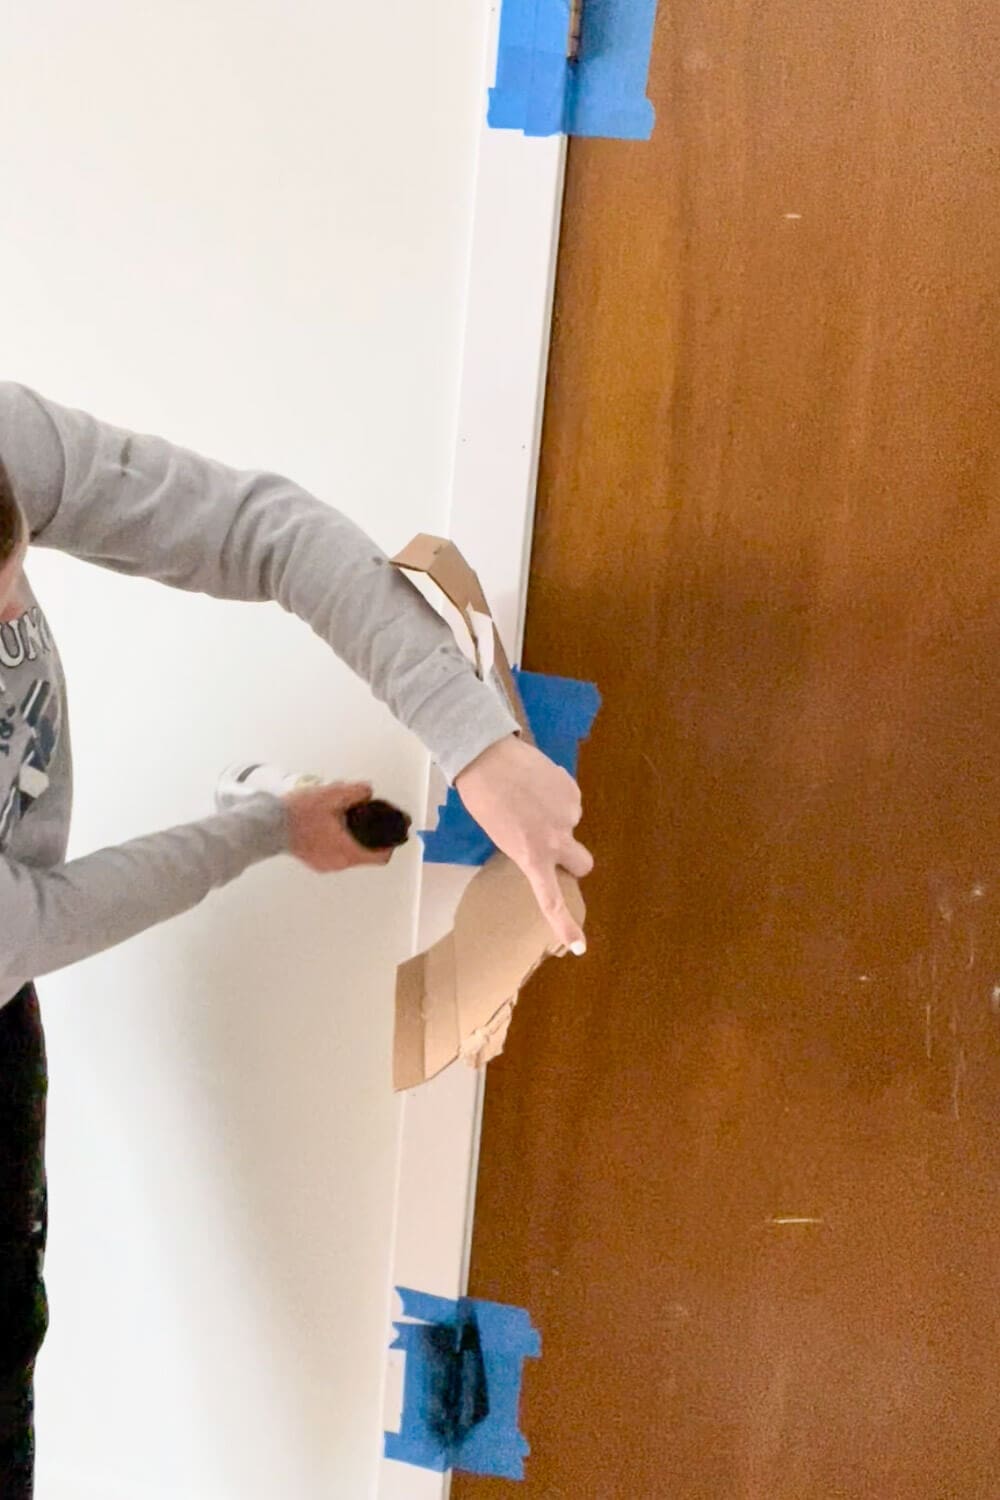
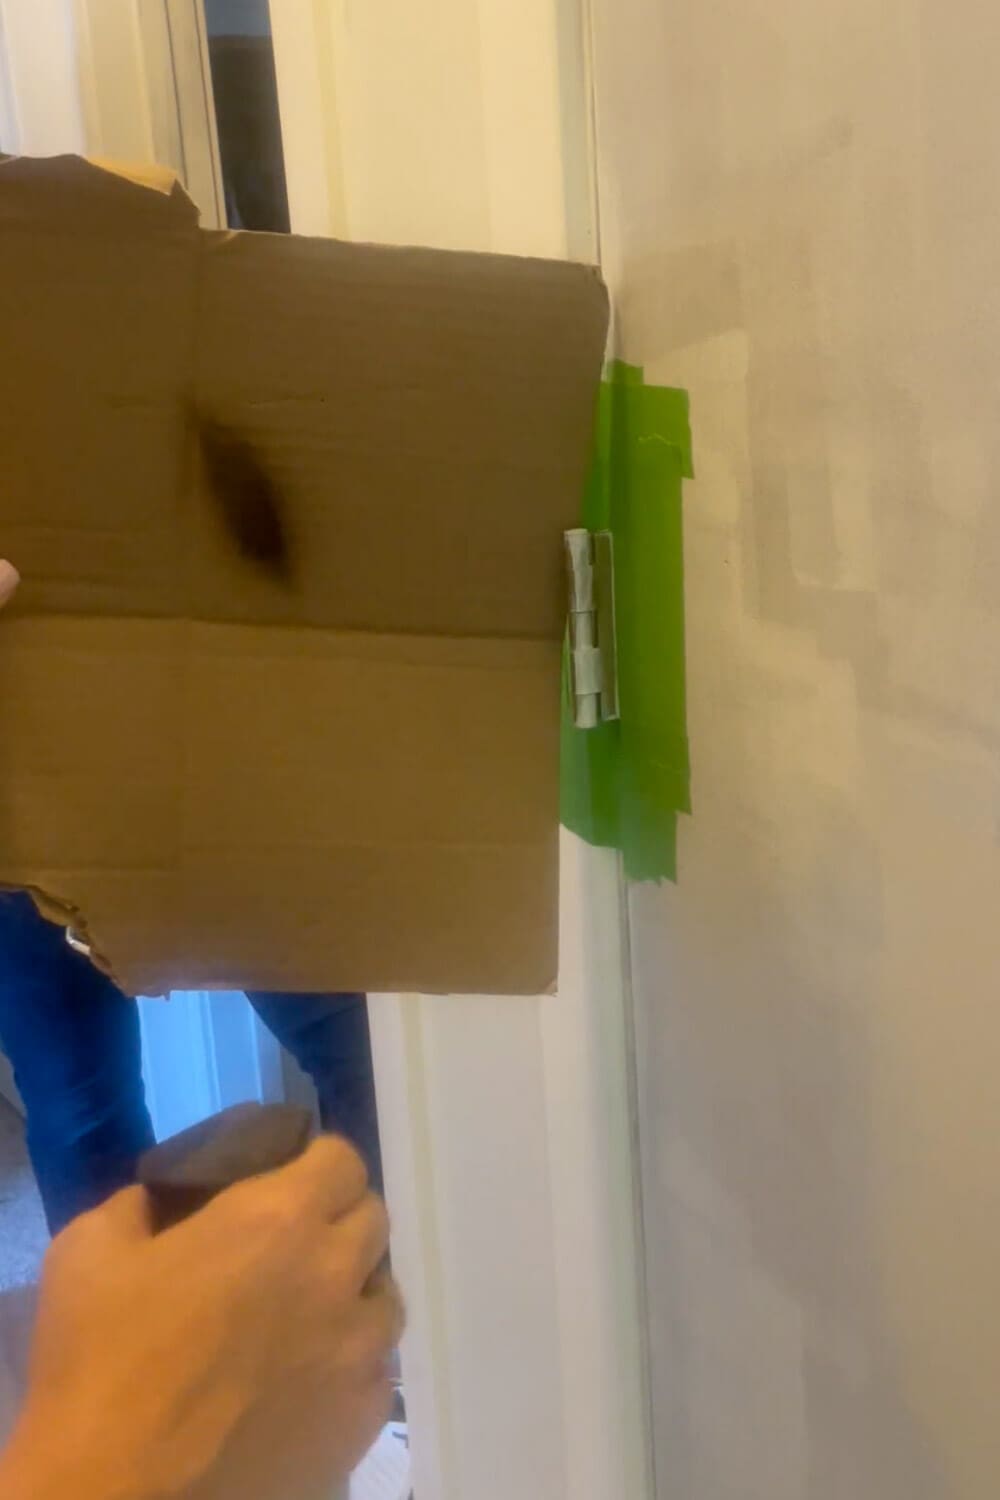
- Use painters tape to mask off the door around each hinge.
- Hold a small piece of cardboard behind the hinge as a paint shield.
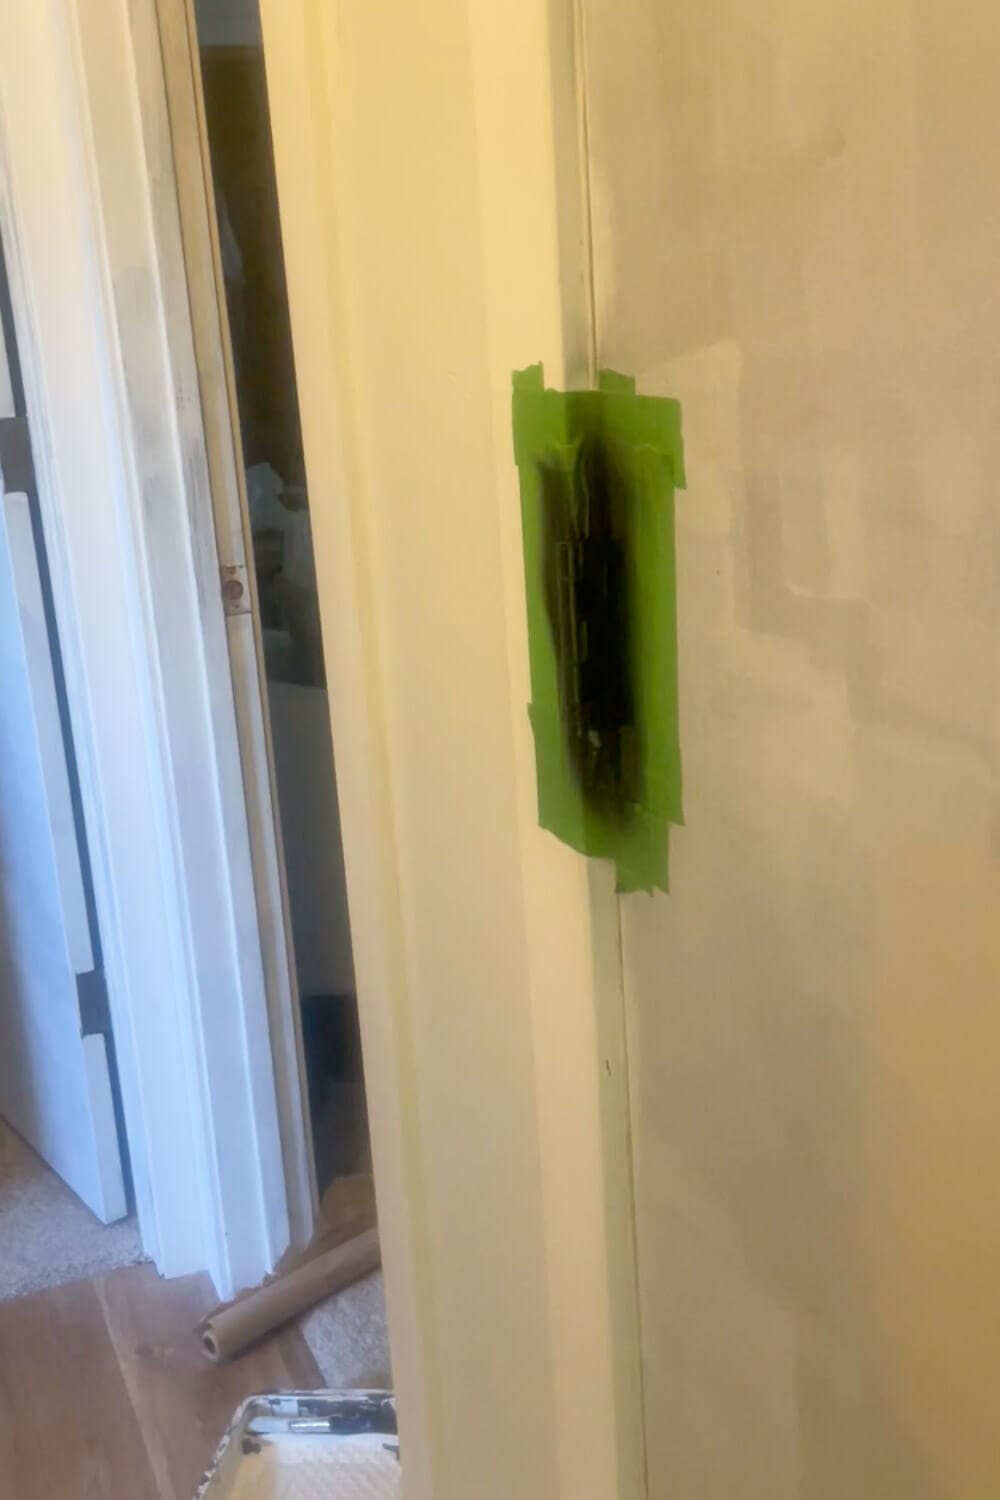
- Spray with black Rust-Oleum Satin Paint and Primer in One. Let dry fully before touching.
That’s it. New hinges in seconds. Chef’s kiss.
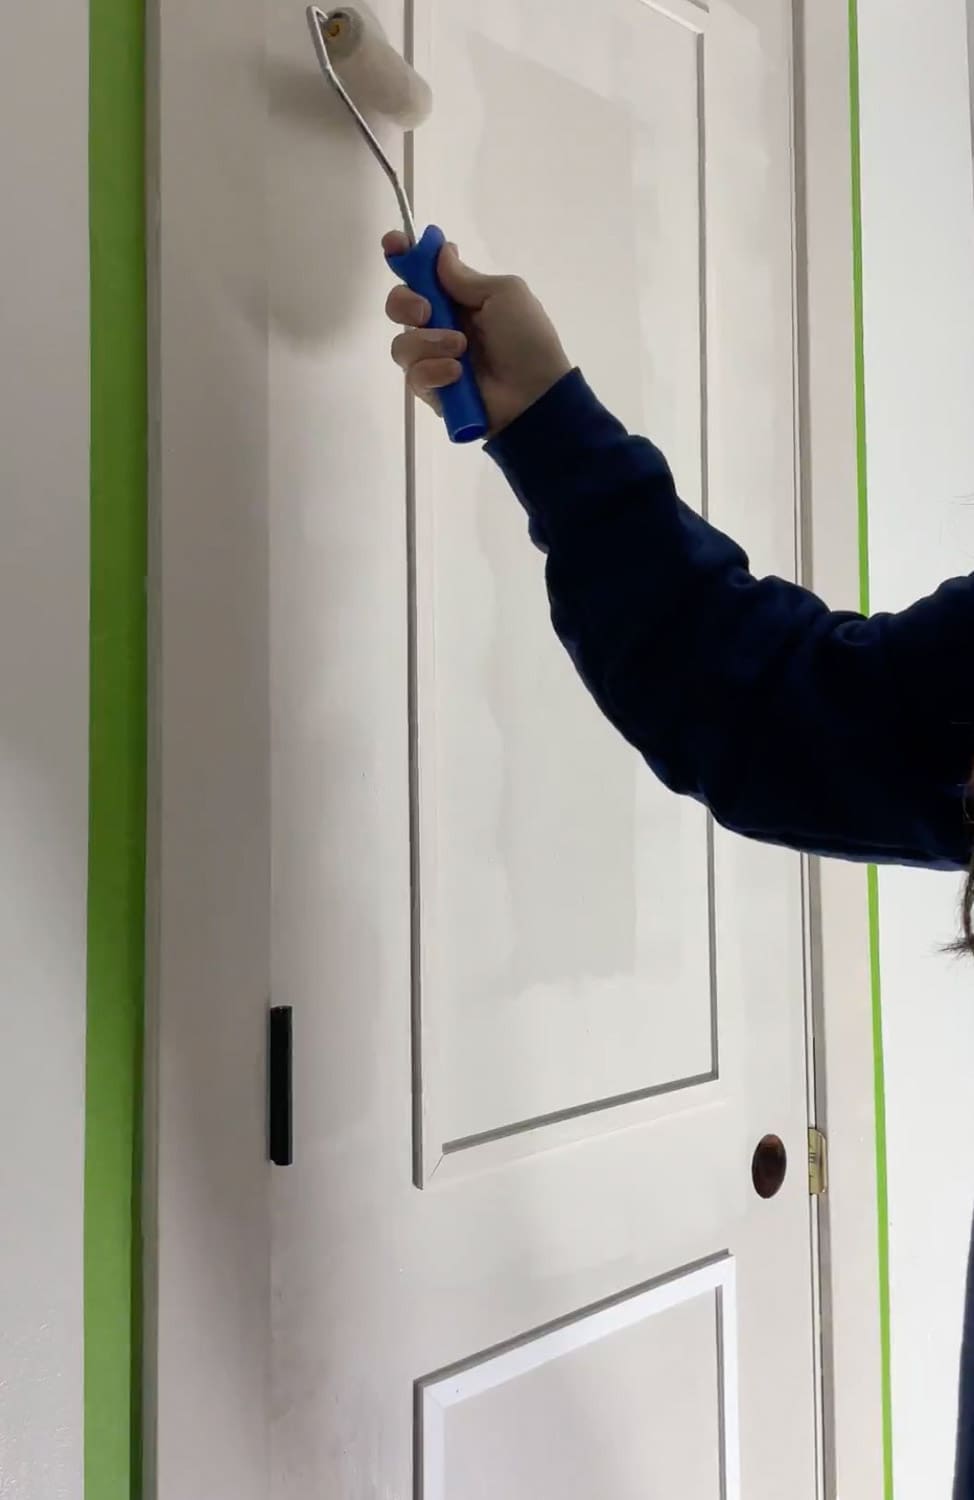
Step 3: Prime the Door for the DIY Door Makeover
Once the hinges are dry, prime the door and door frame before adding trim. This seals the surface and gives your paint something to grip.
- Use a small paintbrush for the hinge areas and frame creases.
- Use a mini paint roller for the flat door surface – it covers faster and leaves a smoother finish.
- Back-roll over any brush marks with the roller. Since this is just primer, it doesn’t have to be perfect.
- Let dry completely before moving to trim placement.
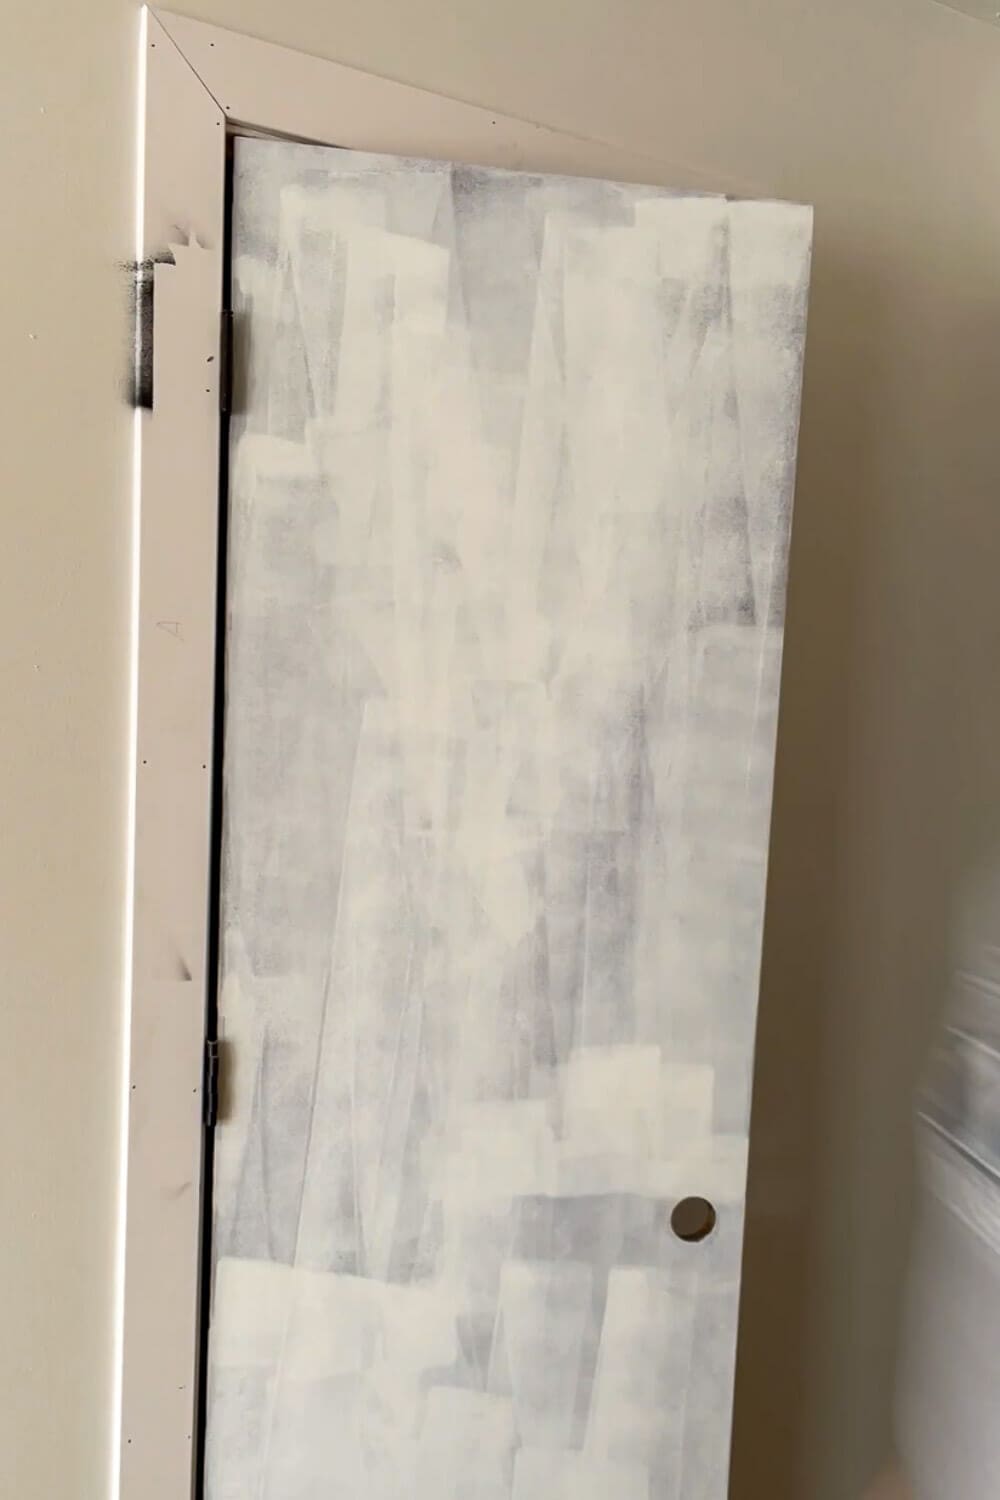
I used Zinnser Stain Blocker white primer. It covers old finishes really well and preps the surface nicely for the final paint coat.
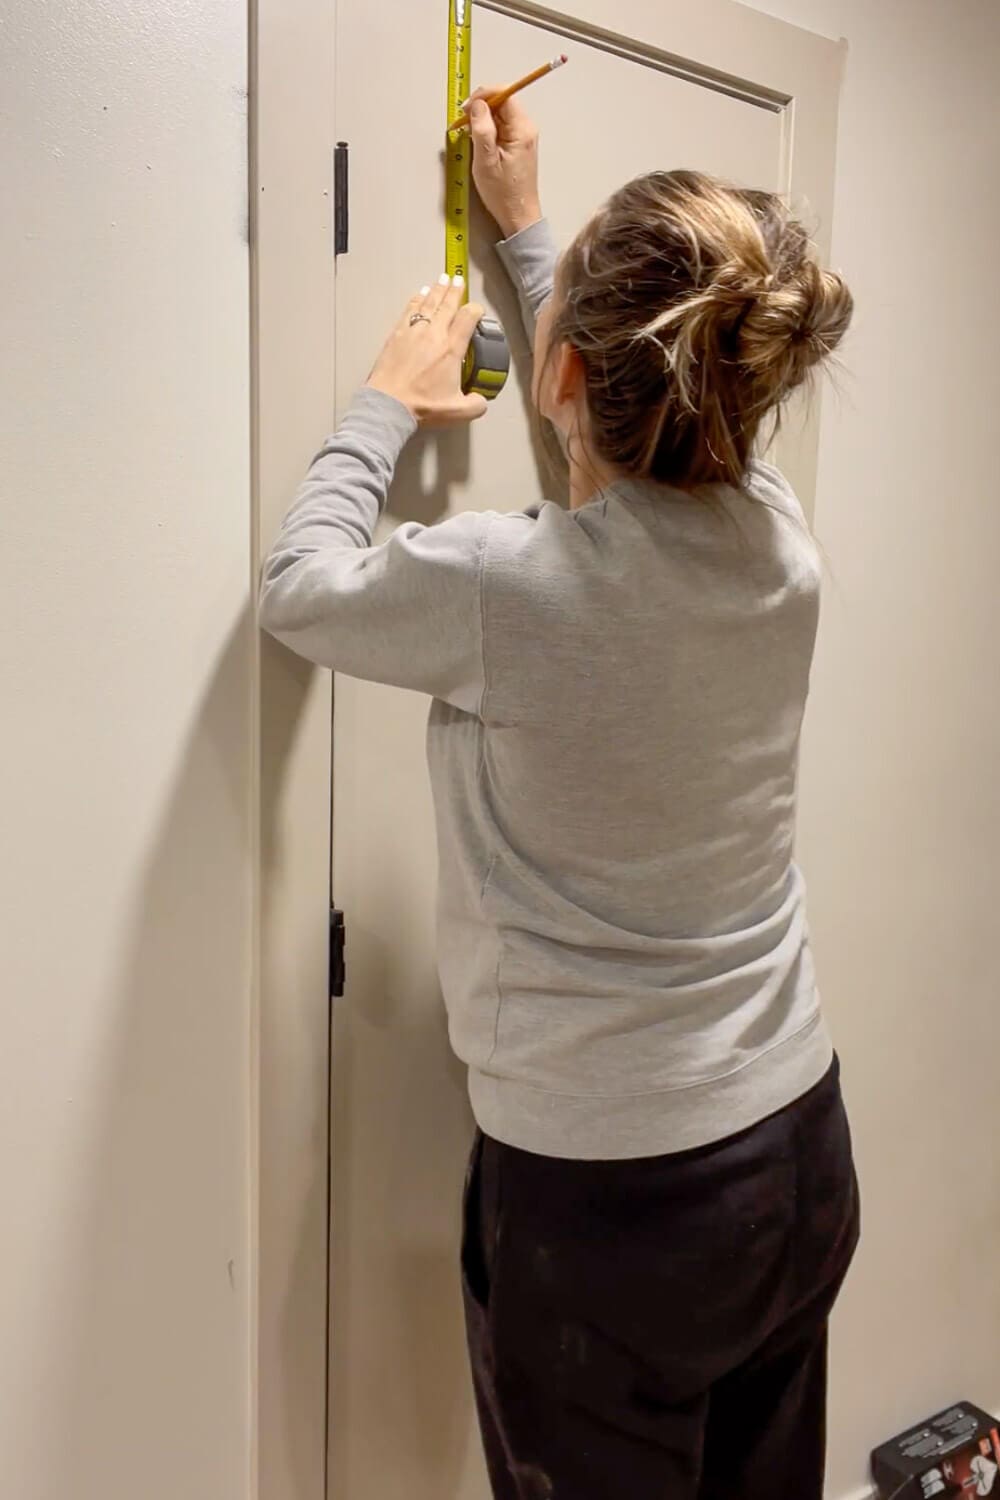
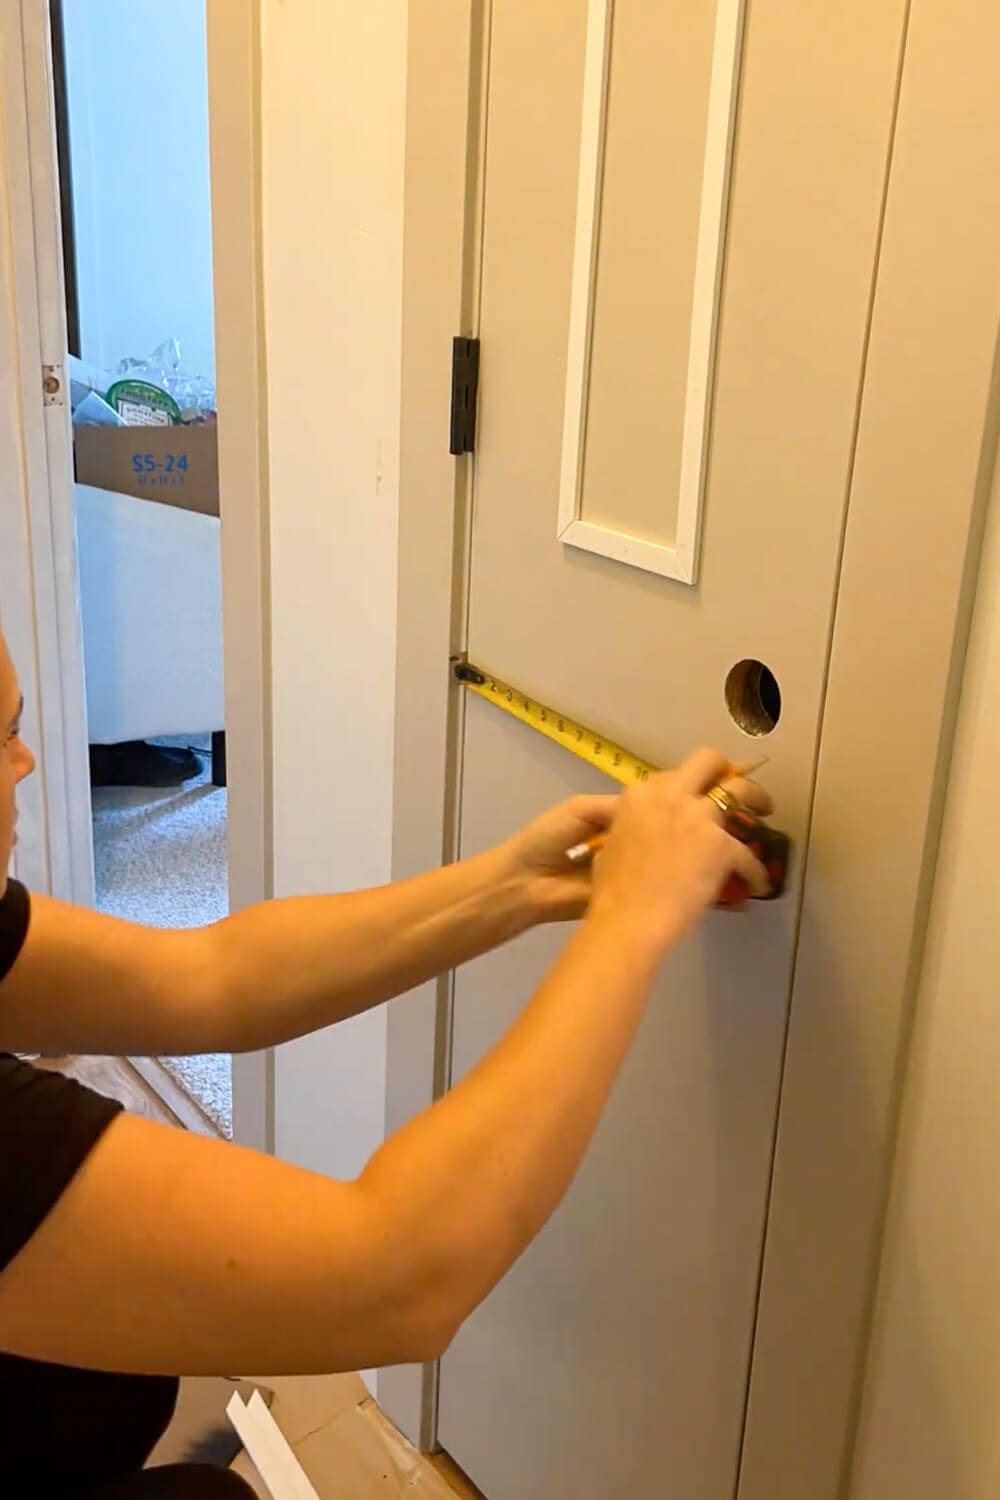
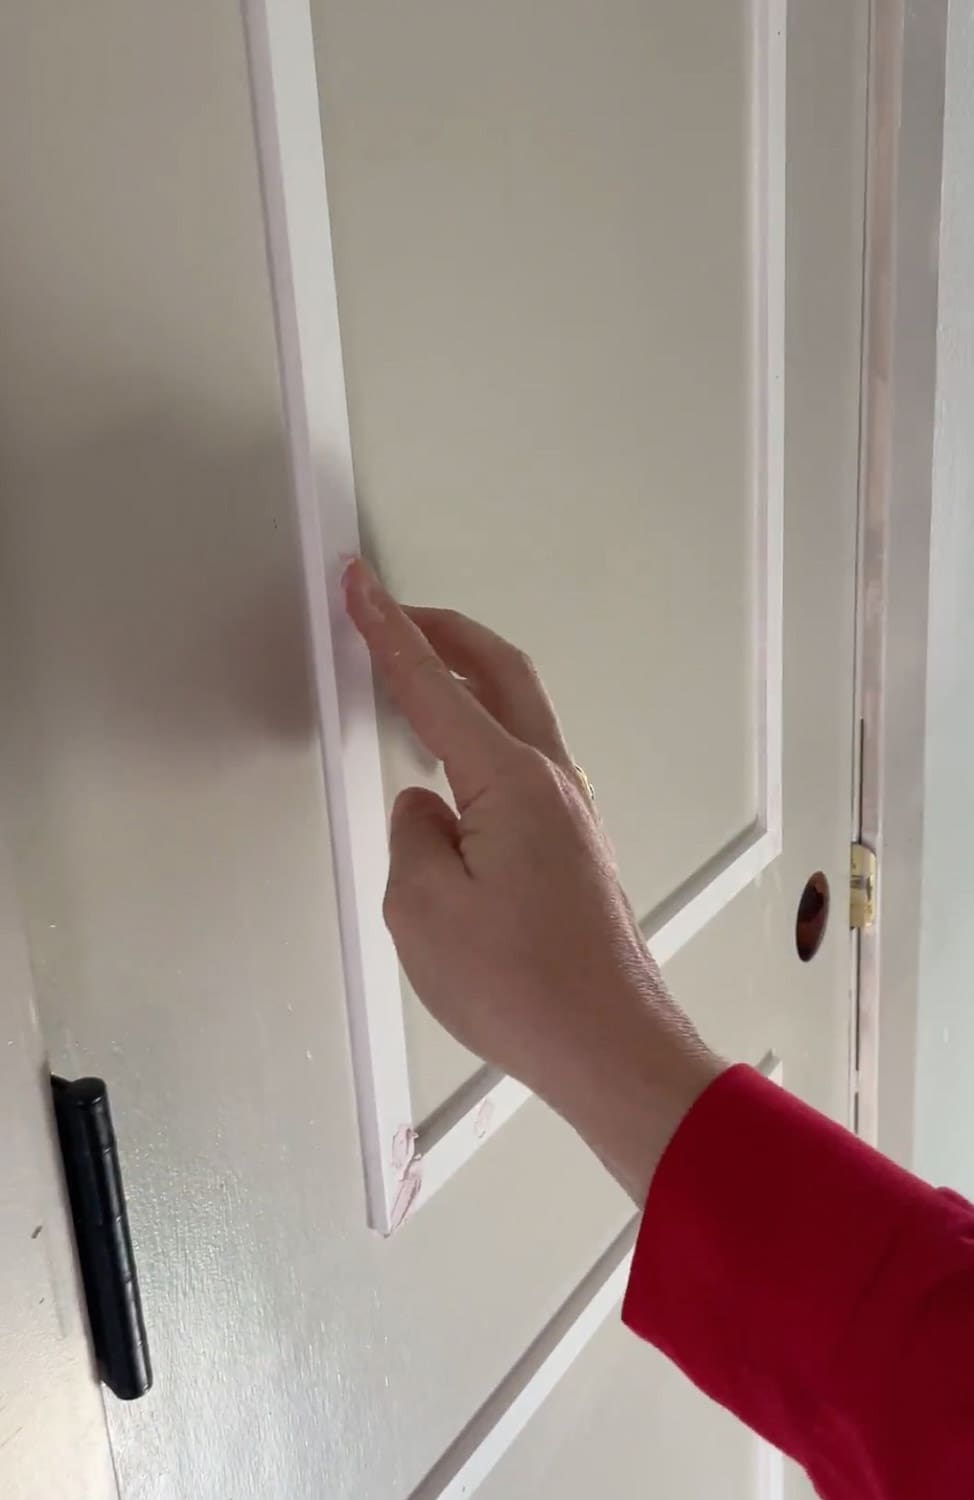
Step 4: Measure and Mark the Trim Placement for Your DIY Door Upgrade
With the primer dry, it’s time to figure out where your trim boxes go. There’s no wrong answer here – I went with two rectangular frames, one on the upper half of the door (larger) and one on the lower half (smaller). Here’s exactly how I mapped mine:
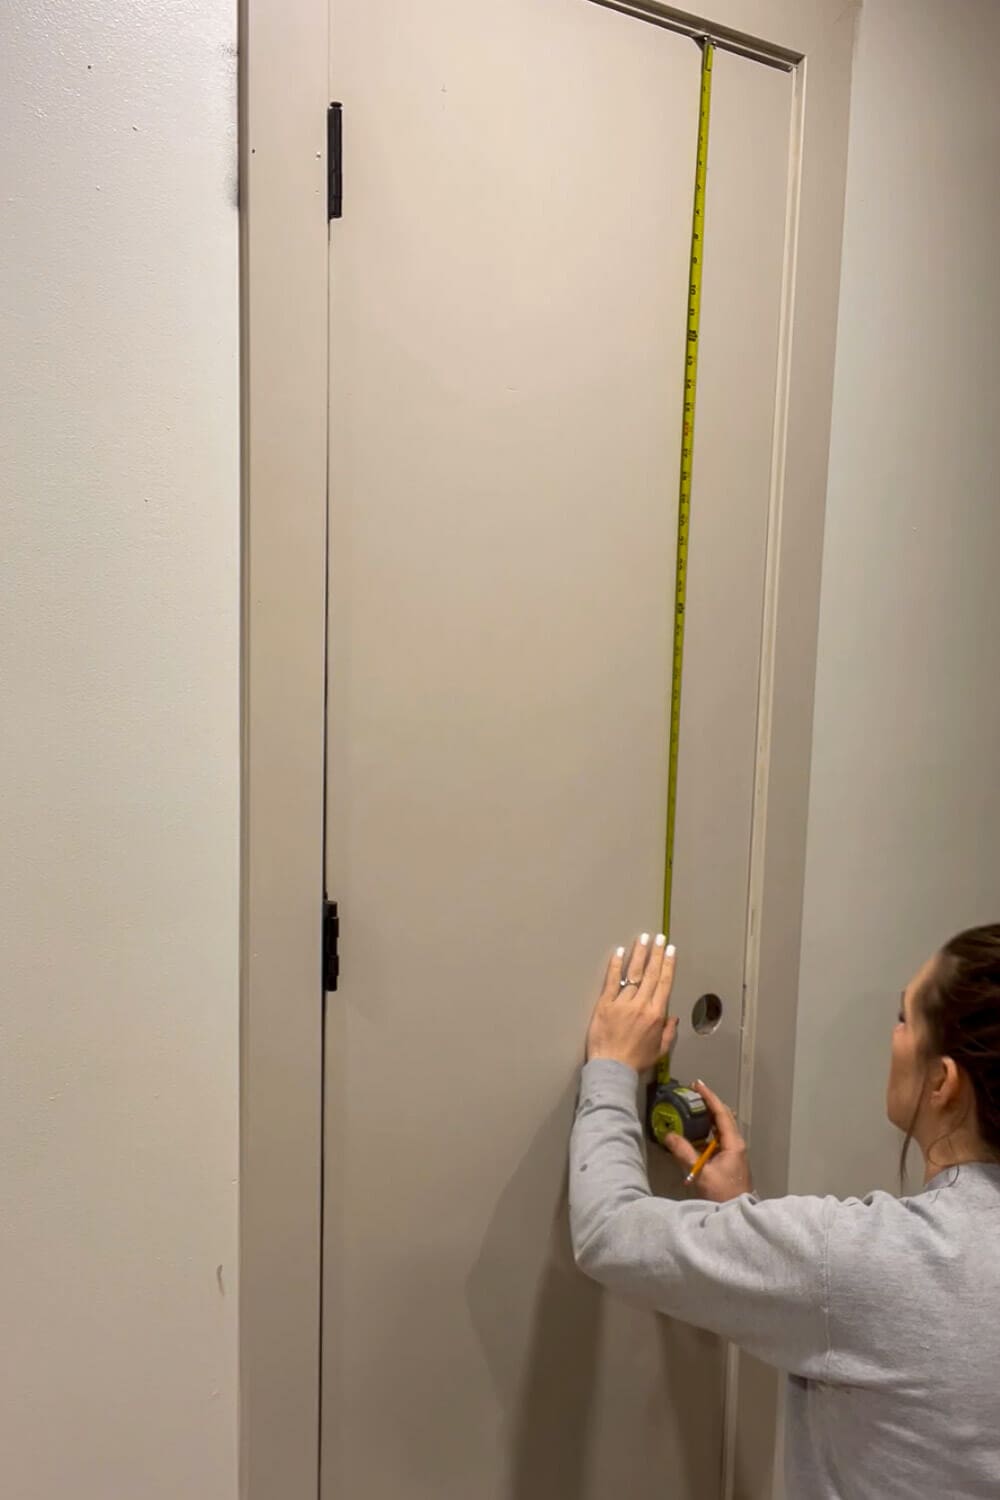
For the upper frame:
- Measure 5 inches down from the top of the door and mark the center.
- Measure 5 inches in from the left side and mark.
- Measure 5 inches in from the right side and mark.
- From the top center mark, measure 36.25 inches down and mark – that’s the bottom of the upper frame.
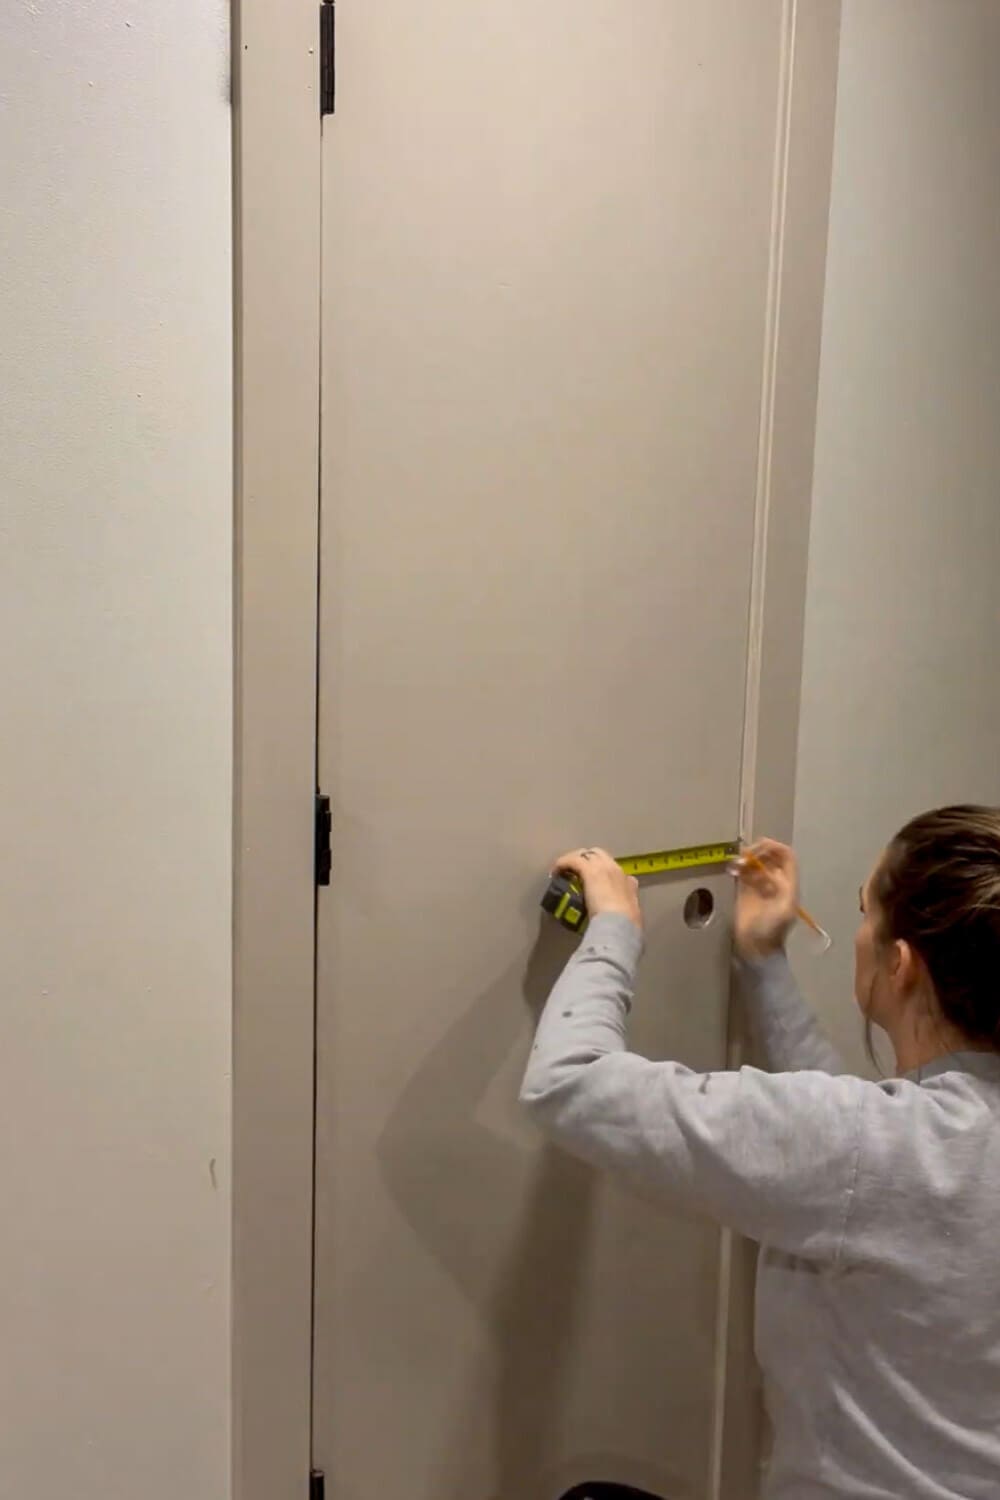
For the lower frame:
- Measure 5 inches down from the bottom of the upper frame mark – that’s where the lower frame starts (I also tried to center it around the doorknob).
- Use the same 5-inch side margins as the upper frame.
- Measure 5 inches up from the bottom of the door and mark center.
- From your 5-inch side marks, measure across – the top and bottom trim pieces for both frames should be 14 inches.
- The lower frame side pieces measured 26.25 inches.
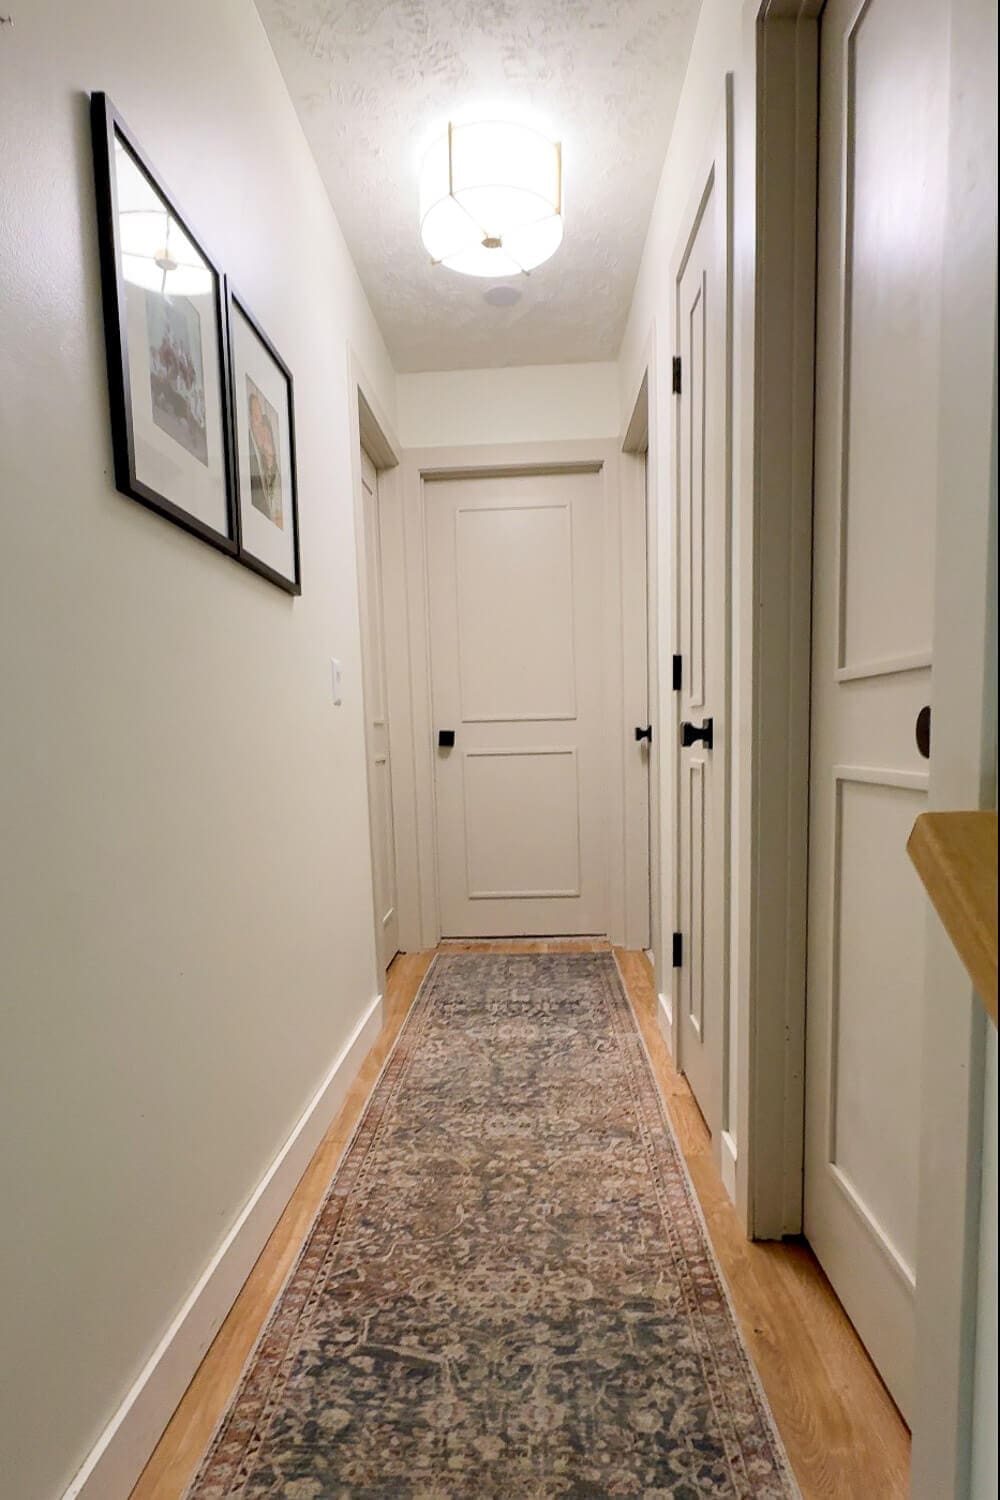
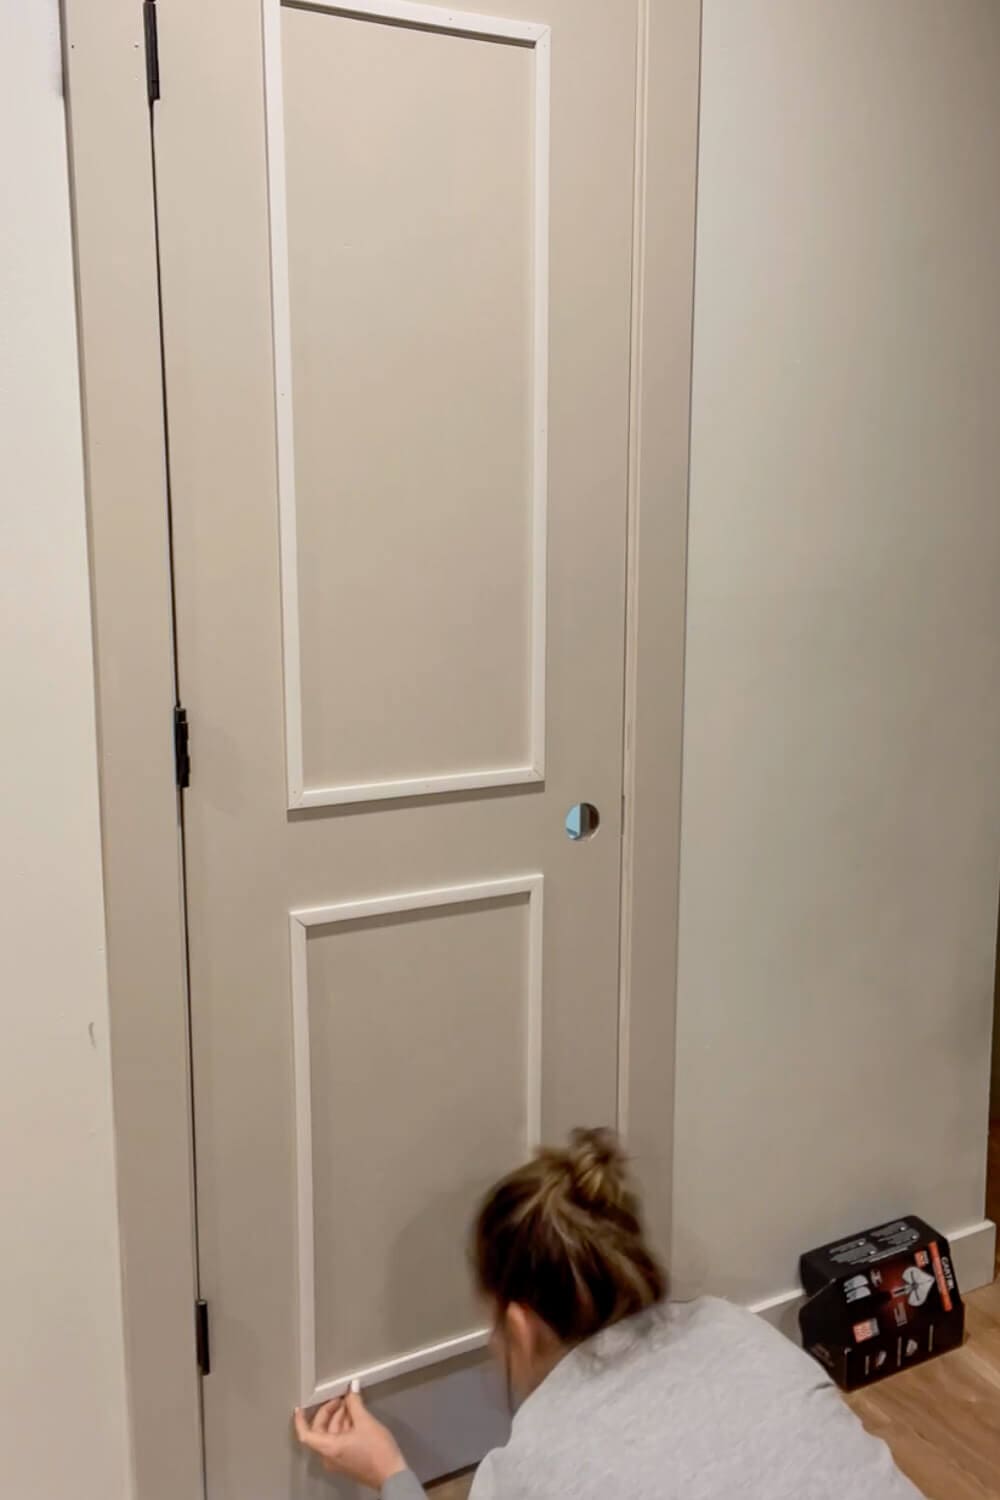
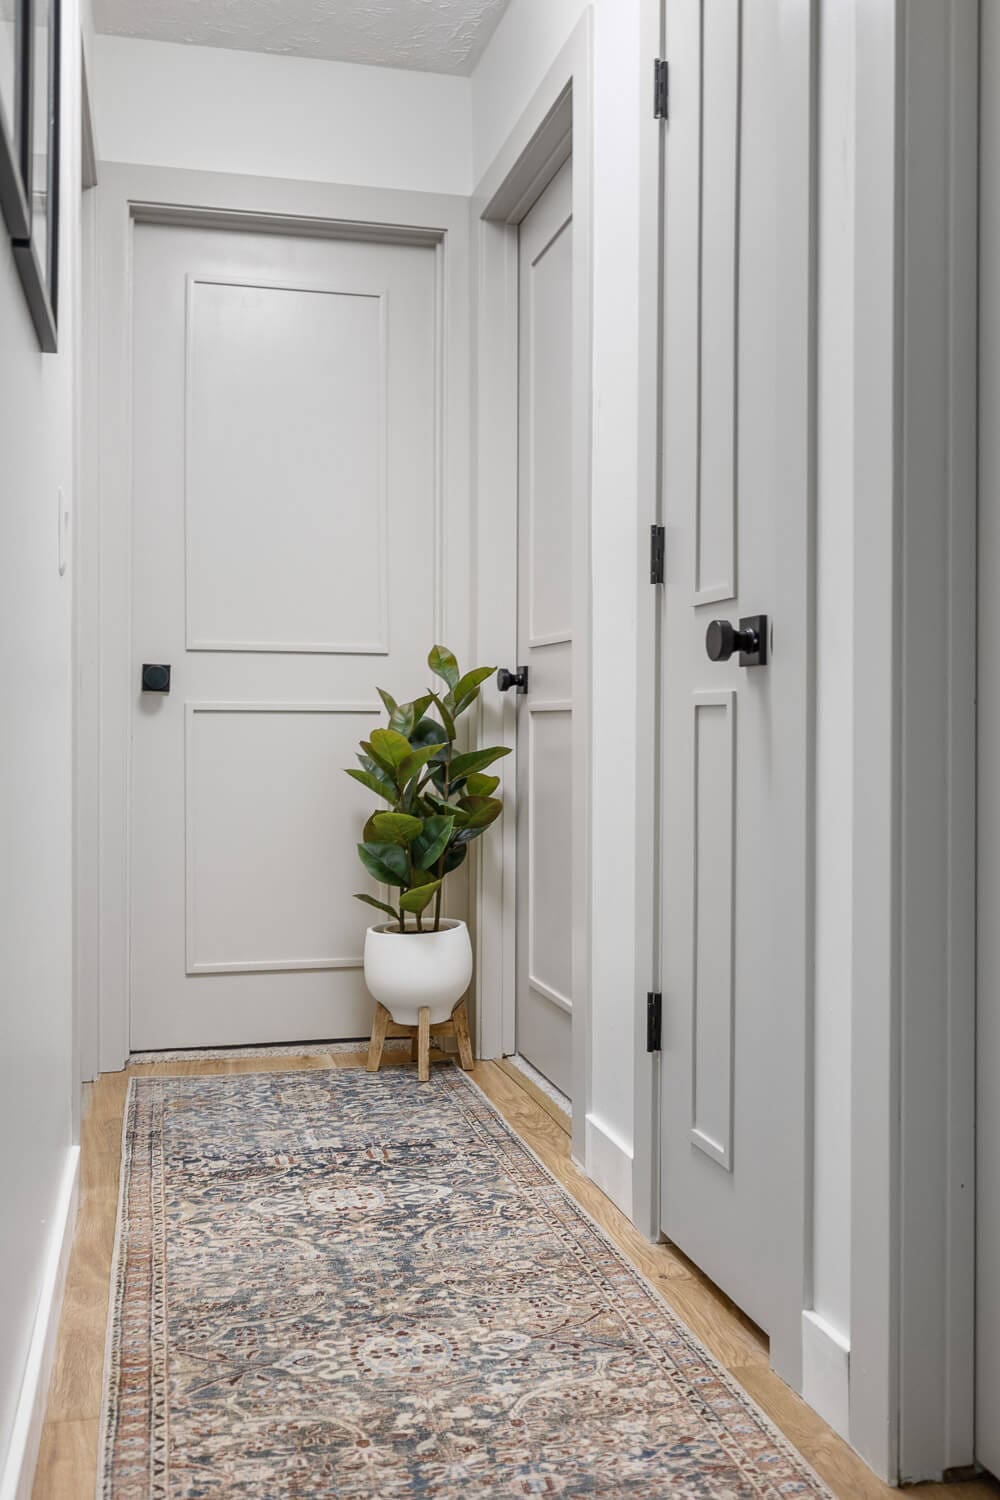
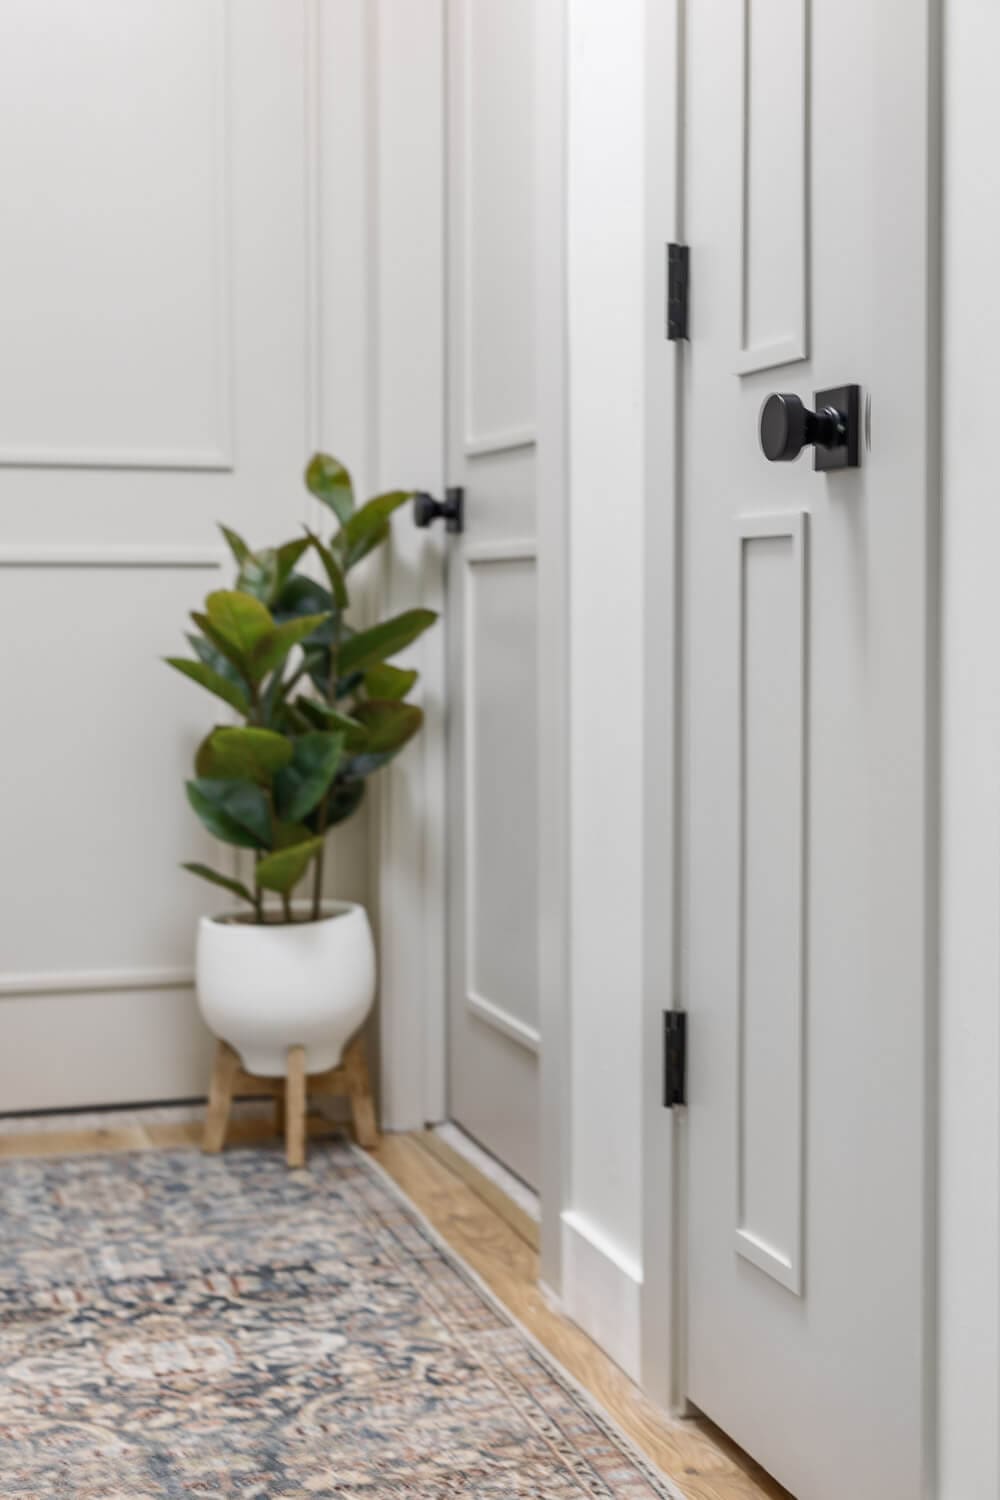
Your exact measurements will vary based on door height – just keep the proportions consistent and you’ll be fine. I have a skinnier door in one of my hallways and you can see below in the picture how narrow I made the trim.
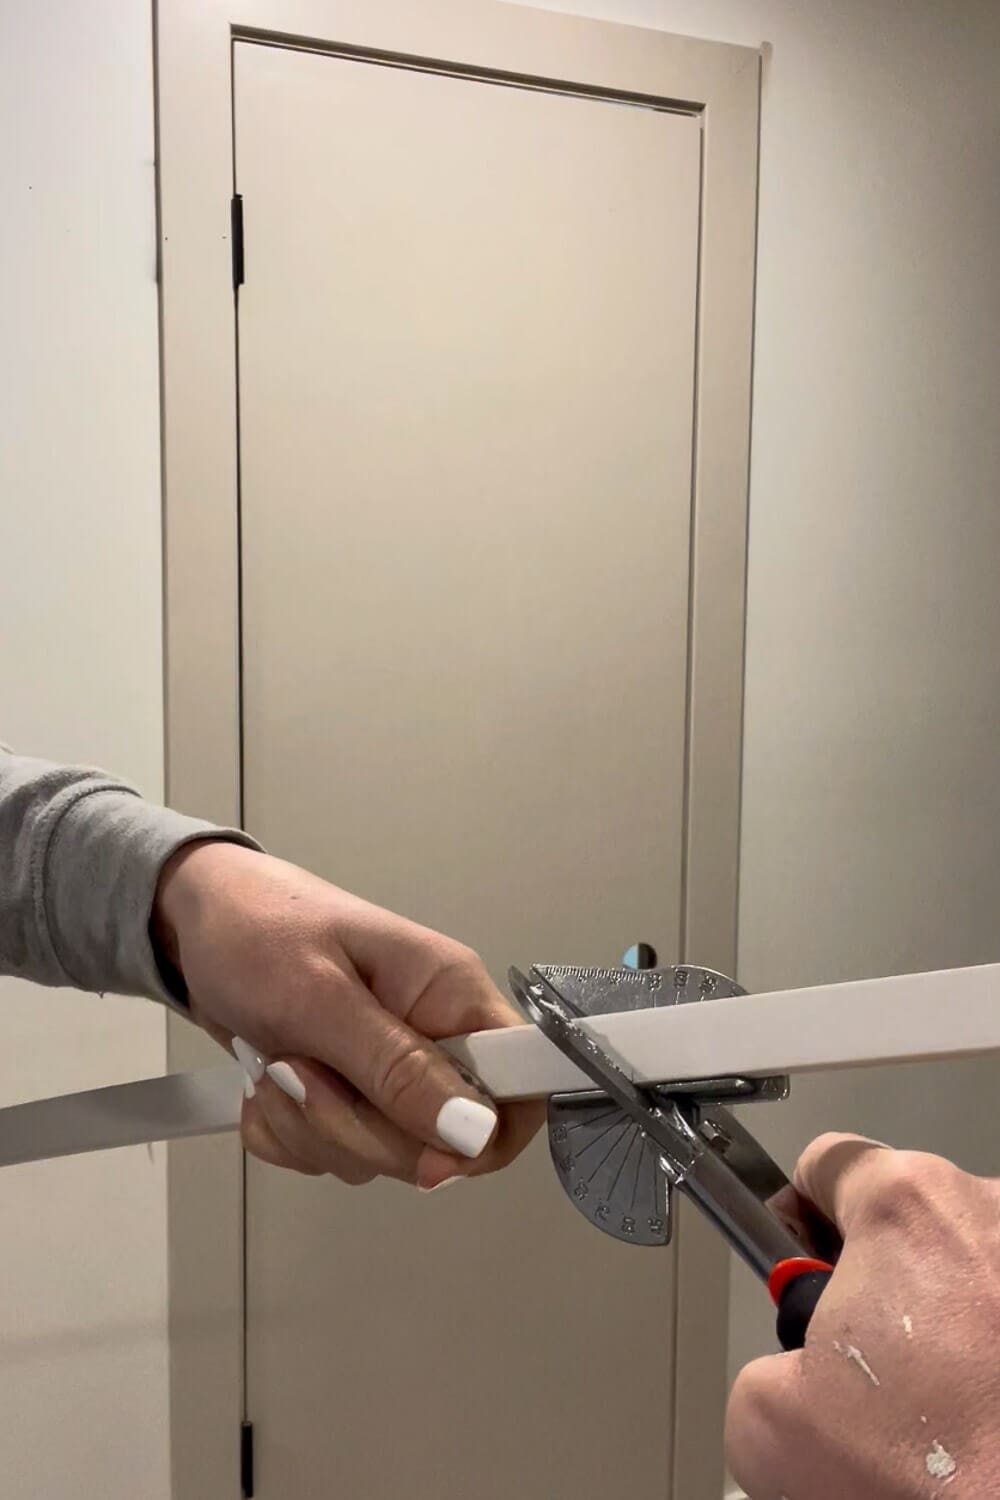
Step 5: Cut and Nail the Trim for the DIY Door Upgrade
With your measurements in hand, it’s time to cut the trim (mine came from Lowe’s) and nail it to the door. I used miter shears set to a 45-degree angle.

Cutting the trim:
- Cut one angled end on your trim piece.
- Measure to your needed length (e.g., 36.25 inches for the upper side pieces) and cut the opposite end at a 45-degree angle in the opposite direction — this creates the mitered corners. Flip the shear angle before cutting.
- Repeat for all pieces: 2 side pieces at 36.25 inches, 2 side pieces at 26.25 inches, and 4 top/bottom pieces at 14 inches.

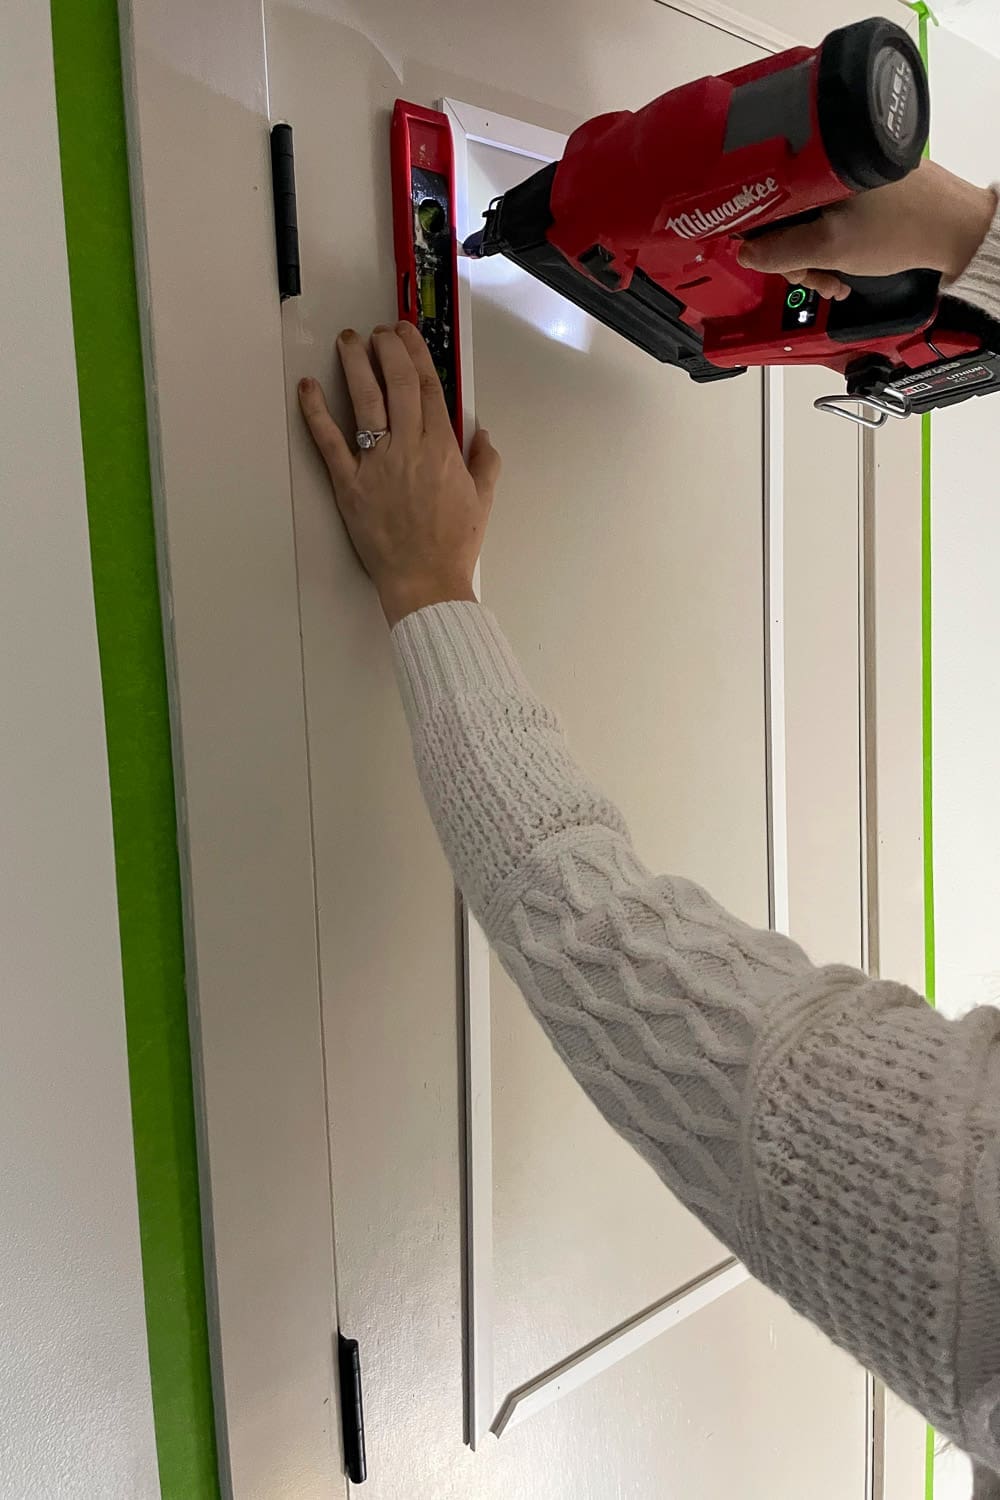
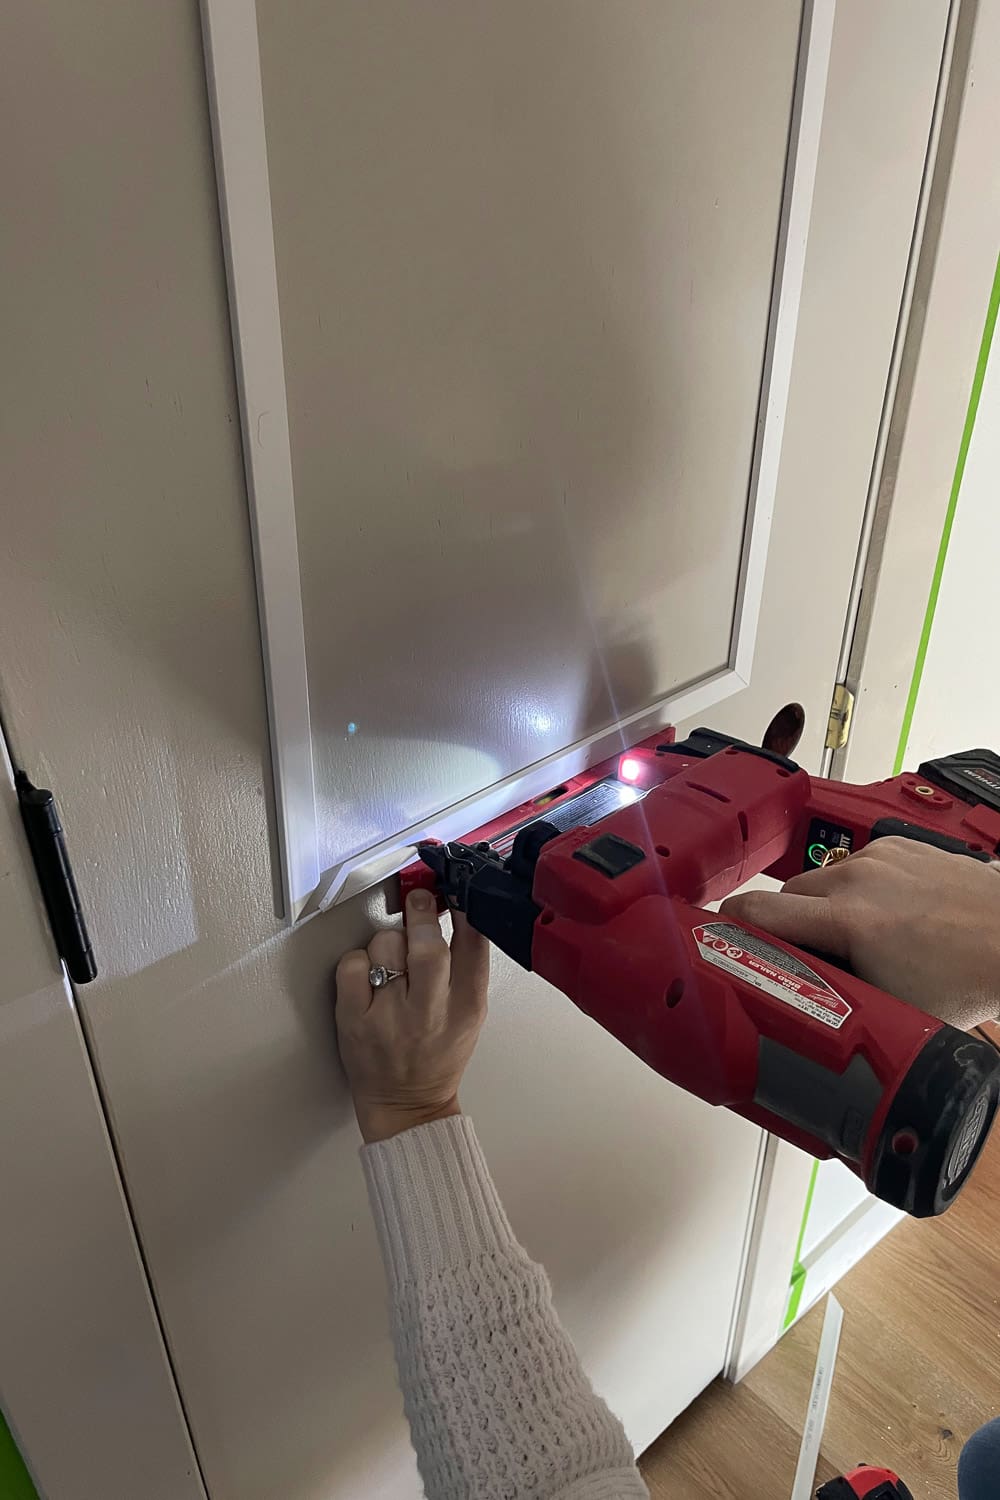
Nailing the trim:
- Place the first piece (top of the upper frame) and secure with one brad nail in the center using your brad nailer.
- Check with a small level before adding more nails.
- Add the remaining three pieces of the frame, each with one brad nail, lining up corners as you go.
- Once all four pieces are tacked and corners are aligned and level, go back and add more 5/8″ brad nails to secure everything.
- Repeat for the lower frame.
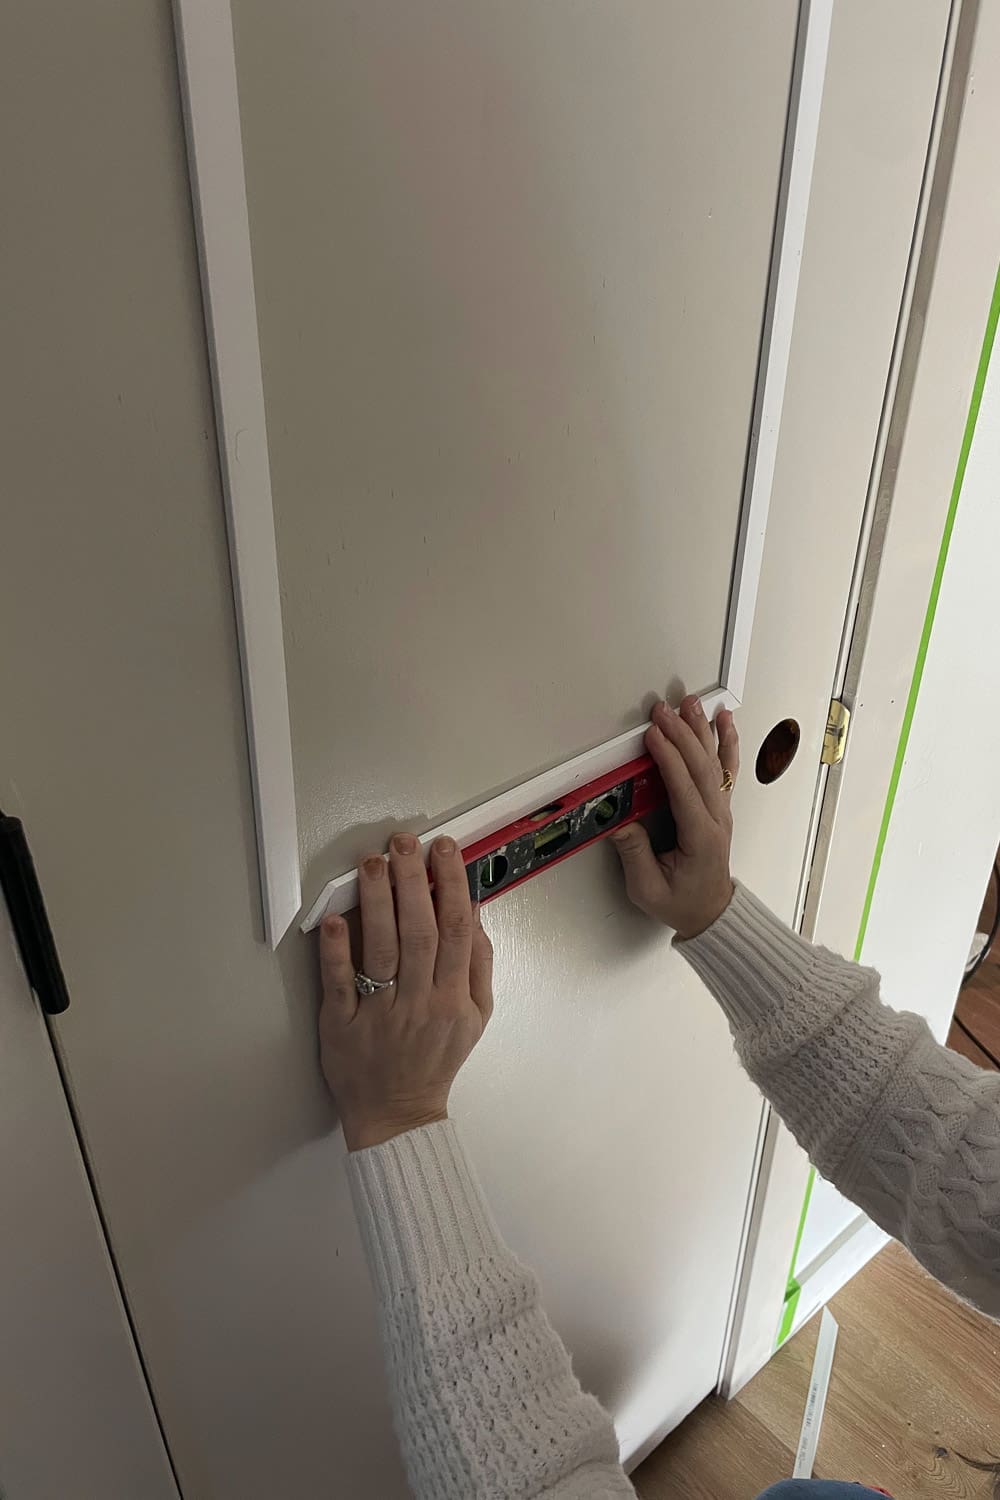
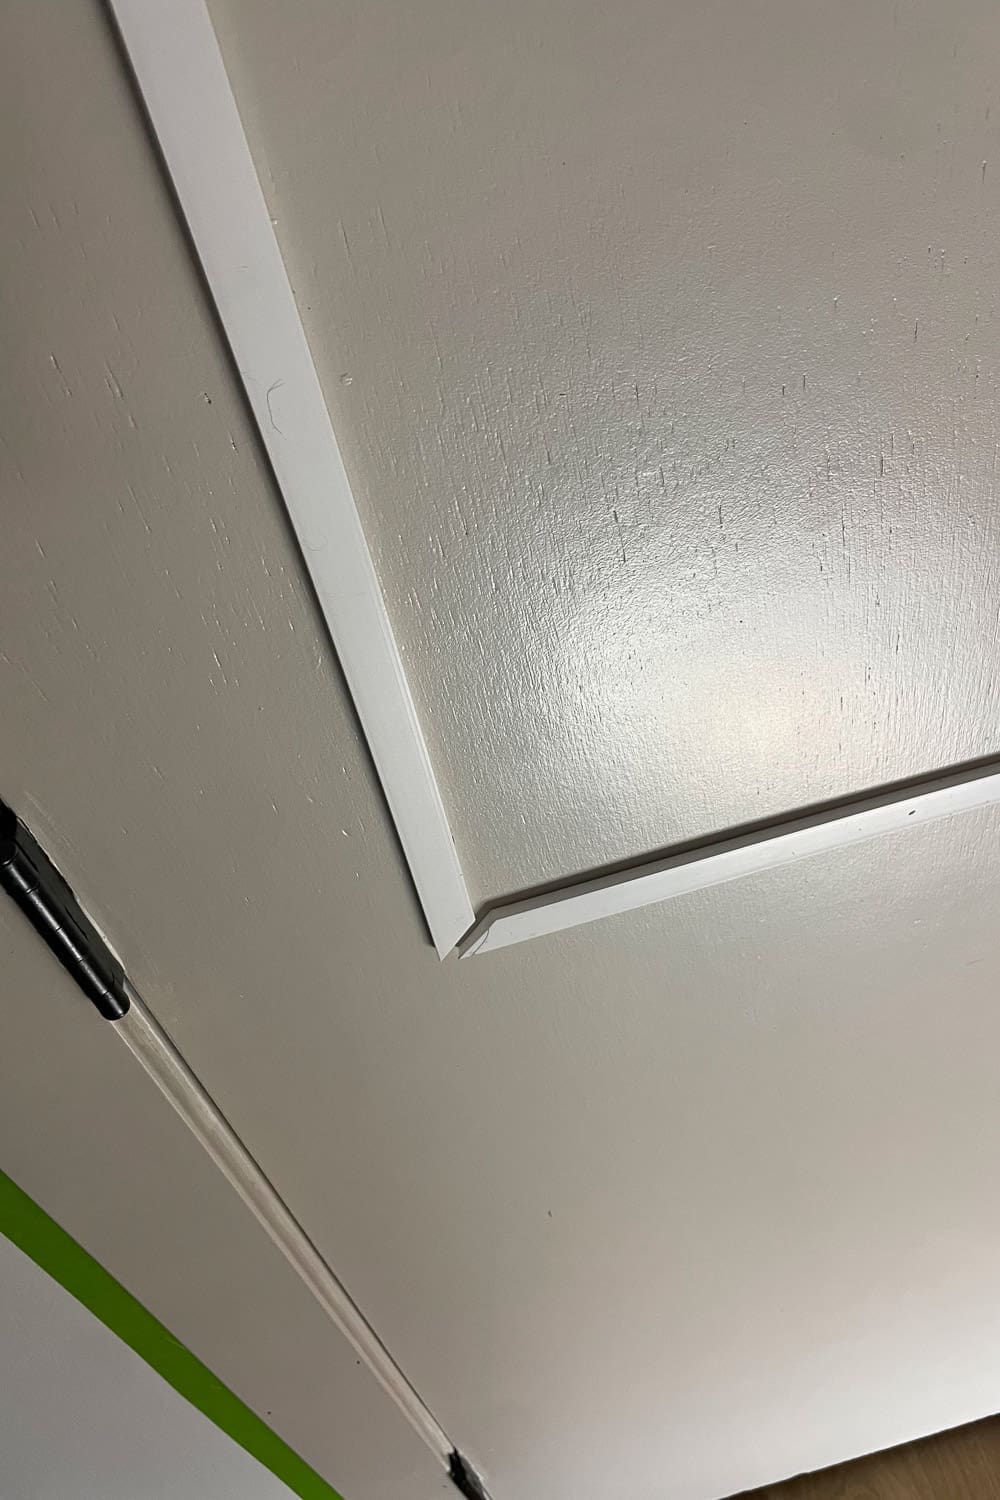
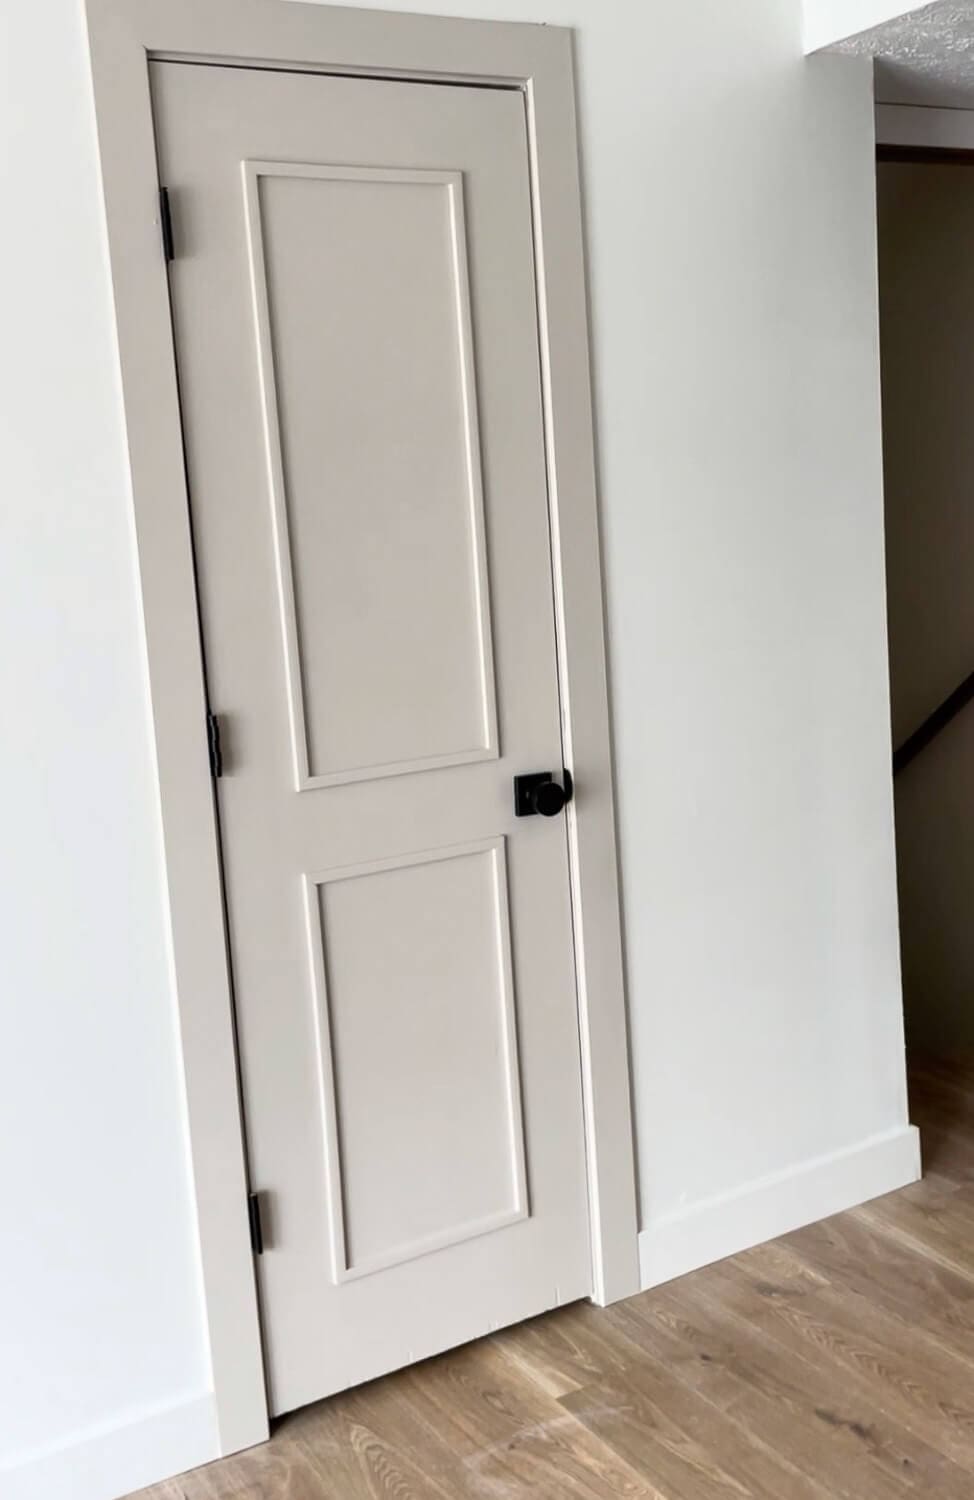
⚠️ Important: Don’t fully nail each piece before building out the whole frame – if a corner doesn’t meet right, you want to be able to adjust. I made that mistake in the image below. Tack everything first, then confirm level and square before finishing.
Since these are lightweight trim pieces on a hollow core door, brad nails alone are plenty. If you’re worried, a little construction adhesive on the back of the trim doesn’t hurt.
Step 6: Caulk the Trim Seams on Your Interior Door Makeover
With the trim nailed up, caulk the seams between the trim and the door. This is what makes it look like a real panel door instead of trim glued on.
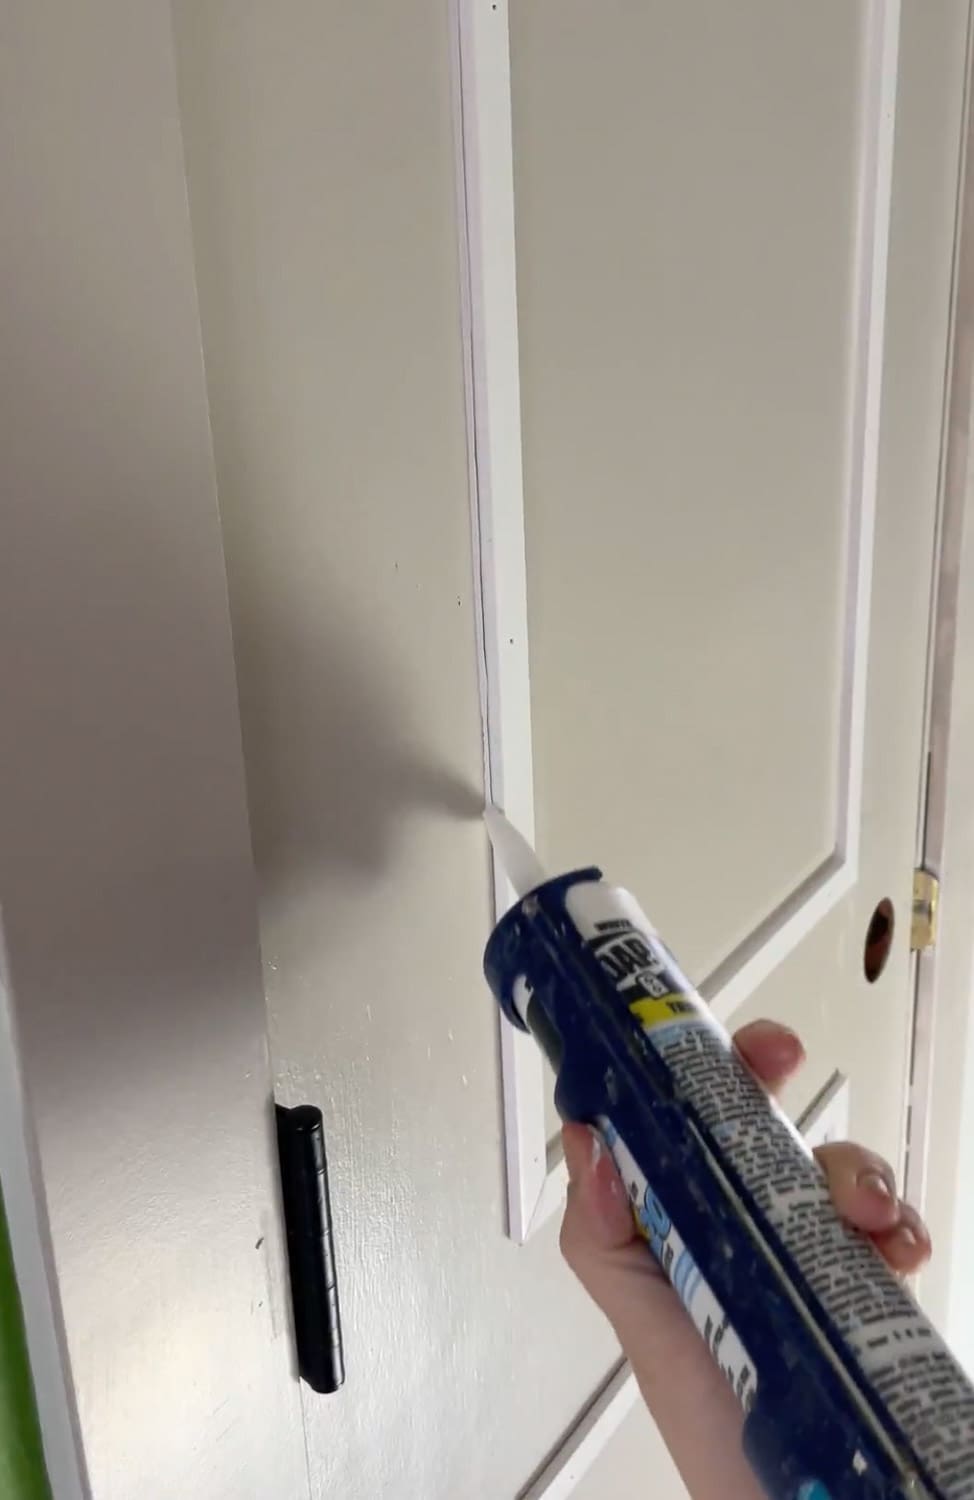
- Cut the tip of the caulk tube at a small angle – this controls flow and keeps it neat.
- Load into a caulking gun and run a thin bead along each seam.
- Smooth with a baby wipe, then a clean finger, then another baby wipe to clean up excess.
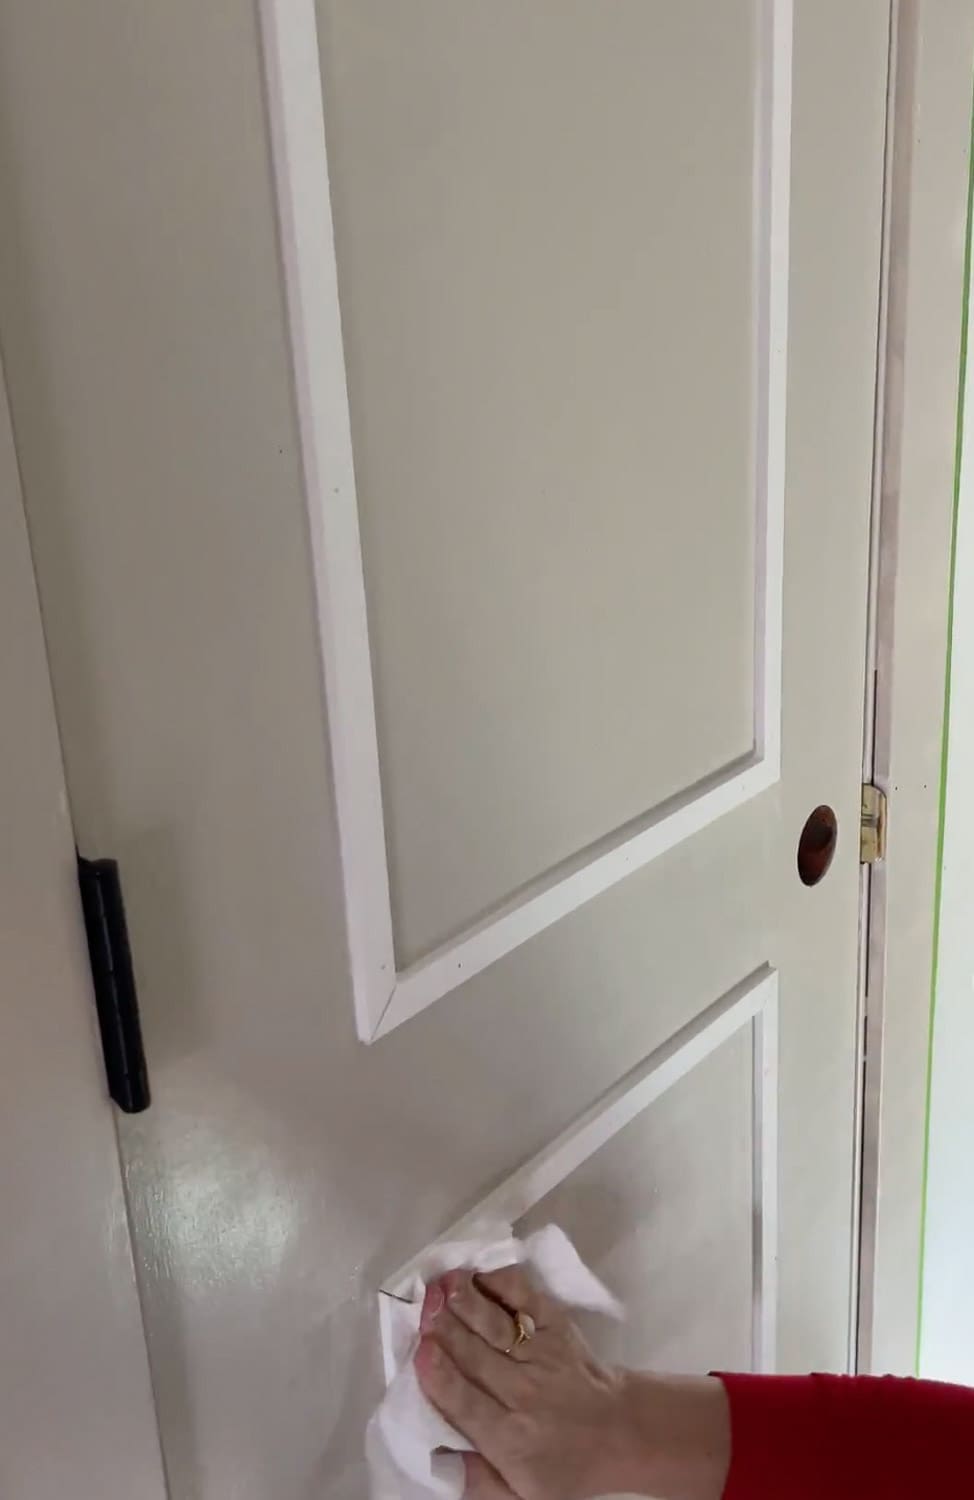
This step is genuinely easy enough to hand off to a kid. I’m not kidding. Hand them a baby wipe and let them feel helpful.
Step 7: Fill Nail Holes and Paint Your Upgraded Interior Door
Almost there. Fill the brad nail holes, then paint.
Filling nail holes:
- For a quick, easy fix: Dap DryDex Spackling. Press it into nail holes, wipe clean with a damp sponge while still wet, no sanding needed. It doesn’t shrink in tiny holes the way caulk does.
- For a sturdier fix: wood filler. Let it dry, then sand smooth.
- For a permanent fix on higher-quality doors: Bondo is a two-part system that dries rock hard and sands beautifully. It’s more work, it smells, and you’ll need to sand and deal with dust – but it hides imperfections like nothing else.
I went with spackling. These are 1970s hollow core doors that I plan to replace eventually – they’re getting the budget treatment, and I stand by that decision.
Painting:
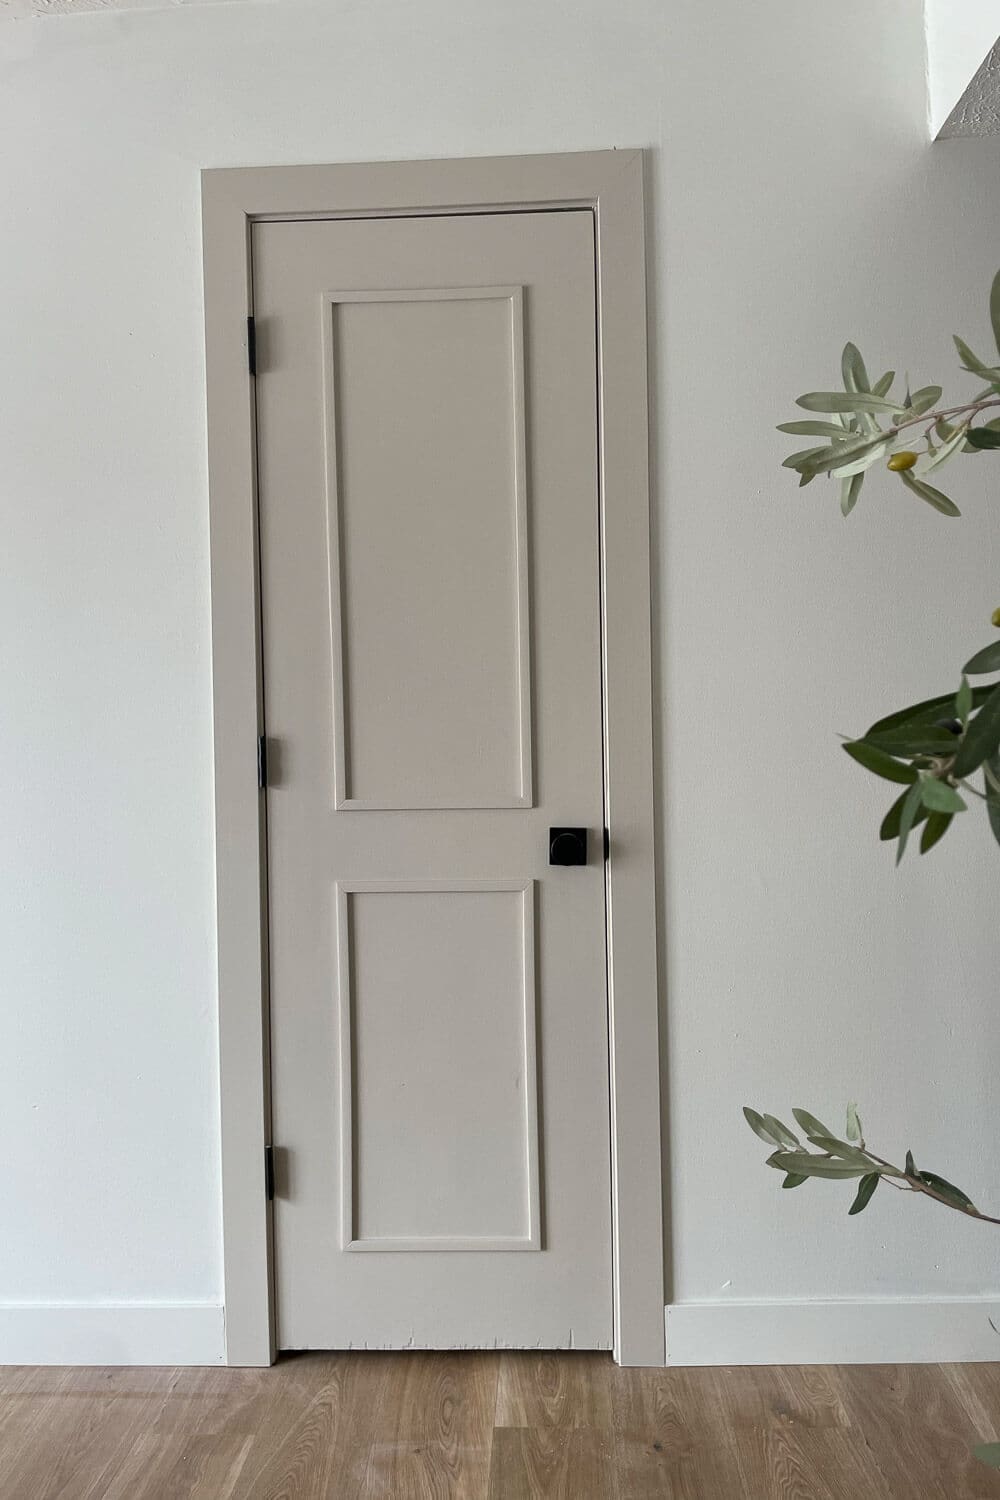
Once holes are filled and smooth, paint the door with your chosen wall color. I used Accessible Beige by Sherwin Williams. Apply with the mini paint roller for the flat door surface and the small paintbrush for the trim edges and frame.
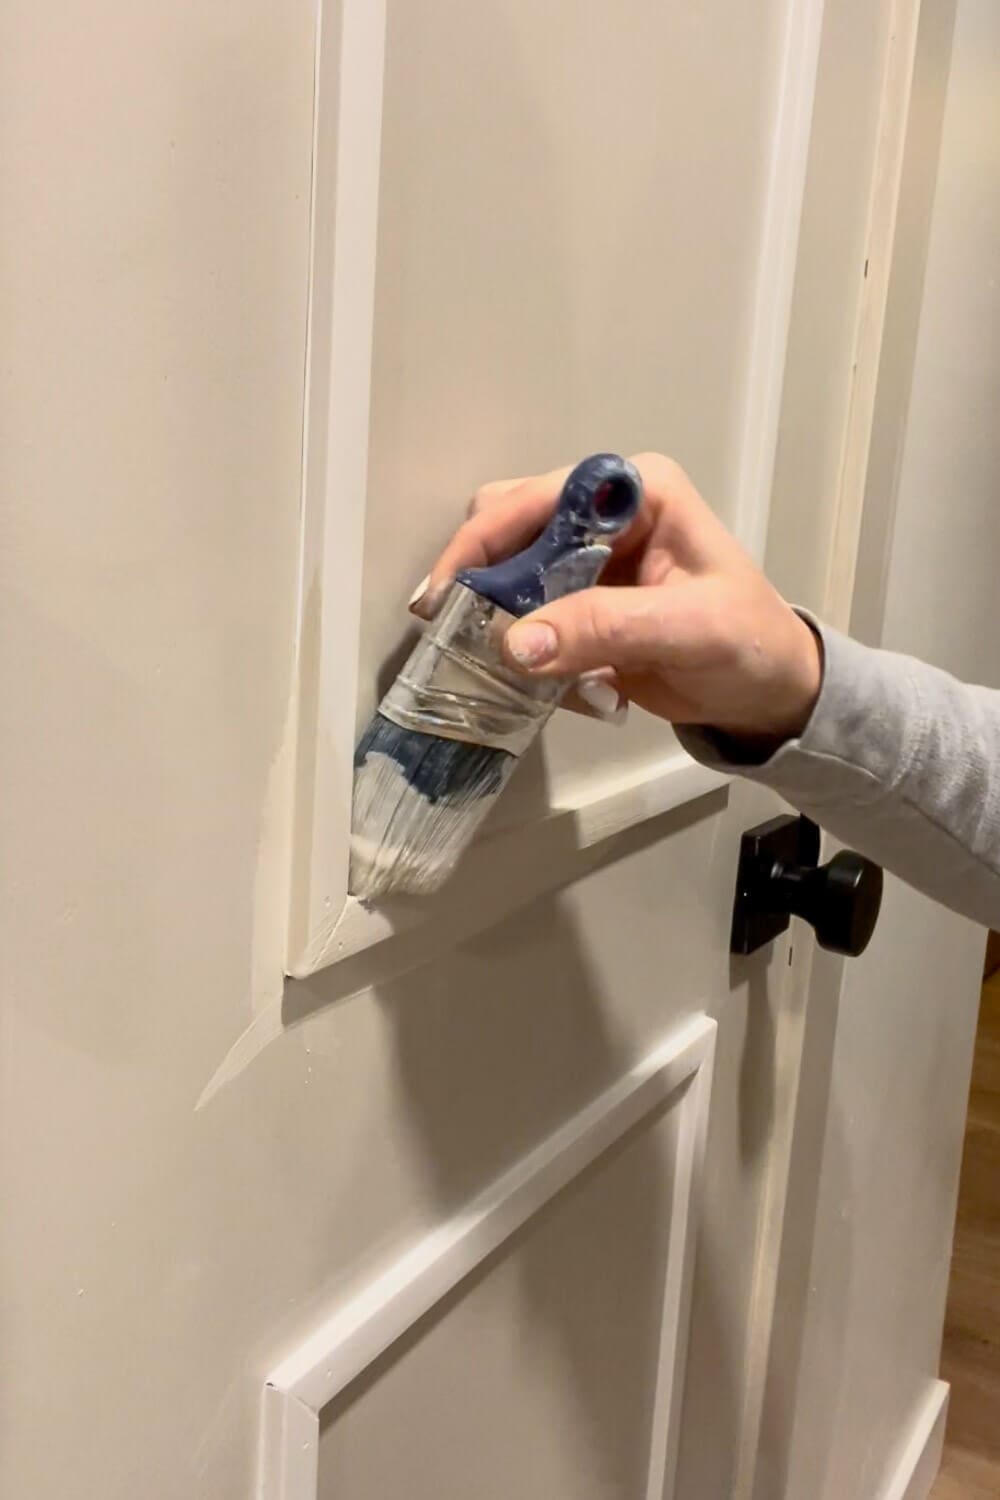
Then install a fresh doorknob and latch mechanism and you’re done.
This DIY door upgrade transformed a flat, dated hollow core door into something that looks intentional and custom – for the price of some trim and a can of paint. I’ve done this same process on my hallway doors too, and every single one looks a thousand times better.
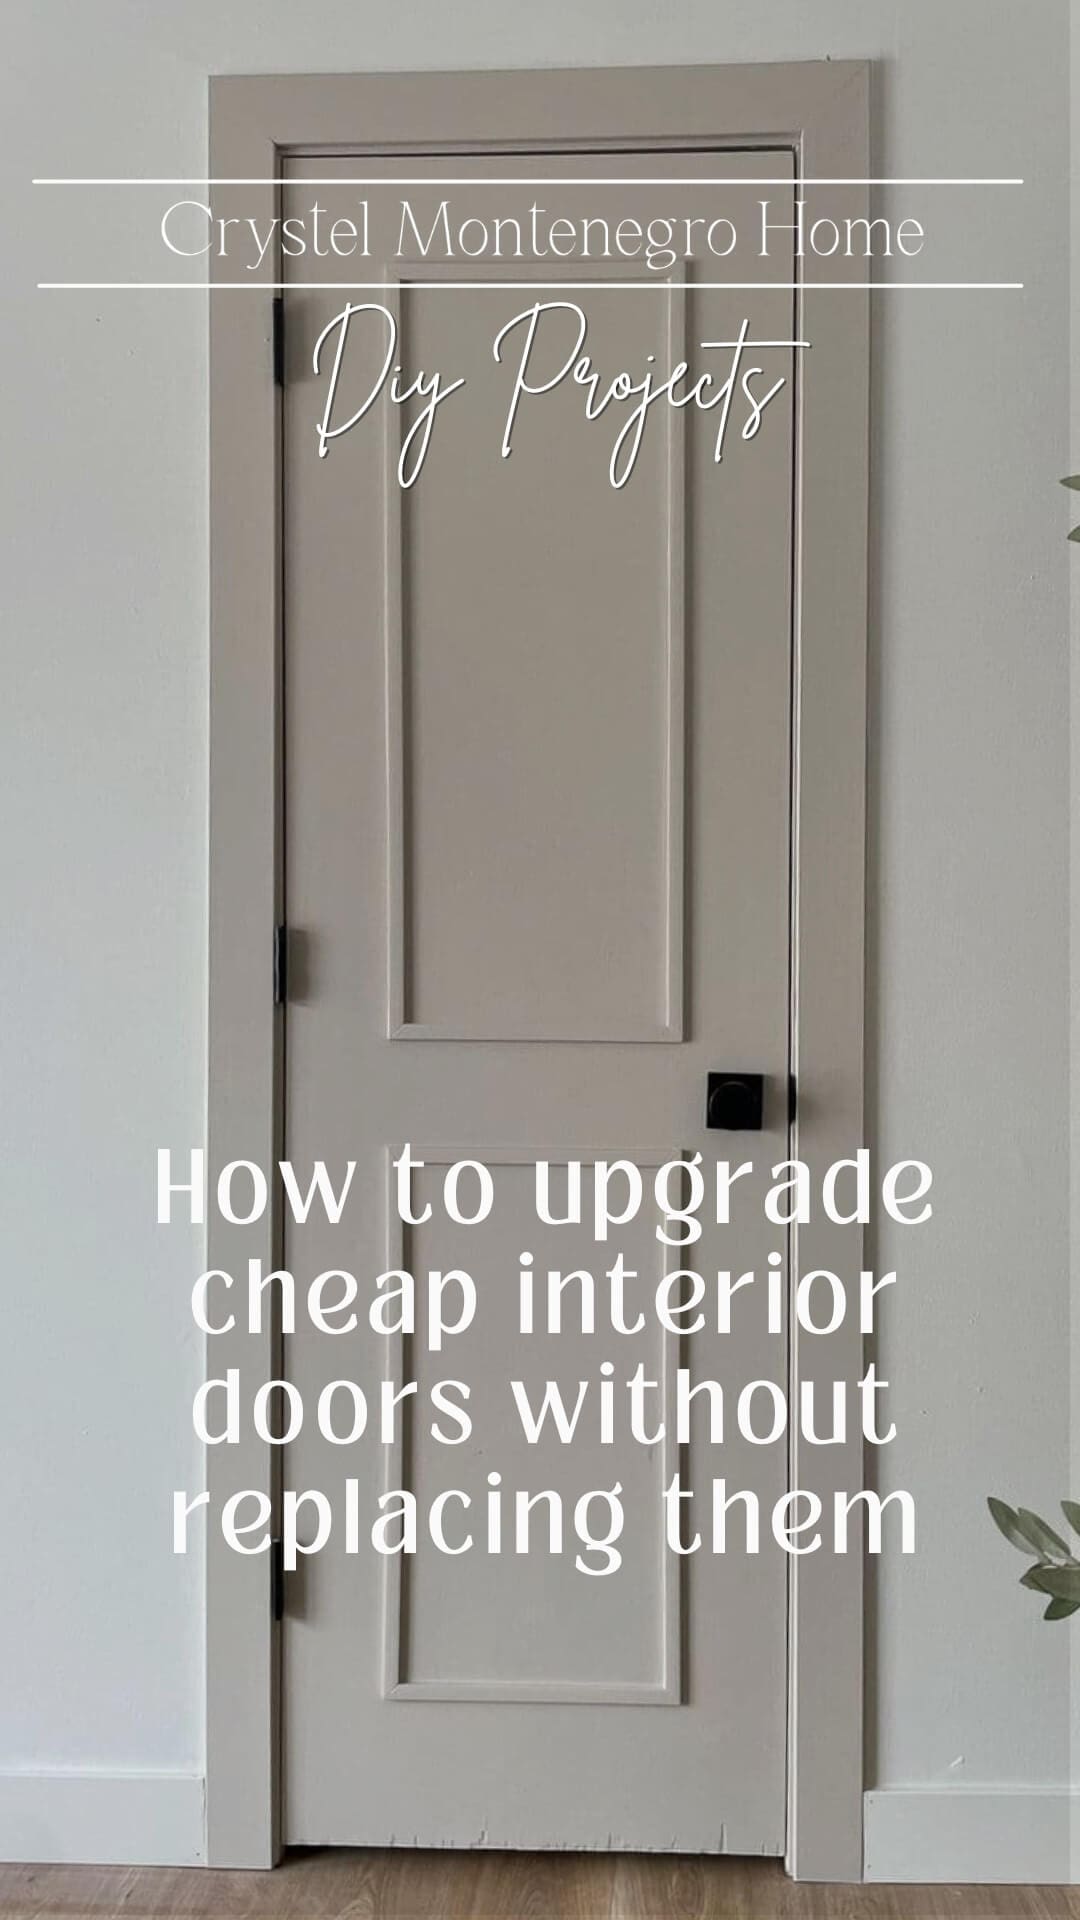
📌 Save This Interior Door Upgrade for Later
Don’t lose this project! Pin it now so you can find it when you’re ready to tackle your own door upgrade.
More DIY Door and Home Upgrade Projects
Ready to keep going? Here are a few more projects you’ll love:
- Beautiful Coat Closet Makeover – The full overhaul that went along with this door upgrade. Functional and cute? Yes, both.
- How to Paint a Front Door in 3 Easy Steps – Take the curb appeal up a notch with this simple front door painting tutorial that’ll have your entryway looking brand new in a weekend.
- Weatherstripping a Front Door to Save on Energy Bills – While you’re upgrading your doors, don’t skip this easy fix that keeps drafts out and your energy bills down.
FAQs About How to Upgrade Interior Doors
Absolutely – and it costs a fraction of the price. Adding trim to create decorative panels, painting the door, spray painting hinges a modern color, and swapping the doorknob can make a 1970s hollow core door look intentional and updated. No door replacement needed.
The most affordable way to update interior doors is the trim-and-paint method: attach decorative trim strips to the flat door surface to create a frame or panel look, caulk the seams, fill nail holes, and paint. Total cost is typically under $50 per door depending on your trim and paint choices.
The key to a great old interior doors makeover is prep. Remove any hardware, sand the door surface clean, prime before painting, and take time to measure trim placement accurately before nailing. The steps that seem fussy – leveling, caulking seams, filling nail holes – are exactly what makes the finished door look like it’s always been that way.
Start with the hinges. Spray painting door hinges from gold or brass to black or bronze takes about 15 minutes per door and costs almost nothing. From there, adding trim panels is the next biggest visual upgrade – and once you’ve done one door, the rest go a lot faste


For all that work would have been good to fill in the damage at the bottom of the door.
My hollow doors are really heavy and likely from the 50s so I’ll keep them. The house is MCM so molding won’t work. But using Bondo for repairs and painting will.
Hinges are mostly brass so will get those cleaned up & lubed with white lithium grease and reuse.
Taking the door down will take longer but will result in a better paint job IMO as I want the entire door one color.
Nice. Another way is to pre-assemble the rectangle on a flat surface, using glue on corners, then stick the rectangle to the door using glue and thin nails.
That’s a great suggestion! I’ve got more doors I can try that on