DIY Kitchen Island: Easy Beginner Build


Published February 6, 2026
We needed more prep space, more storage, and a kitchen layout that didn’t feel like a daily traffic jam. So we removed the peninsula that was here when we bought the house, and built a DIY kitchen island. It instantly made the whole room function better. In this post, I’m sharing exactly how we built our DIY kitchen island, starting with the cabinet base, then anchoring it to the subfloor, and finishing with our faux marble countertop.
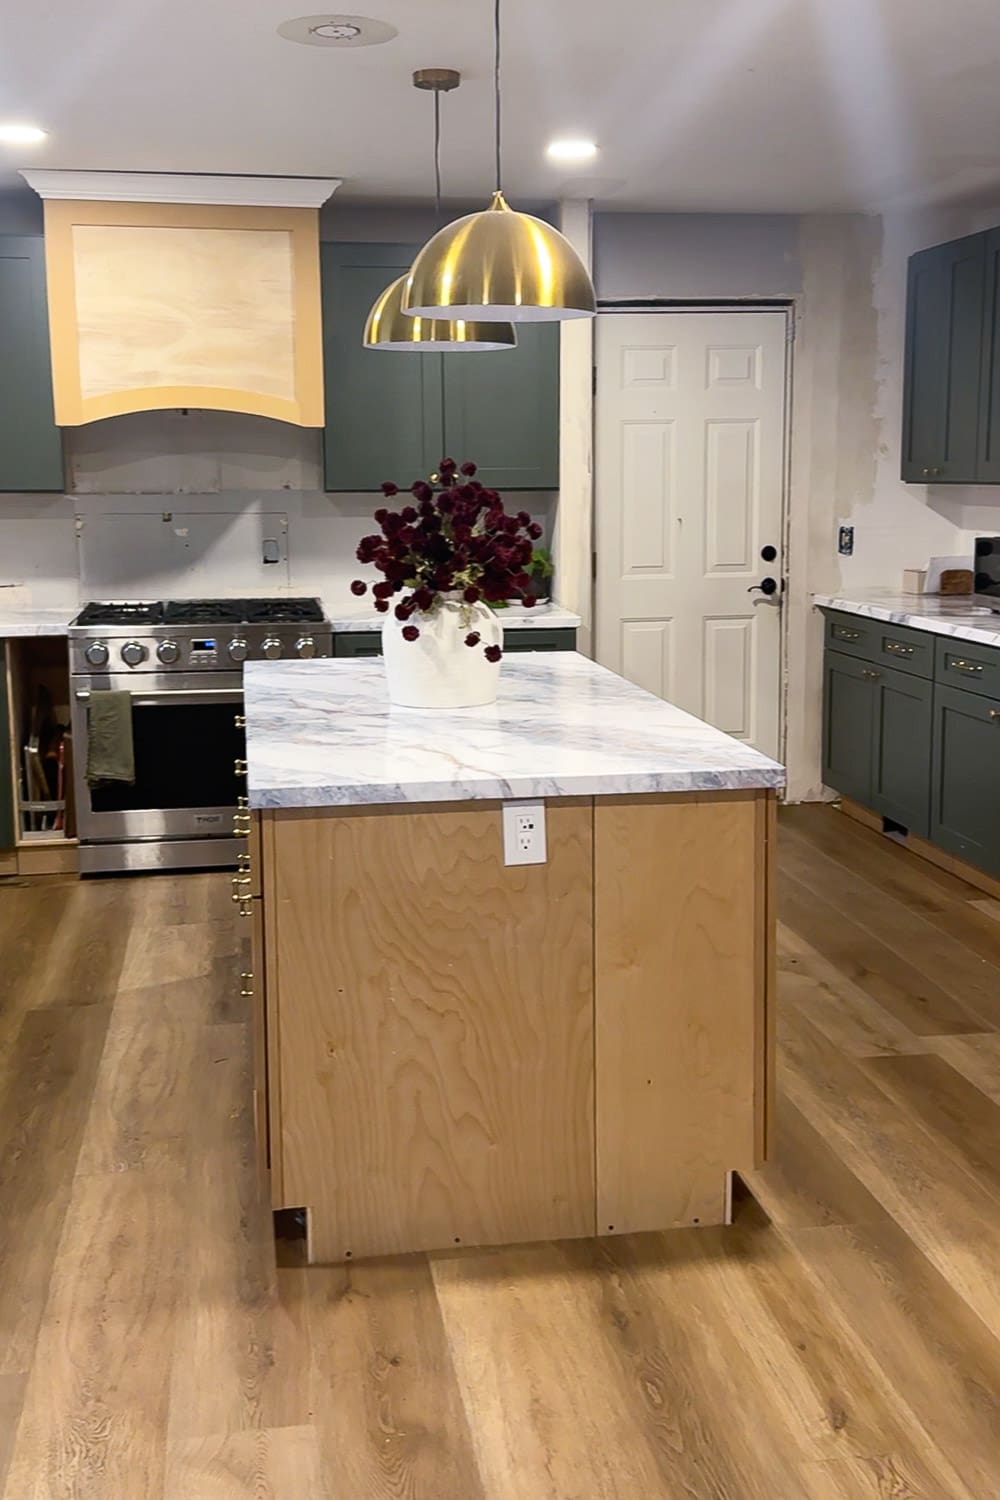
Table of Contents
- Tools and Materials for a DIY Kitchen Island
- Step 1: Set Up the Cabinets for Your DIY Kitchen Island Base
- Step 2: Anchor the DIY Kitchen Island
- Step 3: Countertops (Buy or DIY)
- Where Our DIY Kitchen Island Is at Right Now
- Before and After: Our DIY Kitchen Remodel
- 📌 Save This DIY Kitchen Island for Later
- FAQ: DIY Kitchen Island
Tools and Materials for a DIY Kitchen Island
Having the right tools and supplies makes this DIY kitchen island build faster, sturdier, and way less frustrating.
Tools
- Tape measure, pencil
- Level
- Drill
- Circular saw (for cutting flooring)
Materials
- Base cabinets (stock, RTA, or custom)
- 2x4s for blocking
- Wood screws
- Shims
- Countertop (see: DIY Countertops That Look Like Marble Without the Cost)
Step 1: Set Up the Cabinets for Your DIY Kitchen Island Base
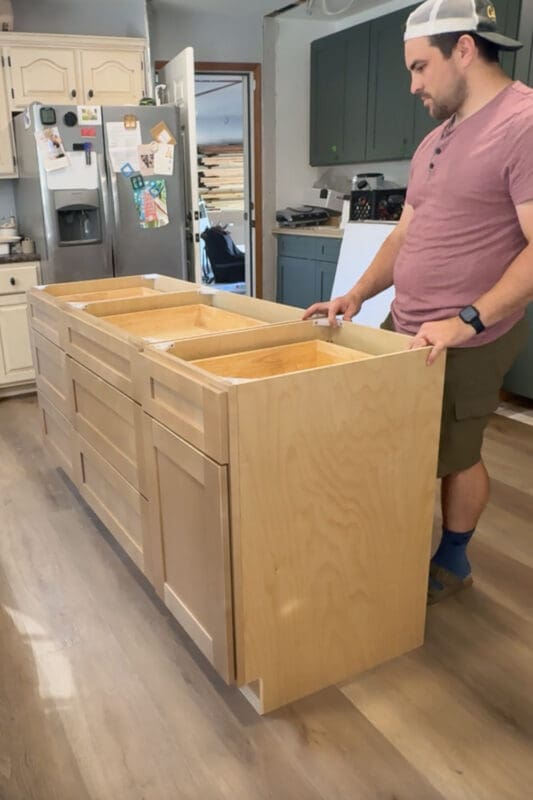
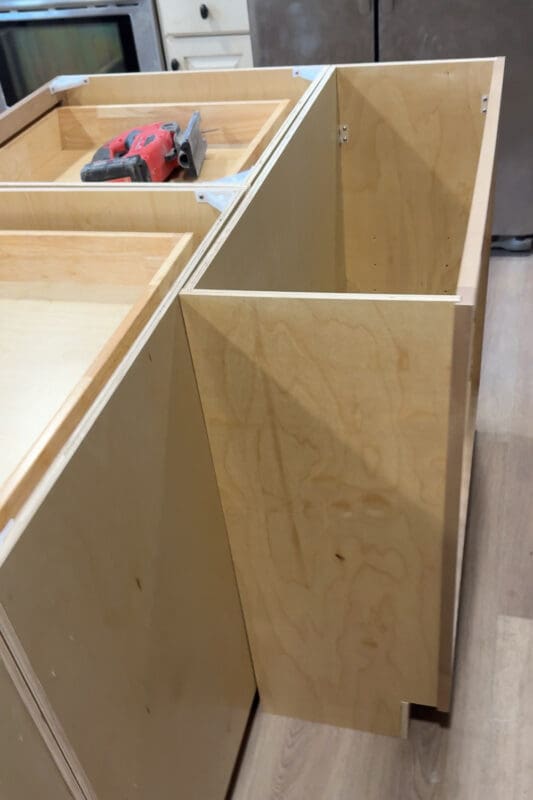
The easiest way to build a DIY kitchen island base is by using cabinets. In our last house, we used stock Home Depot cabinets. In this house, we bought cabinets from a local cabinet maker. Either way, you need some cabinets to start.
On the front side of our DIY kitchen island, we went drawer-heavy because drawers are easier to organize, hold more, and keep everything accessible. On the back side, we skipped seating and opted for narrow cabinets instead, so we could squeeze in even more storage.
Step 2: Anchor the DIY Kitchen Island
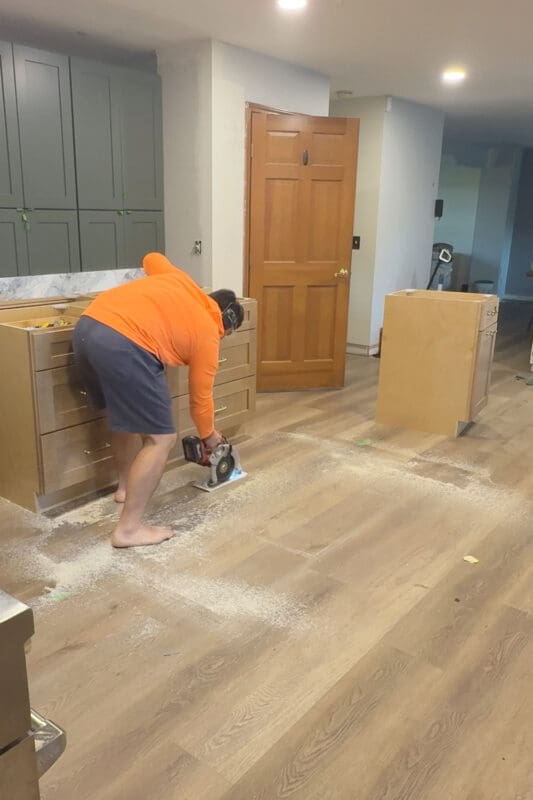
Once the cabinets were positioned how we wanted them, we traced the footprint of the DIY kitchen island on the floor so we’d know exactly where to cut out the flooring.
This step can feel extra, but it matters if you have floating floors like laminate or LVP. You don’t want a DIY kitchen island sitting on top of flooring that needs to expand and contract. The floor should run up to the island, not underneath it. This way, the island can sit on and be anchored directly to the subfloor.
After we had the island traced, we moved the cabinets out of the way and cut the flooring out inside that outline using a circular saw.

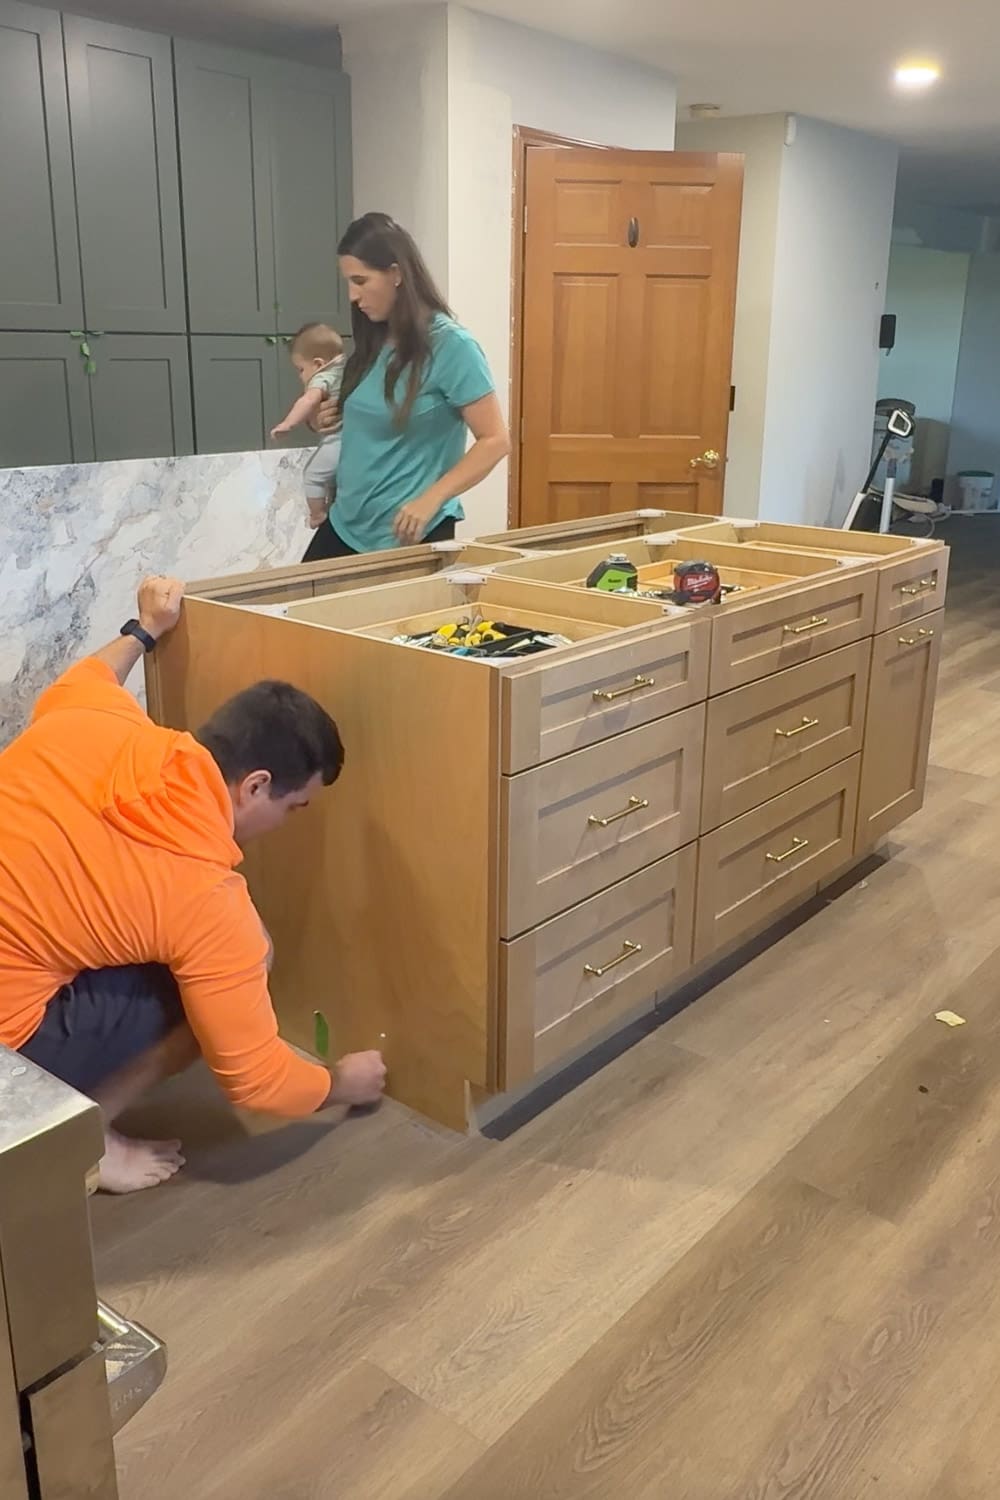
Next, we screwed 2×4 blocking into the subfloor to give the cabinets something solid to attach to. Then we set the cabinets back in place, checked that everything was level, and screwed the cabinet base into the blocking so the DIY kitchen island wouldn’t budge. Don’t worry, those screw holes will get covered by the baseboard and side panels later. You can also screw the cabinets to each other from the inside for even more stability.
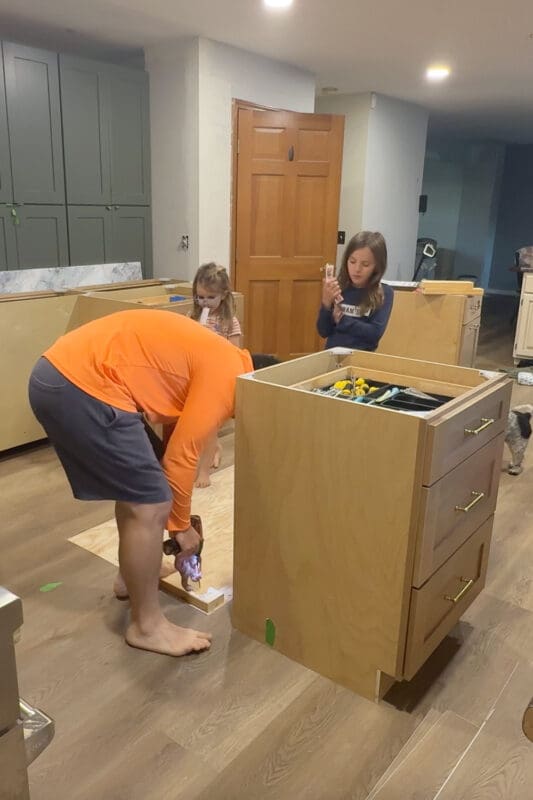
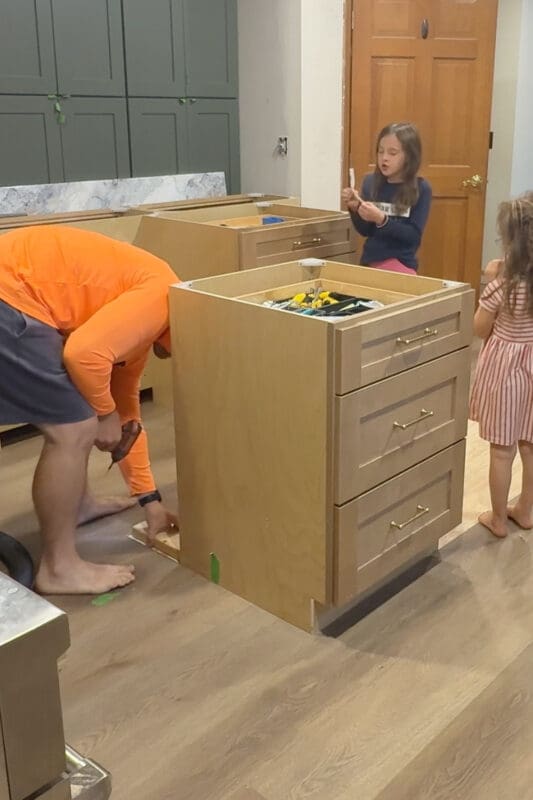
Side note: If your floor isn’t perfectly level, use shims under the cabinets until everything sits nice and even. You don’t want an island that everything rolls off of.
Step 3: Countertops (Buy or DIY)
After the base was done, it was time for countertops. You can buy an island countertop, or you can do what we did and make your own. We started with 3/4 inch plywood as a base and added trim around the edges to give it a thicker, slab look.
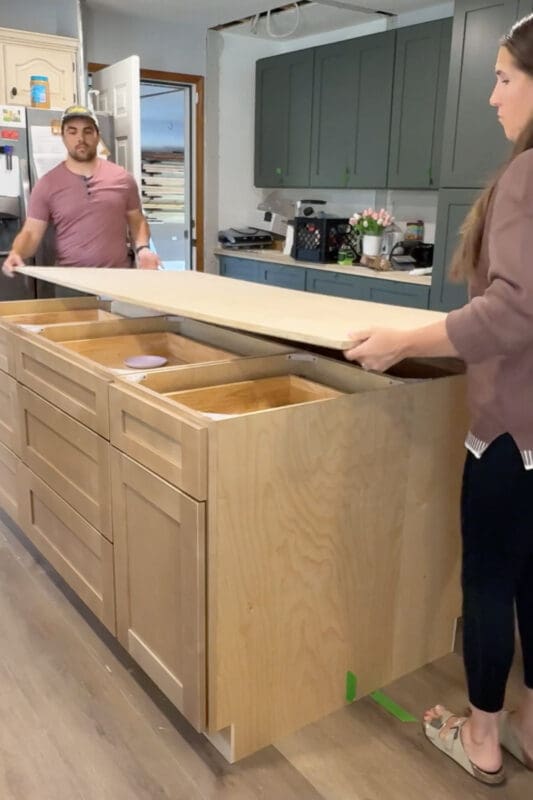

After the plywood base was built, we moved on to the fun part: making it look like stone. First, I covered the entire countertop with marble-looking contact paper. Then, I coated the countertop with epoxy to seal it and give it that durable finish.

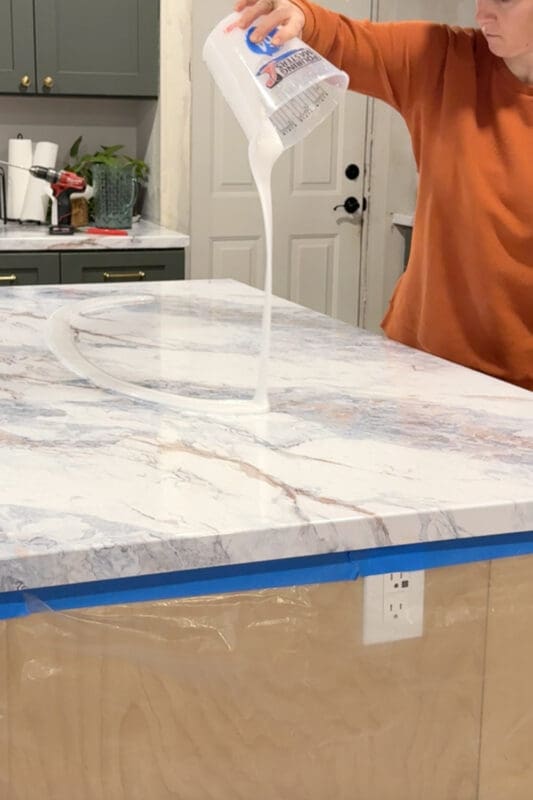
For the full step-by-step on building the plywood countertop base (plus how I added the contact paper), check out this post here: DIY Faux Marble Countertops with Contact Paper (Step-by-Step)
And for the details on my epoxy process from start to finish, check out this blog post here: DIY Countertops That Look Like Marble Without the Cost
Where Our DIY Kitchen Island Is at Right Now
Our DIY kitchen island is done enough to be fully functional, but I will eventually add end panels and trim to hide the seams between the cabinets and cover the screw holes. I also want to stain the island a dark color. I’ll update this post when those finishing touches are done, but we’ve only lived here six months, and DIY progress takes time, especially with five kids in the mix.
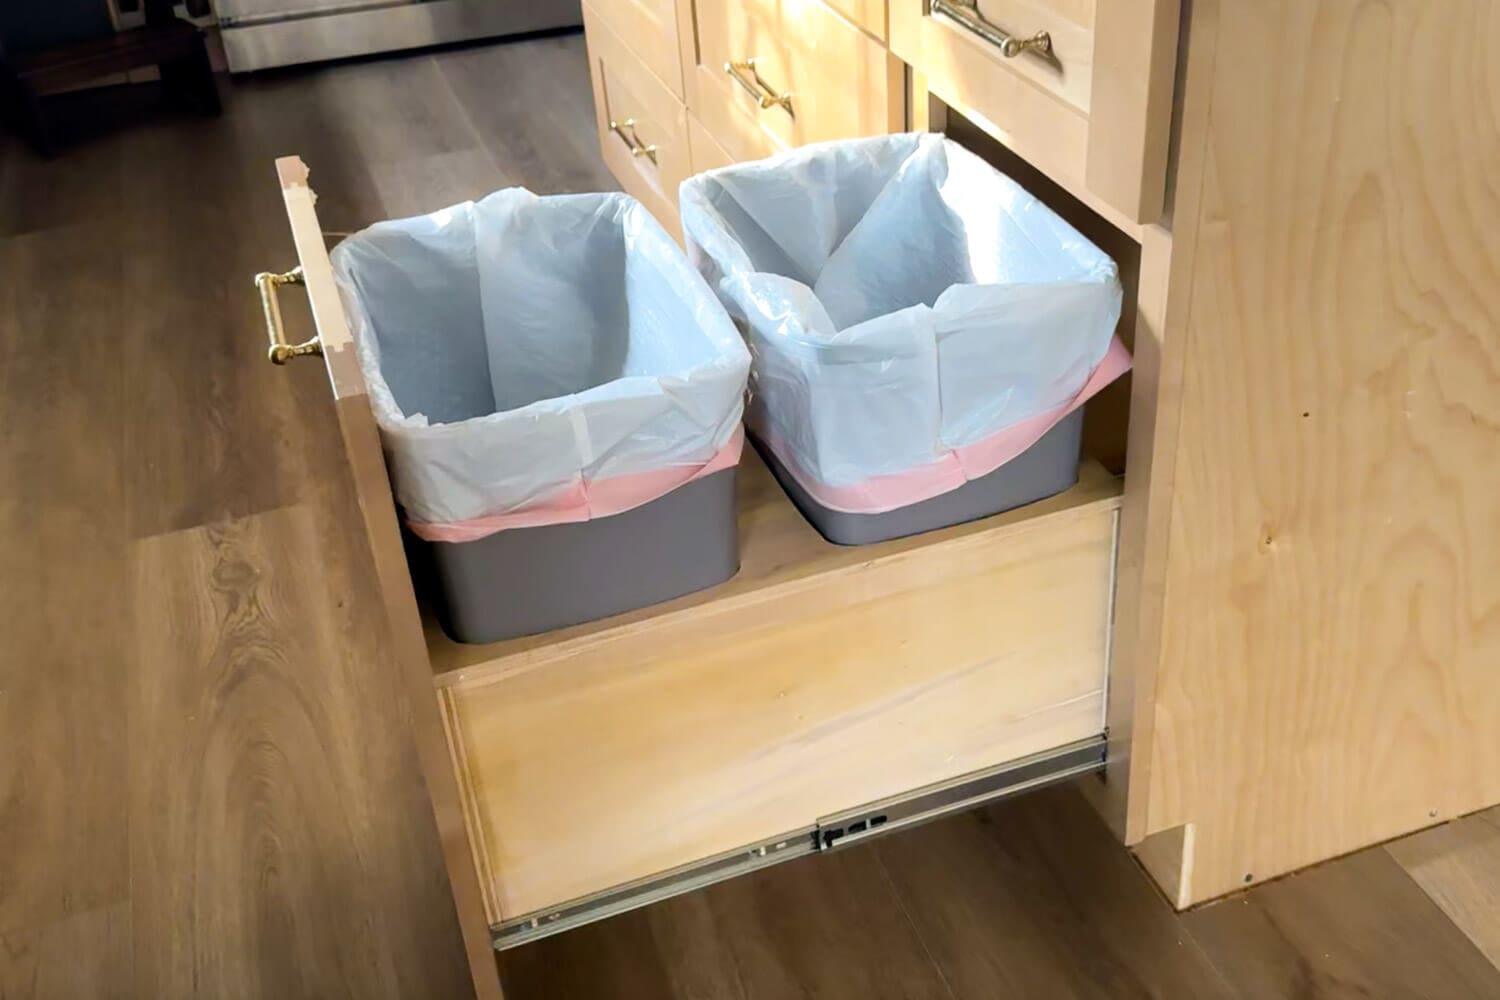
One upgrade you don’t want to miss: I turned a regular cabinet in our DIY kitchen island into a double pull-out trash can cabinet, and it’s a game-changer. Read that tutorial here: Double Trash Can Cabinet DIY: Hide Your Kitchen Garbage
Before and After: Our DIY Kitchen Remodel
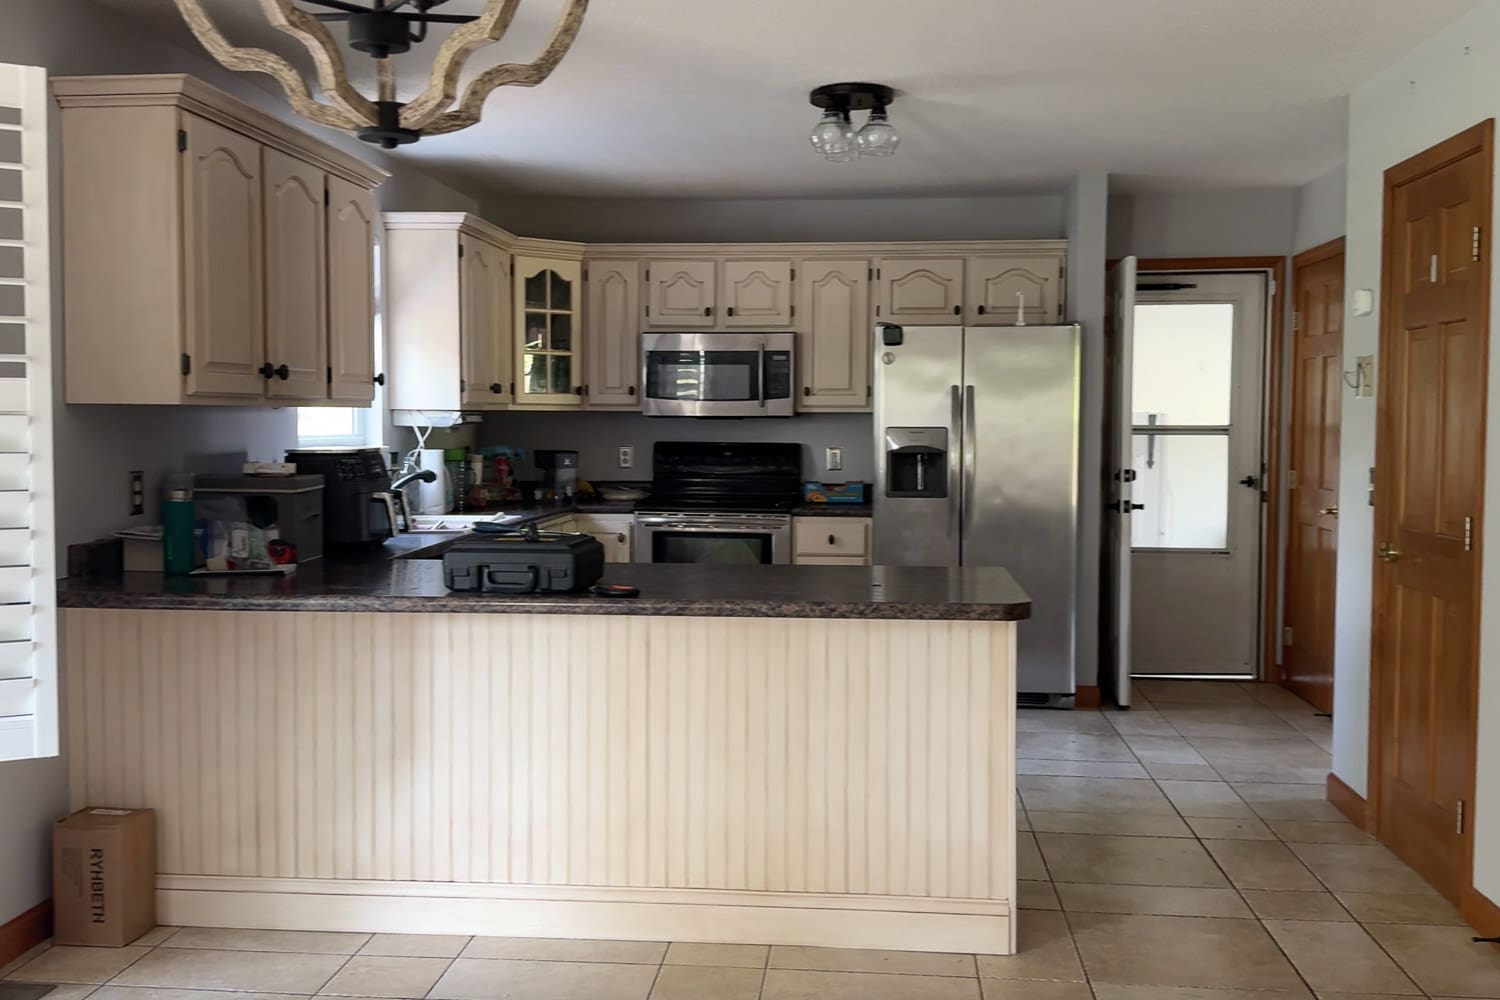
This is how the kitchen looked the day we moved in. We instantly started planning a few layout changes, but the biggest one was swapping the peninsula for an island.
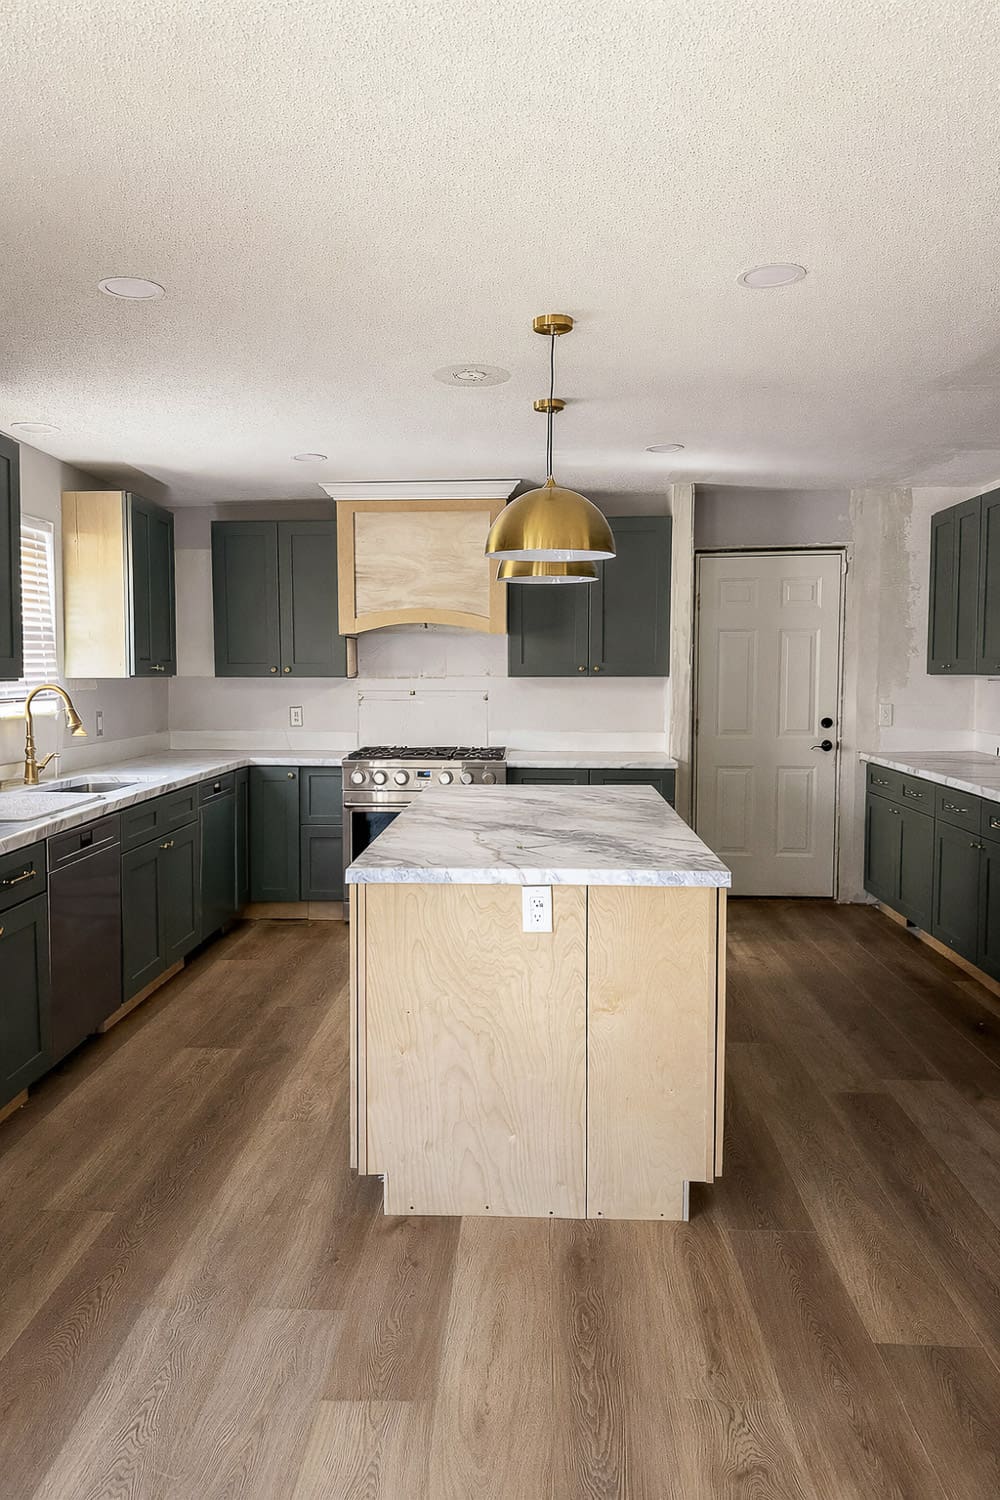
If you need proof that a DIY kitchen island can completely change a kitchen, this is it. Look how much more open, functional, and usable this space feels now, and with so much more worktop and storage space.
If you want the full story and all the messy details behind this remodel, including demo, layout changes, and projects like building our range hood, head over to my full kitchen remodel post here: Kitchen Update: Our DIY Remodel Progress After 6 Months
📌 Save This DIY Kitchen Island for Later
If building a DIY kitchen island is on your someday list, do yourself a favor and save this post now so you’re not hunting for it mid-project with sawdust in your hair. Pin it to your Kitchen Remodel, DIY Cabinets, or DIY Kitchen Island board so you can come back when you’re ready to start.
FAQ: DIY Kitchen Island
The easiest way to build a DIY kitchen island is to use base cabinets as the foundation. Position and level the cabinets, screw them together, then anchor them to 2×4 blocking that’s attached to the subfloor for a sturdy, built-in feel.
In most cases, your kitchen island should sit on the subfloor, not on top of the flooring. This is especially important when it comes to floating floors like laminate and LVP that need to be able to expand and contract. Cutting the flooring out around the island footprint gives you a solid surface to anchor the island to and will prevent disrupting your floors.
A common guideline is about 36 inches of clearance, but more is better in busy kitchens. Make sure you can comfortably open appliances (like the oven and dishwasher) and drawers, and still walk around your kitchen island without feeling cramped.
Yes, and it’s a great option if you need storage more than stools. We skipped seating on our kitchen island and used narrow cabinets on the back side for extra storage.
Drawers are usually the better choice for the working side of a kitchen island because they’re easier to organize, you can see everything at once, and they often hold more than lower cabinets with shelves.
