


DIY Curvy Nightstand


Updated May 9, 2026
You guys. I can’t even tell you how excited I am about today’s project. With my limited tools and knowledge of woodworking I was just about resigned to the fact that I would probably never be able to build anything that wasn’t square unless I spent the time and money to buy all the right tools and learn how to make it. Well, since my husband is starting medical school and I am a stay at home mom, that basically means we don’t have it in the budget. Don’t get me wrong, though. I would happily do it if money wasn’t an issue because I have found that I love woodworking THAT MUCH. But then I came across this beautiful curvy nightstand found at Her Tool Belt and I knew I just had to build it!
You want to know the best part about this whole thing? The only tools you need is a jigsaw, a Kreg jig, and a miter saw. I thought for sure it would require more advanced tools than that but it doesn’t! I’m seriously in love!! I built two of them and made them 27″ tall, the right height to be a nightstand. If you want them to be end tables all you need to do is build the 23″ version and you’re set!
Materials
- 2x10x10
- 1×8
- Kreg jig
- Miter saw
- Jigsaw (although if you have a bandsaw that would be better)
- Measuring tape
- paint stick
- clamps
- 2″ screws
- 1 1/4″ screw
- 60 grit sandpaper
Don’t let this project intimidate you, it’s really not as difficult as you might think. My first one was quite imperfect and took me a little longer, but when I made the second one I did the whole thing in a couple of hours! Oh, and did I mention I did it all on my kitchen table? Living in a one-bedroom apartment means you might have to do that. It’s okay though because we have this awesome thing called a vacuum that takes care of all the mess!
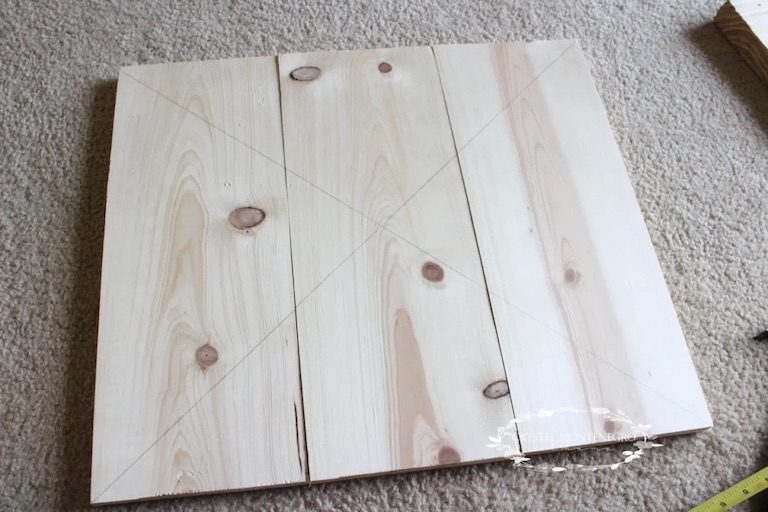
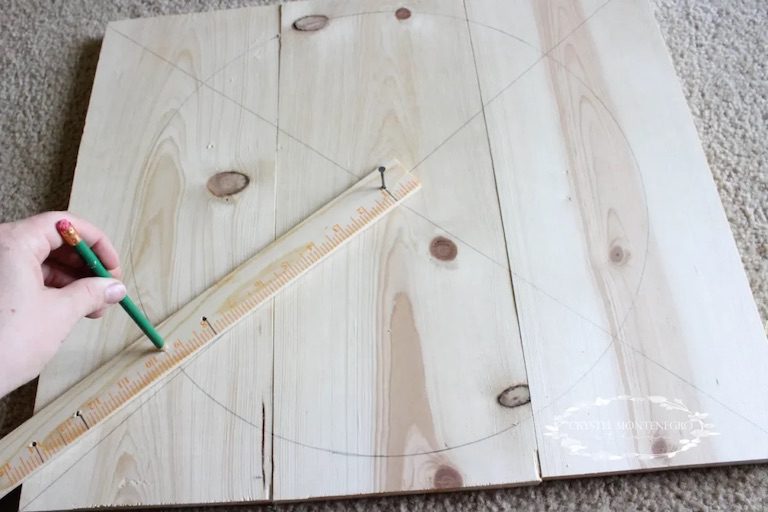
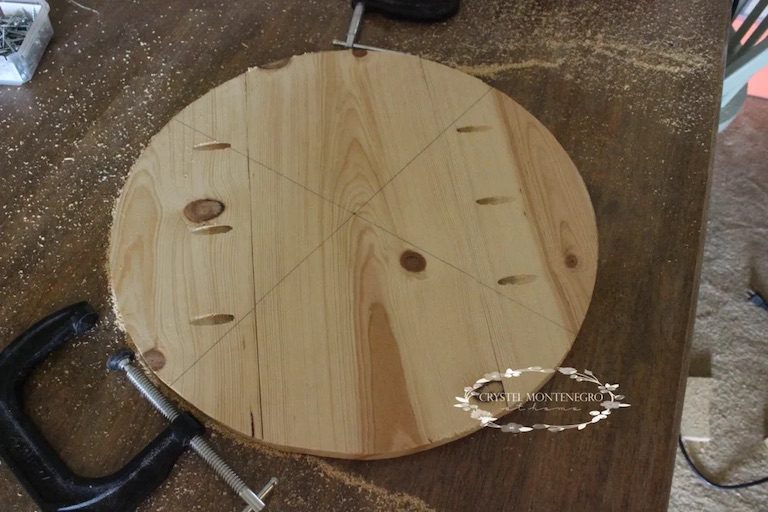
I started by building the tabletop. I happened to have a piece of 1×8 leftover from another project, so I cut it down into 3 pieces 18″ long and lined them up. I drew an X from corner to corner to find my center.
To draw the circle, I grabbed my paint stick (that I had already used for building my round picture frame), drilled a hole at 1 inch in, then again at 9 1/2″. I drove a nail through the 1″ hole and stuck a pencil through the other, then pivoted the paint stick to draw a perfect circle! Simple, right?!
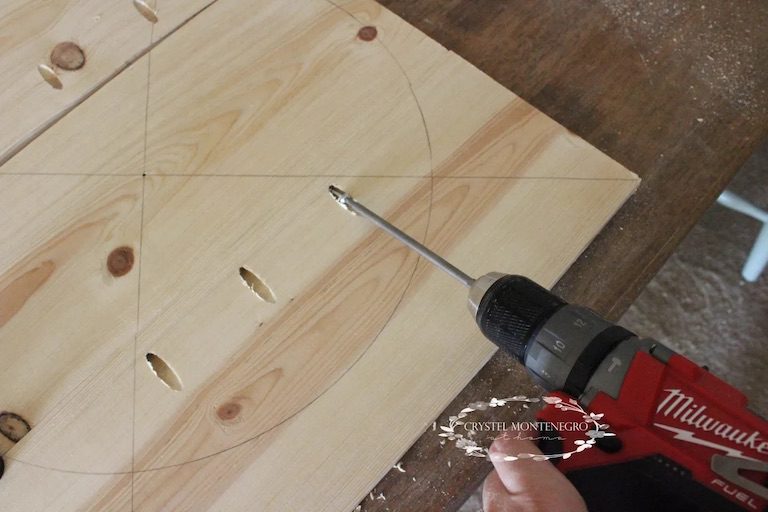
The next order of business was to drill my pocket holes. I didn’t want to drill the holes first because I wanted to make sure they were going to be safely within the circle so I wouldn’t cut them off. Once the holes were drilled I attached the boards with 1 1/4″ screw.
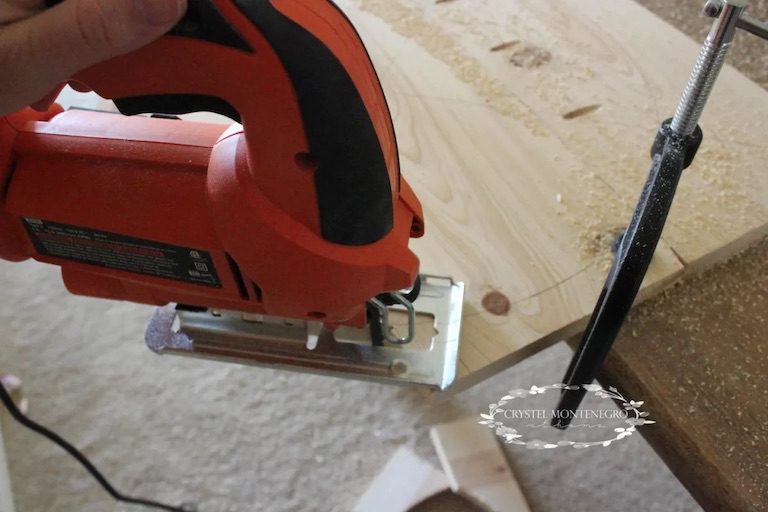
Next I cut out the circle. I clamped the board tight to my table and went carefully around the lines with my jigsaw.
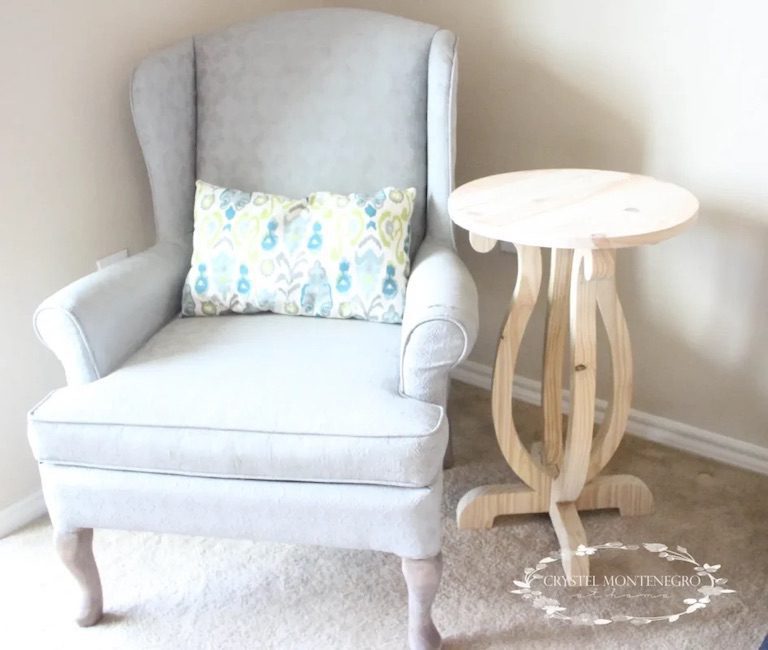
Now you should have your tabletop.
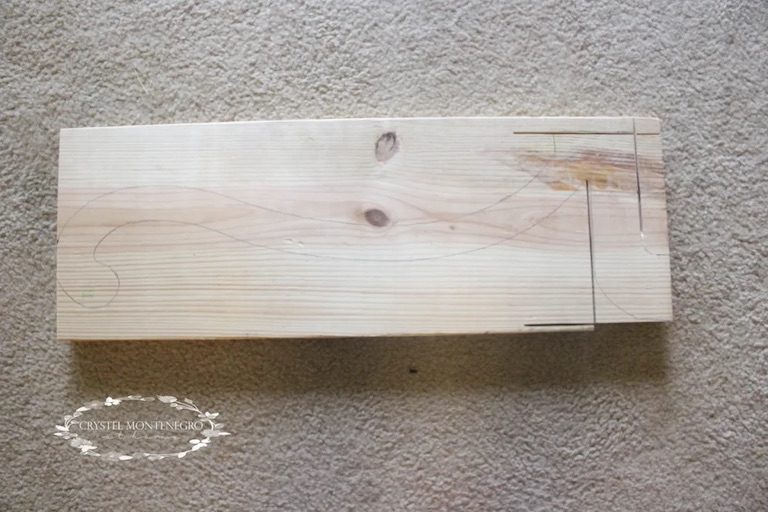
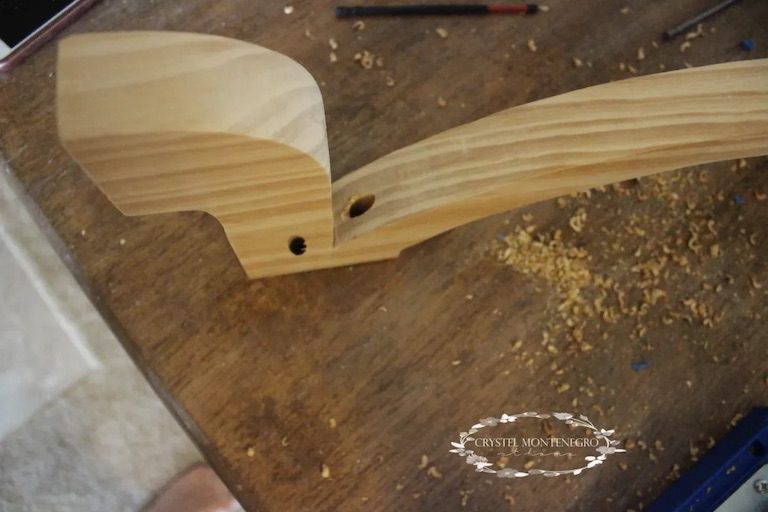
Now for the legs. Depending on the size of the table, you’ll want to cut down your 2×10. I cut mine to 30 inches since I was building a taller table, and then I traced the patterns found on Her Tool Belt onto the wood. On her site she mentions nesting the two patterns to trace two legs on the same piece of wood, but I found at least with the 27″ table that was not possible. I also used my miter saw to make as many of the straight cuts as I could because the jigsaw is much less precise and can take longer to cut the wood. This saved me quite a bit of time.
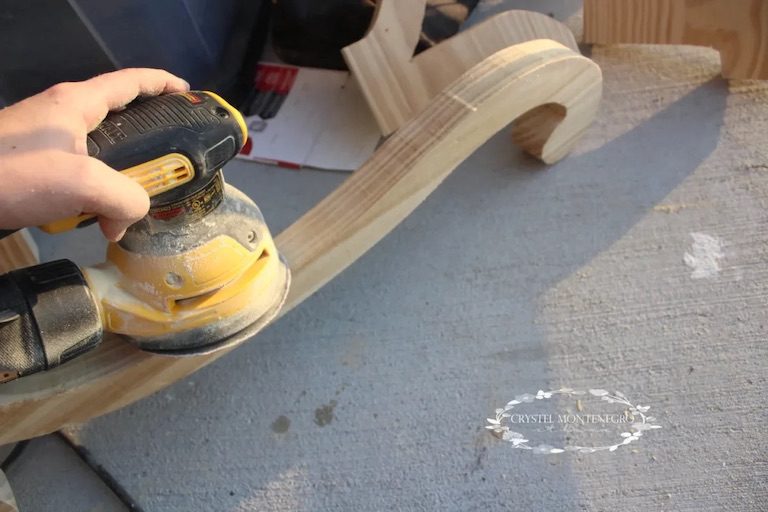
After I cut out my first table leg I was so discouraged. I was thinking “this is not going to turn out well”. I had all kinds of cuts in my wood that either should not have been there or that should have been more precise but I decided not to sweat it and kept on going. I did find that as I cut out more of the table legs they became much easier to cut, and looked much prettier. You know how your parents always say that practice makes perfect? Well that applies here too. You can do it!!

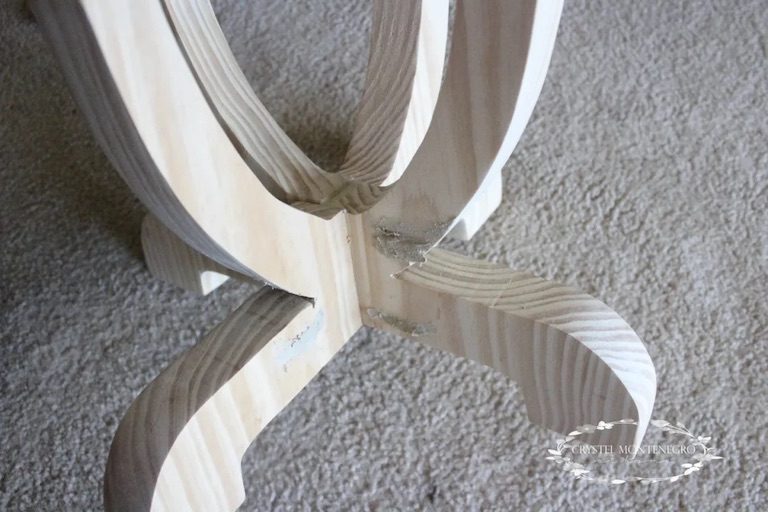
Once I had all of my pieces cut out I did all the heavy sanding. I started by using 60 grit sandpaper because I had LOTS of things to sand down. I also found that in a couple of the grooves I couldn’t get my hand sander in there so I sanded them by hand. There were some parts where my jigsaw wasn’t exactly level when I made the cut so my edges weren’t straight, but I found that my sanding made up for a lot of that. I also found that you can’t really tell that not everything is square once you put it all together and get some paint on it. This is also where I cut down two of the legs 3/4″ on the edge that I would be joining all of the legs together. This made it so two of my legs weren’t sticking out further than the other two. For more clarification Her Tool Belt does a great job of explaining this.
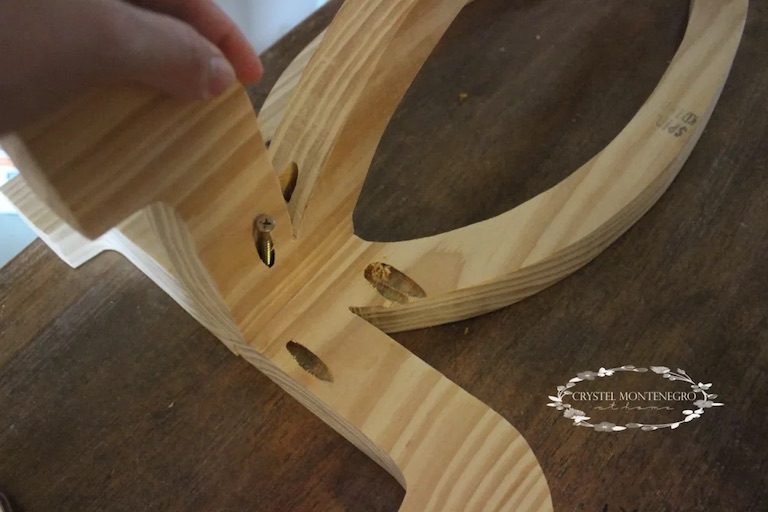
Next I put it all together. This was the trickiest part, but it really wasn’t that tricky. I wanted to make sure that my screws weren’t going to run into each other when I screwed everything in. With the first two pieces, I drilled two pocket holes on the very top and very bottom of the joint, then screwed them together. To make sure your table is level, don’t try to line up the center. If yours turns out like mine the joining edges will all be different sizes. (Not sure how because I traced the same pattern onto each one). You’ll want to stand it on end and make sure the bottoms of your legs, the part that is touching the floor is level. Then screw it in that way.
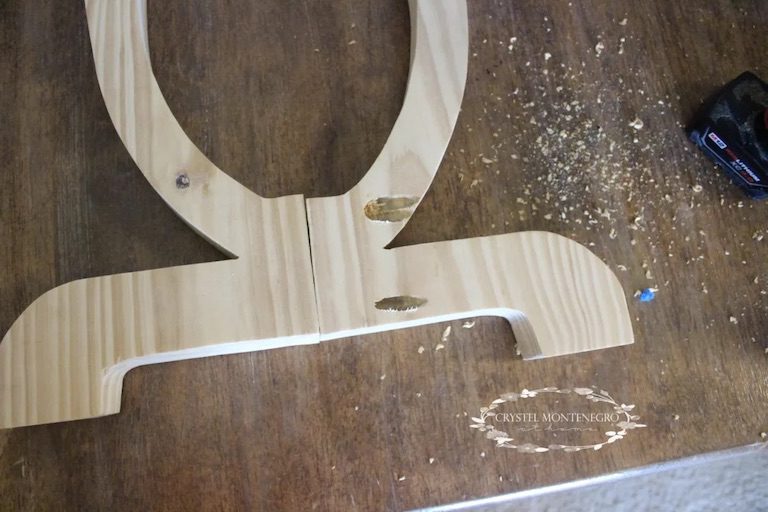
With the other two legs (the ones I cut the 3/4″ off of) I drilled one pocket hole on the inside and one right in the middle of the leg. I found that if I were to drill a pocket hole next to the other one it would take off a big chunk of the corner and I didn’t want that to happen.
Attach them all together with 2″ screws.
Almost there! Repeat the same process with the 4th leg, only this time make sure to drill the holes on the opposite side of the 3rd leg.
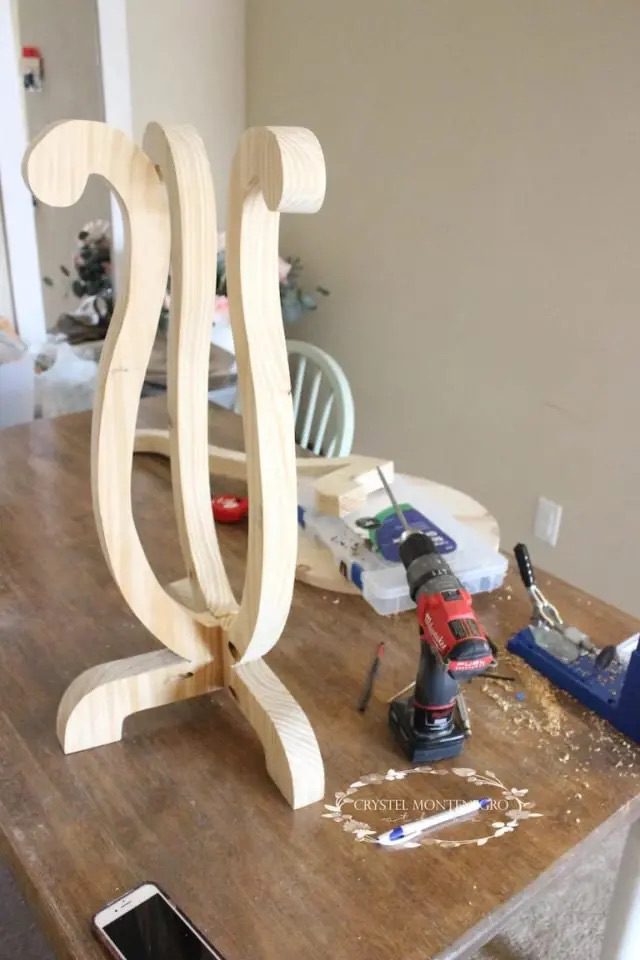
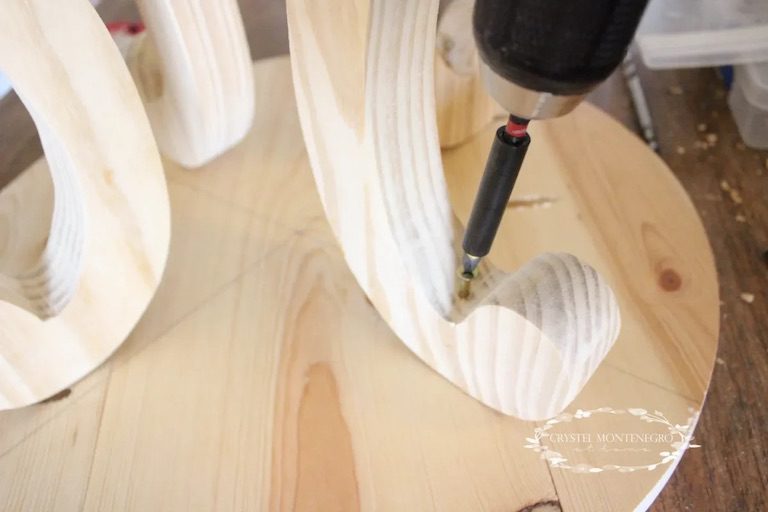
Your last order of business before the final sanding and painting is to attach the tabletop. I just centered the legs on the table, then drove 2″ screws into the tabletop through the legs.
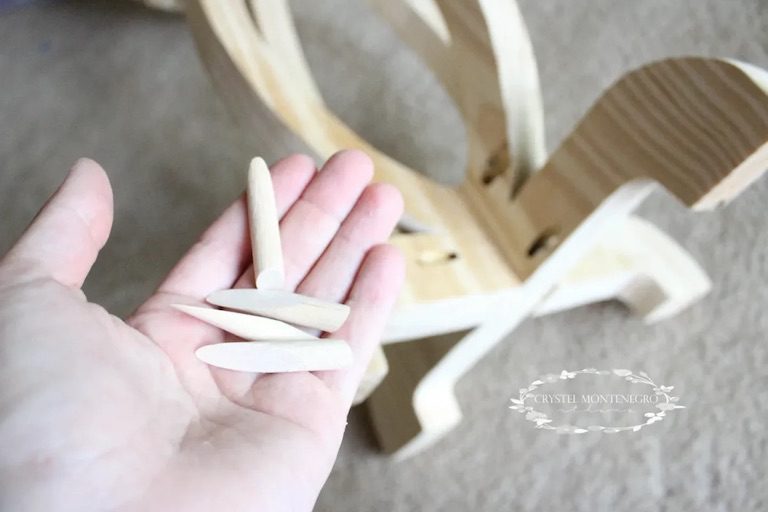
I filled my pocket holes with these fillers you can find at home depot, then covered them up with wood filler.
Once the wood filler was all dry I sanded it down to be level with the wood. This is what it looks like unfinished after I went over the whole thing with a 220 grit sandpaper! Isn’t it beautiful??
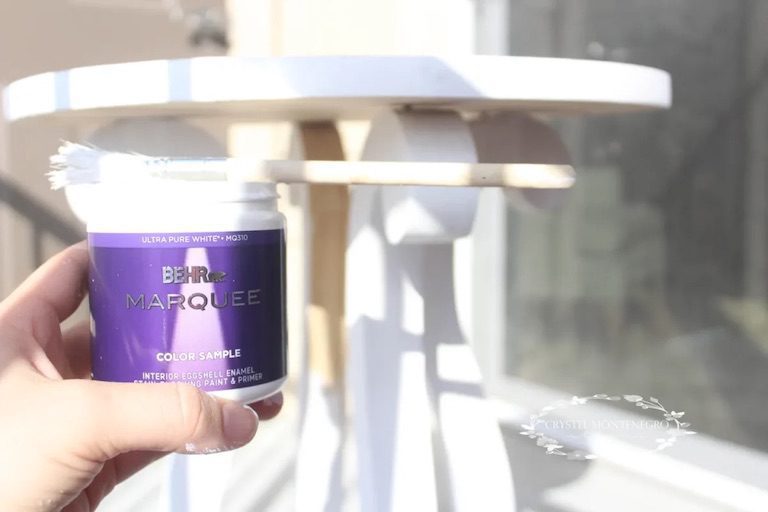
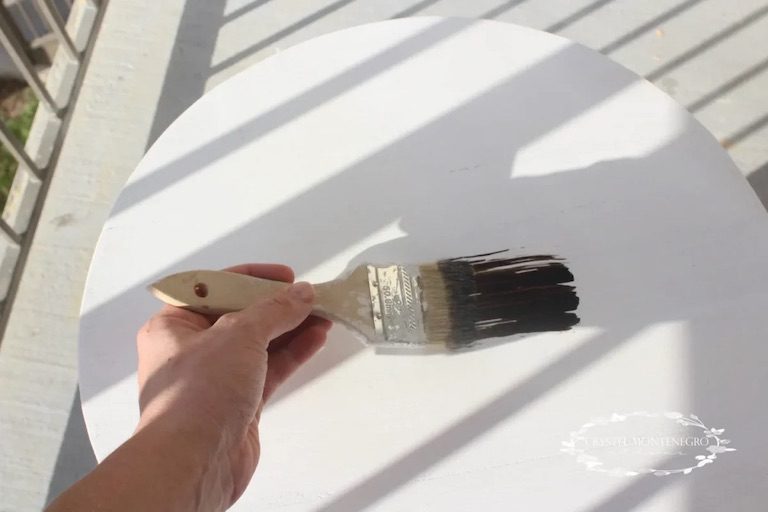
For the paint I used a sample of Behr Marquee paint in pure white, then went over it with a layer of shellac so the dark glaze wouldn’t muddy up the white too much.
I sanded down all the corners ever so slightly so the glaze would soak in.
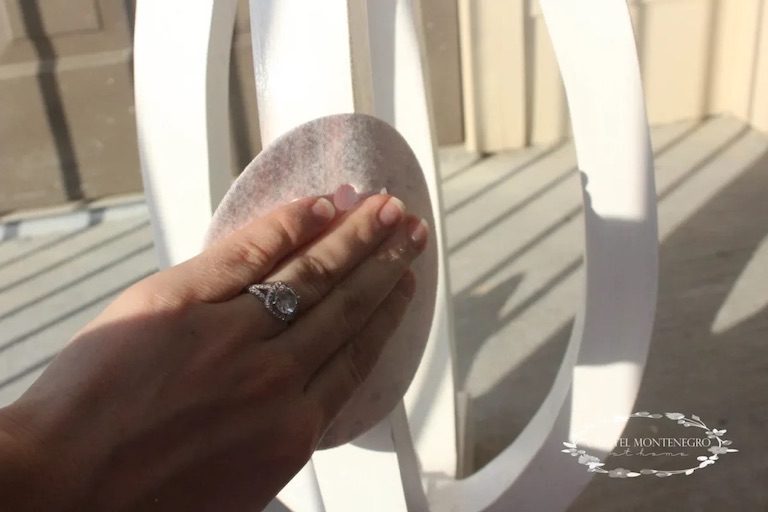
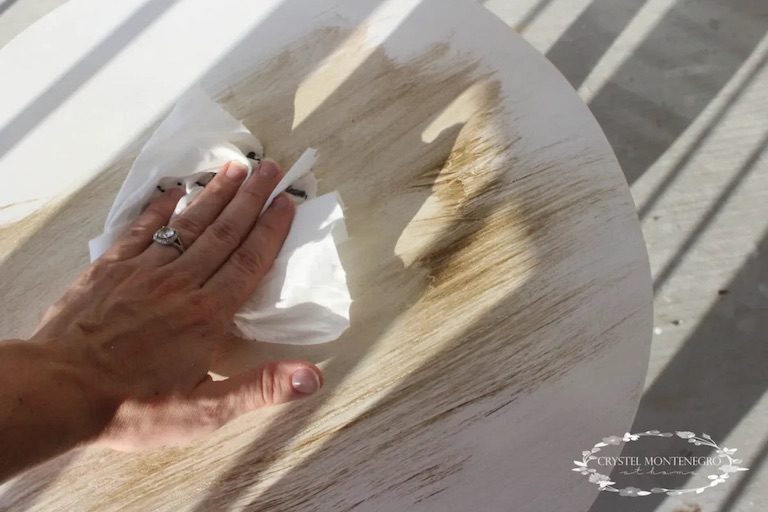
I brushed the glaze onto a small section, then quickly wiped it off. Be careful, if you’re doing it on a very hot day like I did it will dry very quickly, then leave a muddy mess. So small sections are best to work in.
I wanted the glaze to especially soak into the edges I had sanded, so I made sure to focus on these areas most. Once finished, I went over with a layer of clear wax mixed with just a touch of white paint to tint it, and that helped to lighten up some of the glaze.
So pretty, right?! I seriously am extra proud of this one.

Because I already had the 1×8 and the paint, this whole project cost me about $10 for the 2x10x10 board. Is that a steal or what?! Oh, and see that painted chair, that round wooden frame and that throw pillow? I DIY’d them all! Check ’em out!
Thanks for visiting, I would love to know if you make one of these! Leave a note in the comments below if you have any questions!
