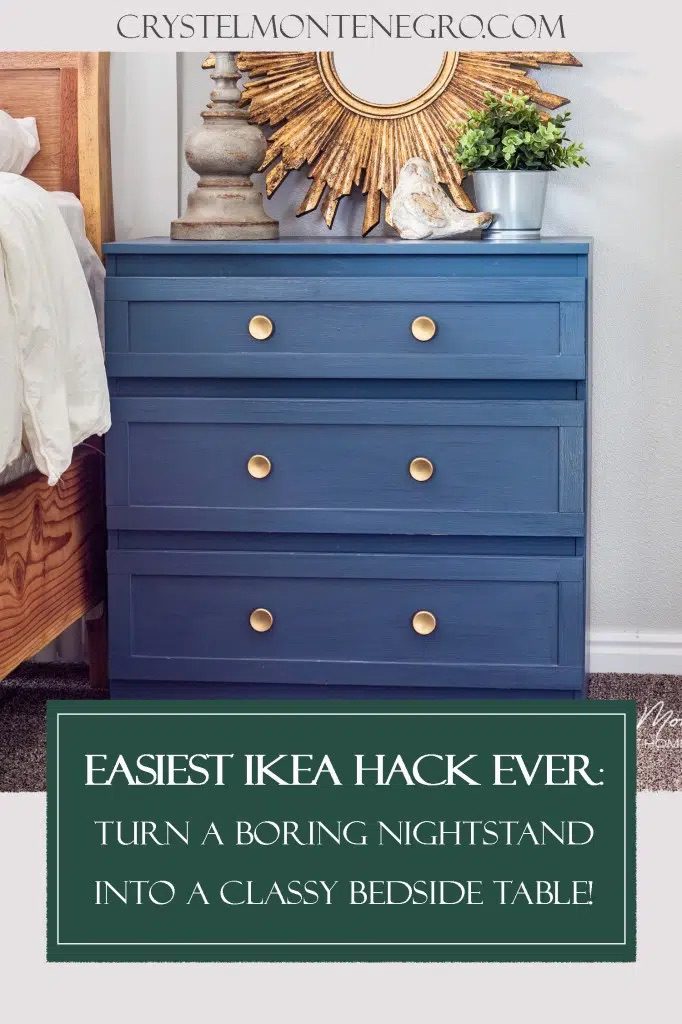
Easy Ikea Hack: Turn A Boring Dresser Into a Classy Nightstand!


Updated May 9, 2026
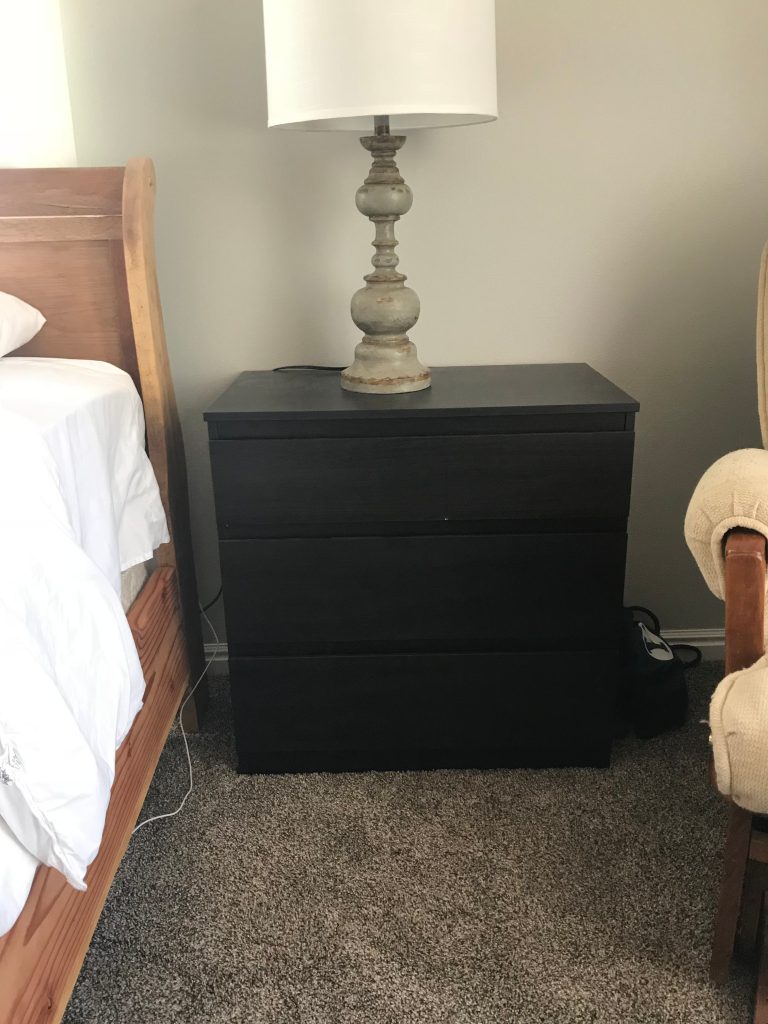
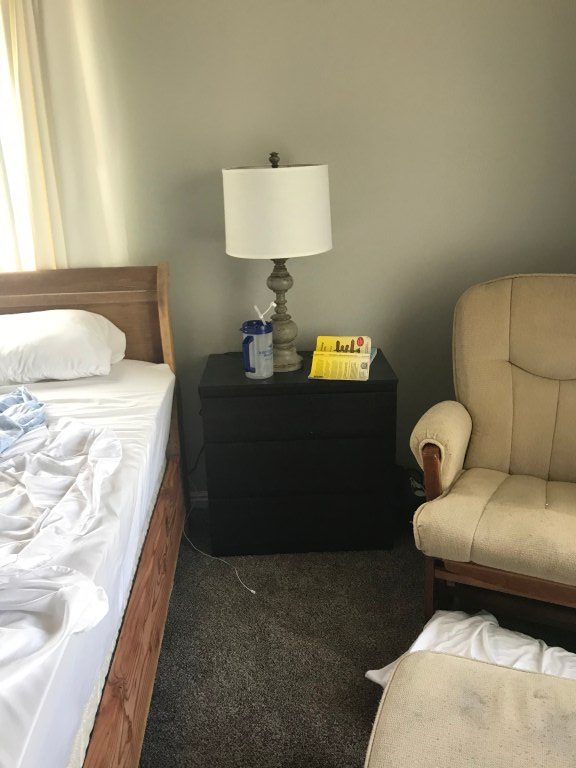
Who loves a good IKEA Hack?? I sure do, and this is one of those that takes so little time and makes a BIG impact. My husband and I moved into our new place without a nightstand to our name, although we did have this massive queen size sleigh bed given to us by my sister. What I realized is that with our pillow-top mattress, plus a 3-inch Costco memory foam mattress topper (as if it wasn’t already soft enough) every nightstand I looked for wasn’t going to be tall enough. I thought about building one, but when I found dressers at IKEA they would have been about the same price to build but without all the work. No brainer!
Materials
- Two strips of 8 foot PVC lattice found at Home Depot
- Liquid Nails
- Measuring Tape
- Saw of any kind. I used my miter saw
- Chalk paint in color of your choice
- Water-Based Polycrylic
- Paint Brush or Roller
I decided they needed a little sprucing up (obviously) and it wouldn’t be a true IKEA hack if we didn’t throw a little bit of paint on it. I wanted to add a little shaker-style look, and the cheapest way I could find was to purchase some strips of PVC lattice at Home Depot.
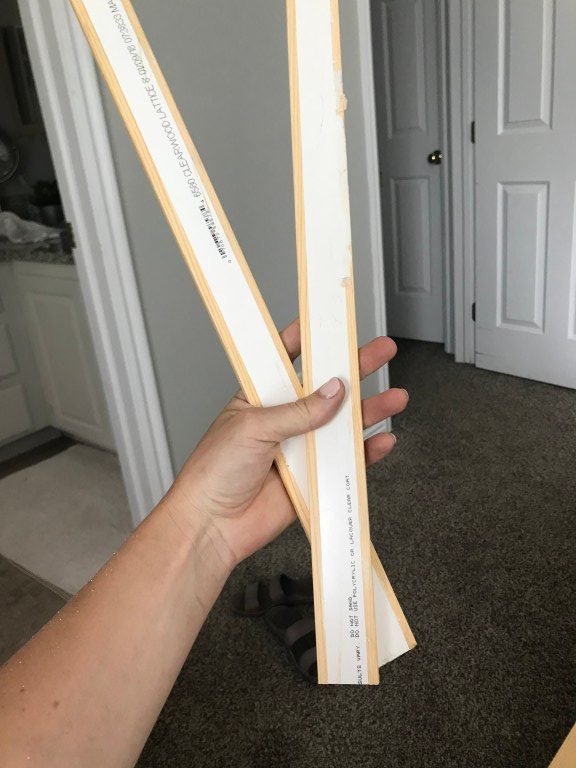
I cut them to length using my miter saw (although you can probably use any saw or other method since they’re made of plastic) and glued them in place with a little bit of liquid nails.
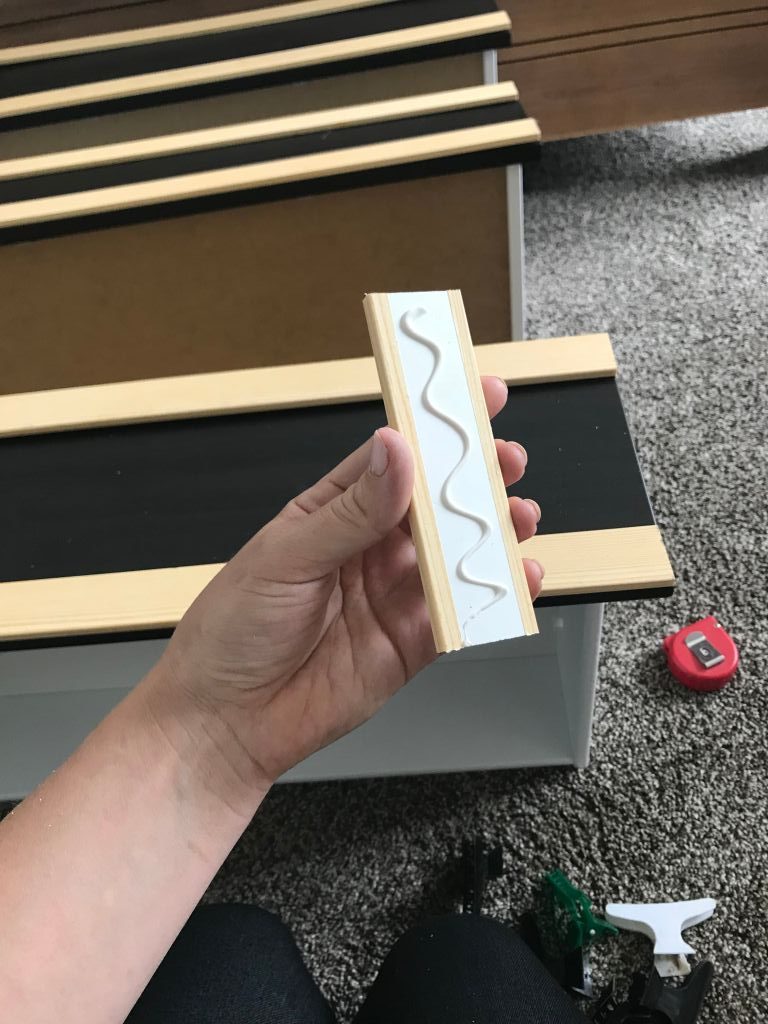
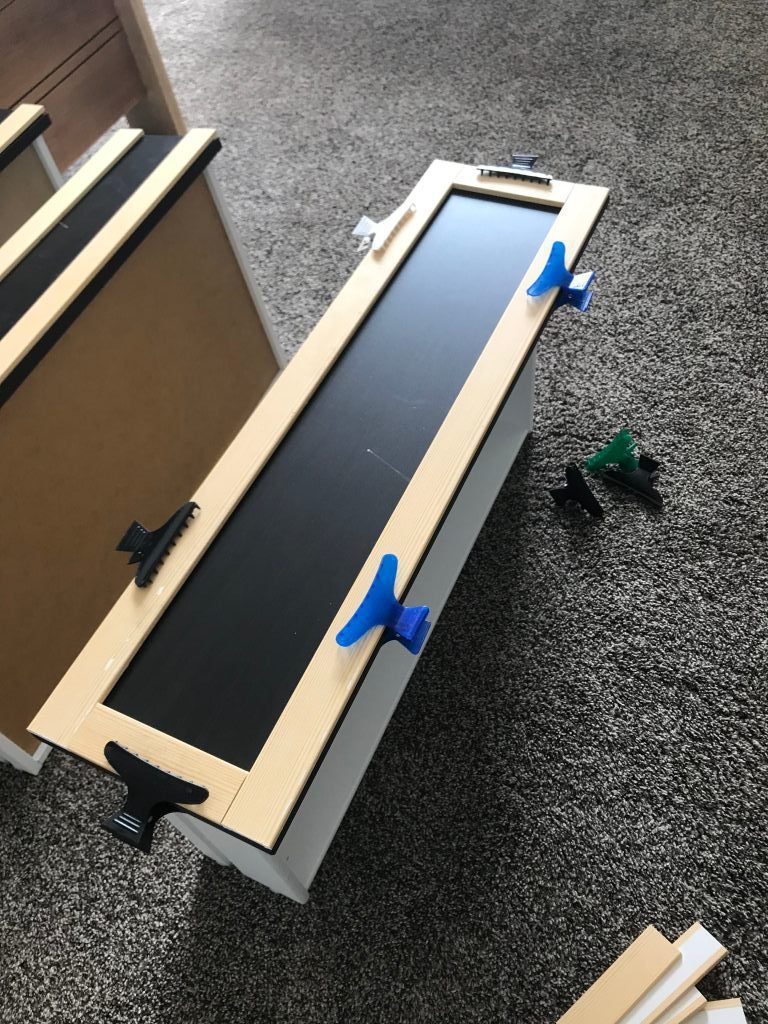
Since I didn’t have any clamps, I got real classy and held them on until the glue dried with my super-fancy butterfly clips. Pays to be a hairdresser, eh? I let the glue dry, and then began to paint!
Can I just tell you how much I love Chalk paint?? The exterior of this dresser was made of some kind of laminate and the lattice was made from PVC, and the chalk paint adhered to it beautifully. No need to prep the surface at all! Sometimes it can be a little bit sketchy painting it onto a slick surface but trust me, in most cases once it has time to cure it’ll stick like glue.
To be quite honest, there isn’t even a name for the color of this paint. I used the Waverly brand (found at Walmart) of chalk paint and mixed up a few of the colors to get the color I liked. I believe I used the color Ocean and added a little bit of grey (Elephant).
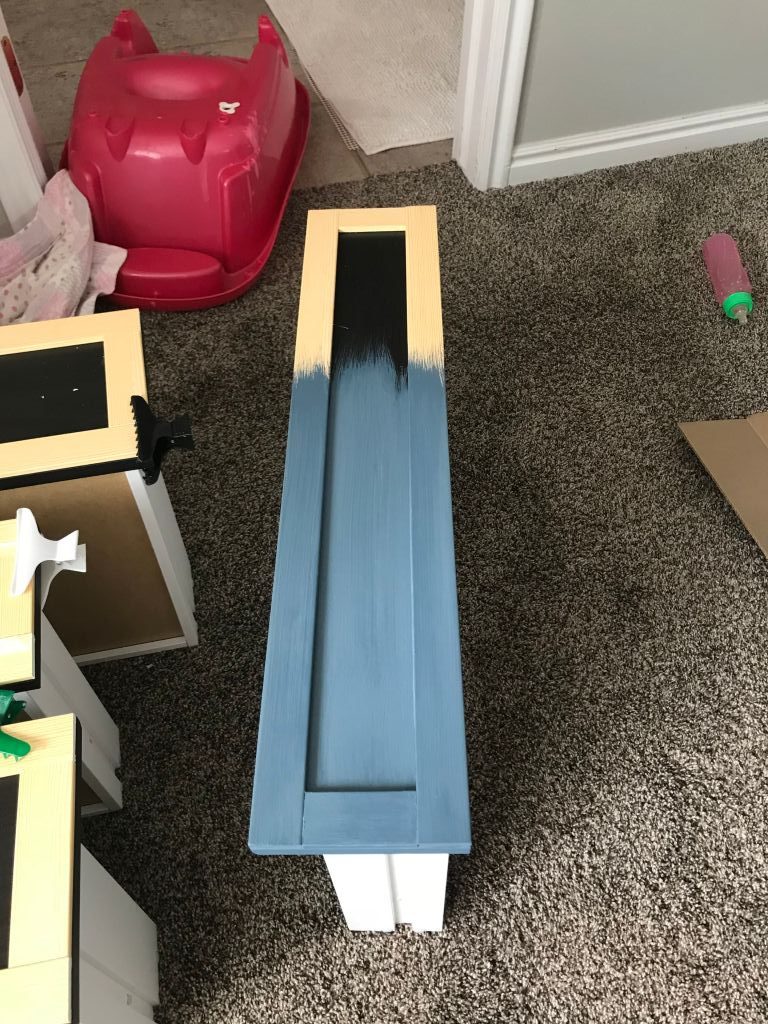
I then added a water-based polycrylic as the top coat to protect the paint. This stuff is AWESOME. It’s similar to the chalk paint, where when it goes on you’re not quite sure if it’s going to do the job, but as long as you get good coverage this stuff cures rock hard and is awesome for when you need to wipe it down. I use this to cover pretty much all of my chalk painted furniture and even my cabinets. Even things I have already waxed!
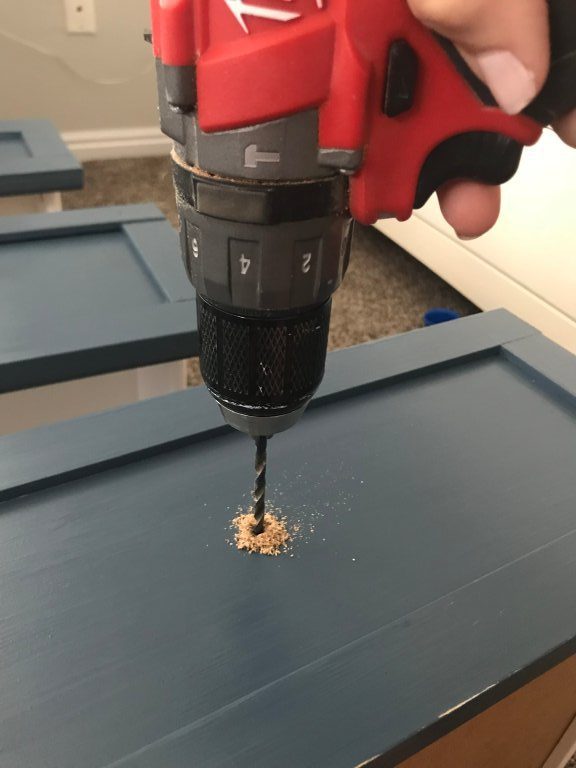
The final step is to drill the holes for the hardware.
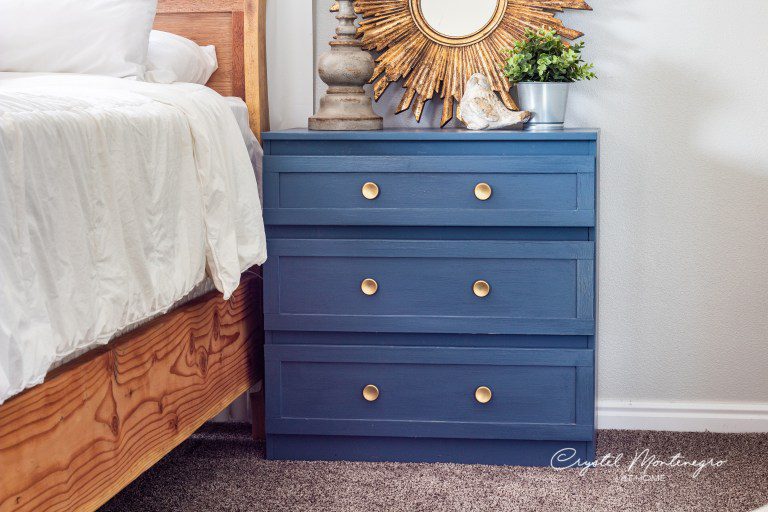
Lemme show you that the before pic again.
What a transformation, eh?? Super simple to do, minimal tools required, SO cheap, and it makes such a big impact! How’s that for the best IKEA hack ever?!

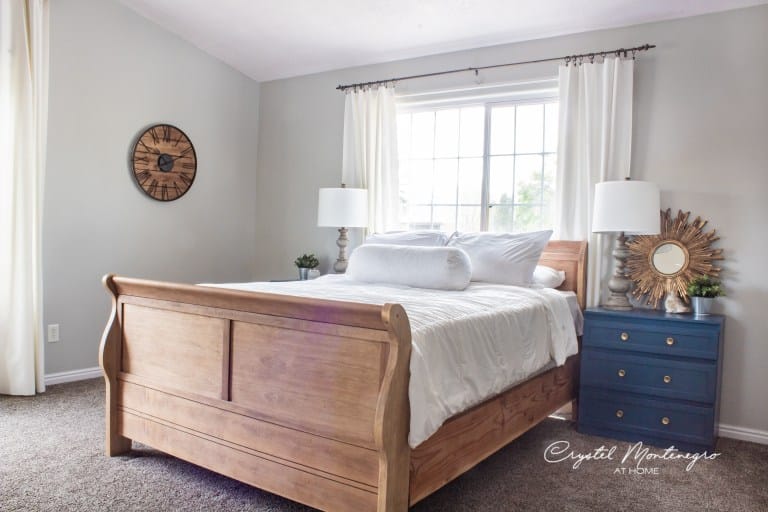
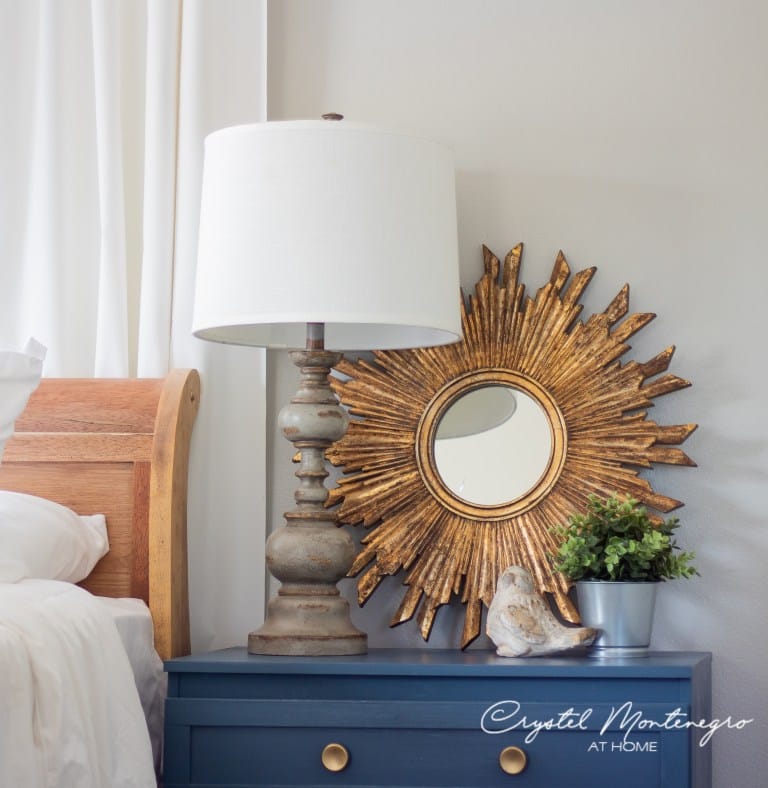
I did this project nearly a year ago and it has held up surprisingly well! Also, my mother in law found that mirror in a dumpster at her work (she works for a home decor wholesaler) and gave it to me. I love it! Nothing better than free home decor. Now to find a matching one for the other side…
I also refinished this sleigh bed my sister gave me last year mostly by sanding it down (even though it’s not all solid wood. It was tricky business), and I think I’m ready to paint over it again. What color should I do??
If you liked this post, you might also enjoy my kitchen table and chair makeover, or how I painted the fabric on my wingback chair with chalk paint.
Let me know what you think! Leave a comment below if this is something you’d like to try!
XOXO,
Crystel