How to Install a DIY Drip System for Raised Garden Beds


Updated August 6, 2025
Want a thriving vegetable garden without dragging the hose out every morning? Installing a DIY drip system is hands-down one of the best upgrades you can make to your raised garden beds. It’s beginner-friendly, super efficient, and saves water (and your sanity) during the hot summer months. In this post, I’ll show you exactly how I installed ours step-by-step, including all the tools, fittings, and tips that made this one of the easiest DIY projects we’ve done in the yard.
Whether you’re brand new to garden irrigation or upgrading your setup, this guide walks you through every step of installing a DIY drip irrigation system that works beautifully with multiple raised beds. Bonus: it’s beginner-friendly, budget-conscious, and super satisfying to knock out in a single afternoon.
Want to build the garden beds first? Here’s how I made our DIY tall outdoor planter boxes for the side of our house: Build Your Own Tall Raised Beds.
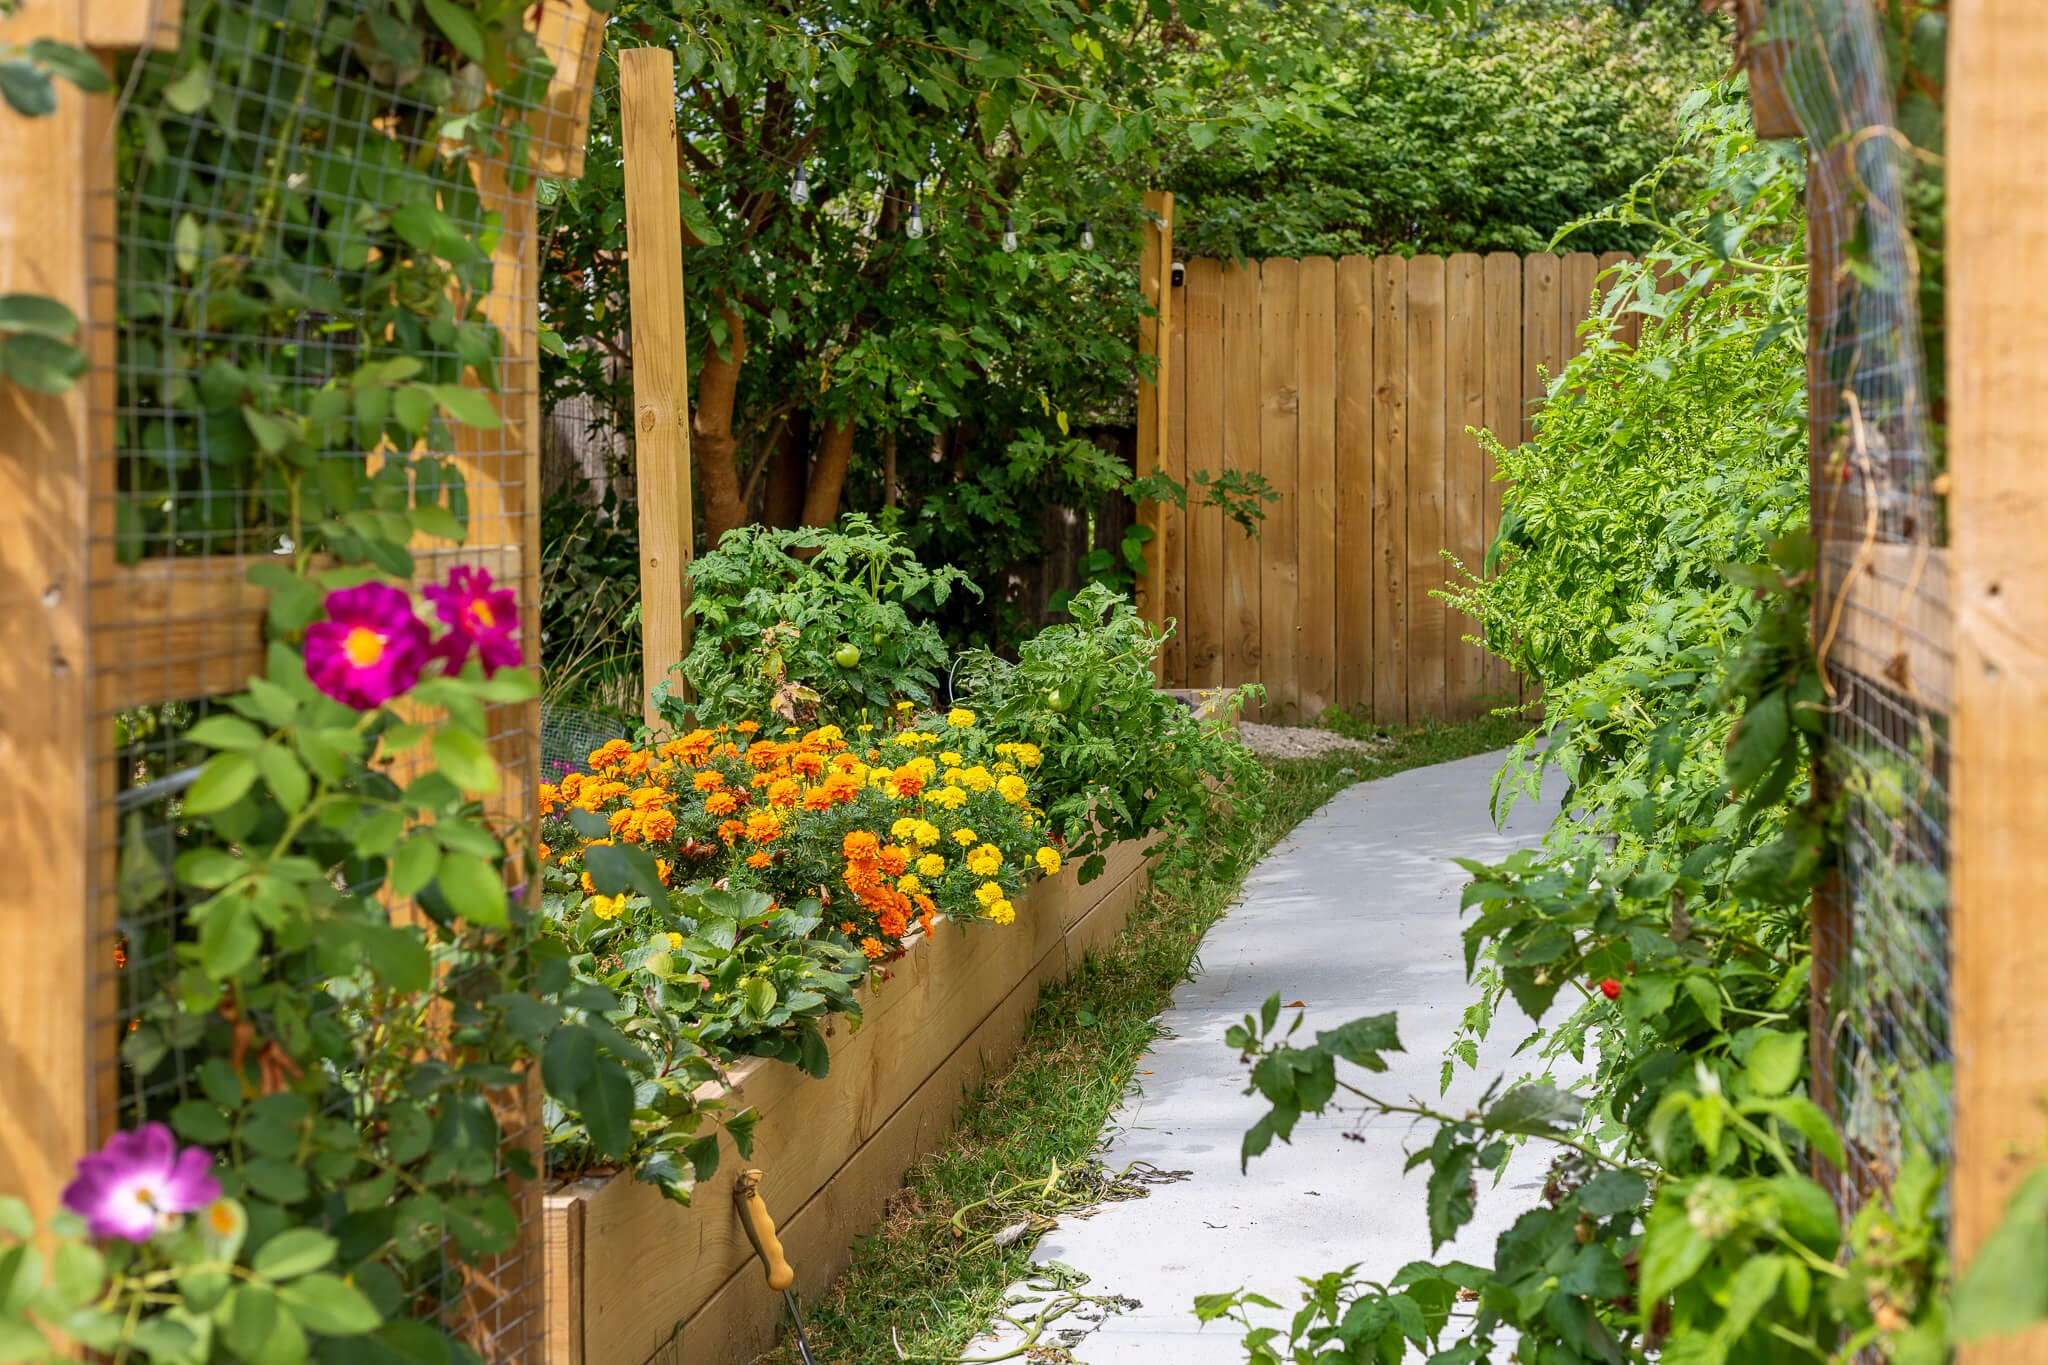
What about taking your garden design a step further? Check out the DIY garden arbor I built to add height, structure, and a touch of charm to this same space.
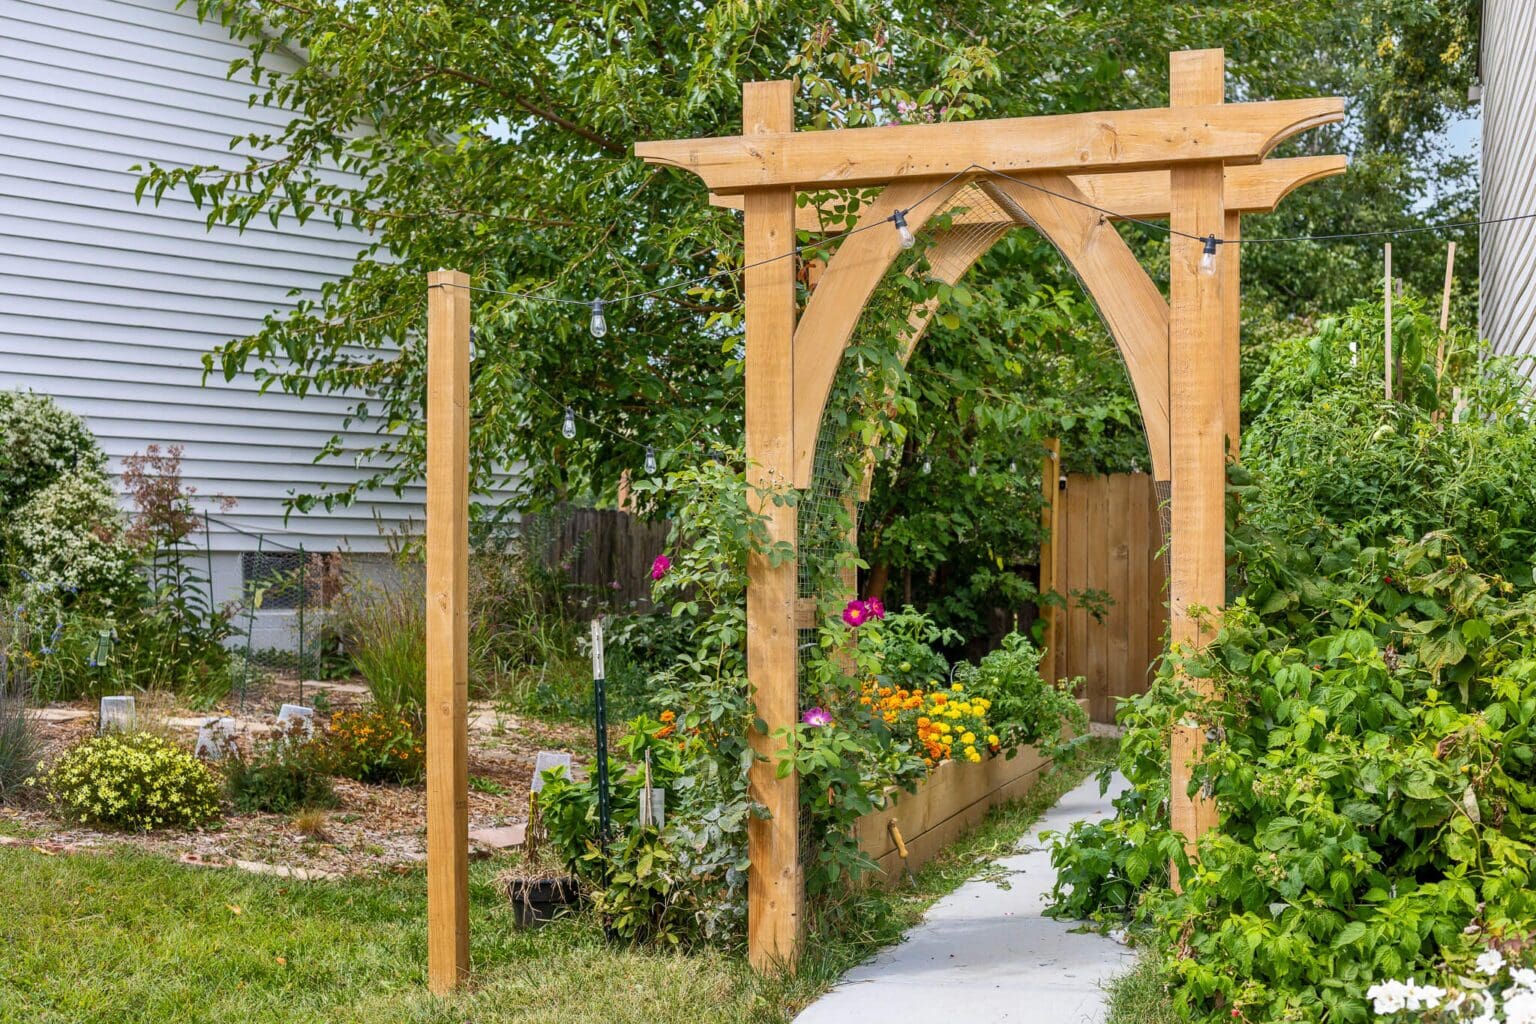
Table of Contents
- Starting Simple: The Easiest Way to Water a Garden
- Why a DIY Drip System for Raised Garden Beds Is a Game Changer
- Supply List for a DIY Drip Irrigation System
- Step 1: Find the Nearest Water Source to Install a Drip System for Raised Garden Beds
- Step 2: Install a Hose Splitter for Drip Irrigation Access
- Step 3: Build the Main Line with Poly Tubing
- Step 4: Use Elbow Joints to Navigate Corners
- Step 5: Connect a Timer to Automate Your Watering
- Step 6: Split the Main Line to Water Multiple Beds
- Step 7: Run Tubing Through the Garden Beds
- Step 8: Use a T-Connector to Branch the Drip Line
- Step 9: Extend Tubing to the Second Bed
- Step 10: Secure the Header Line Inside the Beds
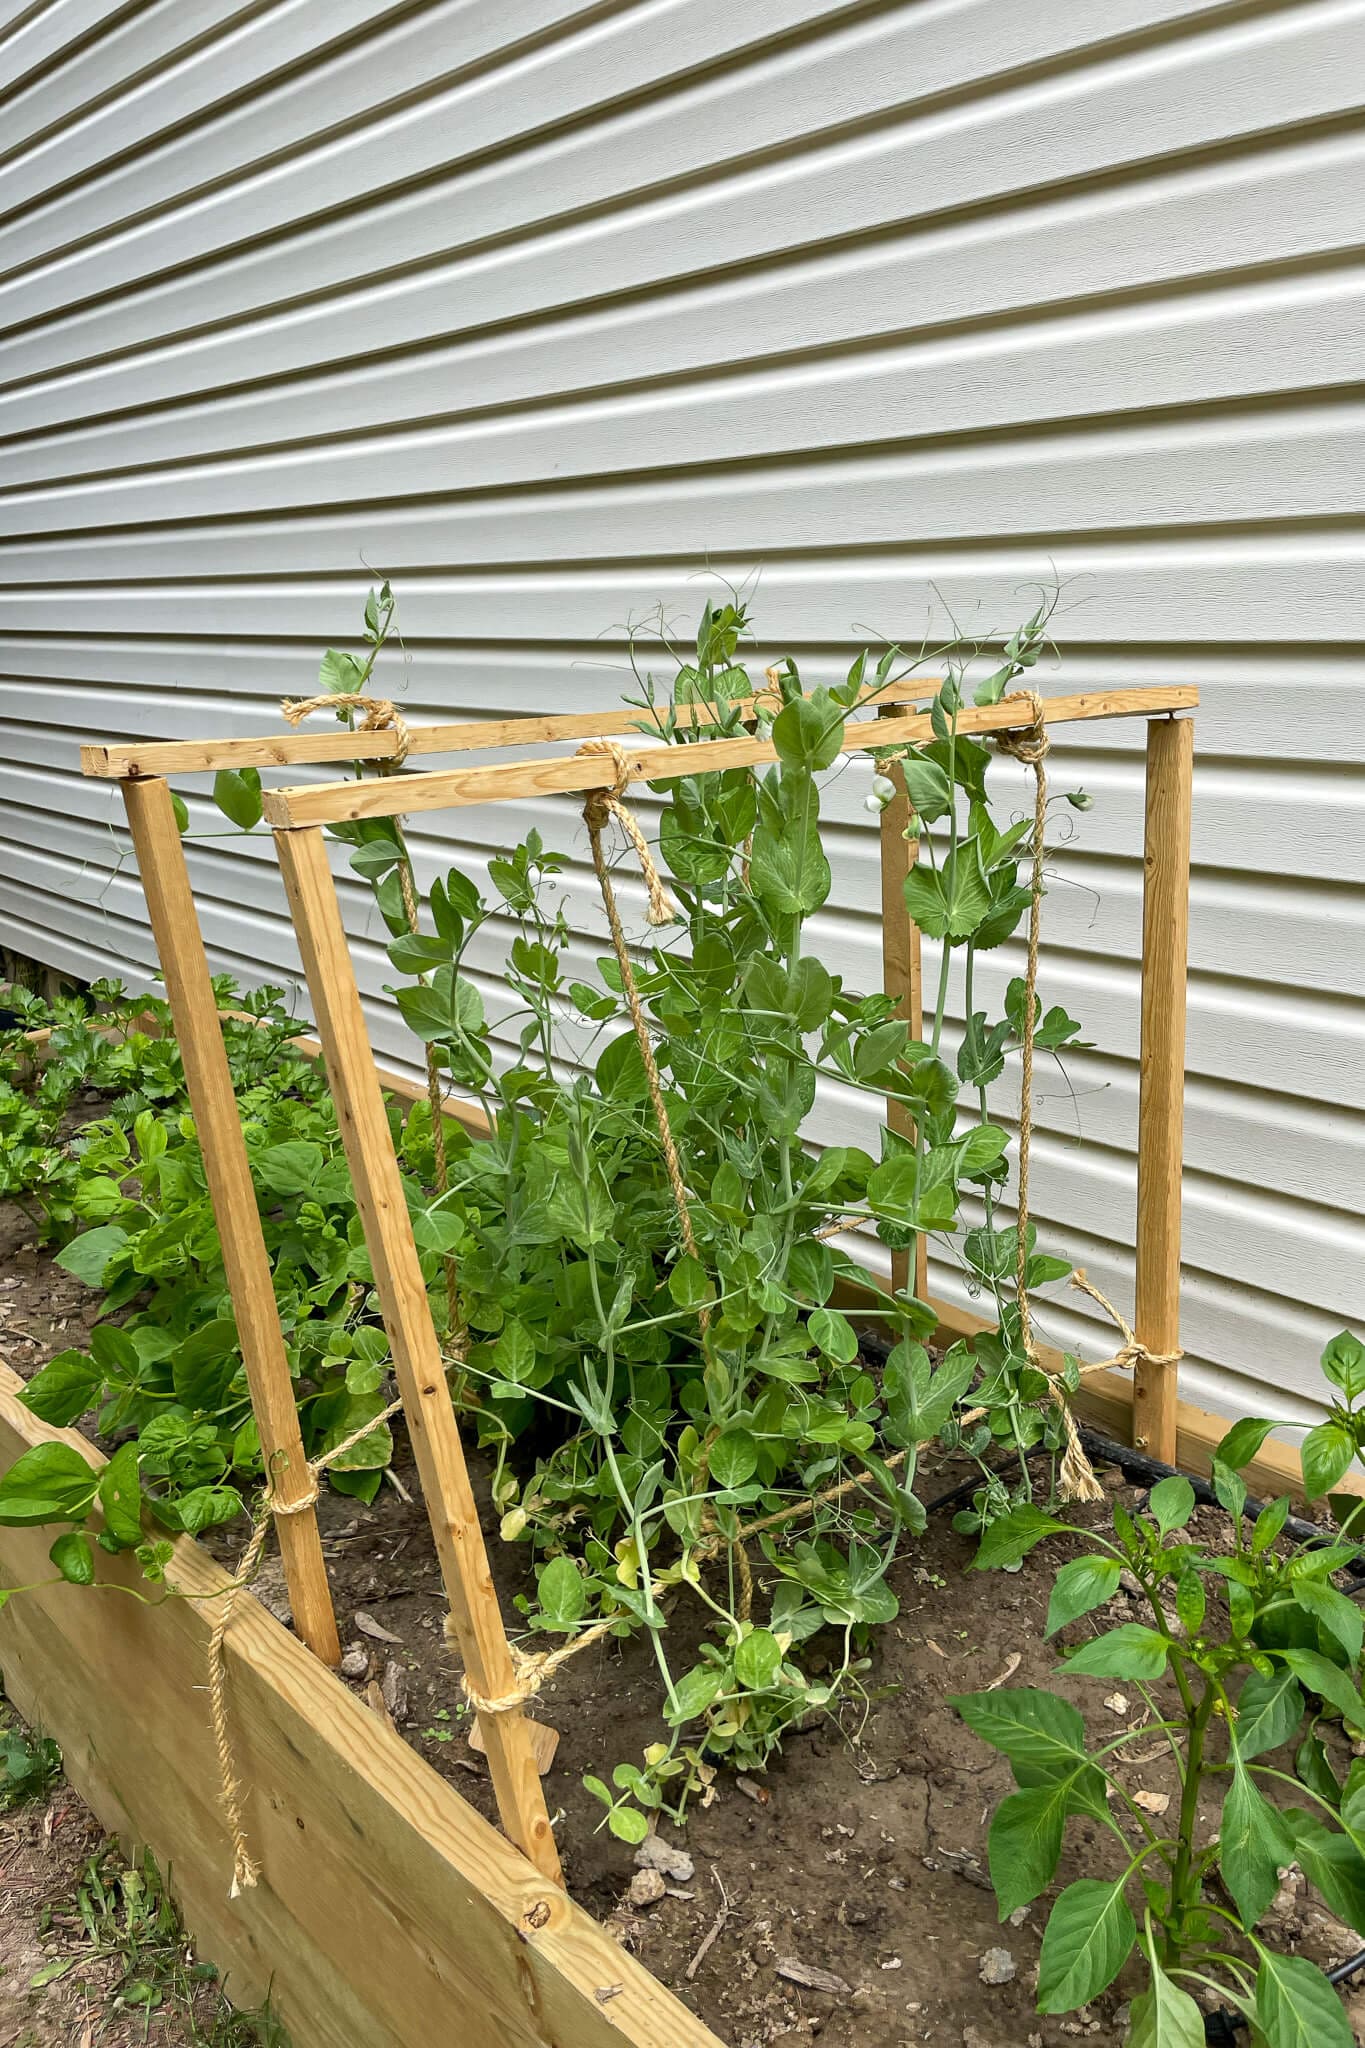
- Step 11: Add Drip Tubing + Emitters to Water Each Plant
- Step 12: Finishing Touches on Your Drip System for Raised Garden Beds
- Drip System for Raised Garden Beds Smart Watering Tips
- Final Thoughts: Why a Drip System is the Best Way to Water Raised Garden Beds
- Ready to Install Your Drip Irrigation System? Let’s Do It!
- 📌 Save this Project for Later
- Frequently Asked Questions About a Drip System for Raised Garden Beds
Starting Simple: The Easiest Way to Water a Garden
I’ll be honest – I’m no gardening expert. I grew up in the desert, where even the weeds struggle. A watering system wouldn’t have fixed all that.
But now that we’re in Omaha, where plants basically volunteer to grow, I decided it was time to fulfill my green-thumb dreams. Installing a drip line system felt intimidating at first, but it ended up being one of the simplest DIY projects I’ve tackled.
Why a DIY Drip System for Raised Garden Beds Is a Game Changer
Five reasons you should install a drip system for watering raised garden beds:
#1. Stop setting alarms to stand in the sun with a hose—unless you really want to cosplay as a Victorian gardener every morning.
#2. Plants thrive with consistent watering = bigger, better harvests.
#3. Your neighbors do not want to water your garden while you’re on vacation. Trust me.
#4. It uses 30–50% less water than hand watering.
#5. It’s easier than you think—ours took less than half a day!
Supply List for a DIY Drip Irrigation System
To install a basic drip system for watering raised garden beds, here’s what you’ll need –
Main Tubing & Water Source Components
- 1/2 Inch Main Irrigation Tubing – We used 1 roll
- Hose Bib Splitter
- 3/4-in Hose Adapter Fitting
- Back Flow Preventer
- Programmable Timer
Connectors & Fittings
- 1/2-in Irrigation Collar – Female Adapter
- 1/2-in Irrigation Collar – Male Adapter
- 1/2-in Irrigation Collar End Cap
- 1/2-in Irrigation Elbow
- 1/2-in T-Connector
- Figure 8 Clamp
Drip Line & Accessories
Installation Tools & Hardware
If you’re more of a “watch it happen” kind of learner, this one’s for you:
Step 1: Find the Nearest Water Source to Install a Drip System for Raised Garden Beds
Start by identifying the closest water source to your raised beds. Ours are tucked along the side of the house behind a fence, but distance isn’t a deal-breaker—just plan your tubing accordingly. This is the first step in any drip irrigation system for beginners.
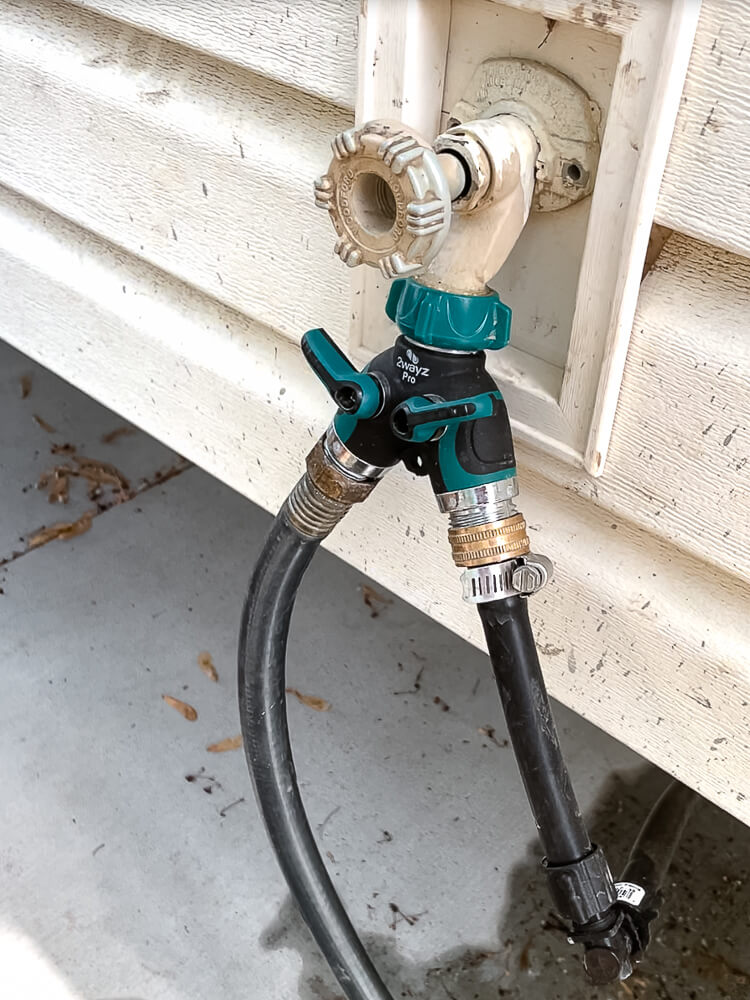
Step 2: Install a Hose Splitter for Drip Irrigation Access
If you’re limited on hose bibs like we are, attach a hose splitter to make room for your DIY watering system for vegetable gardens. This lets you run both a regular hose and your irrigation line from the same spigot.
Step 3: Build the Main Line with Poly Tubing
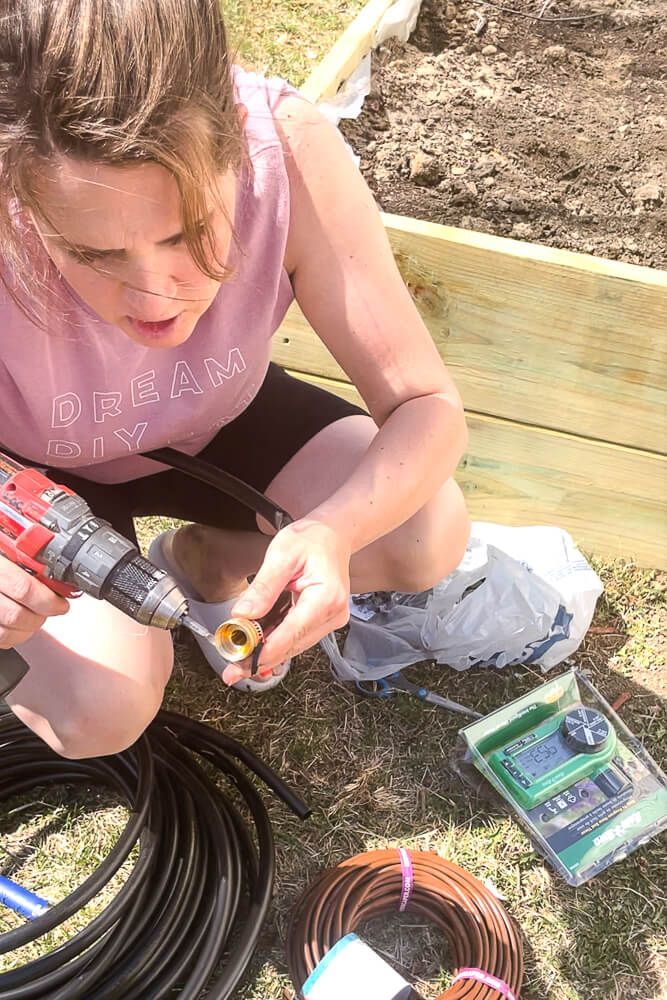
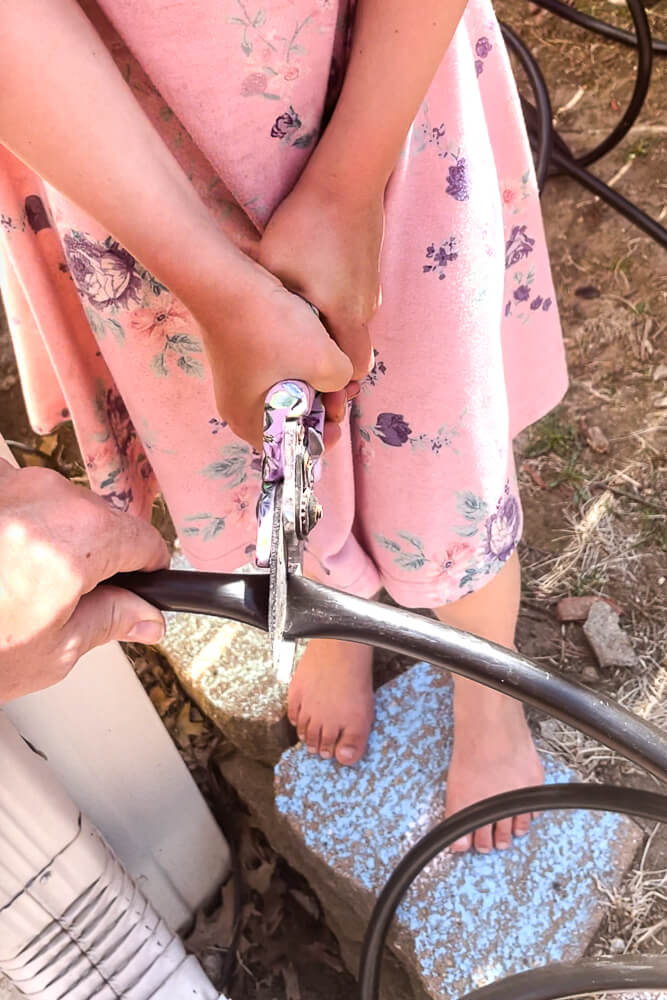
We DIY’ed our own “hose” using 1/2-inch poly tubing since both ends were just open. I slid an adjustable clamp onto one end, then used a lighter to gently heat the tubing – just enough to soften it. That made it easier to press the hose adapter in nice and snug.
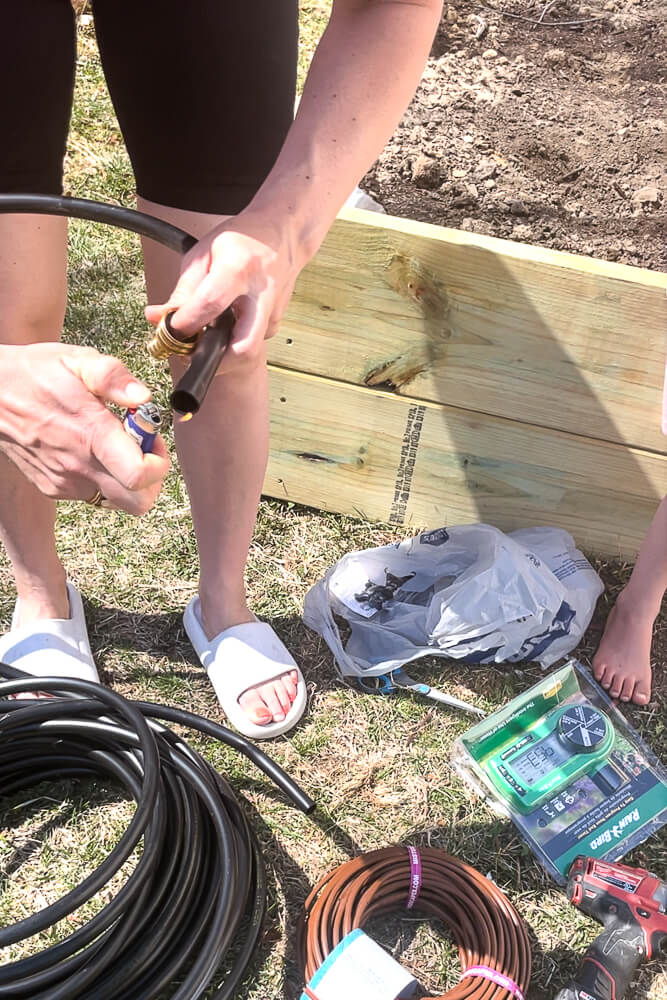
Once it was in place, I tightened the clamp with my drill to lock it down. Just like that, we had our custom hose, which we connected to the splitter as the start of our main irrigation line.
Step 4: Use Elbow Joints to Navigate Corners
To turn corners with your tubing, use a pair of sharp garden shears to make clean cuts where needed.
Insert an elbow fitting at each turn – these thread directly into the tubing and form a watertight seal.
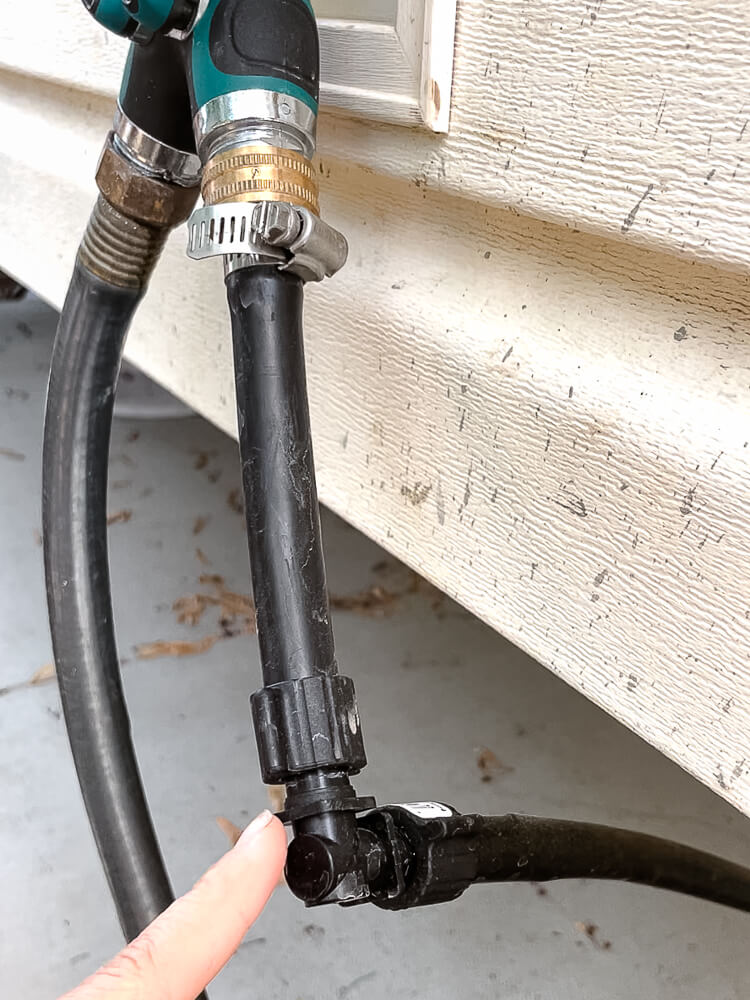
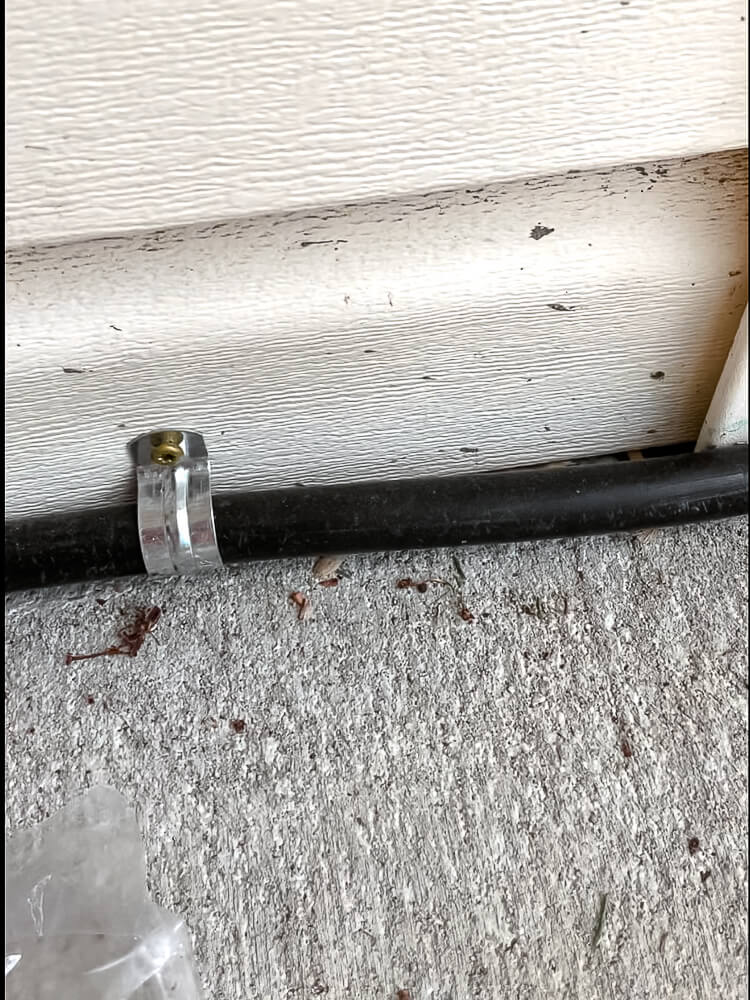
Our main line had to turn a few corners, so we used a lot of elbow joints. We secured the tubing to our house using pipe straps.
Step 5: Connect a Timer to Automate Your Watering
We knew we didn’t want to manually turn the water on and off every day, so adding a programmable timer was a must.
I cut the poly tubing near our side gate (where I wanted the timer to hang), then attached a female irrigation adapter. The timer screwed right on, and from there I added a backflow preventer, a male adapter, and more poly tubing to keep the system moving toward the garden beds.
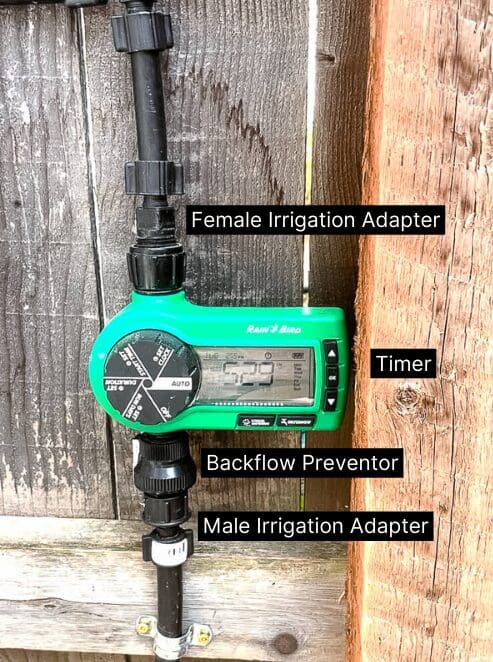
This step turns your drip setup into a low-maintenance dream, and it’s especially helpful during summer travel or busy weeks.
Step 6: Split the Main Line to Water Multiple Beds
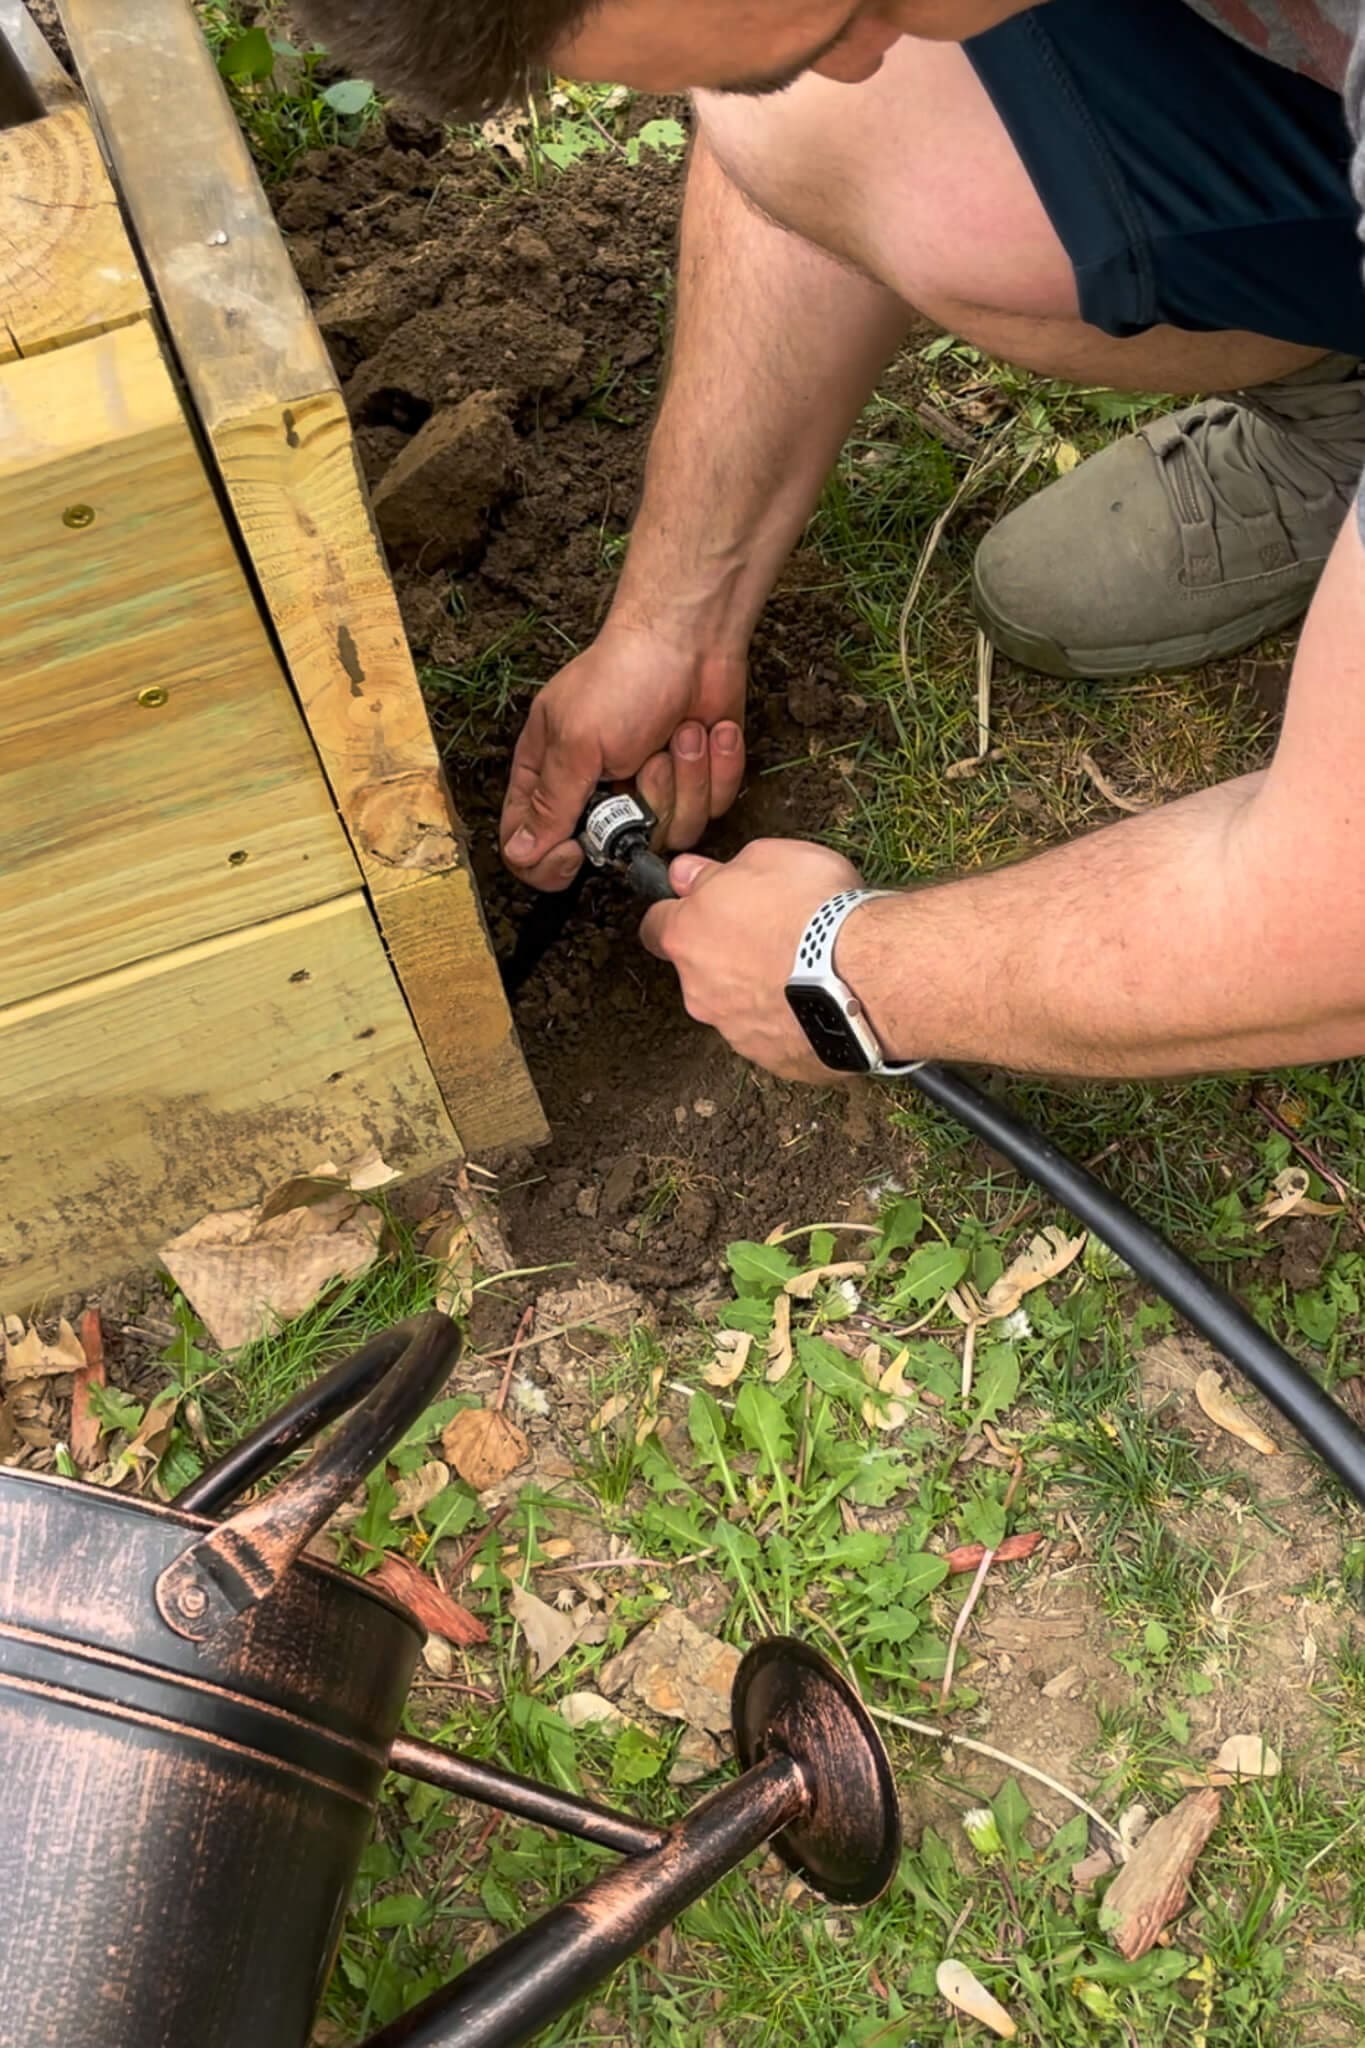
We’ve got two garden beds, so the main line needed to split into two. I cut the line close to the corner of the first bed and set it aside. Then I dug a shallow hole underneath the corner of the bed for the tubing to run through.
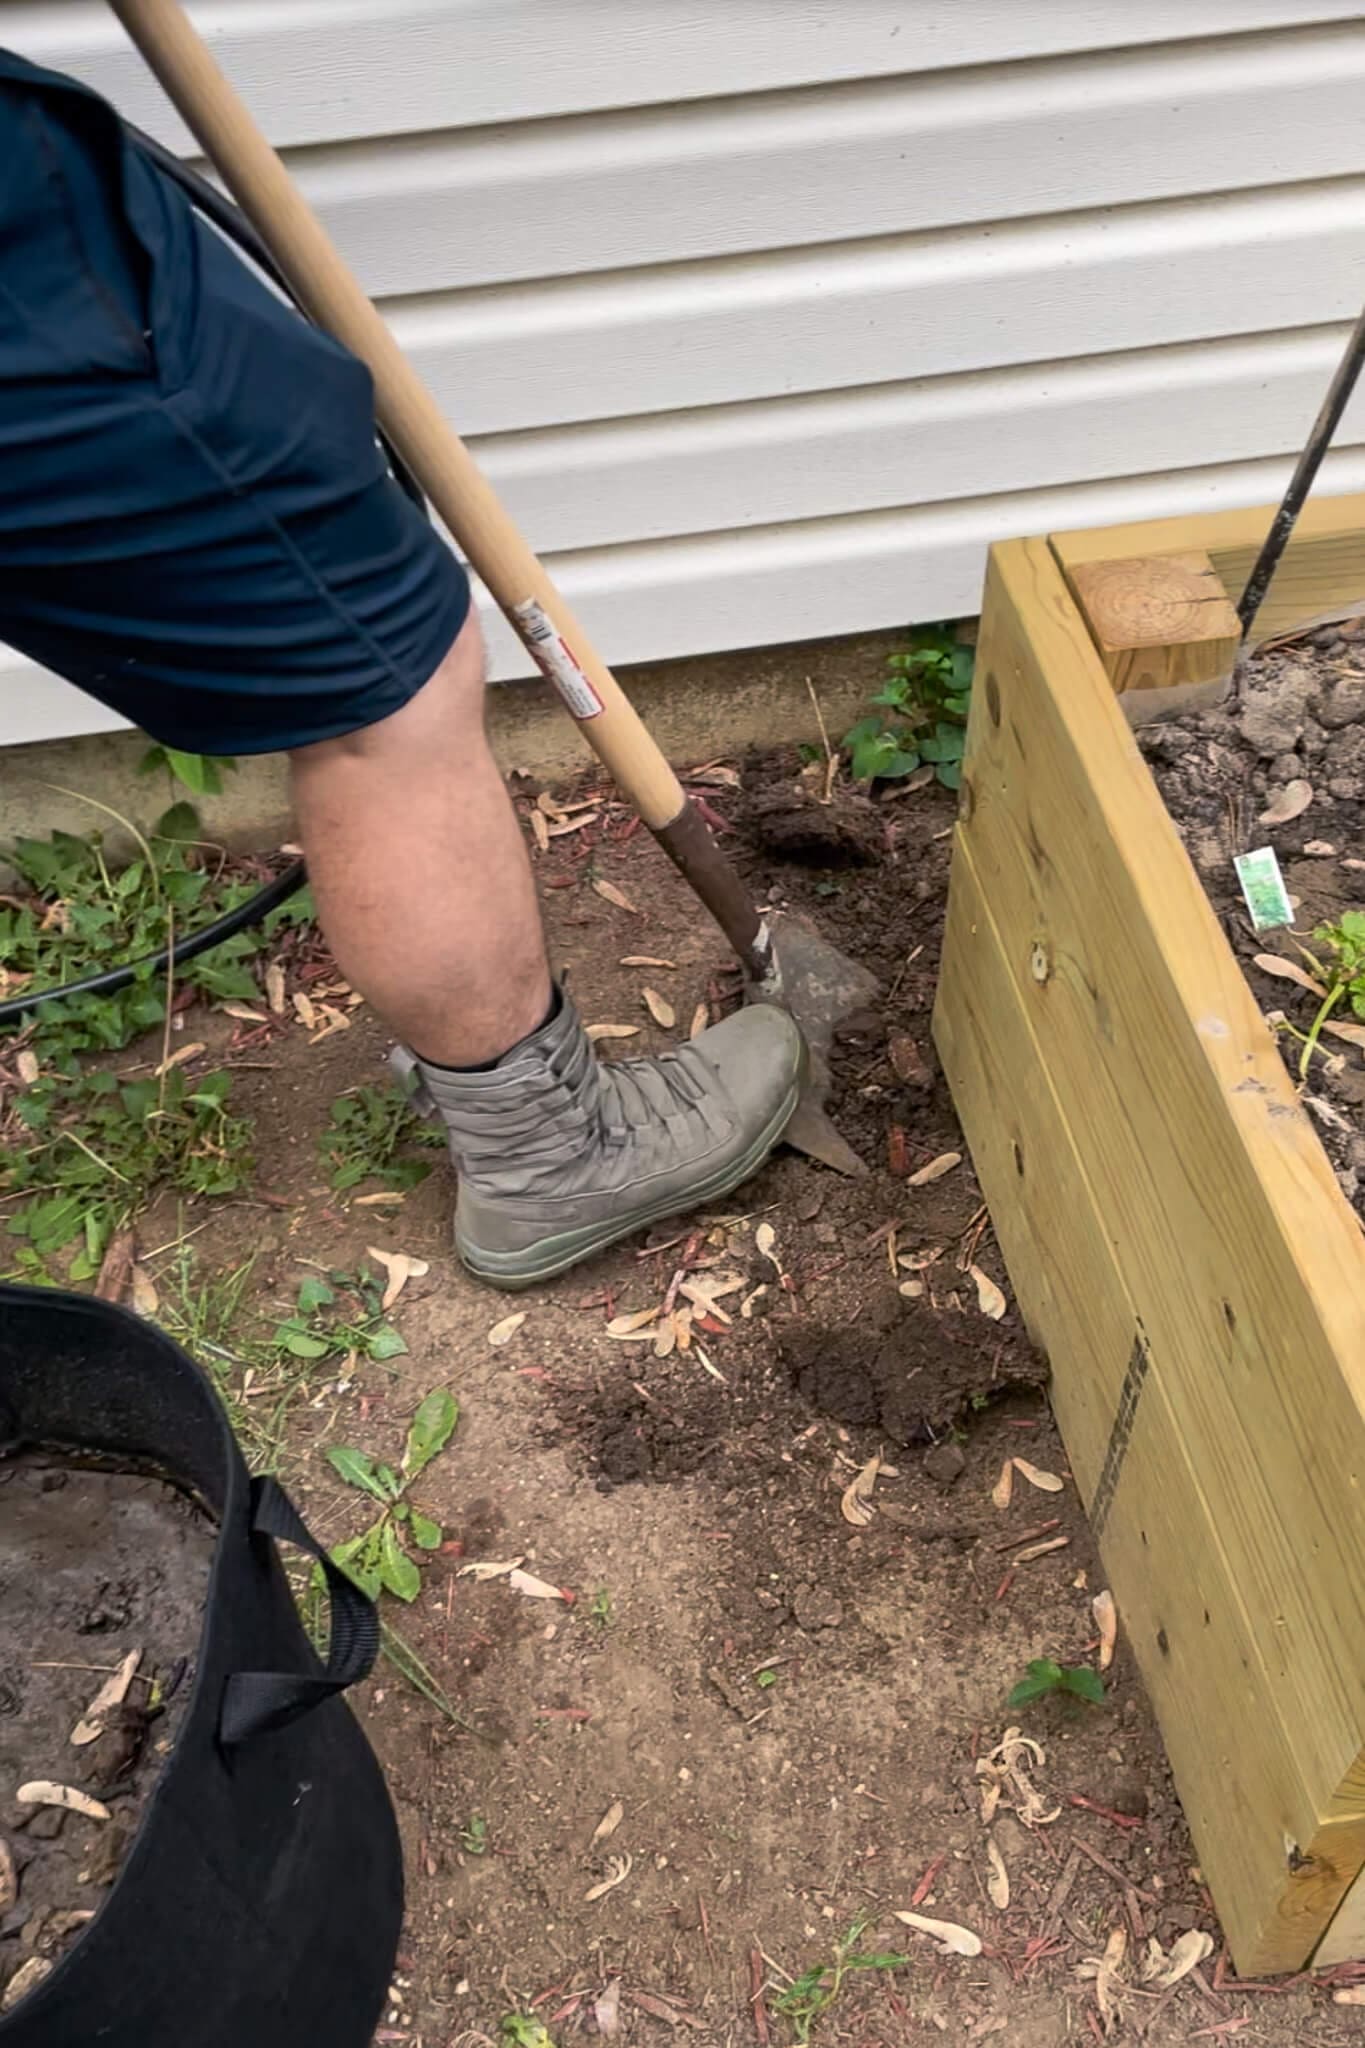
Hot tip: do this before your garden beds are full of soil and plants. Digging under them later? Not as fun.
Step 7: Run Tubing Through the Garden Beds
Now comes the part where you connect the tubing through your raised beds. I took a long stake and drove it down through the top of the garden bed until it touched the ground. That gave us a nice, clean path for the tubing. We fed the poly tubing down through the top hole to meet the main line.
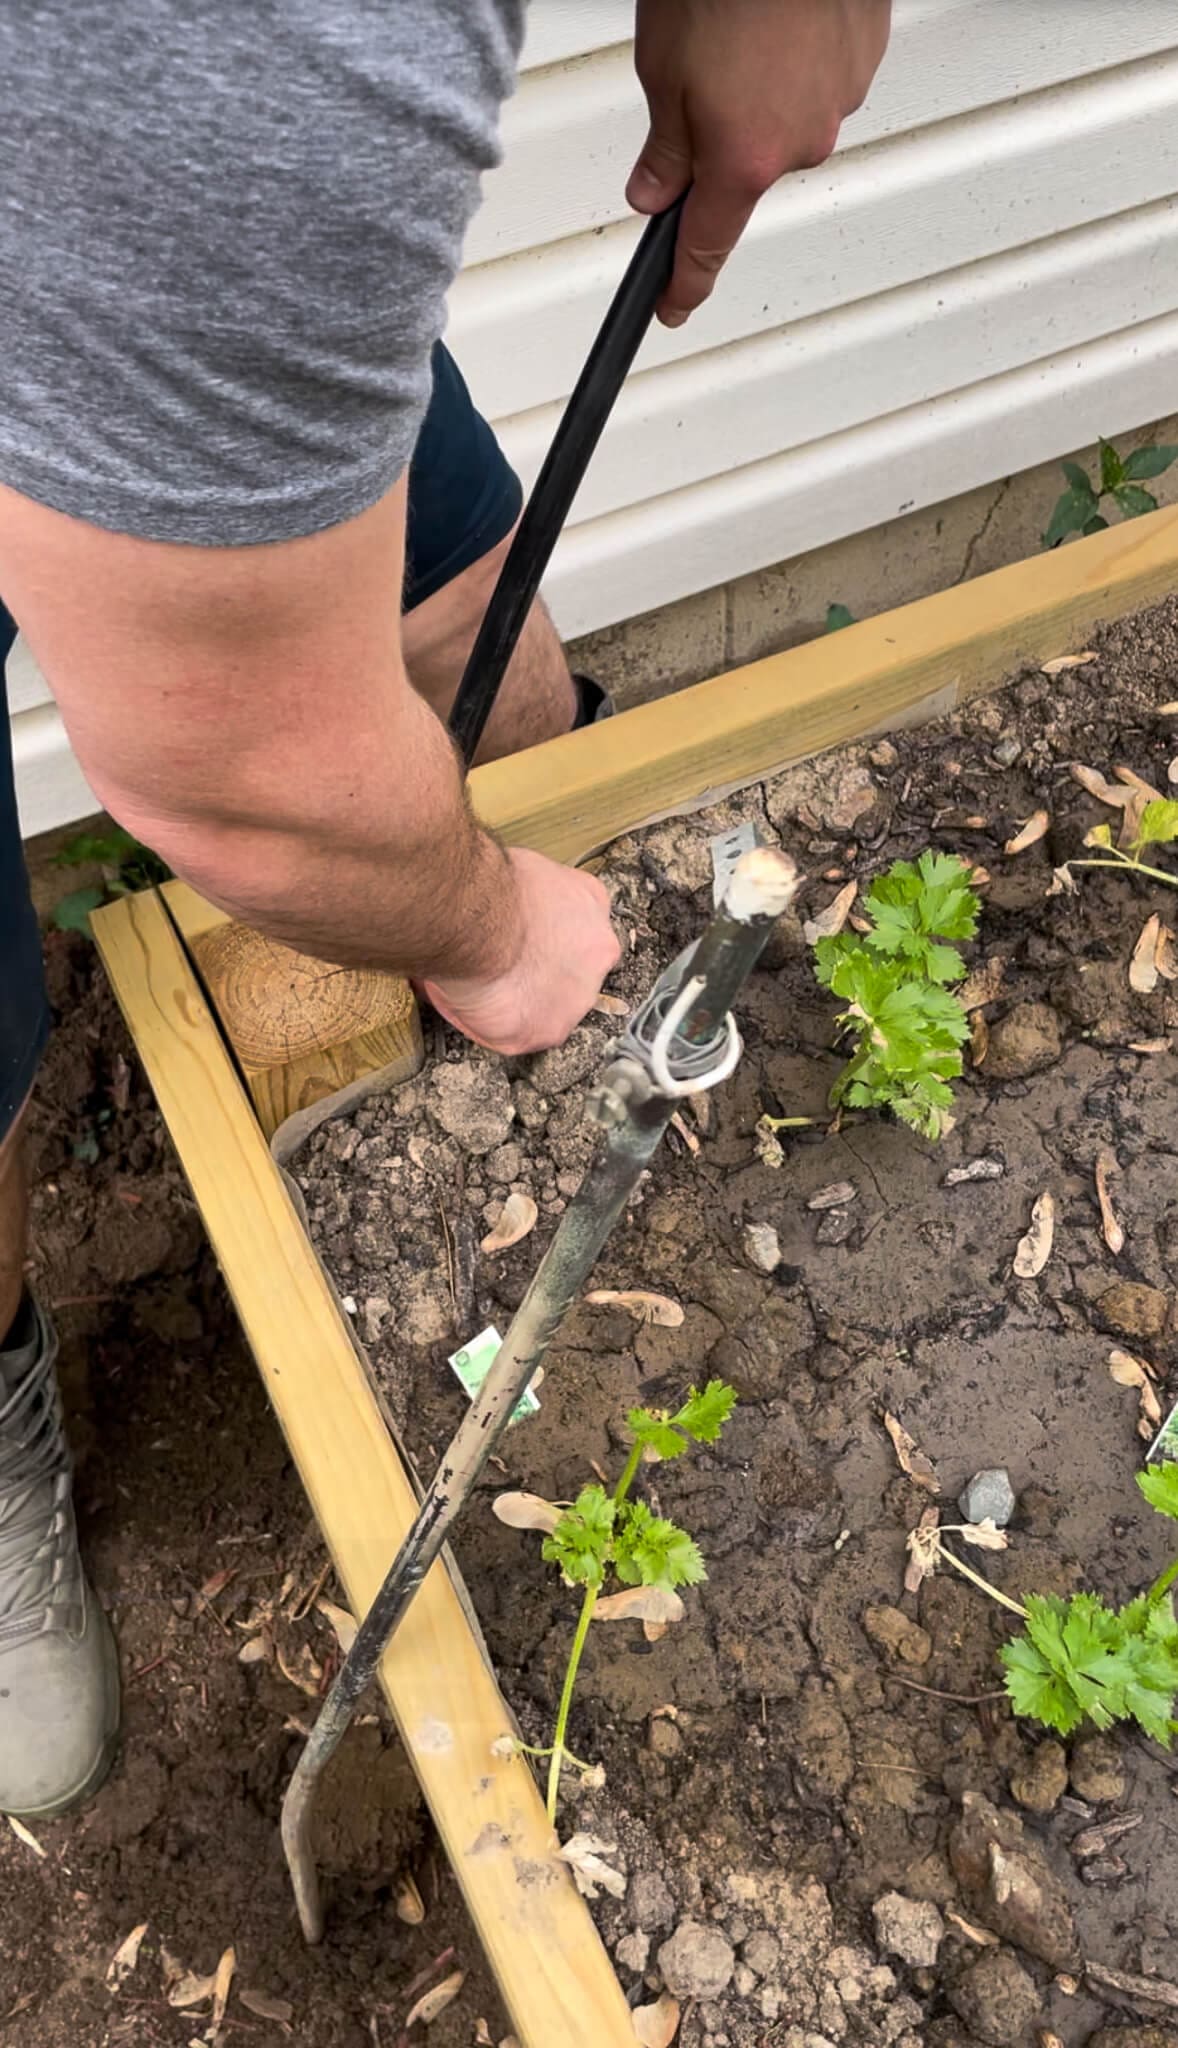
Step 8: Use a T-Connector to Branch the Drip Line
Now that you’ve got tubing running through the first garden bed, it’s time to split the main line and send water to the second one. We used a T-connector to do this. One side of the T went to the tubing we’d just pulled through the bed, and the other side was prepped to continue to bed number two. These connectors grip the tubing easily and securely.
We then attached another length of poly tubing to the open end of the T, which would run to the second raised bed.
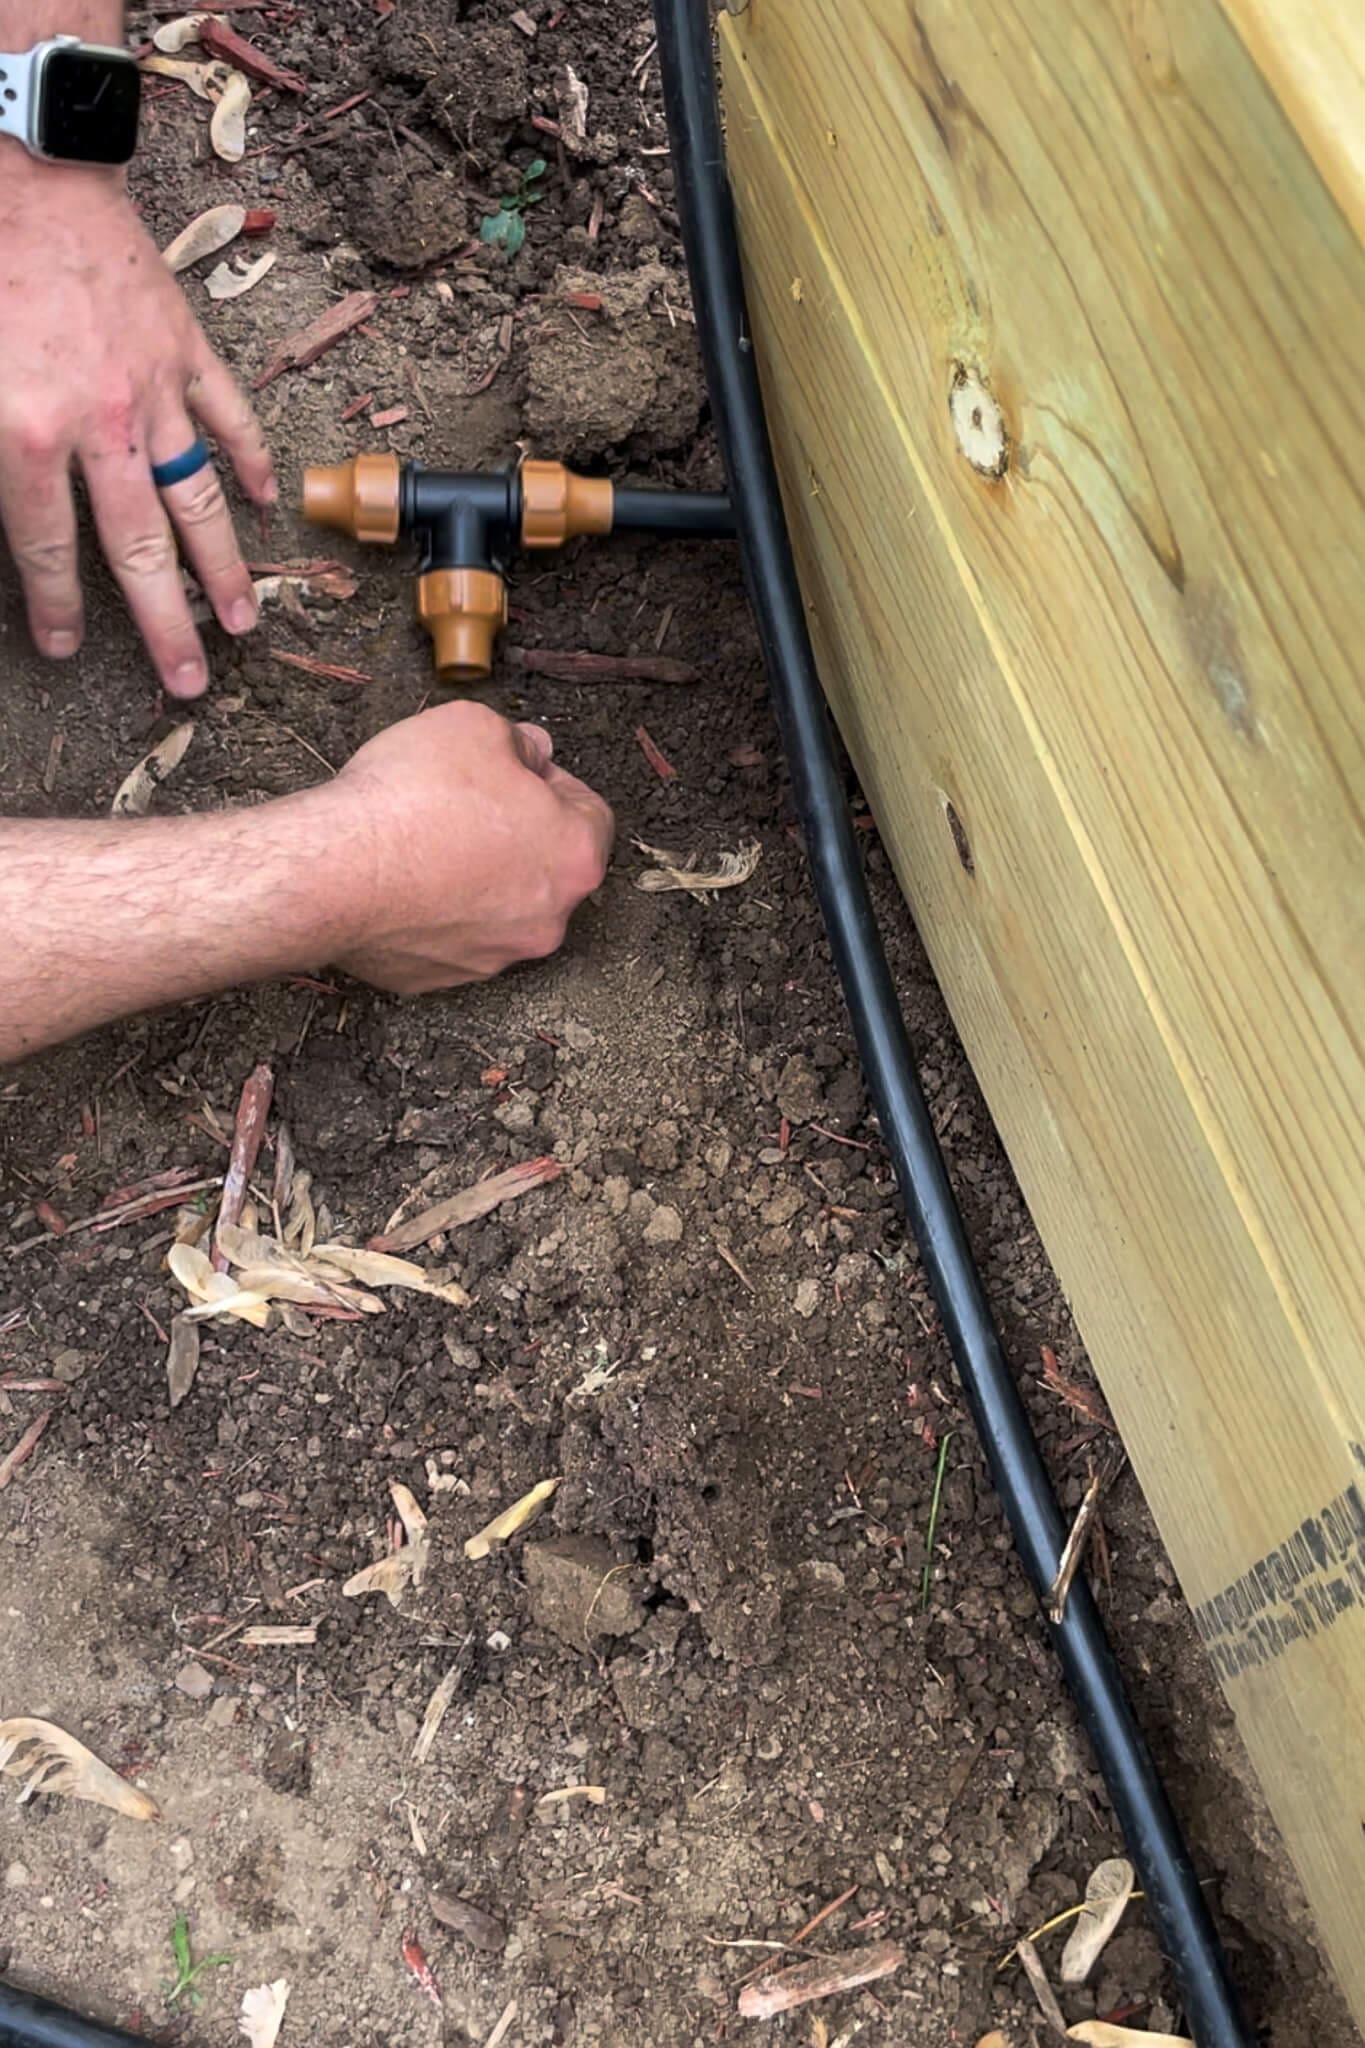
Step 9: Extend Tubing to the Second Bed
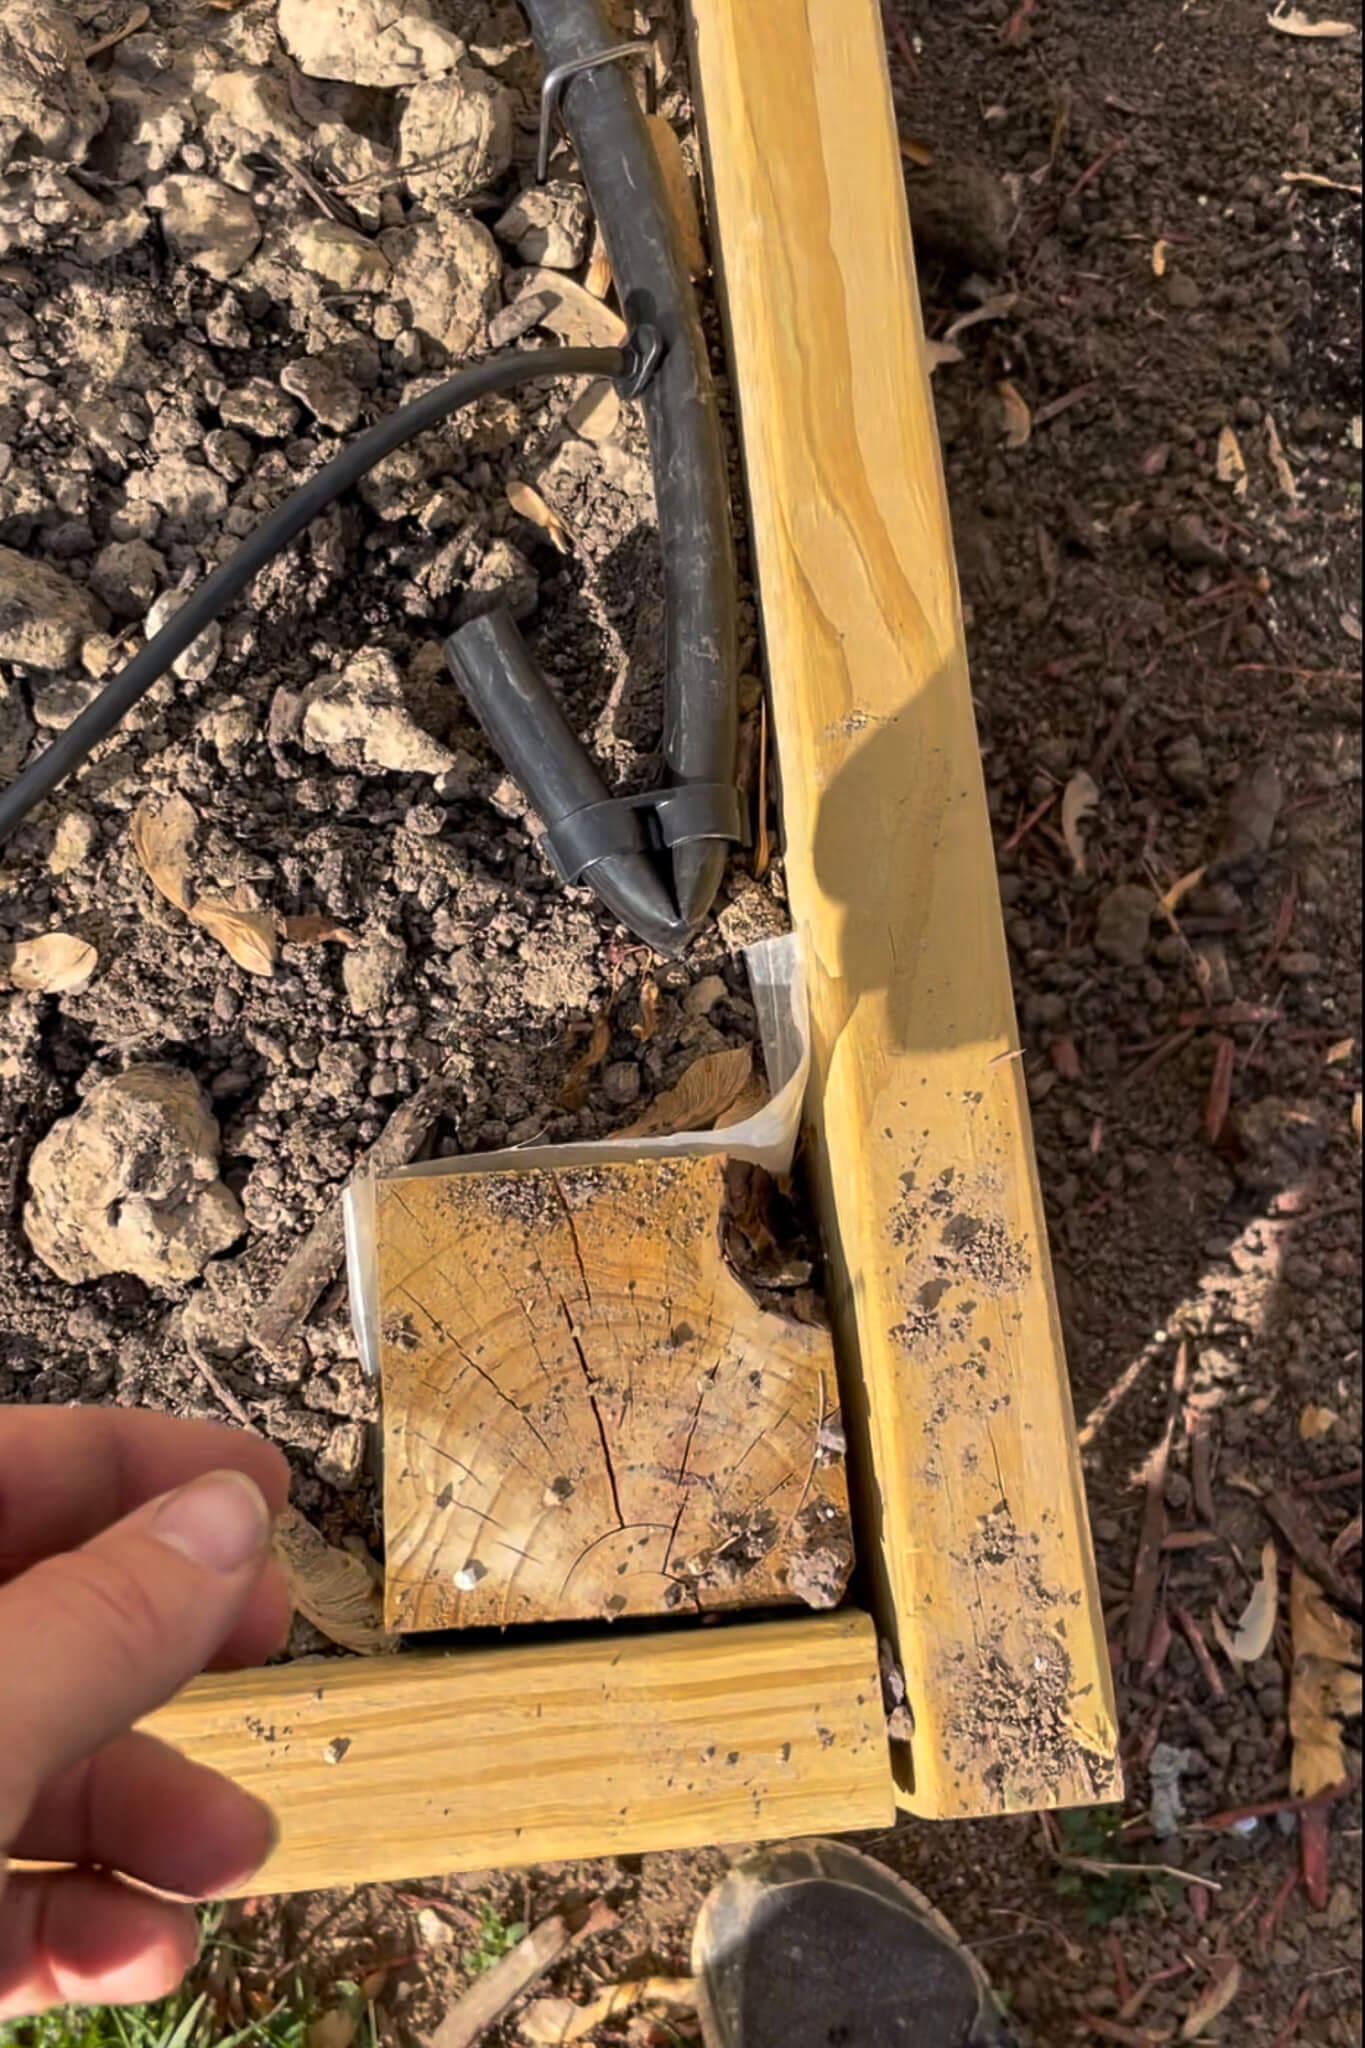
For the second bed, we basically repeated the same process: we dug a small trench near the corner of the bed, then drove a long stake straight down through the top of the bed to the ground. That created a clean path for the tubing to pass through.
We snaked the tubing down through the top hole and back up through the trench, connecting it to the tubing from the T-connector. At the base, we added another elbow to help it turn without kinking. Once everything was connected, the groundwork was basically done!
Step 10: Secure the Header Line Inside the Beds
Now we added another elbow joint at the top of the tubing so it could lay flat along the topsoil. This created the header line – the main line that would run through the bed and feed all the smaller drip lines.
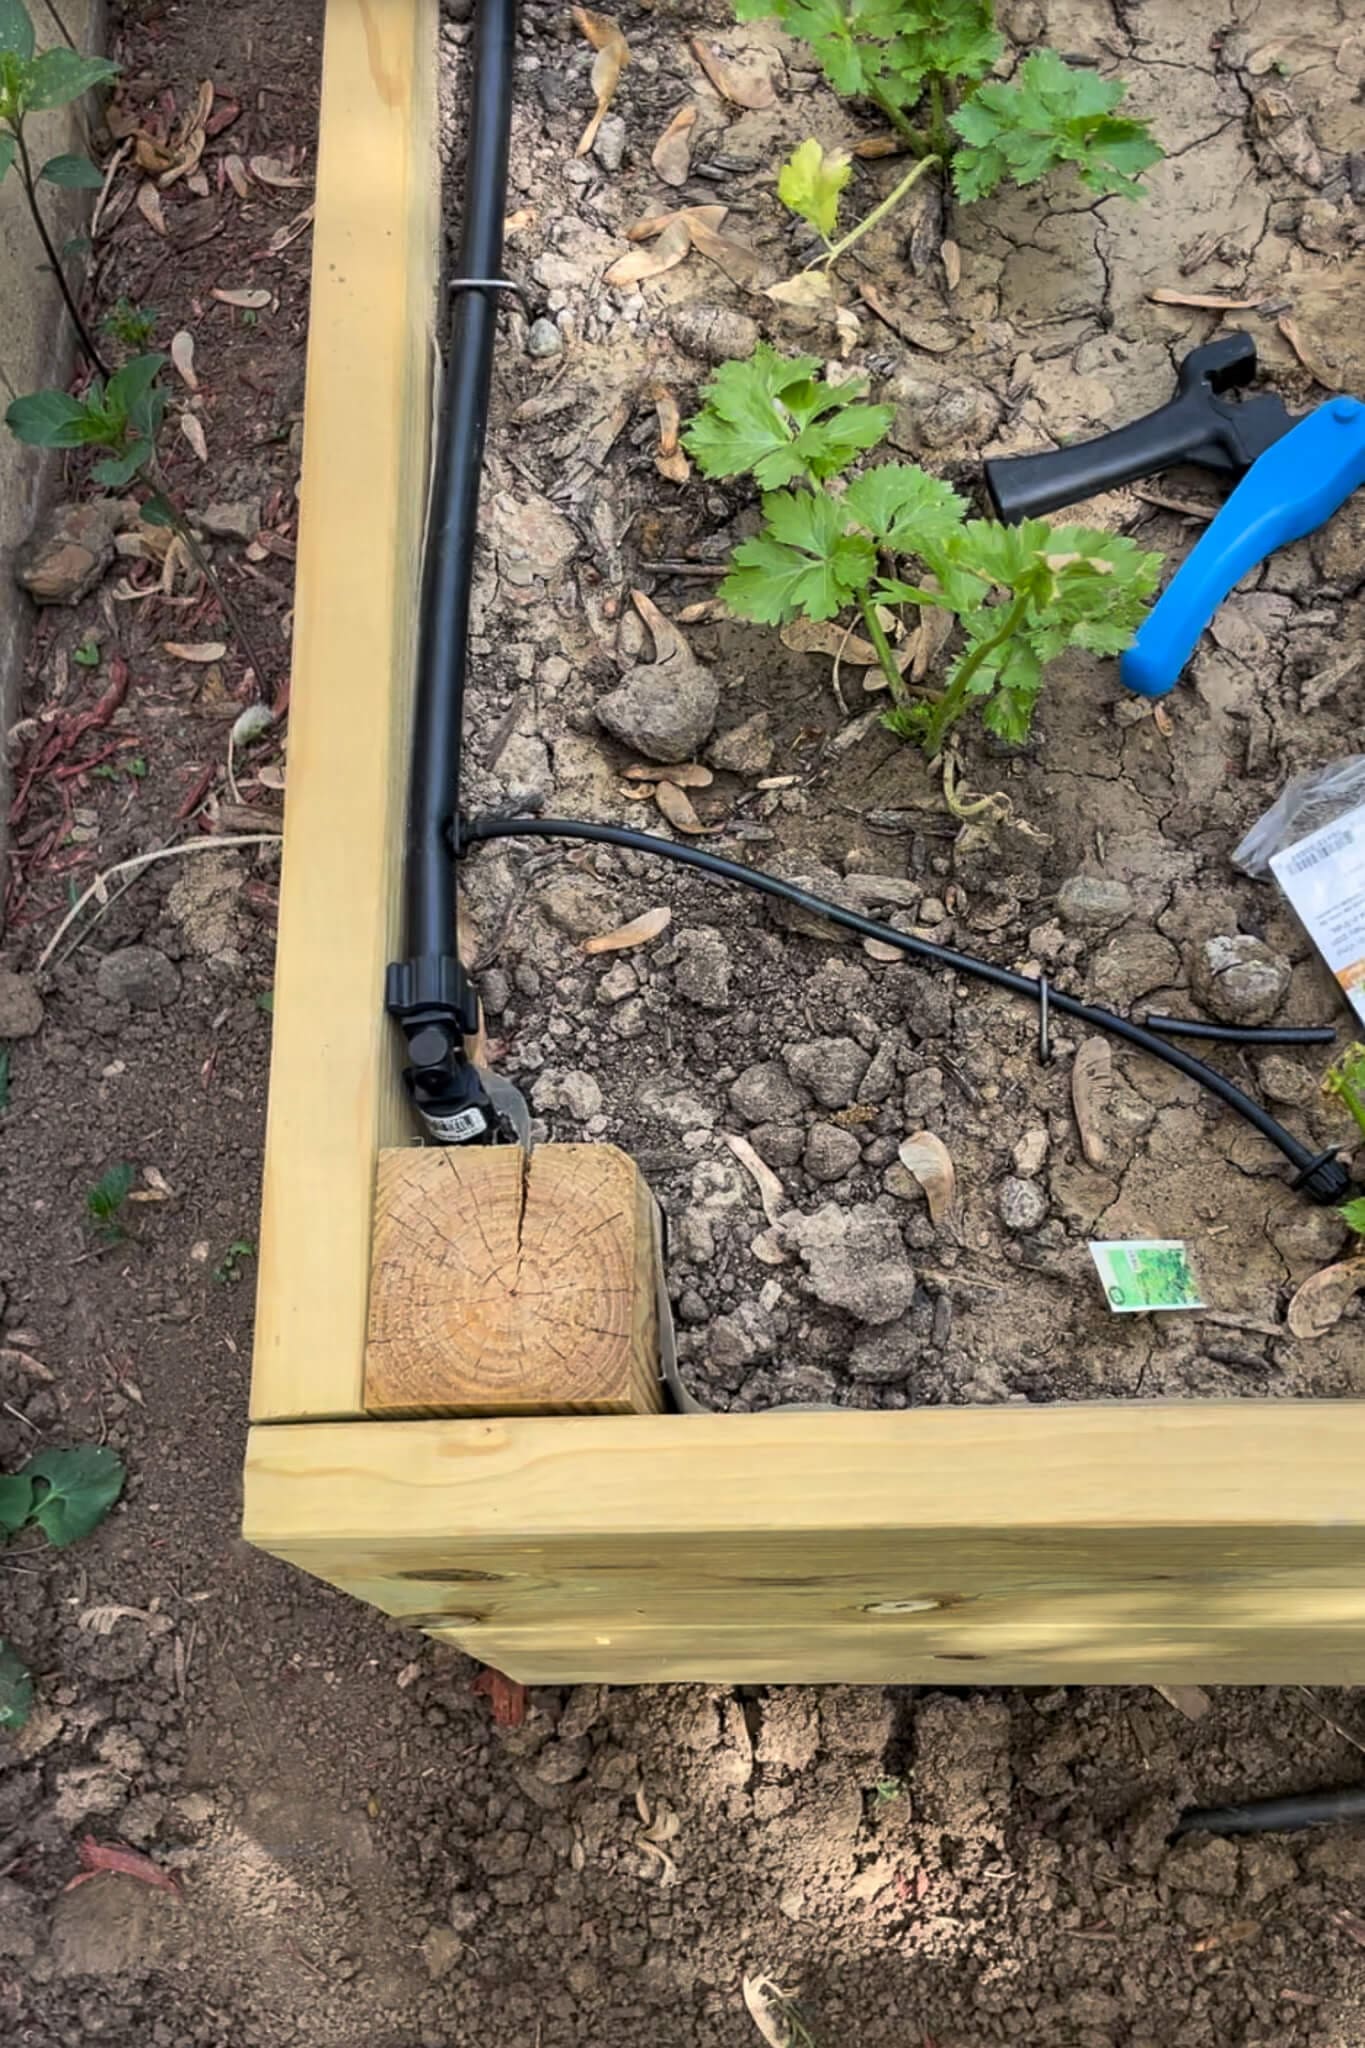
We ran the tubing along the top of the soil, used landscape stakes to hold it down, and added an end cap clamp at the end of each line to keep water pressure strong.
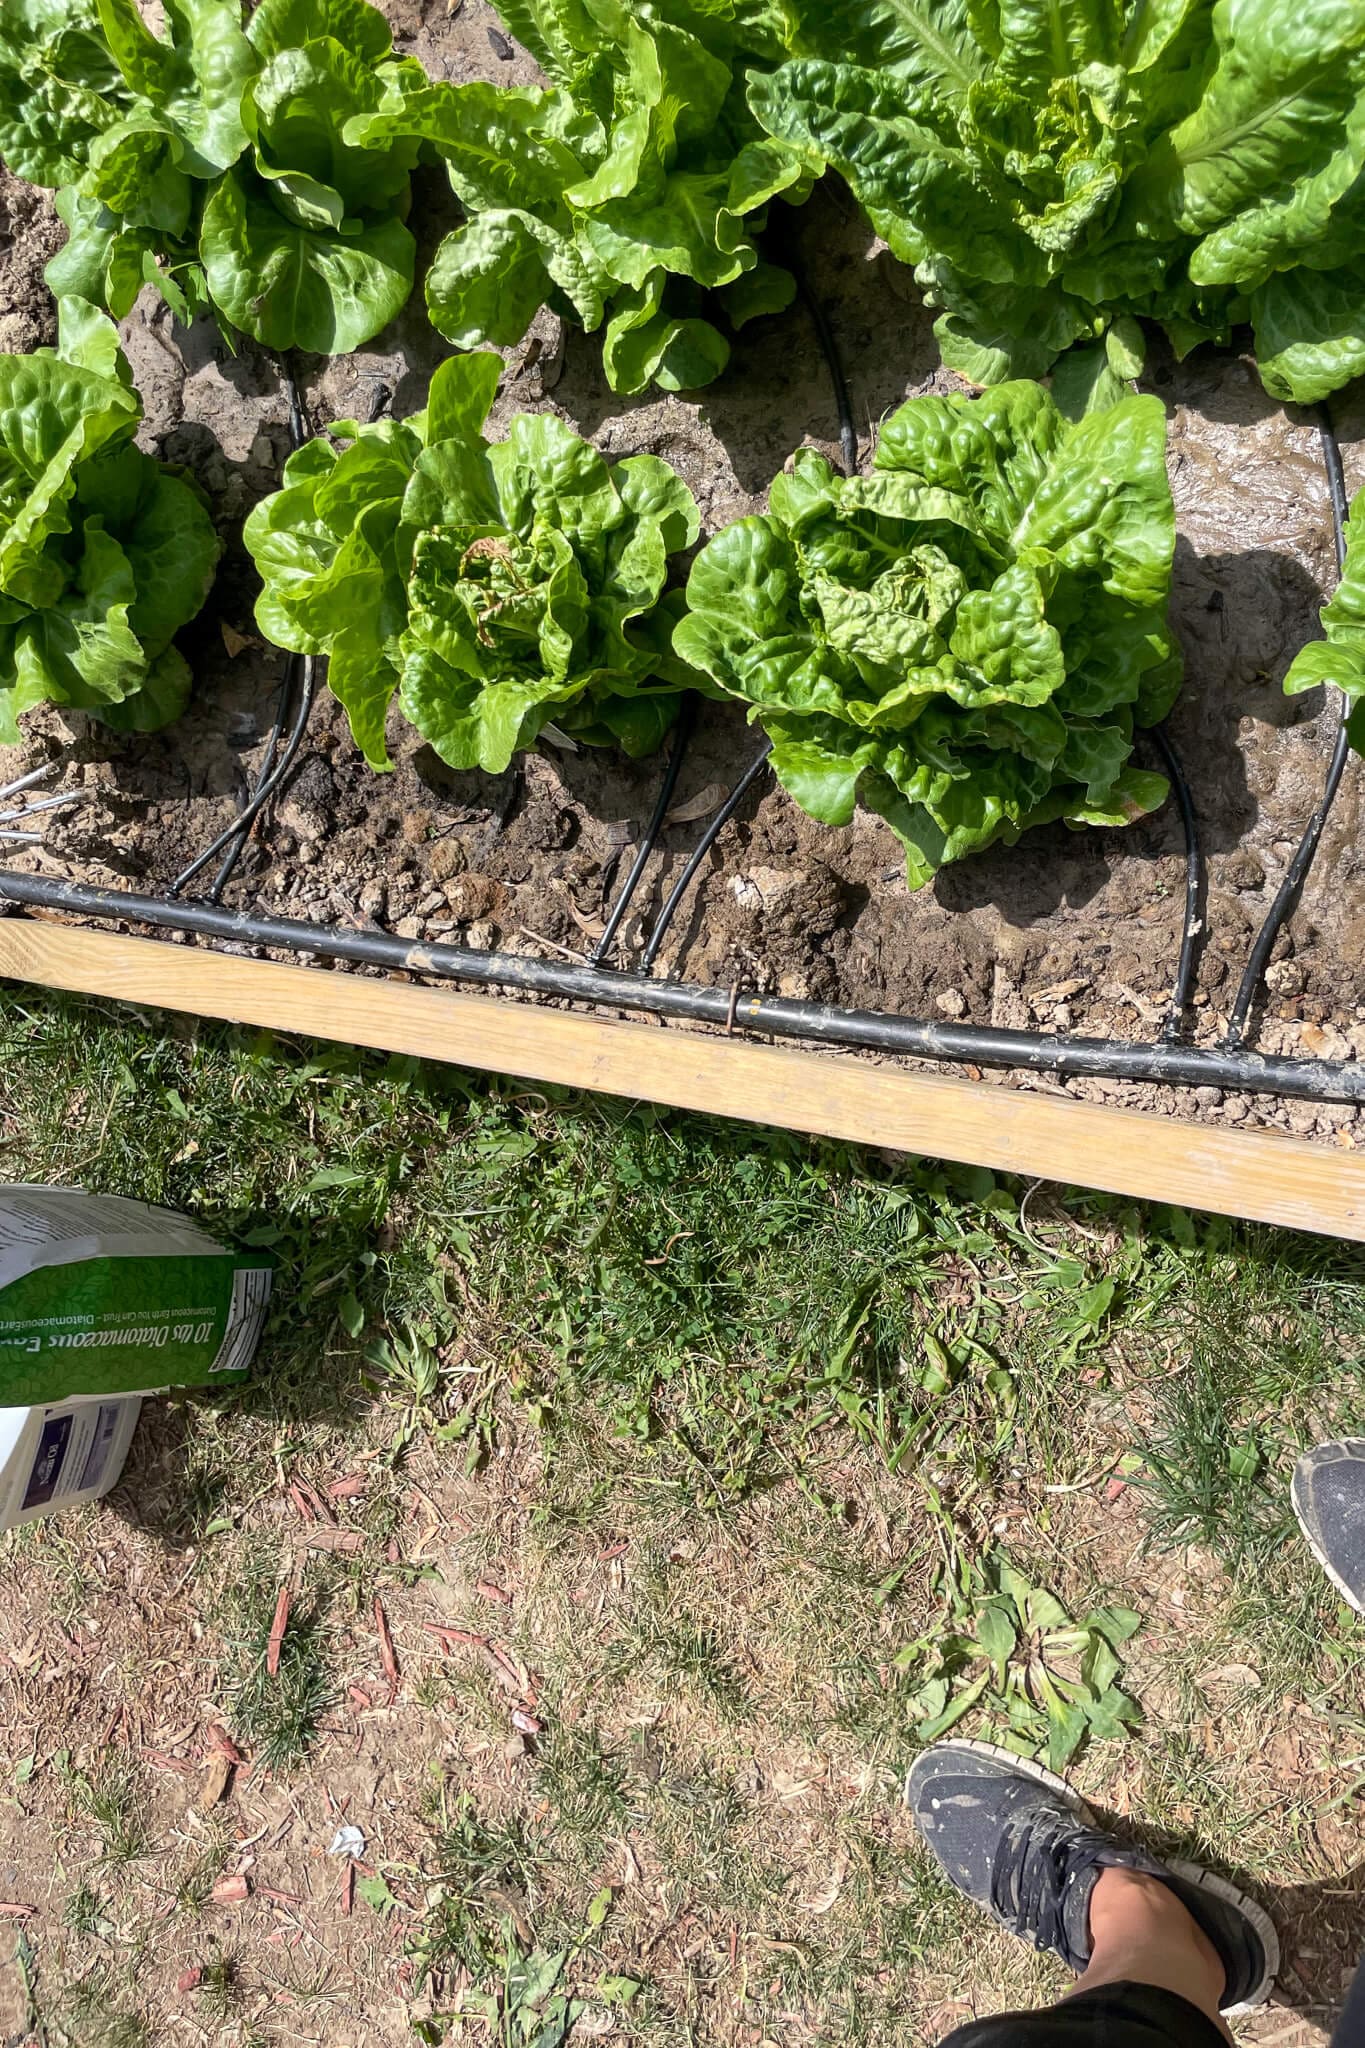
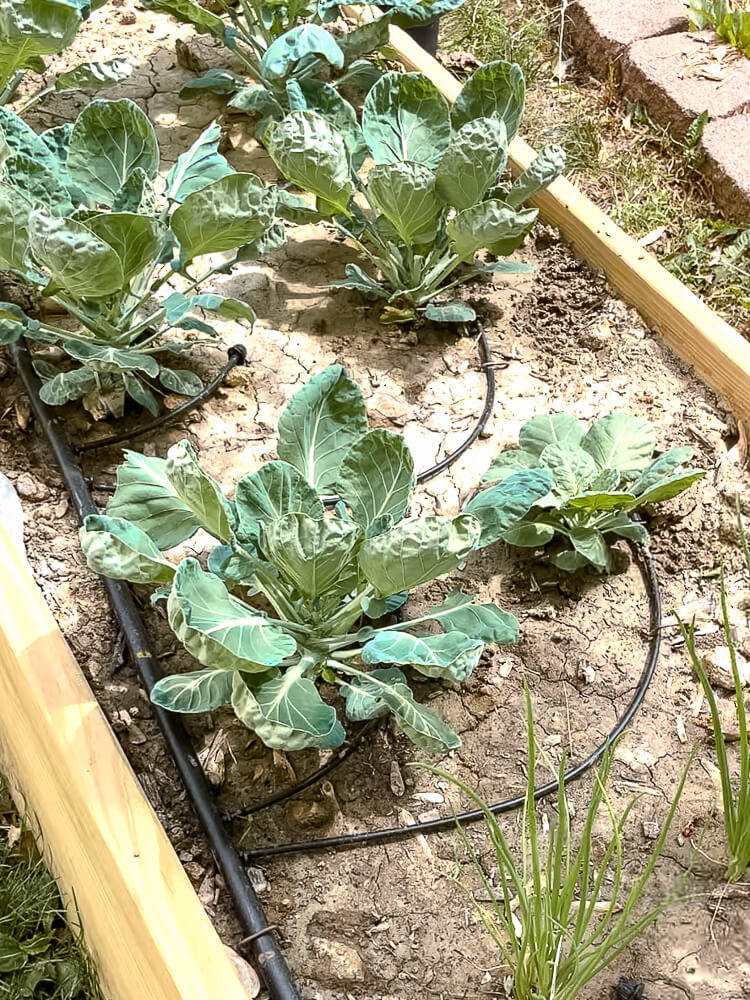
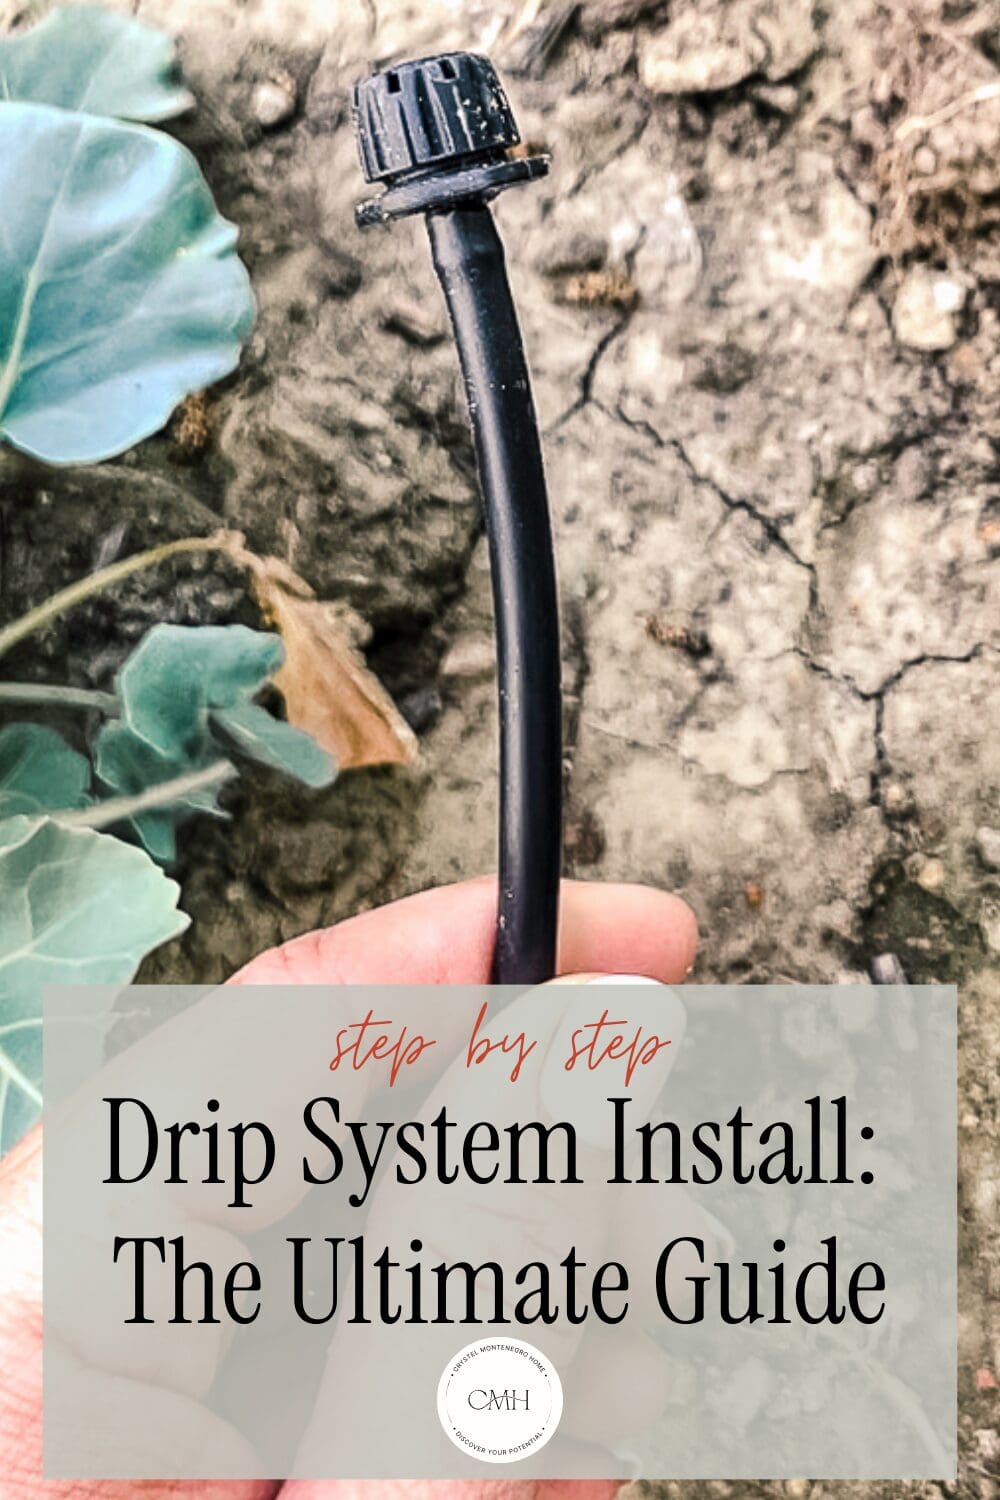
Step 11: Add Drip Tubing + Emitters to Water Each Plant
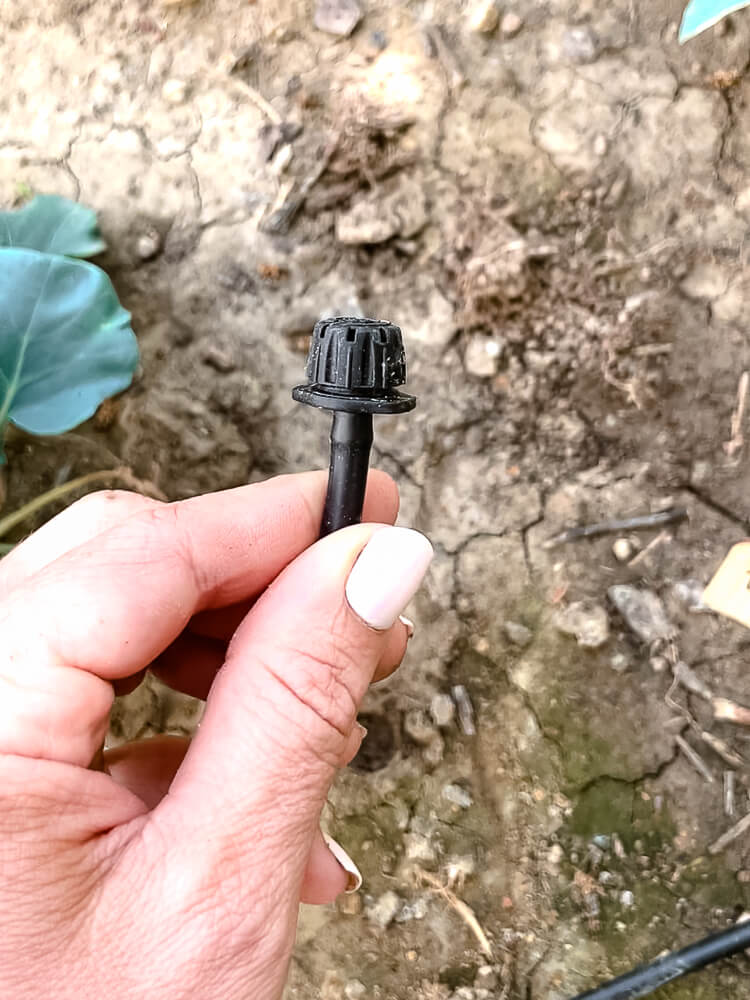
Time to water those plants! I used a hole punch tool to punch holes into the header line, then cut lengths of 1/4-inch drip tubing that could reach each plant.
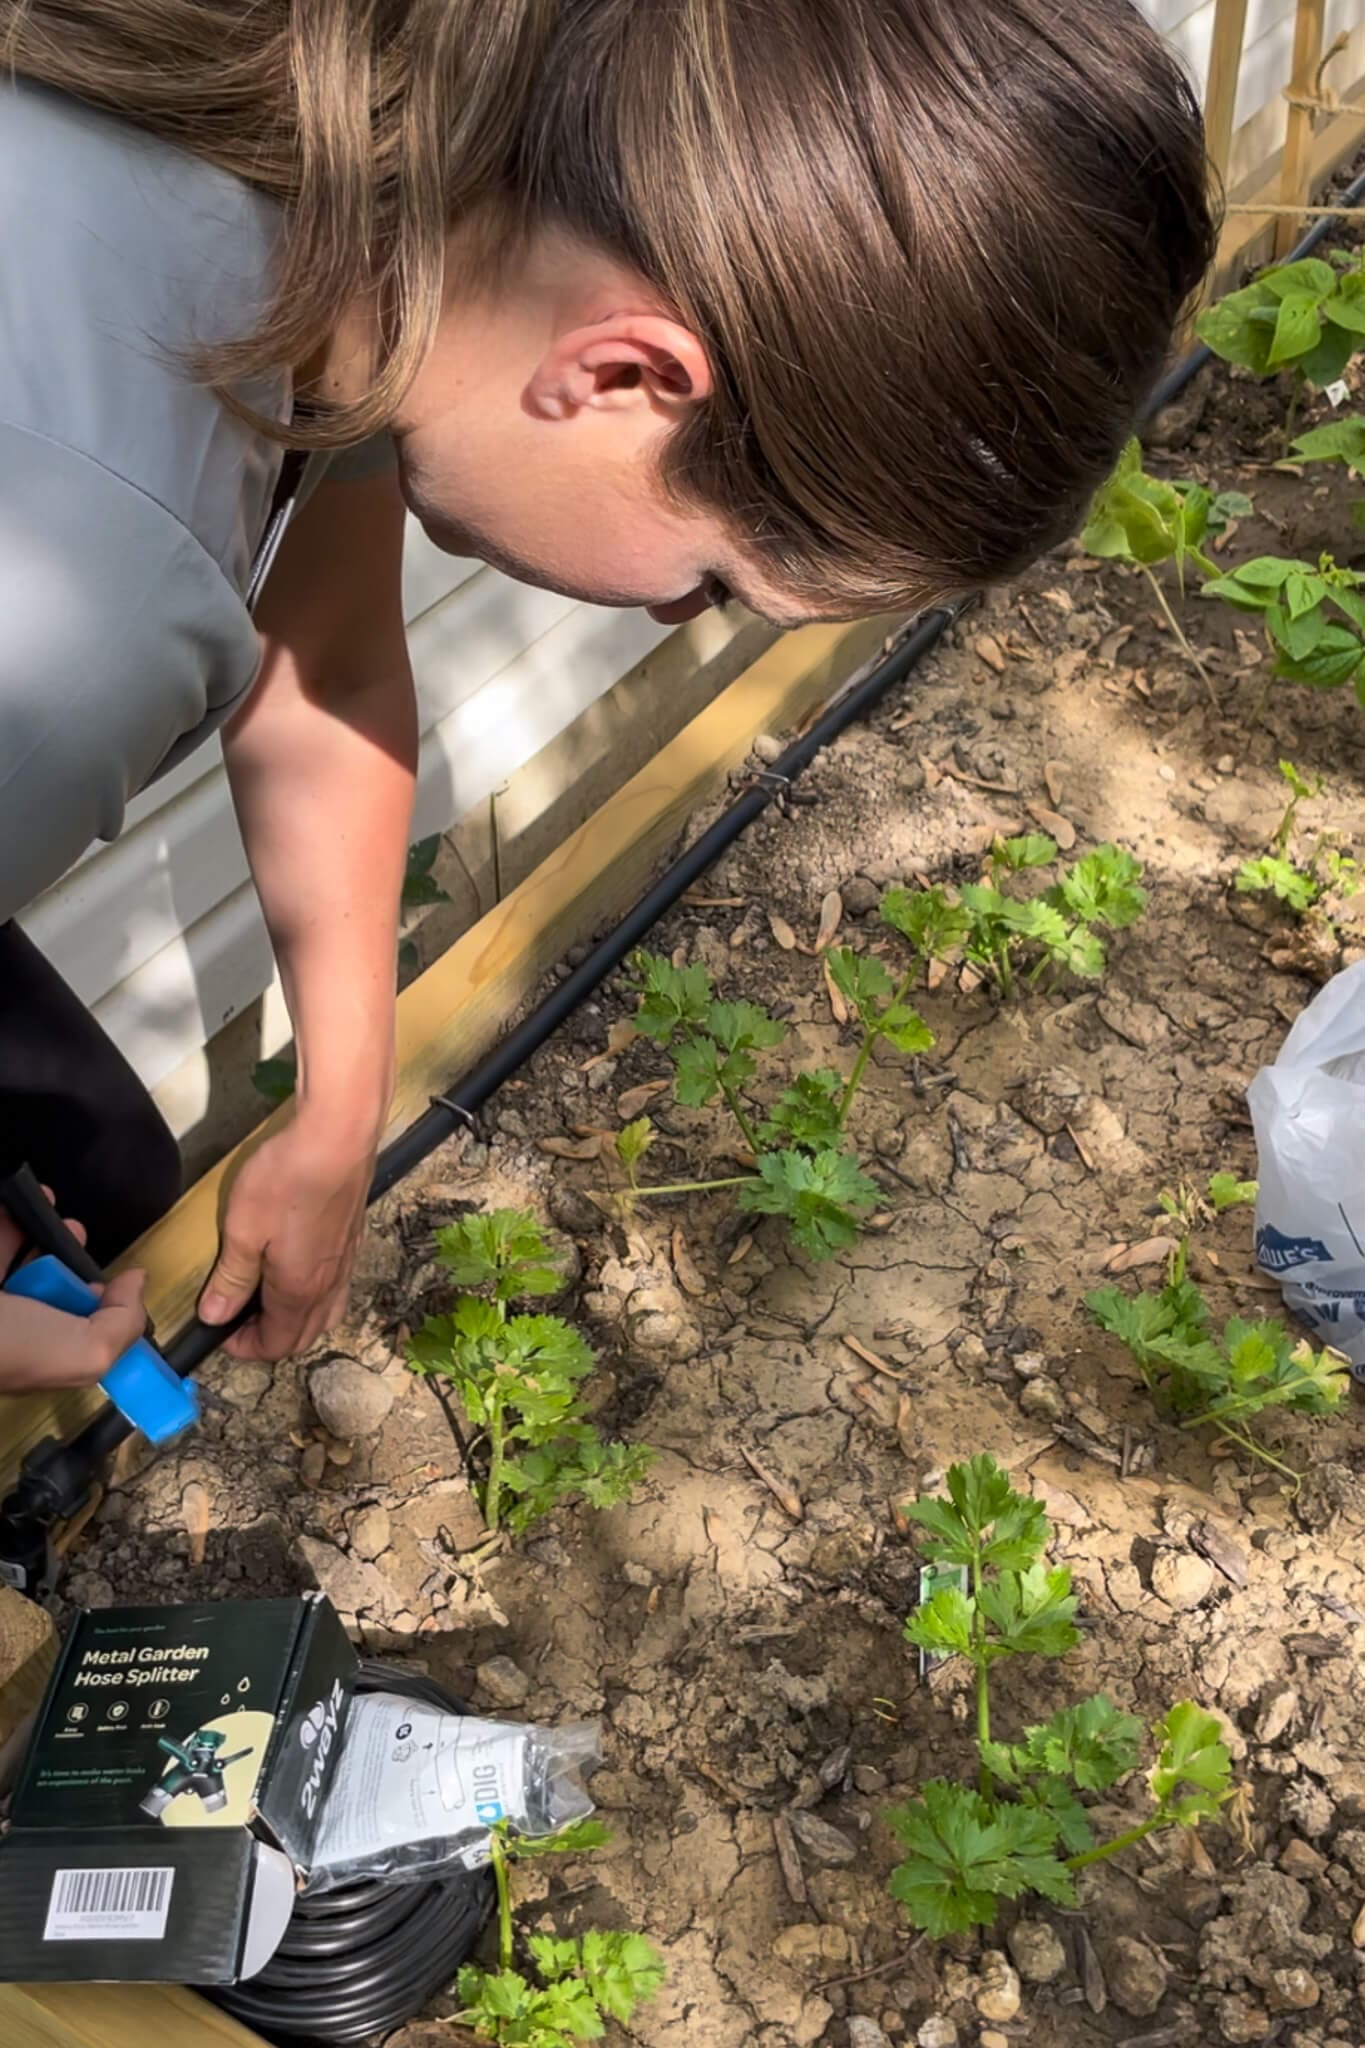
One end of the tubing went over a drip coupler and was inserted into the hole; the other end went over a drip emitter. We used stakes to hold each line in place near the base of the plants.
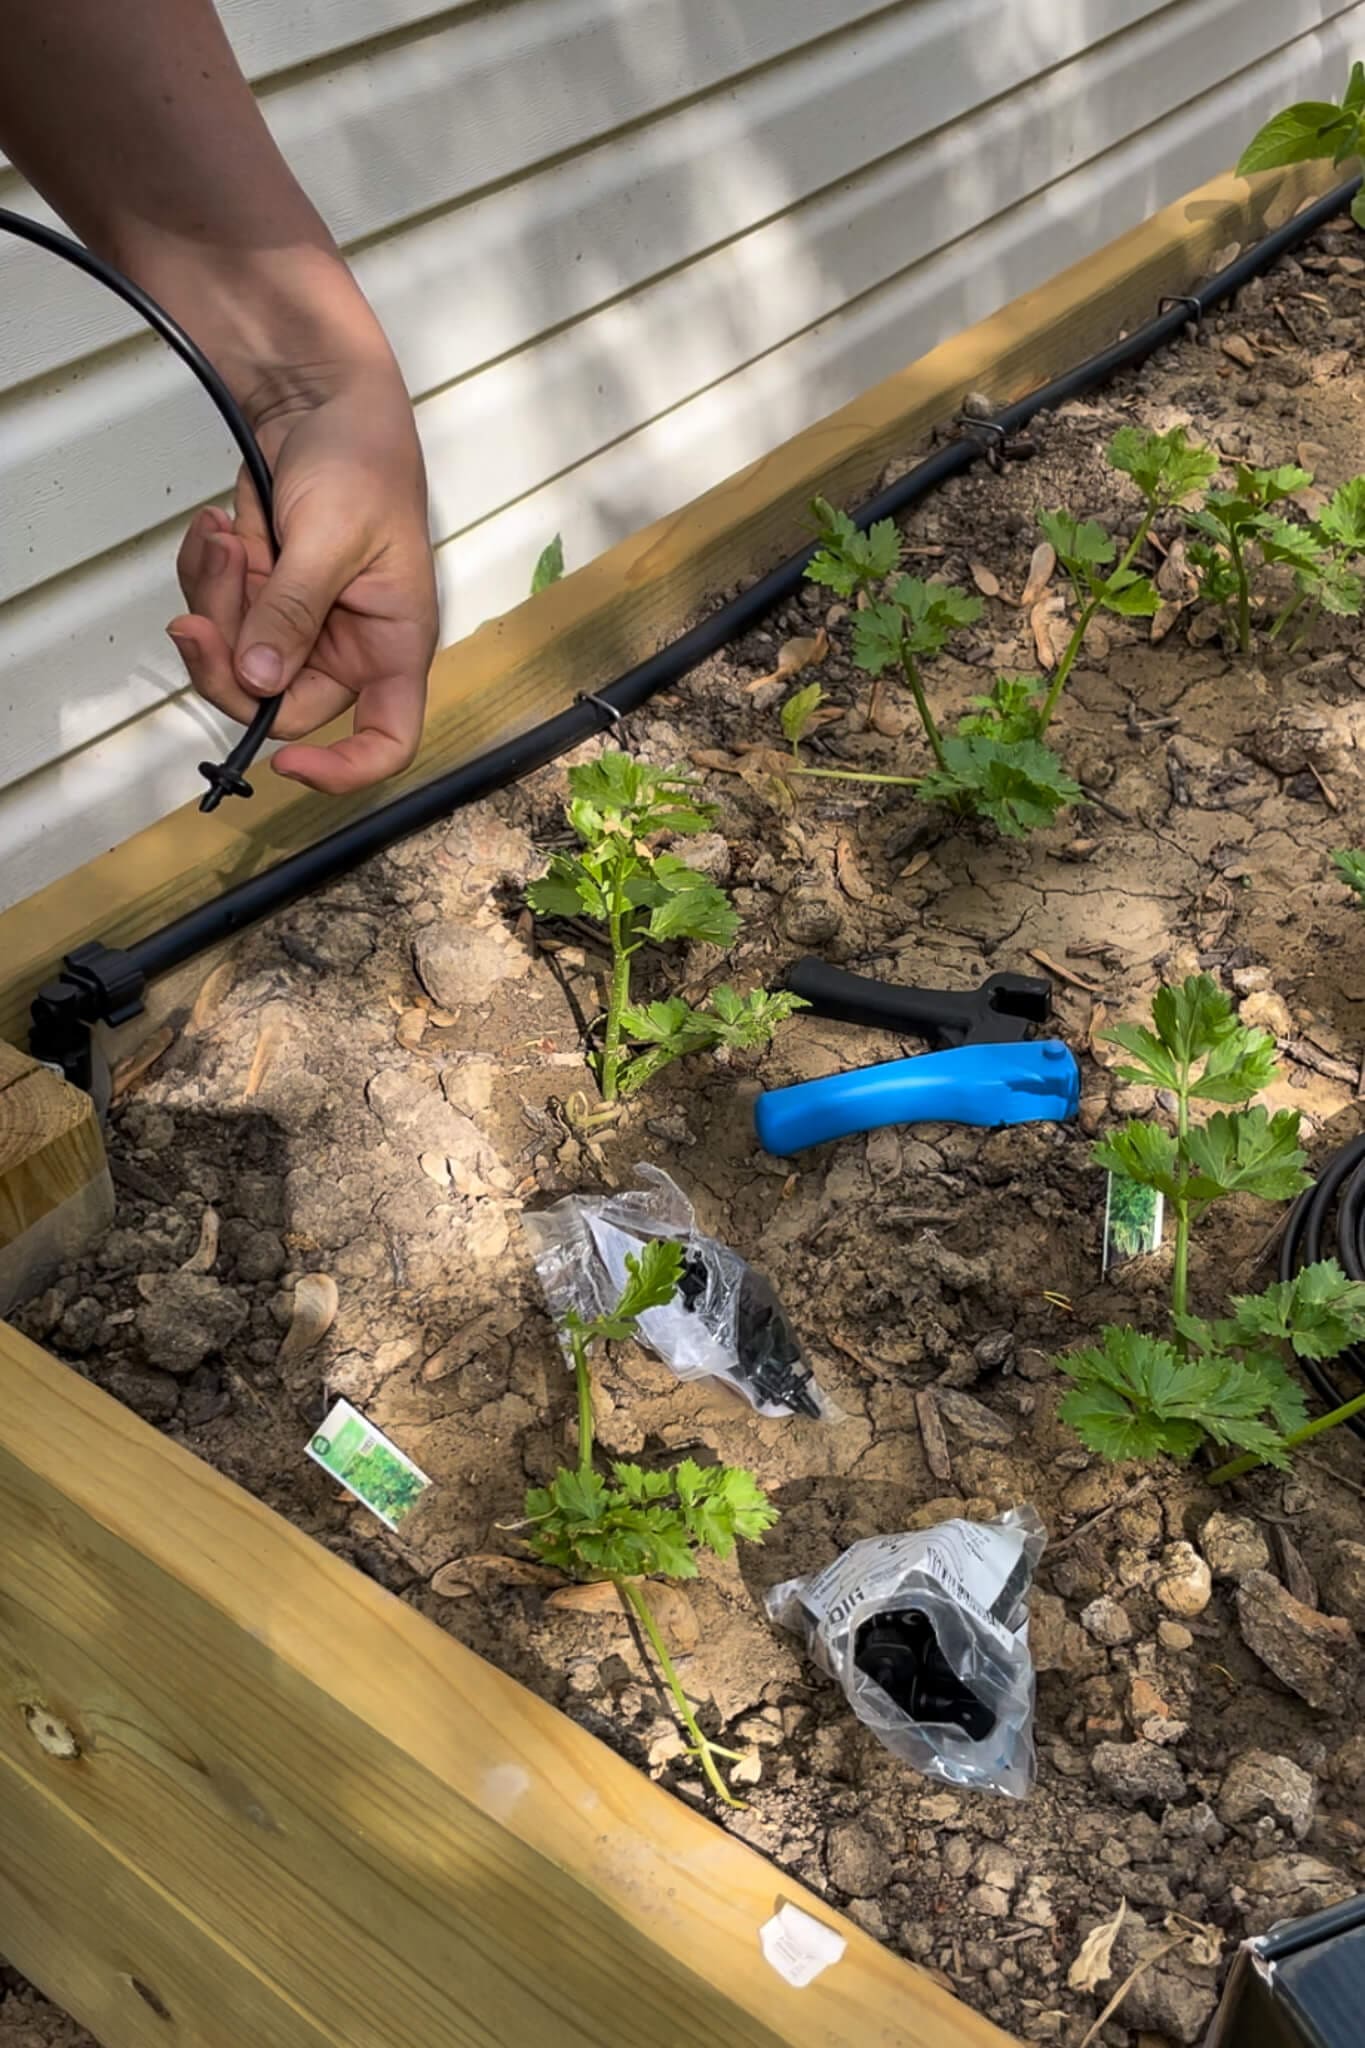
If you need to run tubing to multiple plants from one hole, use a T-connector. And if you accidentally punch an extra hole (which I definitely did), goof plugs will save the day.
Step 12: Finishing Touches on Your Drip System for Raised Garden Beds
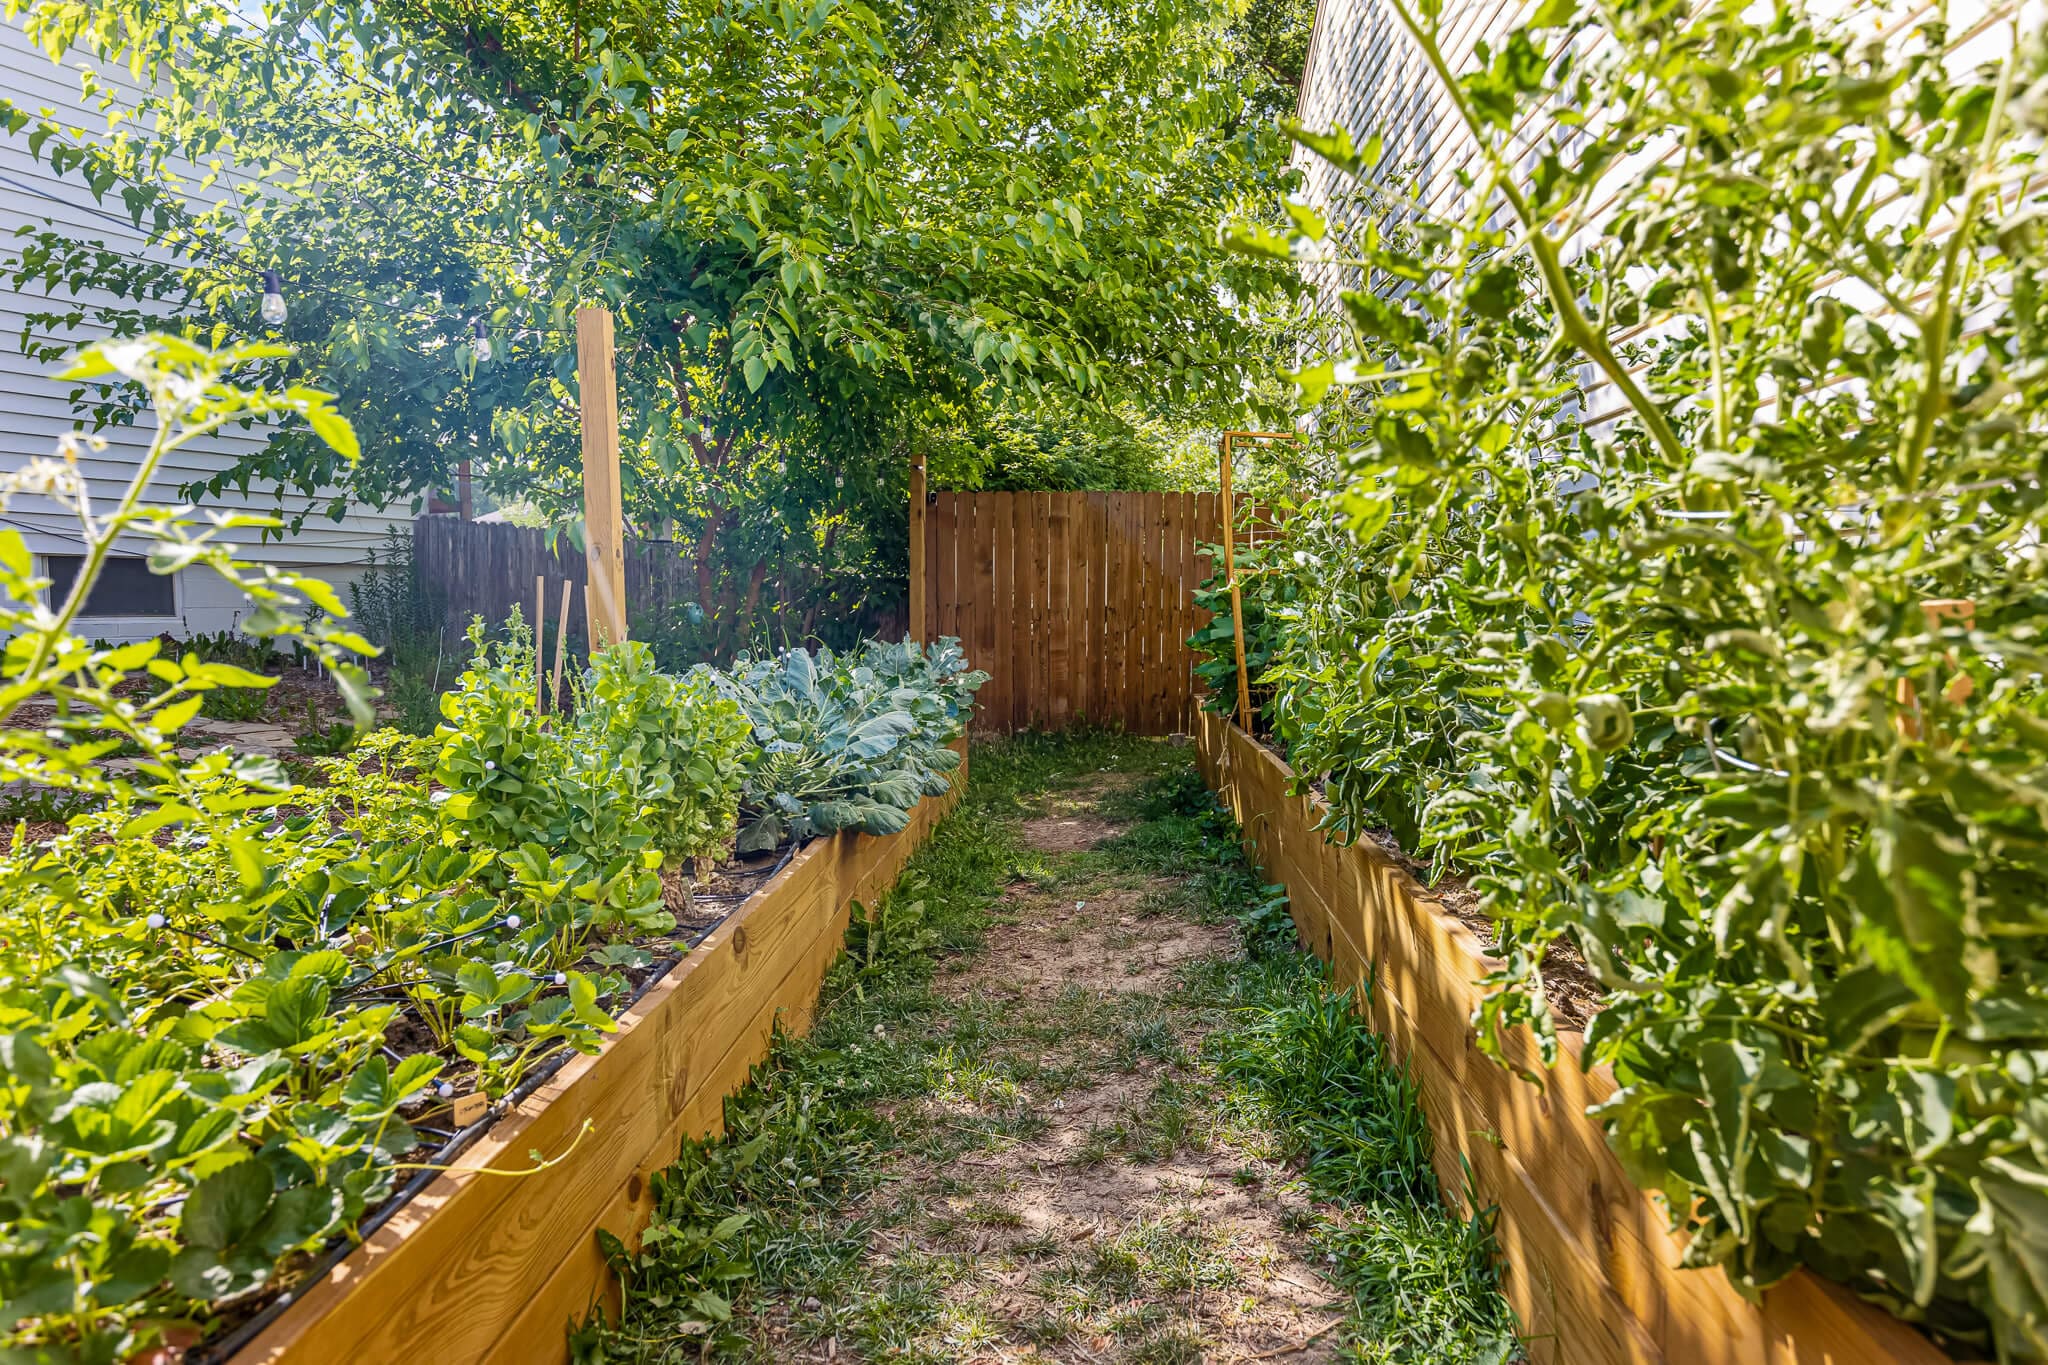
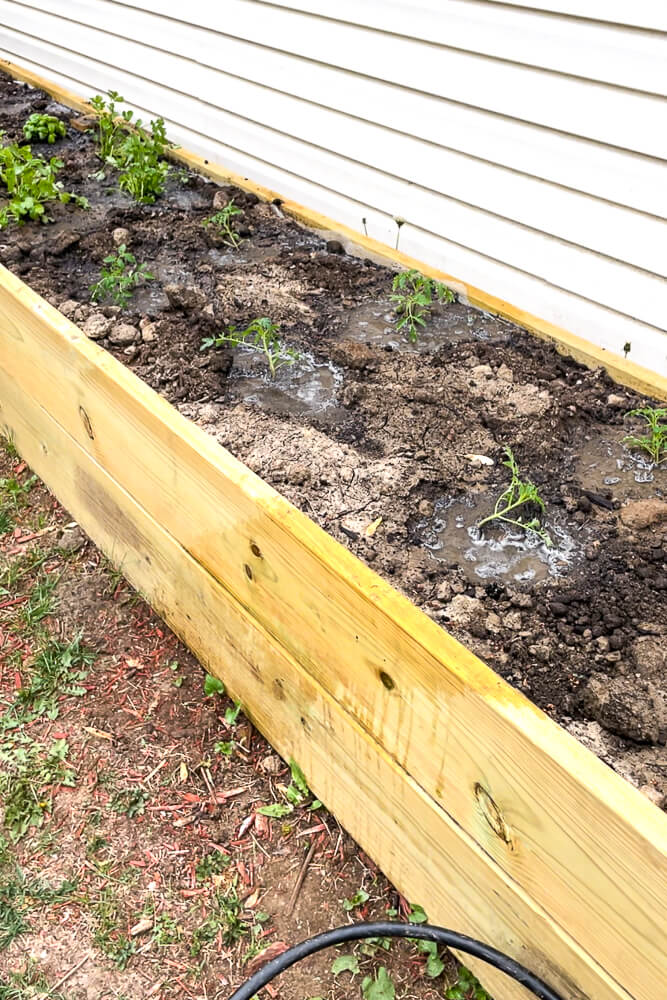
Once everything was connected, we buried the poly tubing 4–6 inches deep to protect it from sun damage and avoid any tripping hazards. When you’re done, your drip irrigation system will quietly do its job while you sit back and enjoy your thriving raised bed garden.
Drip System for Raised Garden Beds Smart Watering Tips
- Water early in the morning to reduce evaporation.
- Set your timer based on your local climate and season.
- Check for leaks, blockages, or dead batteries regularly.
- Use rainwater if possible – it’s better for your plants.
- Consider adding a rain gauge or sensor to avoid overwatering.
Final Thoughts: Why a Drip System is the Best Way to Water Raised Garden Beds
Honestly? I think so. Our drip irrigation system for raised garden beds turned out to be the easiest, most rewarding garden project – truly the best drip irrigation setup for beginners if you’re looking for a low-maintenance garden watering system that delivers big results we’ve done – and the results speak for themselves. We’re growing more veggies, saving water, and spending less time stressing about the hose.
Ready to Install Your Drip Irrigation System? Let’s Do It!
You’ve got the steps, the supplies, and the confidence to make it happen. Installing a DIY watering system for vegetable gardens might just be the most satisfying garden project you’ll do this year.
Got questions? Drop them in the comments. And if this helped you, give it a share or save it on Pinterest!
📌 Save this Project for Later
Frequently Asked Questions About a Drip System for Raised Garden Beds
Yes! You can run smaller lines to containers or even hook this setup to a system that waters potted plants on a porch or patio.
Been there. That’s what goof plugs are for! They’re tiny stoppers that seal up holes in your tubing so you can fix mistakes without starting over.
It depends on how many beds you’re watering, but most people can set up a basic system for $50–$100. We sourced everything online and linked it all in the supply list to make it easy.
Nope! If you can build IKEA furniture or hang a picture frame, you can do this. It’s beginner-friendly and doesn’t require any special tools or plumbing experience—just a little patience and some garden stakes.

Thanks for the detailed instructions! When you winterize a system like this, do you just unscrew the splitter and the hose from the bib? And cap off the hose?
Yep! You got it!
Thanks for taking the time to help us learn things!