
My motivation for adding this paver driveway extension was a simple one. Our driveway is only just wider than two vehicles, and even though it took me a while to figure it out, I realized that my grass was getting really thin at the edge of it because we were walking on it so much from getting in and out of our vehicles. Rather than trying to plant new grass, I decided that I needed to turn this area into a walkway instead. And it has been so functional for us!
Thus Begins the Exterior Makeover
Besides being an issue for loading and unloading my kids in the car, it would be nicer for parking if the driveway was just a bit wider. In this picture, you can even see some tire tracks where someone went just a bit off the concrete pulling into the driveway.
Right now, I’m on a mission to have a lush and beautiful lawn, so I can’t have anyone driving on or trampling my grass. I just need our driveway to be a little wider, which is where this idea for a paver driveway came in.
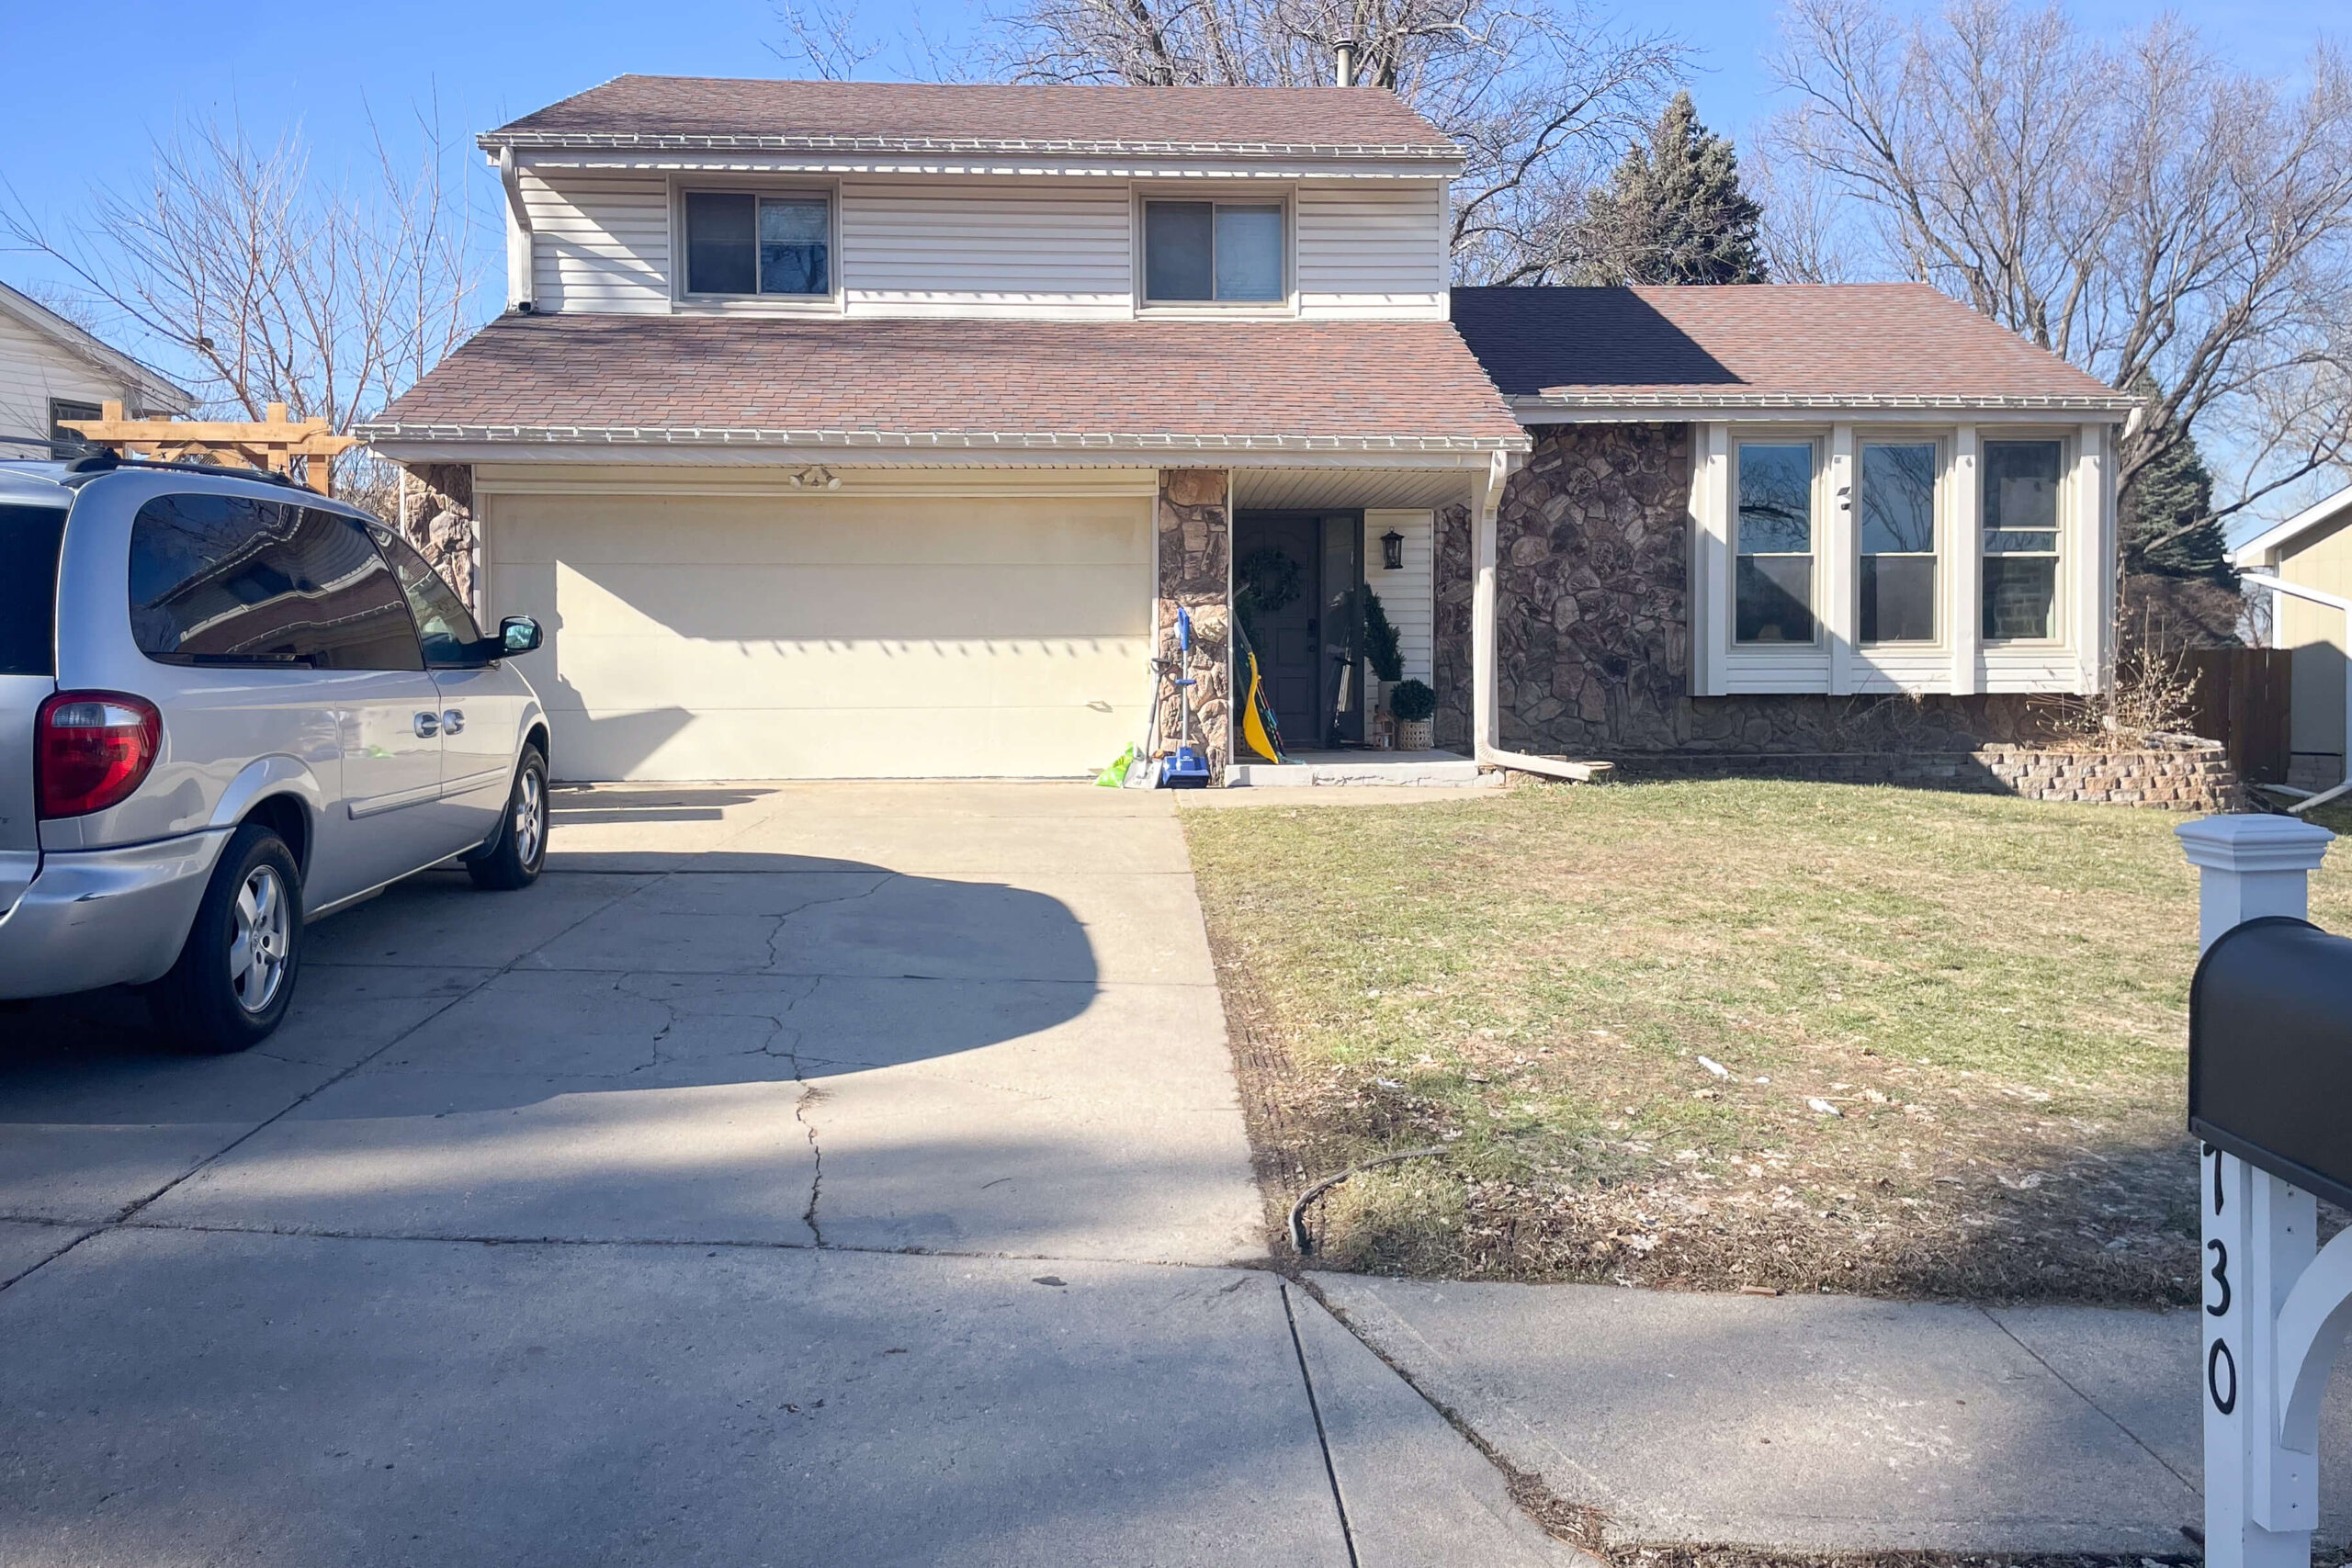
Table of contents
Tools
Materials
Preparing the Ground for Pavers
This is the area of my lawn where I added the paver driveway. The grass looks alright here at the moment, because I re-planted it last spring. Had I thought of the paver solution sooner, the grass definitely wouldn’t have needed to be planted. For the first step, I had to prep the ground so it was ready for pavers.

Breaking up the Dirt
I purchased this tiller with the intention of using it on my lawn revitalization project and adding new flower beds, but it’s come in handy for this paver driveway extension and so many other projects too! After measuring how far out I would be extending my driveway, I took out the tiller and went for it. I determined the width based on how many pavers would fit within the sidewalk distance without me having to cut them down.

Removing Dirt
I wanted the top of my pavers to sit flush with the existing driveway, which meant removing some dirt. So, I shoveled out as much as I could and hauled it with my wheelbarrow to some low spots in my lawn.

After tilling and shoveling, a stiff rake is perfect for smoothing out the dirt you have left and removing any leftover clumps of grass.

Adding a Layer of Road Base
The last thing I needed to do to prep my ground for pavers was add a road base. It’s a mix of sand and gravel that will settle down, making a sturdy base for our pavers. If you skip this step, you will probably end up with sinking or shifting pavers. Adding the road base underneath gives your paver driveway a firm foundation to rest on.

Again, the stiff rake is perfect for moving the road base around until there is an even layer. Make sure to leave room for 1–2 inches of sand plus the paver height, or they’ll sit too high above the concrete.

After the road base is smoothed out with the rake, it’s time to tamp it down.

Using a tamper like this one, you will start at one end and work your way up to the other, pressing and packing the road base down as you go.

Installing the Paver Driveway Extension
Now that our ground was prepped, I could begin installing the paver driveway.
Sand and Tamp
First, you will lay down some sand and tamp it down to pack it tight. I added the sand in small sections as I worked my way up the driveway. The whole point of the sand is to help you nudge the pavers up or down so they line up perfectly with your concrete edge.

Paver Layout
Starting in a corner, I laid my first paver. If a corner of it is too low, add some sand in that corner. If it’s too high, take sand away. Easy peasy.

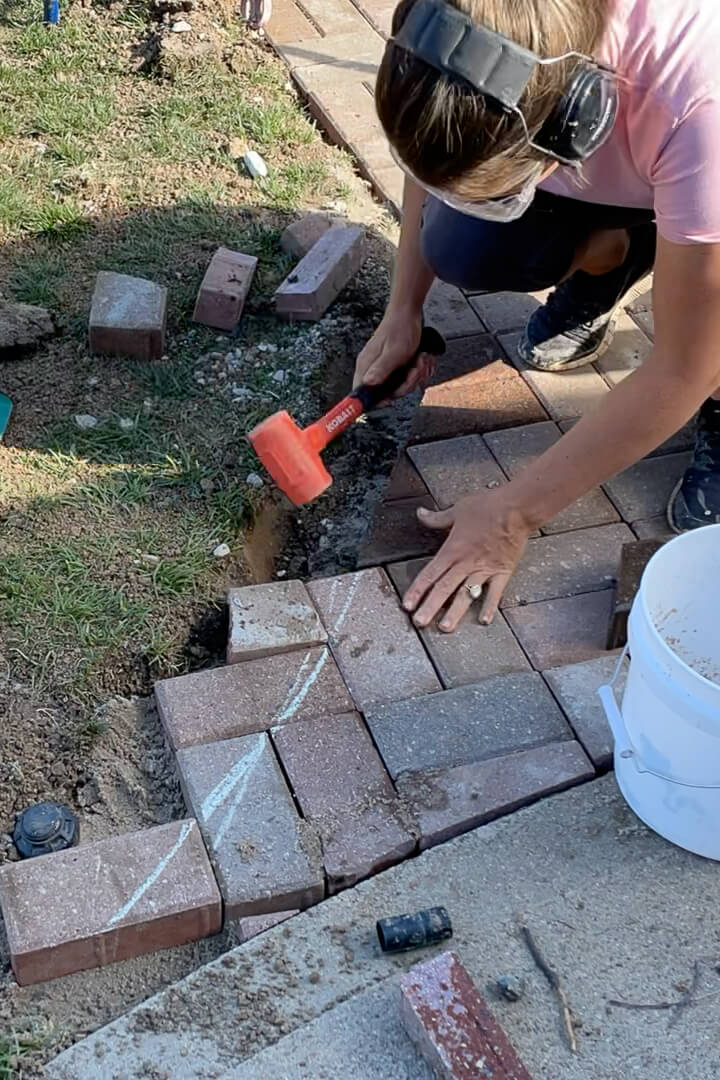
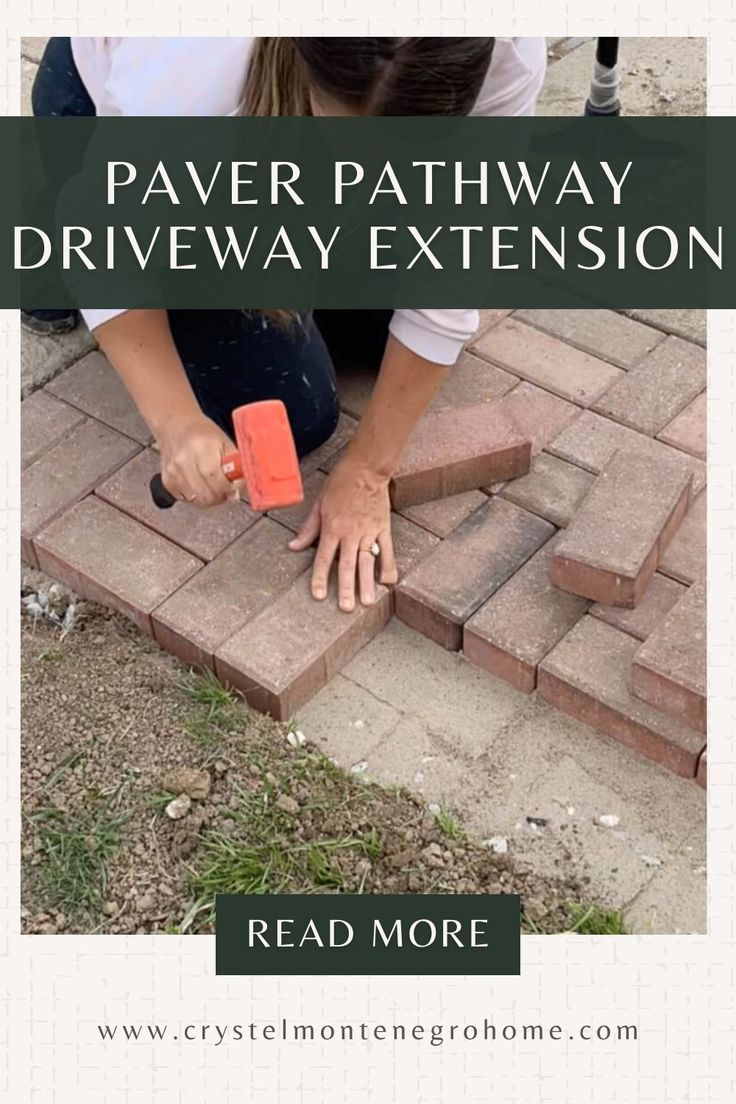
From there, it’s as simple as adding pavers in whatever pattern you choose. Tap them firmly into place with a rubber mallet as you go.

Sometimes, they need a little tapping from the side as well, just to get them perfectly in place.

As I moved farther up the driveway, I added more sand, tamped it down, and just kept moving along, adding pavers.

All of the pavers for this paver driveway project came from our patio that we removed last year. When we tore out our paver patio in the backyard, opting for a larger concrete patio, I saved all of the pavers knowing I could use them in another project. I love saving money by using materials I already have on hand.

Leveling Pavers
After I got a good way along with that first section of pavers, I thought I noticed just a bit of a slope towards the lawn. I had the thought to use a level, but then dismissed it thinking I could eyeball it. But, I was wrong. Grabbing a scrap piece of wood to check it out, and sure enough, look at that gap there! I removed those few pavers that were sloping down, built it up underneath with more sand, then replaced the pavers.

I kept the board with me as I worked, checking the pavers in both directions to make sure everything stayed straight as I installed the paver driveway.
Also… I hate to admit it, but it took me this long to realize I really should’ve been wearing gloves. My hands were raw from handling the rough brick, plus a few too many missed swings with the mallet left me with cuts and bruises. If you value your hands—don’t be like me. Wear the gloves.


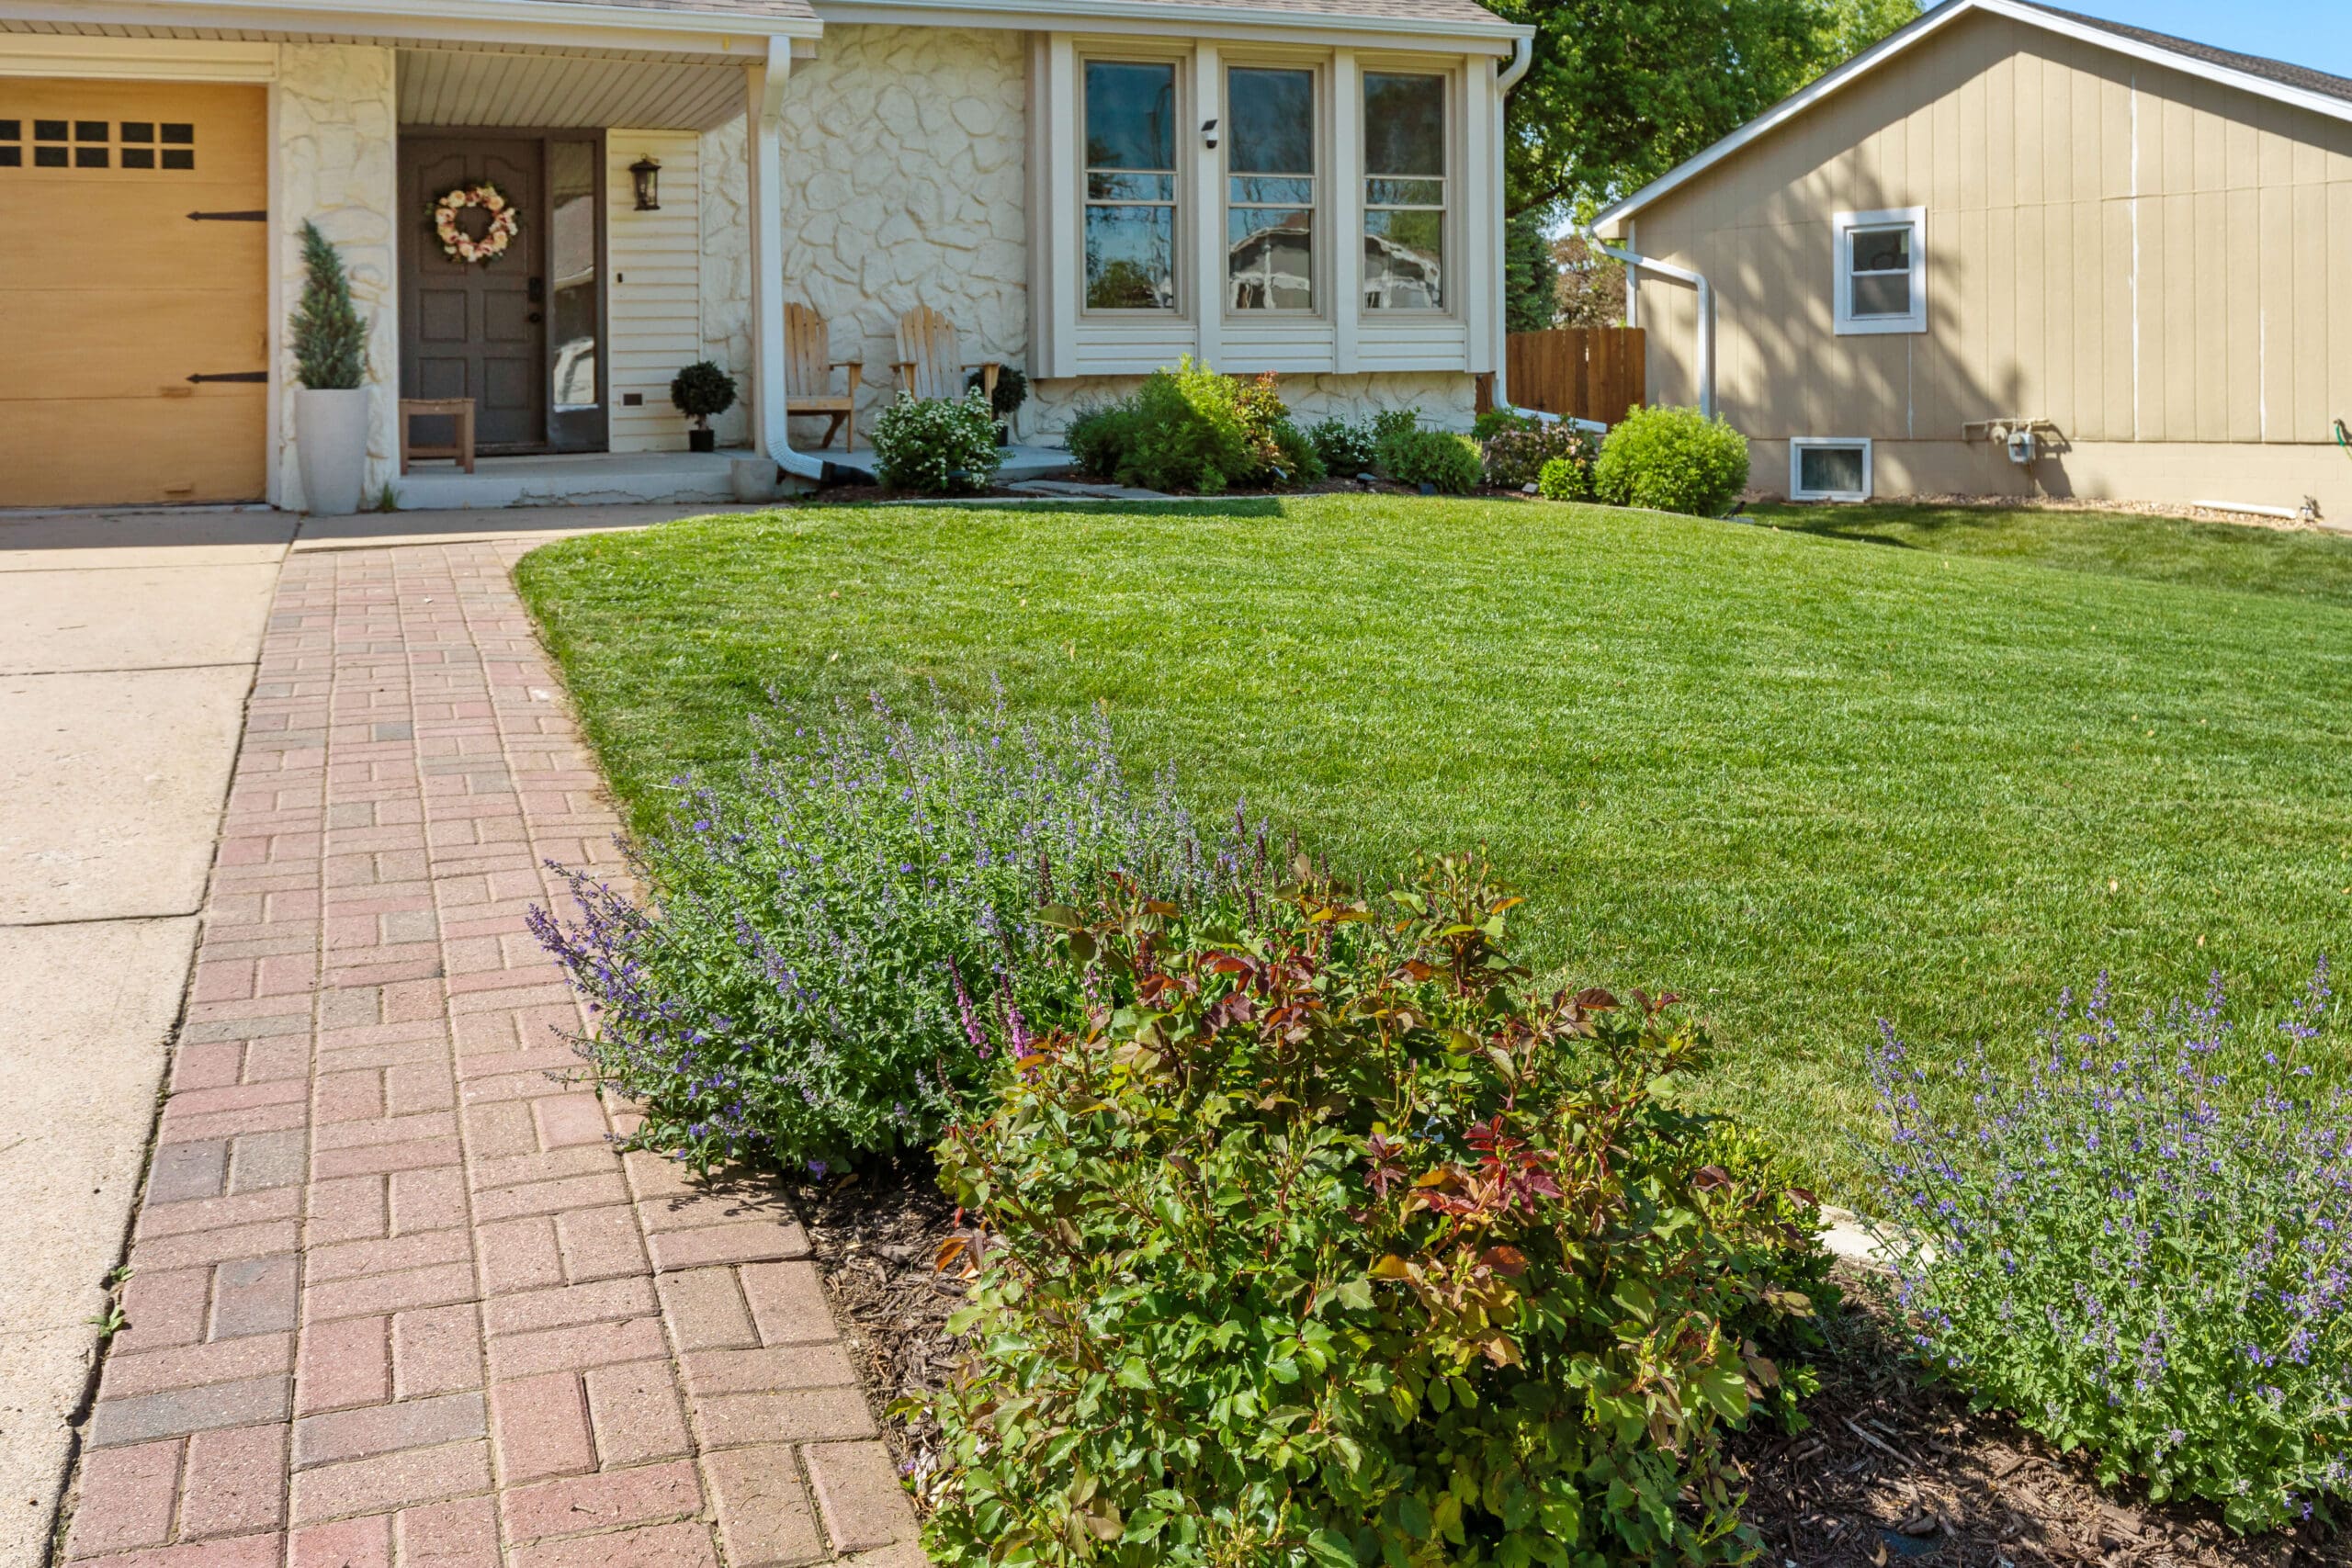
It was already looking so good! I could’ve gone straight to the front patio, but I decided to add a curve instead of a sharp corner. It’s prettier that way—and way easier when mowing since the mower can just glide along the curve.

How to Curve a Paver Driveway
For this curved section, most of it will follow the same procedure as the large, straight portion that I just finished.
- Place the sand
- Add a paver
- Tap it in with the mallet
- Check it with the board


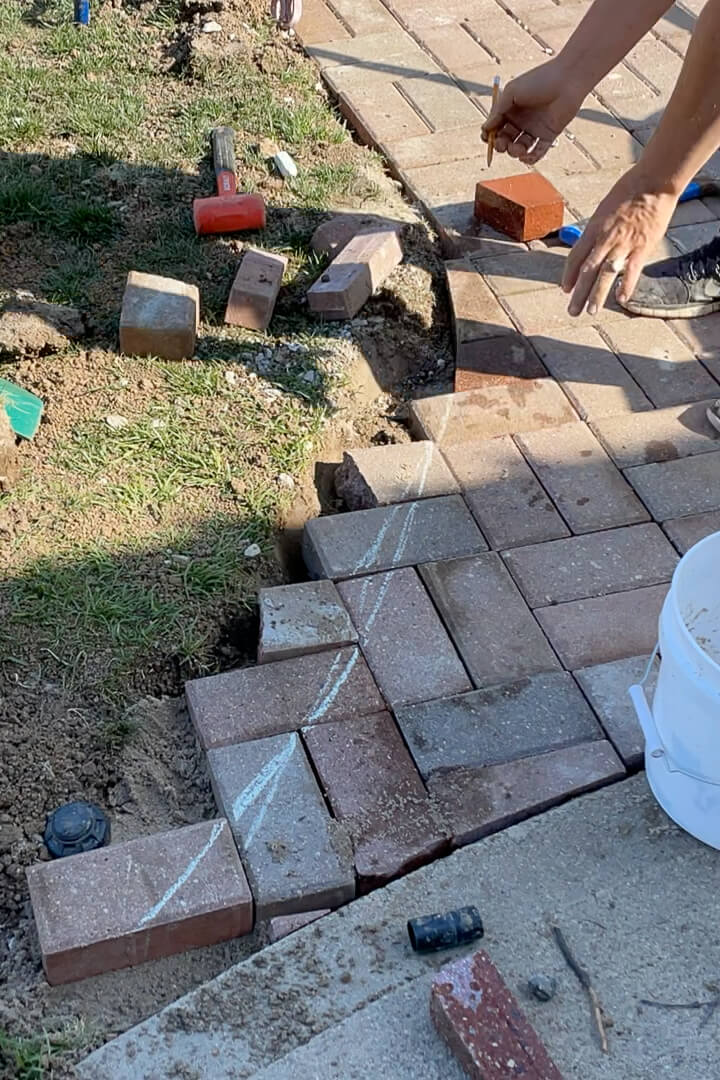
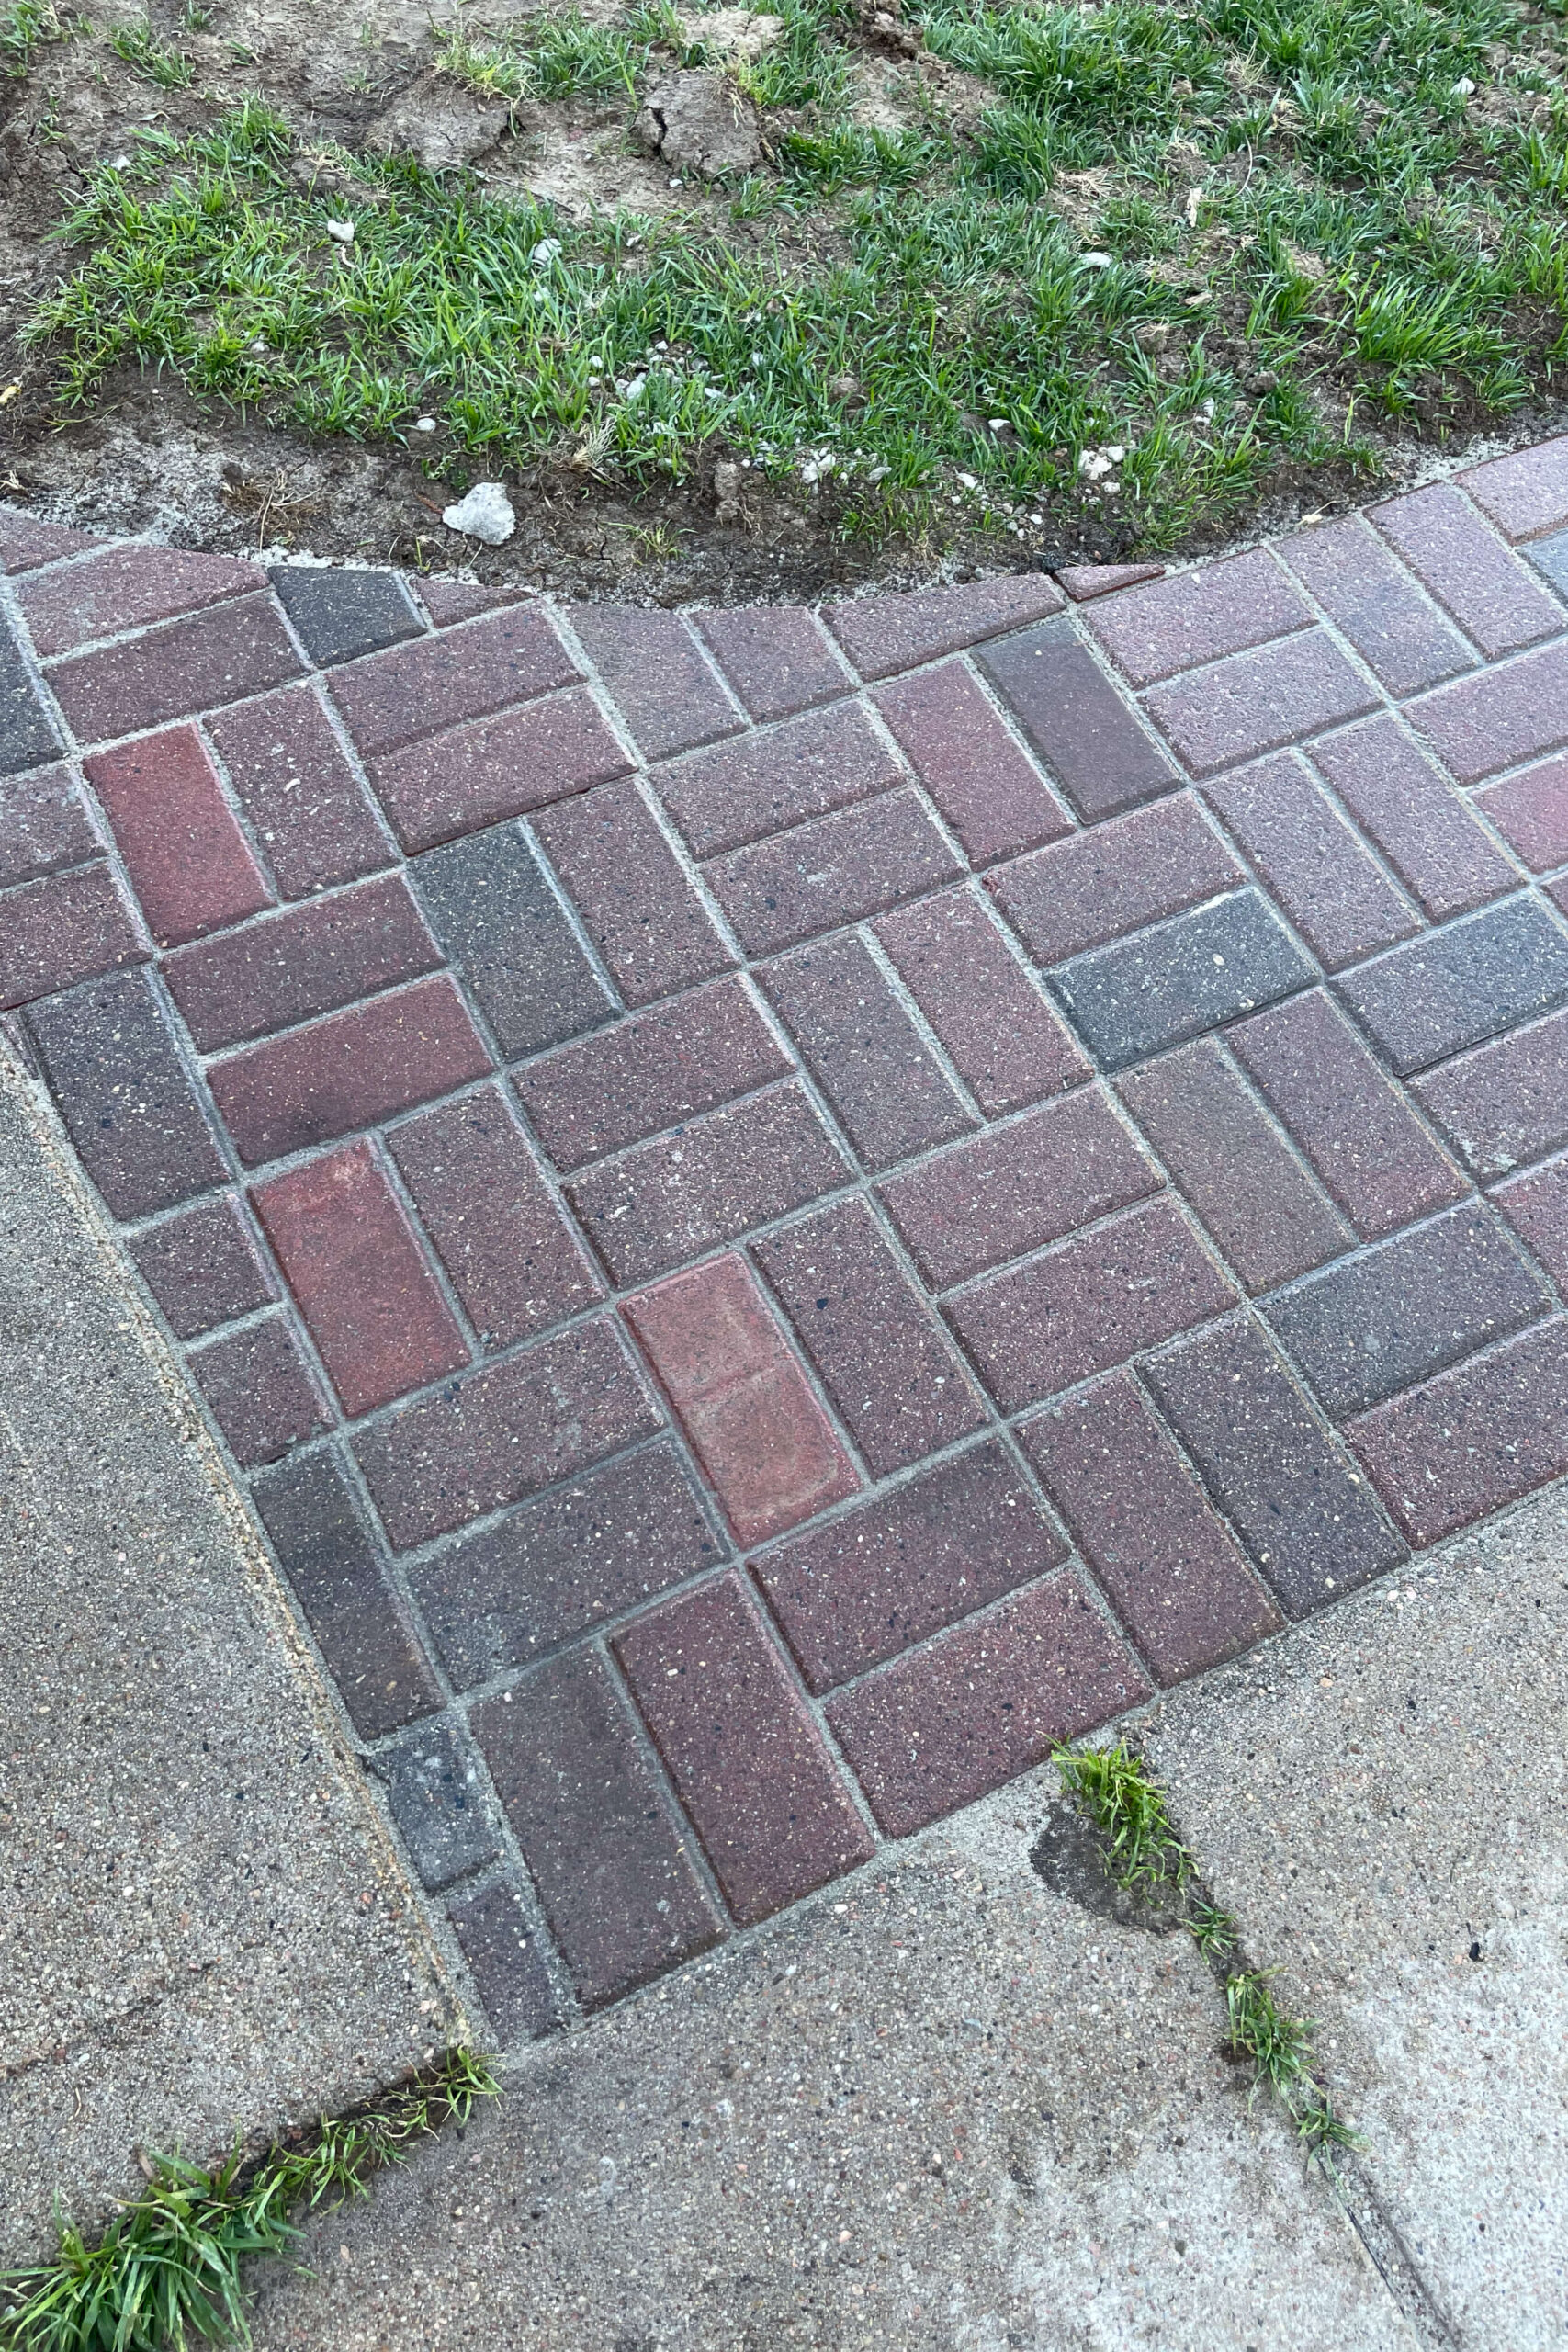
I followed those steps, adding as many whole pavers as I could. And with the cutest little not-helper to boot! You can see that my front sidewalk is not square with the driveway, so there is an angled gap up here. It’s ok, though. We’ll get to it.


Using my tile saw, I cut the pavers down to the sizes that I needed for them to fit into the gap between my paver driveway and my front sidewalk.

As I cut, I installed them by tapping with the rubber mallet just like I did with the rest of the pavers.


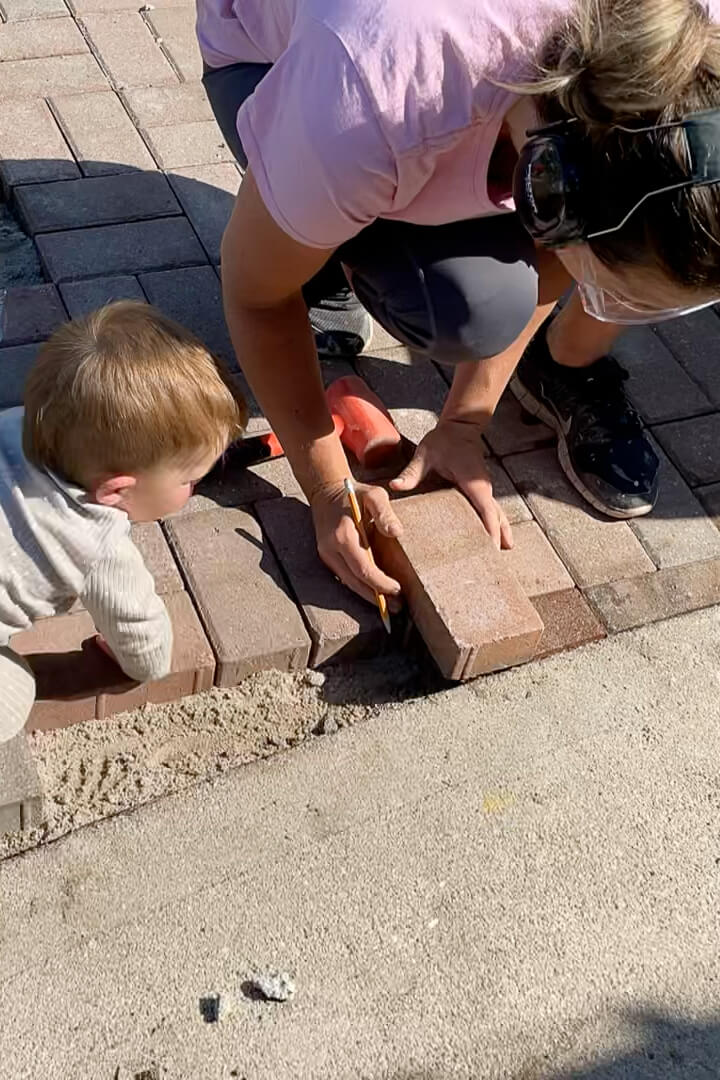
Instead of trying to measure then cut, I found it much easier to mark directly on the paver how much I needed to cut off, then take the paver over to the tile saw and cut on that mark.
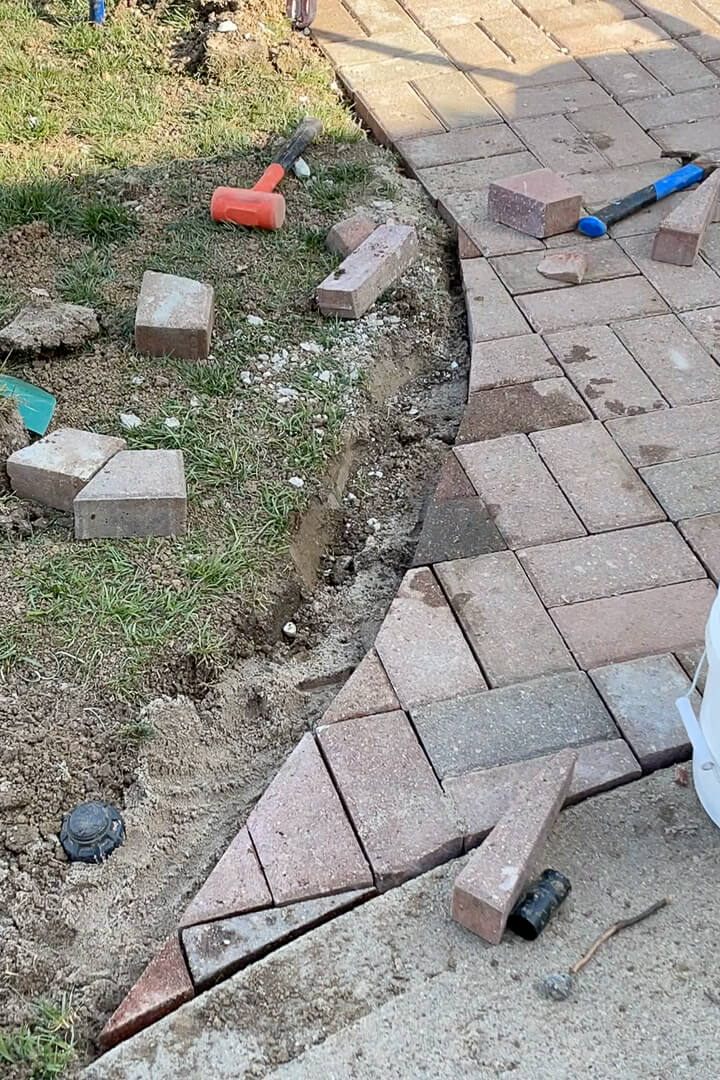
Slowly, but surely I got that gap at the top filled in. Now I needed to cut my bricks for the curve.
Before making any cuts, I used a piece of chalk to draw a rough idea of where I’d like the curve to be, then just one paver at a time I used my pencil to mark the actual cut line, cut it on the tile saw, put it back in place, and repeat.
And done! The curve was definitely a little more work, but I will be thanking myself when it comes time to mow my lawn this summer.
Look how good this paver driveway is looking already! Can’t wait to finish it!

Finishing the Paver Driveway
The last step is the fastest and easiest step of the whole entire project. When you lay the pavers, there are little gaps between them, and we need to fill those gaps with polymeric sand.
Using polymeric sand is essential to have a long lasting paver driveway. It drains better than regular sand. I’m less likely to have issues with weeds coming through the pavers. After we wet the polymeric sand at the end, it’s going to harden to be almost like concrete around these pavers, holding them in place for a really long time. Plus, it comes in a bunch of different colors, so you can choose whichever one matches best with your project.
How to Add Polymeric Sand
Putting the polymeric sand in is so easy. I just poured it right onto the pavers, then used a broom to sweep it into all of the cracks and gaps.


For a few of the bigger gaps, I used my hands to push the polymeric sand down into the empty space, just to make sure enough sand was going in there, and also to try not to get too much of it on the concrete where I didn’t want it.

I continued pouring the polymeric sand and sweeping it into the cracks until I had worked my way down the entire paver driveway extension.


Lastly, I just sprayed it all down with water. My Giraffe hose reel made this part of the job a breeze. Use the lightest setting you can at first so it doesn’t wash away the sand you just put it. Then come back an hour or two later after it has had time to set and wet it all down again, making sure you get it deep into the cracks so all of the sand can harden.

After you have wet down the entire thing, you are done.
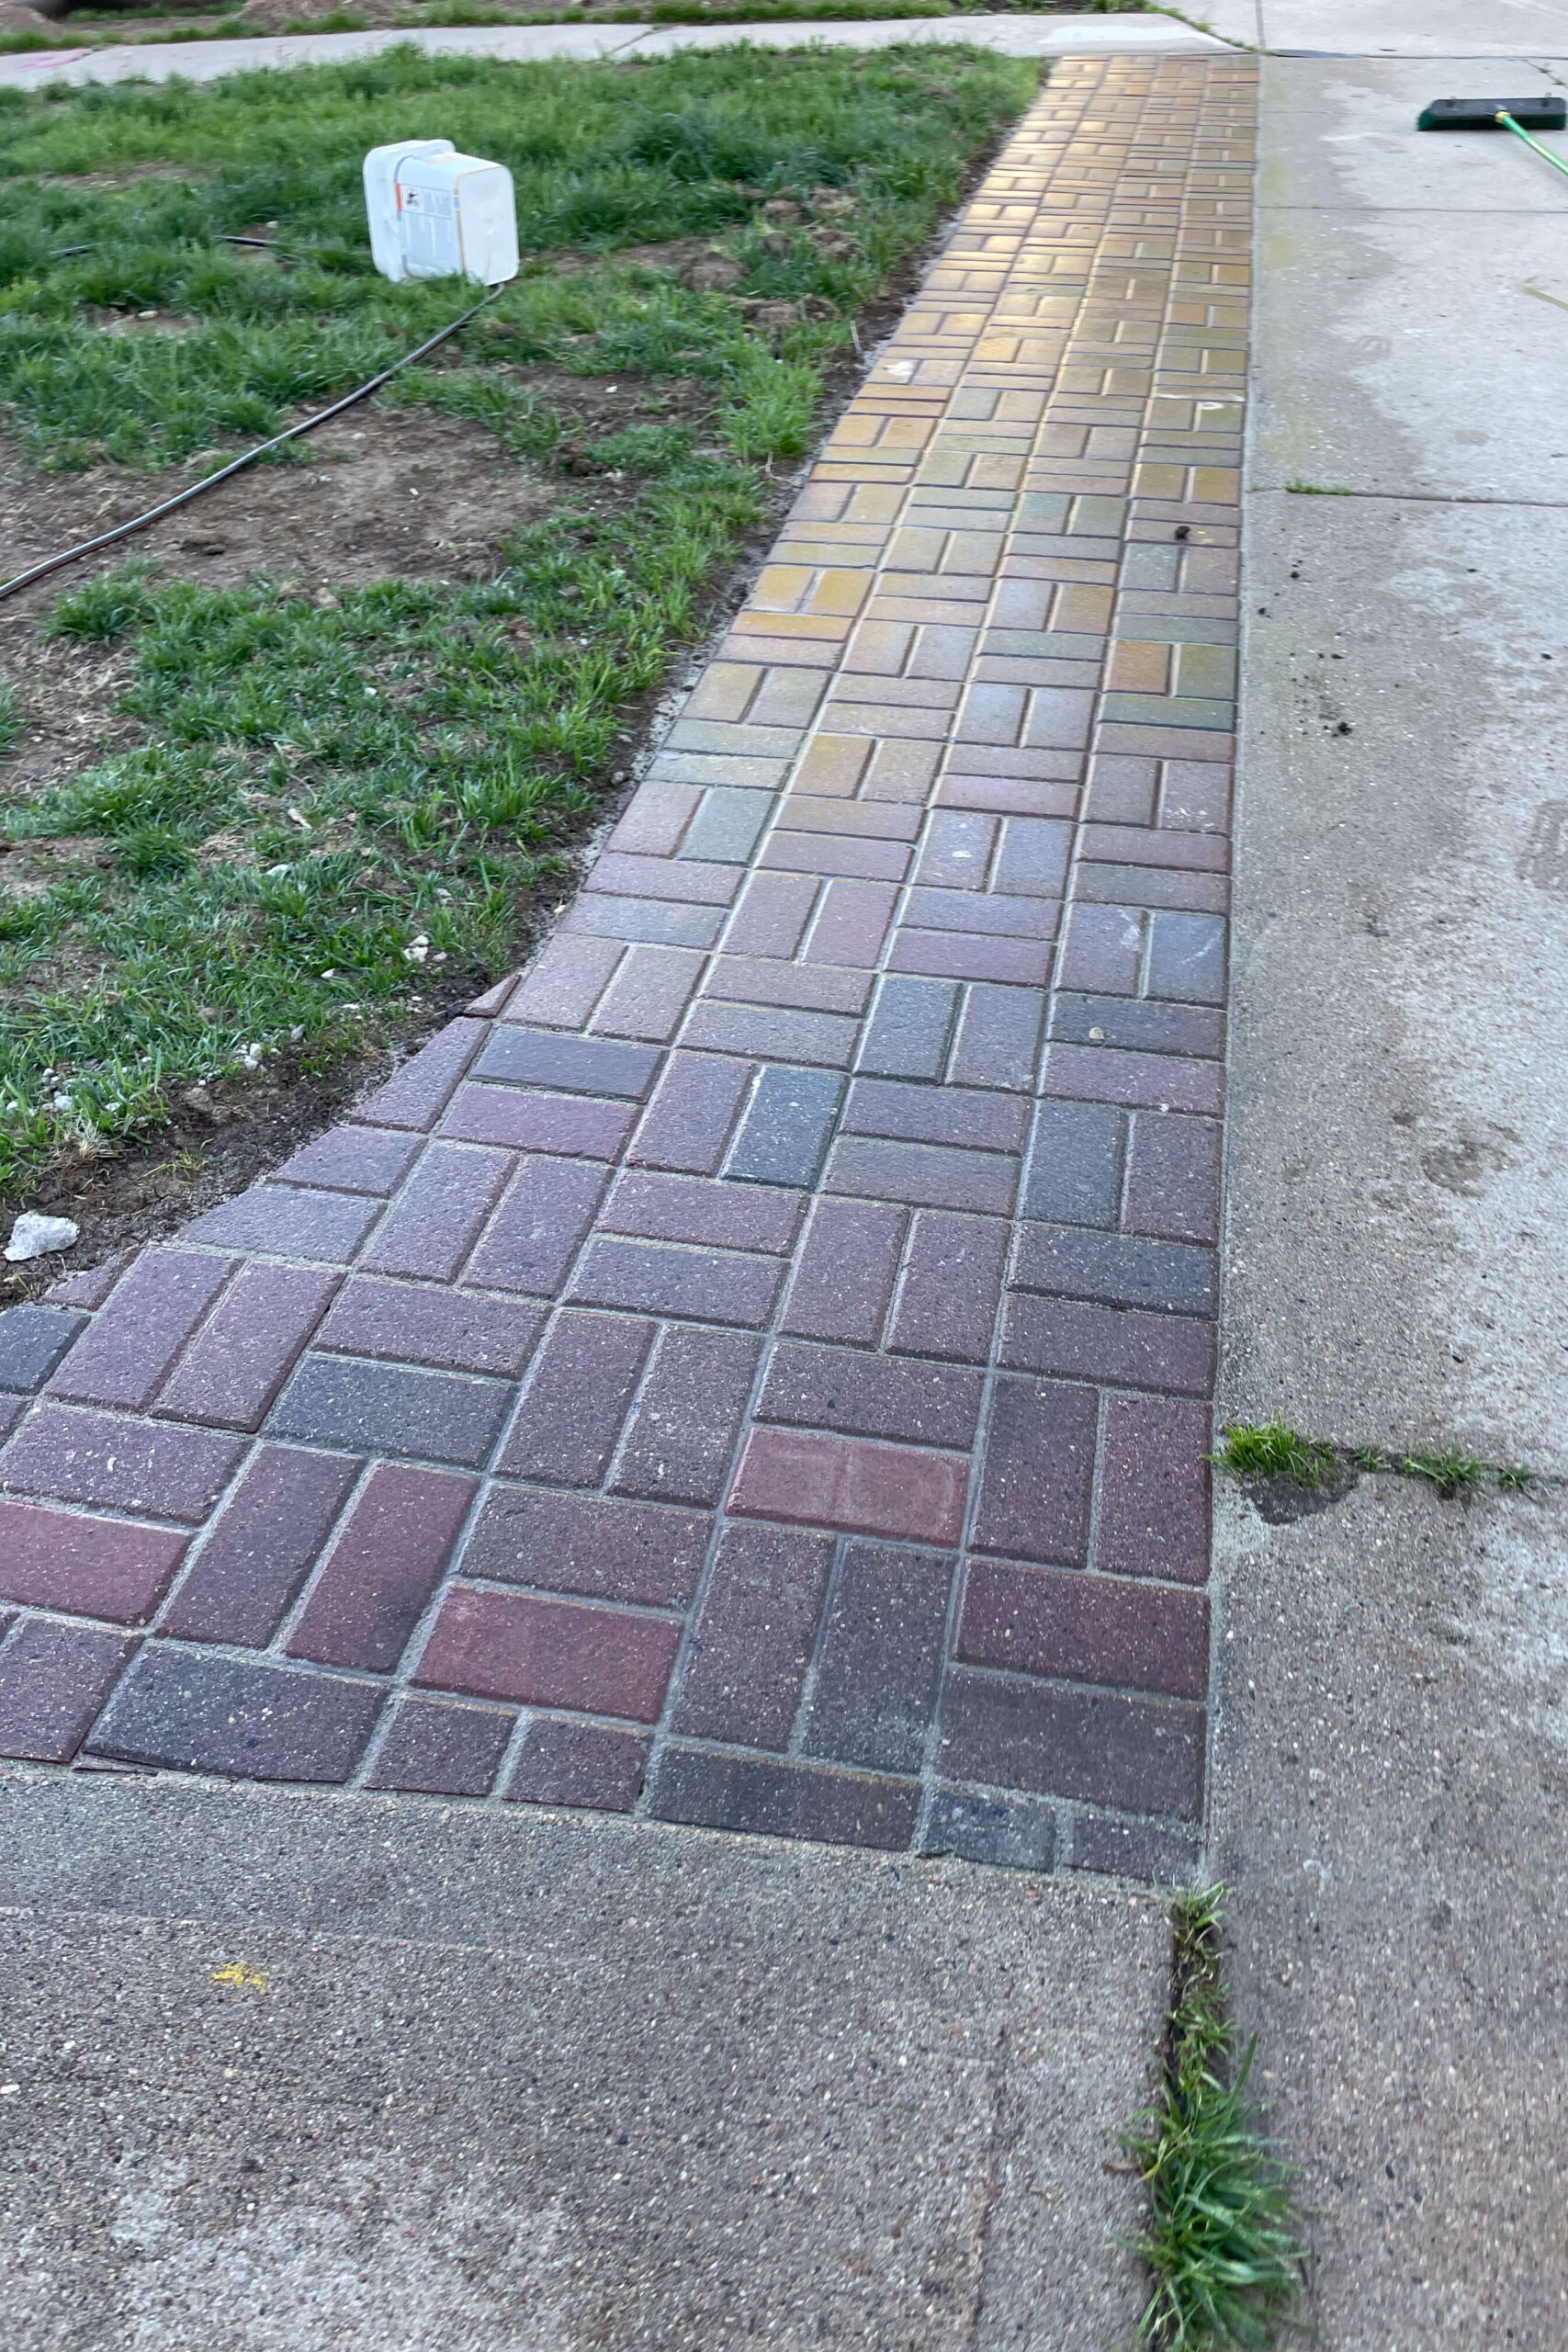
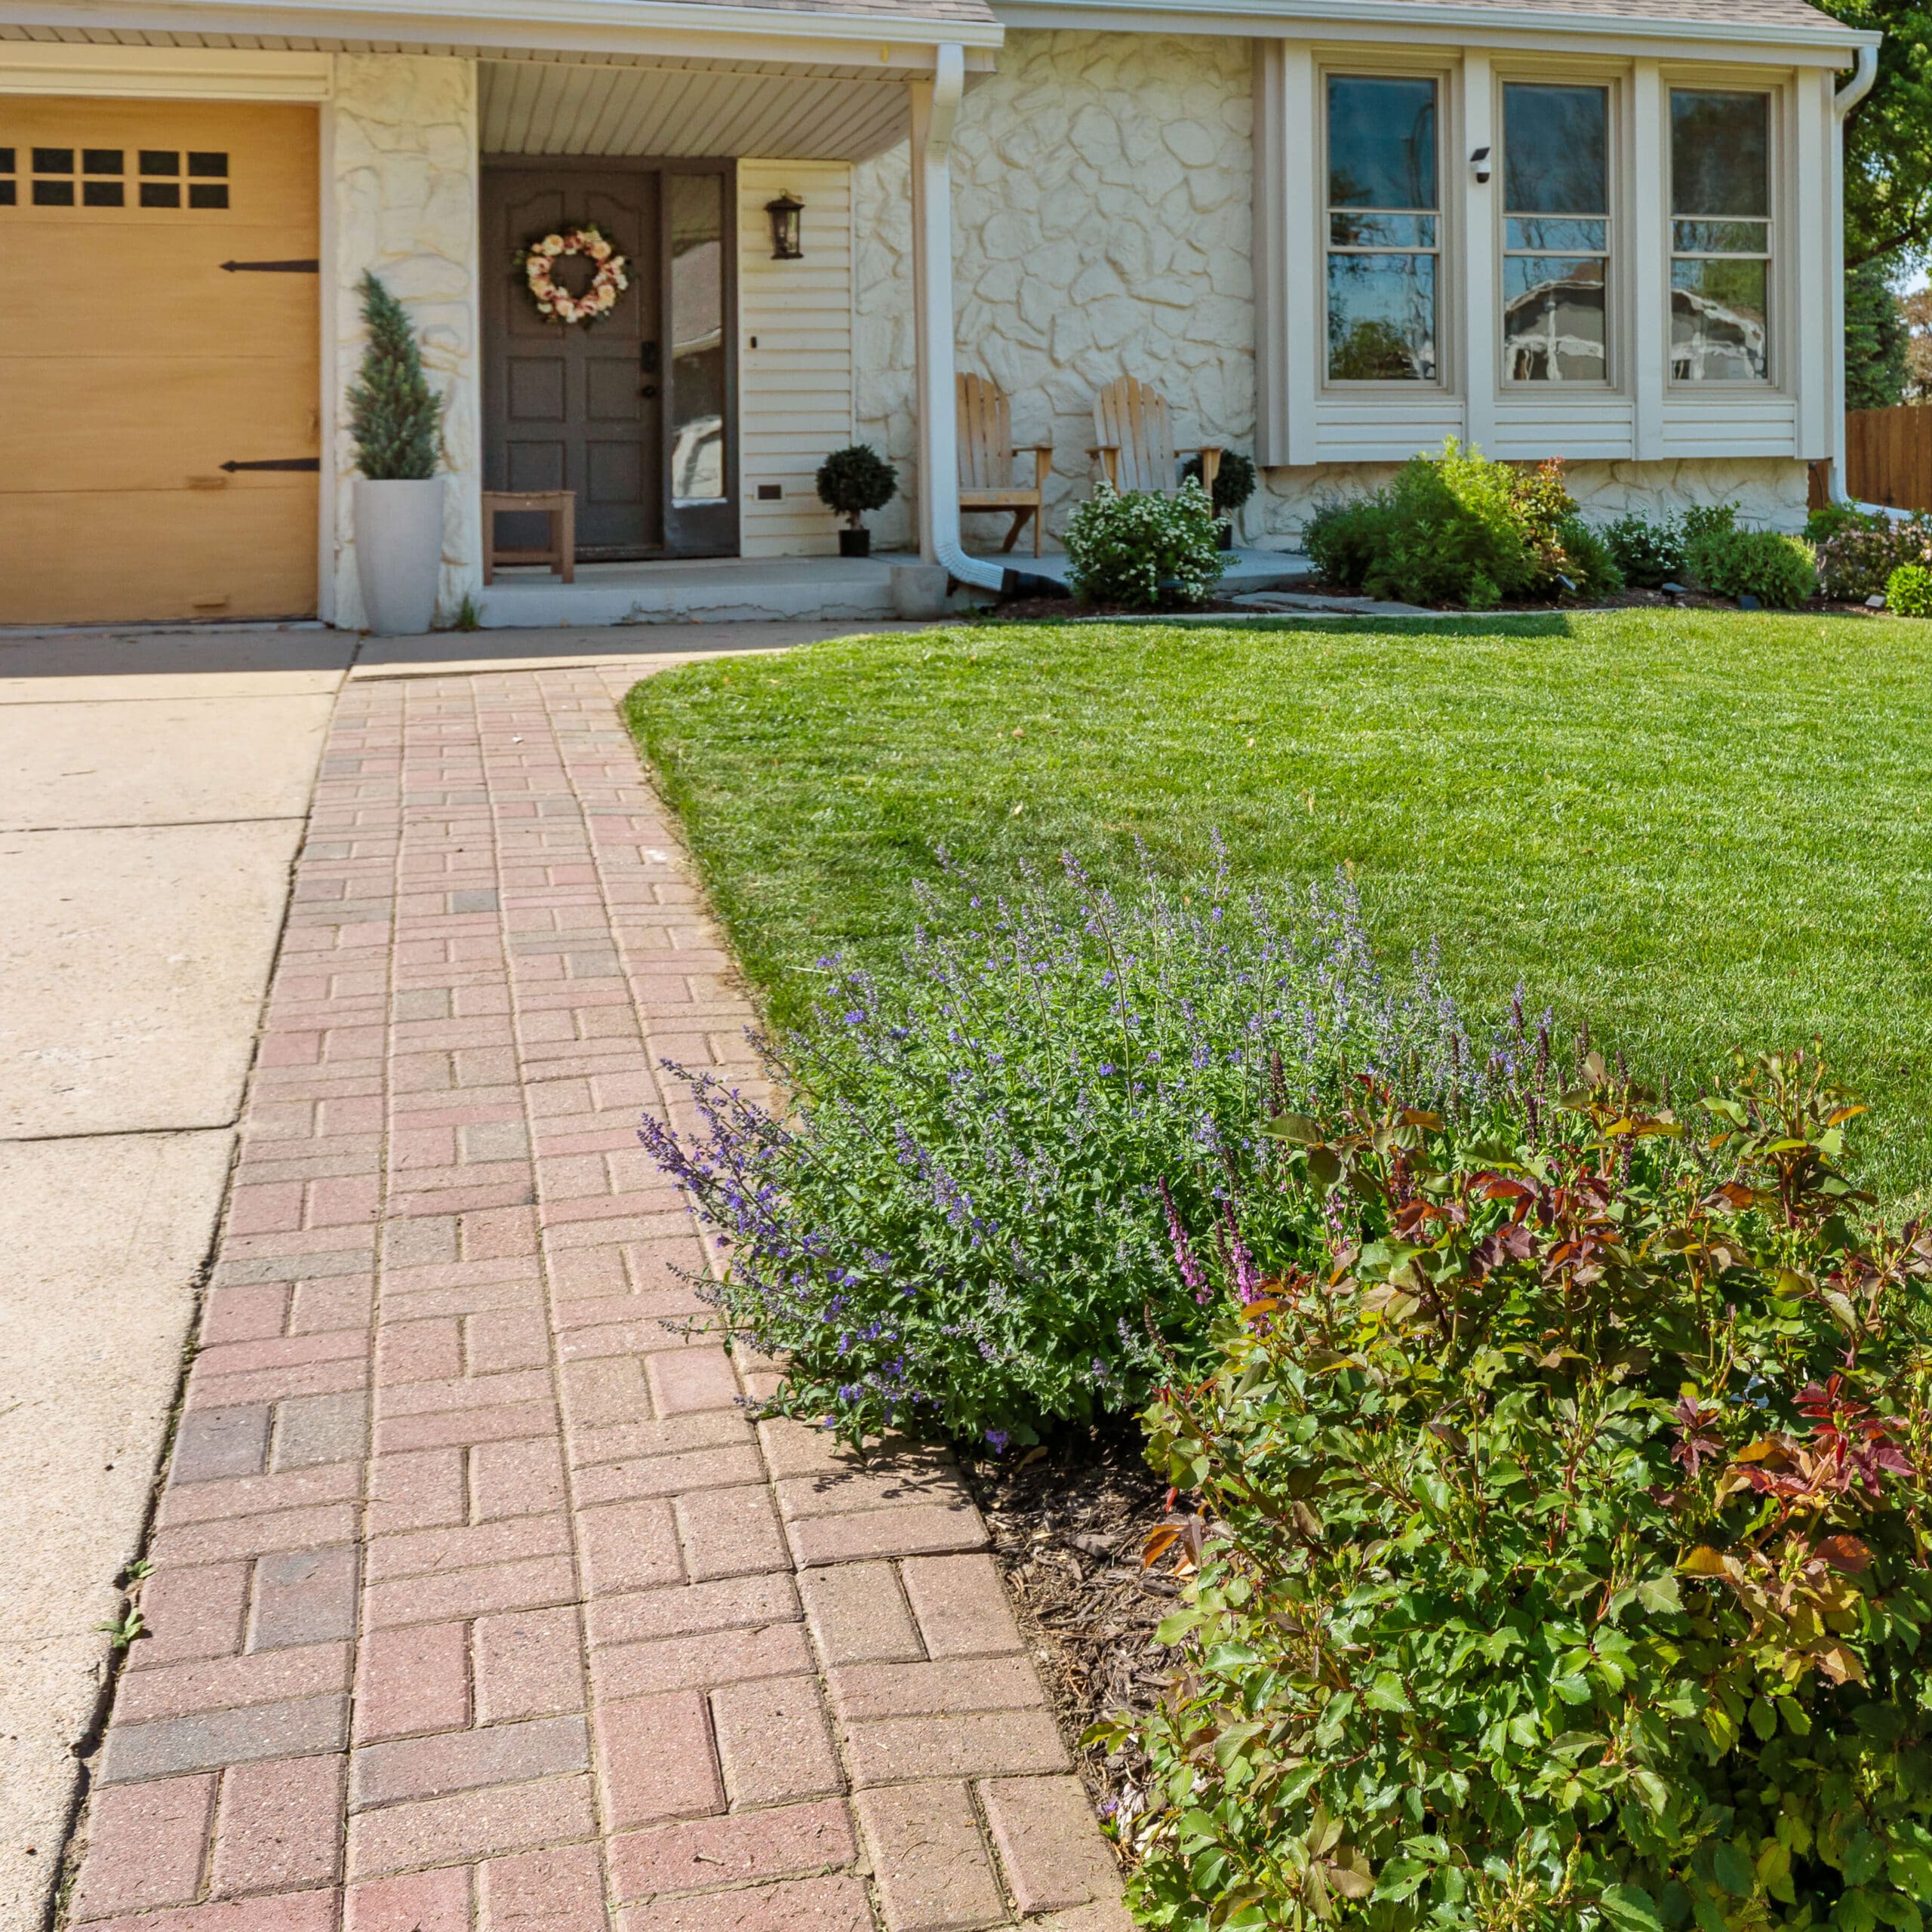
Look how the polymeric sand finished off this paver driveway beautifully! It looks so clean and polished, like these pavers have always been here.
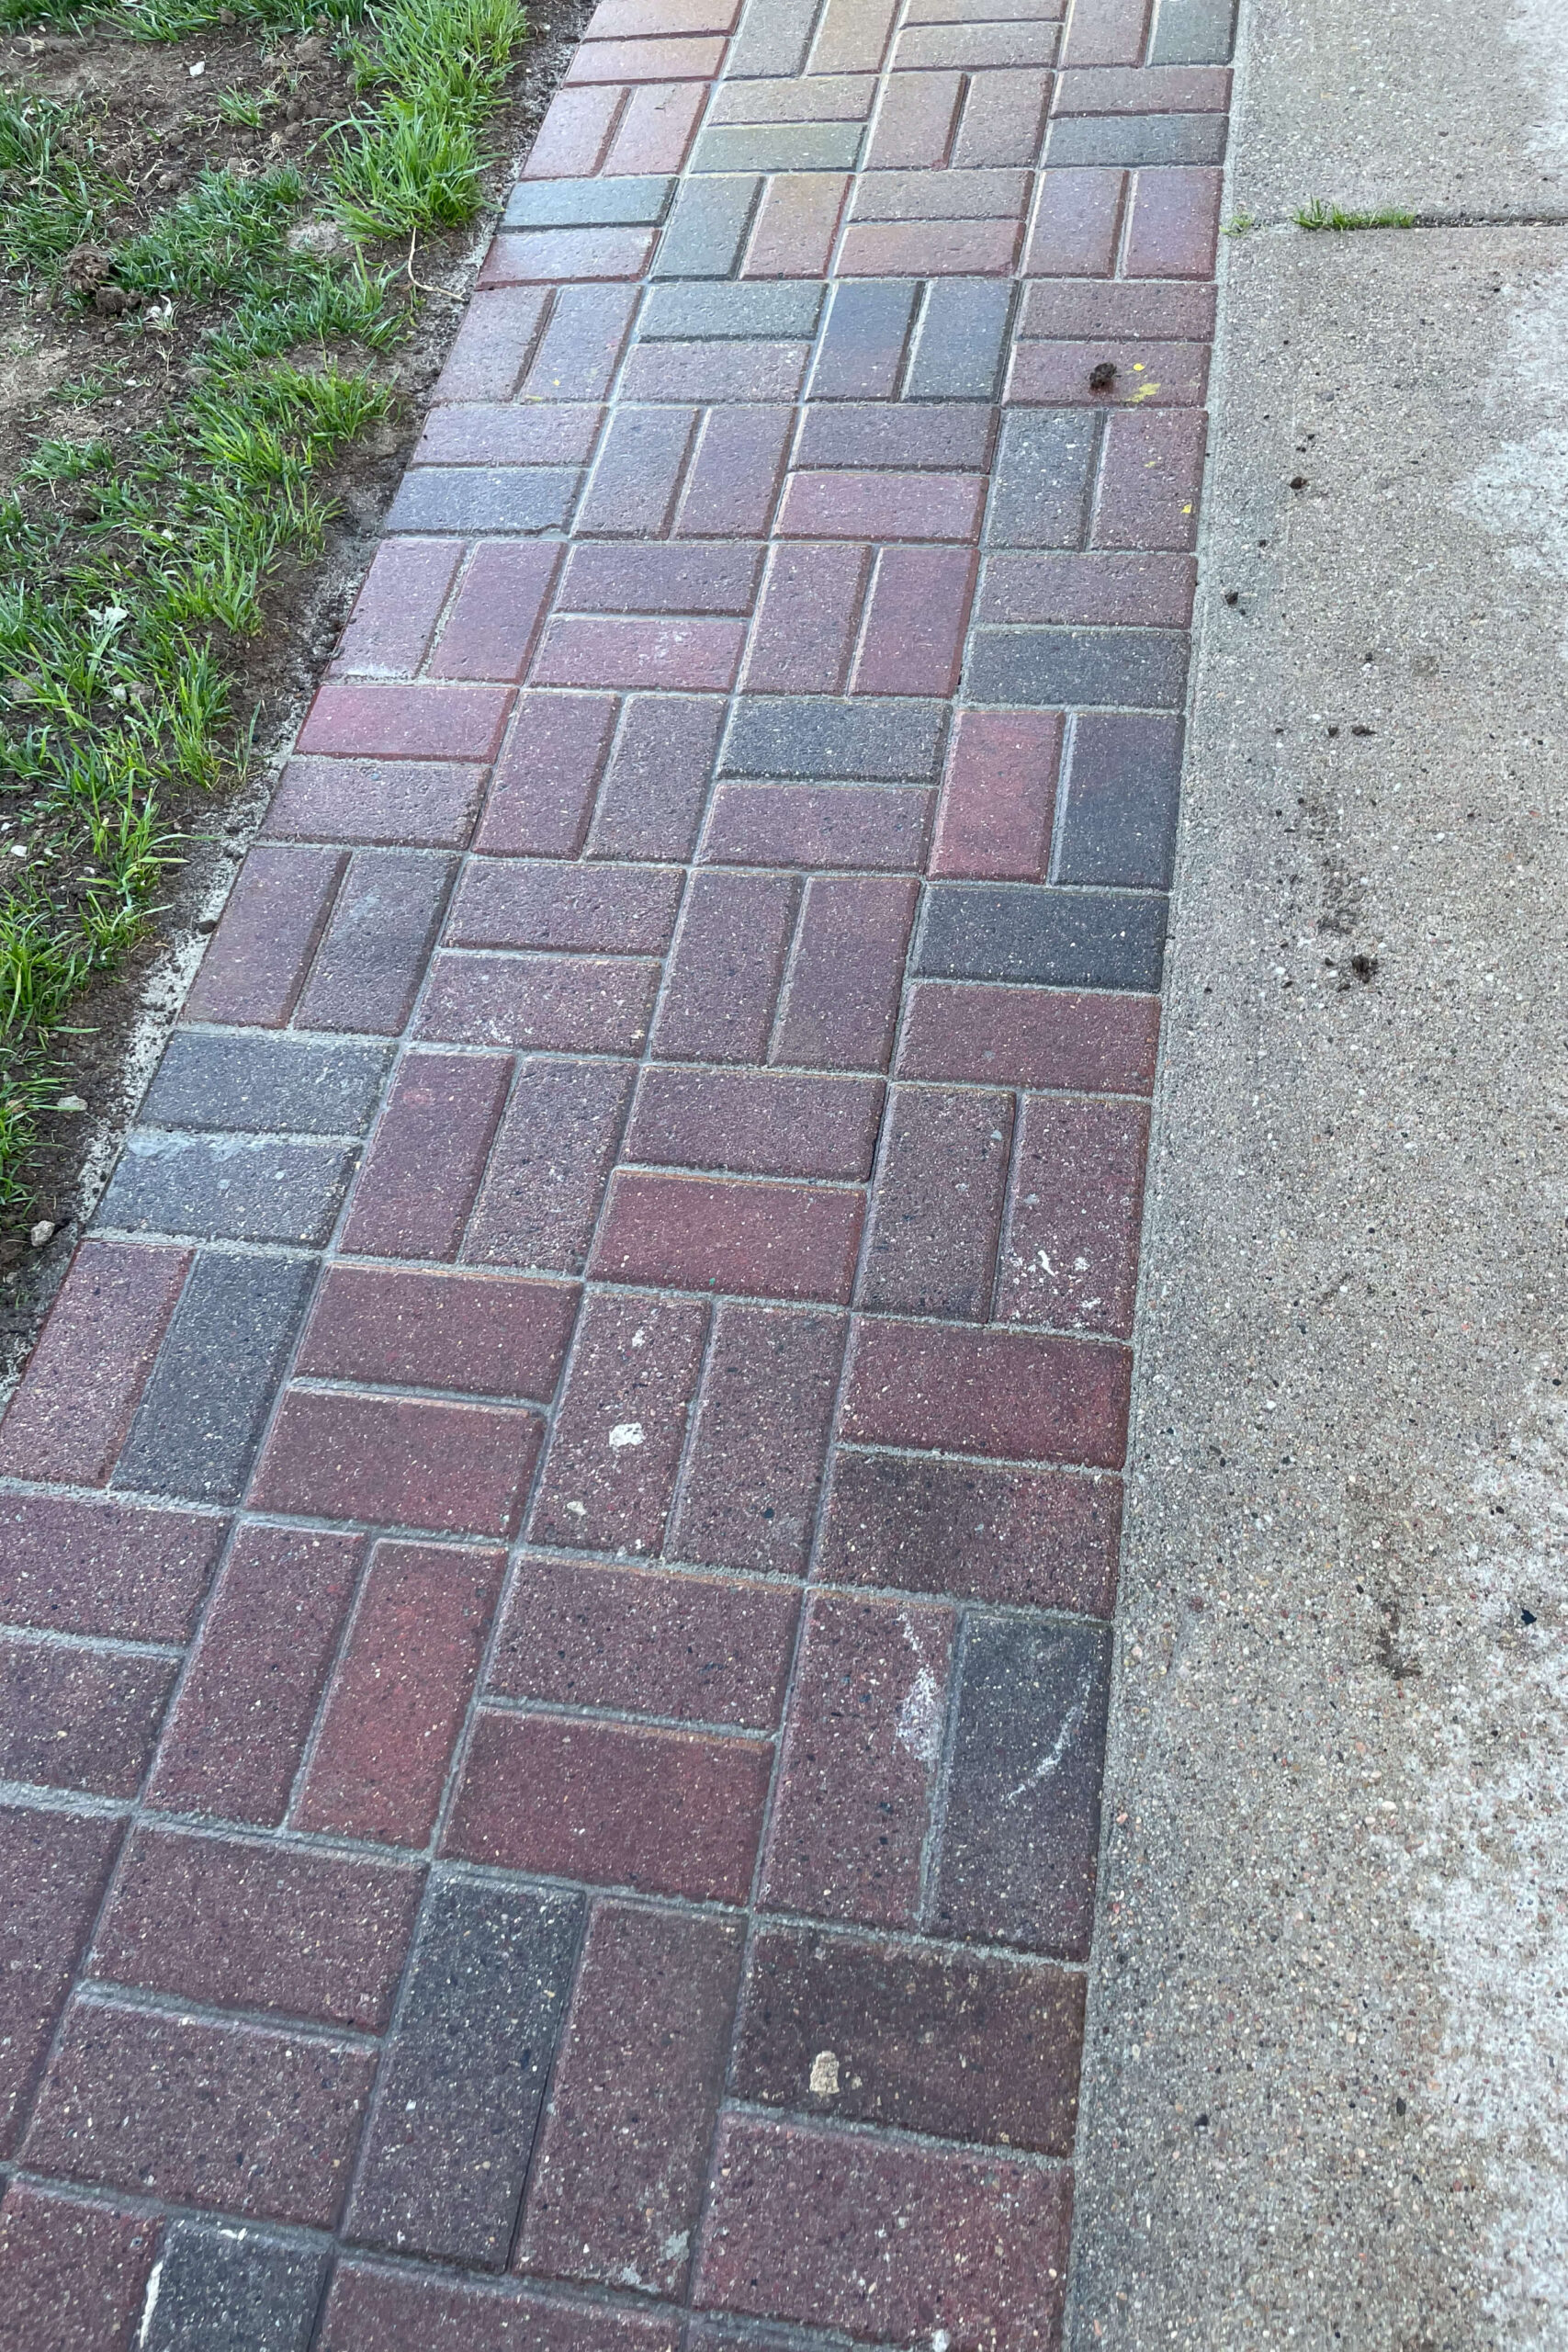
Finished Paver Driveway Extension
I am so happy with how this paver driveway extension looks on the front of my house. Can’t wait till my lawn looks beautiful too!
Not sure you want to try extending your driveway the DIY way? We have hired concrete workers at our house for a sidewalk, as well as our big patio out back. We could have hired them again to widen our driveway with more concrete, rather than do this paver driveway. If you want more insight on hiring concrete workers check out this post.
Looking for another project to upgrade your curb appeal? Check out my mailbox makeover, or how I changed my unused side yard into a beautiful garden.
Leave a Reply


I love your idea and want to implement it. Thank you for this tutorial I just have to say your website is nearly impossible to read with the ads every ten seconds and ads that cover the pictures you’re trying to show your work with…is it possible to scale back some of them because good lord. I hope you’re making money girl.
Yeah we’ve been playing around with how many ads to show, and yes it’s a bit too much so we’ve changed it.
You are amazing! I’m thinking about something similar for my home. How many hours do you estimate this took you to complete the paver driveway? And total cost in supplies and materials?
I worked on it all summer and spring, simultaneously with other projects. We also used pavers we had from our back patio. Sorry I couldn’t be more helpful!