


Kitchen Table & Chair Makeover – And What Not To Do!


Updated May 9, 2026
Alright, you guys. This one’s gonna be a DOOZY. You might be surprised to find out that this type of project is quite often how all of my projects go. I have this image in my mind of how I want something to look, so I try what I think will get it that way, and then it doesn’t work out. So I try something different. And you know, I’m not even mad about it because I learned some lessons and next time I’m going to avoid making the same mistakes. But you guys don’t have to, because I learned it all for you! Lucky, lucky you.
My husband and I were in desperate need of a kitchen table when we moved to Austin, TX for two months so my hubby could work. We got on the Austin craigslist (which I love) and found this table and chairs for a whopping 25 bucks!
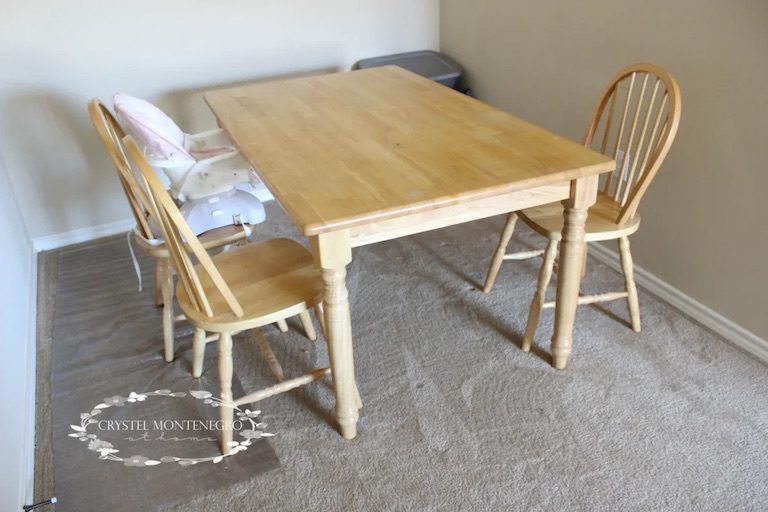
And it’s in great condition, might I add. It was pretty dirty from having sat in some guy’s garage for a while but wouldn’t you know it that the little momma cleaned up quite nicely. But guys. Orange. It just wouldn’t do. And I know what you’re thinking, “Crystel, you couldn’t be patient and live with an ugly table for two months?”. And my response to that is, Well, apparently not. You see, I have some free time on my hands what with not having a vehicle during the day while my husband is working and only one child who takes looooong naps. And, you know, beautifying is my thing. So I got to work.
So this Pottery Barn table was my inspiration for color, and I thought I knew how I could get it there. Source can be found here.
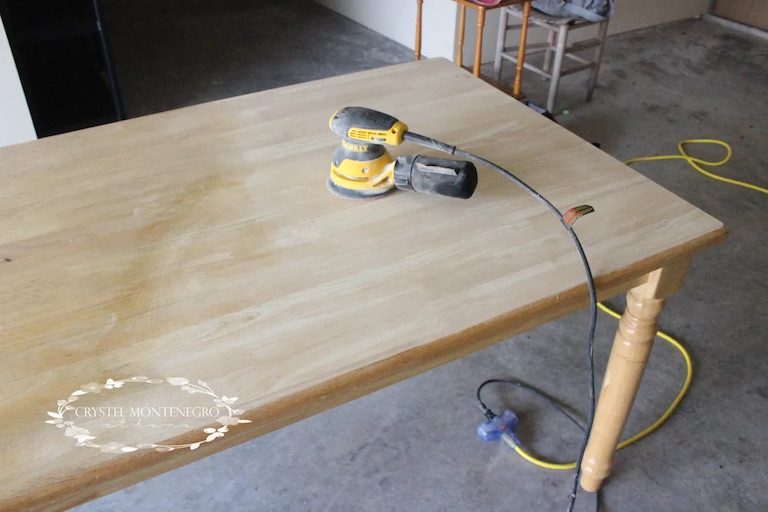
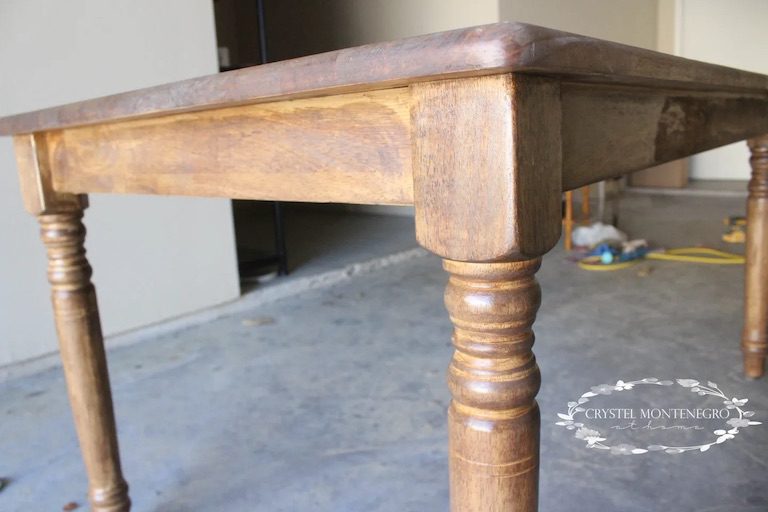
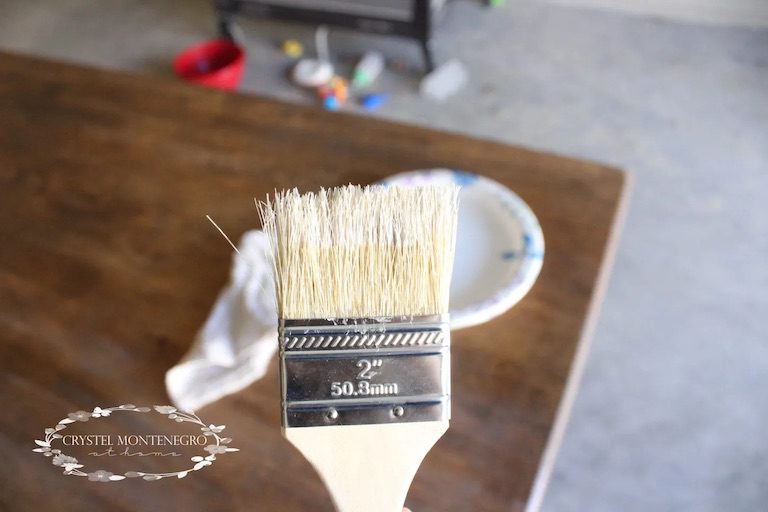
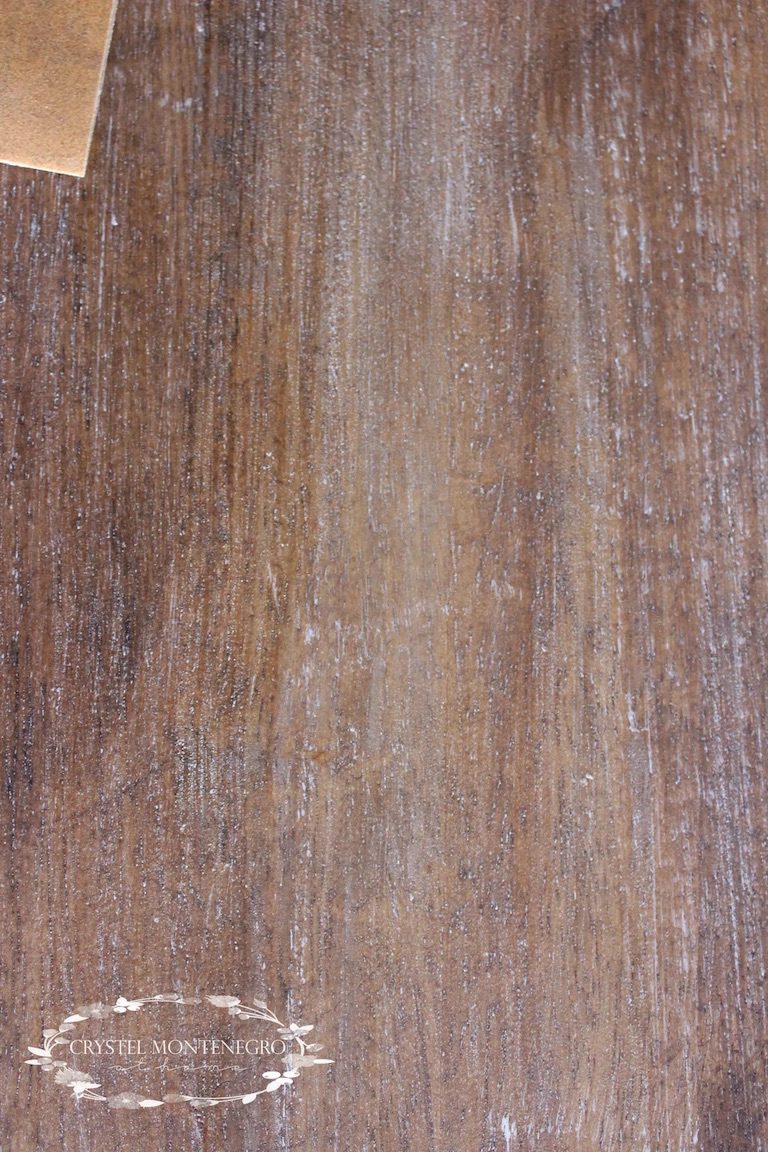
I loooove this color of stain. Weathered, but not too weathered. So, I began by sanding down my table. This took TIME, people. So. Much. Time.
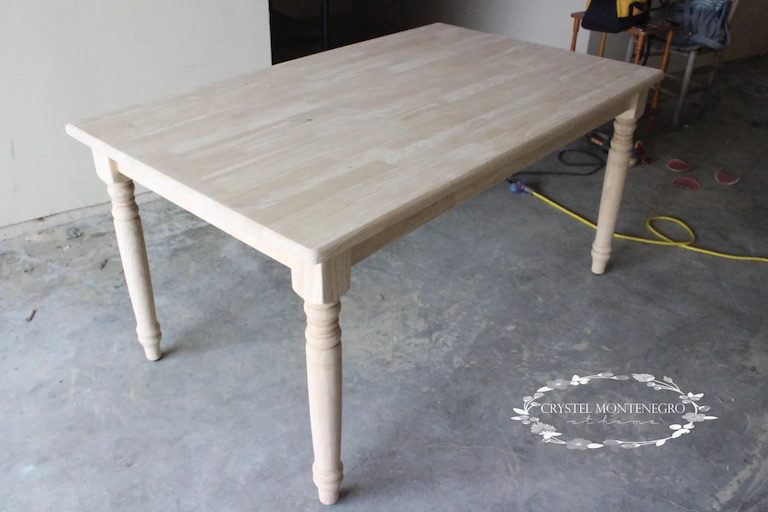
So here’s where my mistake comes in. Looks good, right? Well, look a little more closely.
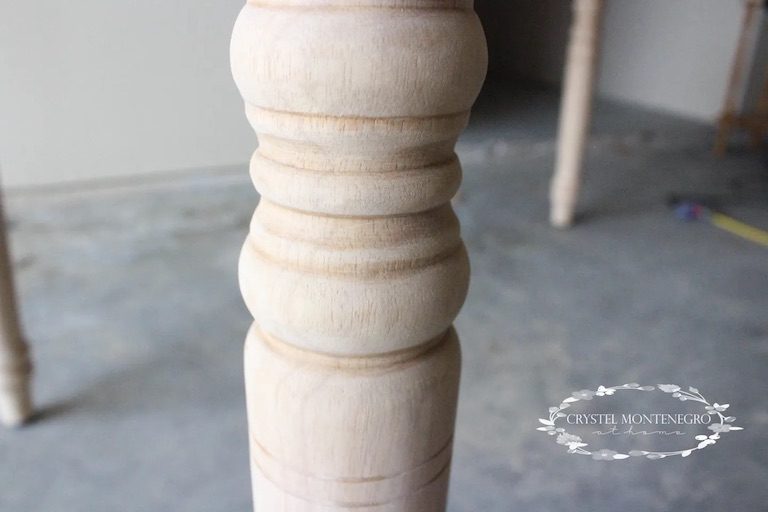
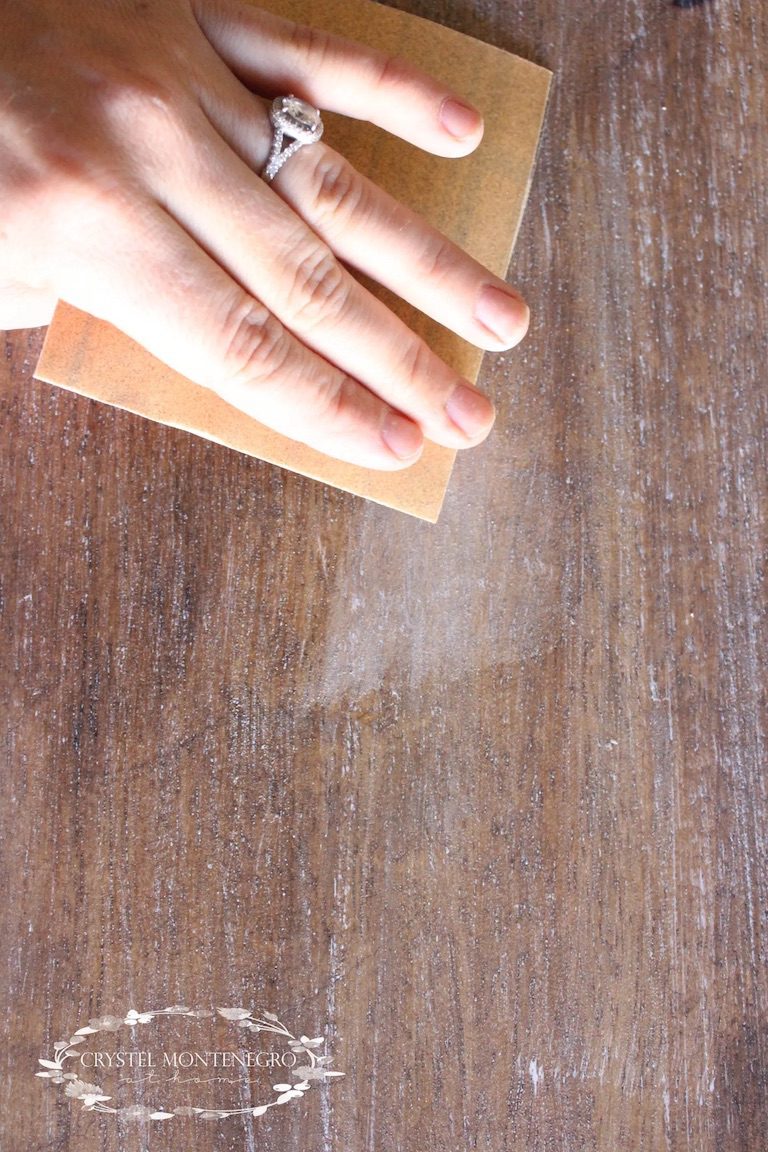
Do you see that right there, my friends? I cannot tell you how long I worked to get the poly coat out of those grooves. I had tiny pieces of sand paper that I was shoving in there to try and get it out and it was to no avail. I even tried using a wood stripper which in hindsight I realize that if I had a wire brush that might be just the thing I needed. I did not, however. But I had scratched the grooves up enough that I thought for sure it would be just fine with the dark stain, so I called it good.
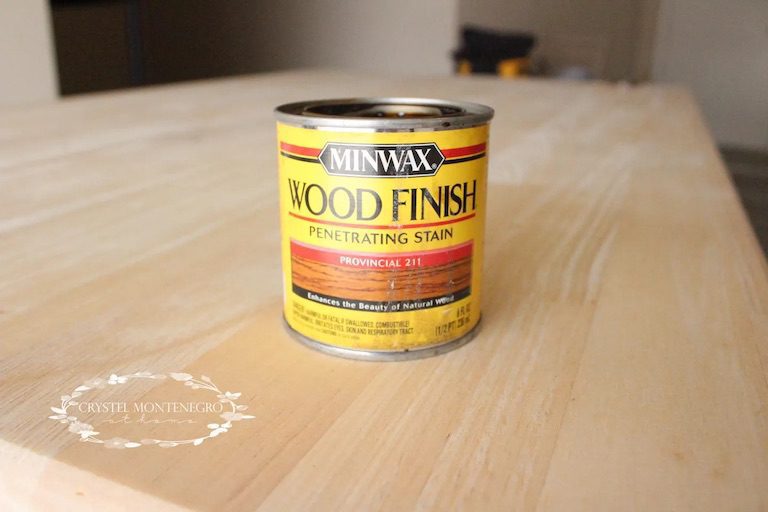
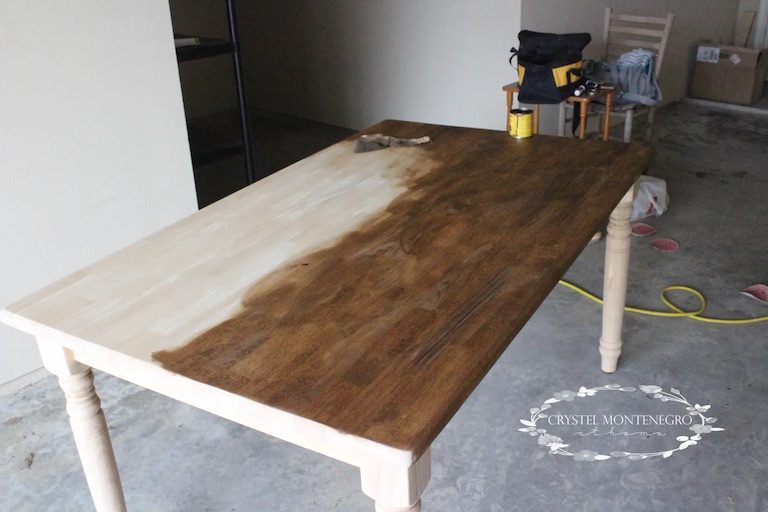
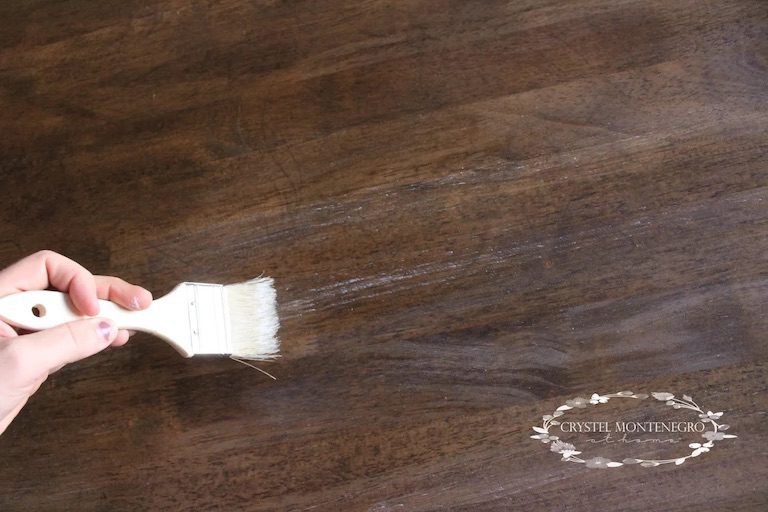
I began by staining it with Minwax Provincial.
So far so good, right? Oh, but just you wait.
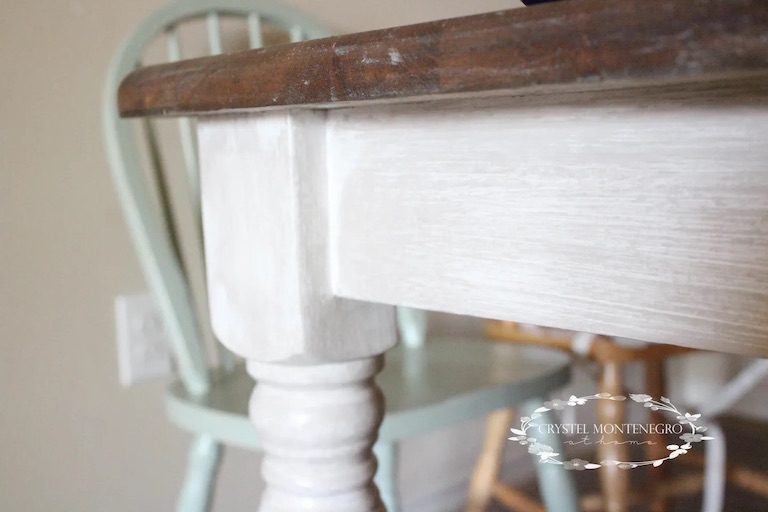
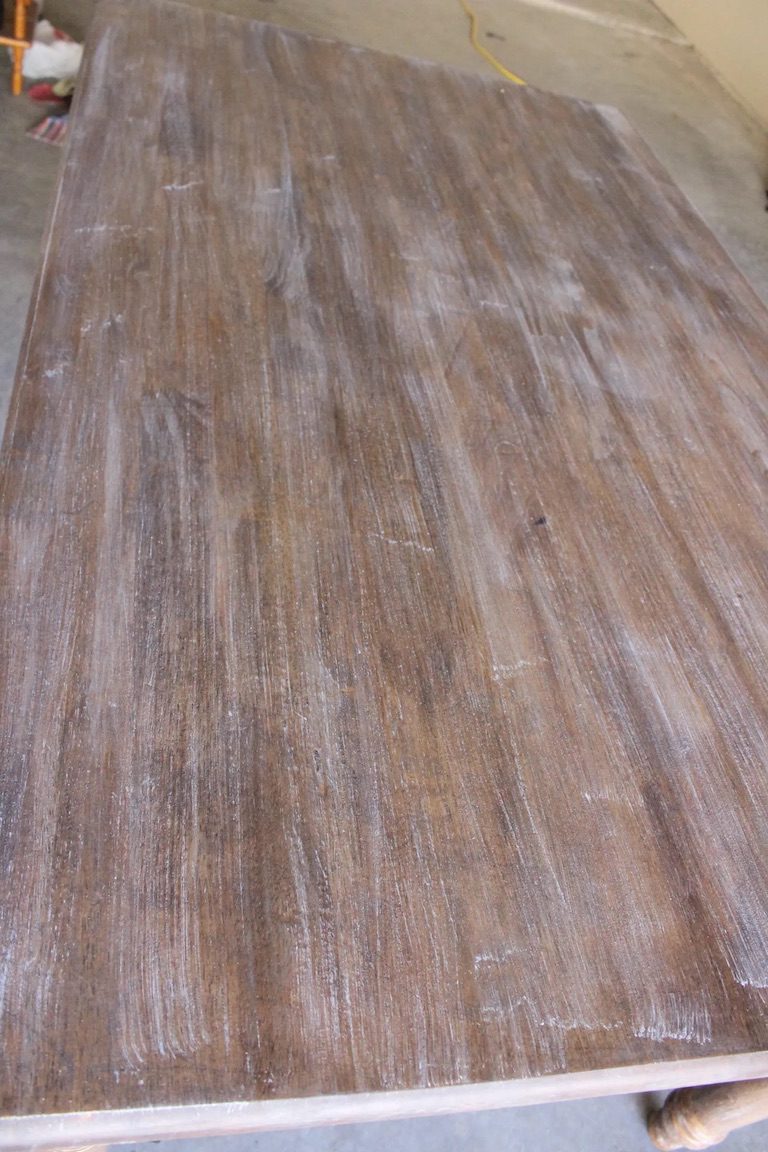
GAH! What have I done?? All that hard work and it turns out to have a bad case of the uglies.
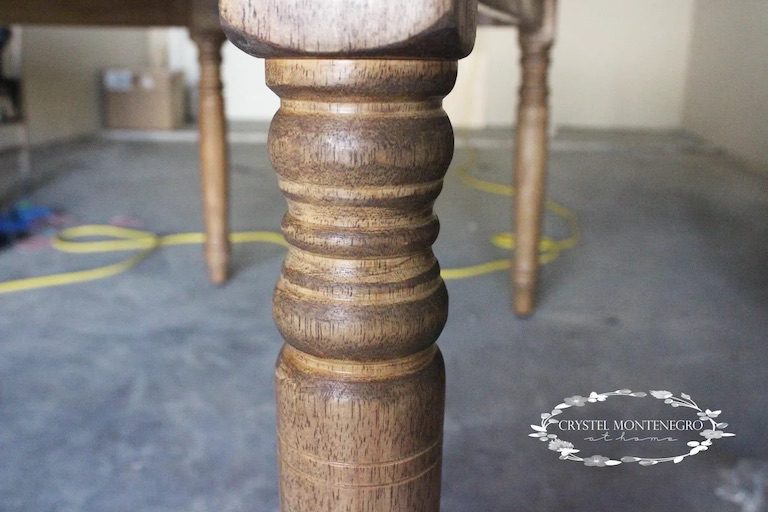
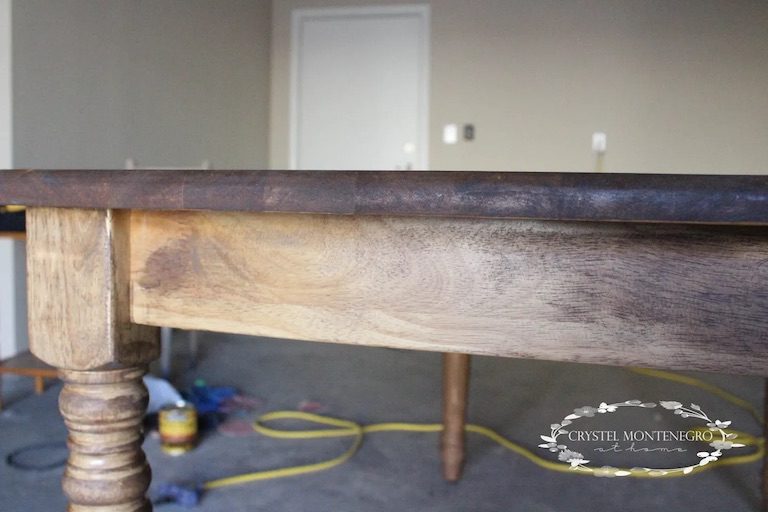
And what’s more, check this out! Somebody was so obsessive about getting the stain out of the leg grooves that she totally missed entire sections of the table! Plus those nasty little corners that I was struggling with almost equally as much as the legs.
So, by this time, as you can imagine, I was pretty discouraged. Wanna guess how much I wanted to go back and sand everything down again? Like, zero. So I got to thinking… I have this chalk paint here, and chalk paint can really fix anything. And it wouldn’t require any more sanding, which I couldn’t bear to even consider doing anyways. It’s not the look I was going for, but what the heck. If I hate it I can try again another day.
So I went for it! I gave it some good drying time and then started with the painting. And then the darndest thing happened. I used Americana Decor Everlasting chalk paint, which is my go-to white, and it was as if the stain seeped through the paint! What the heck?! So I decided to give it another coat.
Nope, and nope.
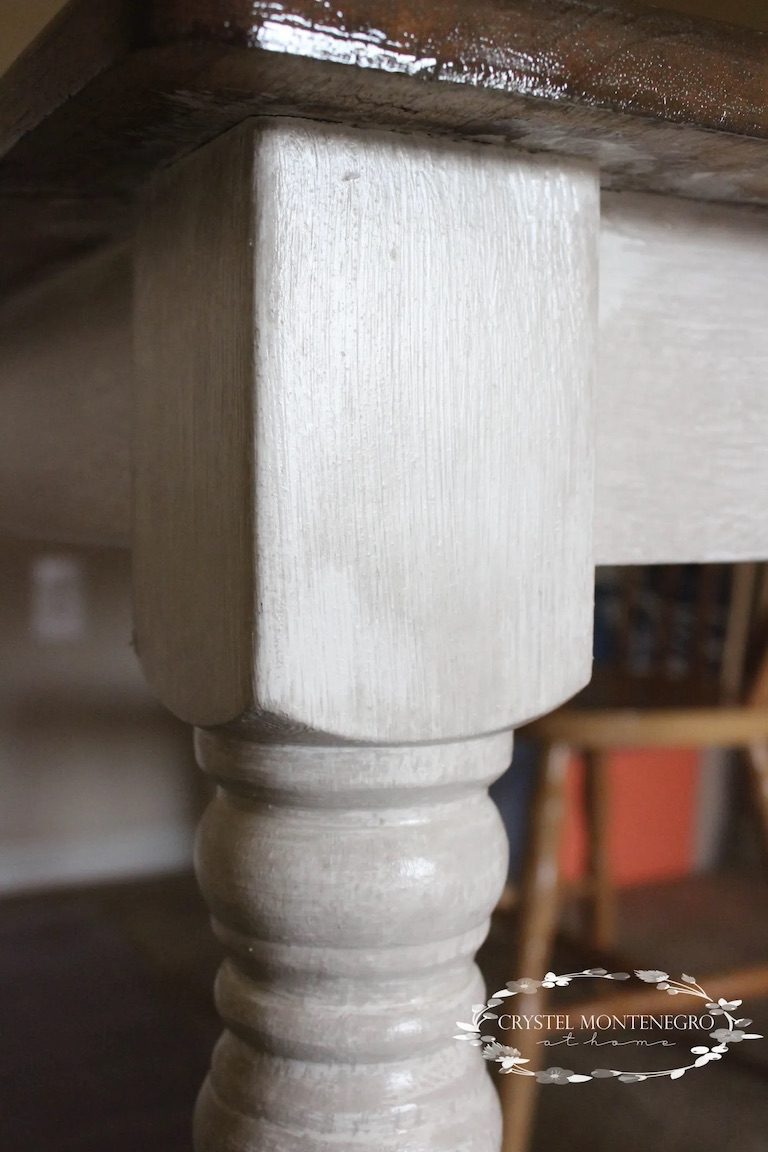
So I decided, yet again, to give it another coat. Aaaaand nope. Can anyone tell me why this happened? I am still so puzzled by it. I was expecting a pure clean white but I guess I just wasn’t gonna have it.
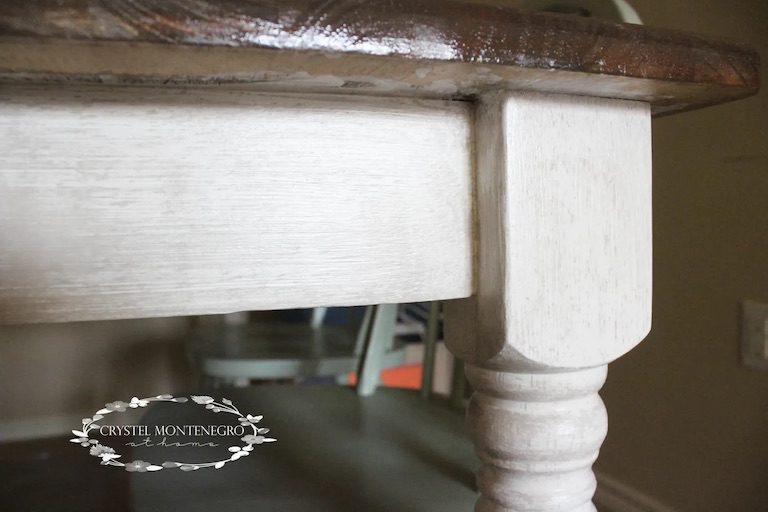
By this time, as you can imagine, I was what some might call frustrated. I decided to leave it as it was because I guess it had kind of a rustic look about it anyway. So I decided to take care of the table top and let bygones be bygones.
All I did for the top was take that same color of chalk paint and did a little dry brushing. I began by wiping off most of the paint off of the brush, but now I’m realizing I should have wiped ALL of the paint off the brush, because it was leaving too many brush strokes.
I gently brushed over the entire table, which afterward ended up looking like this:
See that? Not pretty. But, it wasn’t anything a little bit of (ugh) sandpaper couldn’t fix. I went over any of the harsh brush lines with a fine grit sandpaper and it took those brushstrokes right away.
Muuuch better, although still not exactly the vibe I was going for.
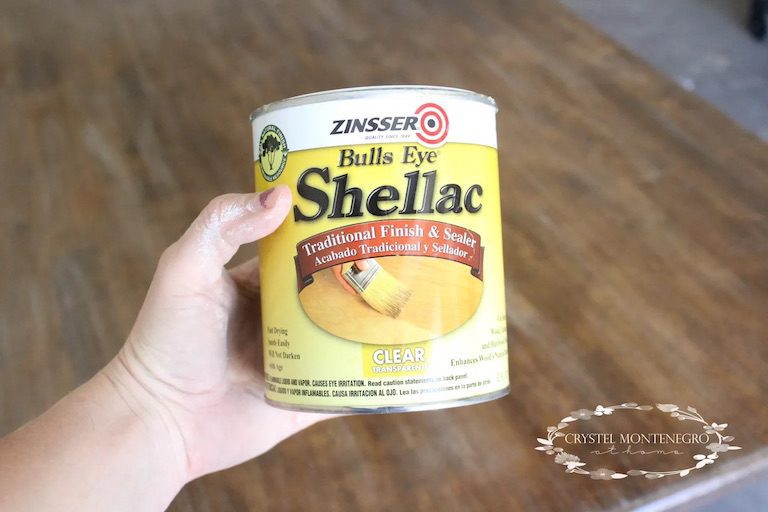
But, I’d just about had it up to my ears with this table so I decided to throw a top coat on it and call it good. Only, I wanted to try a Shellac top coat because I hadn’t used it before. I’d always stuck with a good ol’ Polyurethane to cover my oil based stains and I quickly figured out why.
This is several days after I used the Shellac. We had dinner, and I put a hot pan on the table with a hot pad between, mind you. That little dark circle right there is where the Shellac was completely melted off! And if you look closely there are even marks on the table where our bowls were that had hot soup in them.
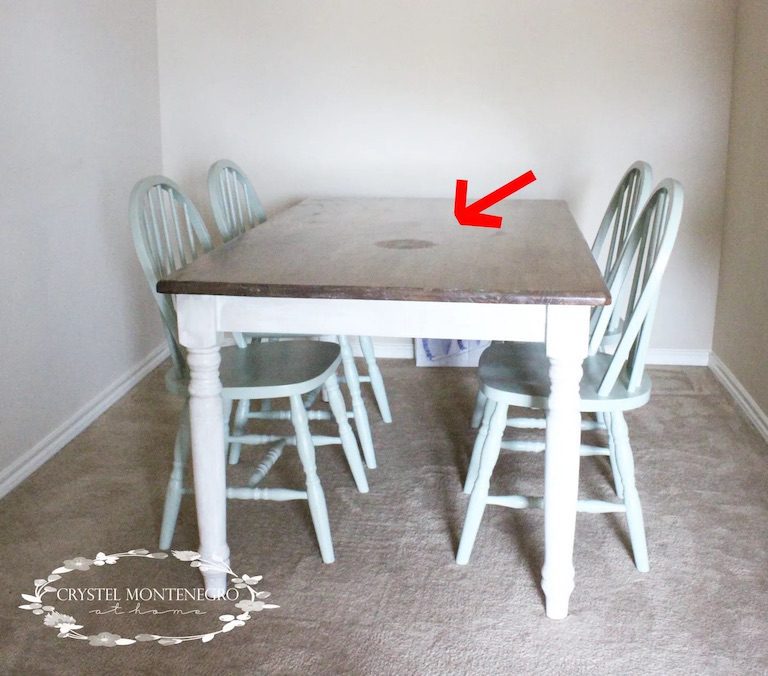
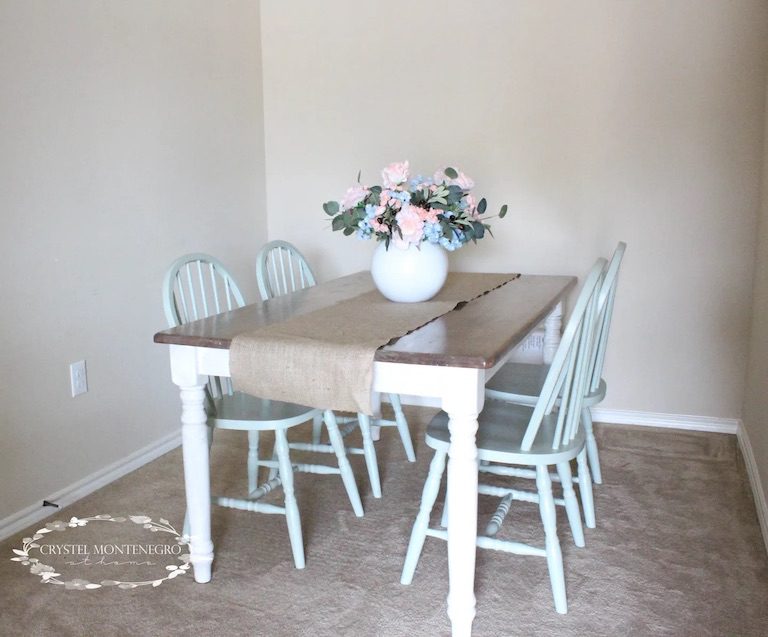
After I thought all of my troubles with this table were over, there had to be this. But you know, the rustic looking table legs have actually started to grow on me. Even though the table went in a totally different direction than what I had originally planned aside from the Shellac I am actually quite pleased with it. Someday I might redo it, since we will be taking it back to Utah with us. But we’ll see.
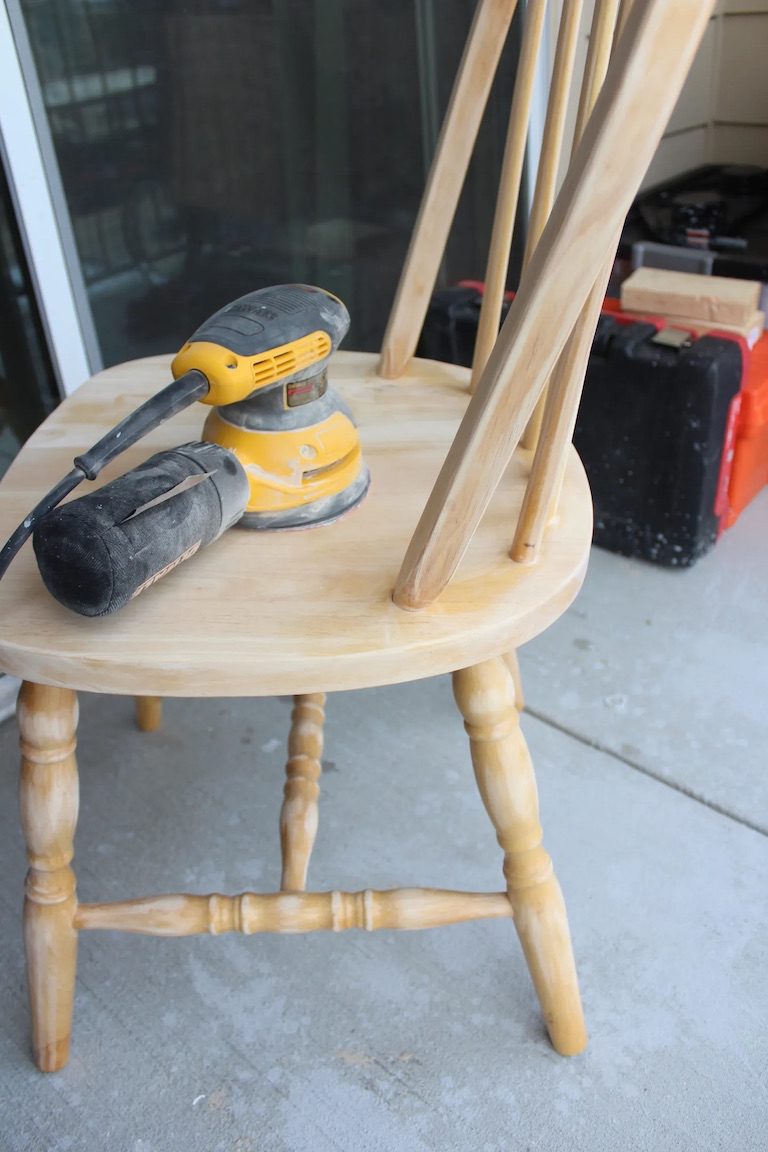
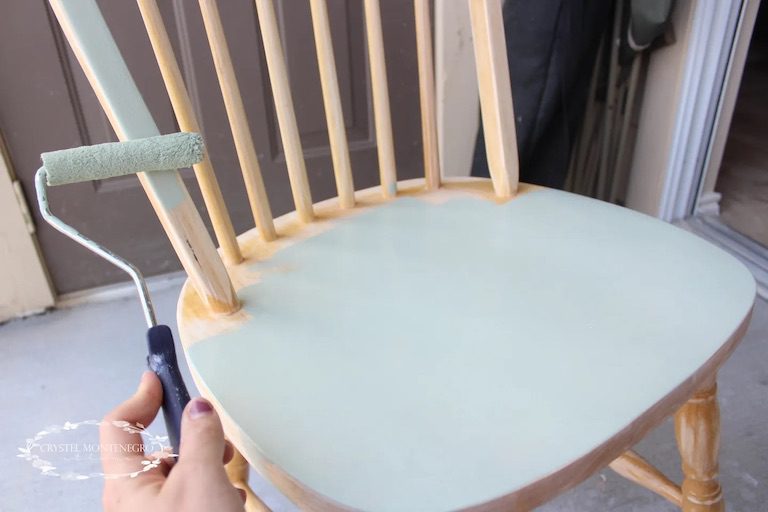
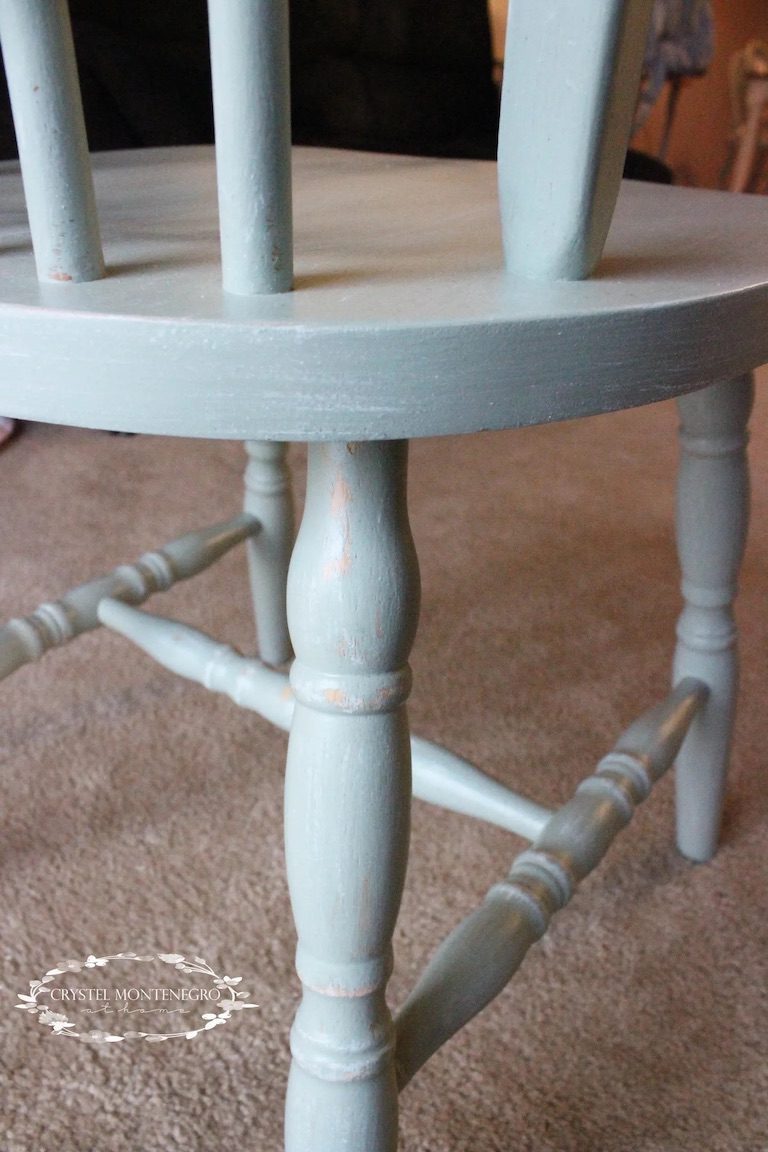
Redoing those chairs gave me a much easier time. I had done them slowly, one each day so as to not overwhelm myself after my experience with the table.
I sanded them down, probably more than I had to since I was using my homemade chalk paint for them. I did discover that the sanding made it much better when I distressed it later on. As I was distressing it came off in bigger chunks if there was still a shiny poly coat underneath the paint, and that yucky yellow showed through more than I wanted.
After the sanding I painted with a fine roller brush so I wouldn’t have any streaks. I used Behr paint in a color called Jojoba, and I love the color! I’ve been feeling a little obsessive about the sage greens lately, and this color just increased my obsession. Oh, also, you wanna know a money saving tip? I didn’t want to buy a whole huge pint of paint just for 4 itty bitty chairs, and I didn’t have any other plans to paint anything else this color, so all I did was buy a sample size of the paint and it was enough to cover all 4 of my chairs! I decided to go with the Behr Marquee paint which is much more expensive but has great 1 coat coverage, and the sample was still only $5 or so. So cheap!
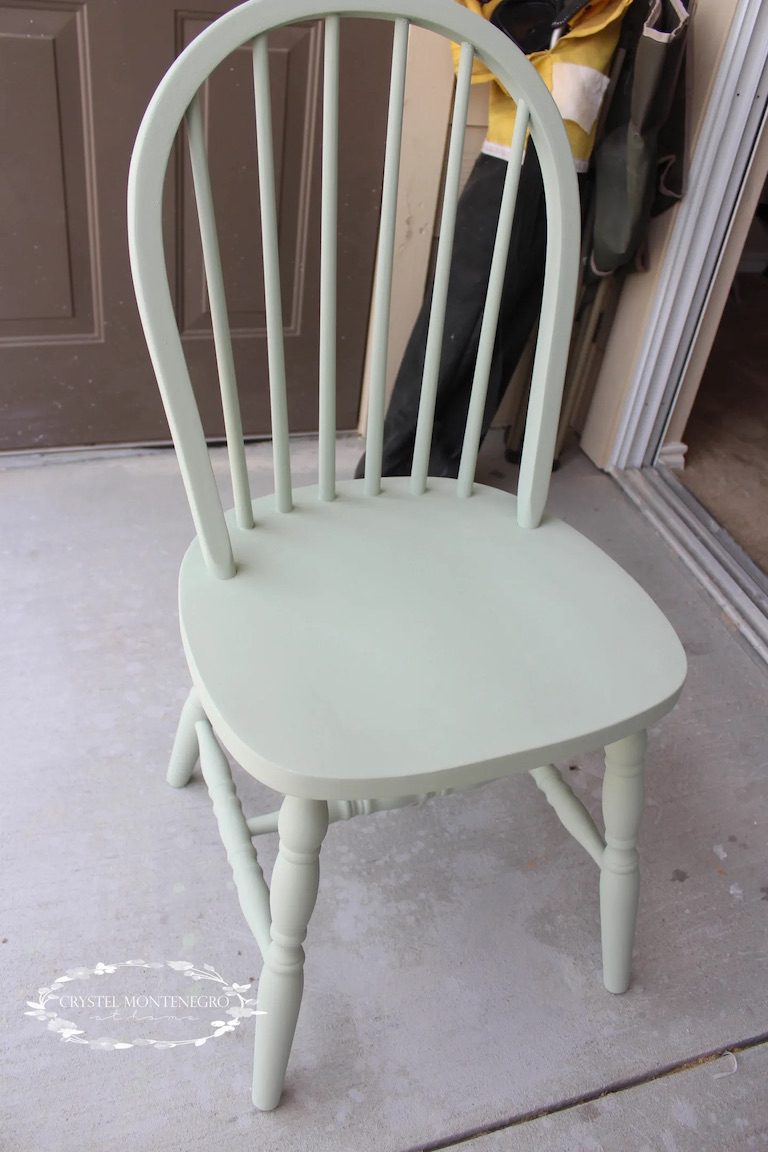
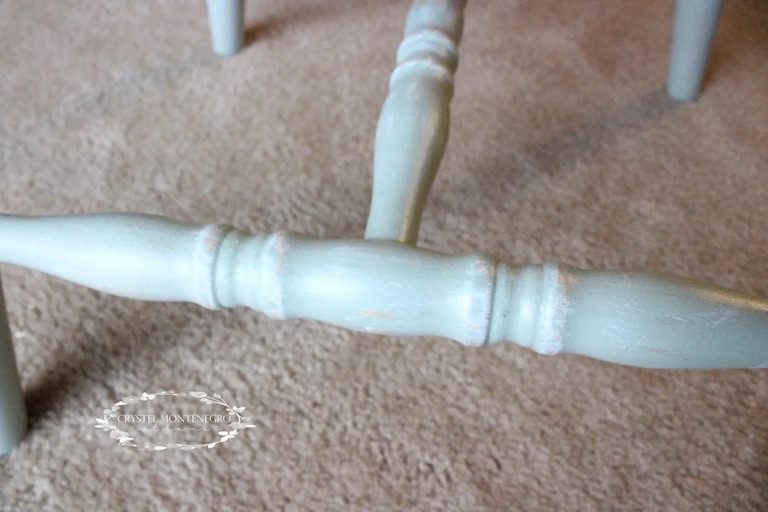
Once the paint was completely dry, I lightly distressed the corners and high points and then lightly dry-brushed over the chairs with the same American Decor chalk paint in Everlasting. I don’t like too much distress, but this turned out just beautifully.
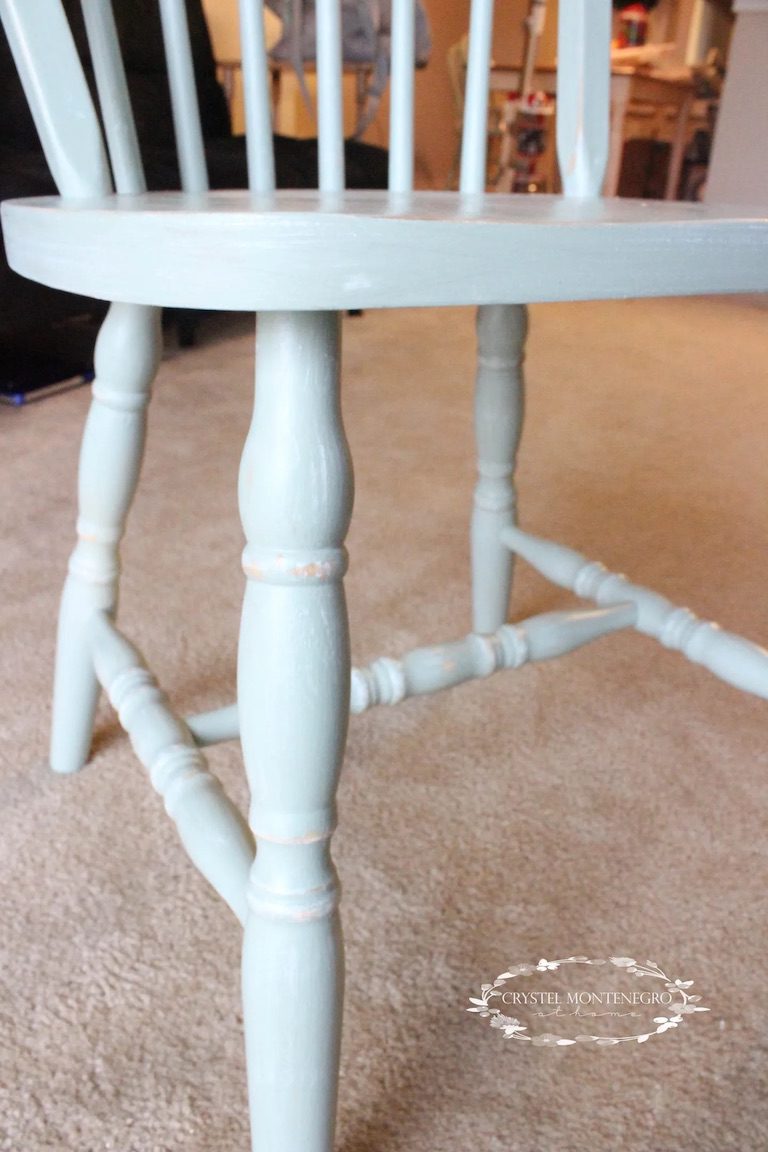
And the finished product! I slapped on a top coat of Minwax Polycrylic which is a water based top coat that I just love, and now my paint won’t chip, and it makes for an easy clean up!
Thanks for tuning in, guys. Seriously. I hope you will learn from my experience and do it right the first time, haha. But, you live and you learn I guess. Until next time and good luck!
XOXO,
Crystel

What type of Behr paint did you use??
Back then it was Behr Ultimate, but I think that line is now called Behr Marquee.