

Updated March 4, 2025
Curious about adding walls with beadboard to your bathroom? Got a plain, builder-grade bathroom that needs a makeover? I’ve got you covered! Adding beadboard is an easy, budget-friendly project that can take your bathroom from dull to dazzling in no time. Come along with me, and I’ll show you all the steps and share my best tips and tricks to make it happen!
The Before Photos
This bathroom was super basic, boring, and way too blue. It didn’t match my style or the rest of my house at all. Since this half-bath is right off the entryway, just down the hall from our family room, it’s the main bathroom that guests use and see. I wanted to give it a fresh look by covering the lower part of the walls with beadboard.


Tools
- Table saw
- T-square
- Tape measure
- Jig saw
- Brad nailer
- Laser level
- Drill
- Caulk gun
- Paintbrush
- Foam roller
- Paint shield
Materials
Removing the Vanity
First things first, clear out everything in the way before covering the walls with beadboard. That means taking down the toilet paper dispenser, mirror, towel holder—anything mounted on the walls. I’m also removing the vanity and the toilet tank.
Before I take out the vanity, I mark the wall on each side so I know exactly where it sits. You’ll see why this is important later!

The vanity isn’t attached to the wall or floor, so just turn off the water valves, unscrew the water lines, and remove the P-Trap (the curved pipe under the sink).

Pro Tip: Keep a bowl under the drain pipe while removing the P-Trap—there’s usually some water in there.
Once the plumbing was undone, the vanity was free, and I pushed it right out into the hall.

Removing the Toilet Tank
Removing the toilet’s water tank is a bit trickier. Turn off the water valve behind the toilet, flush to empty the tank, and soak up any remaining water with a towel. Use pliers to unscrew the water line from the valve and then remove the nuts holding the tank.

Once those nuts are completely off, your toilet tank is free and should lift right up off of the base.

Covering the Walls With Beadboard
Time to start covering all of the bathroom walls with beadboard.
Beadboard comes in 4×8 sheets, pre-primed and ready for paint. Measure and cut the beadboard to fit your walls.
Pro Tip: Use a T-Square for straight, square lines.


These sheets are floppy and awkward, so it’s easier to run them through the table saw with a friend’s help. Luckily, my niece was staying with me, and she was happy to lend a hand.

Installing Beadboard Around Plumbing
For the most part, covering the bathroom walls with beadboard is a pretty straightforward project, but you might run into a few scenarios that make it tricky, starting with installing around plumbing.
Measure and cut holes for the water valves and plumbing. I used a jigsaw to cut a rough horseshoe shape from the bottom of the beadboard so it fits around the toilet valve.


Now, the piece will slide right behind the toilet, and the valve will fit perfectly inside the gap.
For this beadboard bathroom project, a laser level is a must-have. I’ve used it for big projects like installing my shiplap kitchen backsplash, and for small jobs like hanging a family photo gallery wall.
Attach the beadboard to the wall with a brad nailer, making sure to hit the wall studs.

Remember earlier when I marked the wall with how far out my vanity went? This is why. I added baseboard on each side of the vanity.

Since most of this wall will be hidden, I used my jigsaw to cut out a square in the middle to give me room around the pipe and water valves. Trust me, no one but you will ever see back here!

Installing Beadboard Around Electrical Outlets and Switches
Another tricky install situation you may find yourself in when covering bathroom walls with beadboard, is working around outlets and switches.
First, remove the wall plates, then use a drill to take out the screws holding the switches and outlets. Pull them out a bit for wiggle room, and then cut holes in the beadboard to fit around them. I just used a jigsaw. After the beadboard was installed, I reattached everything. Easy peasy!


Installing Beadboard in a Crooked Corner
The last tricky thing I faced while covering these walls with beadboard, was crooked corners. Houses aren’t always (like pretty much ever) straight, floors aren’t usually level, and corners are rarely square. So you may need to trim the edge of the beadboard at a slight slant to make it fit. Once caulked and painted, no one will notice! I ran the beadboard through the table saw just cutting off a little, angled sliver on the edge.


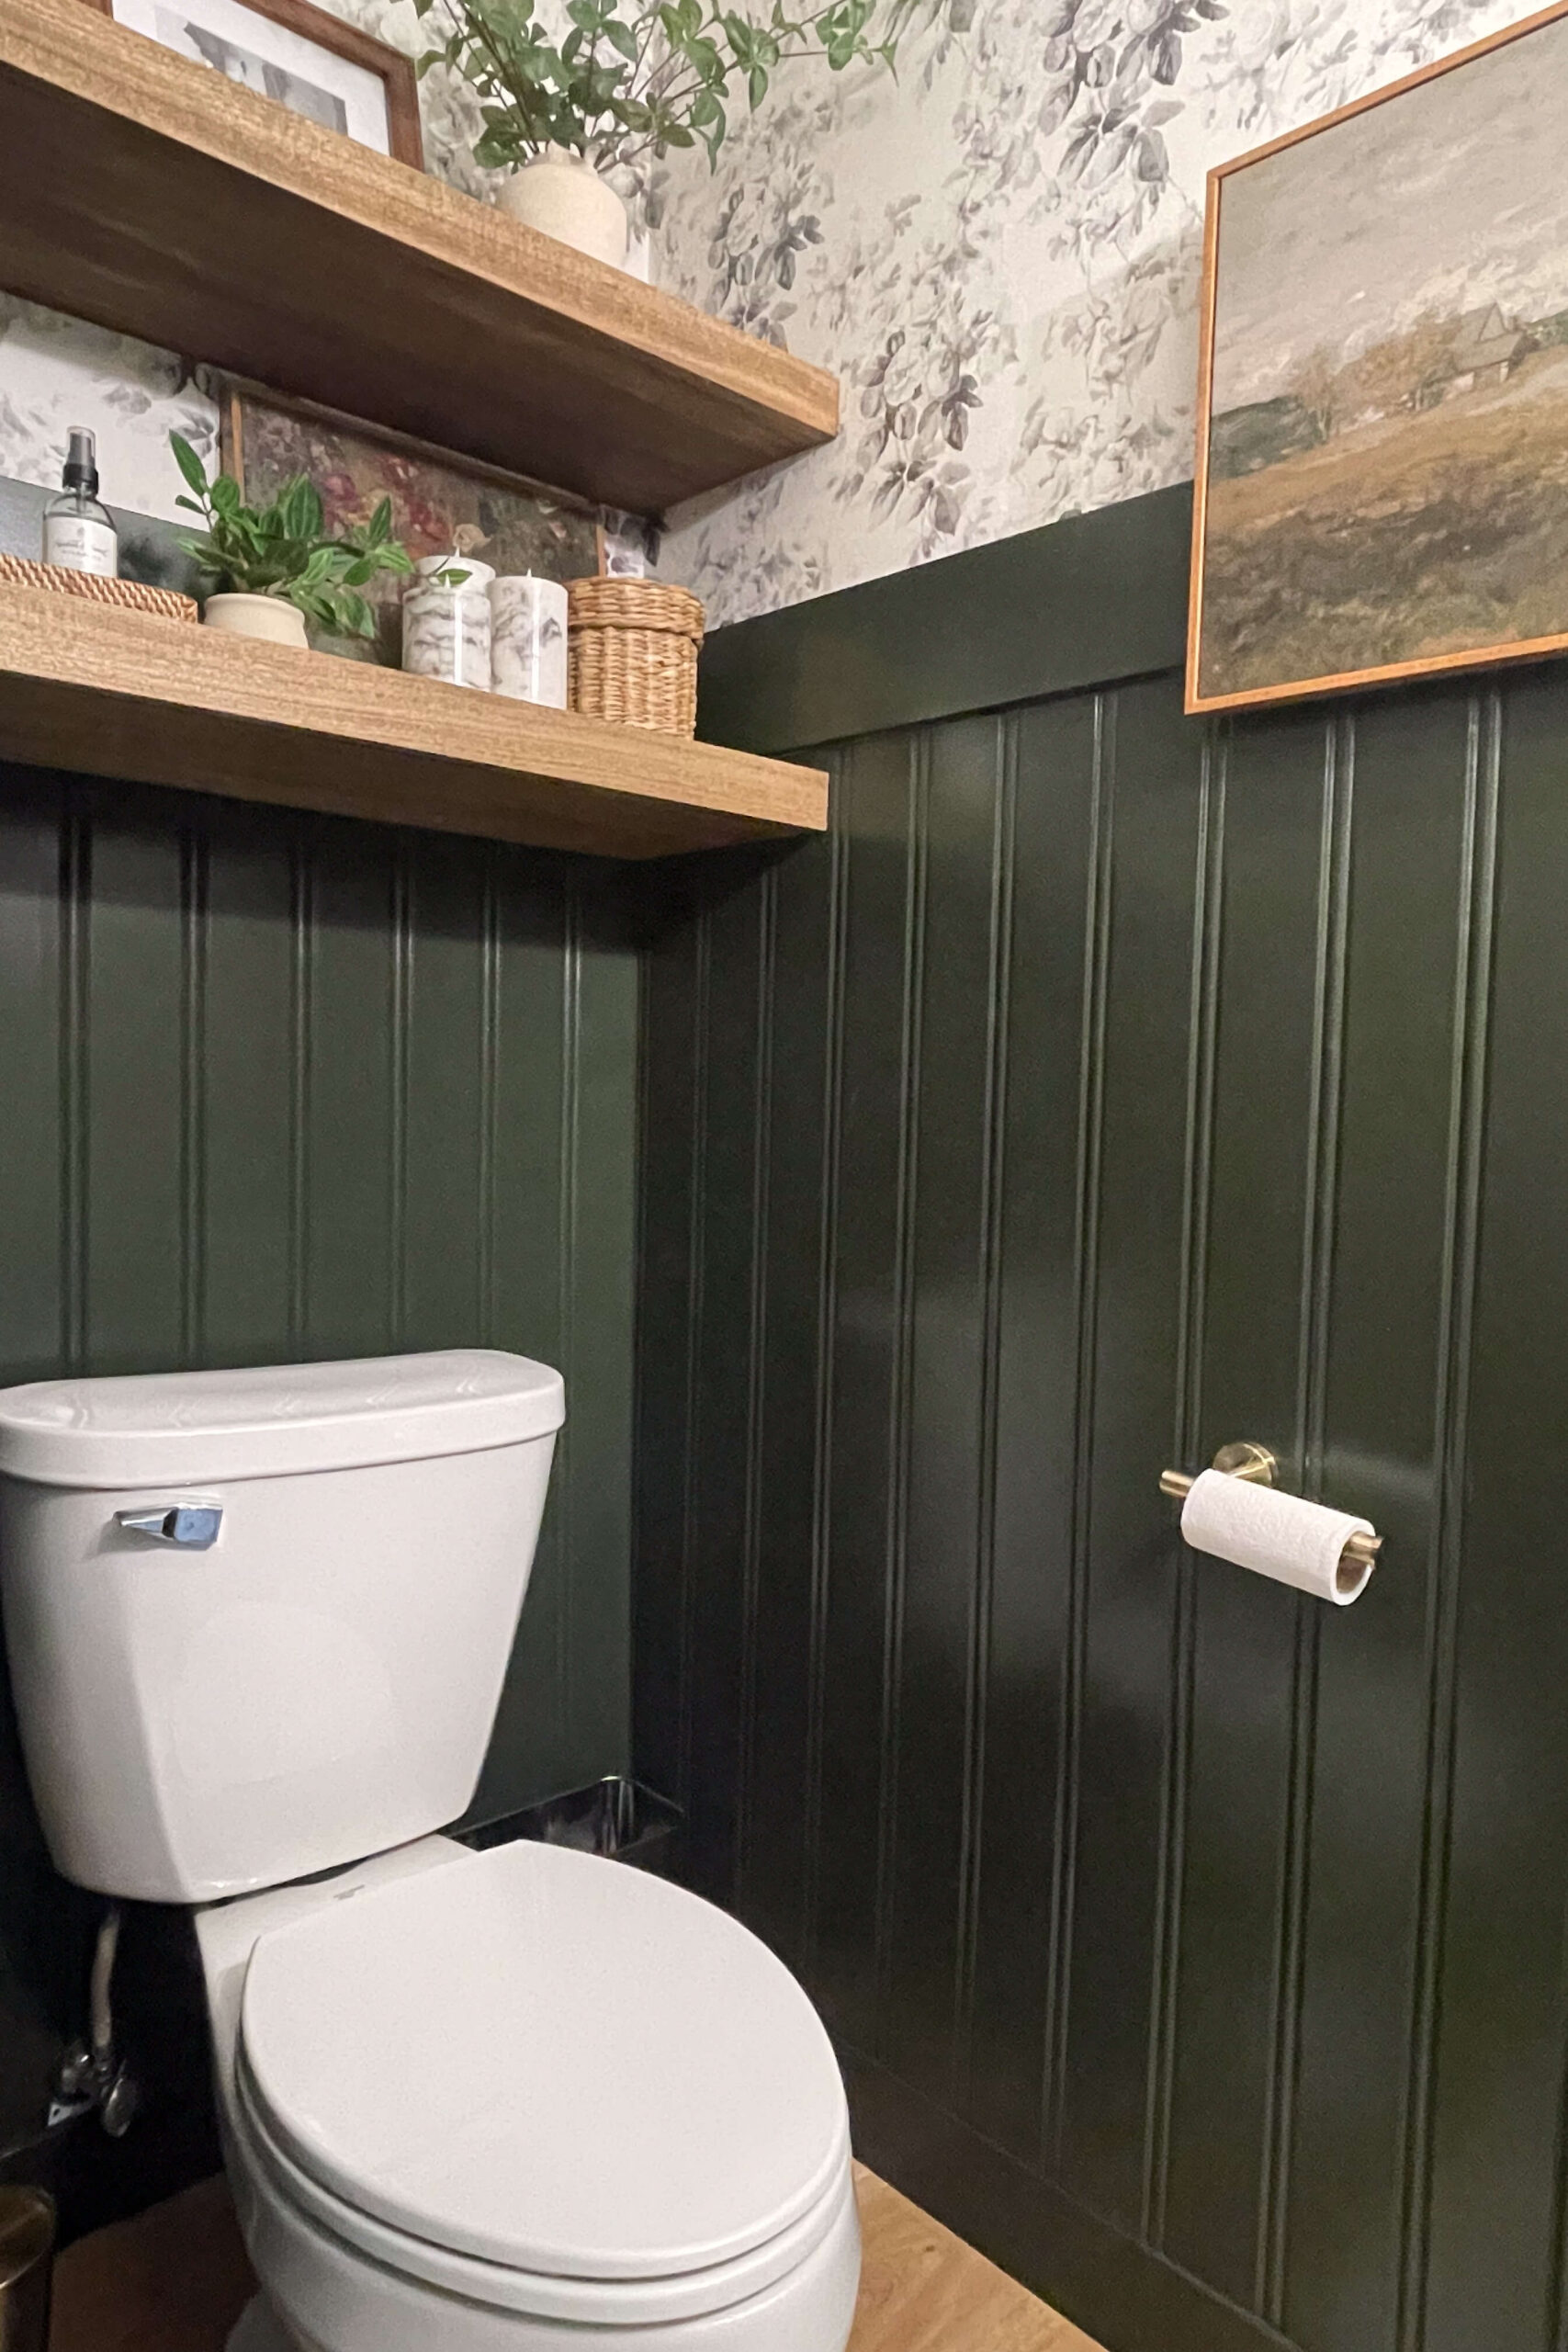
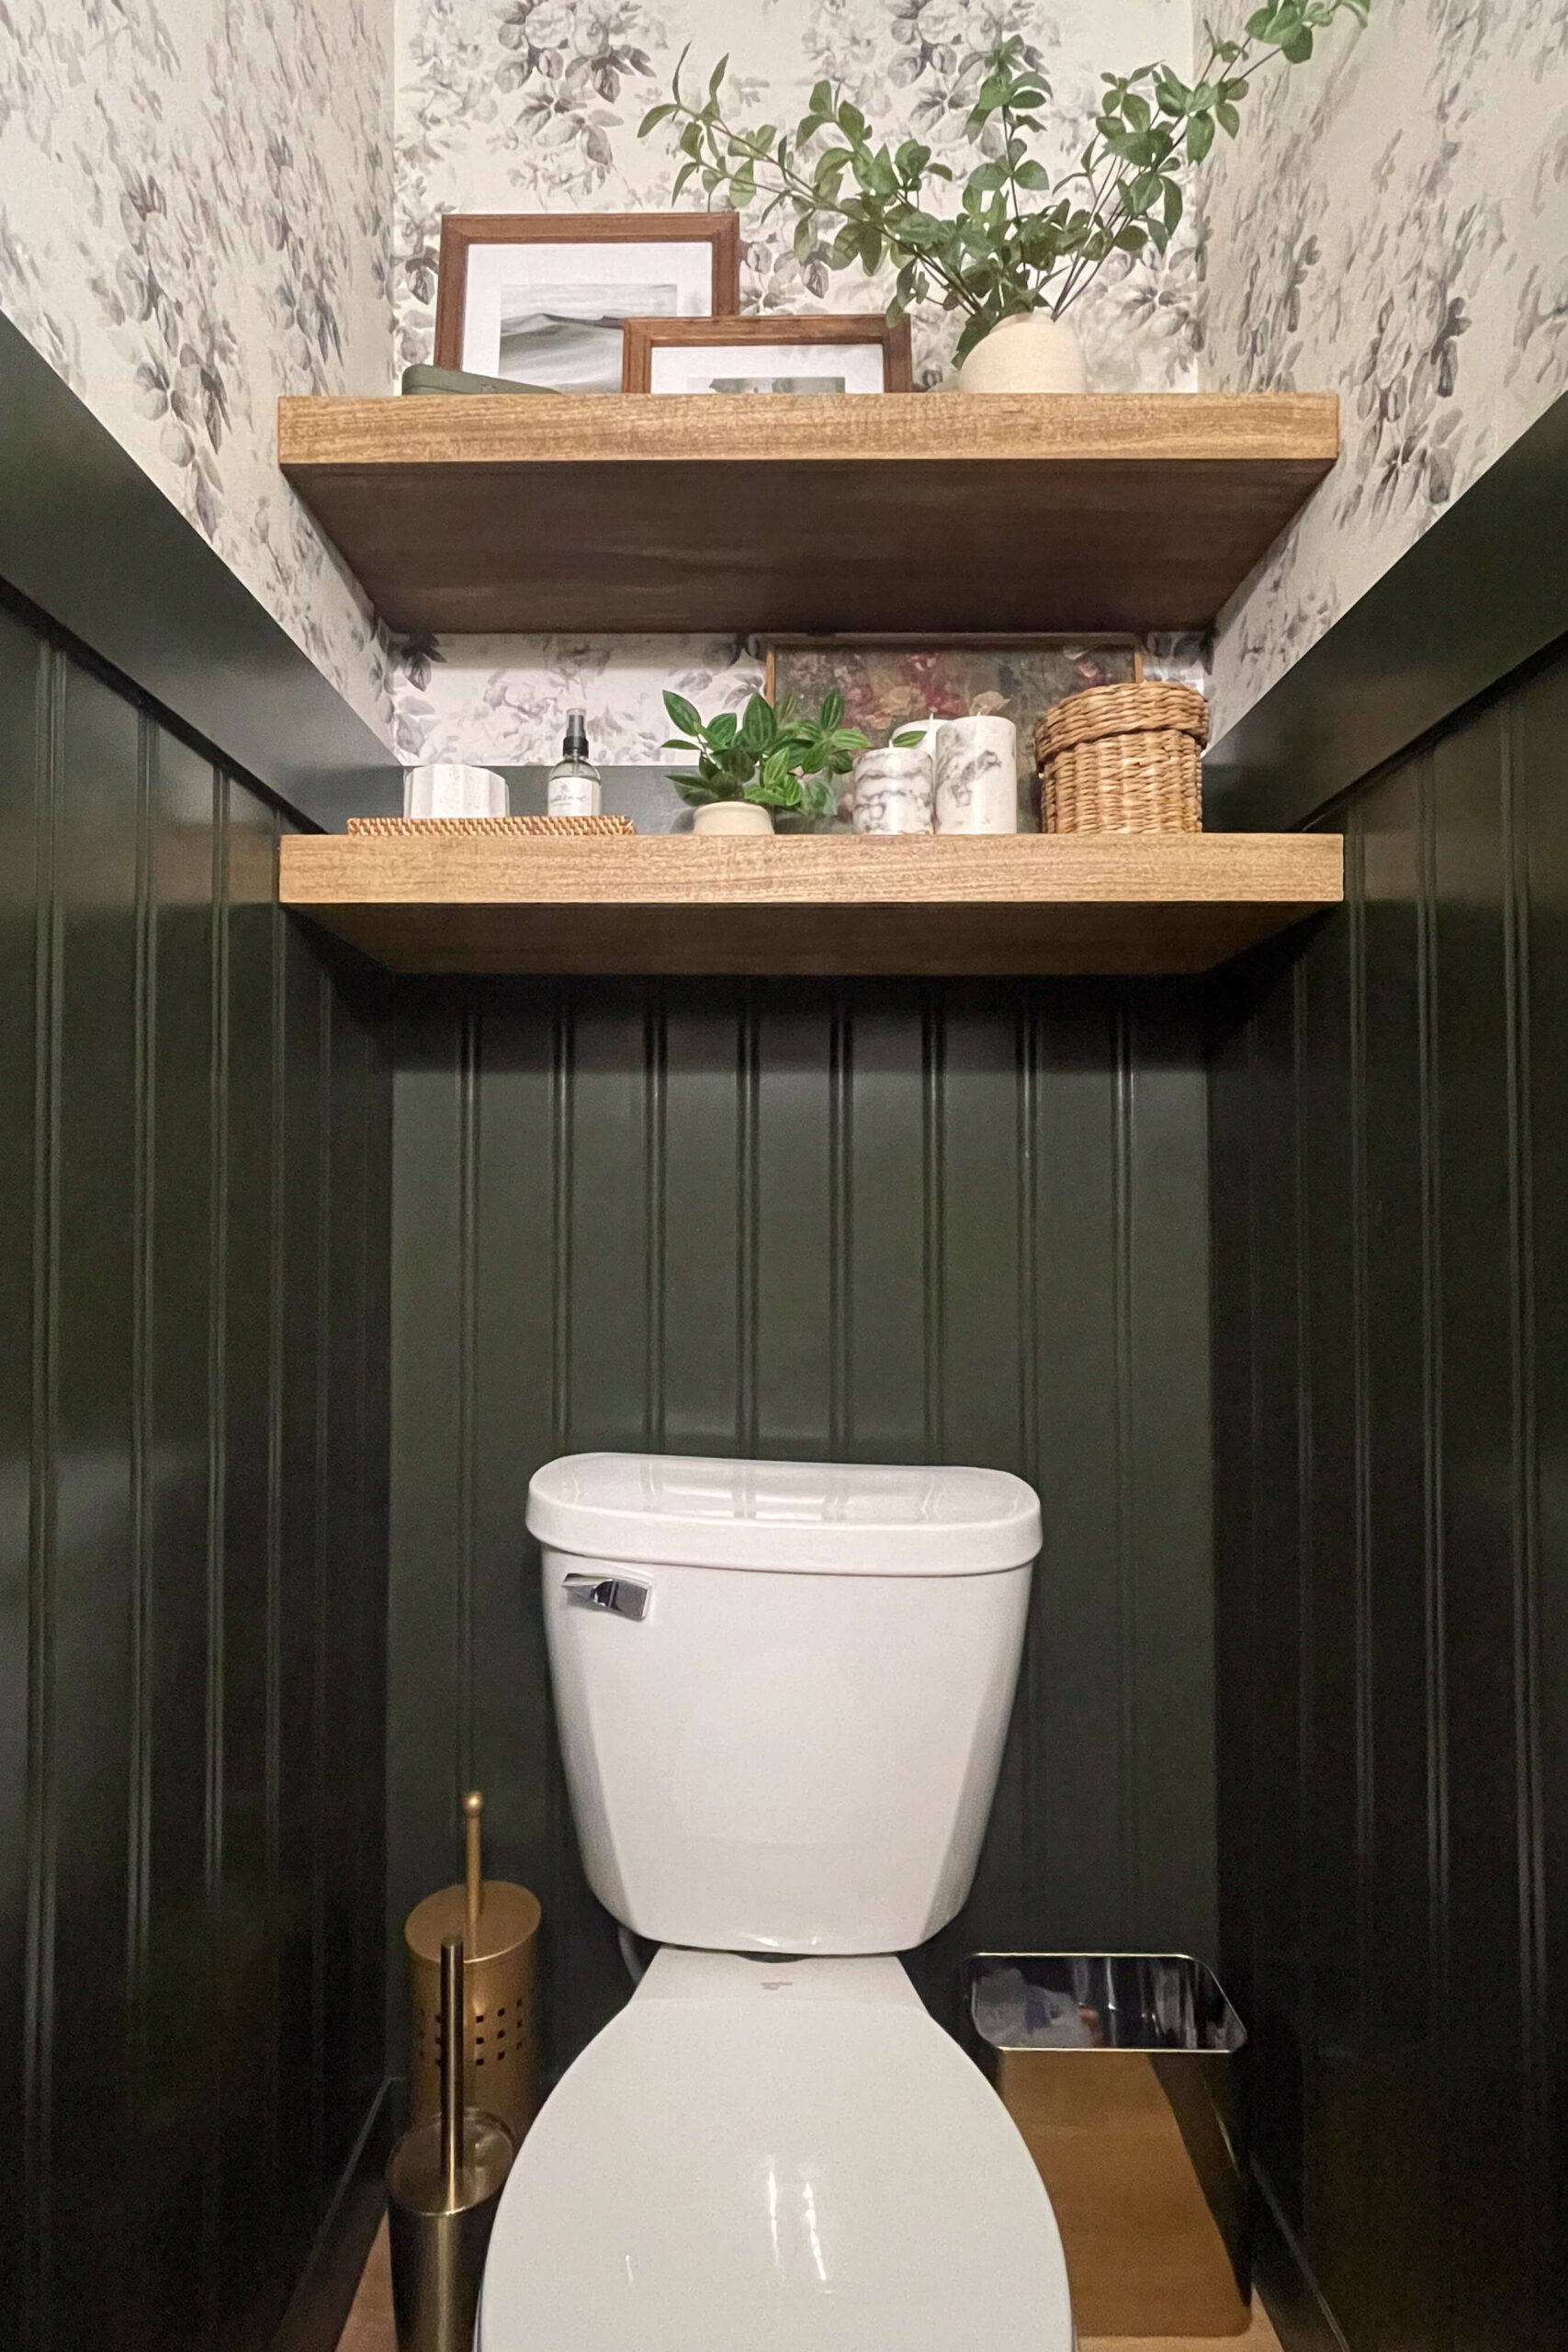
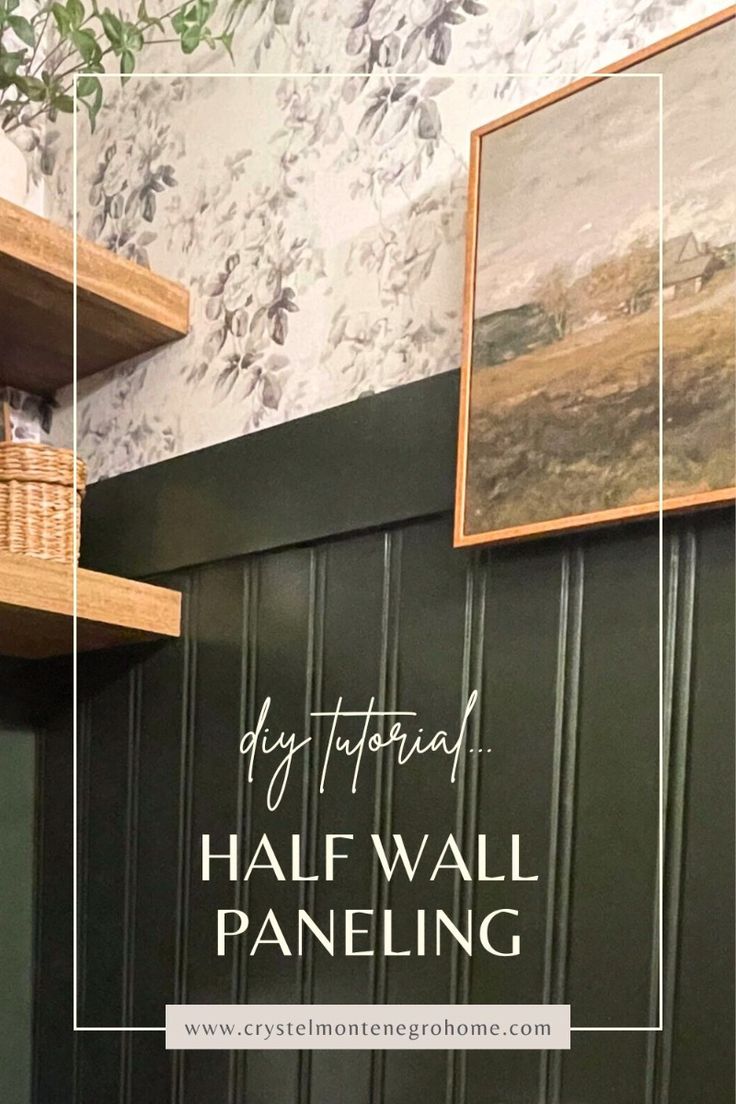
The top of the beadboard isn’t the prettiest, so I’m adding a 1×6 MDF trim piece as a cap all the way around the room to give it a finished look. It covers the unfinished edge and looks amazing too!

The last step s caulking. You’ll need to caulk all the seams—where the beadboard sheets meet, where the beadboard touches the baseboard, and where the top cap meets the beadboard. Caulking all these seams will give everything a clean, finished look.
I’m a huge fan of the baby wipe method. Just apply a thin bead of caulk along the seam and then wipe it with a baby wipe.


Tips for Painting Walls With Beadboard
Use a good-quality paintbrush and foam roller. The brush gets into corners and grooves, while the roller gives a smooth finish. Skip the primer since the beadboard is pre-primed and apply two coats of paint for the best look.

One time-saving trick that I love is using a paint shield. Slide it underneath the baseboard just a bit, then paint away. It prevents getting paint on your floor and is much faster than taping. Look how good that crisp line looks!


After these walls with beadboard were painted, I was blown away by the transformation. It was looking so good in this half-bath. You can’t even notice the cut off edge in that crooked corner.

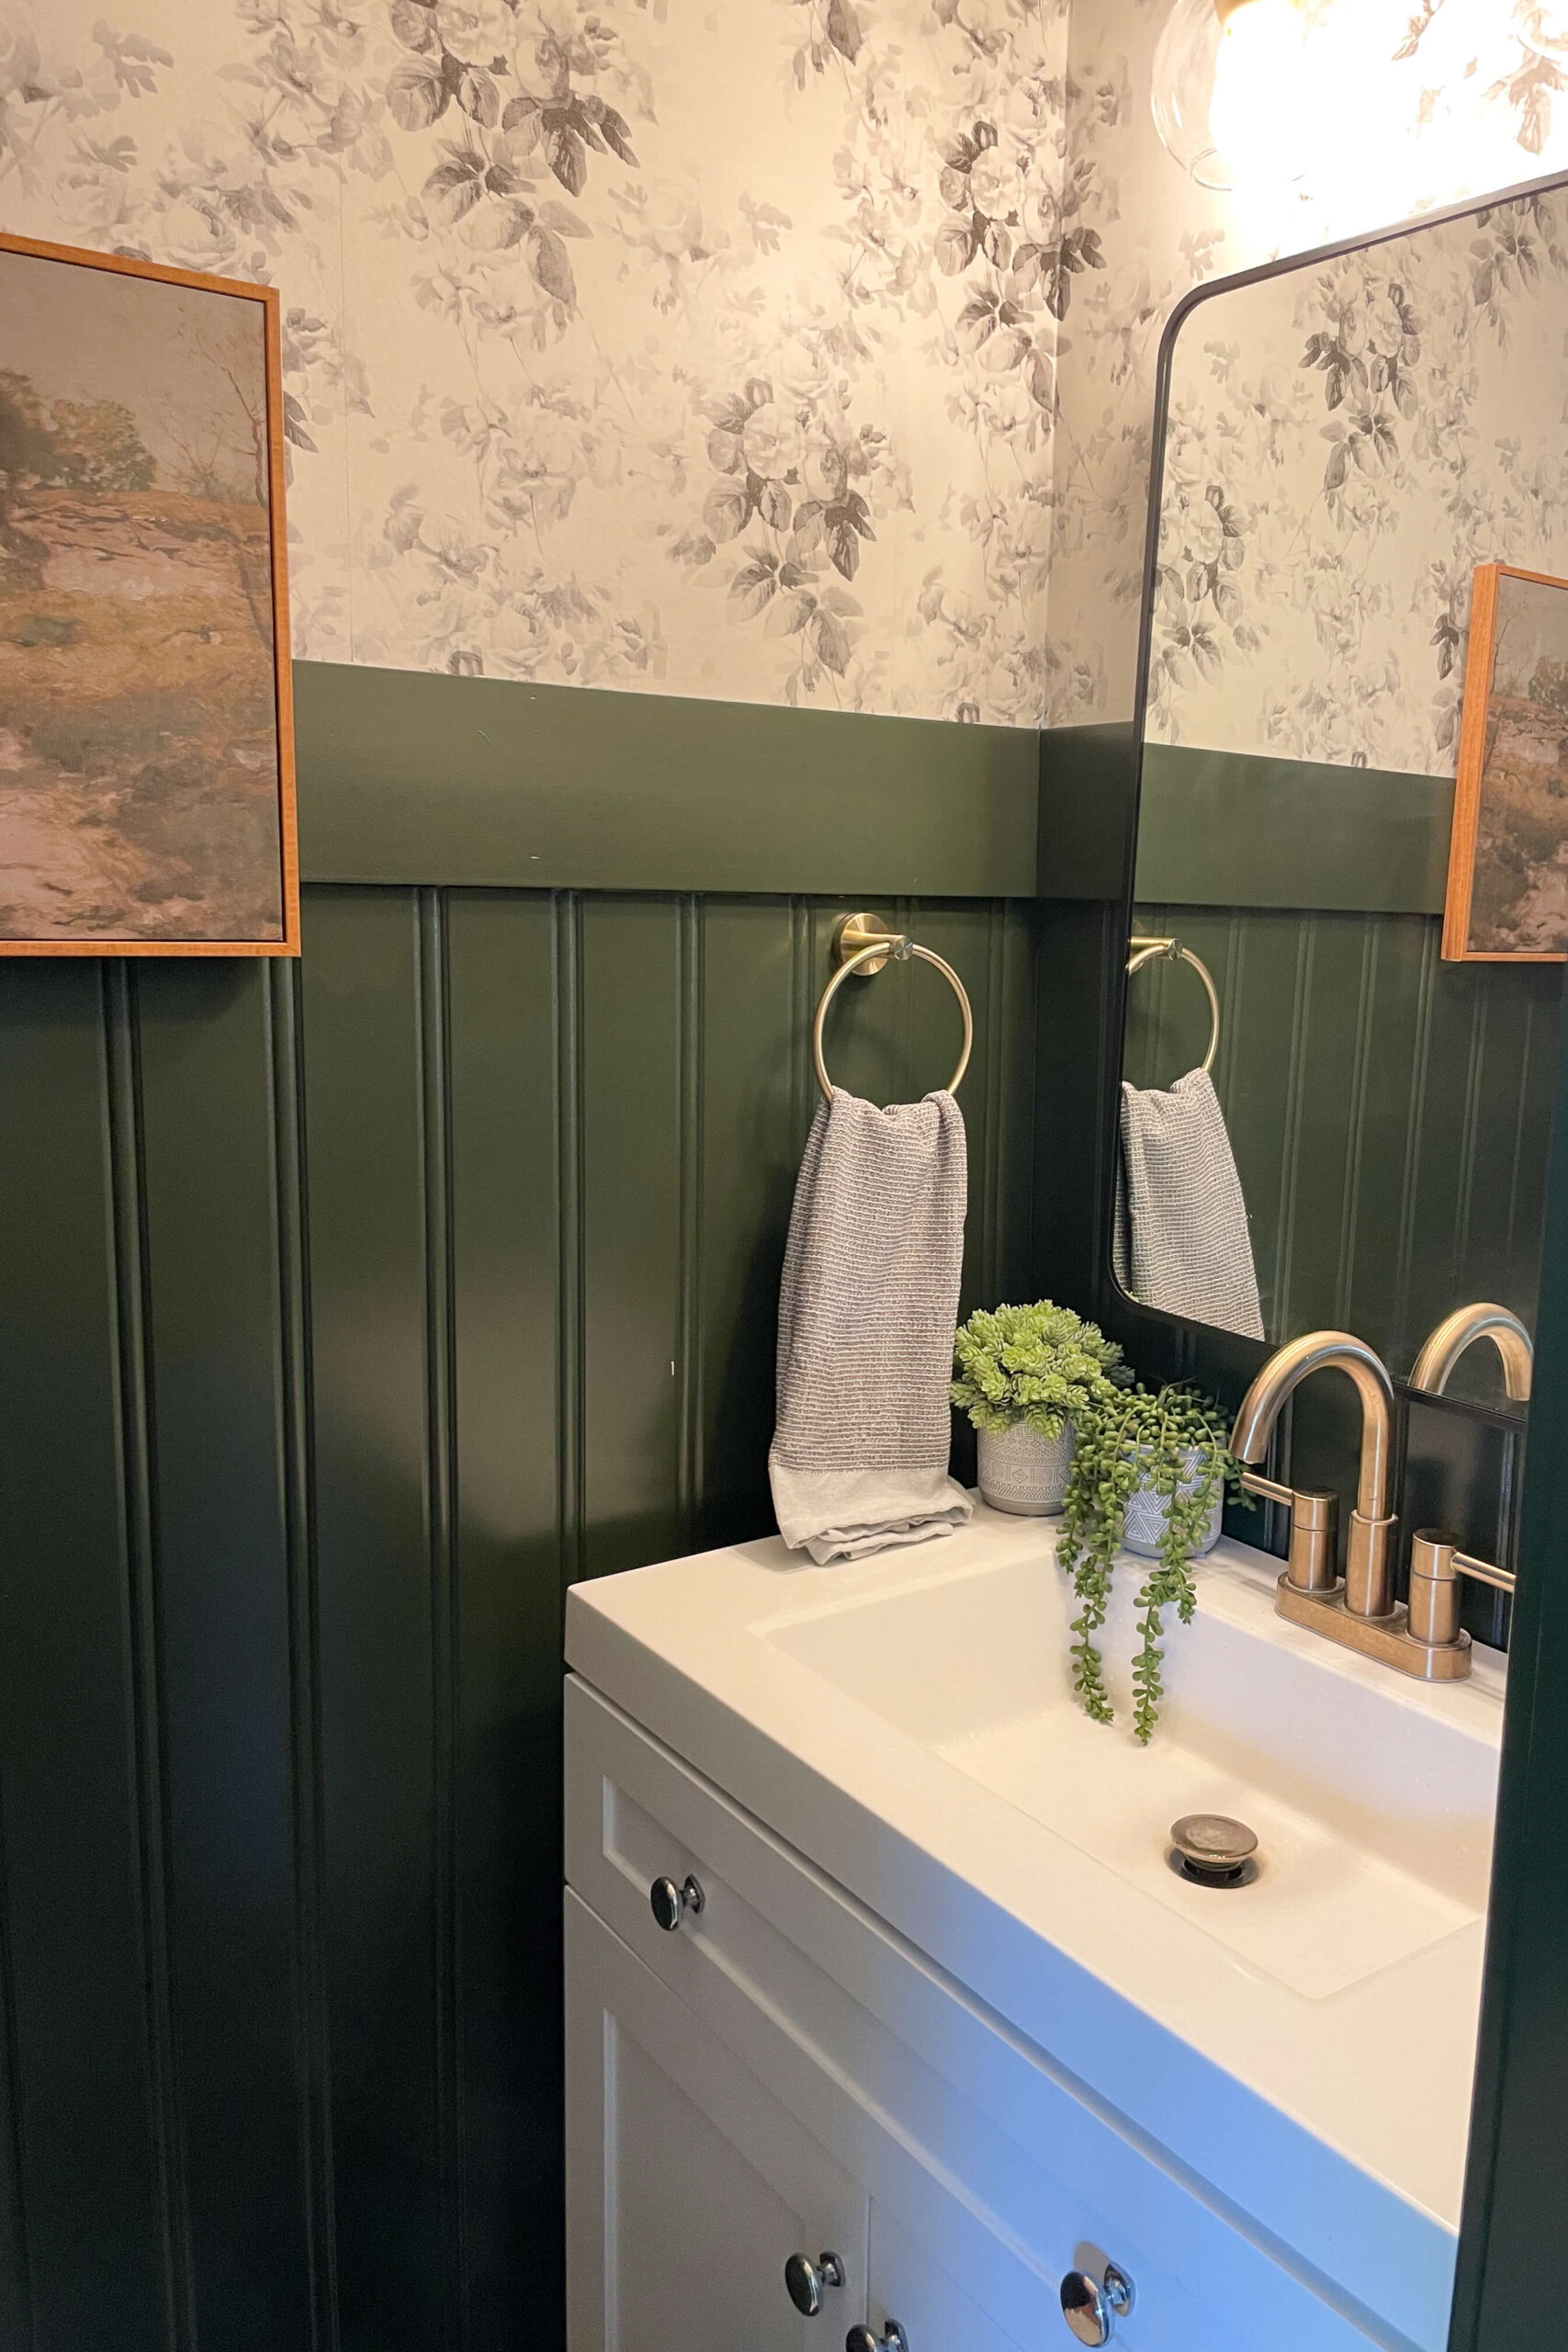
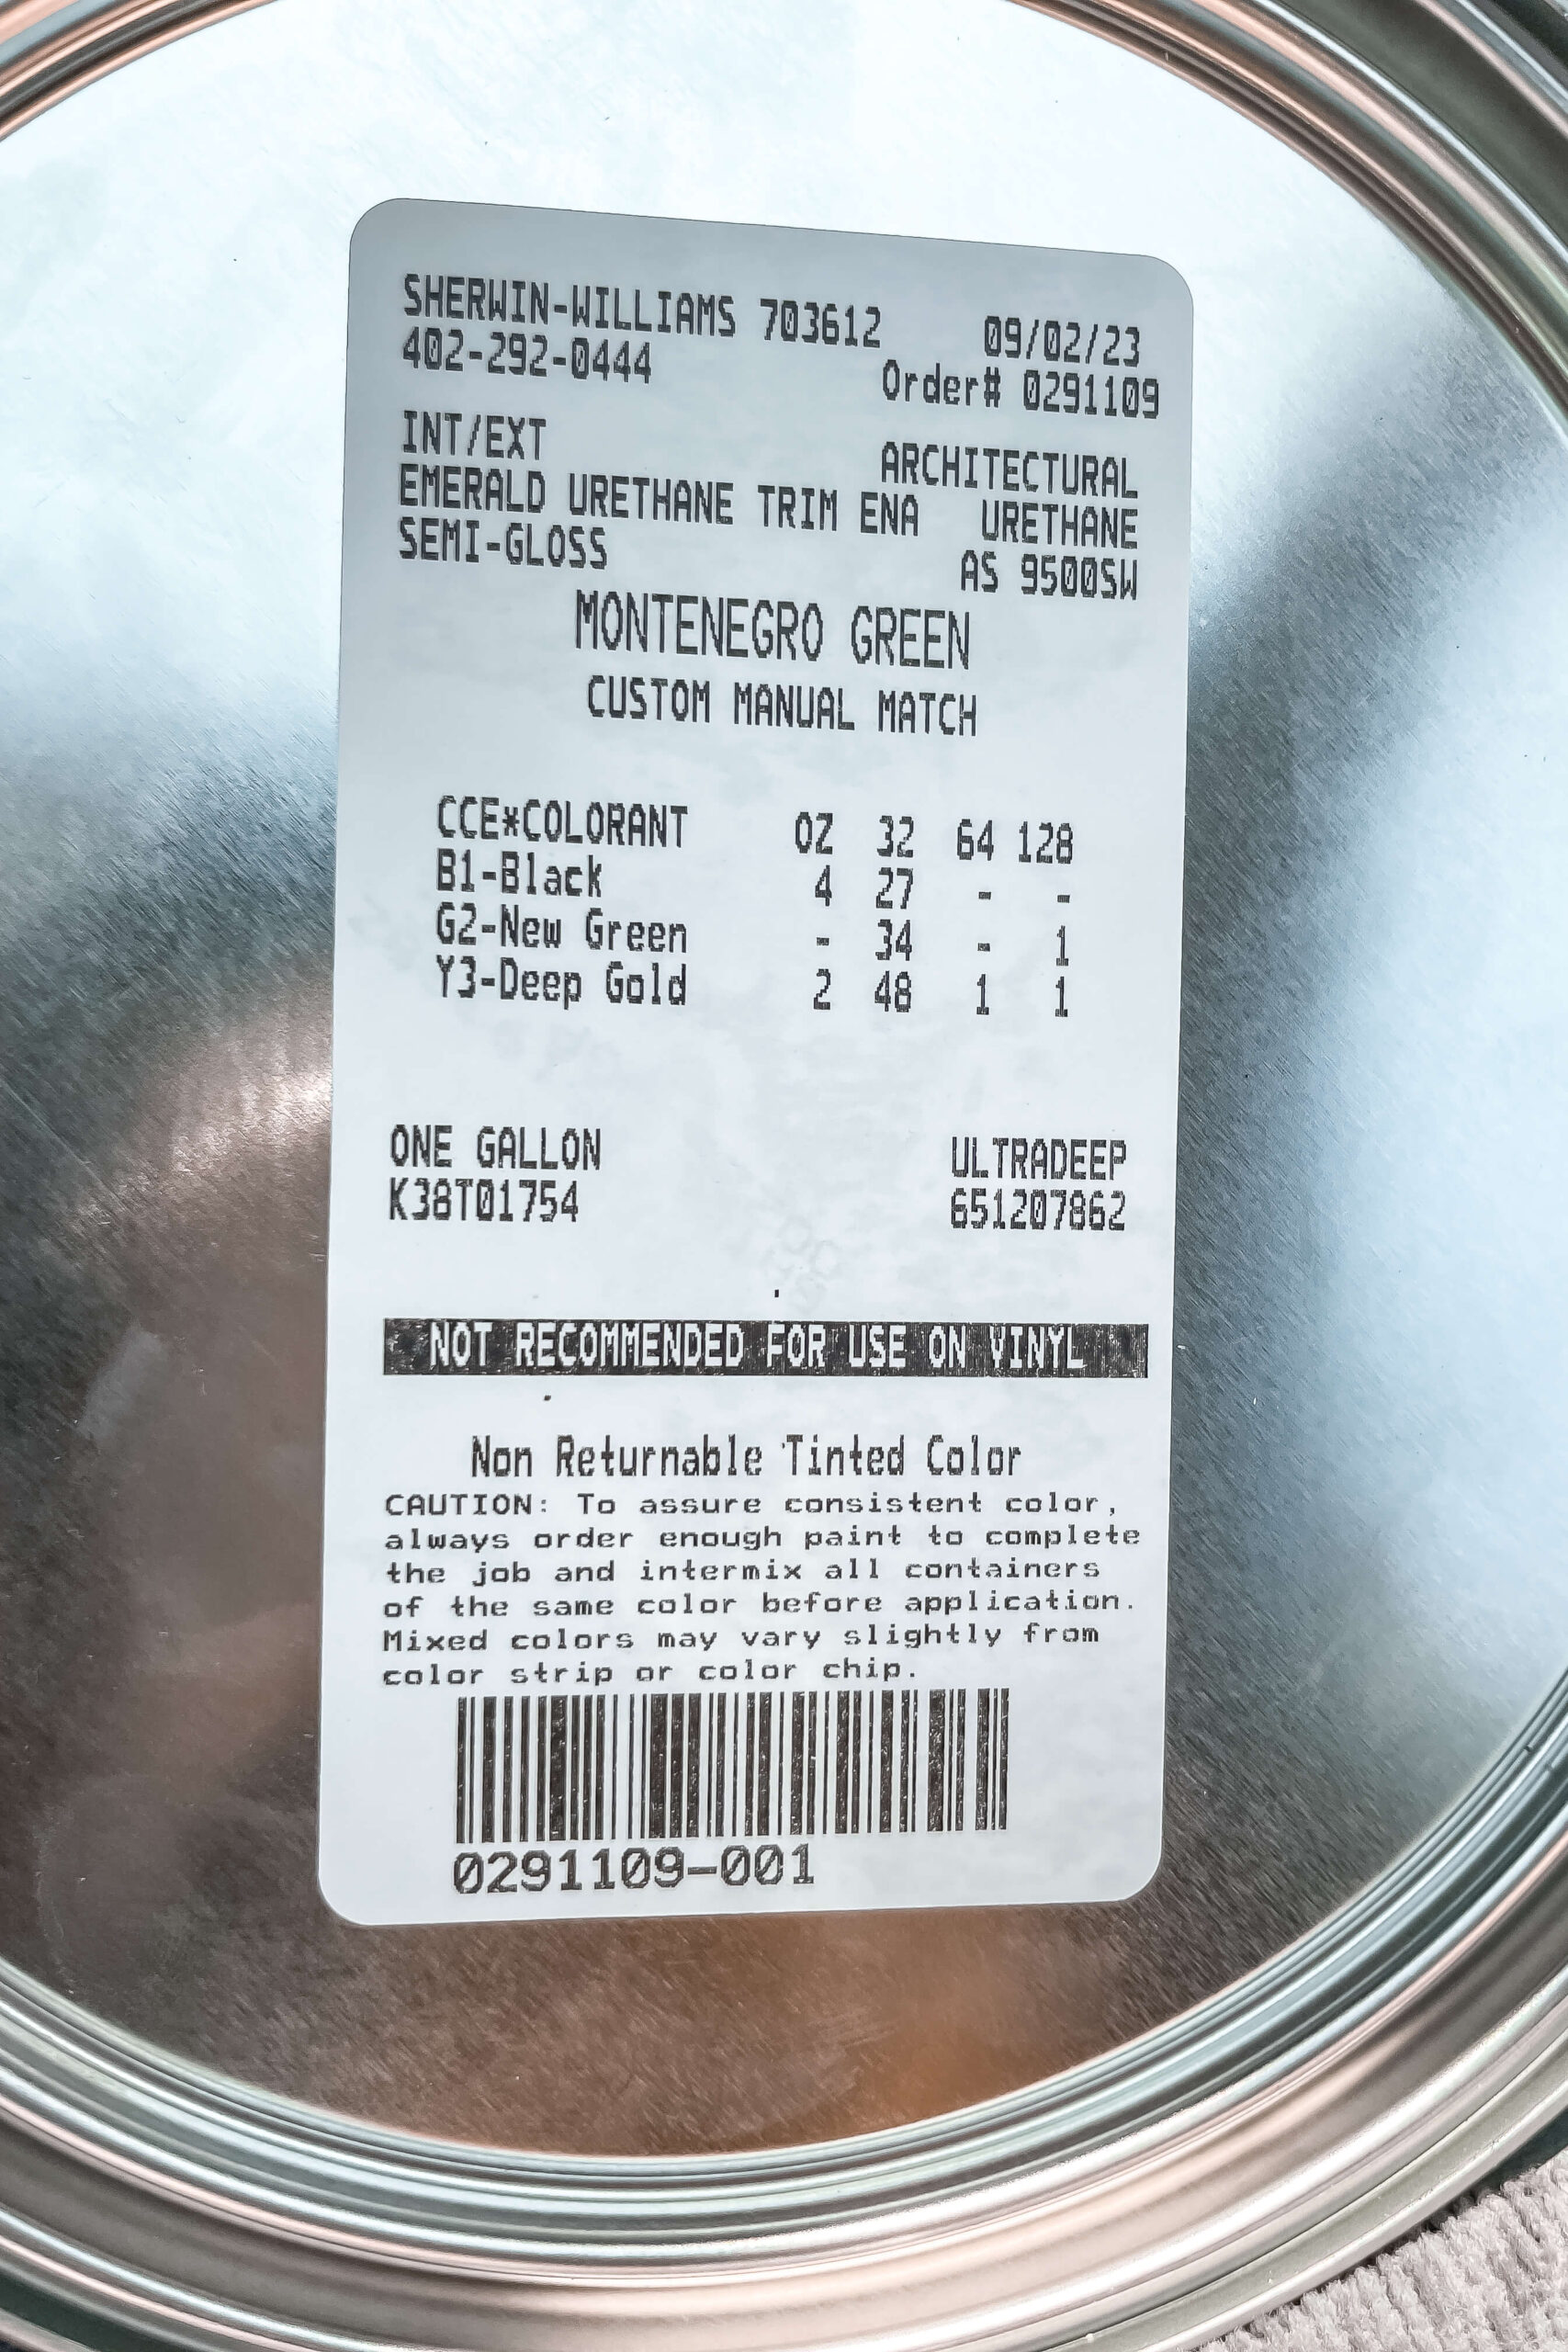
I get asked about this gorgeous shade of green paint all the time. It’s a custom color that I’ve named Montenegro Green. Take this picture of the label to your local paint supplier that carries Sherwin-Williams paint and they can match it for you. If you’ve been following along on my home projects, you’ll recognize it as the same color I painted the DIY built-in Murphy bed that I did in the basement.
It’s time to put the vanity and the toilet tank back. When you reattach the plumbing, you’ll want to use a little bit of plumber’s tape on the threading.

Pro Tip: Place some toilet paper underneath the connection point to double-check that your plumbing is not leaking after reattachment. If the toilet paper stays dry, then you know you’re good.

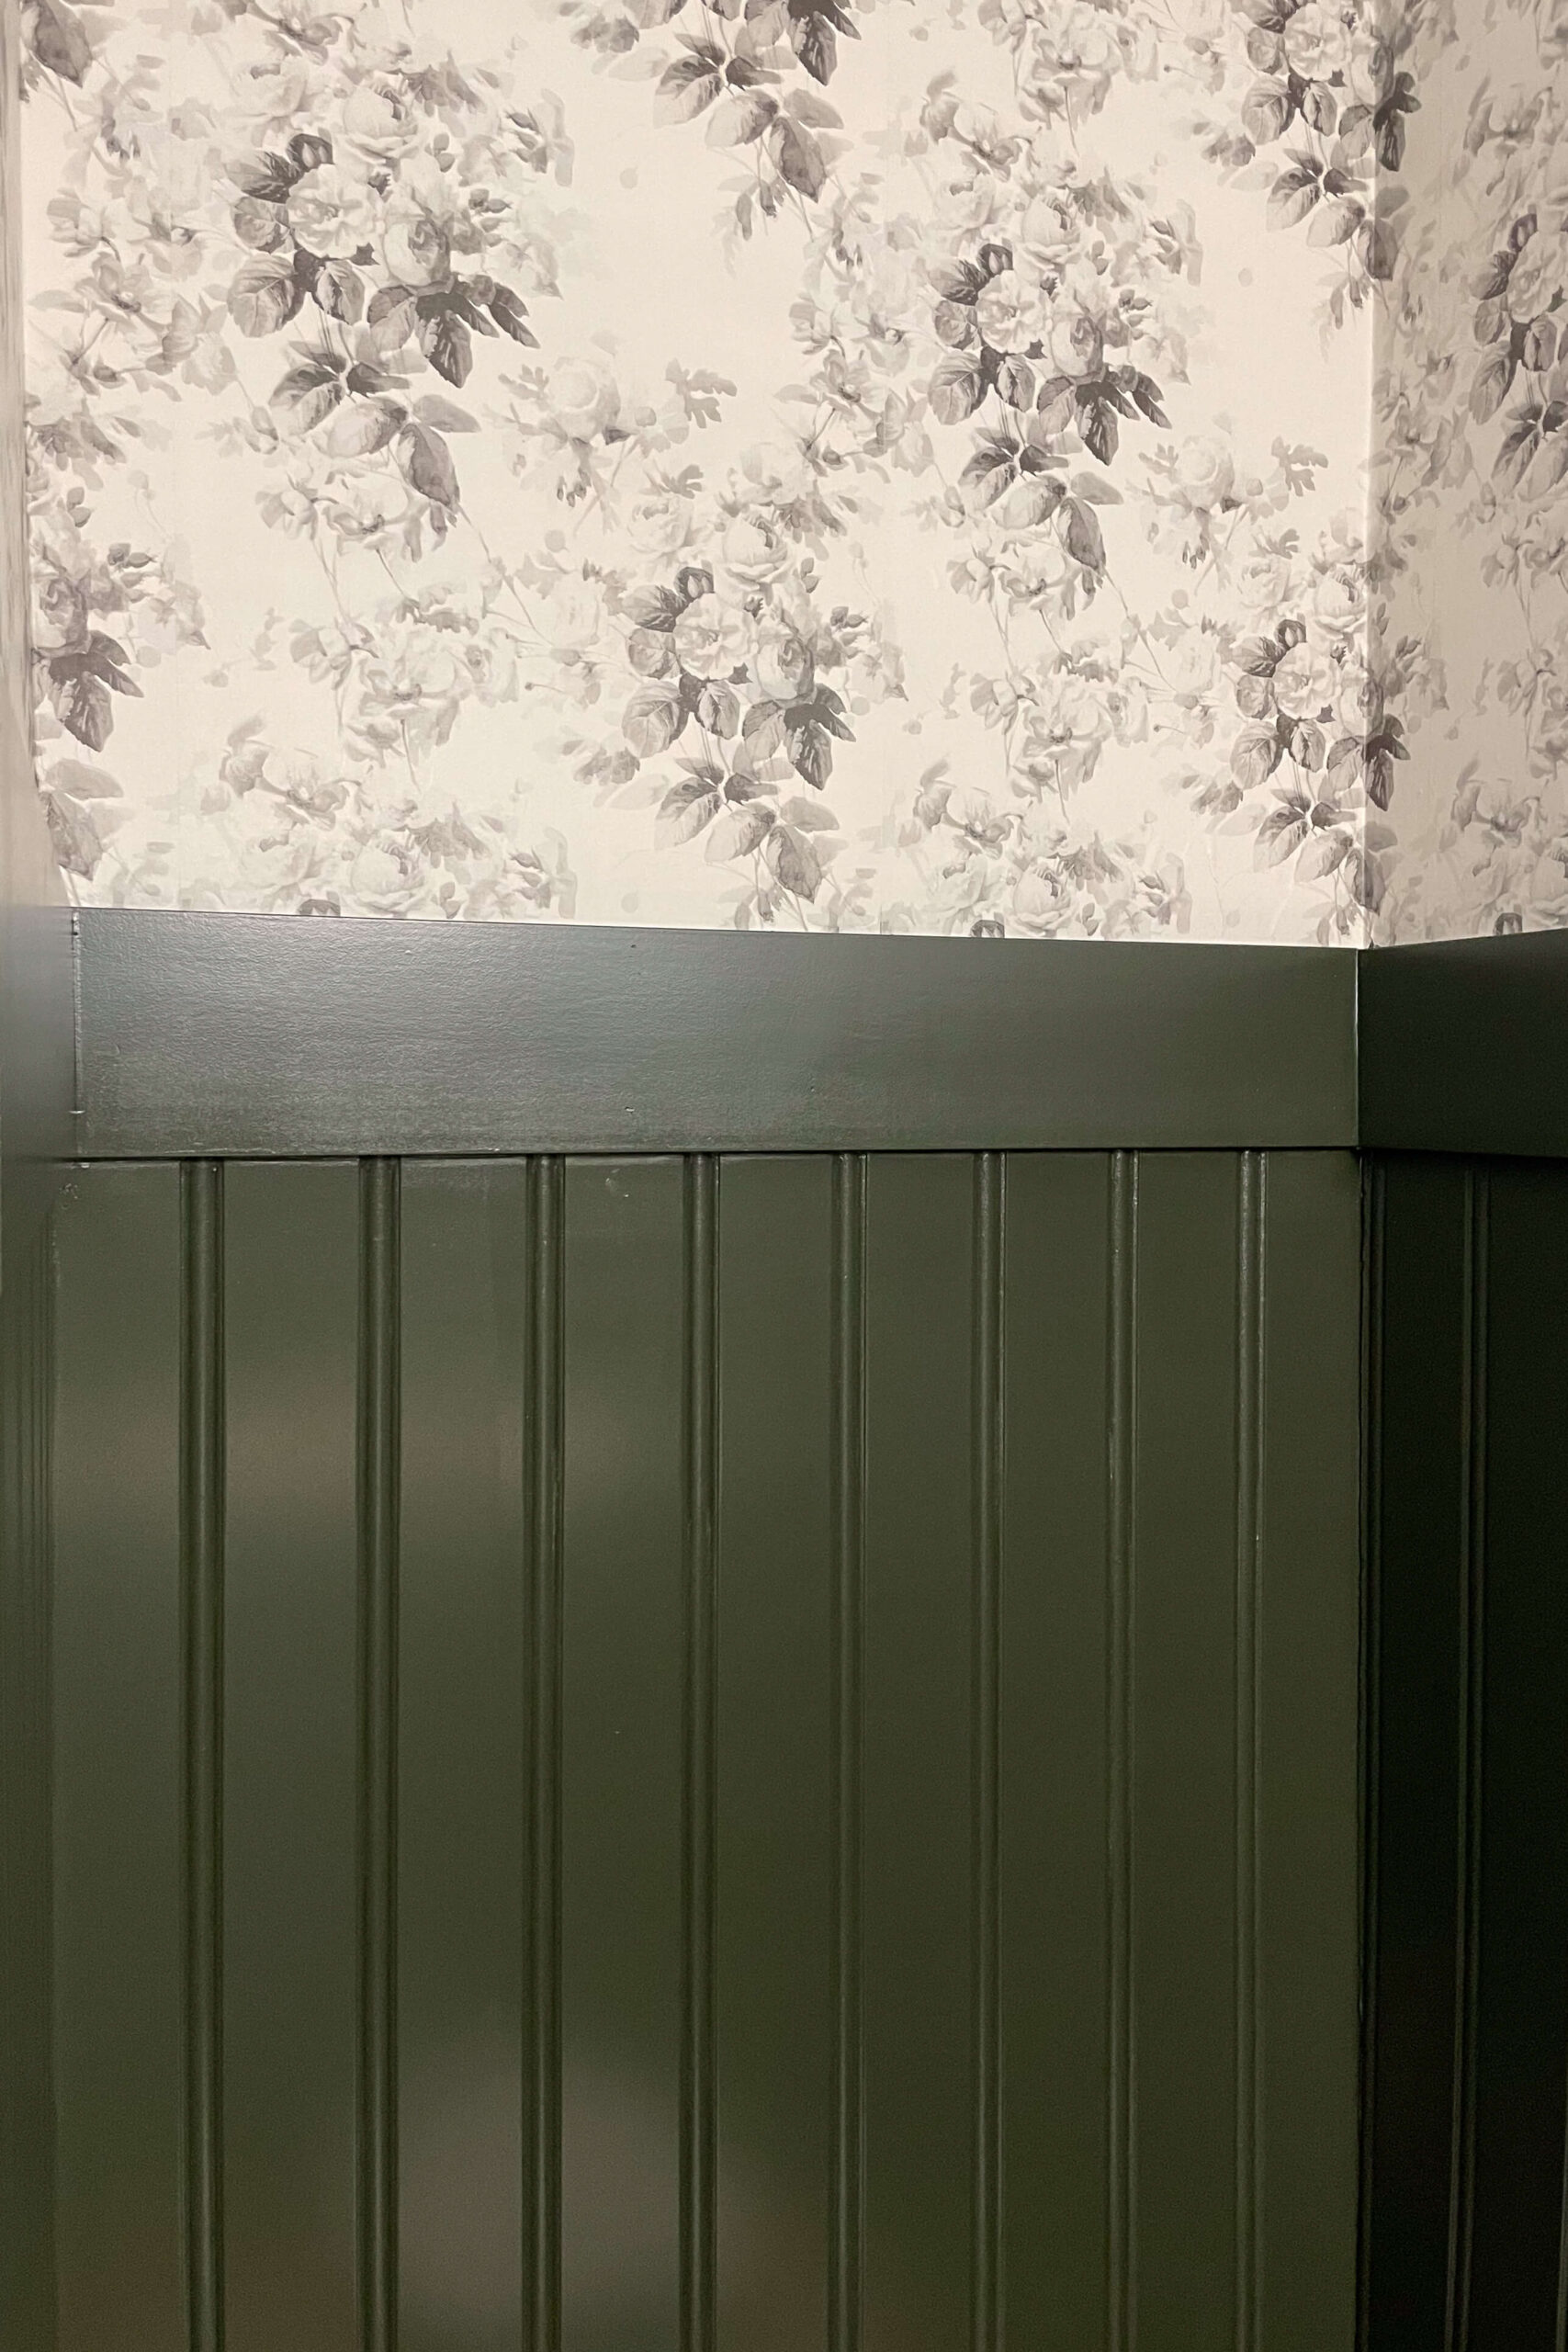
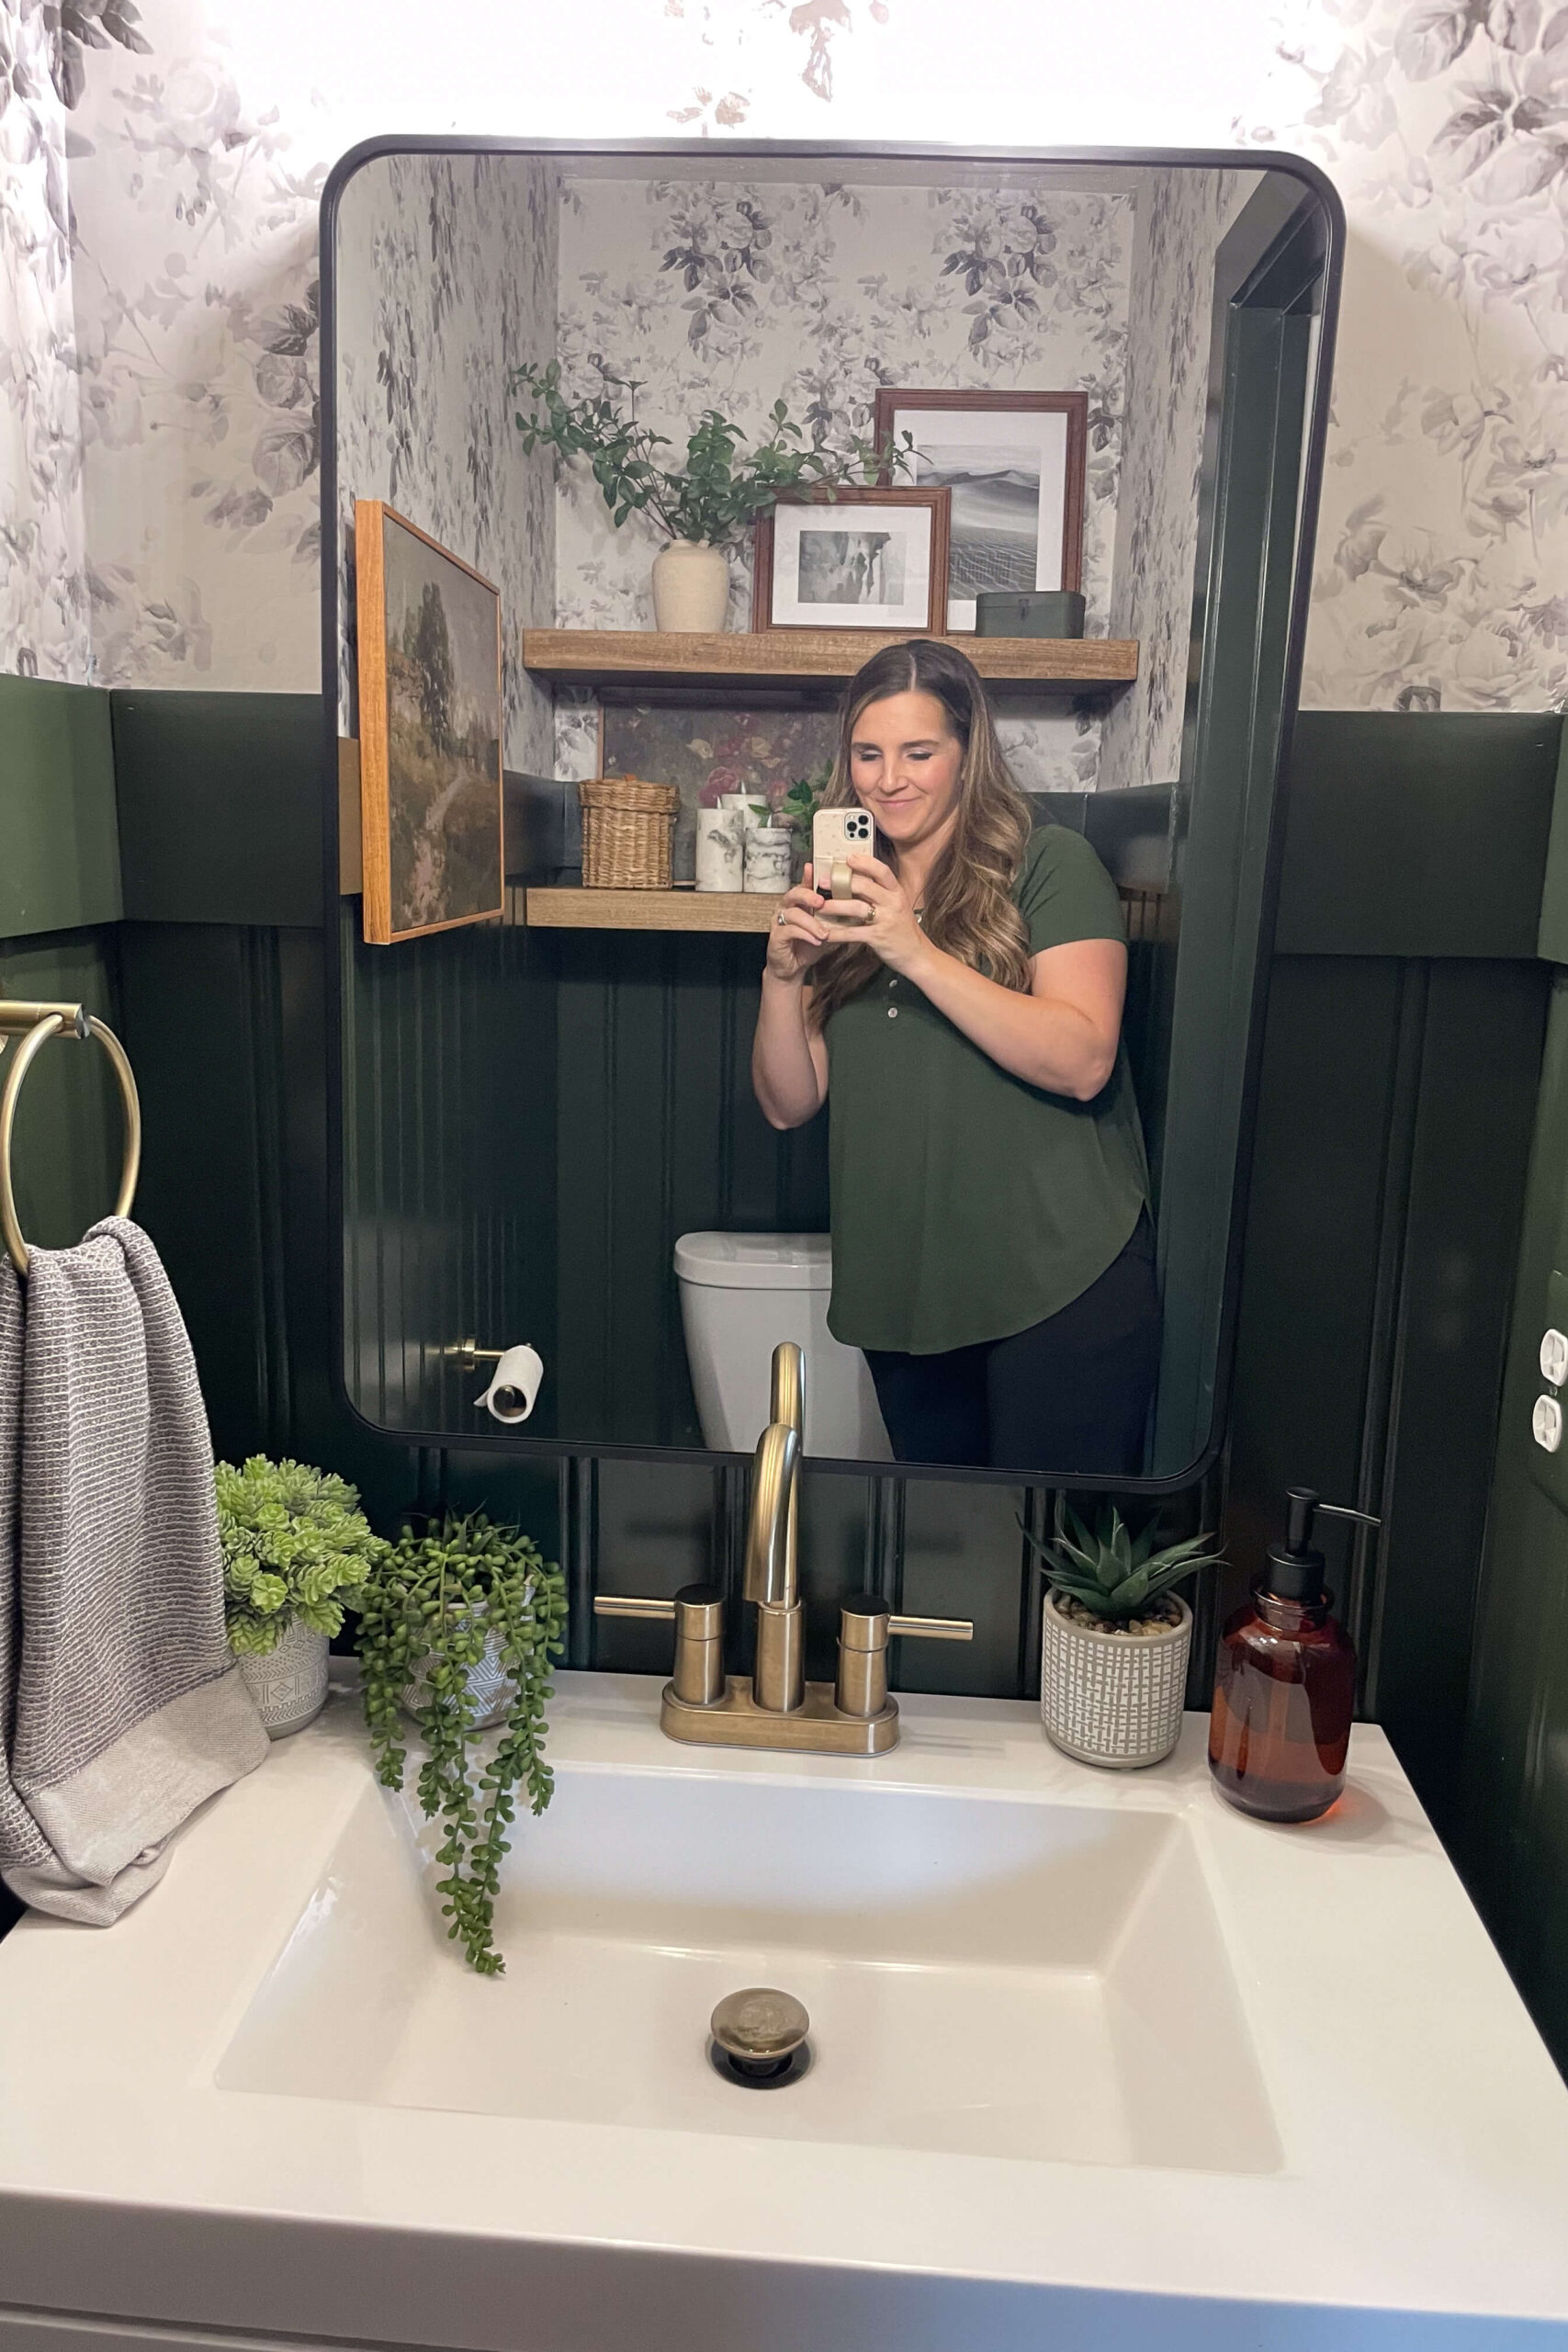
Look at these beautiful bathroom walls with beadboard! The light floral wallpaper on top is the perfect complement to the dark green beadboard. This bathroom feels classic and custom in all the best ways.
After finishing a few more projects in this room like changing out the light fixture, hanging a new mirror, building floating shelves, and of course, adding the decor, this half-bathroom was done! Overlaying the walls with beadboard made such a big difference in this bathroom. I can hardly believe it!
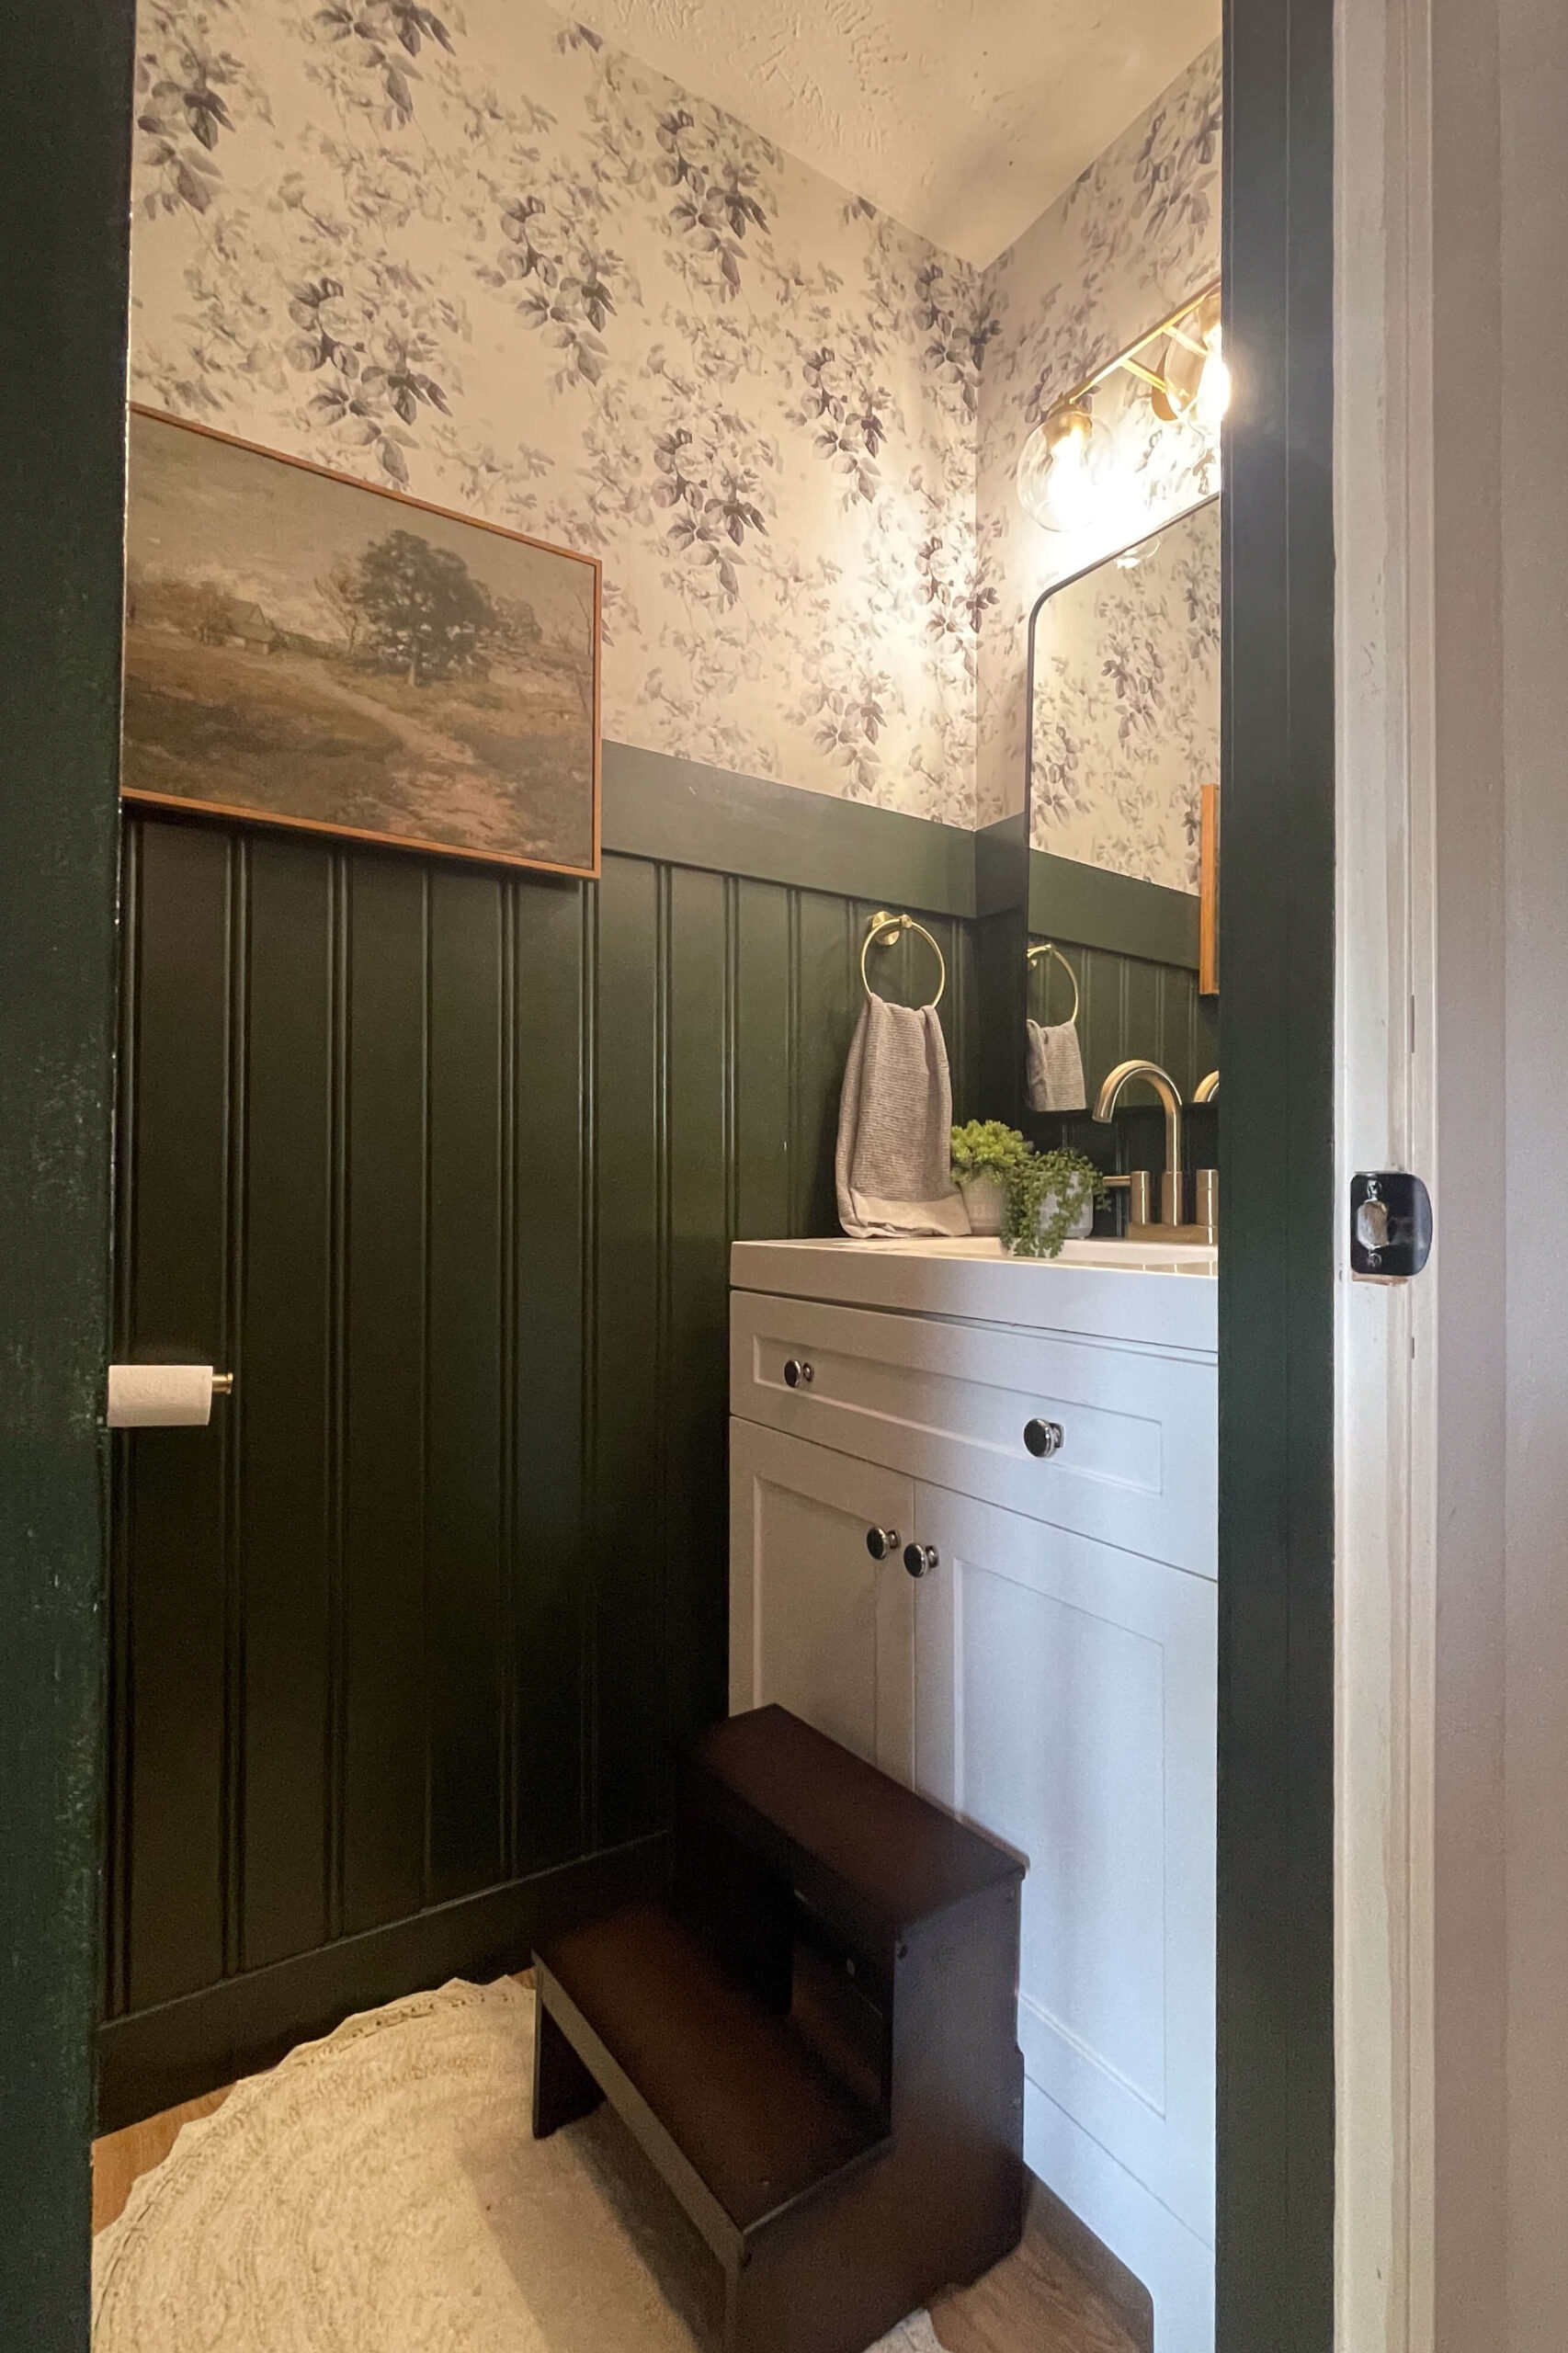
I love the big impact that this small space has on my home. It now flows with the rest of the house and is a welcoming space for my guests. Covering the lower portion of the walls with beadboard was absolutely the right move in here. I’m so happy with how it turned out.
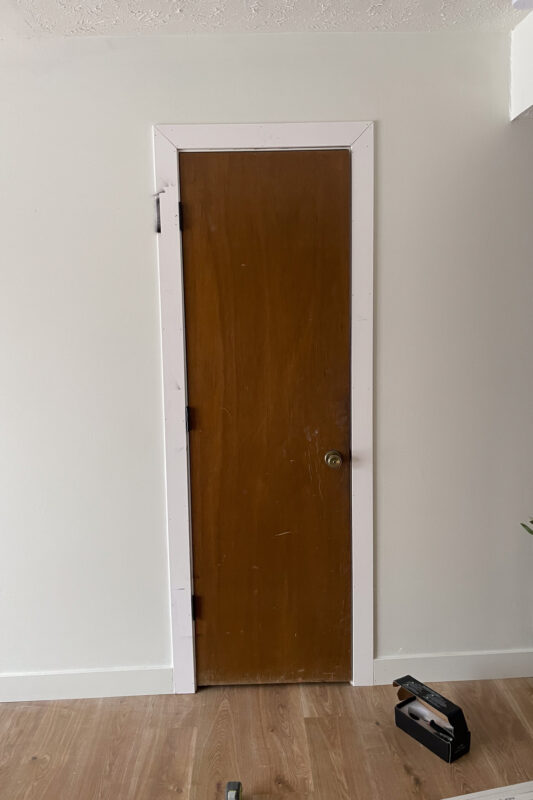
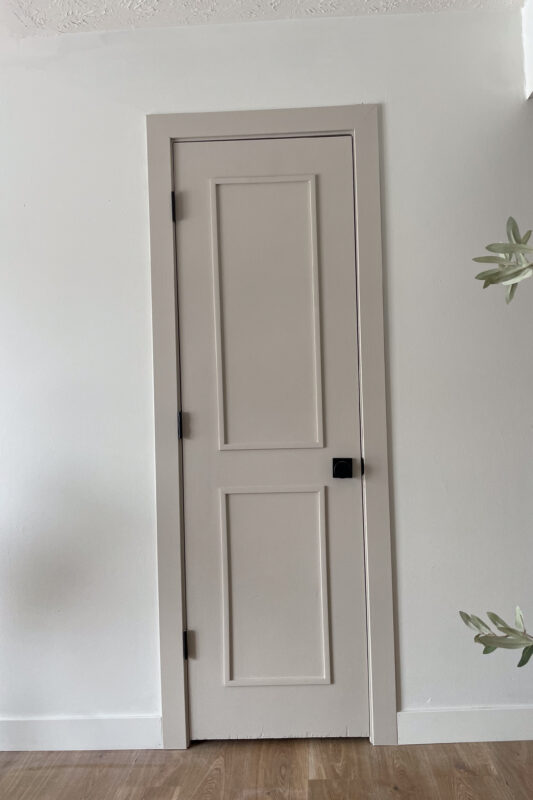
Of course, I couldn’t stop with just the inside of the bathroom, so I also gave the 1970s-style bathroom door a makeover and facelift! For all the how-to’s on that project, you can check out my full tutorial here.

I would have kept the small horseshoe cutoff piece, cut a semicircle in the “top” of the cutoff piece to accommodate the underside of your toilet supply line, and then glued that back into place flush with the rest of the headboard so it would look like you drilled a hole for the toilet line rather than leaving the gap between the trim.
Where did you source your beadboard? I like the width between beads on yours!
All the sources are in the blog post. Find the materials or supplies section.