

Published December 5, 2025
If you’ve ever stared into a cabinet full of mismatched lids and wobbly stacks of containers and wondered if there is a better way to organize your Tupperware and food storage containers without losing your mind, you’re not alone. It’s amazing how quickly that cabinet or drawer can turn into a messy black hole, but I have a solution!
We’ve done a lot of DIY kitchen remodels over the years, and usually, I do things in the “aesthetic” order. I make it pretty first, with backsplash, hardware, and styling, and then months later, I circle back to figure out organization. For our latest fixer-upper, I flipped the script. I’m prioritizing smart storage before the pretty finishes, so this kitchen actually works for our family right away.
That’s how this custom cabinet came to be. Instead of leaving a big empty box under the counter, I built a vertical organizer for cutting boards on one side and a pull-out drawer system for our glass food storage containers and lids on the other. It looks custom because it is, and it finally solves that chaotic Tupperware cabinet problem for good.
Table of Contents
- Tools and Materials for Organizing Tupperware
- Choose the Right Cabinet for Organizing Tupperware
- Step 1: Plan the Layout Inside the Cabinet
- Step 2: Measure and Mark for Your Drawer Slides
- Step 3: Attach the Slides to the Side Panels
- Step 4: Build the Tupperware Organizer Insert
- Step 5: Fit the Tupperware Organizer in the Cabinet
- Step 6: Build Simple Pull-Out Shelves for Containers and Lids
- Step 7: Adding Rails for Function and Grip
- Step 8: Load Your Organized Tupperware Containers
- My Best Tip for Keeping Tupperware Organized
- More DIY Kitchen Storage Projects
- 📌 Save this Tupperware Organization Idea for Later
- FAQ: How to Organize Tupperware and Food Storage Containers
Tools and Materials for Organizing Tupperware
Here is what I used to create this custom pull-out cabinet insert for organizing all the Tupperware and food storage containers inside our kitchen cabinet.
Tools
- Tape measure
- Circular saw or table saw
- Drill
- Brad nailer
- Speed square
- Router with straight bit (for the front rail groove)
- Sander
Materials
- 1/2 inch plywood for the cabinet box
- 3/4 inch plywood for the pull-out shelves
- 1×2 boards for the front rails
- Full extension drawer slides (two sets for the shelves)
- Wood screws
- Brad nails
- Wood glue
- Small bin or box for lids
Choose the Right Cabinet for Organizing Tupperware
When you’re trying to organize your kitchen, the biggest game-changer is storing things close to where you actually use them. Simple idea, huge impact. This cabinet sits right next to the fridge, so it’s the perfect spot for organizing all of our Tupperware-style food storage containers.

Step 1: Plan the Layout Inside the Cabinet
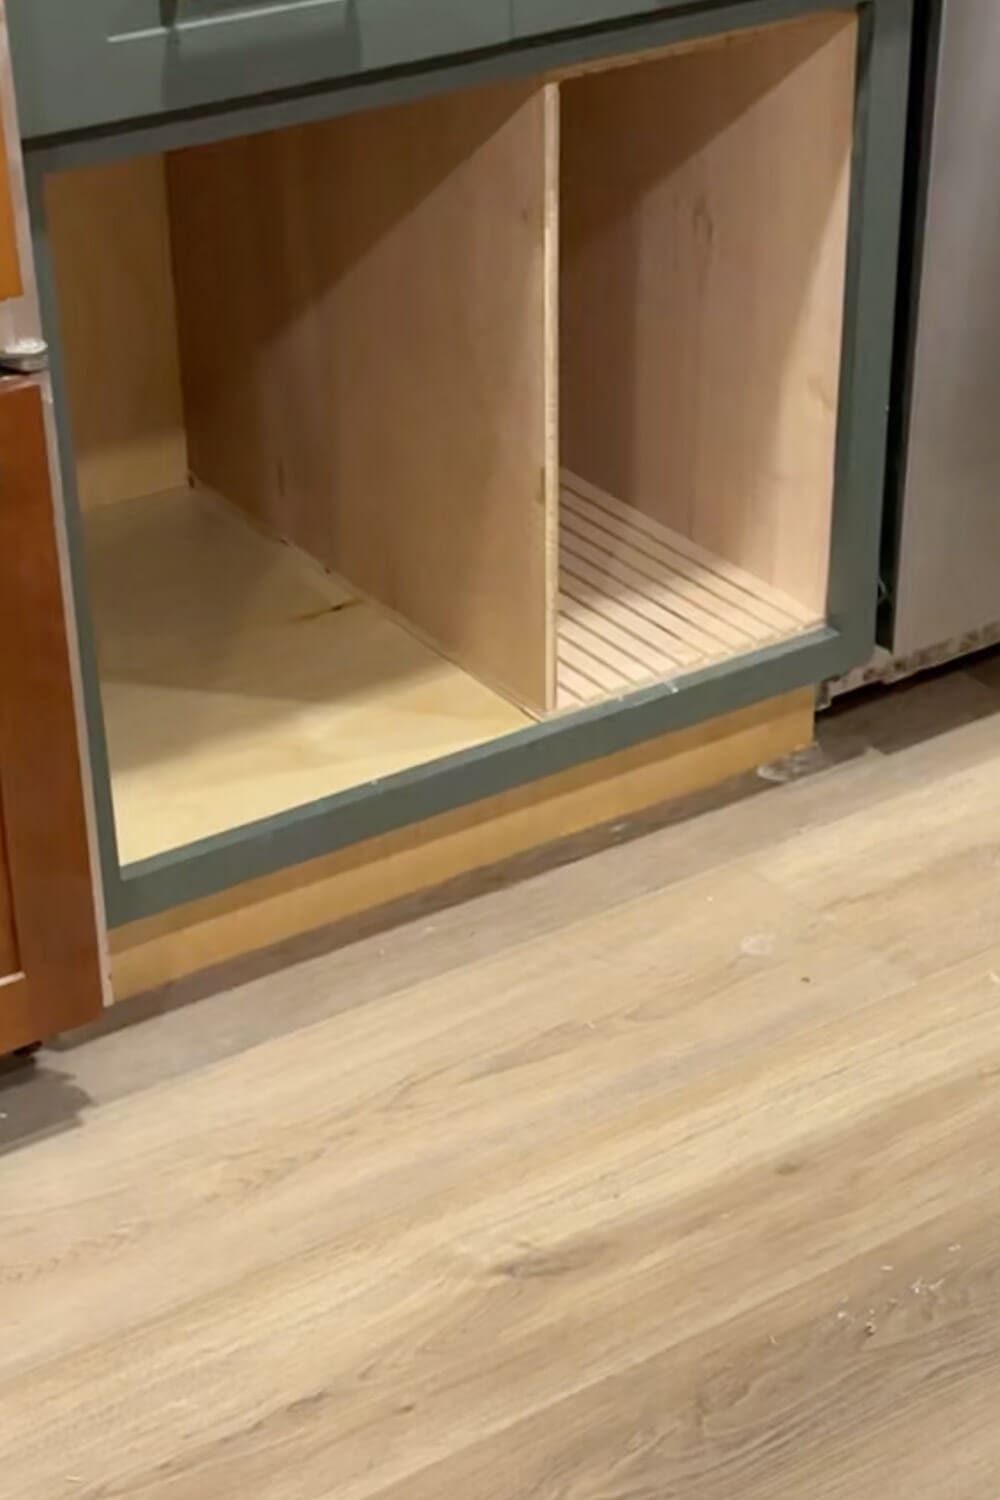
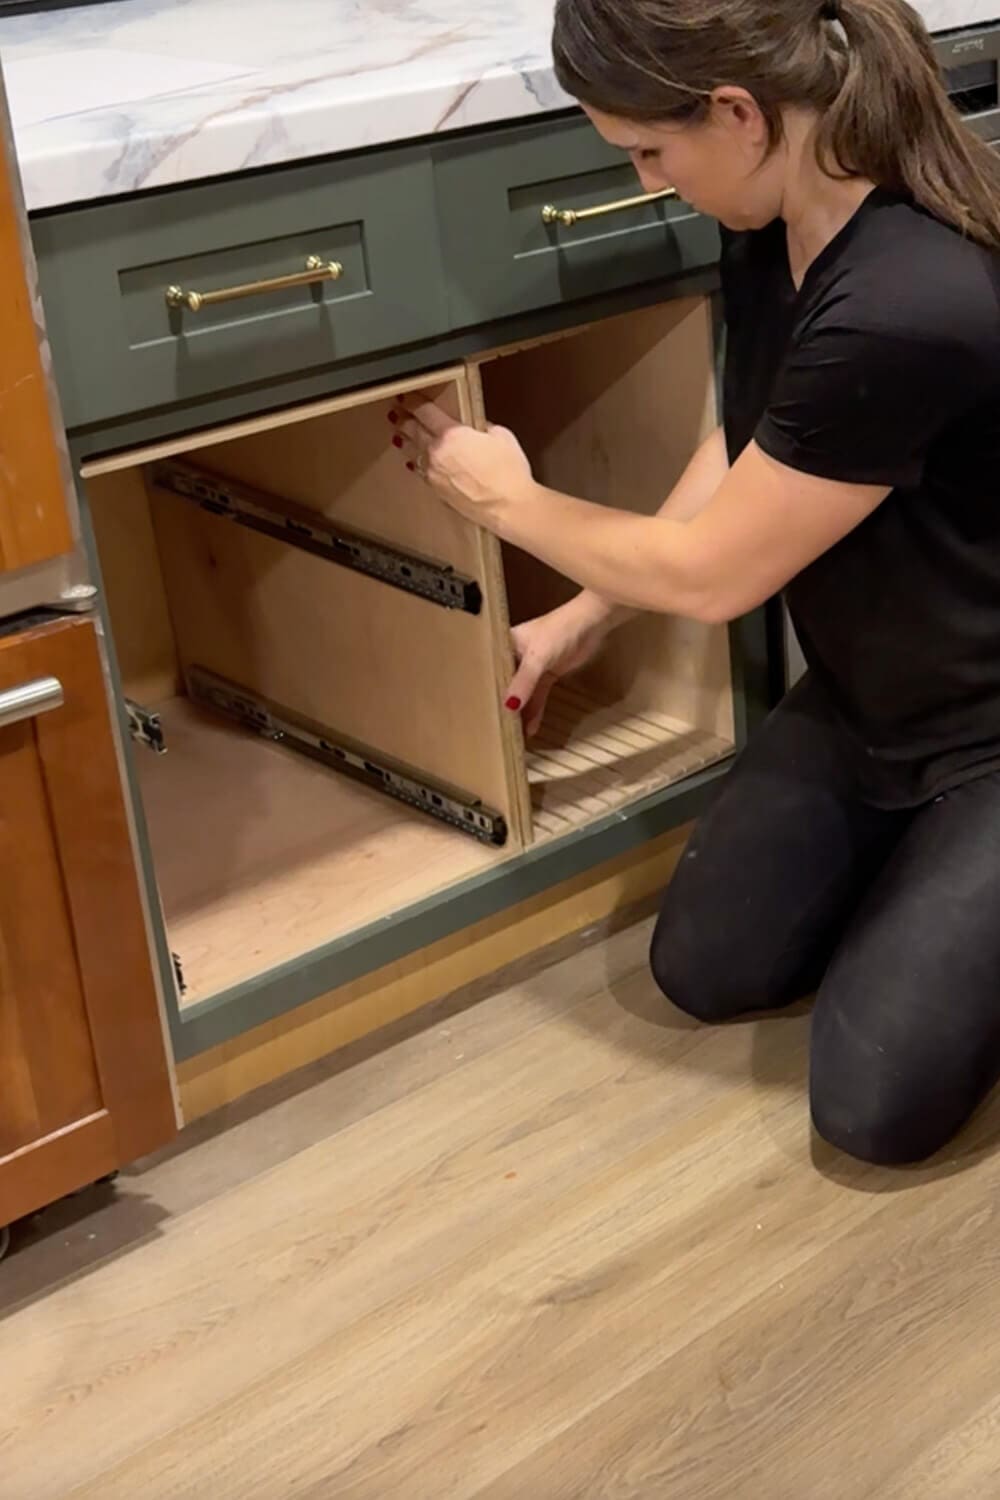
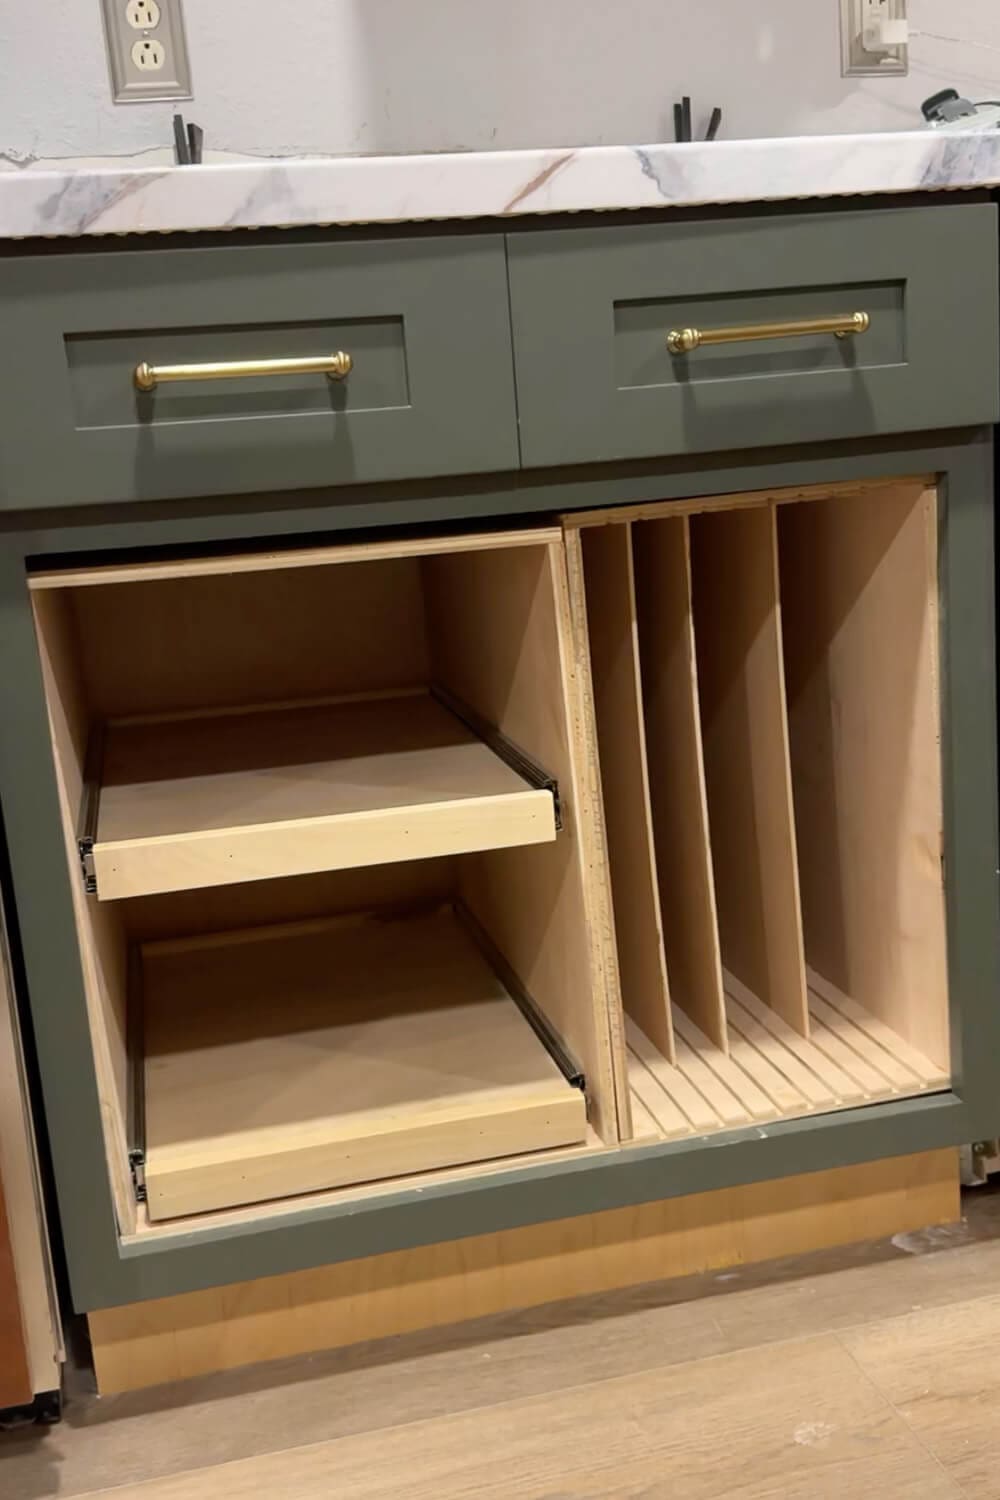
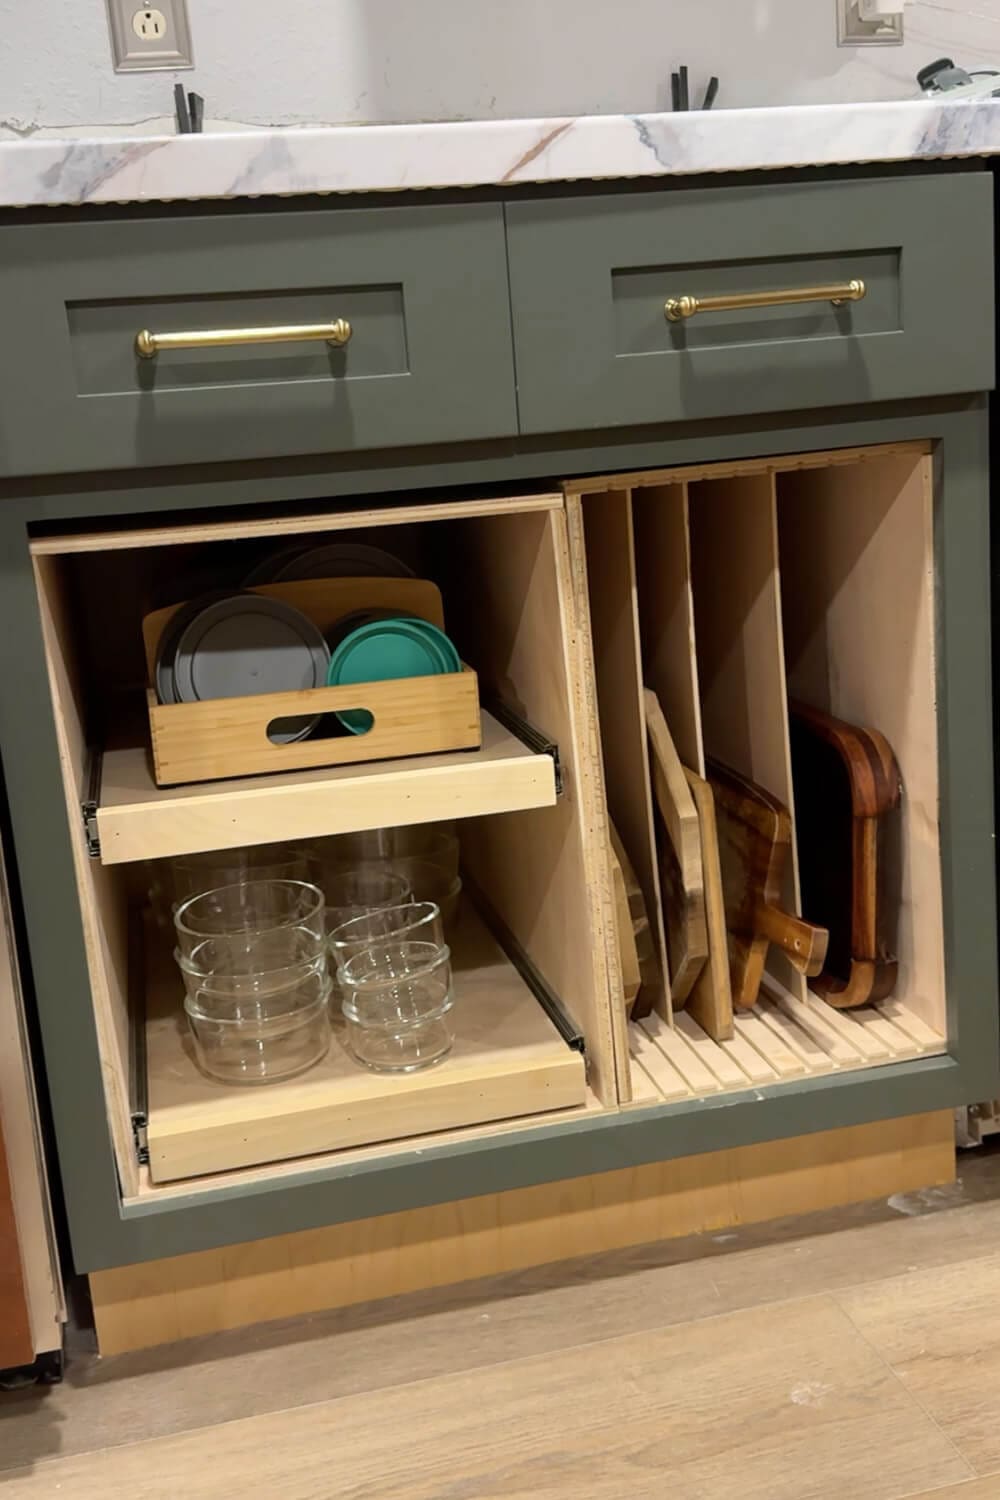
A big empty cabinet is one of the worst places for trying to organize smaller items like Tupperware food storage containers, so I turned it into two zones instead: vertical storage for cutting boards on the right and a custom pull-out organizer for containers and lids on the left.
Once the right side was set, I turned my attention to building my Tupperware organization on the left.
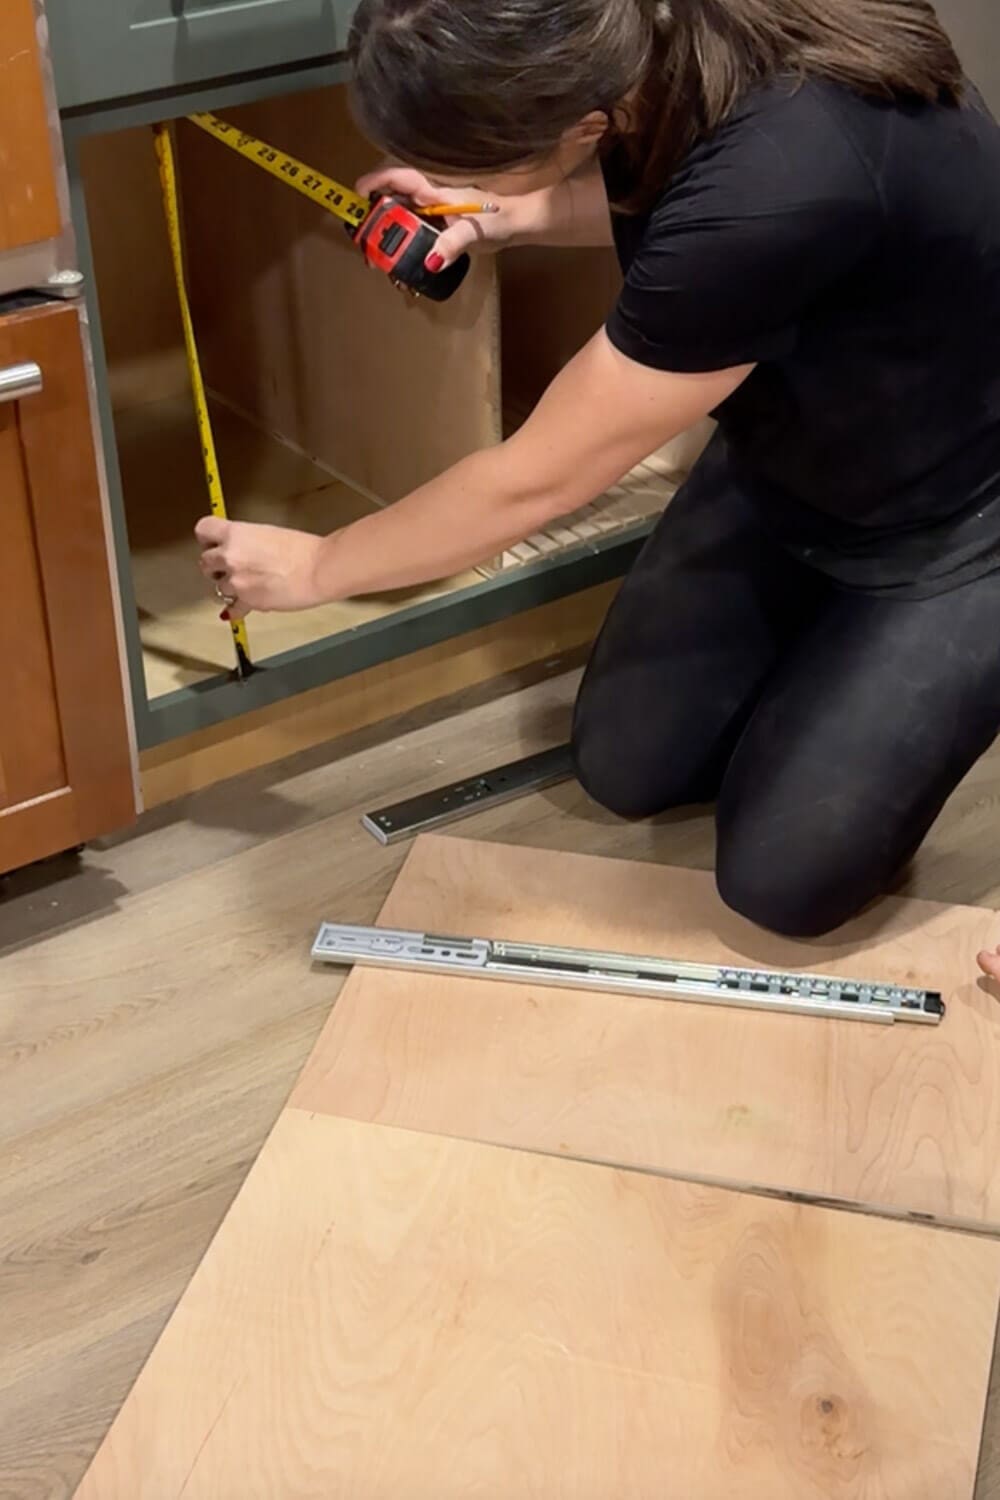
Step 2: Measure and Mark for Your Drawer Slides
First, I measured the space I was working with, checking width, depth, and height so this insert would be a snug fit. I also decided how much room I wanted above each pull-out shelf, planning for the heavier glass containers on the bottom and the lids on top.
With those measurements in hand, I used both my table saw and miter saw to cut 1/2 inch plywood to the sizes that I needed. Then, I marked the position for my two shelves directly onto the plywood side panels.
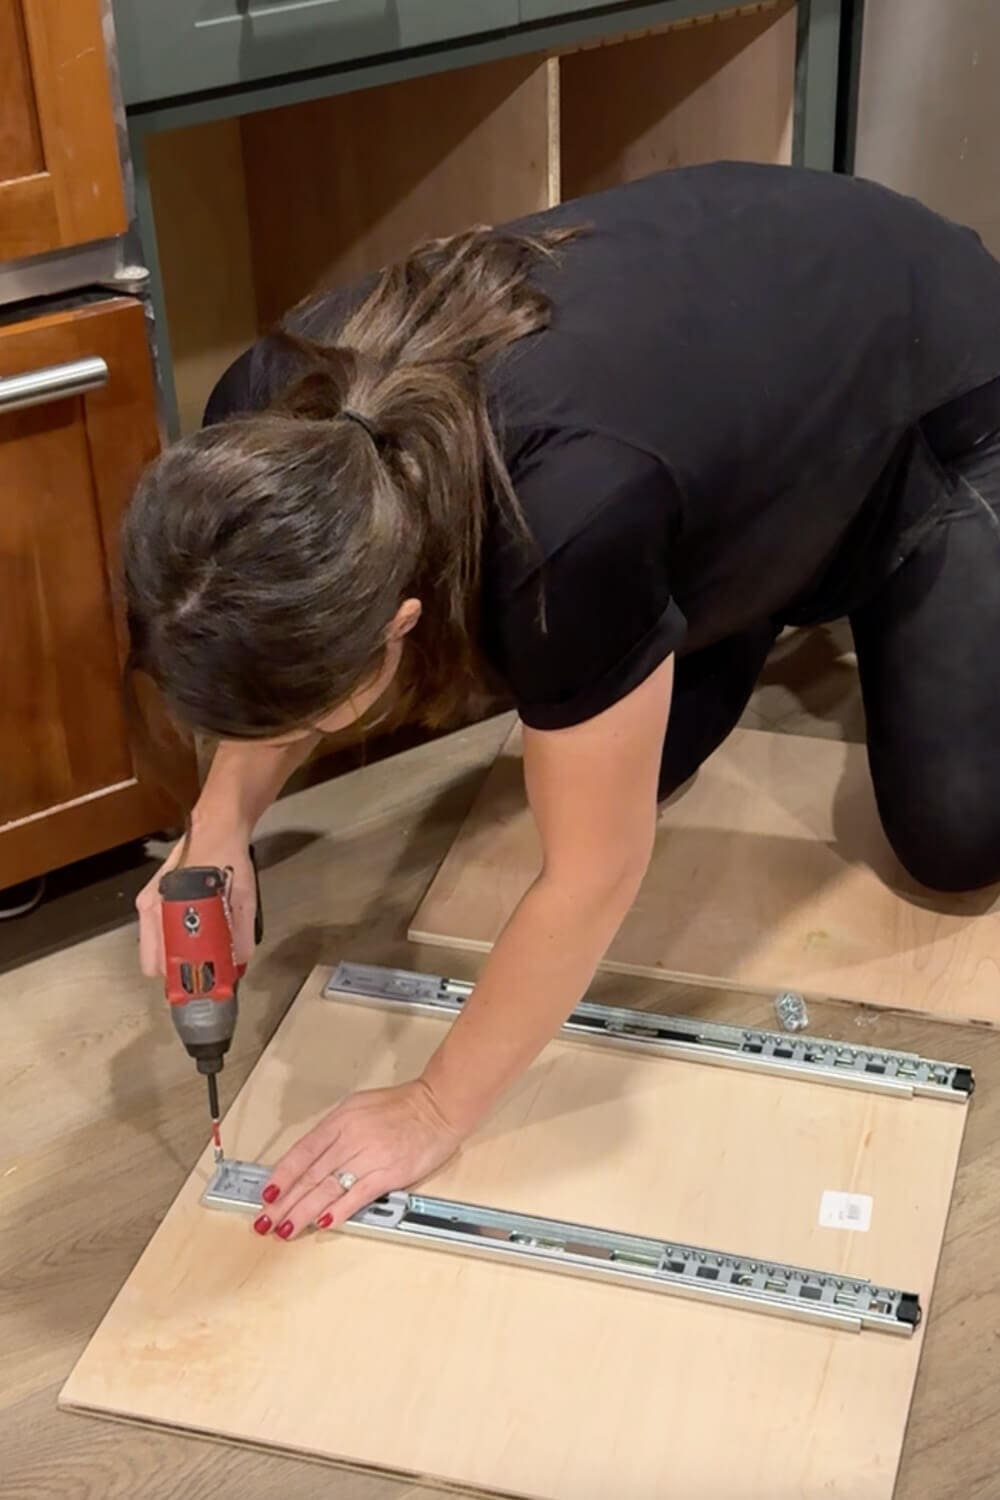
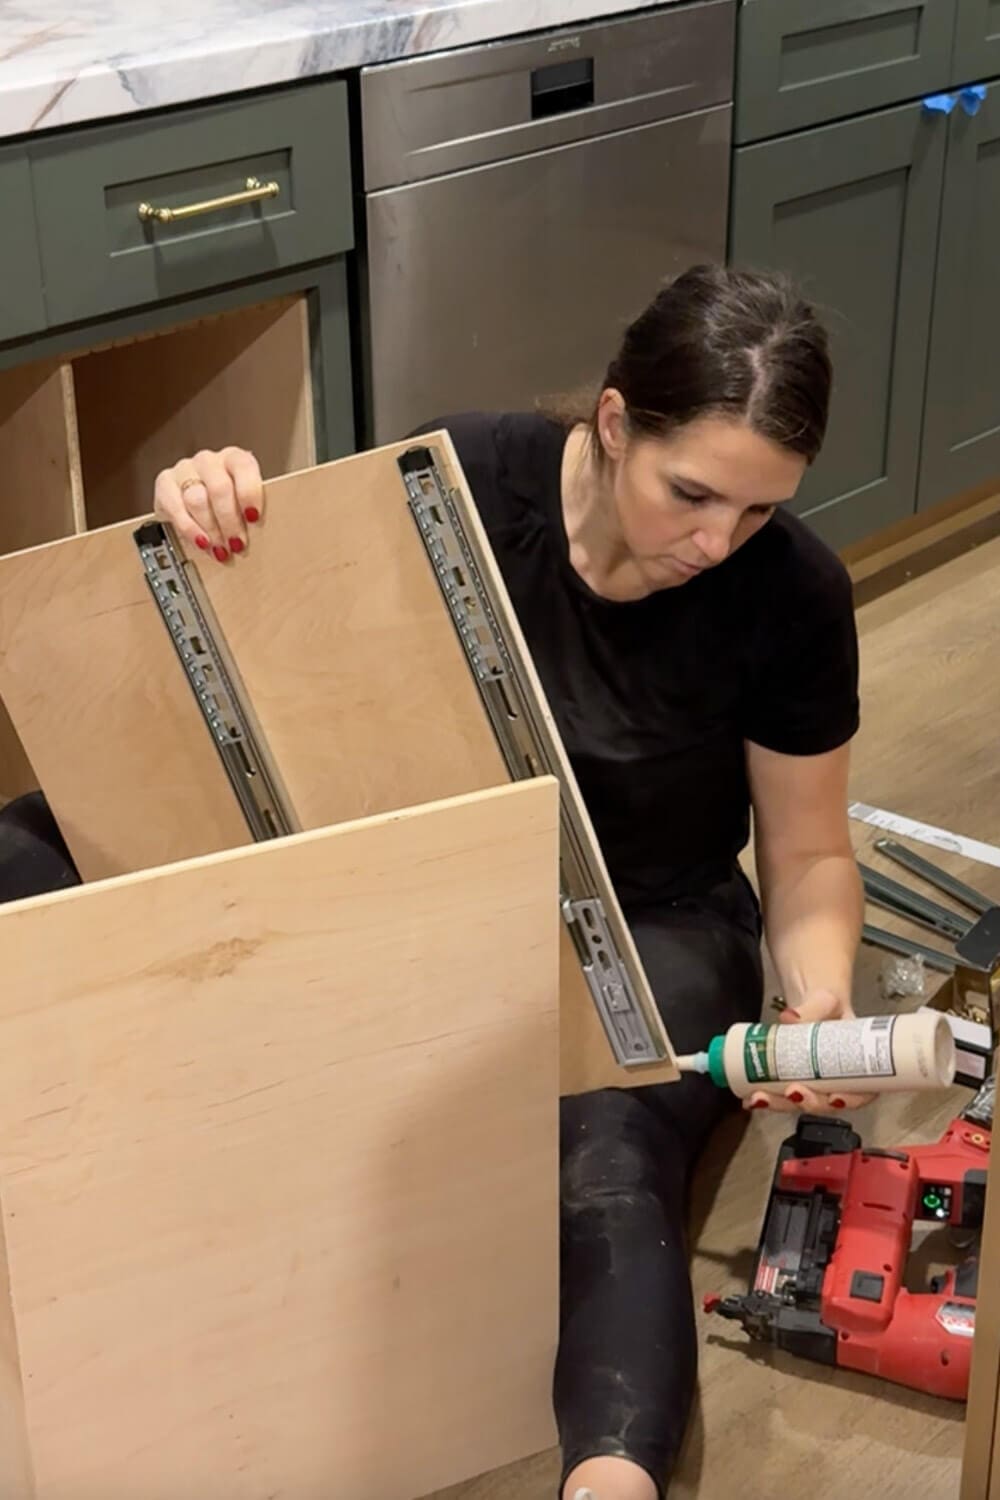
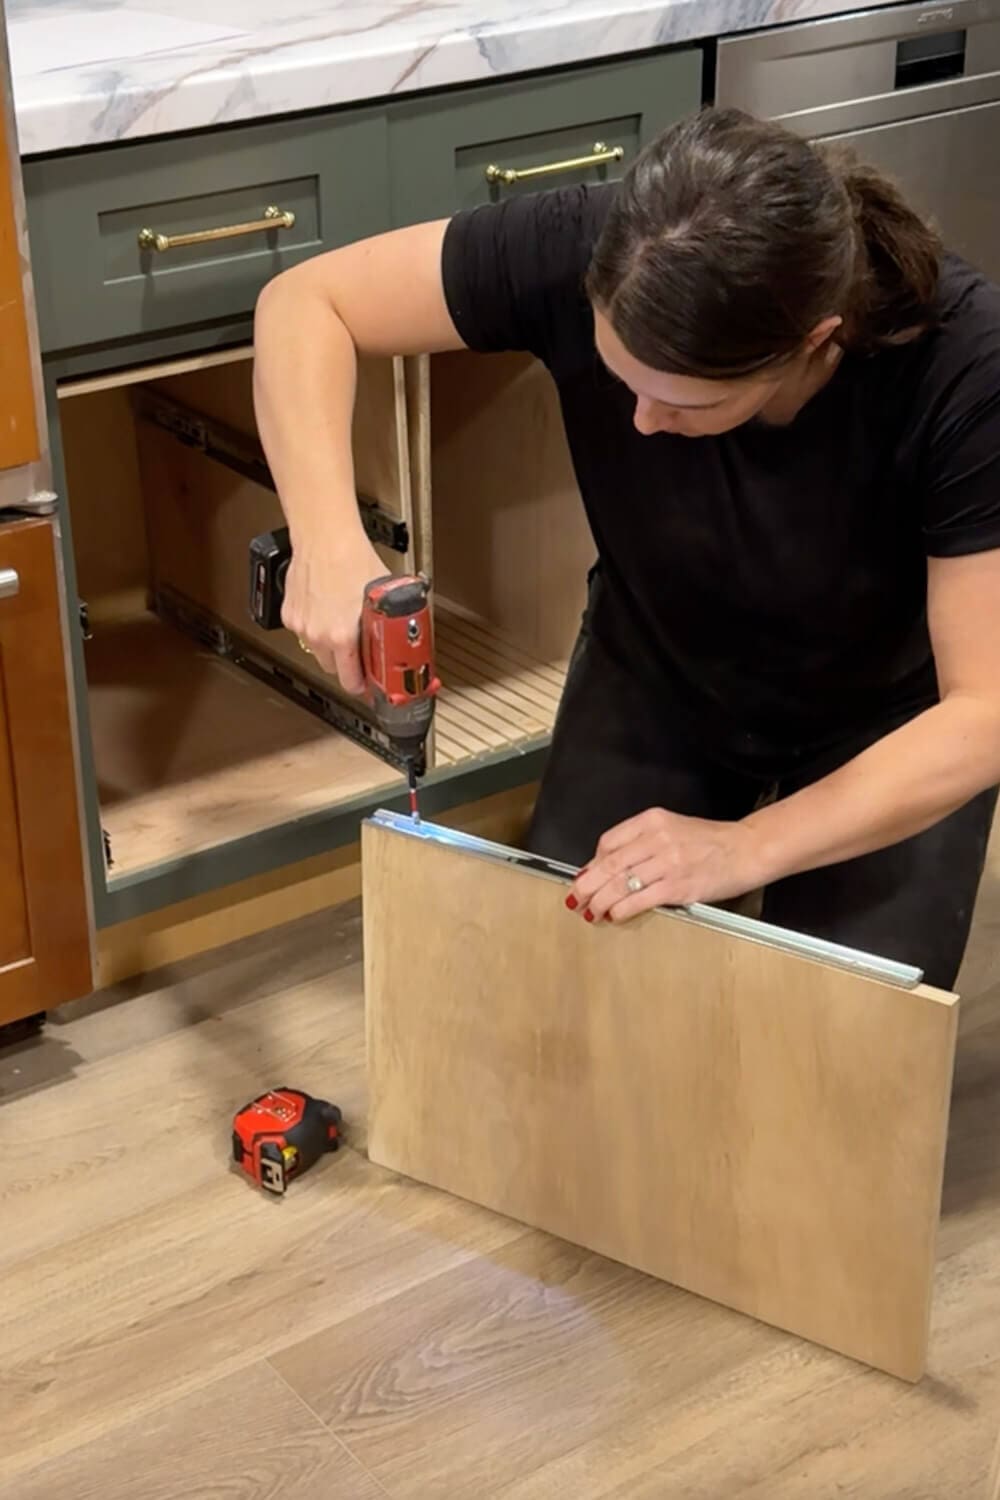
Step 3: Attach the Slides to the Side Panels
I laid the tall side pieces of plywood flat on the floor and used my drill to mount the cabinet half of each drawer slide. I lined the slides up with my marks, checked that both sides matched, and screwed them into place.
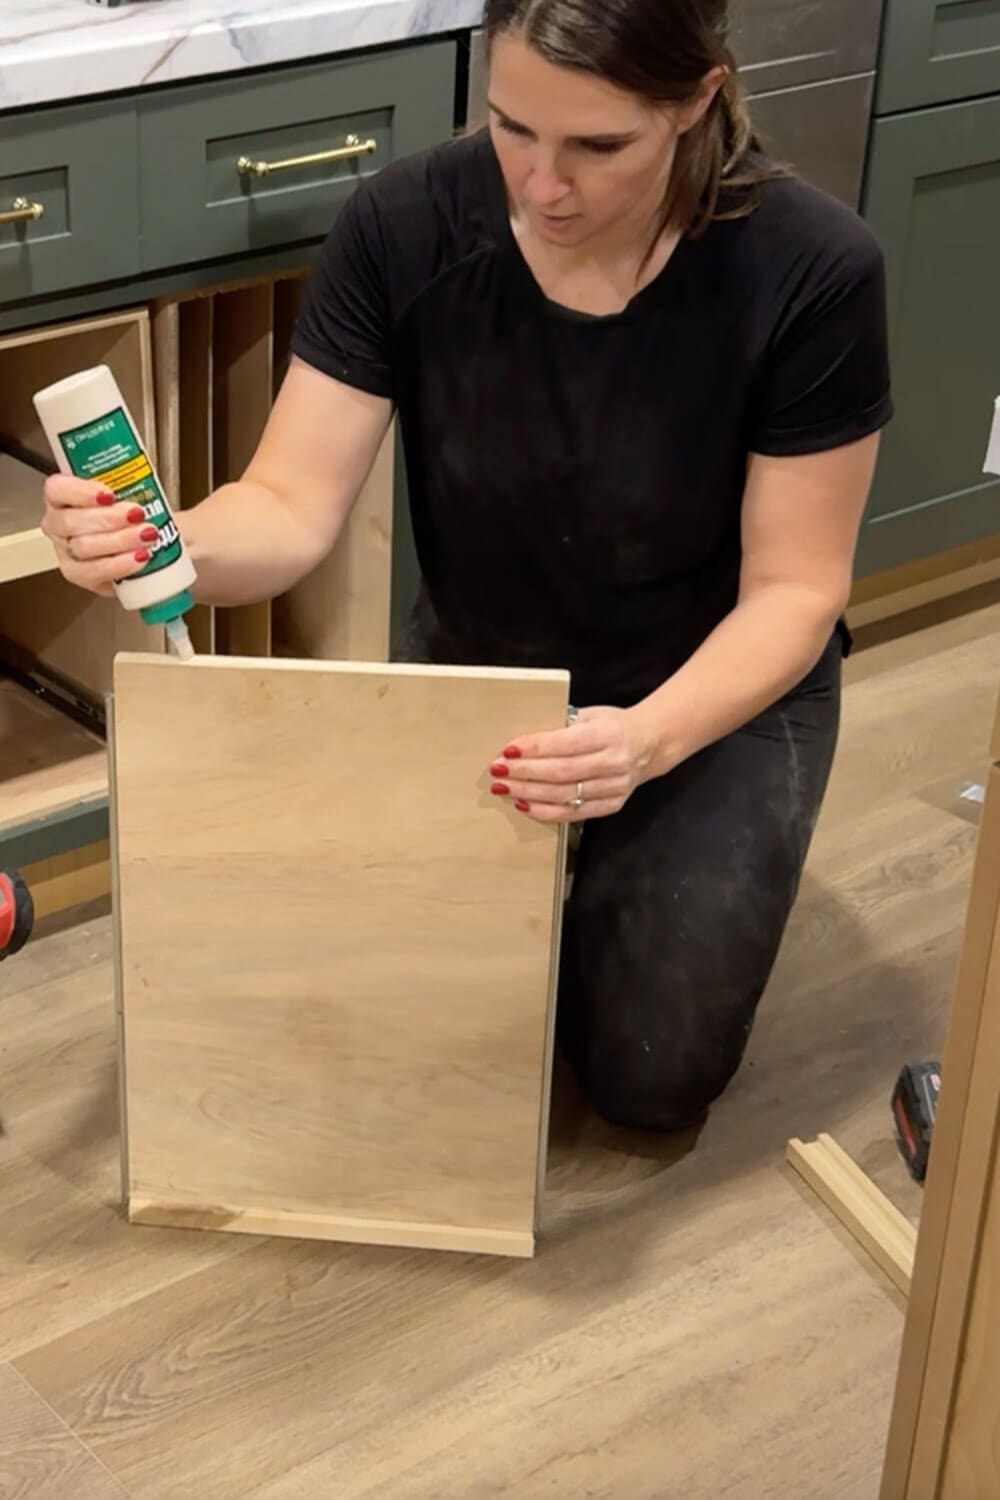
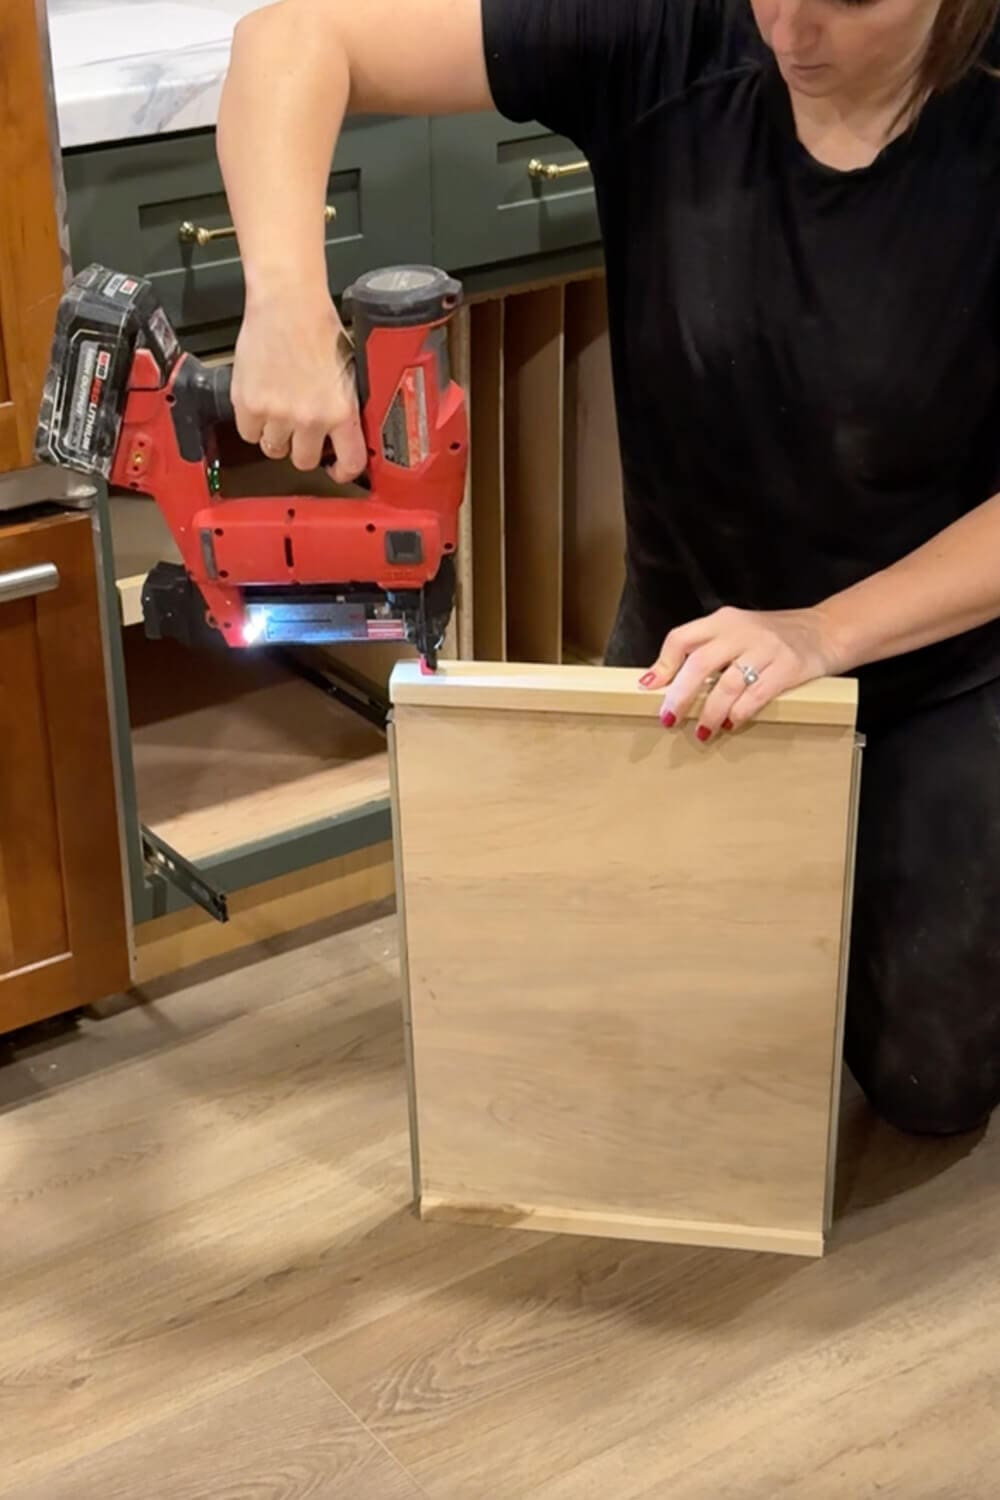
Step 4: Build the Tupperware Organizer Insert
Once the slides were attached, it was time to assemble the box. My go-to method for basic cabinet boxes is simple and strong:
- Wood glue anywhere two edges touch
- Brad nails to pin it together while the glue sets
- Screws to reinforce the joints long term
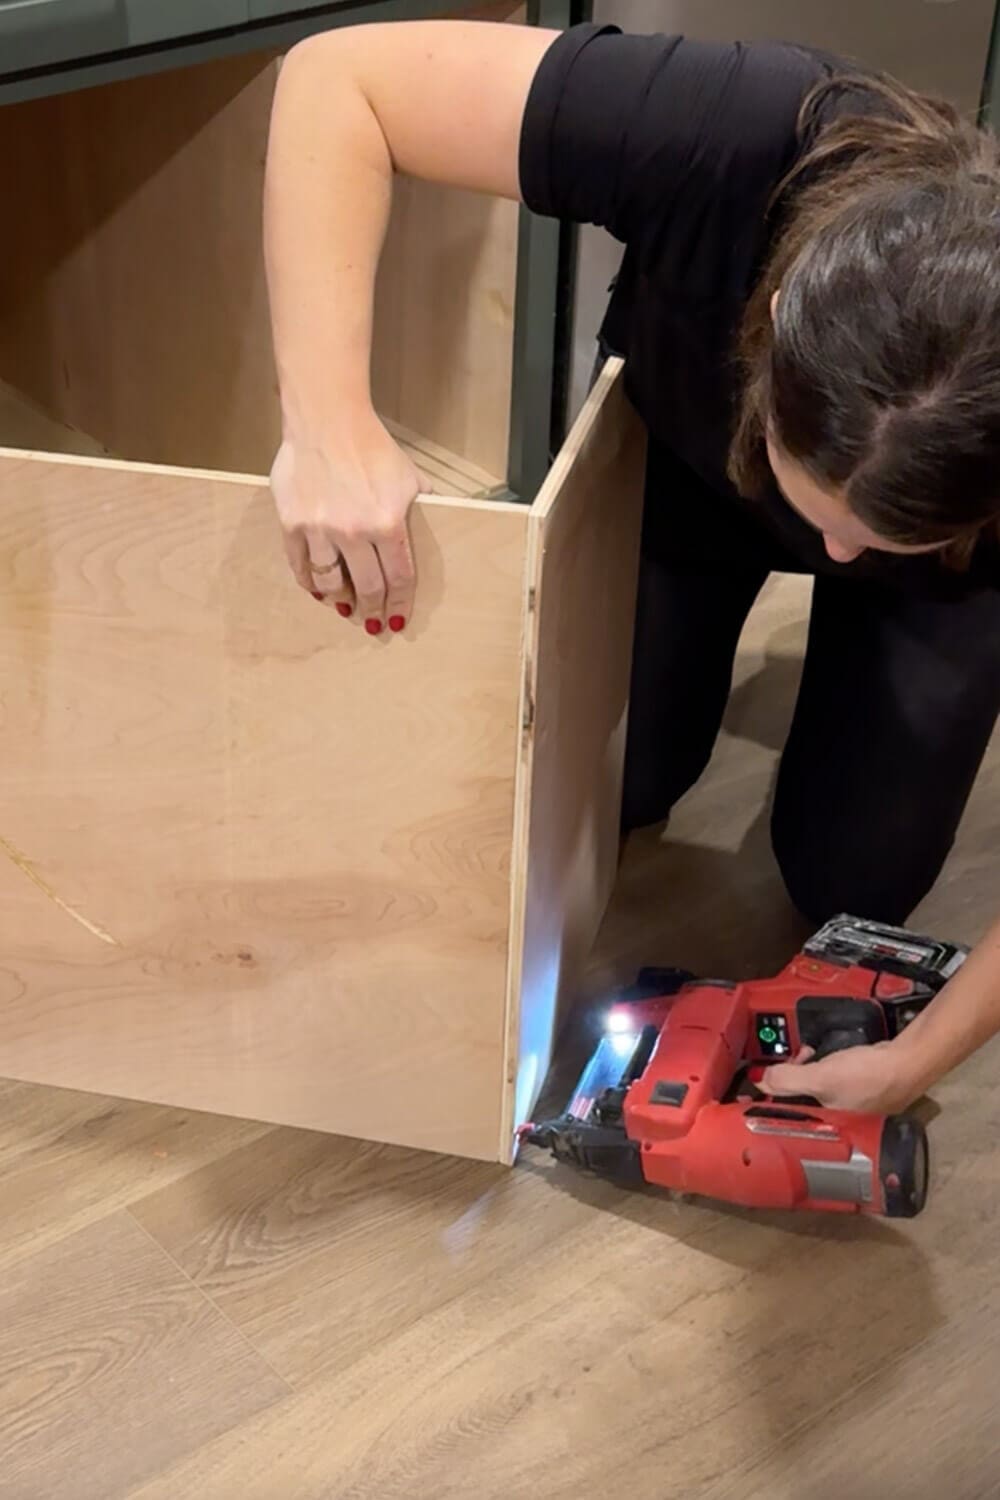
The brad nailer is perfect for this stage because it lets you hold pieces in place and tack them together one-handed. After the box is pinned together, I go back with screws for extra strength.
The real MVP is the wood glue. Once it has a chance to dry, the whole box feels solid and sturdy, which is exactly what you want when you are loading it up and organizing glass containers and Tupperware.
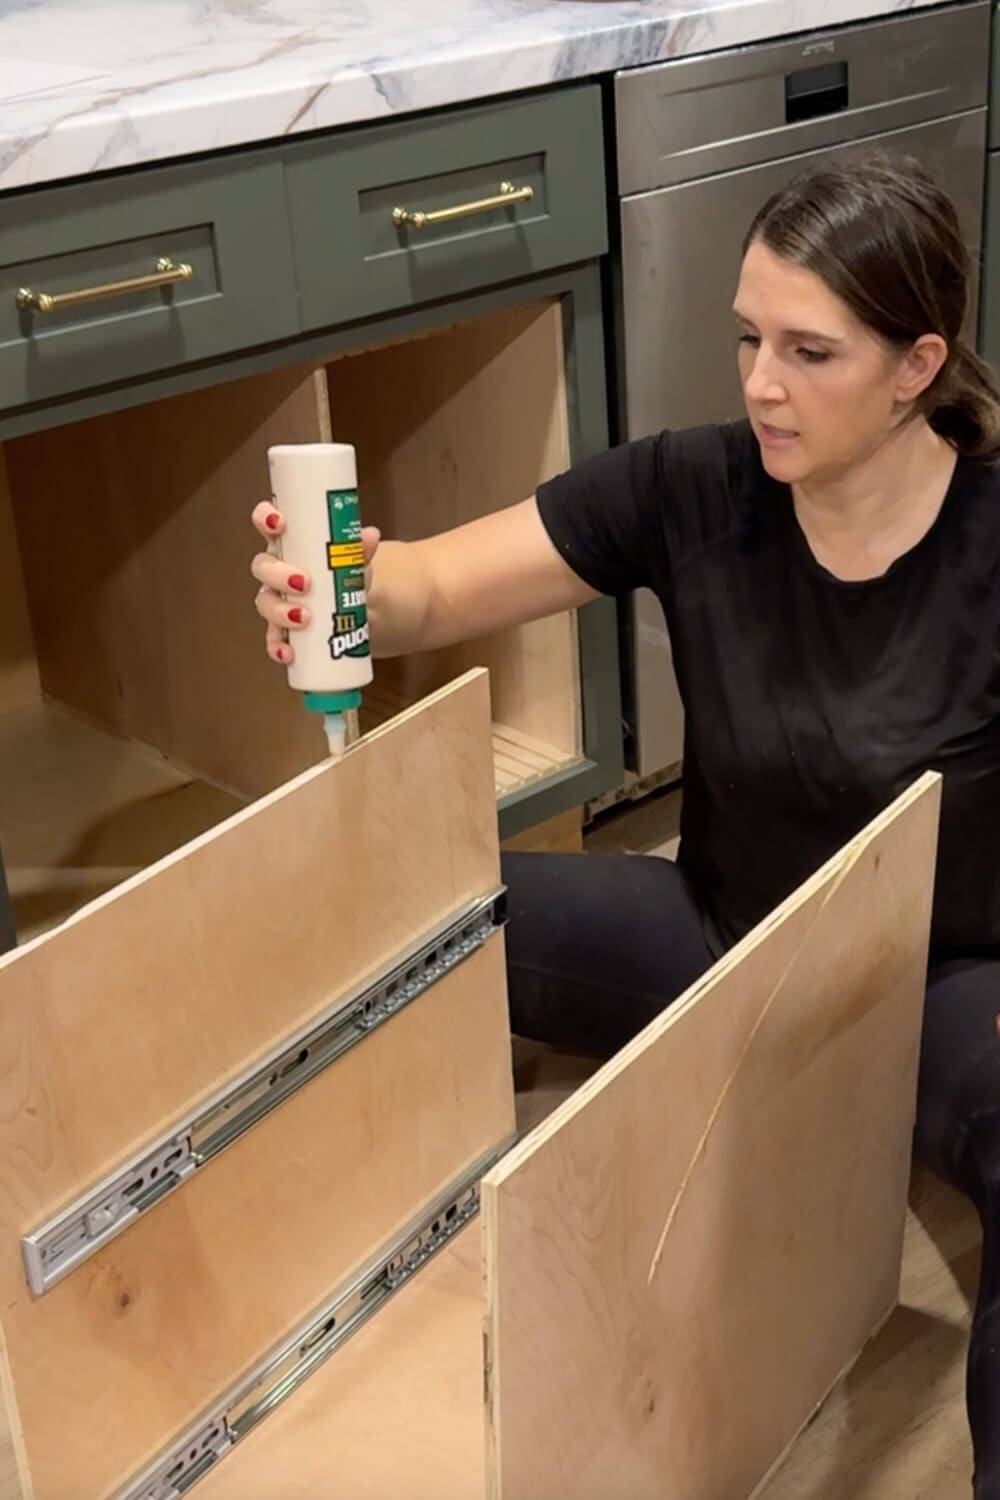
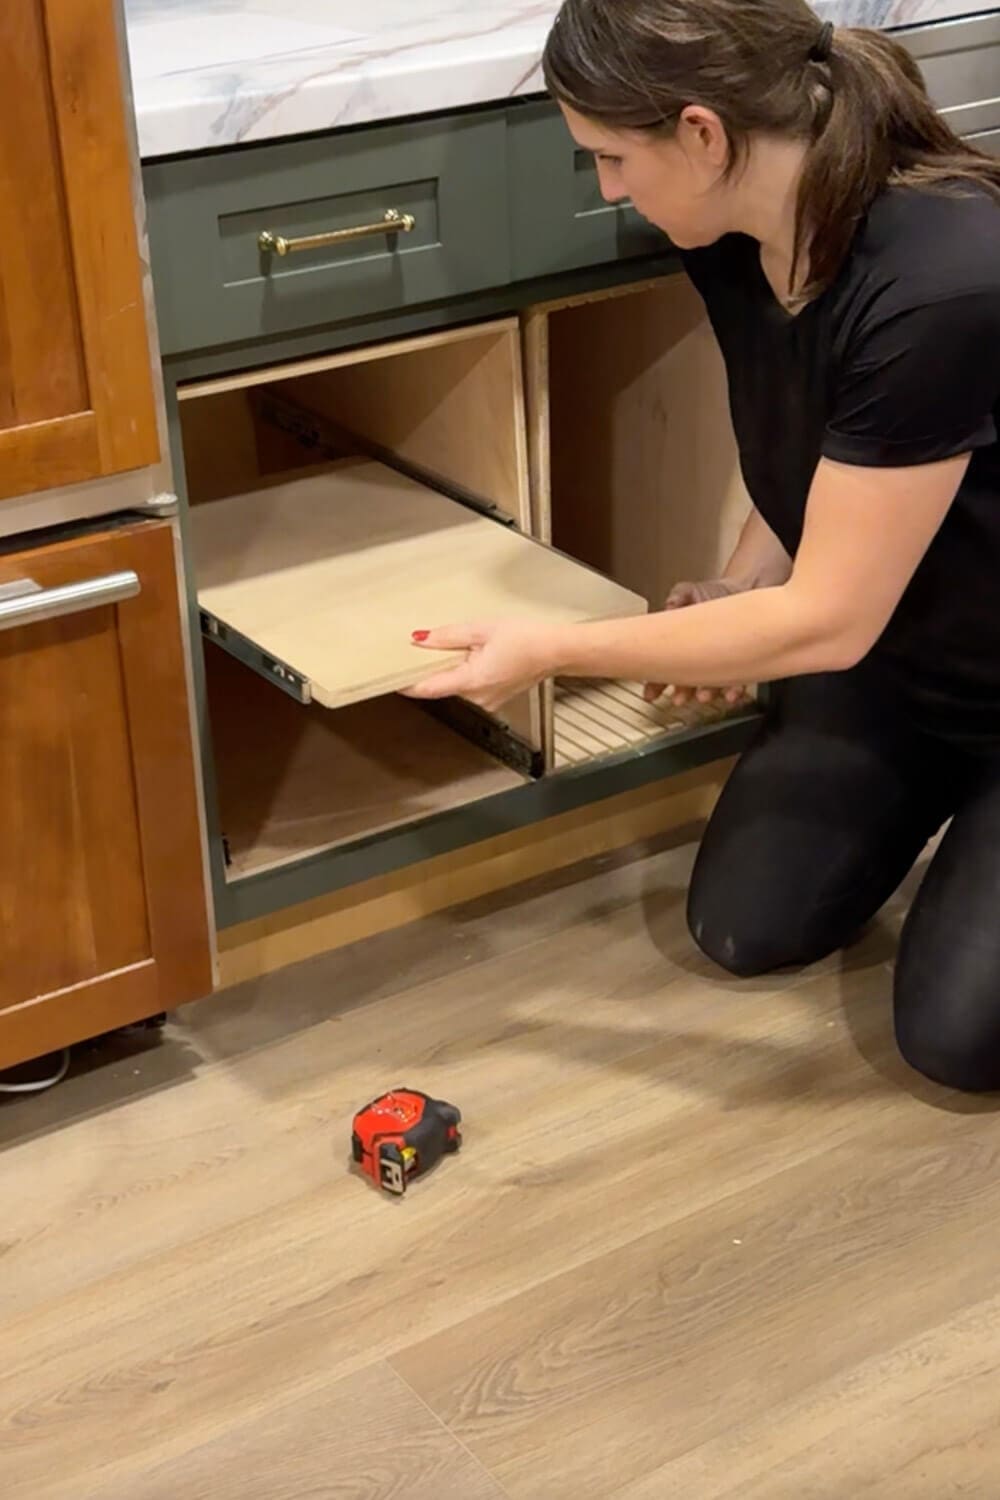
Step 5: Fit the Tupperware Organizer in the Cabinet
With the box assembled, I slid it into the cabinet next to the vertical cutting board insert. It fit nice and snug, so there was no need to attach it to the cabinet itself. If you want extra security, you can tie the two inserts together by running a couple of screws through each side where they meet, or even screw the insert into the cabinet box itself. It’s up to you.
Step 6: Build Simple Pull-Out Shelves for Containers and Lids
For the shelves, I cut 3/4 inch plywood to fit the width and depth of the box. These are simple flat pull-out trays. I attached the other half of the drawer slides to the sides of each plywood shelf so they could ride on the slides already mounted inside the box.
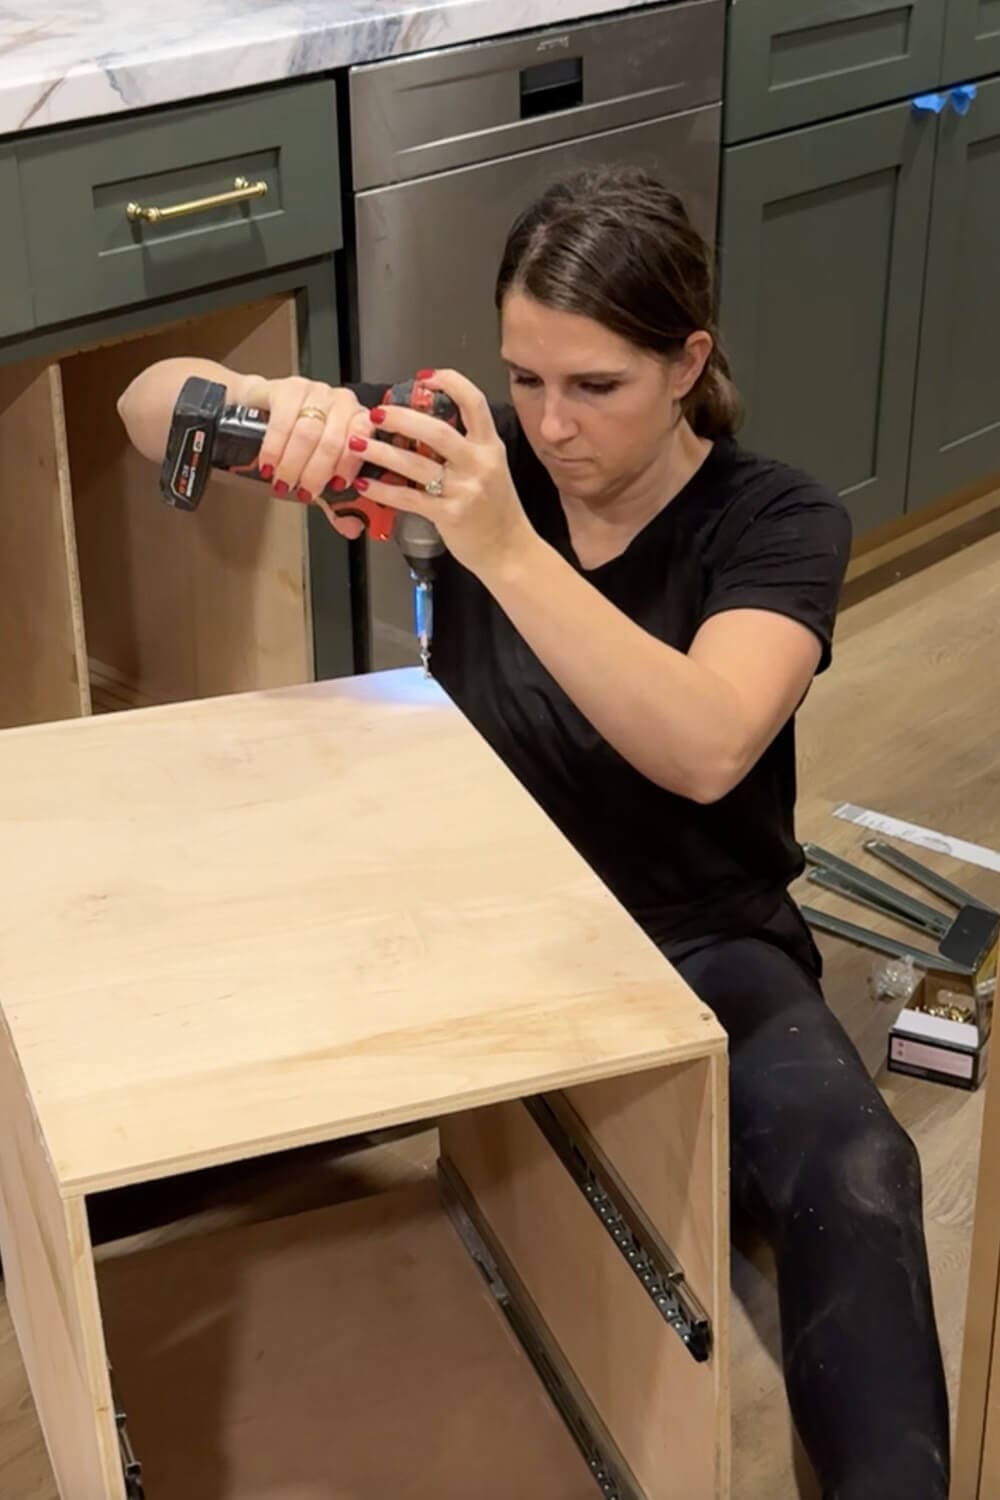
Step 7: Adding Rails for Function and Grip
To finish each shelf, I added a small rail to the front and back. They do two important jobs: keeping things from sliding off the front or back, and the front rail creates a comfortable lip to grab onto.
You will see in the photos that I used my router to cut a groove along the back of a piece of 1×2, so the plywood shelf nests slightly inside it. You could attach a flat board to the front, but that joint would not be as strong. The groove helps lock the rail in place and keeps it from pivoting or popping off over time. A table saw is a good backup option for cutting out the groove if you don’t own a router.
It looks like a completely custom cabinet insert because it is, and the best part is that it was just a bit of plywood and an afternoon of work. Now we can get to organizing all my Tupperware-style food storage containers.
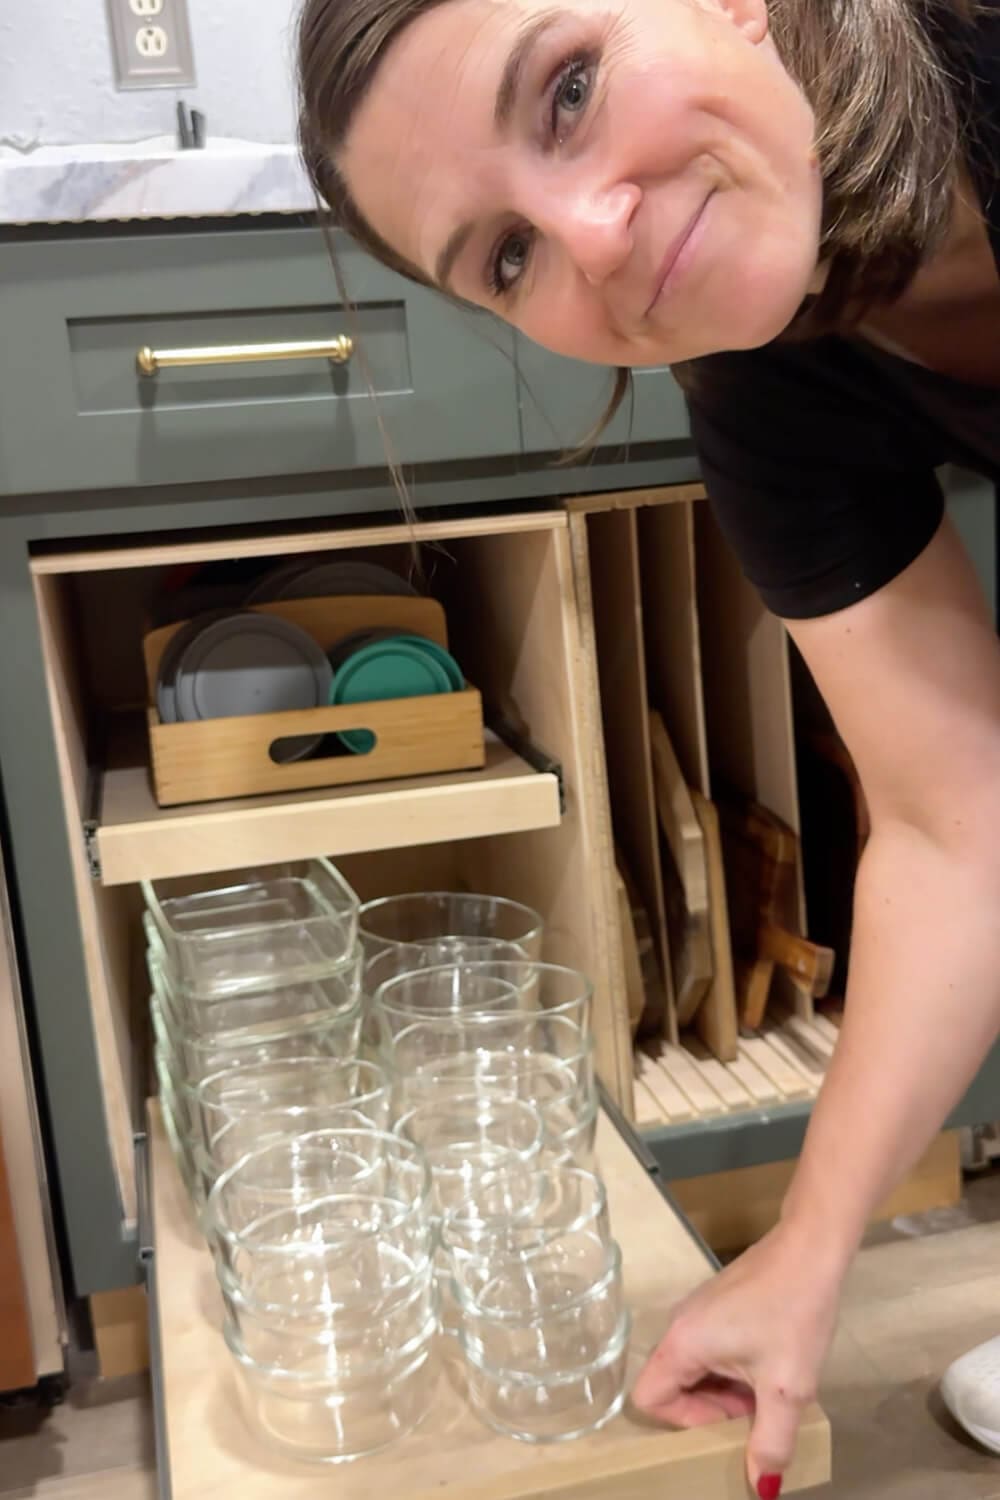
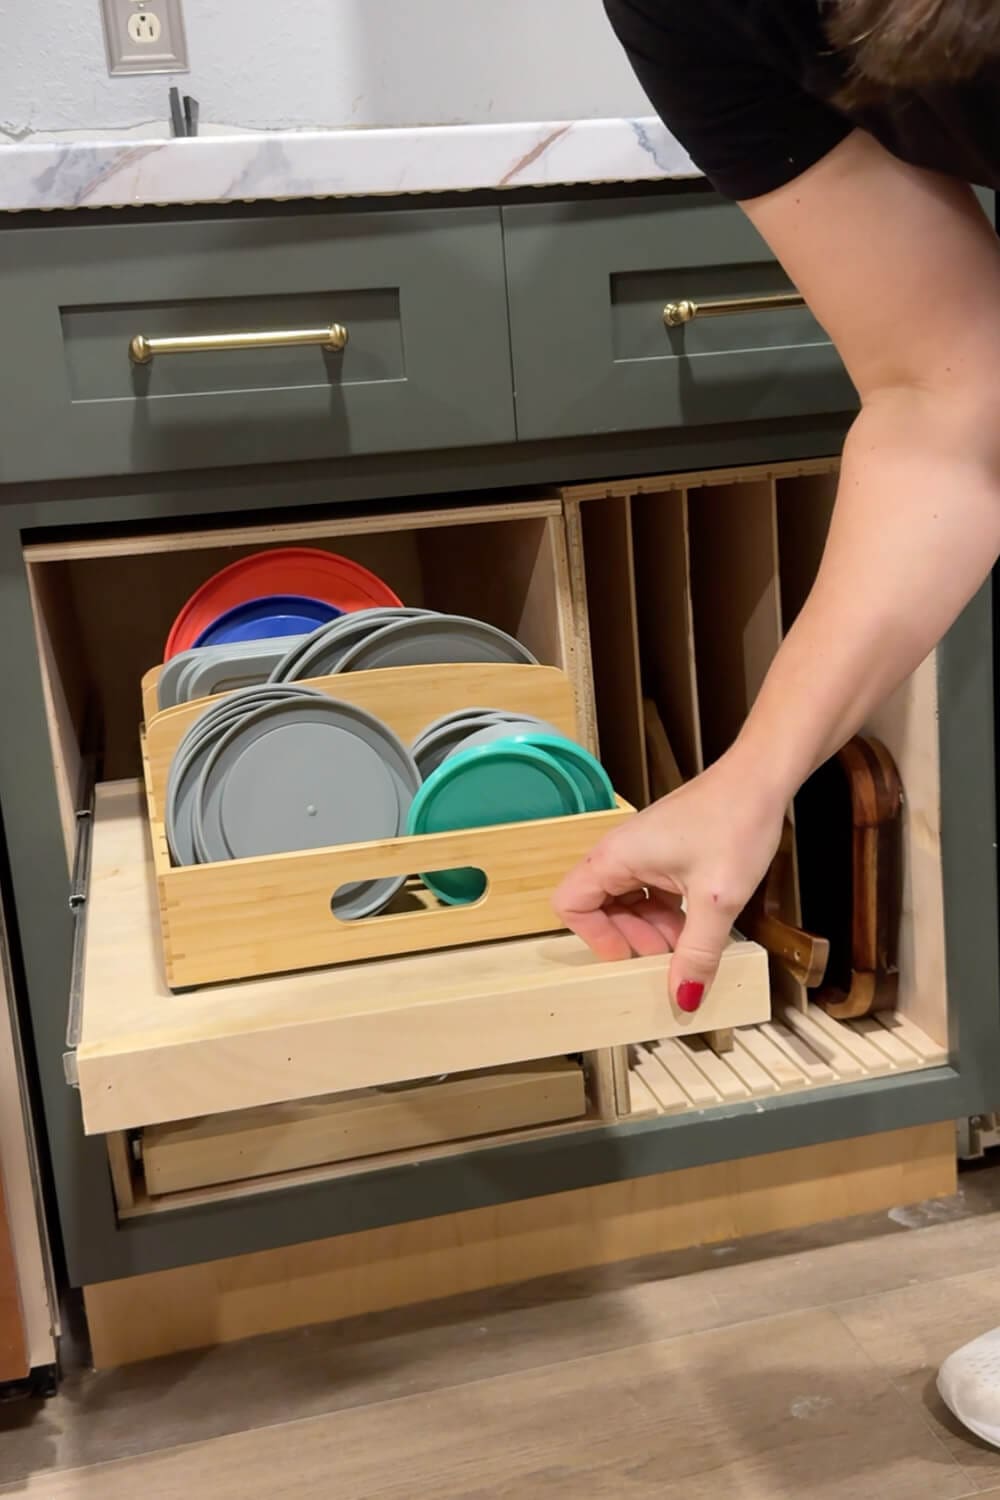
Step 8: Load Your Organized Tupperware Containers
These pull-out shelves are so strong, I loaded them up. The top shelf holds a bamboo box full of lids, sorted by size and color. The bottom shelf has neat stacks of all my glass food storage containers.
My Best Tip for Keeping Tupperware Organized
My number one tip for keeping your Tupperware containers organized is to commit to one kind of container.
When you have a random mix of sizes and brands, they do not stack well, and you end up with a pile of extra lids that do not fit anything. When you stick with one style, the containers nest, the lids match, and it is so much easier to keep everything tidy in a drawer or cabinet like this. If you’re in the market for a new set, I love this glass set! Way better than plastic in my opinion.
More DIY Kitchen Storage Projects
If you are on a mission to tame your cabinets, you might also like these projects:
- My vertical cutting board and sheet pan organizer in the same cabinet: DIY Cutting Board and Sheet Pan Organizer for Kitchen Cabinets
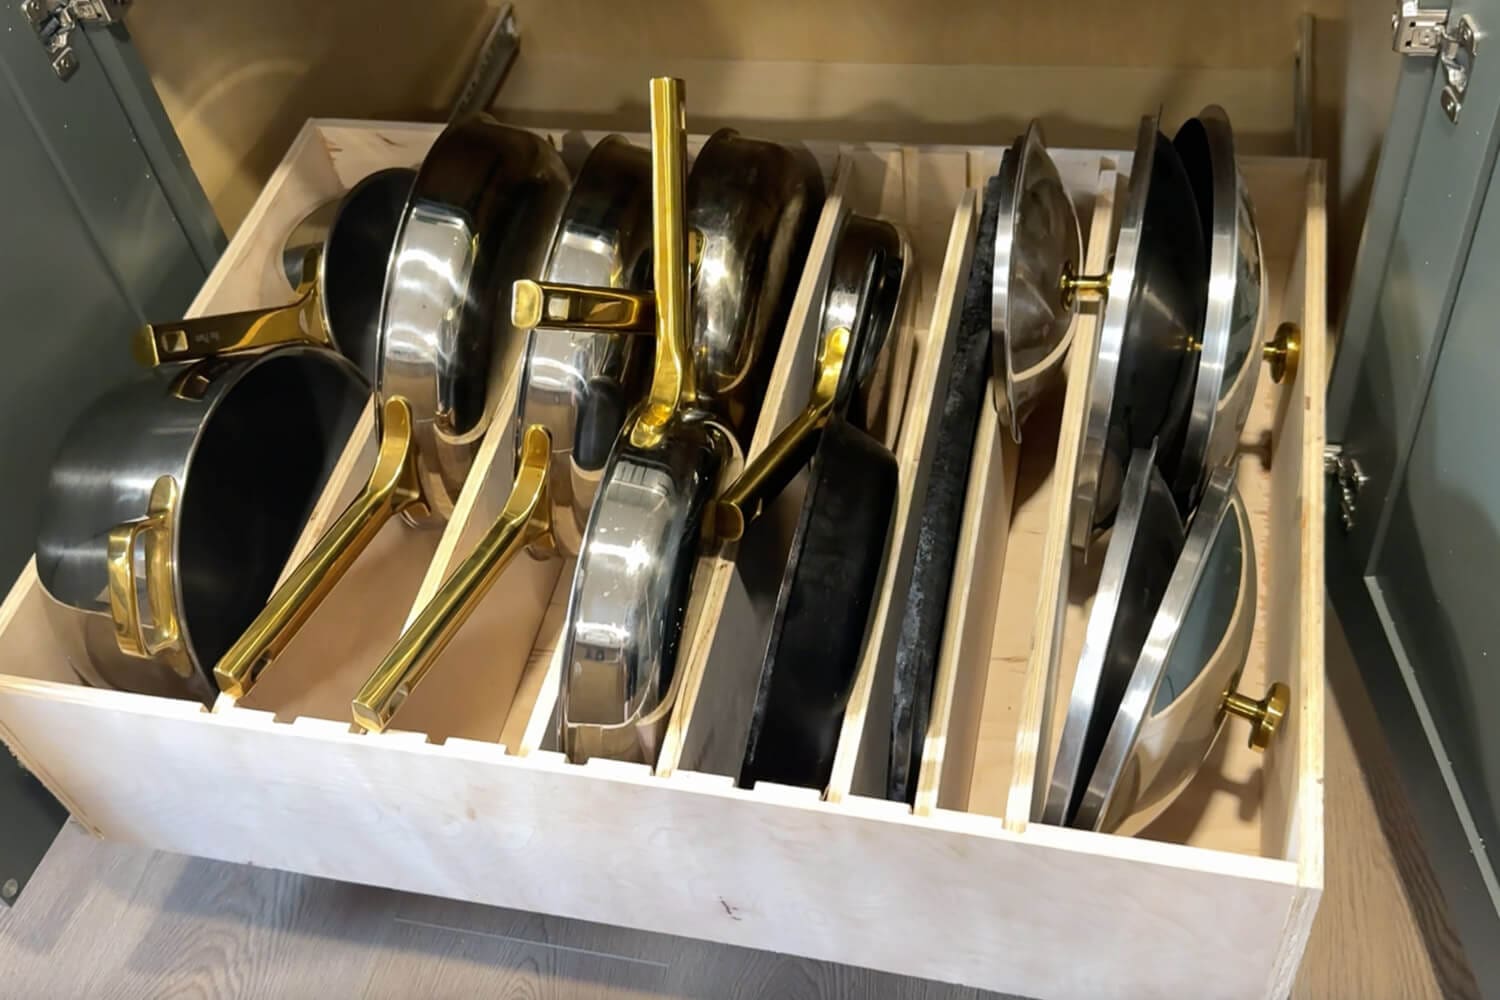
- The custom pot and pan storage drawer I built in another base cabinet: DIY Slide-Out Pots and Pans Storage for Cluttered Lower Cabinets
Little upgrades like this may not be as flashy as new backsplash tile, but they are the changes you feel every single day when you are cooking for your family.
📌 Save this Tupperware Organization Idea for Later
If you want to remember how to organize Tupperware and food storage containers without the lid avalanche, make sure you save this project to your Pinterest boards. Pin it to:
- Kitchen organization ideas
- Small kitchen storage
- DIY cabinet projects
- Fixer upper kitchen remodel
That way, when you’re ready to tackle your own “Tupperware cabinet,” you will have all the steps handy.
FAQ: How to Organize Tupperware and Food Storage Containers
The best way to organize Tupperware and food storage containers is to give them a dedicated spot with clear zones for lids and containers. Pull out shelves or drawers work really well because you can see everything at once instead of digging in the back of a deep cabinet.
Keep all the lids together on a shallow pull-out shelf or in a bin like this one so they cannot wander. I like using a small box or bin on the top pull-out, sorted by size, so every lid has a home and does not disappear into the back of the cabinet.
For a small kitchen, it is usually better to nest the containers inside each other and store the lids separately. This saves a ton of space and works really well with a pull-out drawer system where one shelf holds containers and another shelf holds lids.
Yes, this DIY drawer organizer works for glass and plastic containers. You can adjust the shelf spacing and bin size for lids, but the basic system of a lower pull out for containers and an upper pull out for lids works with any style.
