

Published February 3, 2026
If you’ve ever googled how to build an igloo and thought, “That’s adorable… but also not happening,” let me introduce you to my husband on a rare stretch of time off that lined up perfectly with a big snowstorm. He grew up in the desert and has always wanted to build an igloo, so when winter basically delivered a giant pile of snow to our front yard, he took it as a personal invitation.
It took a couple days, a lot of cold fingers, and a slightly unhinged amount of motivation, but it was 100% worth it. Our kids were obsessed, and I already know this is going to be one of those childhood memories they talk about forever. The kind of thing that makes you go, “Remember when Dad built an actual igloo?” and everyone just nods like that was totally normal.
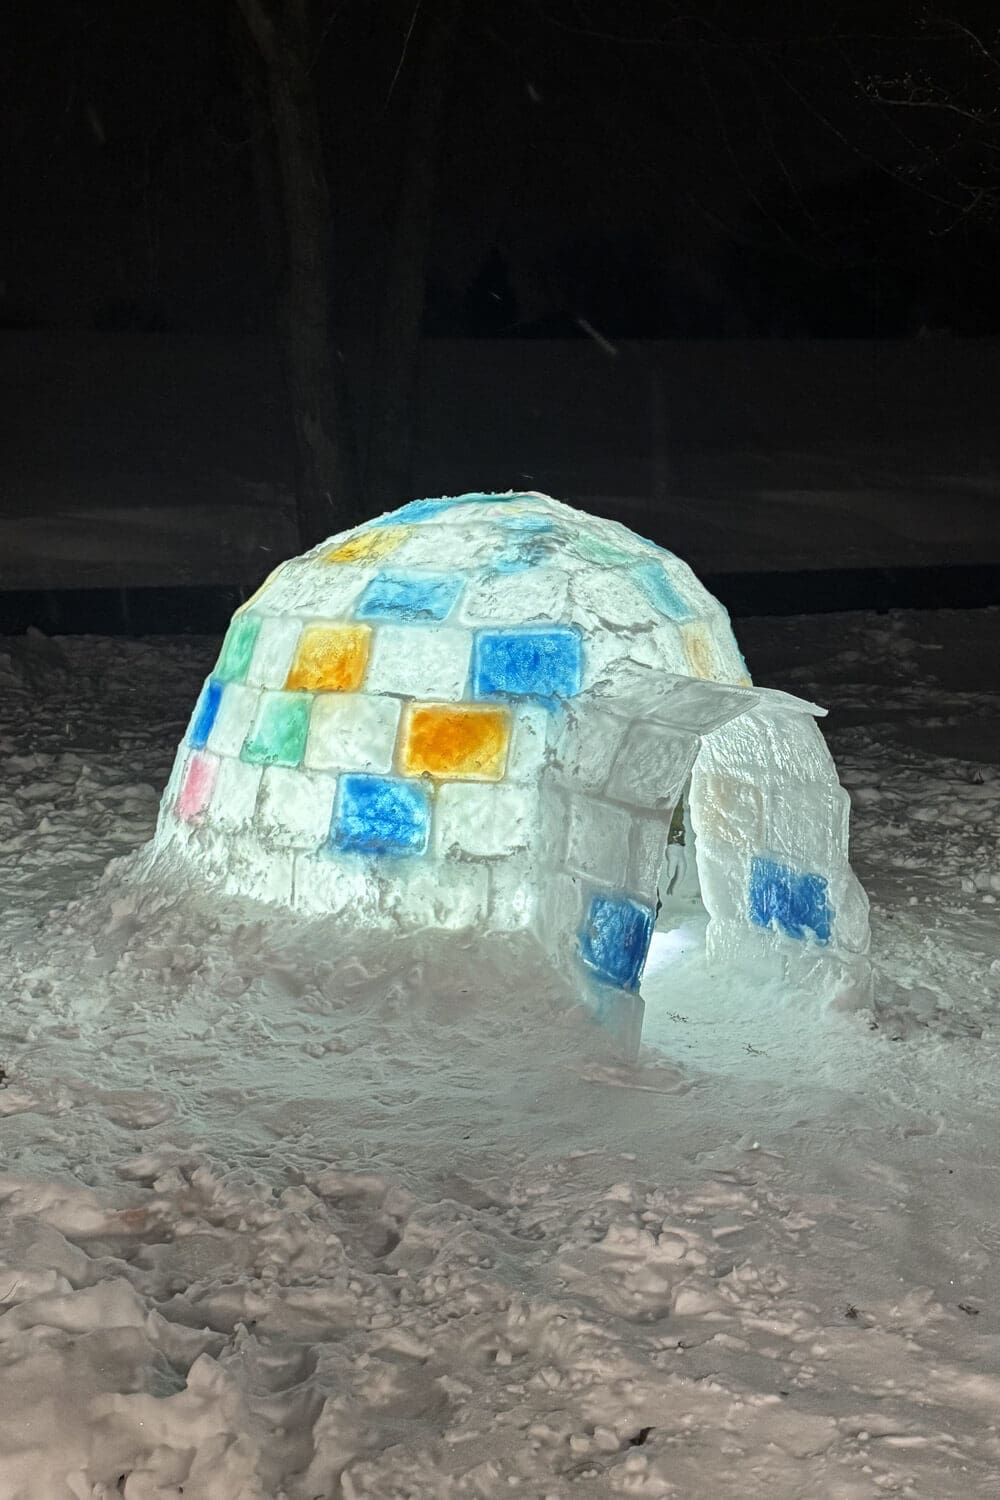
Table of Contents
- What You’ll Need to Build an Igloo
- Step 1: Make Your Ice Blocks
- Step 2: Prep the Spot for Your Igloo Base
- Step 3: Stack Your First Rows Like Brick
- Mixing Slush to Glue Ice Blocks Together
- How to Use Slush Mortar When Building an Igloo
- Day 1 Progress: 3 am Quitting Time
- Day 2: This Igloo is Coming Along
- How to Build the Igloo Ceiling
- The Big Finish: Our DIY Igloo
- More Family Fun We’ve DIY’d
- 📌 Save This for Later: How to Build an Igloo
- FAQ: How to Build an Igloo
What You’ll Need to Build an Igloo
Before you start stacking anything, grab a few basic supplies. Nothing fancy, just the stuff that makes the ice blocks and “snow mortar” part actually work (and keeps your hands from turning into frozen meat sticks).
- Two 5-gallon buckets (one for snow, one for water)
- Bowl (for mixing slush mortar)
- Small shovel or garden trowel
- Foil pans (for freezing ice blocks)
- Food coloring (optional, but so fun)
- Snow gloves
- Nitrile gloves (nice for slush work)
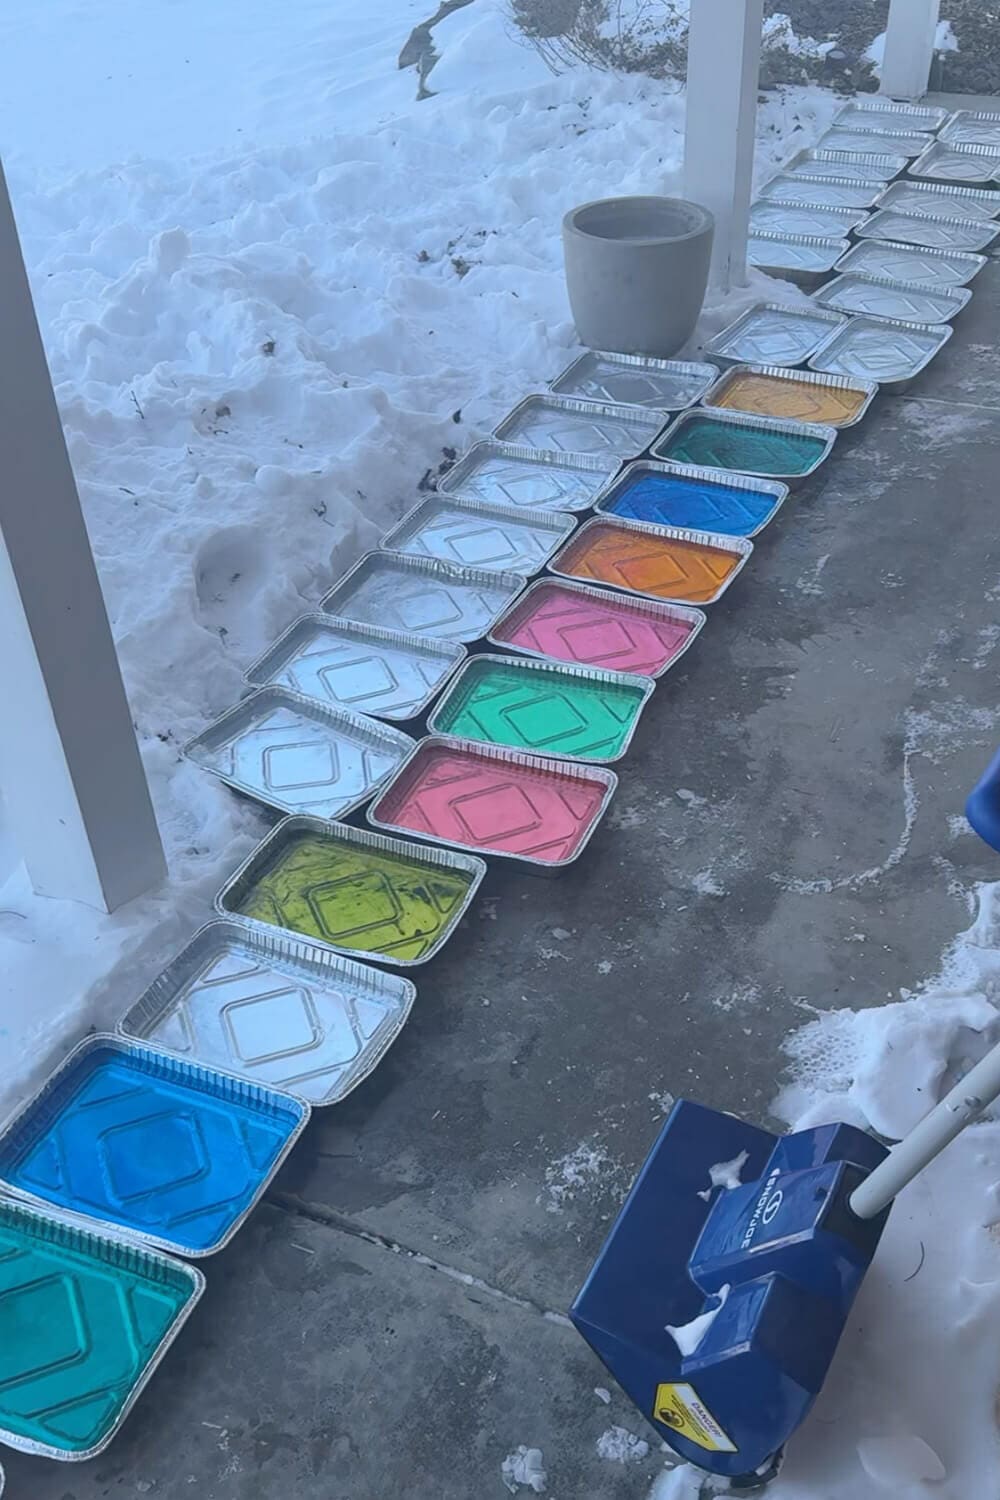
Step 1: Make Your Ice Blocks
You can’t build an igloo without ice blocks. You can make actual blocks of ice, but we used foil pans to create more of a thick ice sheet instead. They freeze way faster, and they’re much easier to stack and work with as you go.
- Set your foil pans outside somewhere flat.
- Fill the pans about halfway with water for the first several layers.
- If you want colorful blocks, add a few drops of food coloring to some pans.
- As you get closer to the top and start thinking about the ceiling pieces, fill the pans with a little over an inch of water instead. Those thinner blocks are lighter and way easier to hold up when you’re building the upper rows.
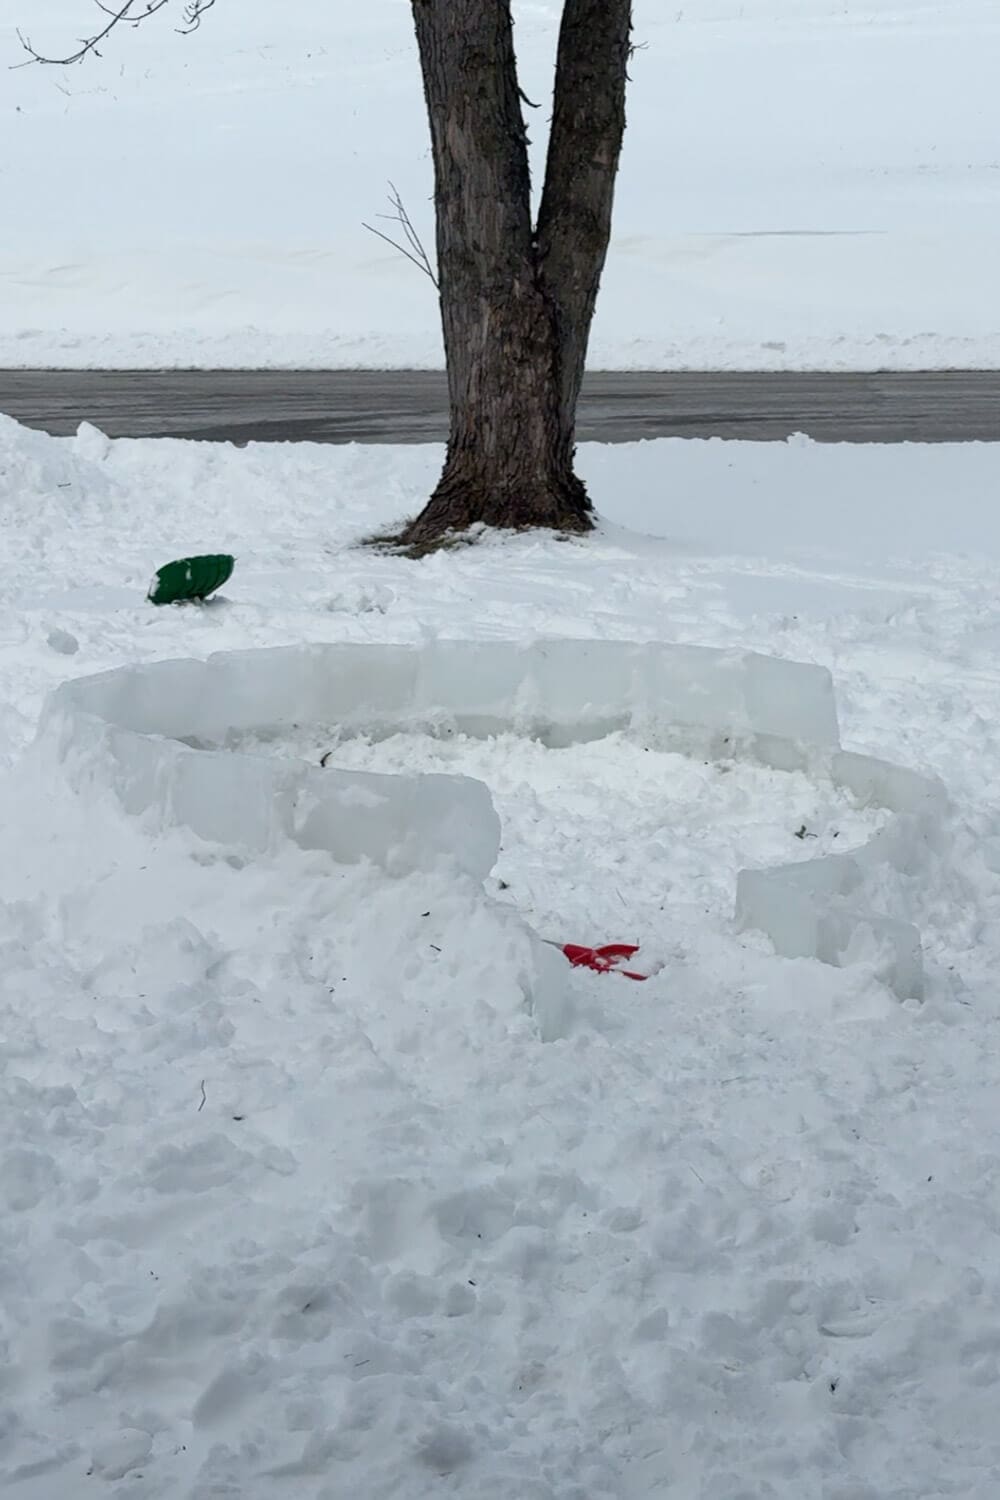
Step 2: Prep the Spot for Your Igloo Base
If you want this to work, the weather has to cooperate. To build an igloo, the outside temp really should be 10° or less ideally. You can make it work up to maybe 20°. Anything higher, it’s just too warm.
- Find a relatively flat spot in your yard.
- Create a circle divot in the snow where your igloo base will go.
- Don’t clear away all the snow. Leaving some behind is helpful for packing around the first row of blocks so everything stays stable.
- Plan your entrance and leave an opening right from the beginning.
Step 3: Stack Your First Rows Like Brick
This is where it starts to look like something.
- Lay your first row of ice blocks around the circle you made, leaving the entrance gap.
- For the second row, stack the blocks off-center, like laying brick. You want the seams to be staggered instead of lining up.
- Keep going row by row, adjusting as needed so the walls stay strong
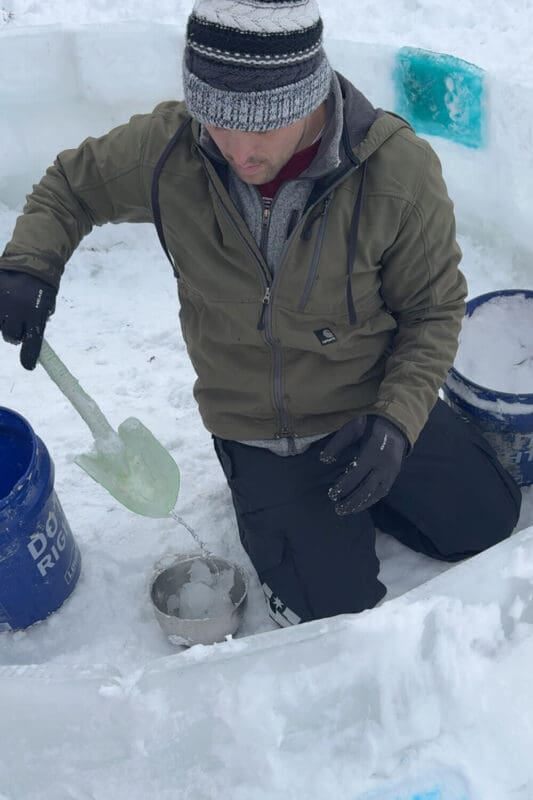
Mixing Slush to Glue Ice Blocks Together
Ice blocks alone will slide around, so you need your own version of mortar. Ours was slush, basically a mix of snow + water that freezes into place and locks the blocks together.
- Fill one 5-gallon bucket with water.
- Fill the other 5-gallon bucket with snow.
- Scoop water into your bowl, then add a couple scoops of snow.
- Mix it together until it’s spreadable.
- Too hard? Add a little more water.
- Too runny? Add more snow.
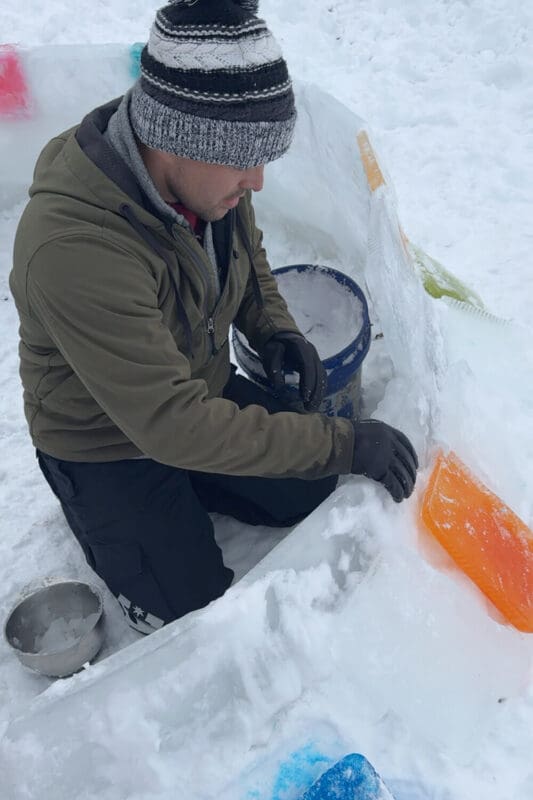
How to Use Slush Mortar When Building an Igloo
- Add slush to where your next block will sit.
- Add slush to the bottom and also the side where it touches the block next to it.
- Set the block in place.
- Pack slush into the seams on both the inside and outside of the igloo.
- Repeat over and over and over again.
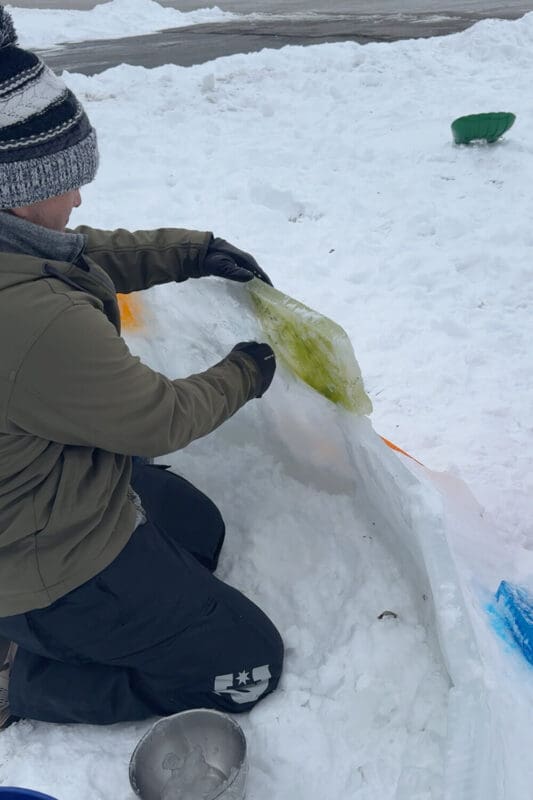
Biggest tip ever: protect your hands, because slush will make them cold and soaked fast. Even with snow gloves, my husband’s hands were getting wet. What worked best was nitrile gloves, then snow gloves, then another pair of disposable gloves over the top.
Day 1 Progress: 3 am Quitting Time
On Day 1 of building the igloo, my husband finally called it quits around 3 am. The ice sticks better when it’s colder, and there’s no sun warming things up. So if you can keep going after dark, your igloo building will go faster.
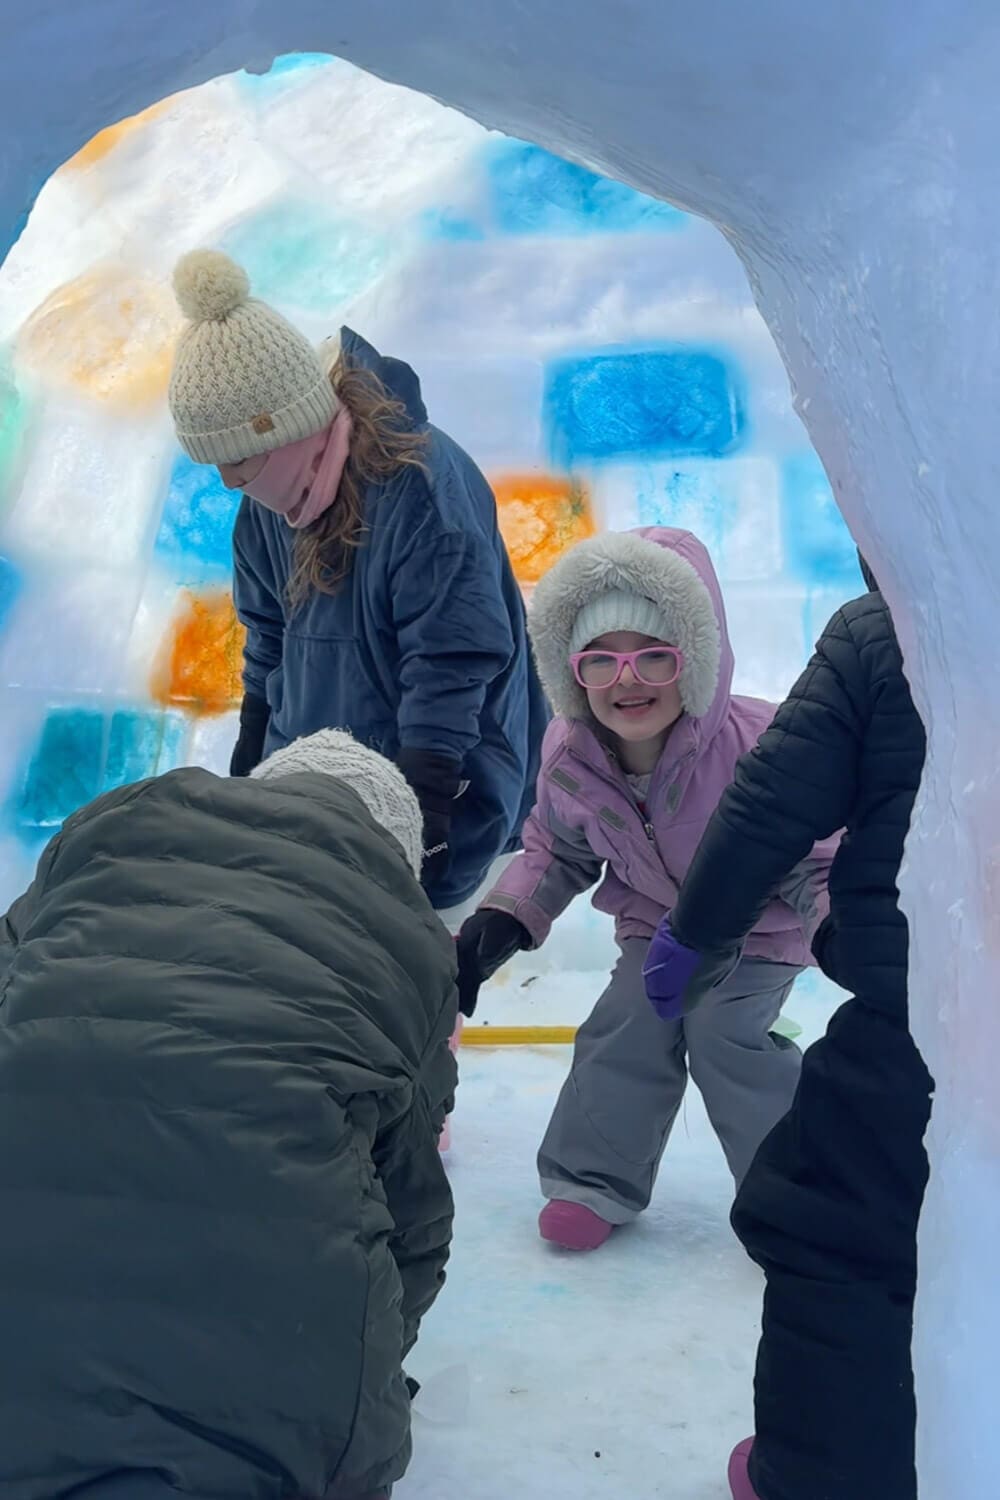
You can see how far he got on day one. The walls are up, the colored blocks are already giving it that stained-glass look, and the entrance is starting to take shape. It still looks like an ice-block fort at this point, but you can tell it’s officially becoming an igloo.
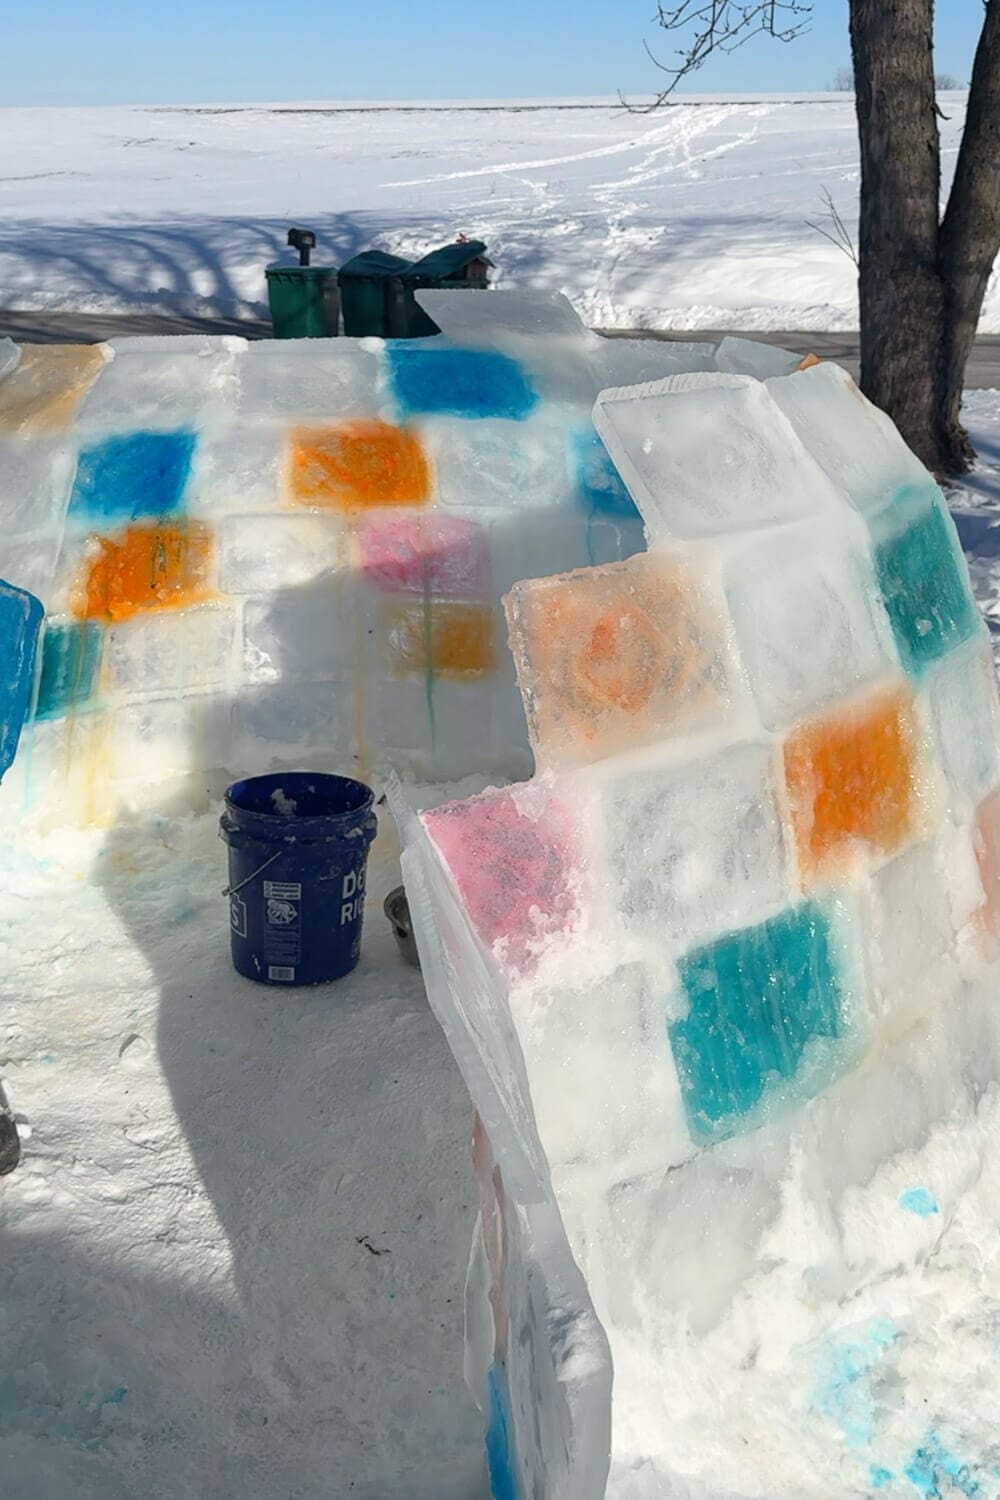
Day 2: This Igloo is Coming Along
Day two is when it starts to look like the real deal. A few things I want to point out to help you as you’re building your igloo.
- The first row ends up mostly buried in the snow, which is actually helpful because it adds stability.
- By the third row, the wall starts to slant inward a little.
- By the fourth row, it’s slanting in even more, and you can see that classic igloo shape forming.
- From there, every row continues to angle inward more and more until you’re basically building the ceiling.
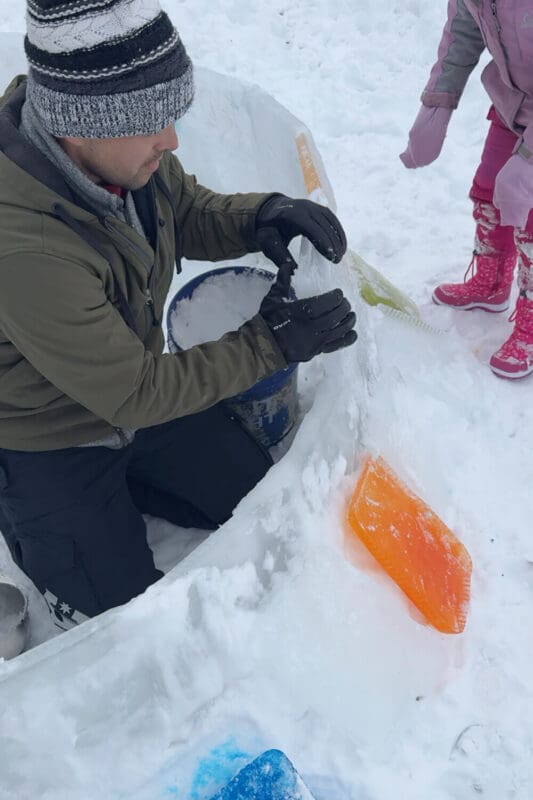
How to Build the Igloo Ceiling
When you’re building the ceiling, it helps a ton to use thinner ice blocks because they’re so much lighter. Just don’t go too thin. Cold weather also makes this part way easier. When it’s freezing out, the blocks basically stick in place almost immediately.
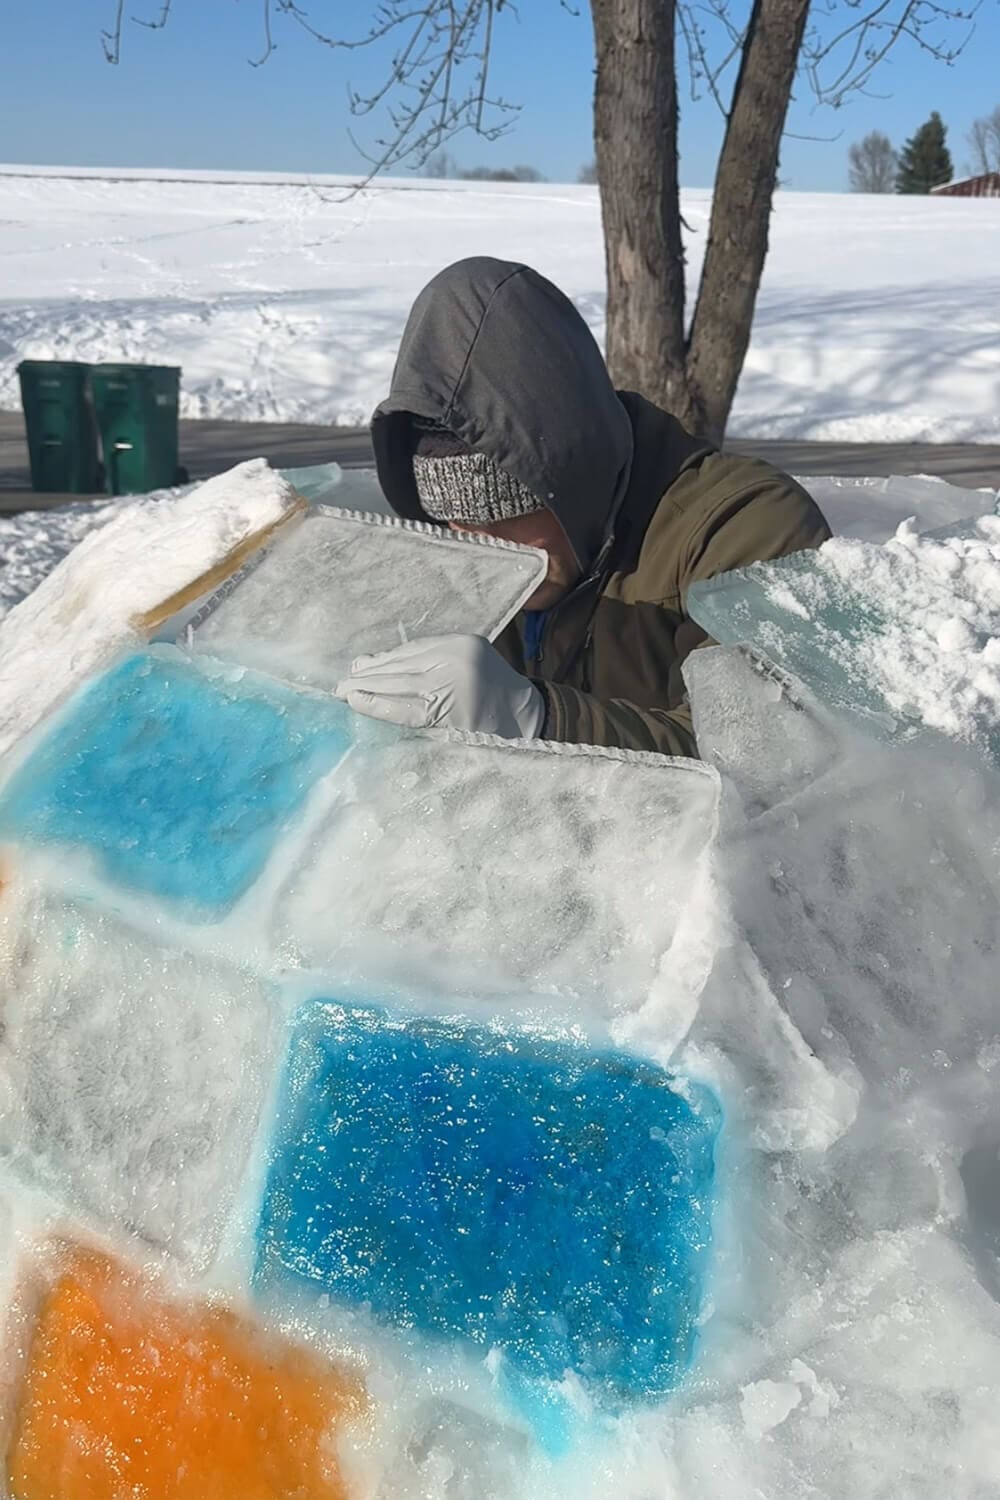
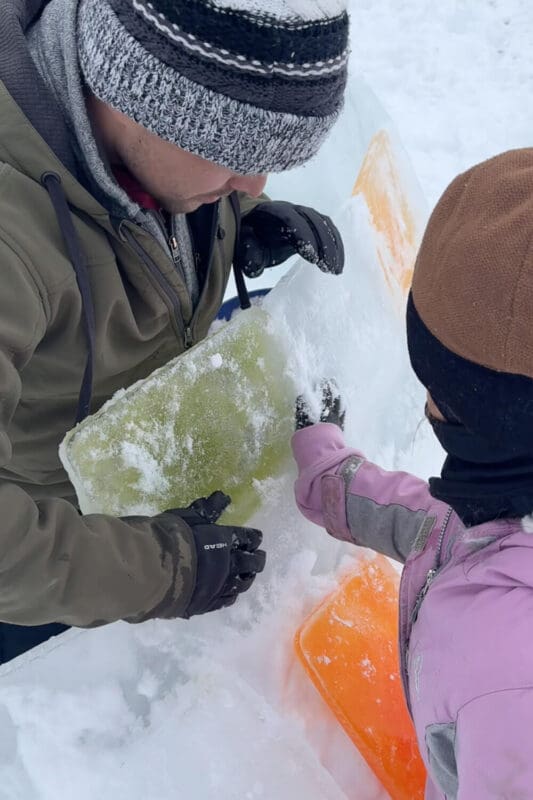
As you start slanting the walls inward, and especially around the entrance, you’ll probably run into gaps that are too big for slush but too small for a full block. No big deal. Just trim an ice block down to the size and shape you need. A hatchet, a hammer, or even a hand saw all work great for shaping pieces to fit those weird little holes.
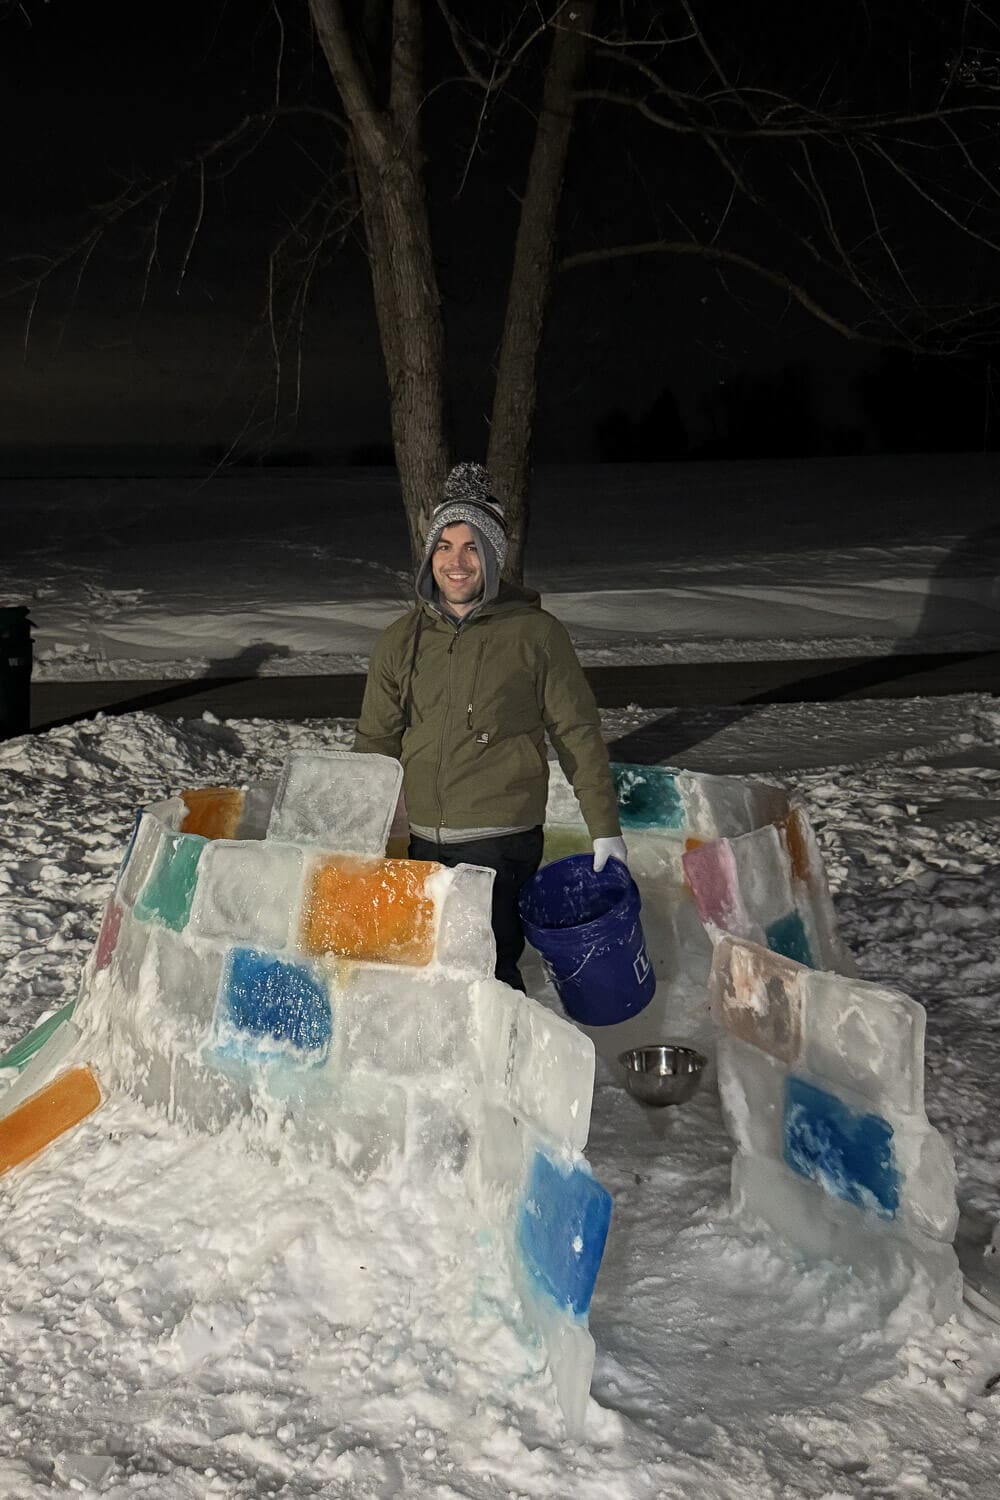
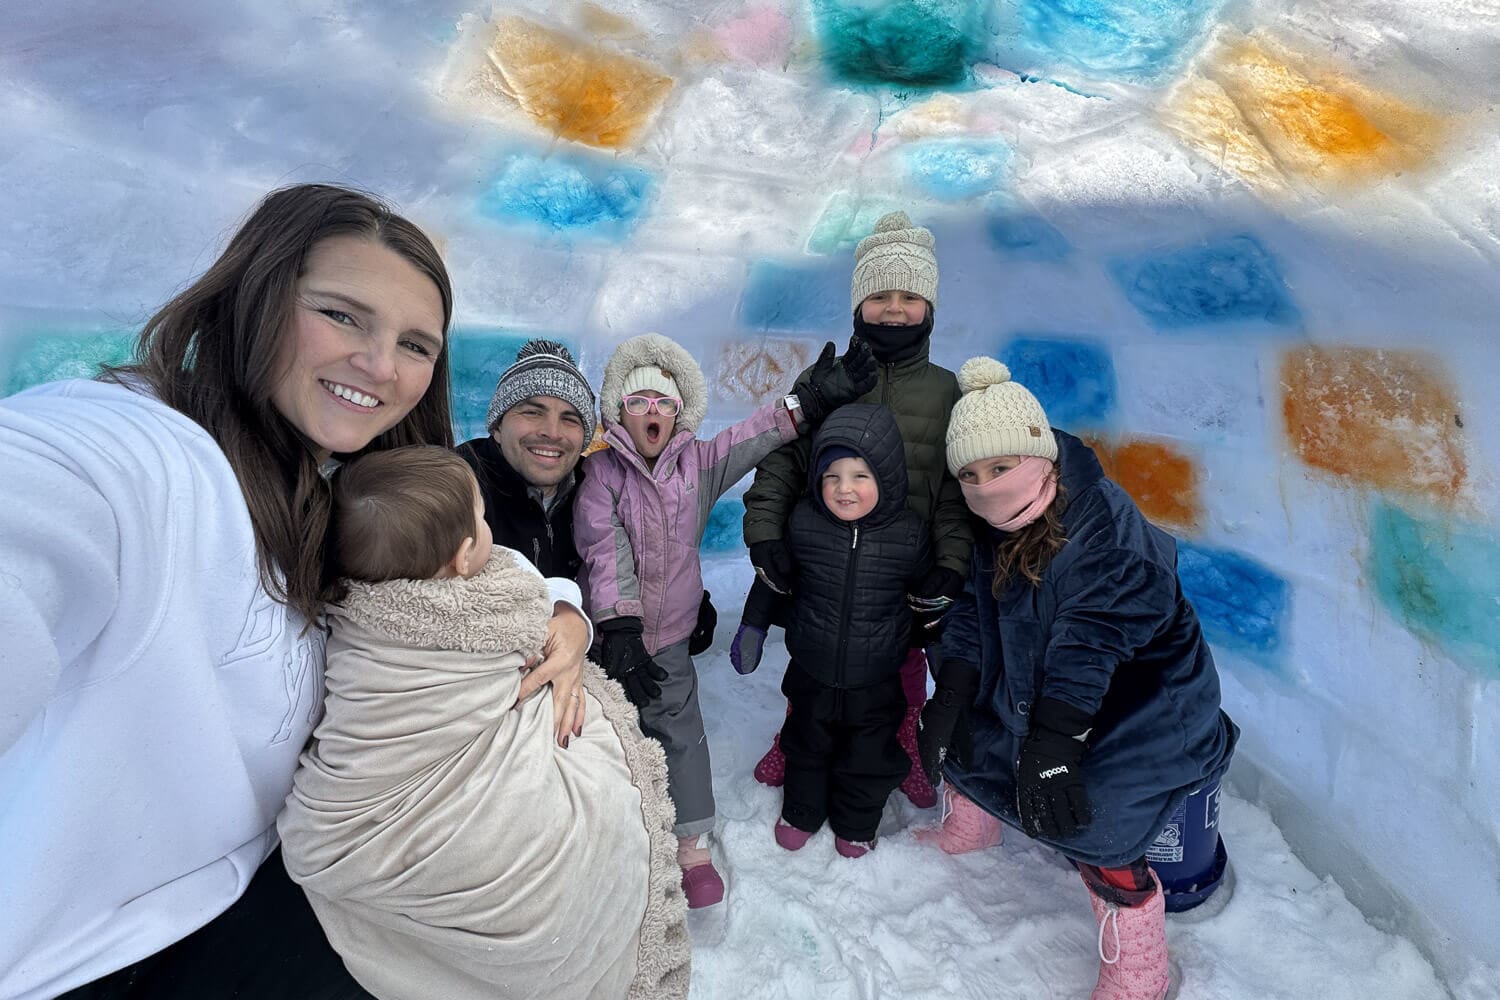
The Big Finish: Our DIY Igloo
And then… the igloo was done. It looked amazing, and the kids were obsessed.
This thing is huge, and I already know they’re going to ask for one every single winter from now on.
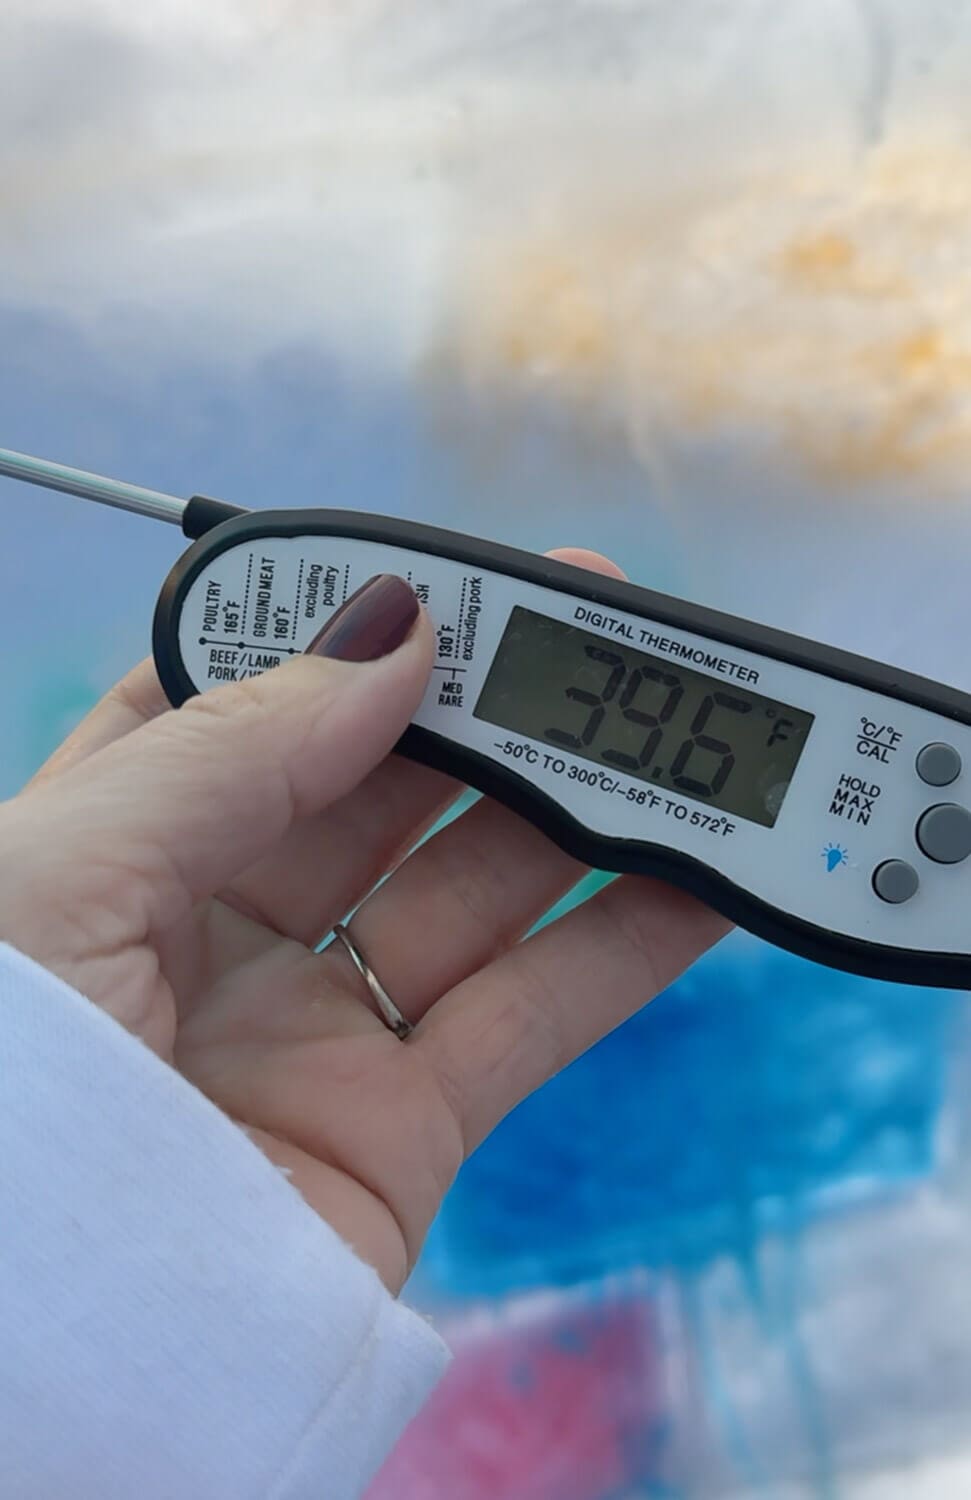
The wild part was how much warmer it felt inside. The outside temp was hovering around 19°F, but inside the igloo was about 20 degrees warmer.
Adding a light inside at night was the cherry on top. You could totally build one with clear ice only, but the colored blocks make it look unreal, and it only takes a few drops of food coloring to get that glow.
More Family Fun We’ve DIY’d
If your kids loved this igloo as much as mine did, you’ll want more ideas like it. 120+ Fun Out-Of-The-Box Family Tradition Ideas is packed with simple traditions that turn into those “remember when we did that?” childhood memories.
📌 Save This for Later: How to Build an Igloo
If you’re even thinking about tackling this, save this post now because once the next snowstorm hits, you’ll be out there freezing foil pans and pretending you’re “just checking on something” while you secretly build an igloo.
FAQ: How to Build an Igloo
Ideally, around 10°F or colder, but you can make it work up to about 20°F. The colder it is, the faster the ice blocks and slush “mortar” freeze into place, which makes stacking way easier.
Plan for a couple days. You have to freeze blocks, stack layers, and give yourself time to work with the weather.
We used slush mortar, which is just snow + water mixed to a spreadable consistency. You smear it between blocks and pack it into seams on the inside and outside so it freezes solid.
Yes. When ours was finished, it felt about 20°F warmer inside than the outside temperature.
Layer up. The slush will soak gloves fast, so we did nitrile gloves, snow gloves, then another pair of nitrile gloves over the top to keep hands warmer and drier.

This is so incredibly cool! I live in a part of New Zealand that never ever gets snow & the snow you’ve been getting is fascinating. Probably really frustrating for you guys especially not having heat. The core memories you are building for your kids are amazing & they will never forget things like this
Awe thank you! I think Stuart had a blast living out a dream he’s had since a child. It was a fun project!