DIY Faux Marble Countertops with Contact Paper (Step-by-Step)


Updated November 22, 2025
As part of our DIY kitchen remodel, I transformed plain plywood into stunning DIY faux marble countertops using marble contact paper – and you can too. This renter-friendly, budget-conscious project is easier than it looks, and the results are seriously gorgeous.
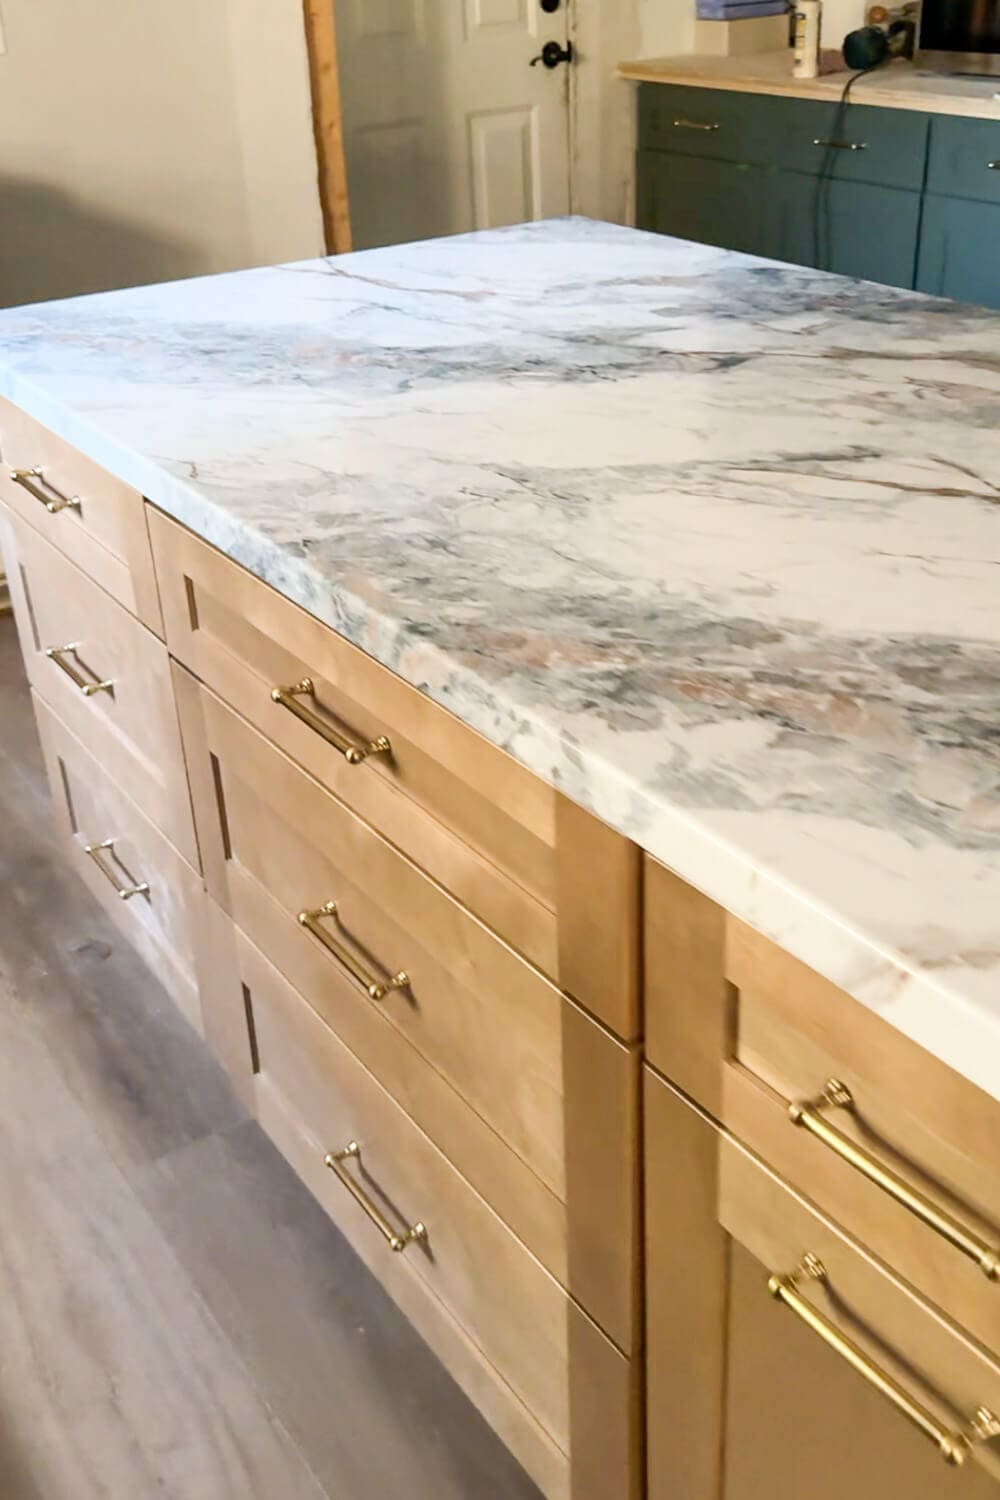
Table of Contents
- Tools and Materials for DIY Faux Marble Countertops
- Step 1: Build a Solid Countertop Base
- Step 2: Trim Out the Edges
- Step 3: Shape the Edges and Sand
- Step 4: Seal the Plywood Surface
- Step 5: Apply Peel-and-Stick Marble Contact Paper to Your Countertops
- Step 6: Seal Your DIY Faux Marble Countertops with Epoxy for a Long-Lasting Finish
- Troubleshooting Contact Paper Countertops
- Finished DIY Faux Marble Kitchen Countertops (Before & After Reveal)
- 📌 Save This Project for Later
- FAQ Contact Paper Faux Marble Kitchen Counters
Tools and Materials for DIY Faux Marble Countertops
I built my countertops from scratch, so my supply list includes all the lumber and tools. If you’re just wrapping existing counters, you’ll only need the marble kitchen counter contact paper and a smoothing tool.
- 3/4-inch plywood sheet
- 1×3 boards (for underneath)
- 1×2 boards (for cross supports + edge trim)
- Miter saw
- Brad nailer
- Wood glue
- Router
- Handheld sander
- Polycrylic
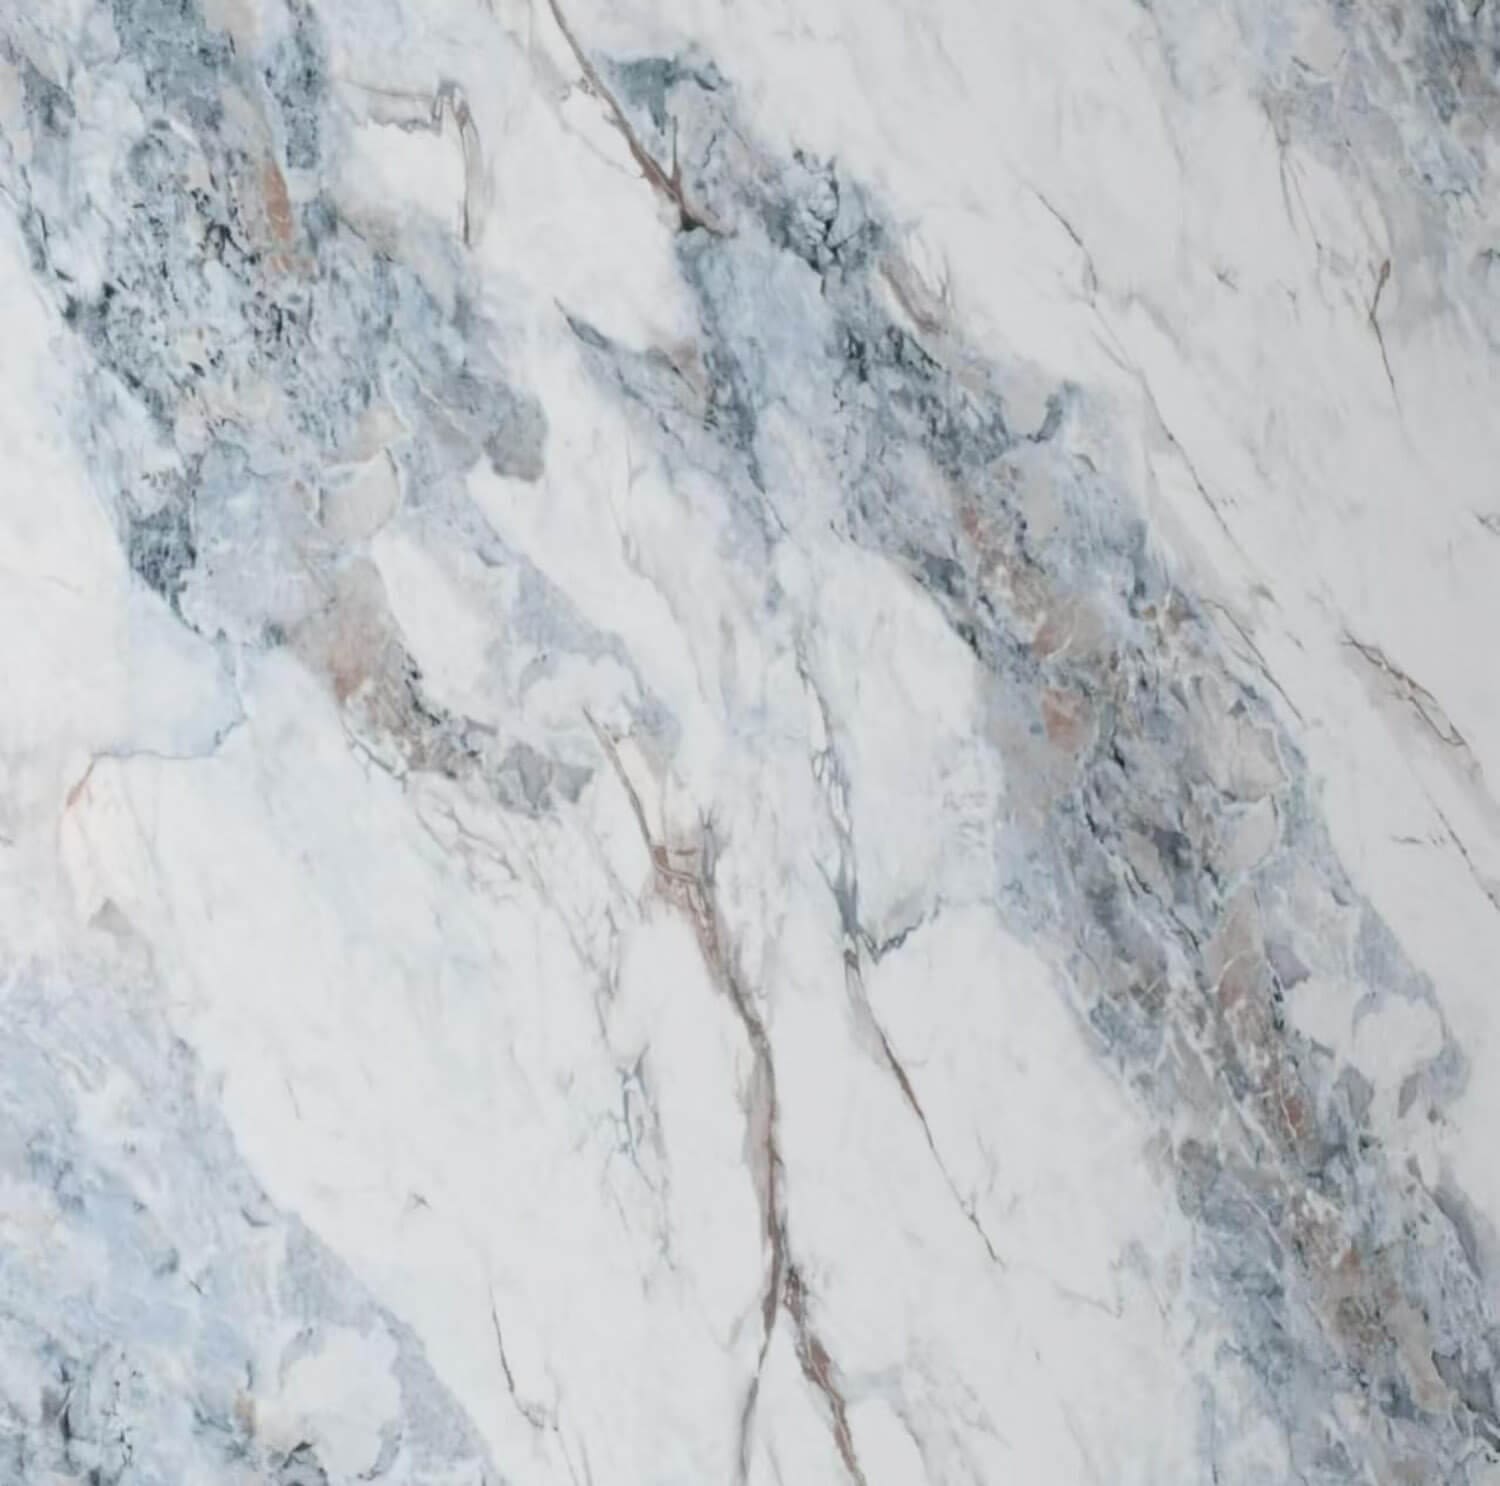
- Marble contact paper for kitchen counters
- Scissors
- Smoothing tool
Step 1: Build a Solid Countertop Base
If you’re building your countertops from scratch like me, you’ll need to create a solid base for your faux marble kitchen counters. Plywood alone is too skinny to look like real stone, so I bulked mine up by attaching 1x3s around the edges and a couple of 1x2s across the middle for extra bracing and support. A brad nailer and a miter saw make this part quick. This gave me a sturdy foundation to work with.
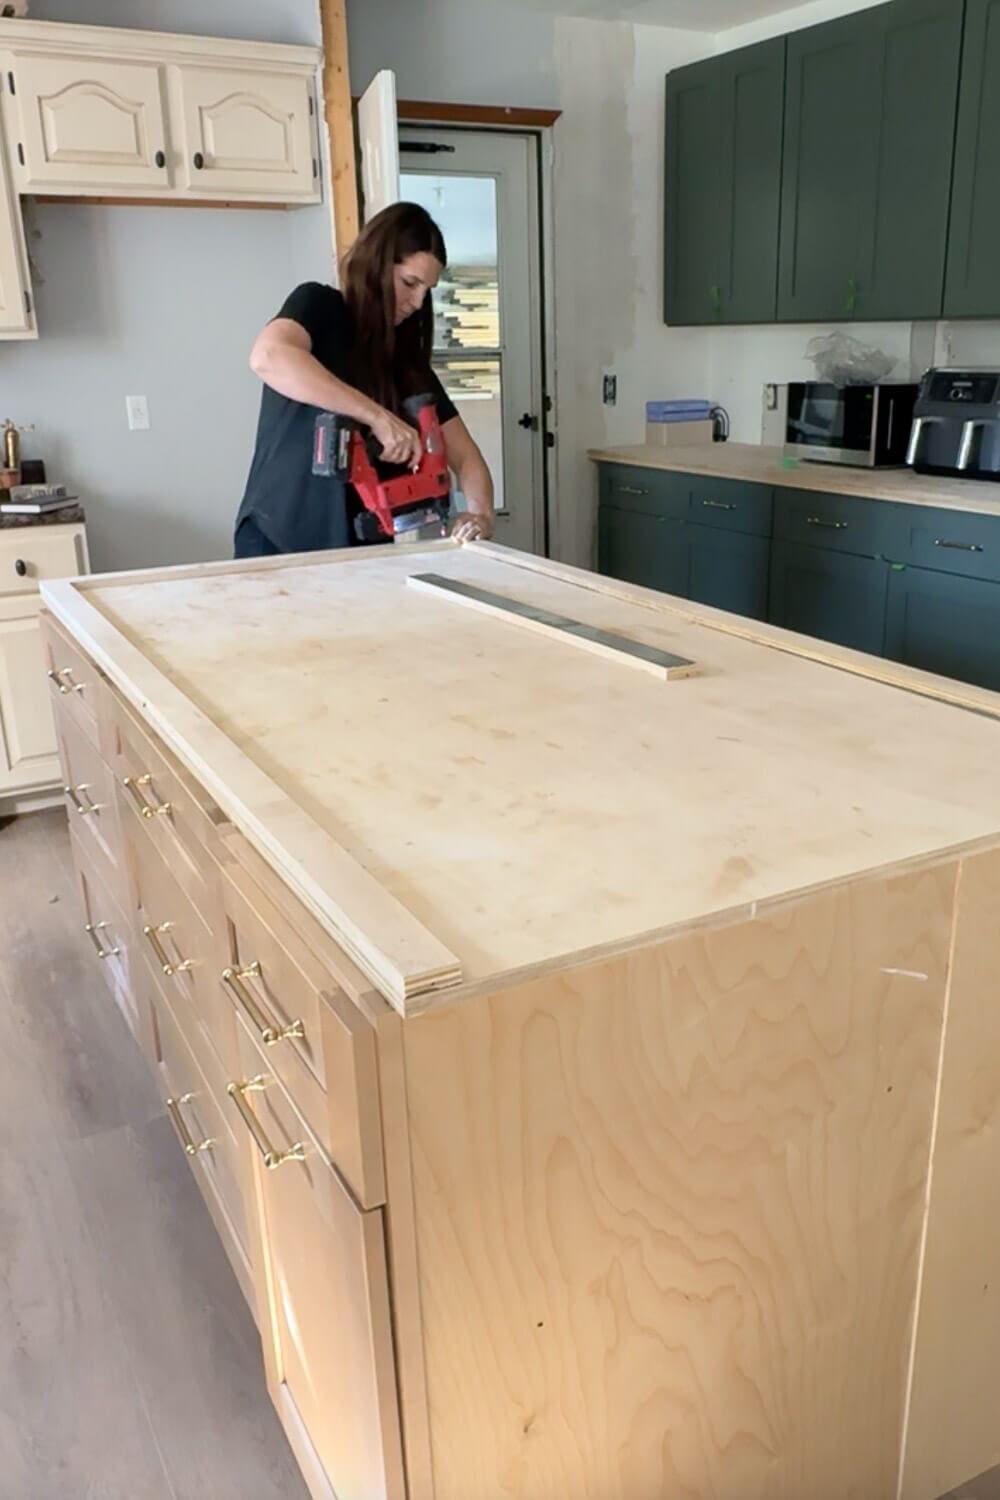
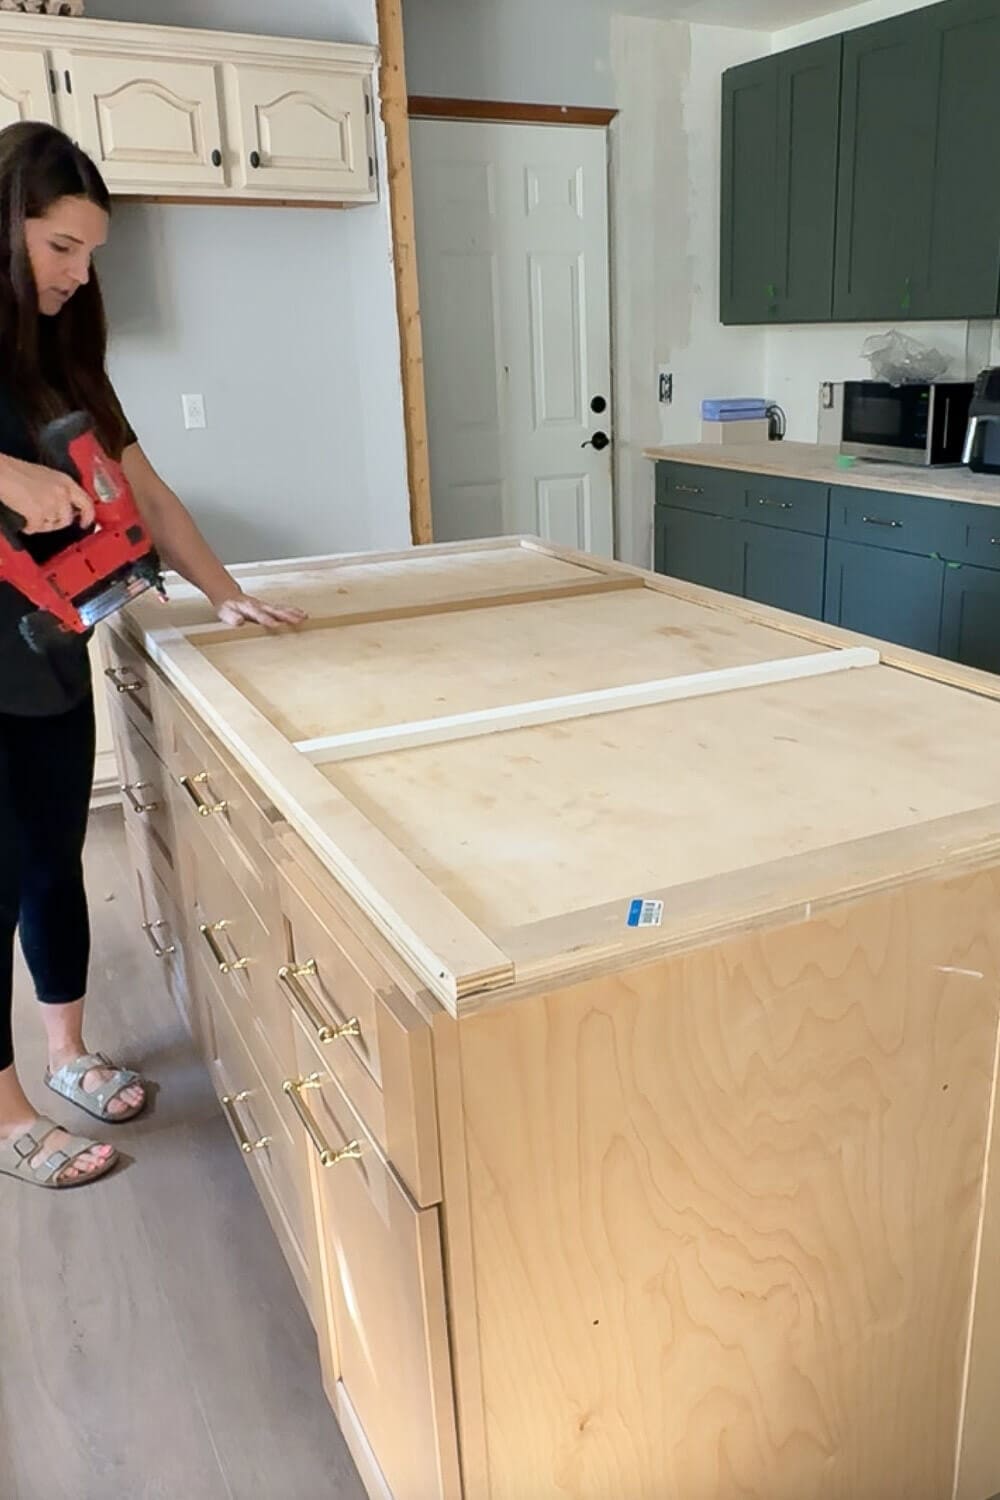
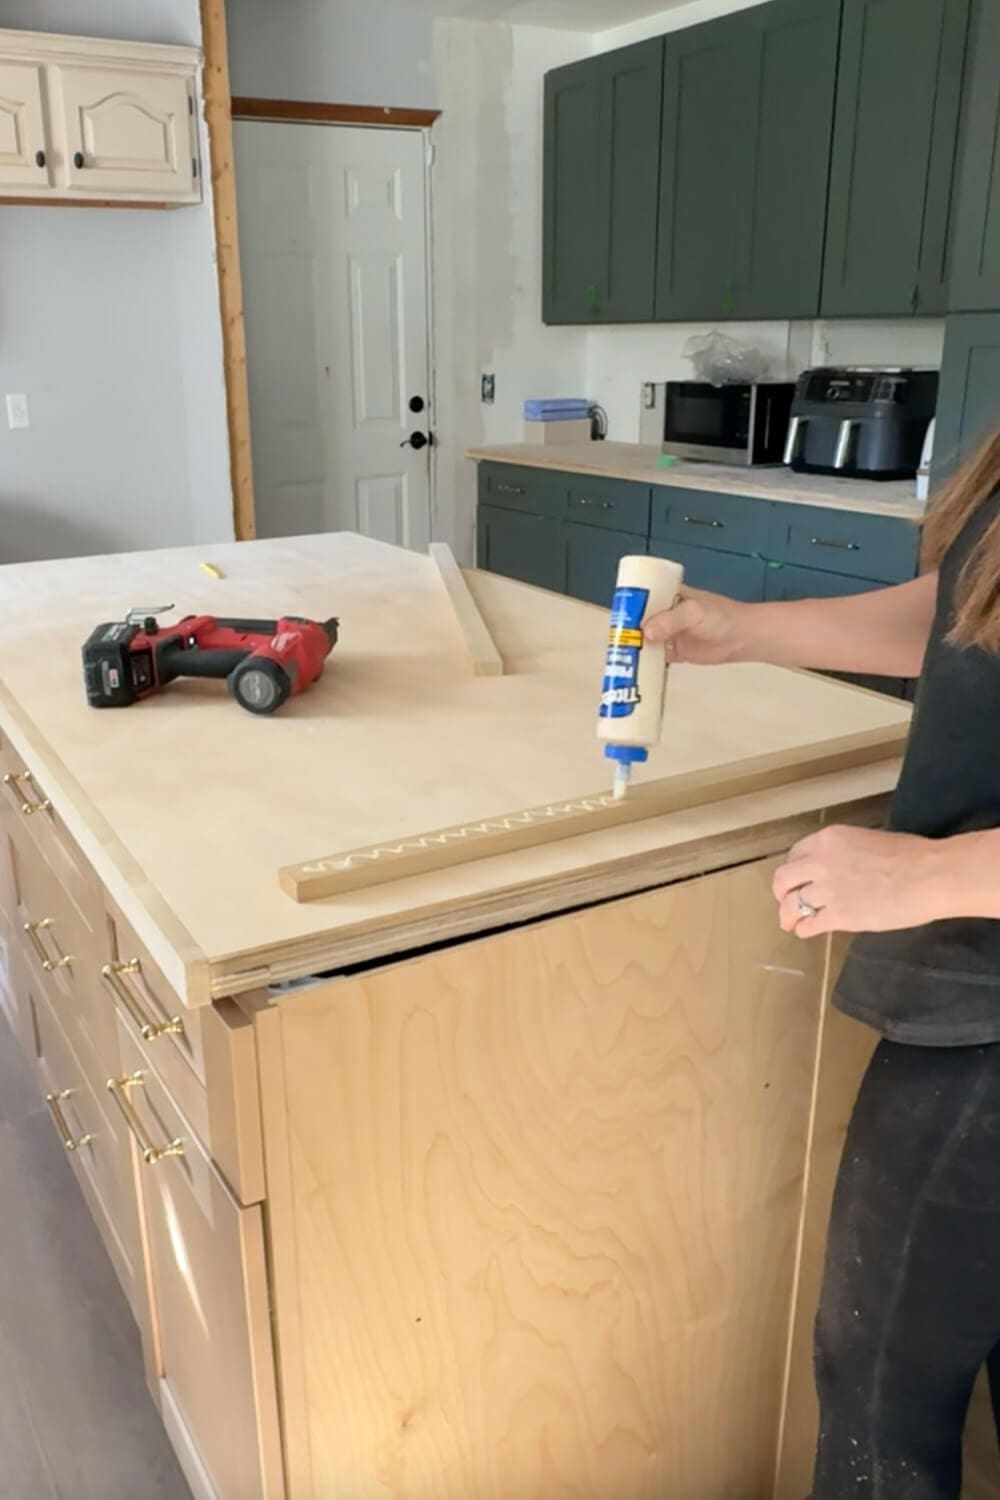
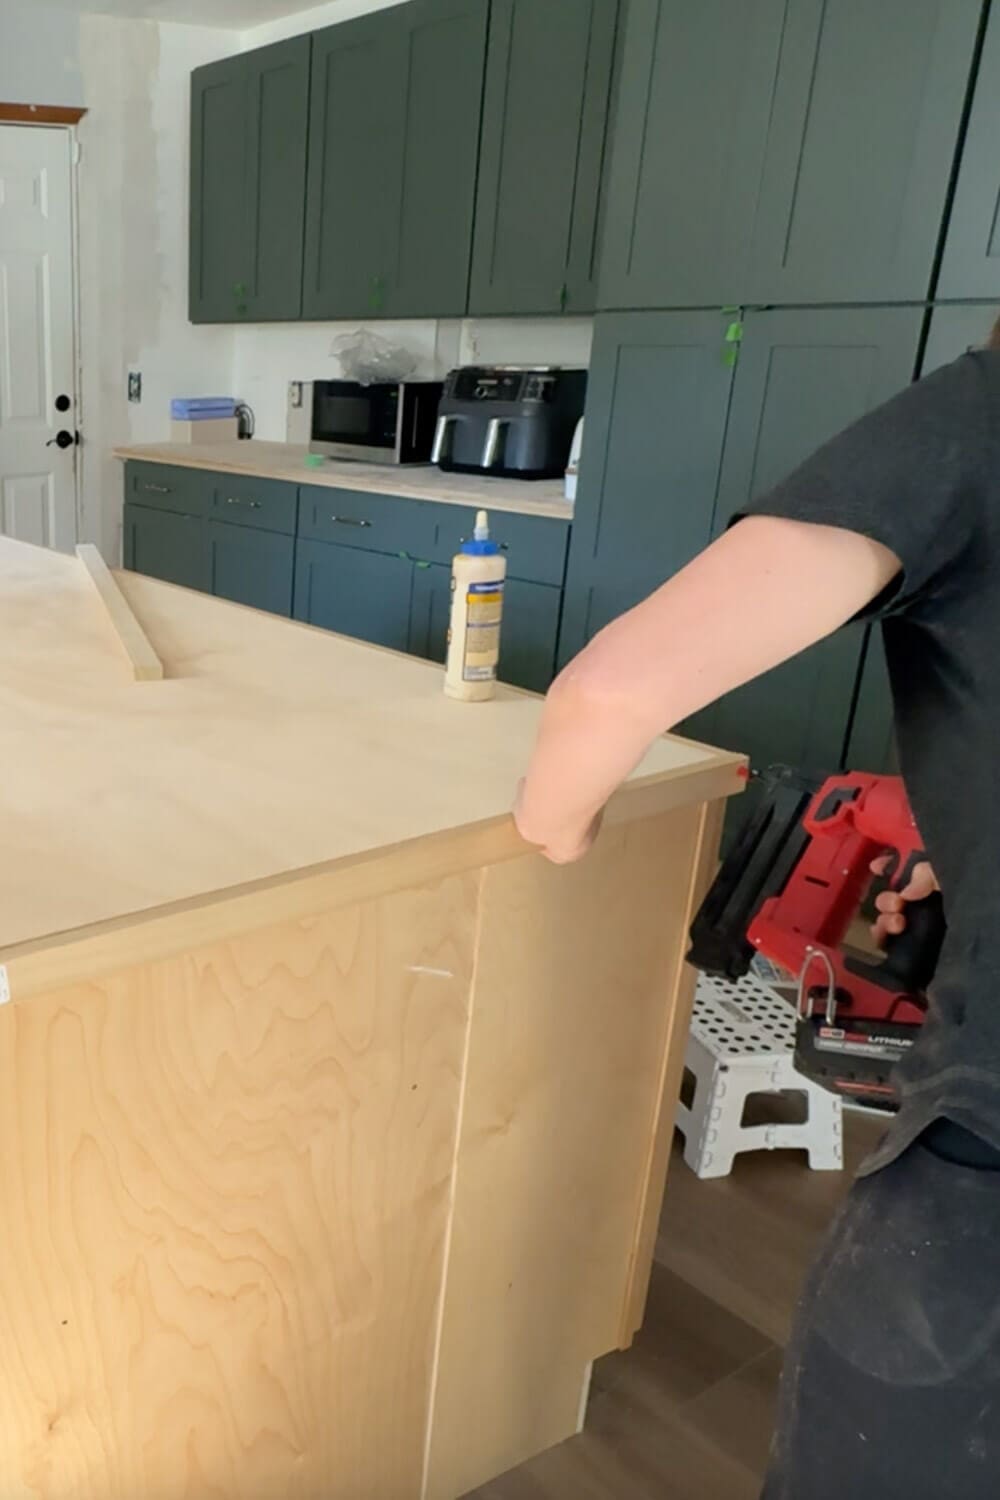
Step 2: Trim Out the Edges
To finish the sides and cover the exposed edges, I attached 1x2s all the way around with wood glue and brad nails. Once the countertop is completely trimmed out, it looks like one solid slab instead of a thin sheet of plywood.
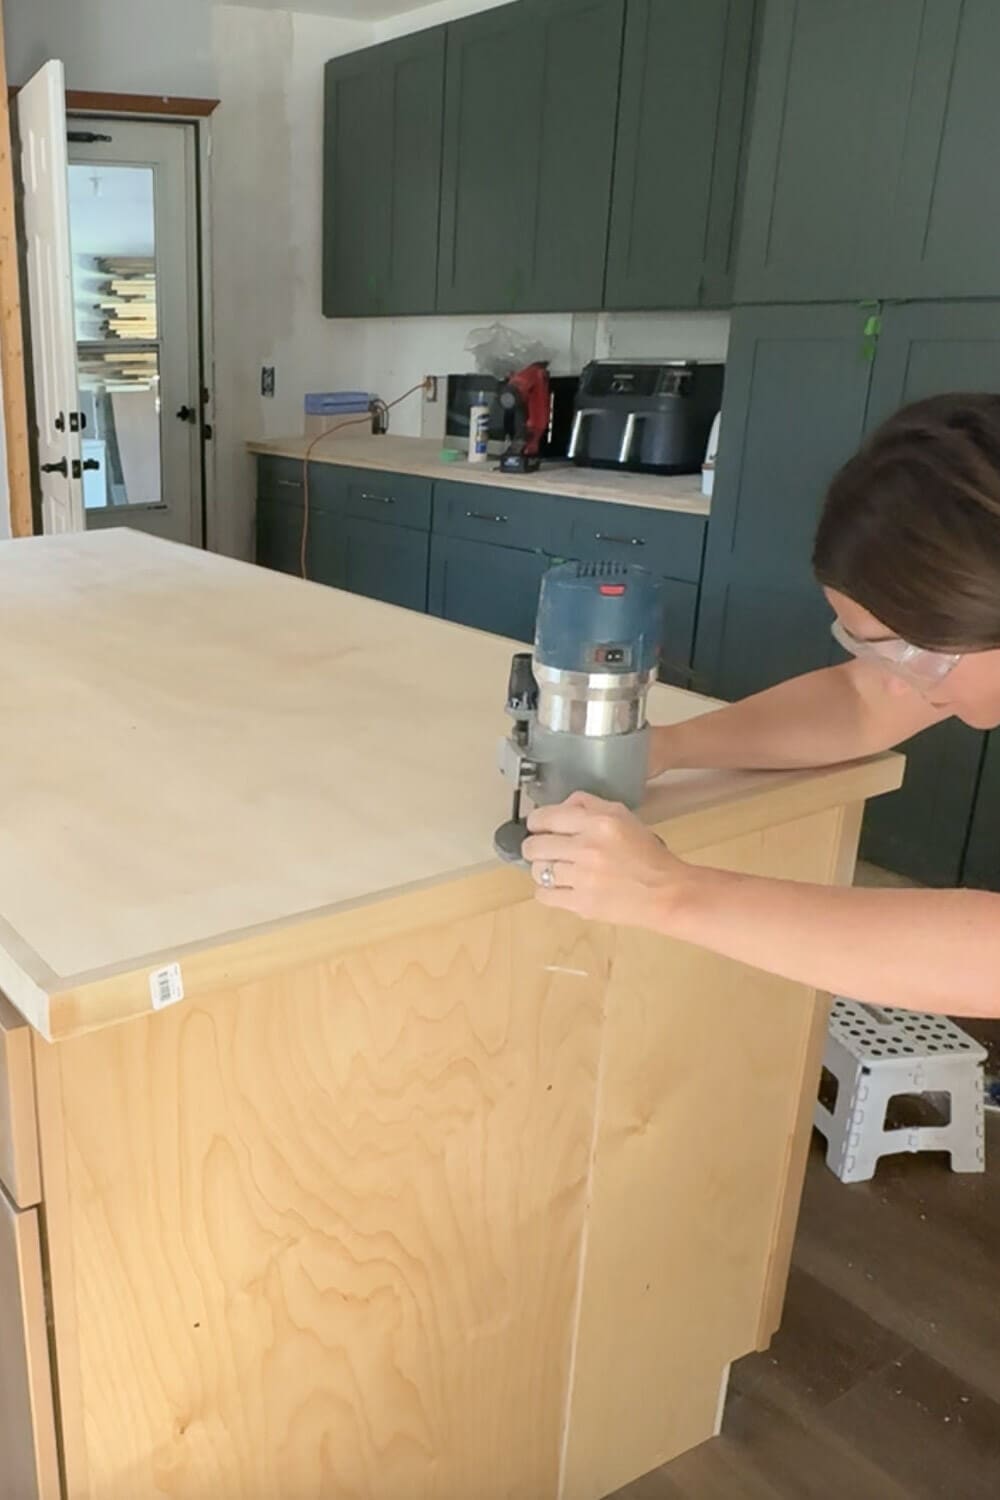
Step 3: Shape the Edges and Sand
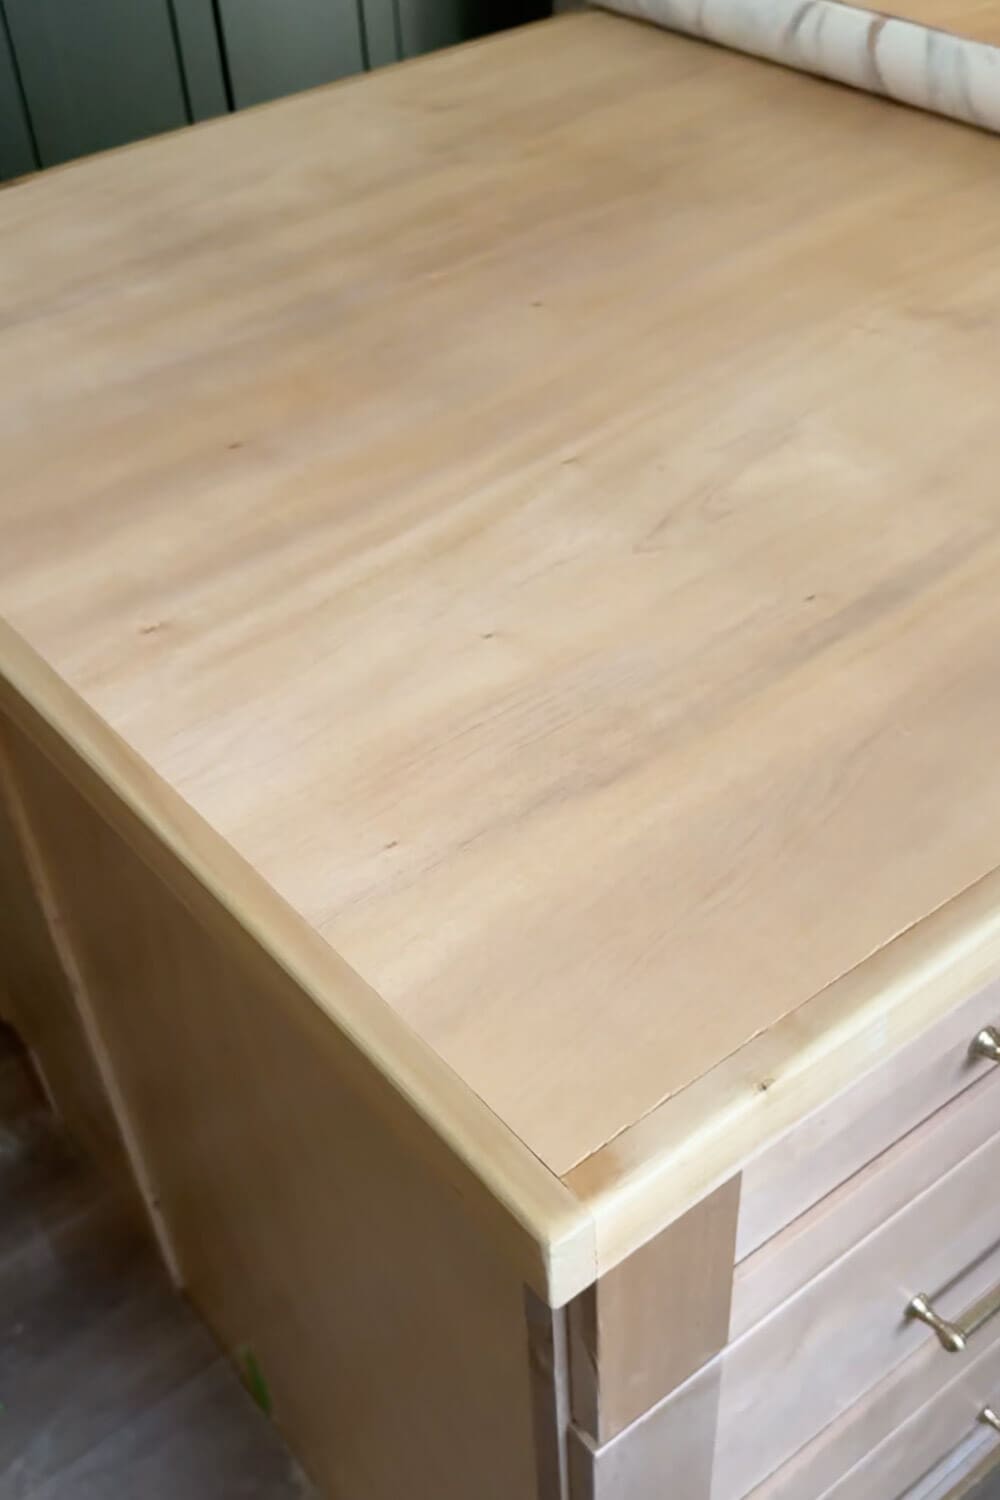
Once the trim is on, it’s important to sand just to make sure that the trim sits nice and flush with the plywood. Real marble doesn’t have squared-off corners, so I used my router to round over the edges. After running the bit all the way around the island, I gave it another quick sanding just to make sure everything was nice and smooth.
Pro Tip: After sanding, make sure to wipe and vacuum away every bit of dust so your surface is clean and smooth. If you’re using existing countertops, this is the time to give them a deep clean. Any residue can keep the kitchen counter contact paper from sticking properly.
Step 4: Seal the Plywood Surface
Since I wasn’t sure how well the vinyl wrap would stick to raw plywood (and I didn’t want to find out the hard way), I rolled on a quick coat of polycrylic sealant. It will give the kitchen contact paper something with a bit more grit to stick to, and hopefully help my DIY faux marble counters last so much longer.
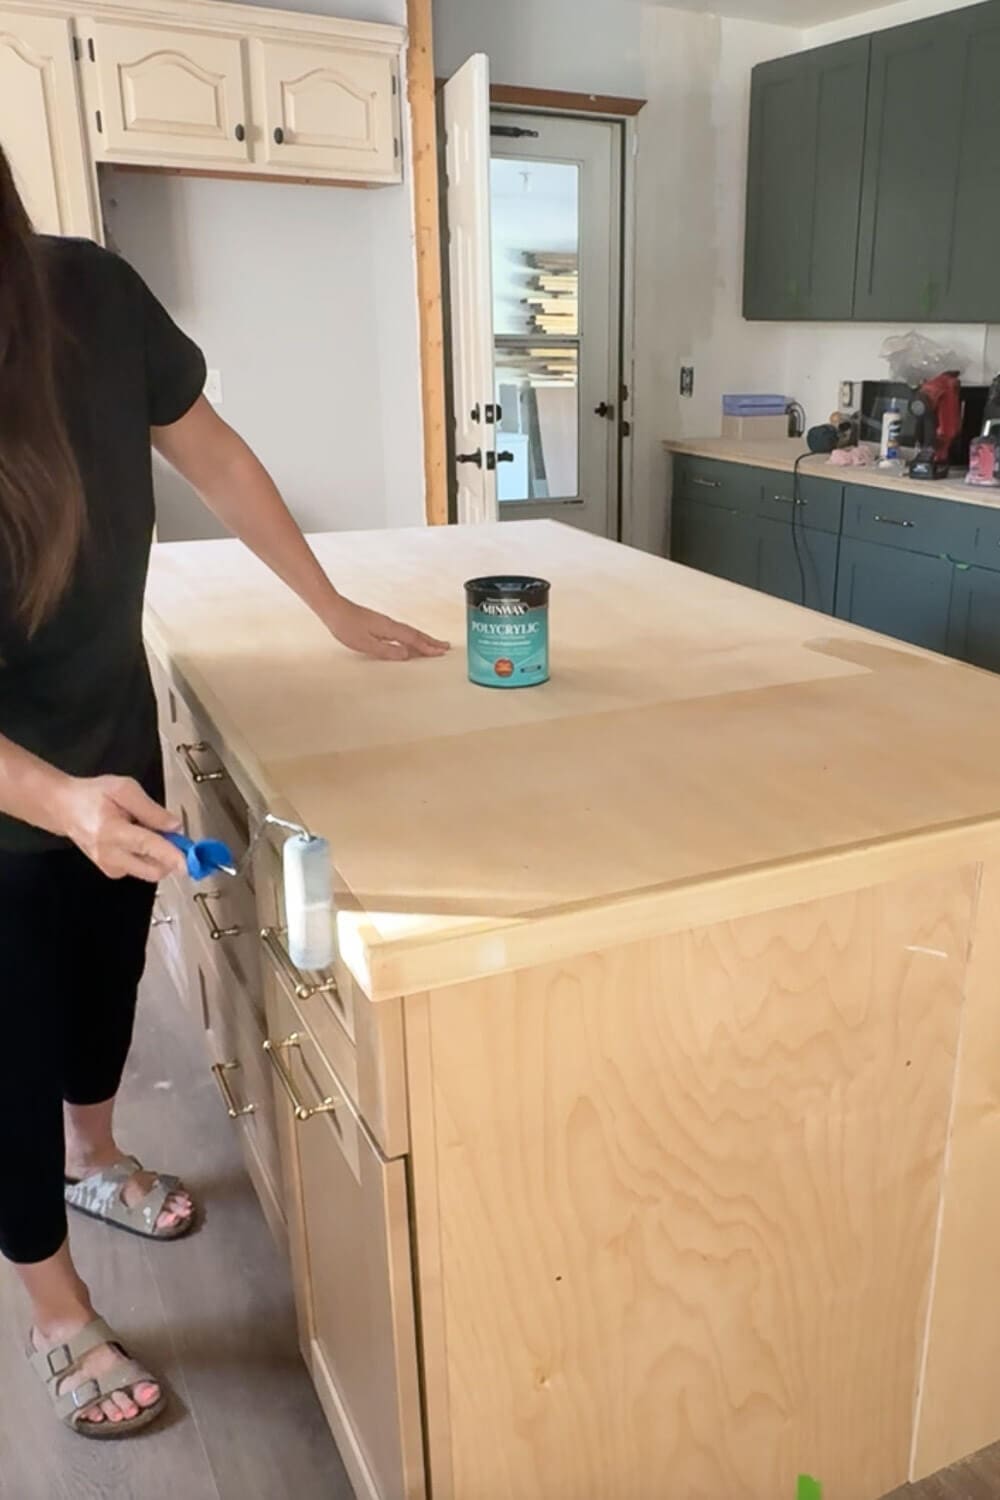
Look how smooth and beautiful this looks! I have a nice sturdy surface that can now be covered in the faux marble countertop wrap.
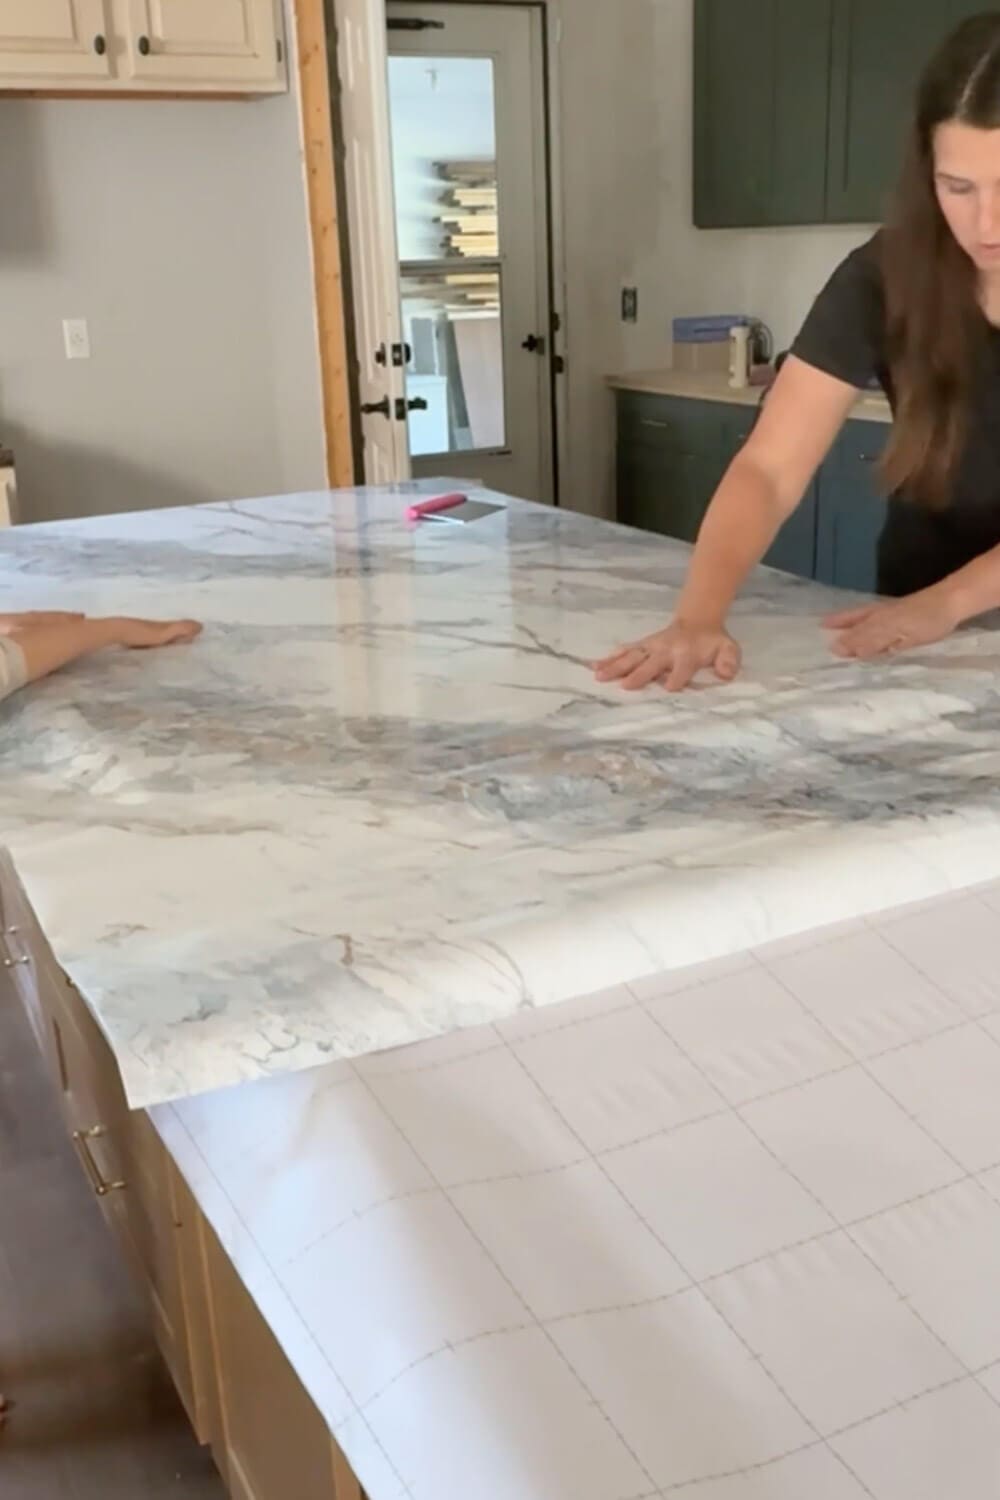
Step 5: Apply Peel-and-Stick Marble Contact Paper to Your Countertops
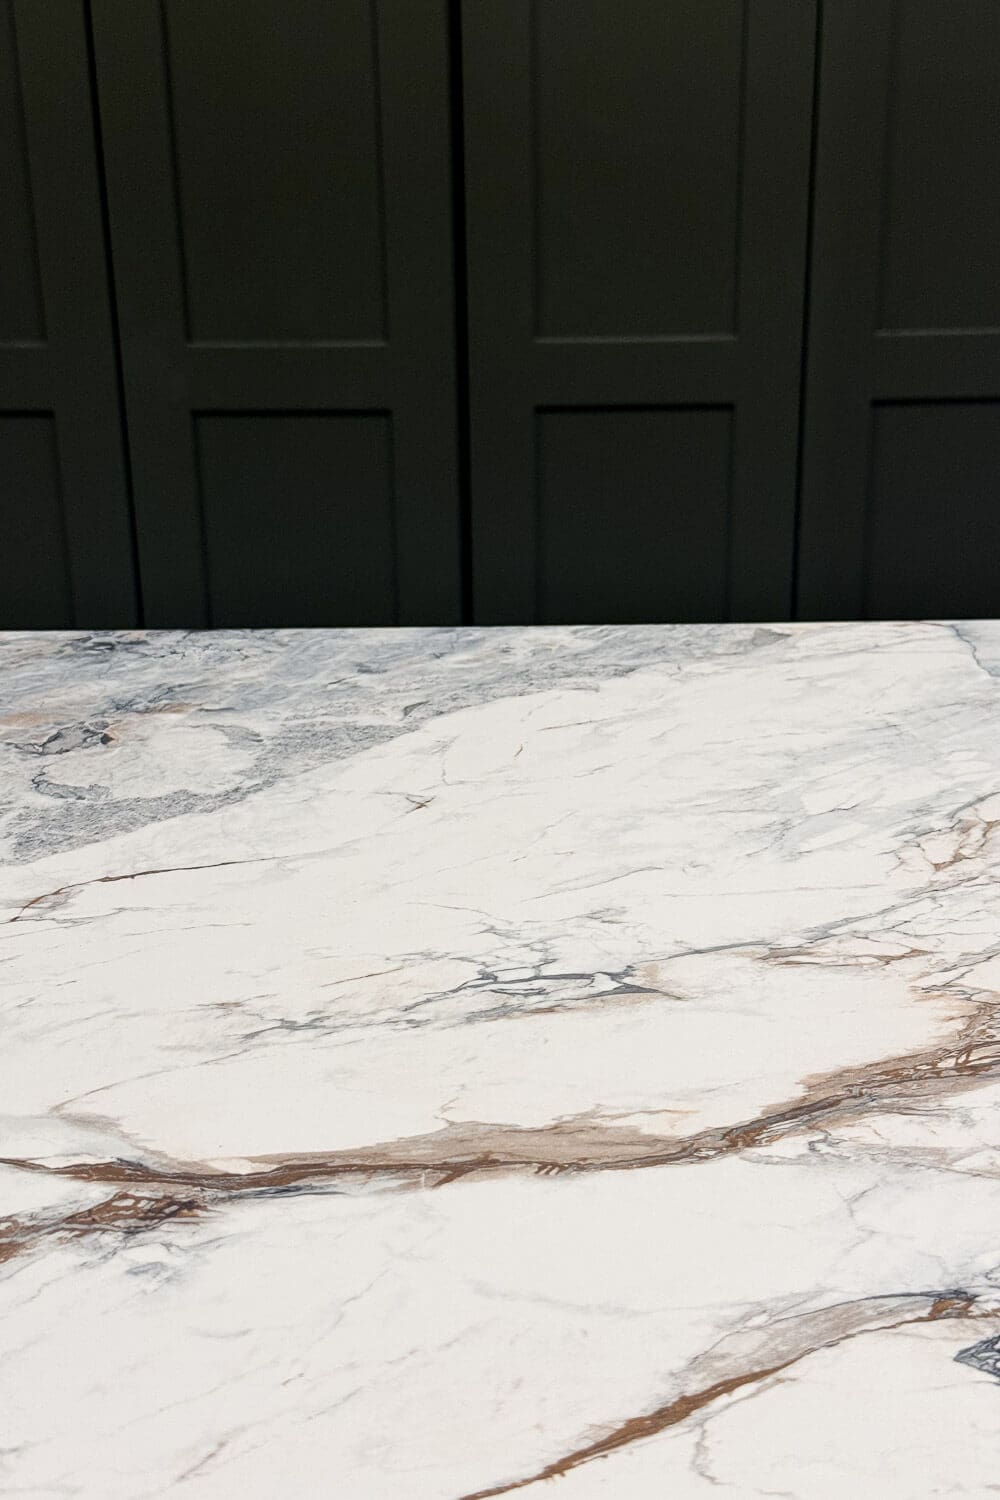
I’ve painted faux marble countertops in plenty of kitchens and bathrooms in our previous homes, but this time around, I really wanted a much more intricate and detailed design. This kitchen countertop contact paper is so gorgeous and will give me the look of high-end marble for a fraction of the cost.
The process is fairly similar to peel-and-stick wallpaper:
- Peel off the backing a little at a time
- Smooth it down with your hand or a smoothing tool
- Work out bubbles as you go
- Trim the edges clean
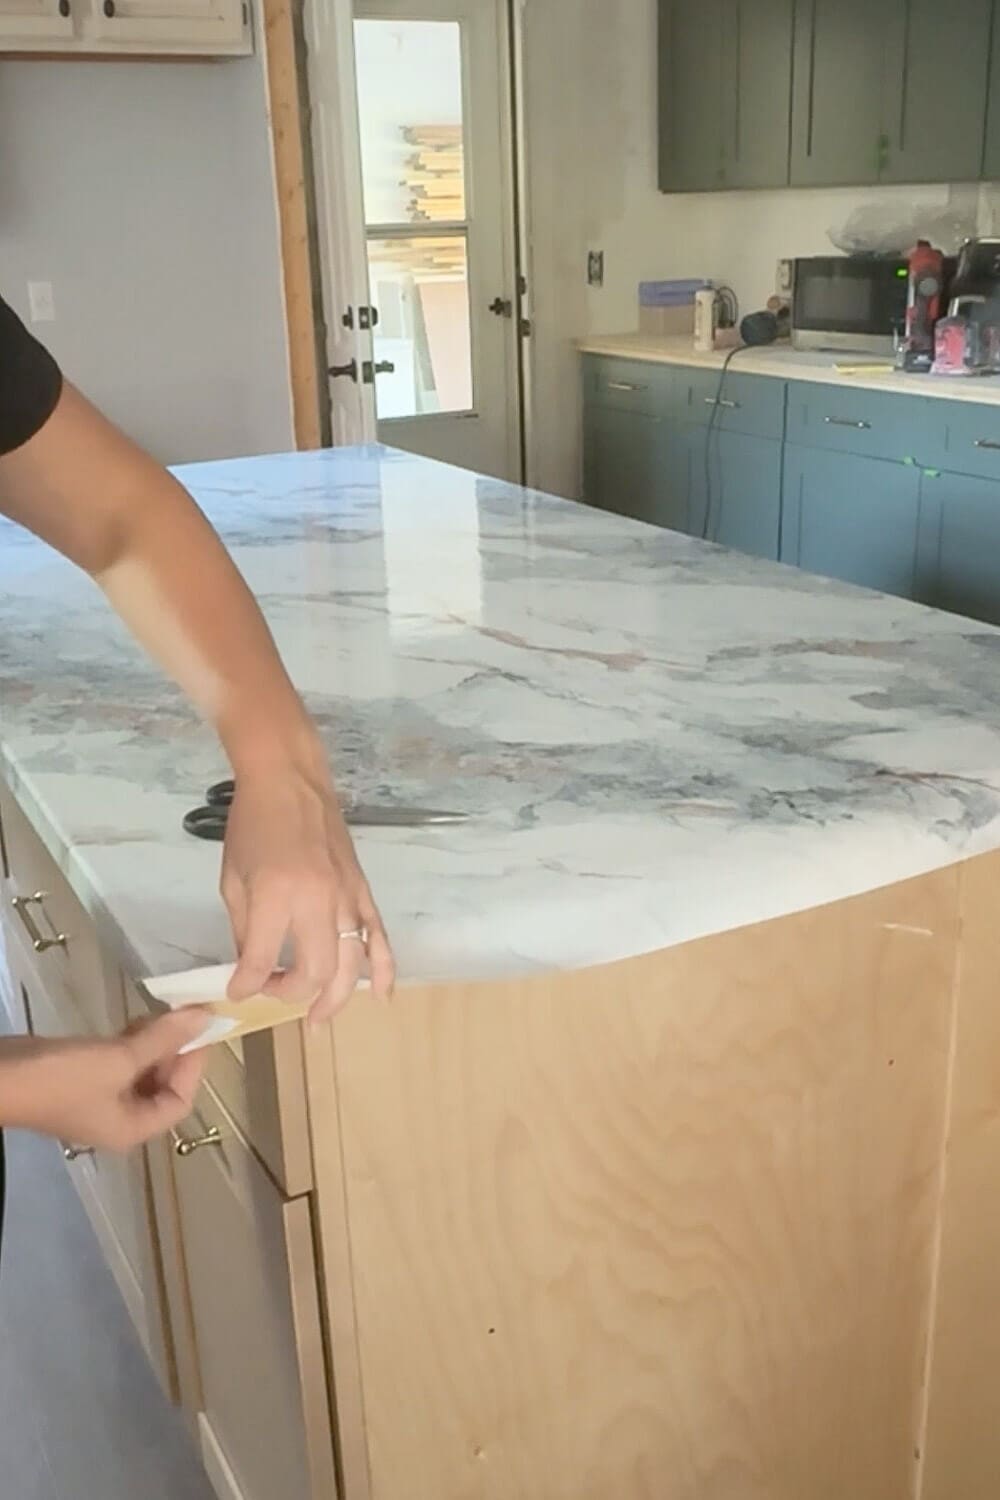
- Wrap the extra paper underneath for a seamless look
- The transformation is instant! Hello, gorgeous faux marble countertop.
Step 6: Seal Your DIY Faux Marble Countertops with Epoxy for a Long-Lasting Finish
The contact paper looks amazing on its own and makes a great short-term improvement, especially since it can be removed, which is perfect for rentals. For a longer-lasting finish in a busy kitchen like ours, I sealed mine with epoxy. Want to see how it looks? I have the post here – DIY Countertops That Look Like Marble Without the Cost.
If you’ve never worked with epoxy before, I put together an ebook that will walk you through the full process, have a complete supply list, and give you my best tips and tricks for a perfect finish. You can choose either a matte or glossy finish, both of which protect faux marble kitchen counters from scratches, stains, and water damage. Ebook – DIY Epoxy Faux Marble Countertops
If you’re wondering how well epoxy actually holds up over time, check out my post > 3 Years Later: How Our Epoxy Kitchen Countertops Are Holding Up.
Troubleshooting Contact Paper Countertops
This was my first time using a vinyl wrap like this on countertops. It’s definitely a beginner-friendly project, but that doesn’t mean there weren’t a couple of tricky spots.
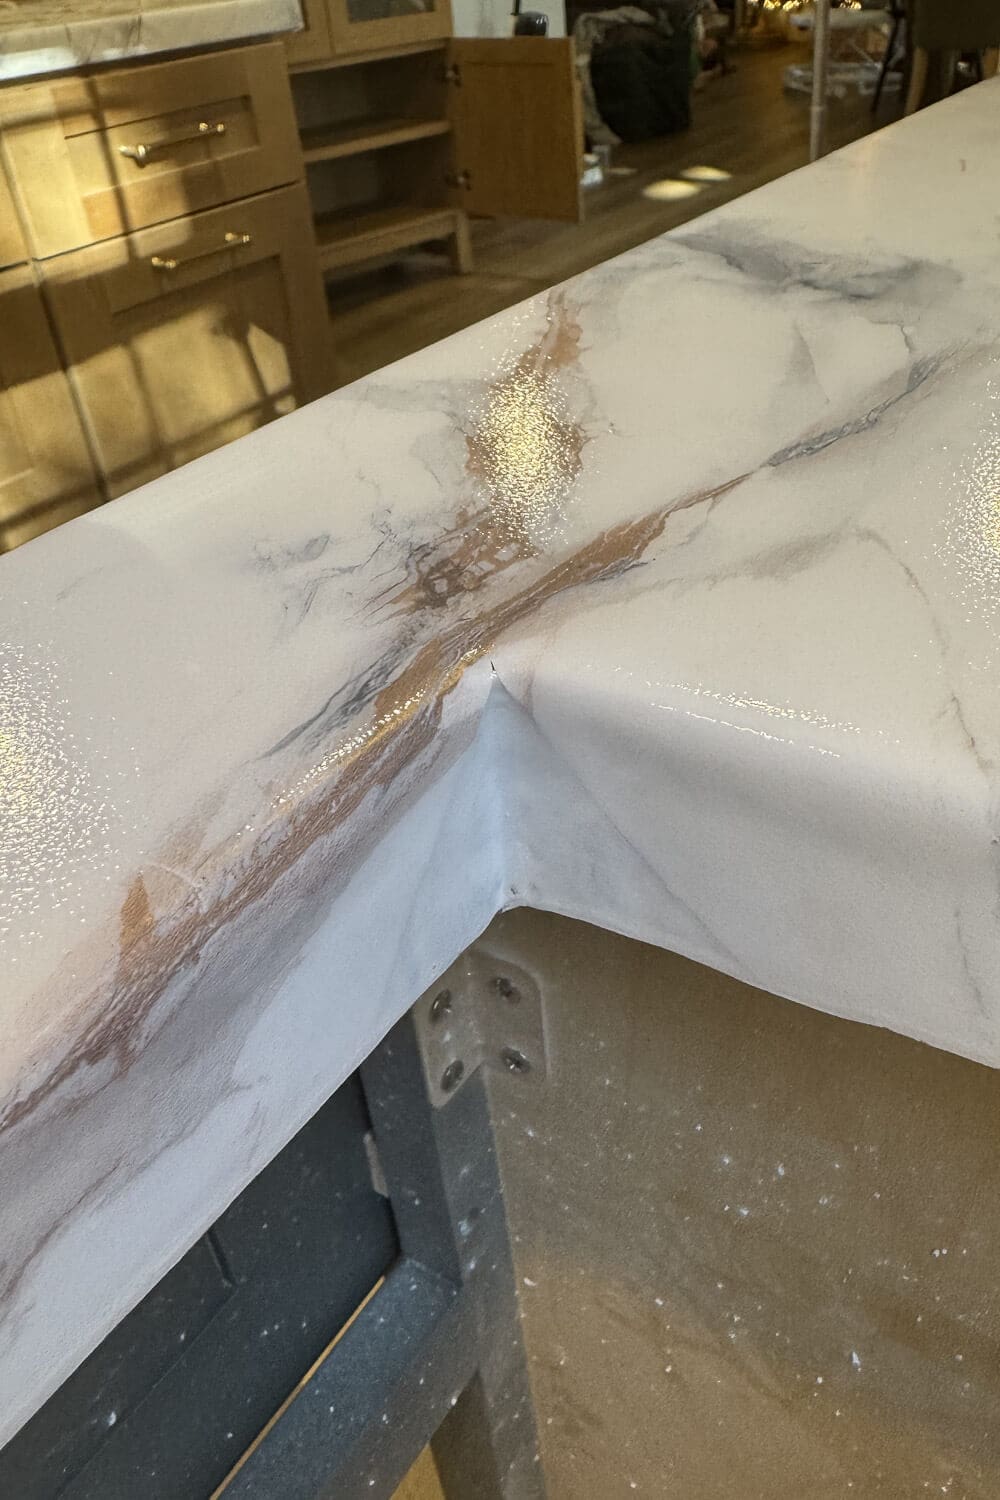
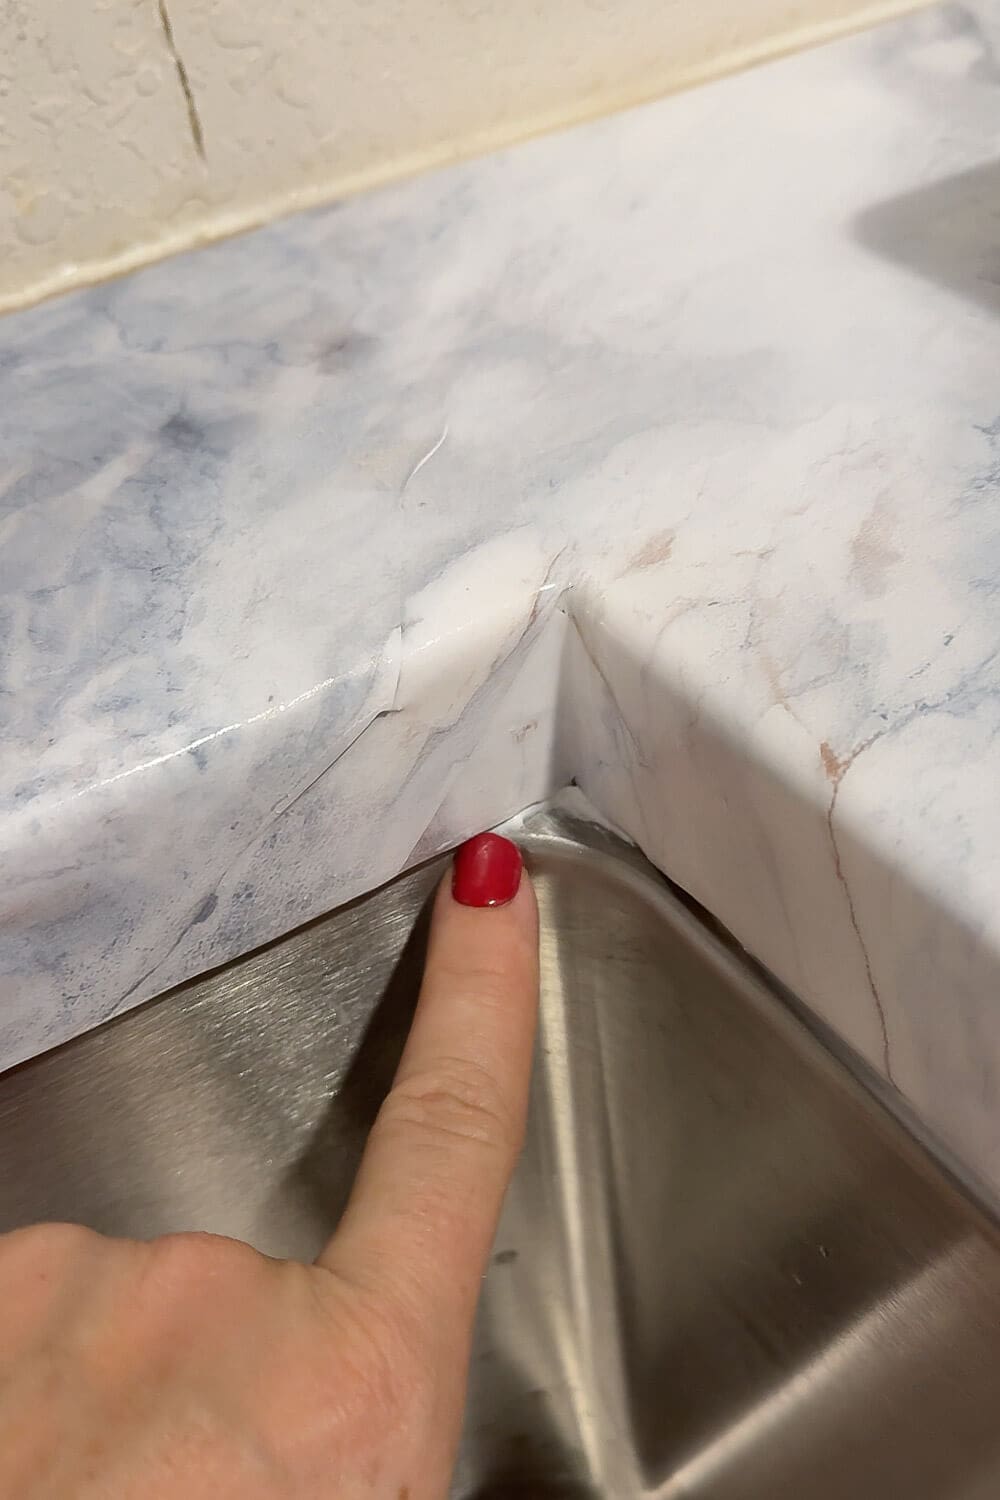
Inside Corners
Around the sink, I had four inside corners to work around, and because I went with an undermount sink, they’re fully visible. When you slice the contact paper and wrap it underneath the plywood, it leaves a small triangular gap. To fill it, I cut a tiny matching piece of contact paper, lined up the pattern, placed it in the corner, and then wrapped the main top piece down and around the plywood. Once everything was sealed with epoxy, the seams blended in and the surface became completely smooth.
Tip: If inside-corner seams will drive you crazy, go with a topmount sink. Then you’ll never see them!
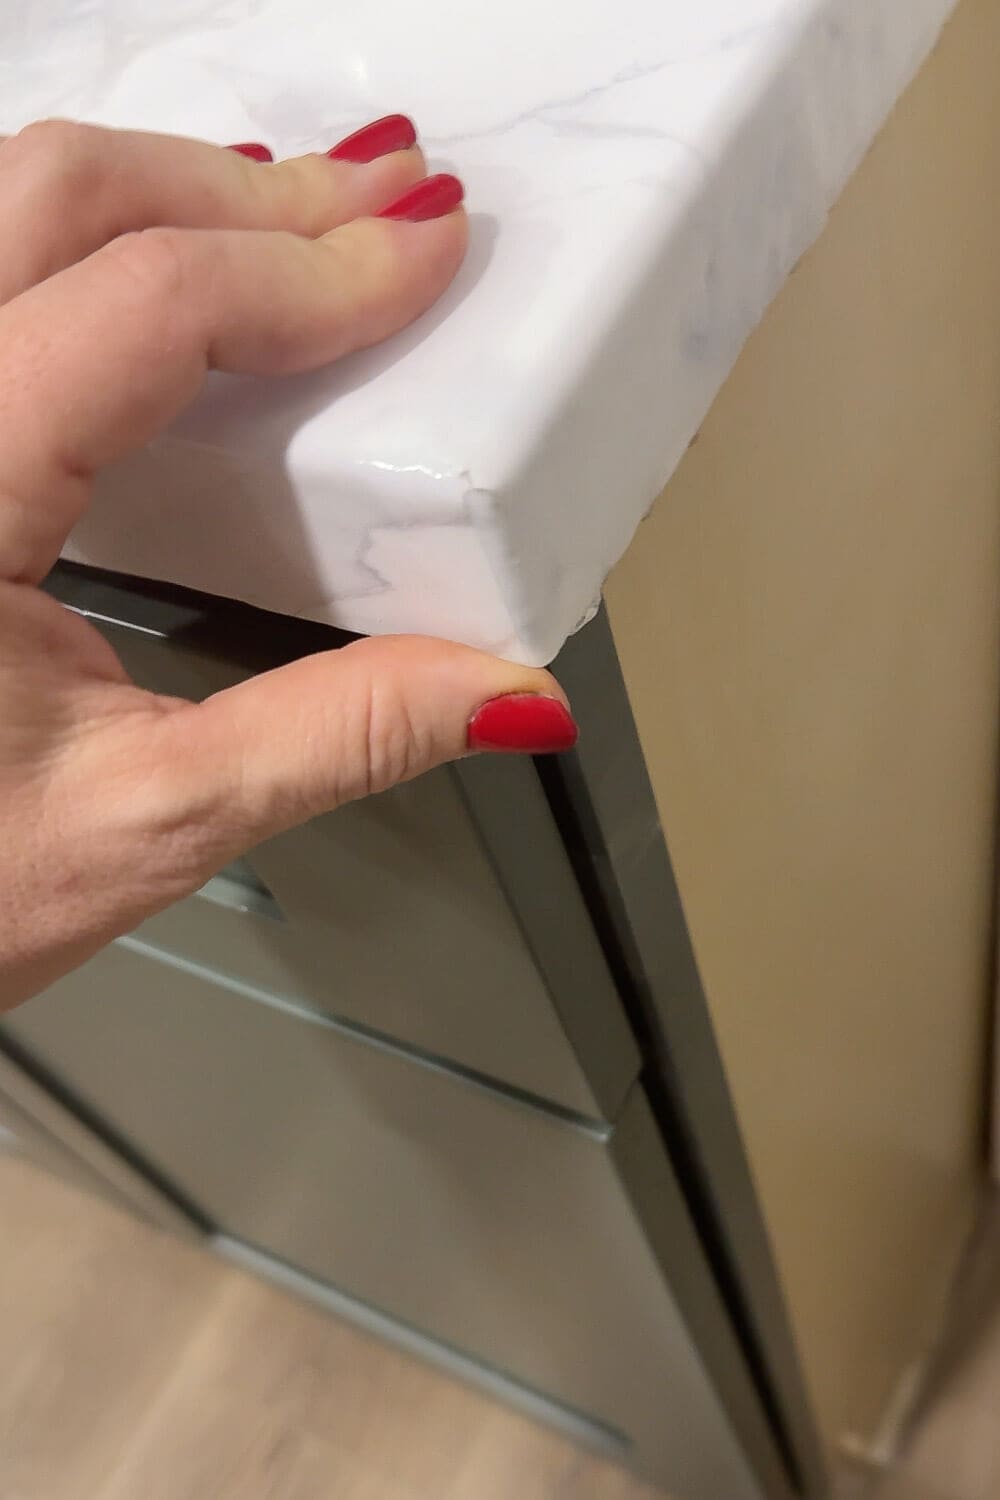
Outside Corners
For the outside corners, I treated them almost like wrapping a present. After laying the contact paper flat across the countertop, I smoothed it right up to the edge and then pressed it firmly down the side. At the corner, I made a clean vertical cut so the paper could fold neatly without bunching. One side gets wrapped down first, then the second side overlaps it for a crisp seam. Once it’s wrapped and smoothed into place, the edges look sharp and seamless, especially after everything is sealed under epoxy.
Finished DIY Faux Marble Kitchen Countertops (Before & After Reveal)
Not bad for a sheet of plywood, some special contact paper, and an afternoon of work! These faux marble kitchen counters look so realistic. It’s a quick and easy budget makeover that makes a huge impact.
📌 Save This Project for Later
Pin now and come back anytime you’re ready to try this faux marble countertop DIY with kitchen counter contact paper!
FAQ Contact Paper Faux Marble Kitchen Counters
Kitchen counter contact paper holds up surprisingly well for a budget DIY project, especially if applied to a smooth, clean surface. It resists light spills and daily use, but it’s not heat- or cut-resistant, so always use trivets and cutting boards. Coat with epoxy for a finish that will last for years!
Yes! Kitchen counter contact paper can go right over laminate, wood, or other smooth surfaces. Just make sure the counters are thoroughly cleaned and dried before applying so the adhesive sticks properly.
Look for thick, waterproof vinyl contact paper or countertop wrap designed for kitchens. Marble-look styles are especially popular for creating a faux marble countertop finish.
Absolutely. Contact paper is a removable option, making it perfect for renters who want a stylish update without permanent changes.
