Painted Piano Hack: My Easy, No-Stress Method


Updated August 7, 2025
Can you really paint an old piano? Spoiler alert: yes, and it’s gorgeous. I was so happy with how my painted piano turned out that I had to share all the details – because, honestly, it was way easier than I expected.

Table of Contents
- Supplies for Painting a Piano
- My Old Piano: Before the Paint
- Picking the Perfect Color for a Painted Piano
- Prepping the Piano: Sanding Is Key
- Don’t Skip the Primer When Painting a Piano
- How I Painted My Piano (Step-by-Step)
- Why a Painted Piano Might Be Your Next Favorite DIY
- 📌Save this Makeover for Later
- Frequently Asked Questions About Painting a Piano
Supplies for Painting a Piano
My Old Piano: Before the Paint
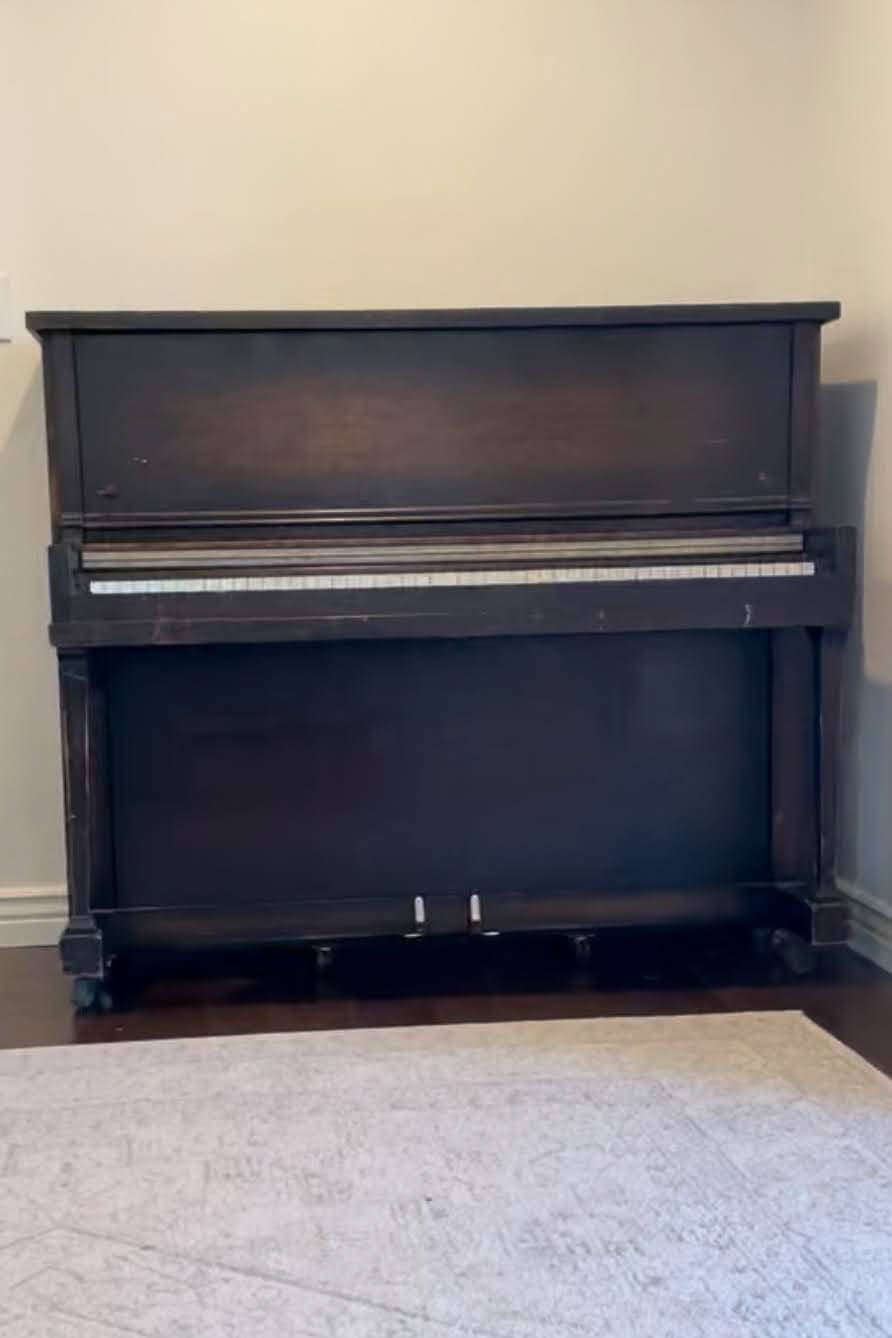
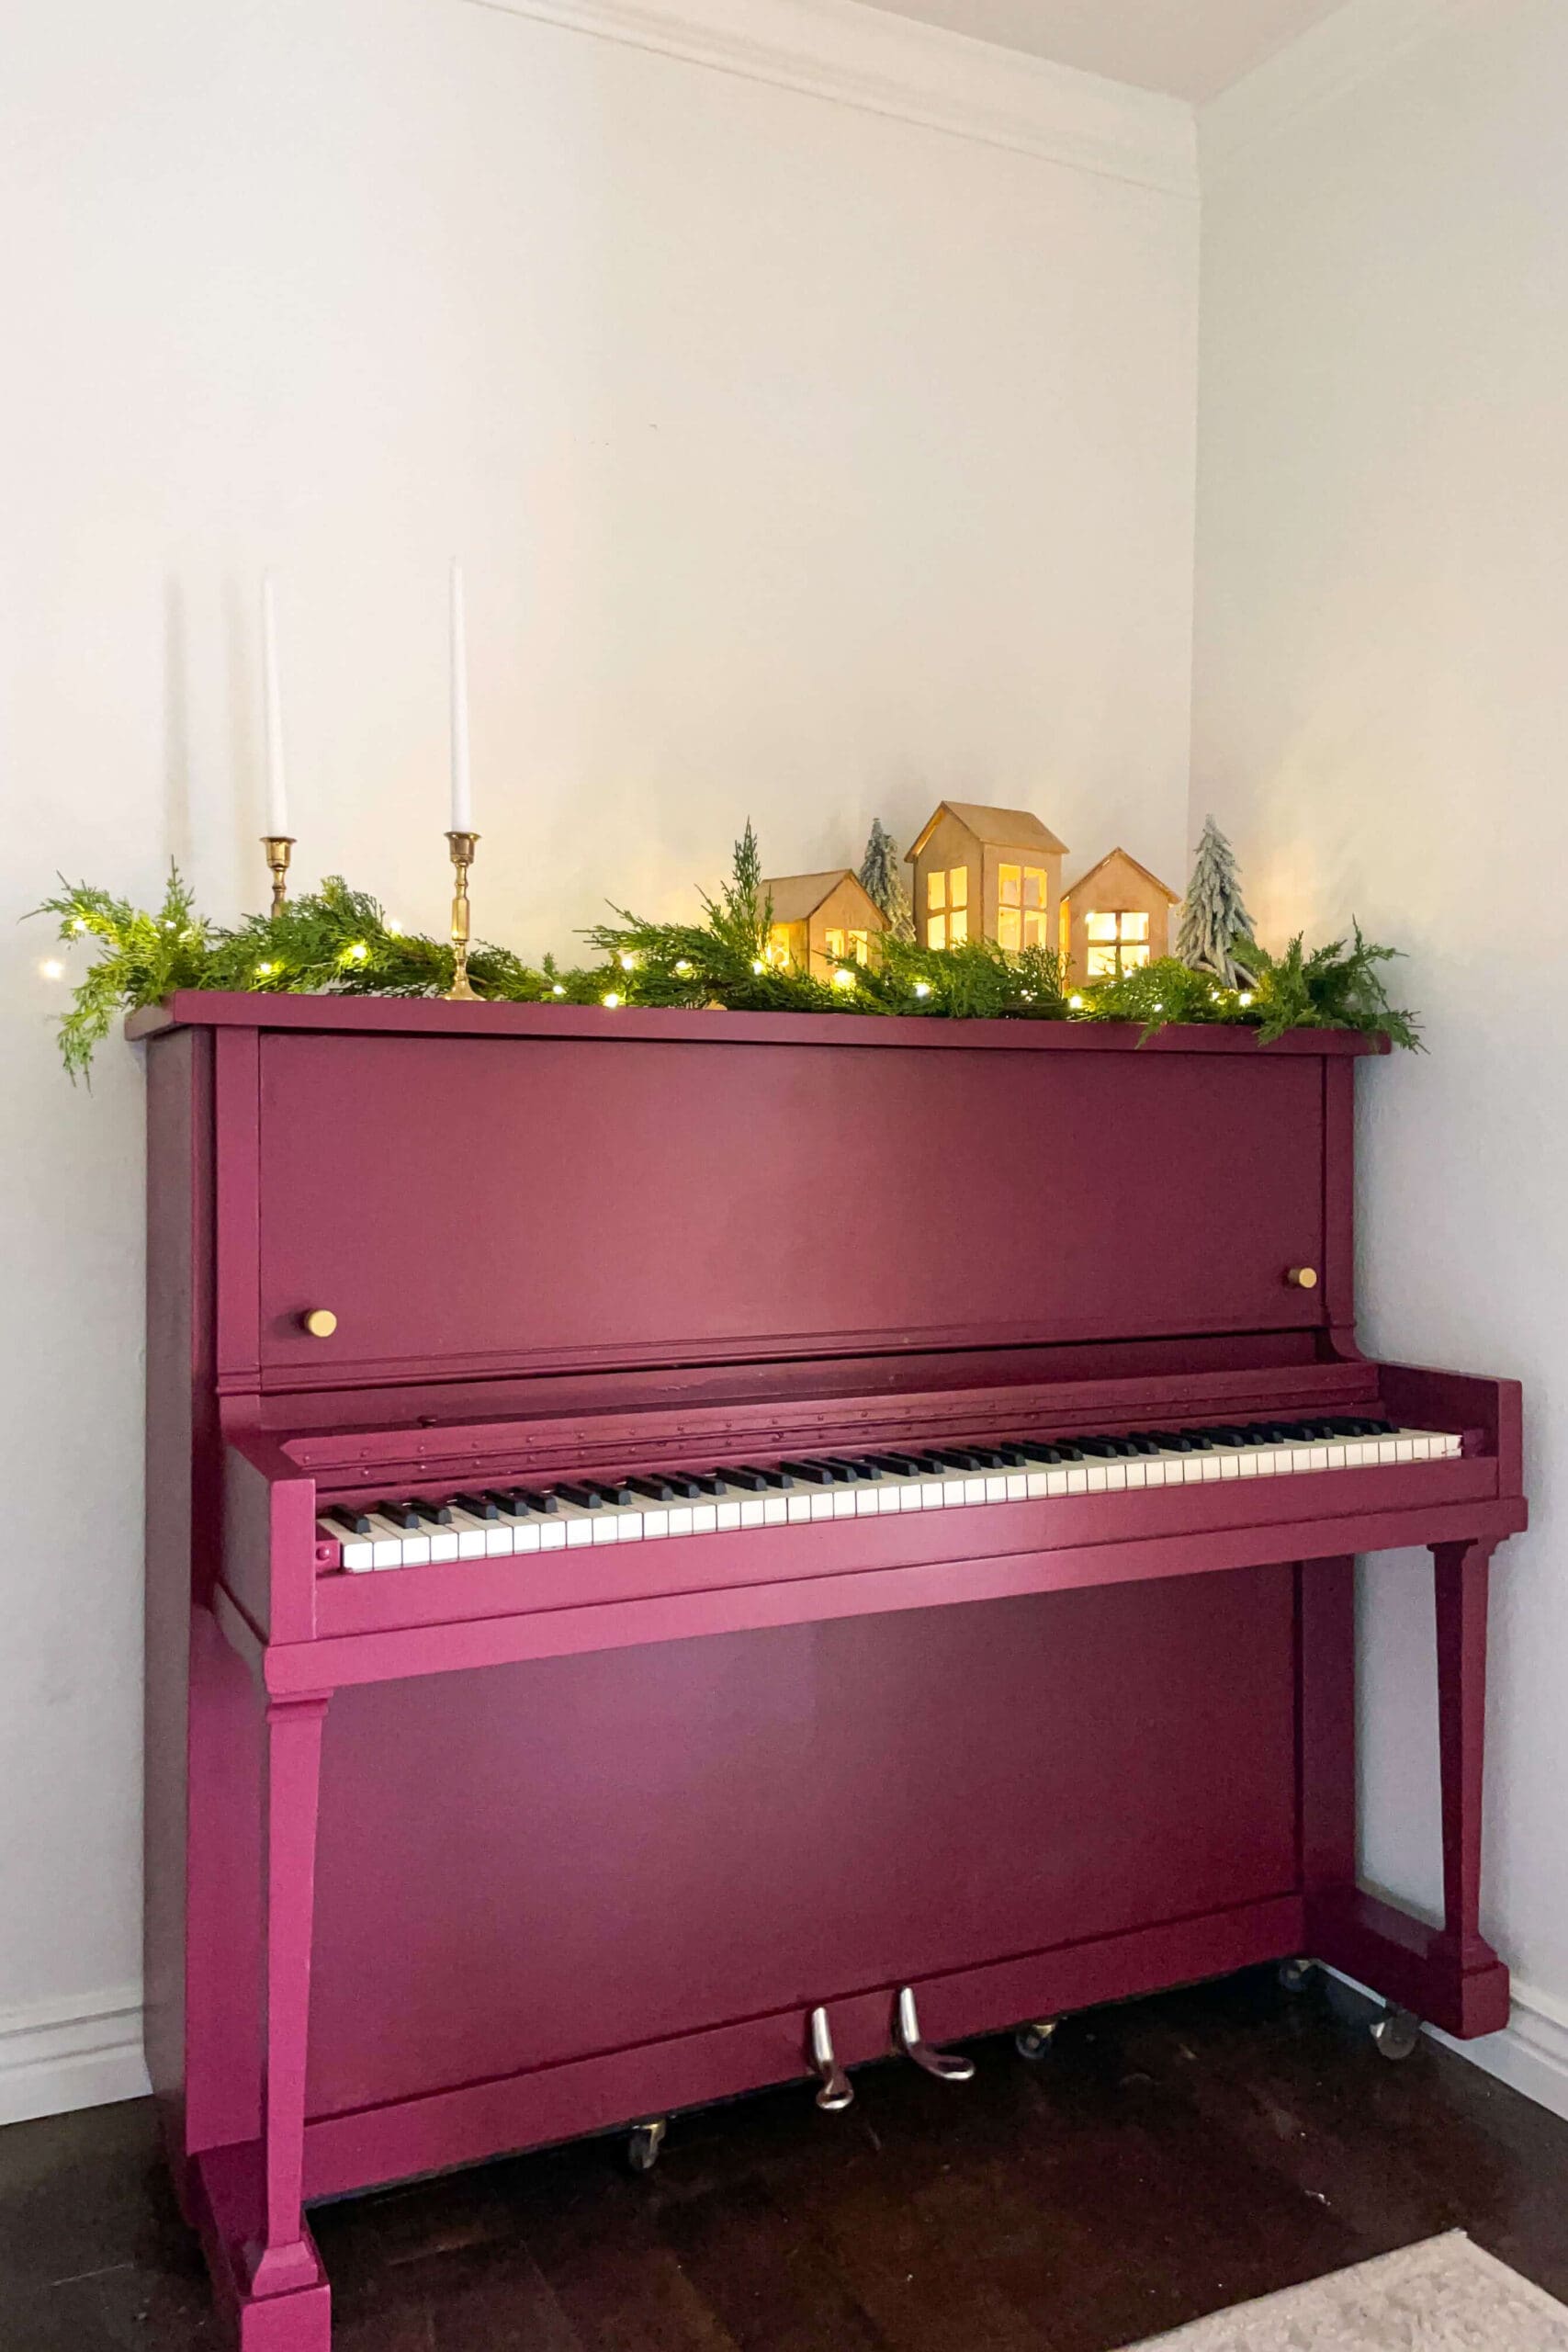
This old upright piano had definitely seen better days. It wasn’t anything special, and it had the wear and tear to prove it. But with a little creativity (and paint!), I knew I could give it a whole new look and bring it back to life.
Picking the Perfect Color for a Painted Piano
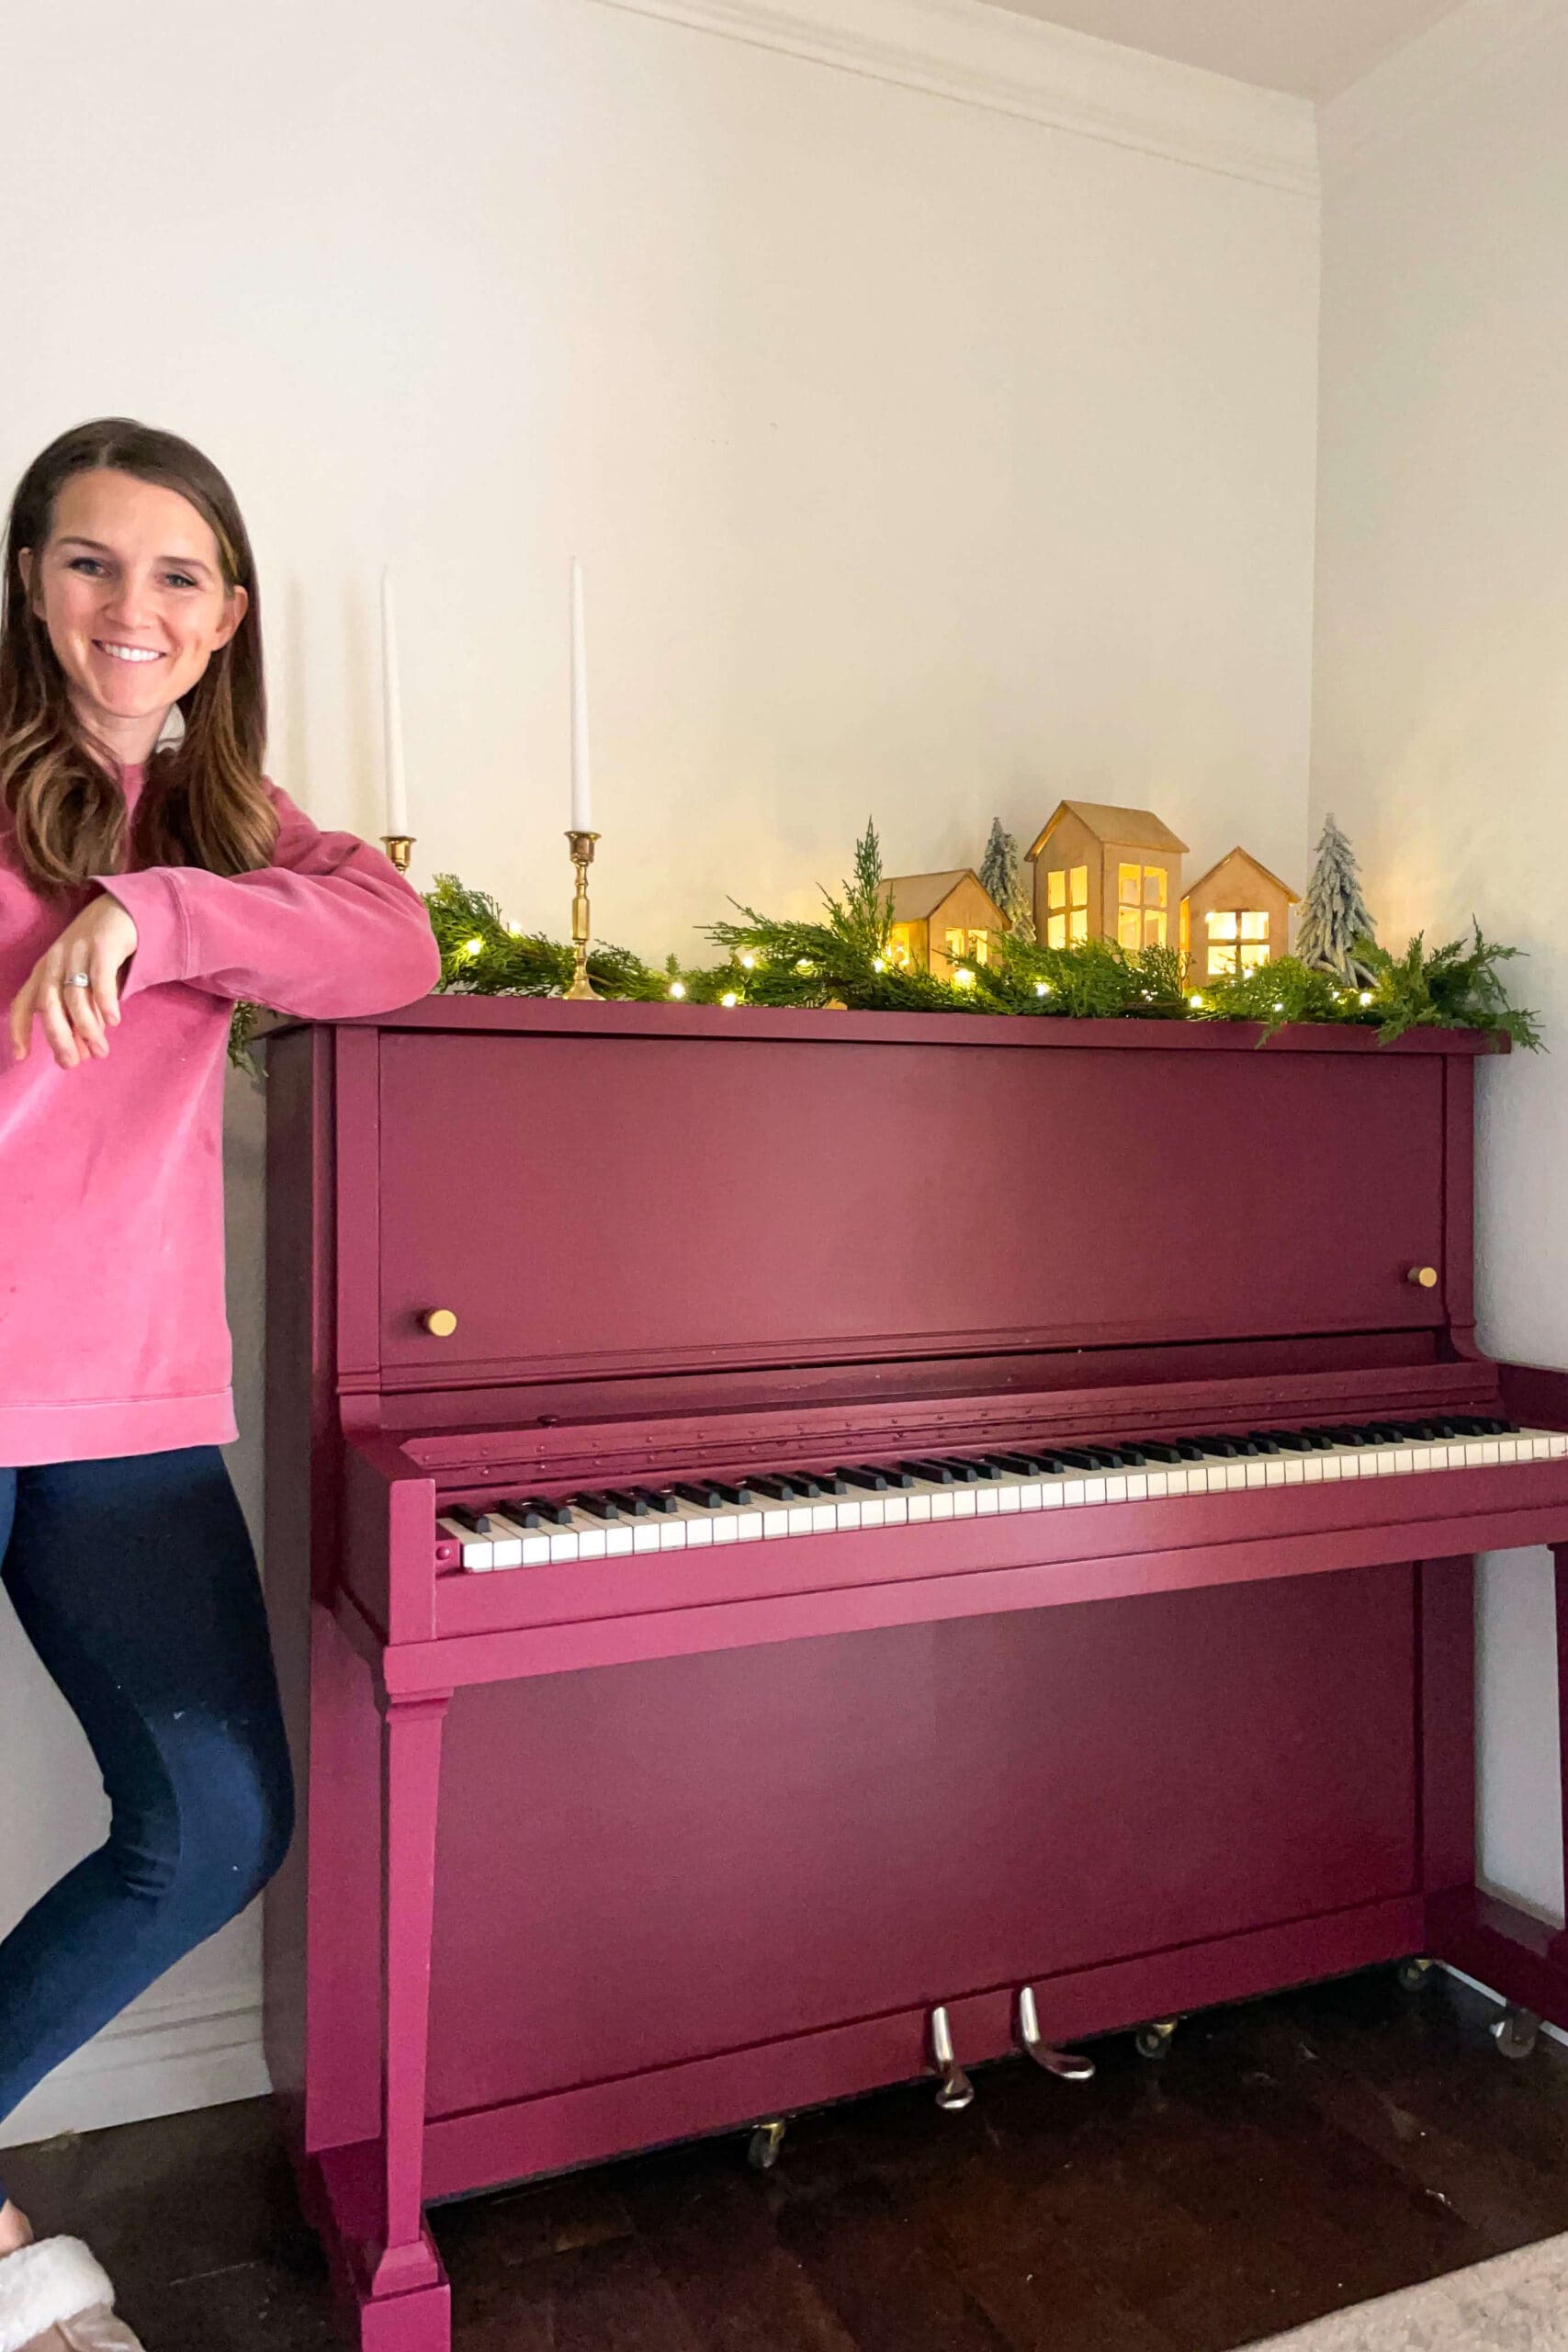
Ever see something and wish you could bottle that exact color into a paint can? That’s exactly what I did.
I had a gorgeous burgundy throw pillow in my living room – the same space where my painted piano was going to live. Using my Datacolor ColorReader (which, by the way, is so easy to use), I scanned the pillow, took the color match to Sherwin-Williams, and had it mixed right then and there. Boom. Custom color magic.


With the perfect shade locked in, it was time to roll up my sleeves and get to work on my painted piano project.
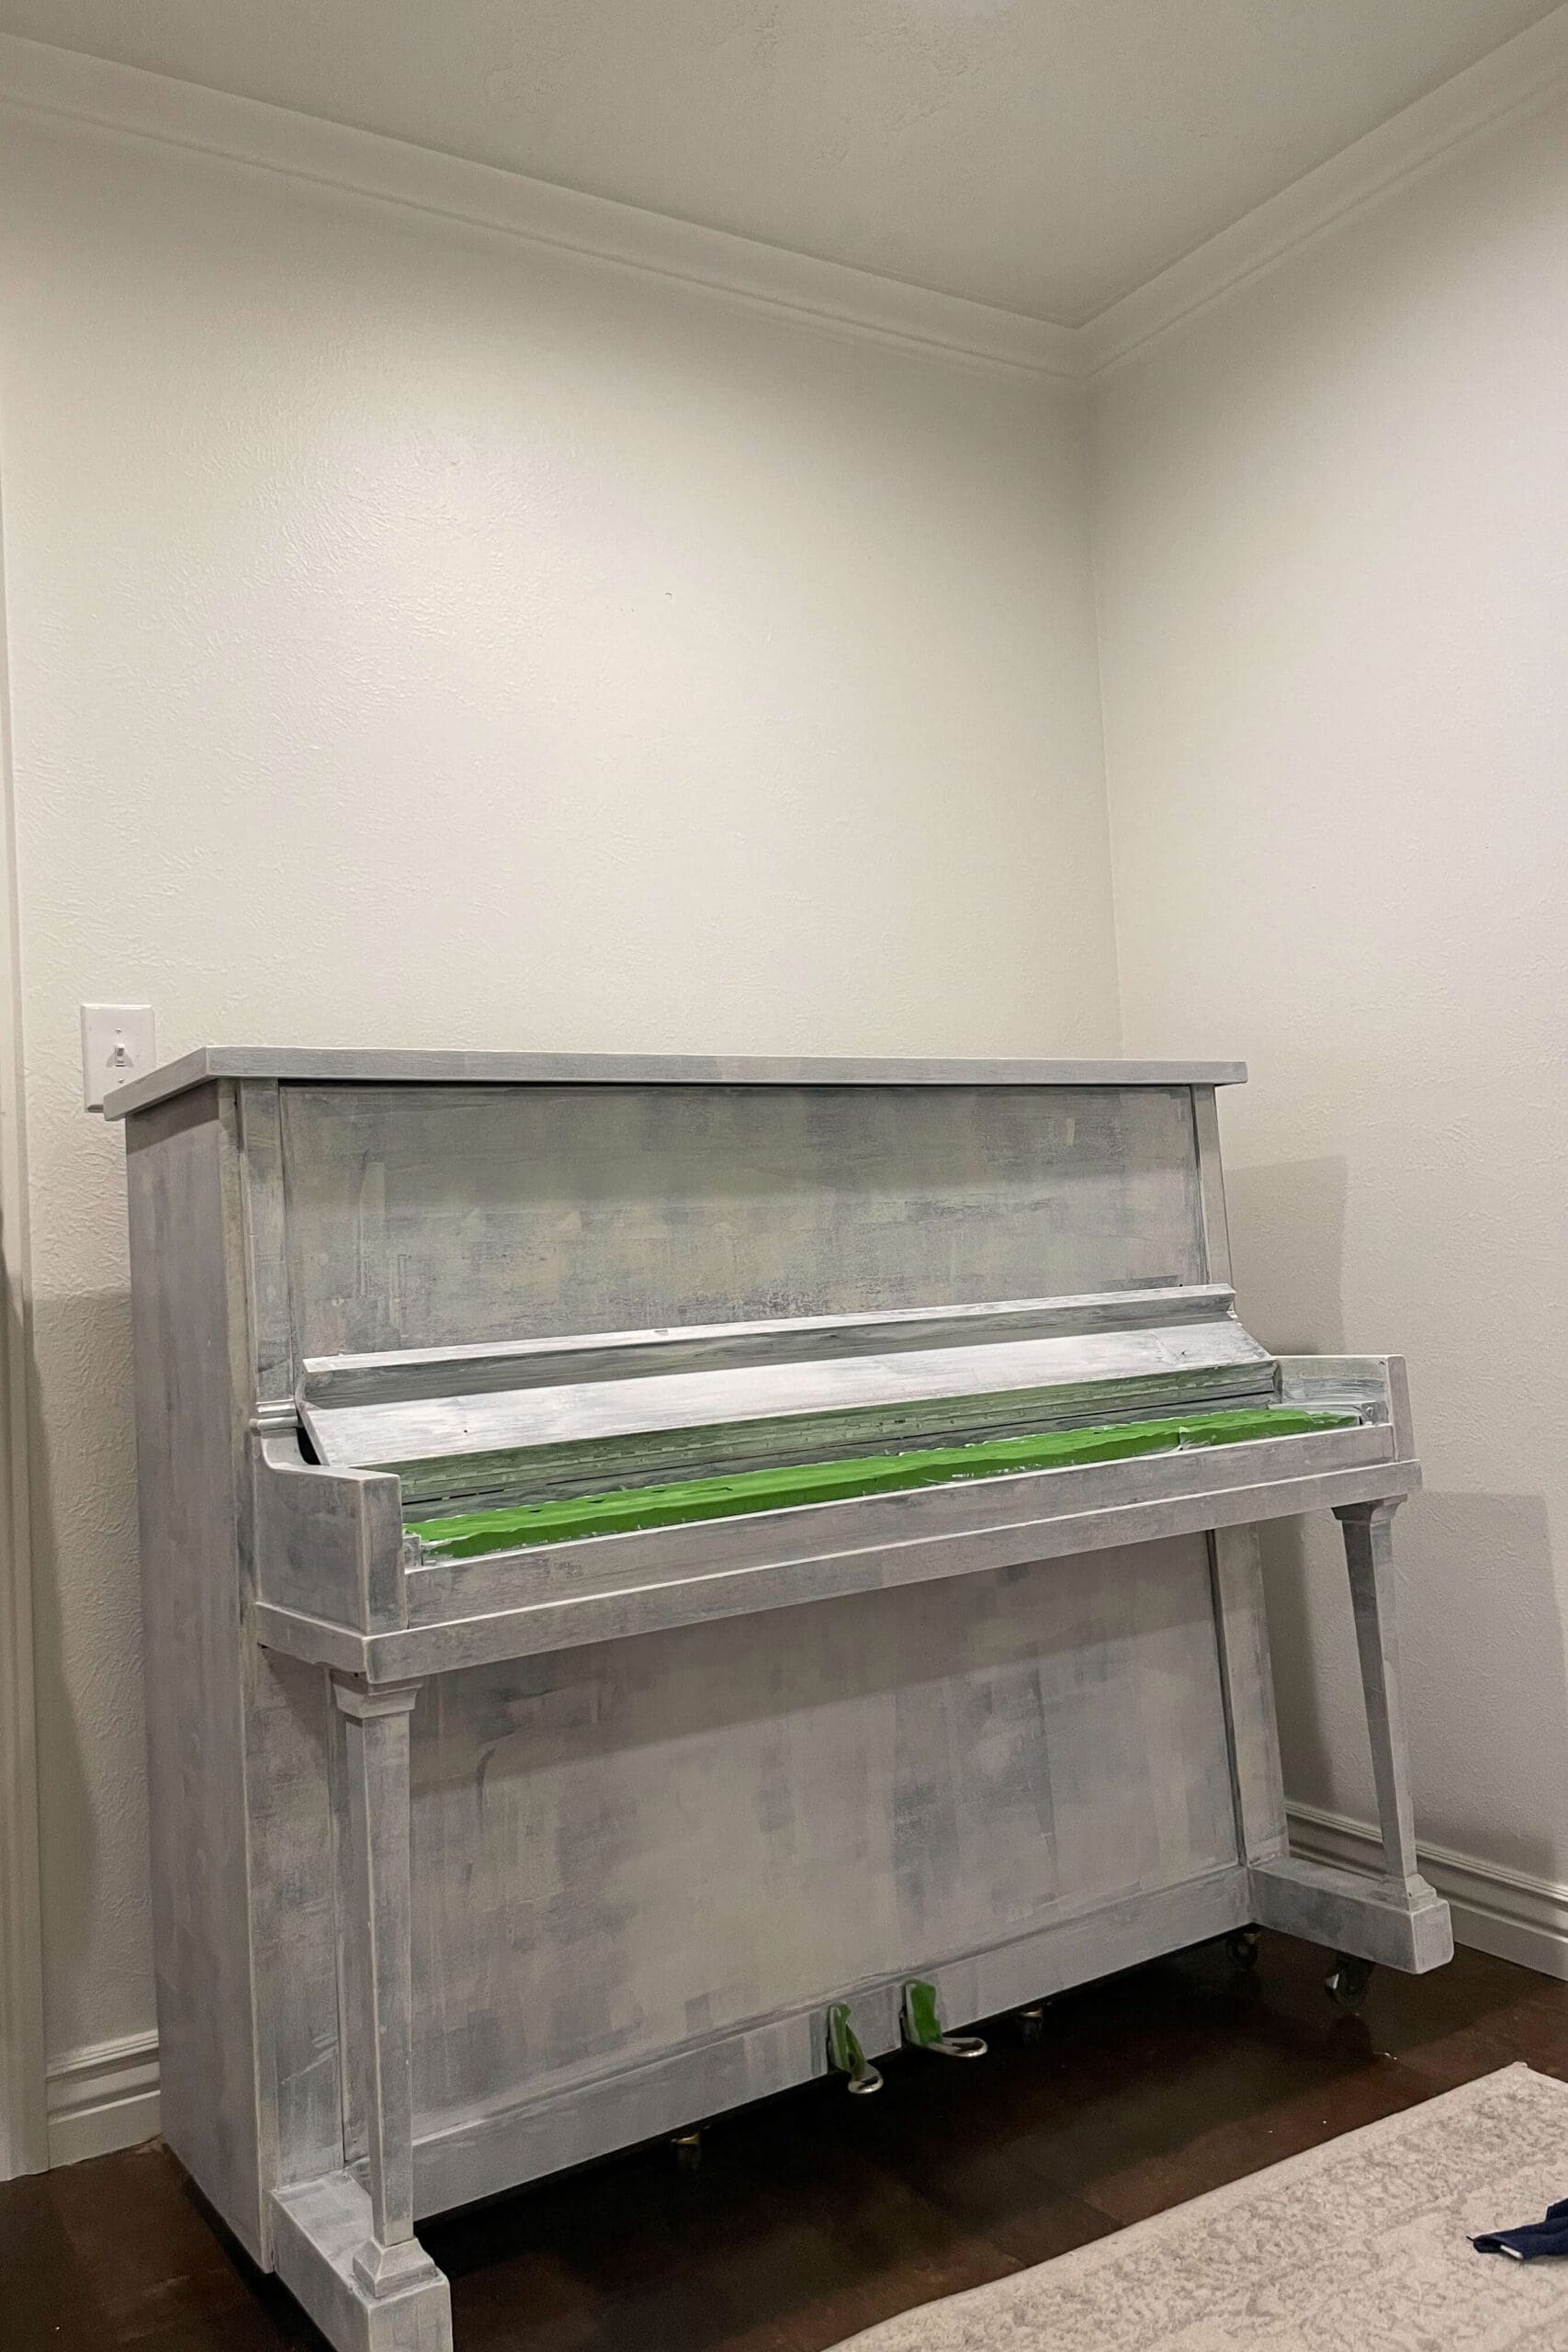
Prepping the Piano: Sanding Is Key
Look, I know sanding isn’t exactly fun. And I know everyone’s always searching for that magical no-sand method (believe me, I’ve tried them all). But here’s the truth: proper prep work is what makes your paint job actually last – especially on a piece like a piano.
Using a 150-grit sanding block, I went over every surface I planned to paint. Don’t skip the little grooves or the area under the fallboard – basically, if it’s getting painted, it needs to be sanded. Once I finished, I vacuumed up the dust and wiped everything down with a lint-free cloth to make sure it was nice and clean.


Don’t Skip the Primer When Painting a Piano
Next up: primer. This is not the step to skip, friends. A good primer is the foundation of a flawless painted piano.
I used a combo of a paintbrush for the detailed areas and a foam roller for the flat surfaces. Painter’s tape came in clutch for protecting the keys, pedals, and any parts I didn’t want to touch with paint.

How I Painted My Piano (Step-by-Step)
Now for the fun part – paint!
Using my custom color, I started applying the first coat to my painted piano using the same brush and roller combo. And yes, that first coat looked a little rough. Don’t panic. It’s totally normal.
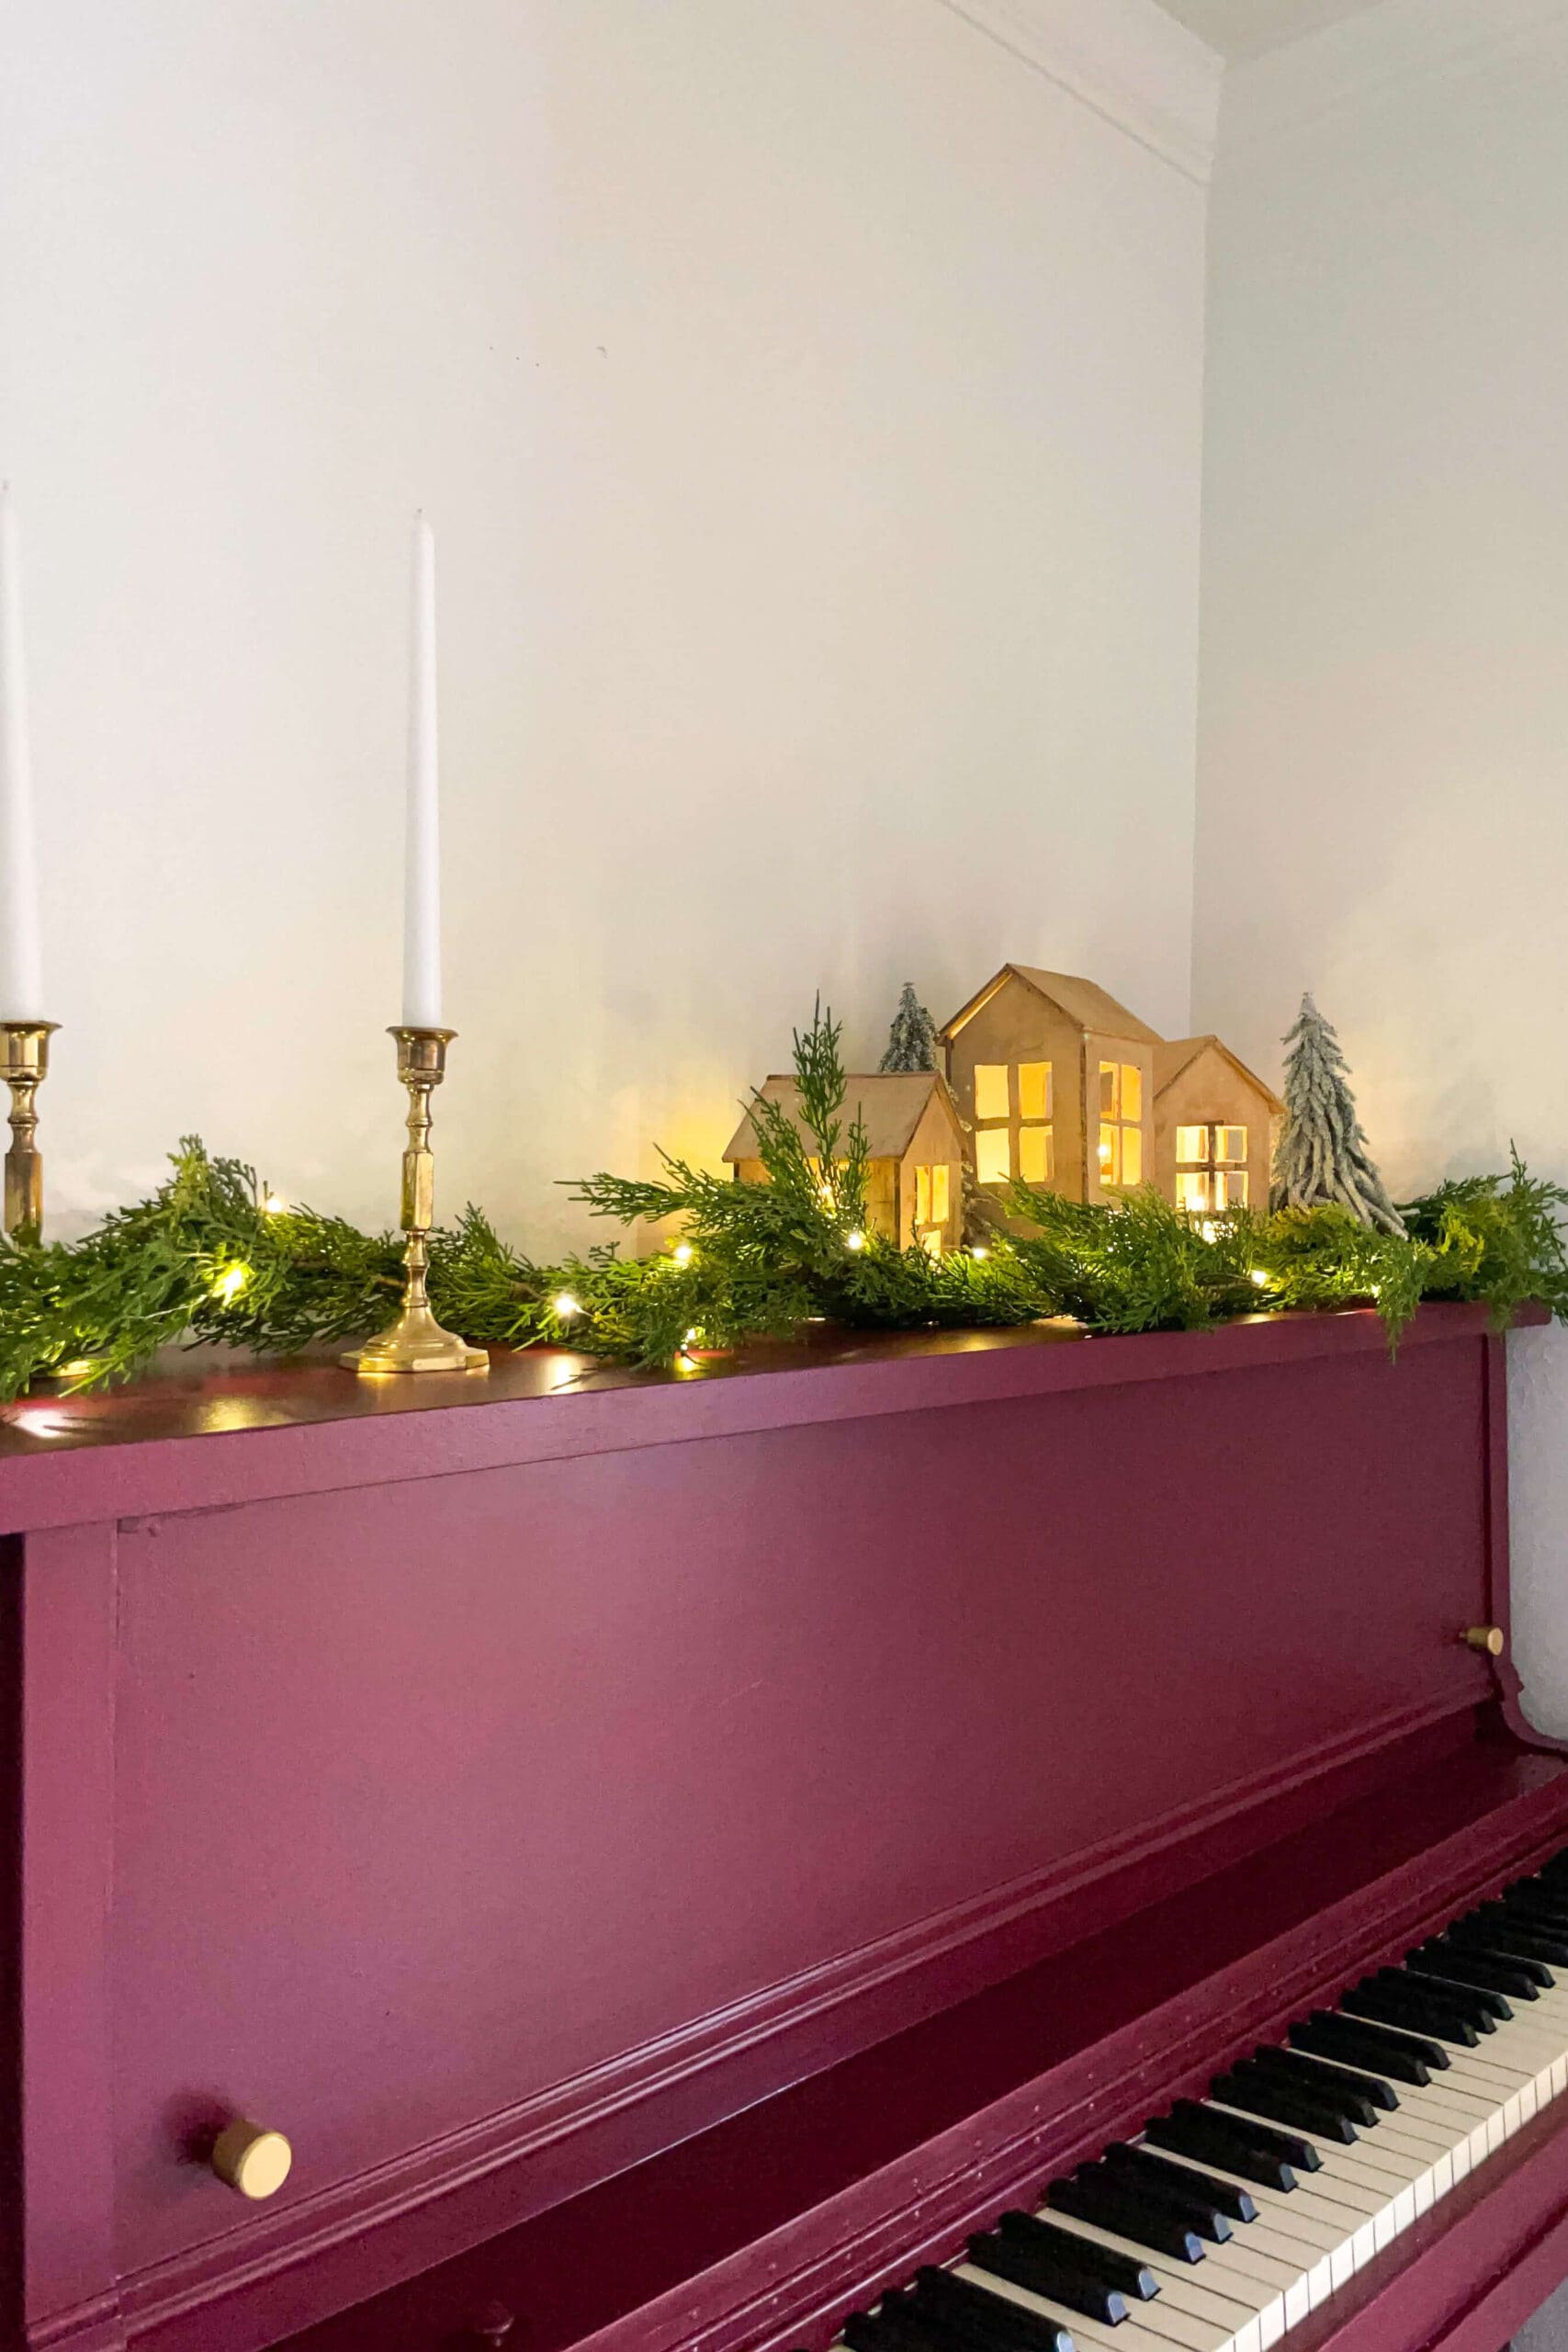
Once it dried, I added a second coat, and that’s when the magic really started to happen. My painted piano transformed into the rich, beautiful burgundy statement piece I had envisioned. Total showstopper.


Depending on how much use your piano gets, you might want to seal it with a protective topcoat like polycrylic. I skipped it this time around, but it’s definitely something to consider if your painted piano will see a lot of traffic (hello, little fingers and sticky snacks).
Why a Painted Piano Might Be Your Next Favorite DIY
A painted piano is such a bold and beautiful way to add color and personality to your home. It’s one of those projects that looks super impressive but doesn’t actually require a ton of skill – just a little patience and a good playlist.
And if you don’t already have an old piano collecting dust in your house? Check out Facebook Marketplace. People are practically giving them away. Grab one, grab some paint, and create your own stunning painted piano.
Looking for another simple project that highlights the power of paint? In this post, I explain how to update your window frames with a sleek black finish for a modern look.
📌Save this Makeover for Later

Frequently Asked Questions About Painting a Piano
If you’re just painting the outside, you’re in the clear. I didn’t open anything up or paint any of the inner components—just the exterior case. So the sound? Still lovely.
You want a high-quality interior paint with a durable finish. I used a custom-mixed color from Sherwin-Williams and it worked like a charm. If your piano is going to get a lot of love (aka kid fingers), consider sealing it with polycrylic.
Honestly, this was a weekend project. The longest part is waiting for paint to dry between coats (which is the perfect excuse for a coffee break or sneaky Target run).
