How to Build DIY Raised Garden Beds (Step-By-Step)


Published April 10, 2026
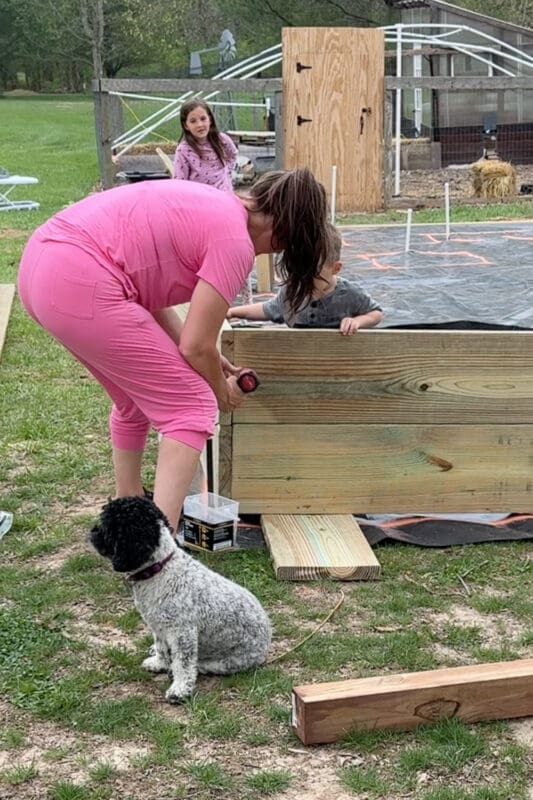
If you’ve been following along, you know we moved into this house last summer. As much as it killed me, it was just too late in the season to start a garden. So I spent all winter dreaming about it, and the second the weather started warming up this spring, I was OUT. THERE. One of my biggest outdoor projects this year is building a garden for our family, and I’m doing it with DIY raised garden beds. And honestly, I couldn’t be more excited about it.
So why raised beds instead of just planting in the ground? Two big reasons. First, our soil here is only decent for a few inches before it turns into straight-up hard clay. Not exactly ideal for growing anything. With raised beds, I get to fill them with gorgeous, high-quality soil that will actually nourish my plants and give me a better yield. Second, and my back will thank me for this, raised beds are just so much more comfortable to work. No bending all the way down to the ground, no kneeling in the dirt. Yes, please.
Table of Contents
- What You’ll Need for DIY Raised Garden Beds
- Before You Build: Prepping the Garden Area
- Getting the Lumber for DIY Raised Garden Beds
- Step 1: Cut Your Boards
- Step 2: Assemble the Side Panels
- Step 3: Connect the Corners
- Step 4: Reinforce Outside Corners (For L-Shaped Beds)
- Step 5: Add Interior Support Beams
- Step 6: Add the Cap (Optional, But Do It!)
- My DIY Raised Garden Bed is Done
- One Important Note: Remove the Weed Barrier!
- 📌 Save This DIY Raised Garden Bed for Later
- FAQ: DIY Raised Garden Beds
What You’ll Need for DIY Raised Garden Beds
Tools:
- Miter saw and/or circular saw
- Impact driver or drill
- Staple gun
- Measuring tape
- Speed square
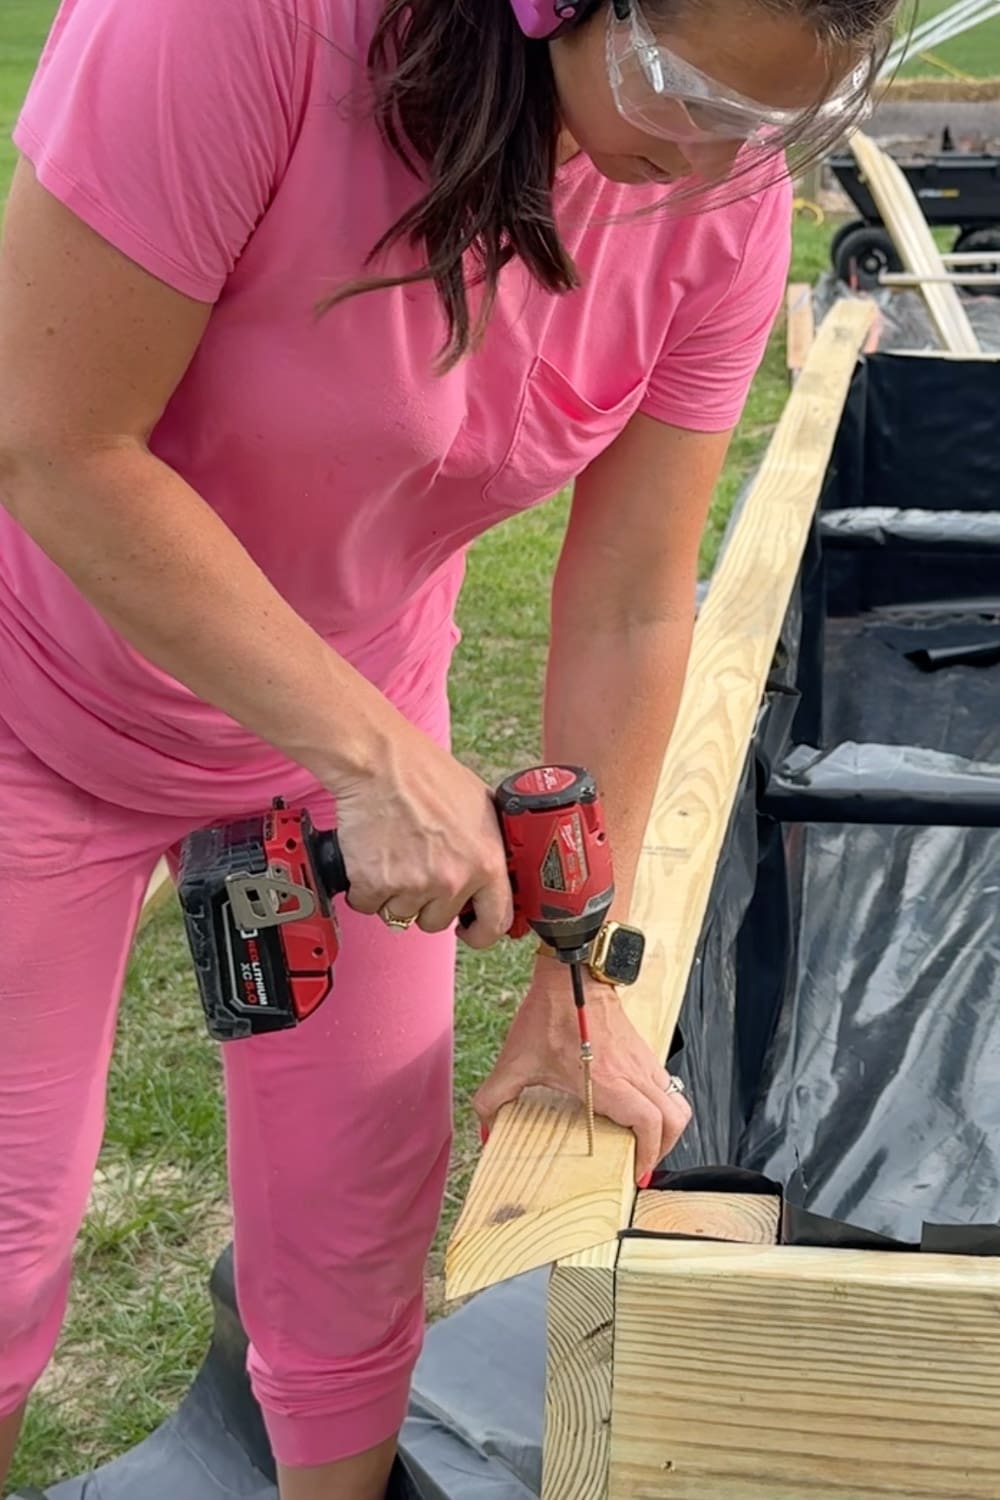
- Safety glasses and ear protection
Materials:
- 4×4 pressure treated posts (cut to 24″)
- 2×12 pressure treated boards (side panels)
- 2×4 pressure-treated boards (support beams and cap)
- Black plastic sheeting / liner
- Wood screws for exterior use
- Staples for staple gun
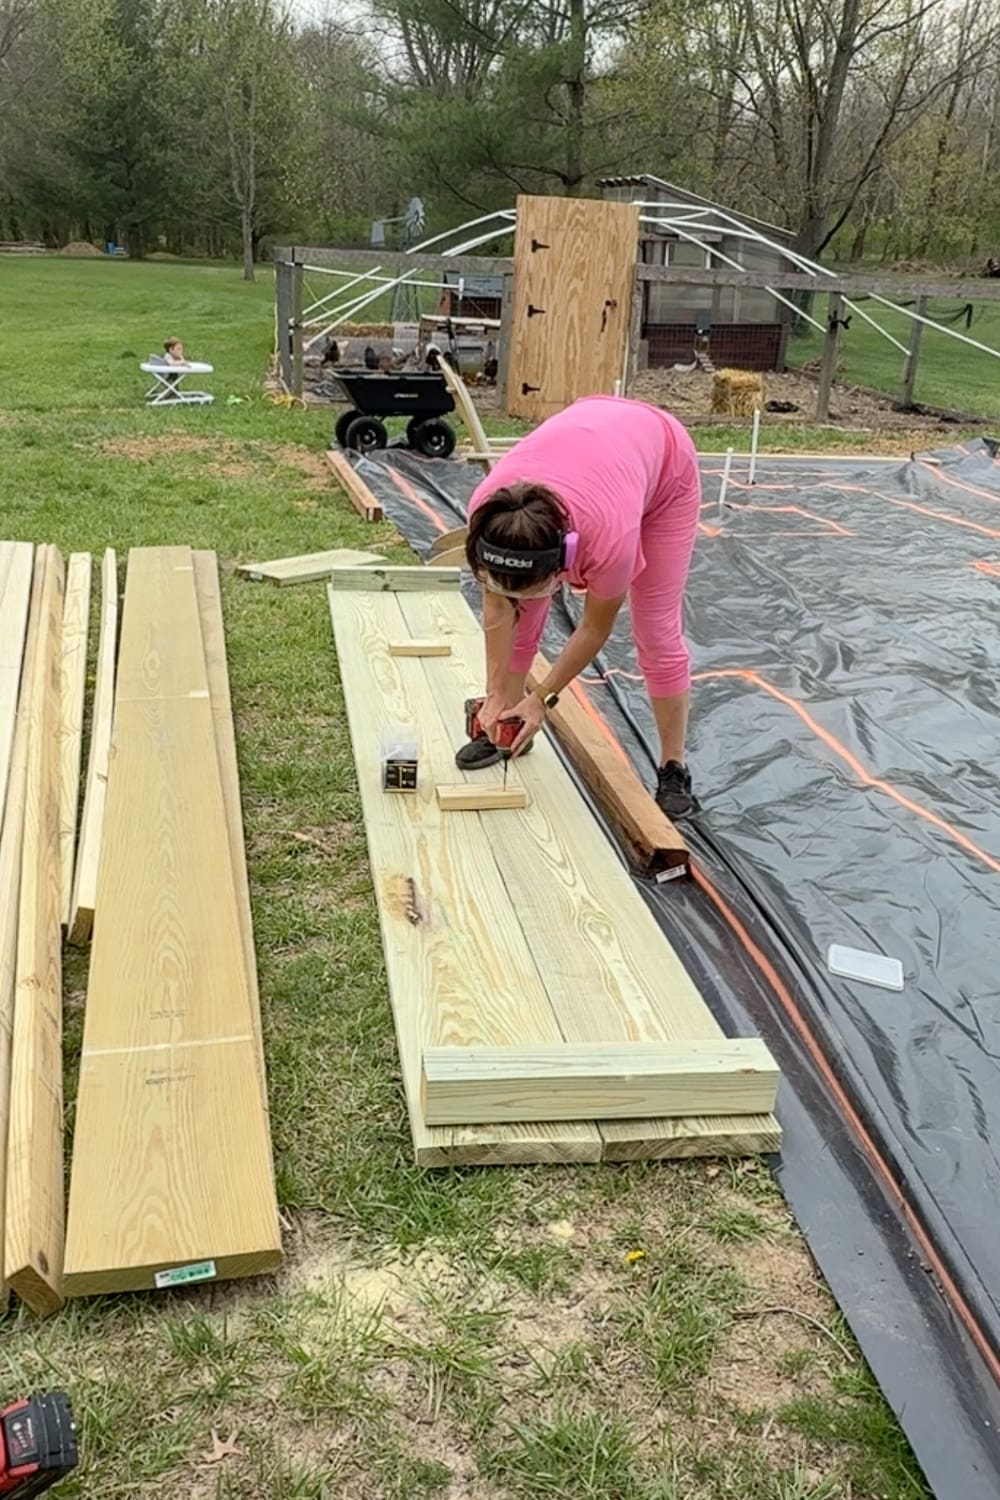
Before You Build: Prepping the Garden Area
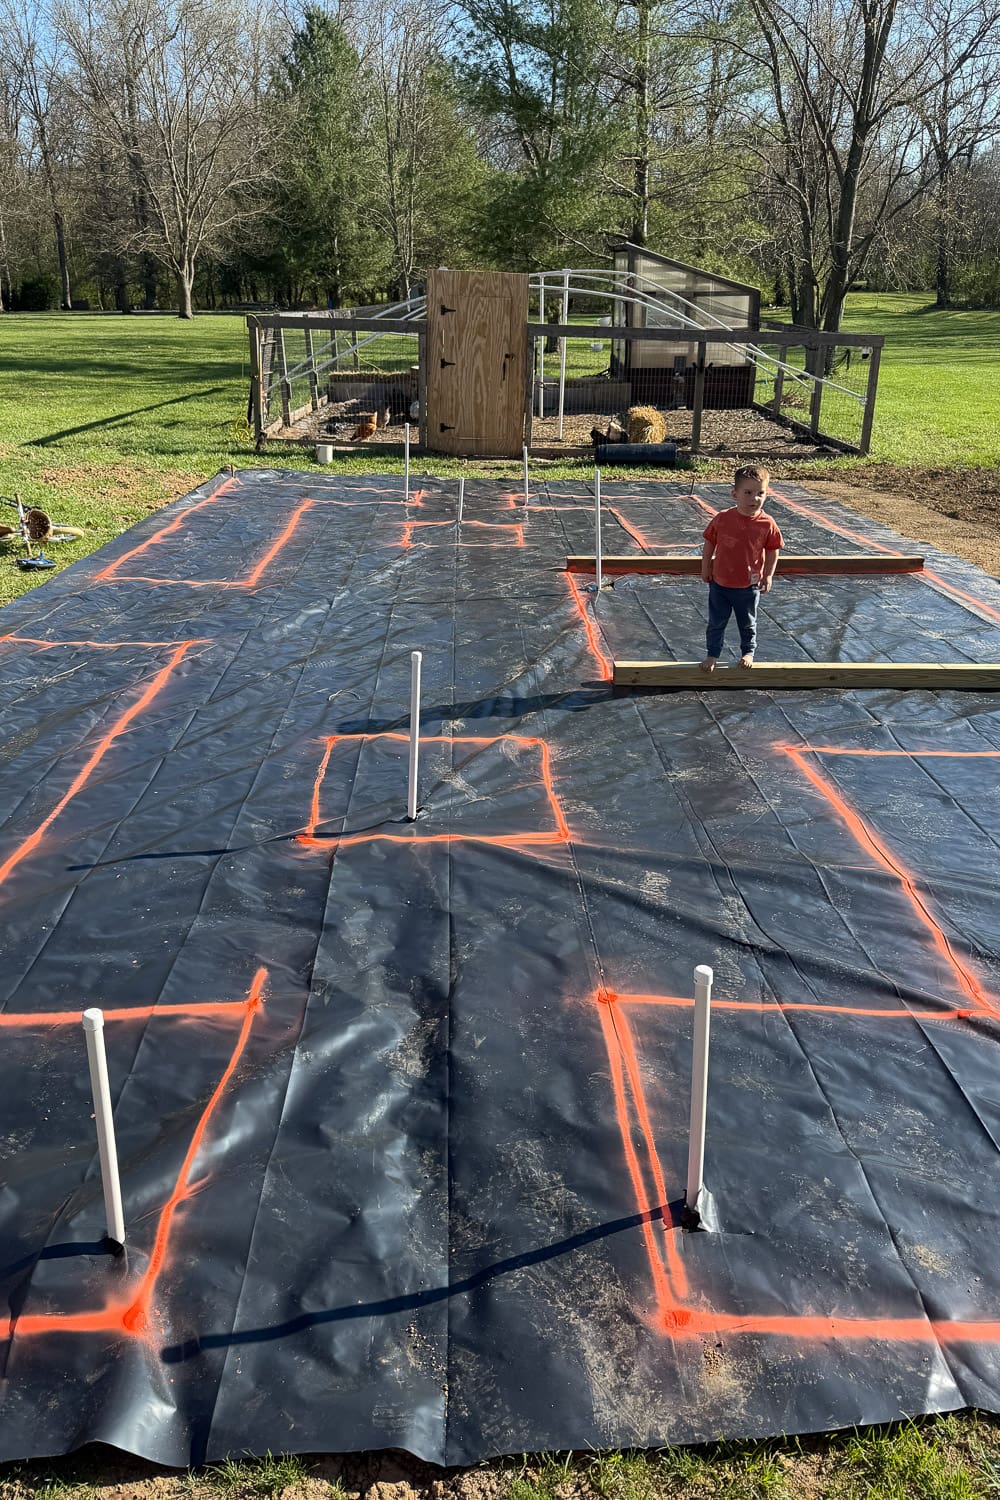
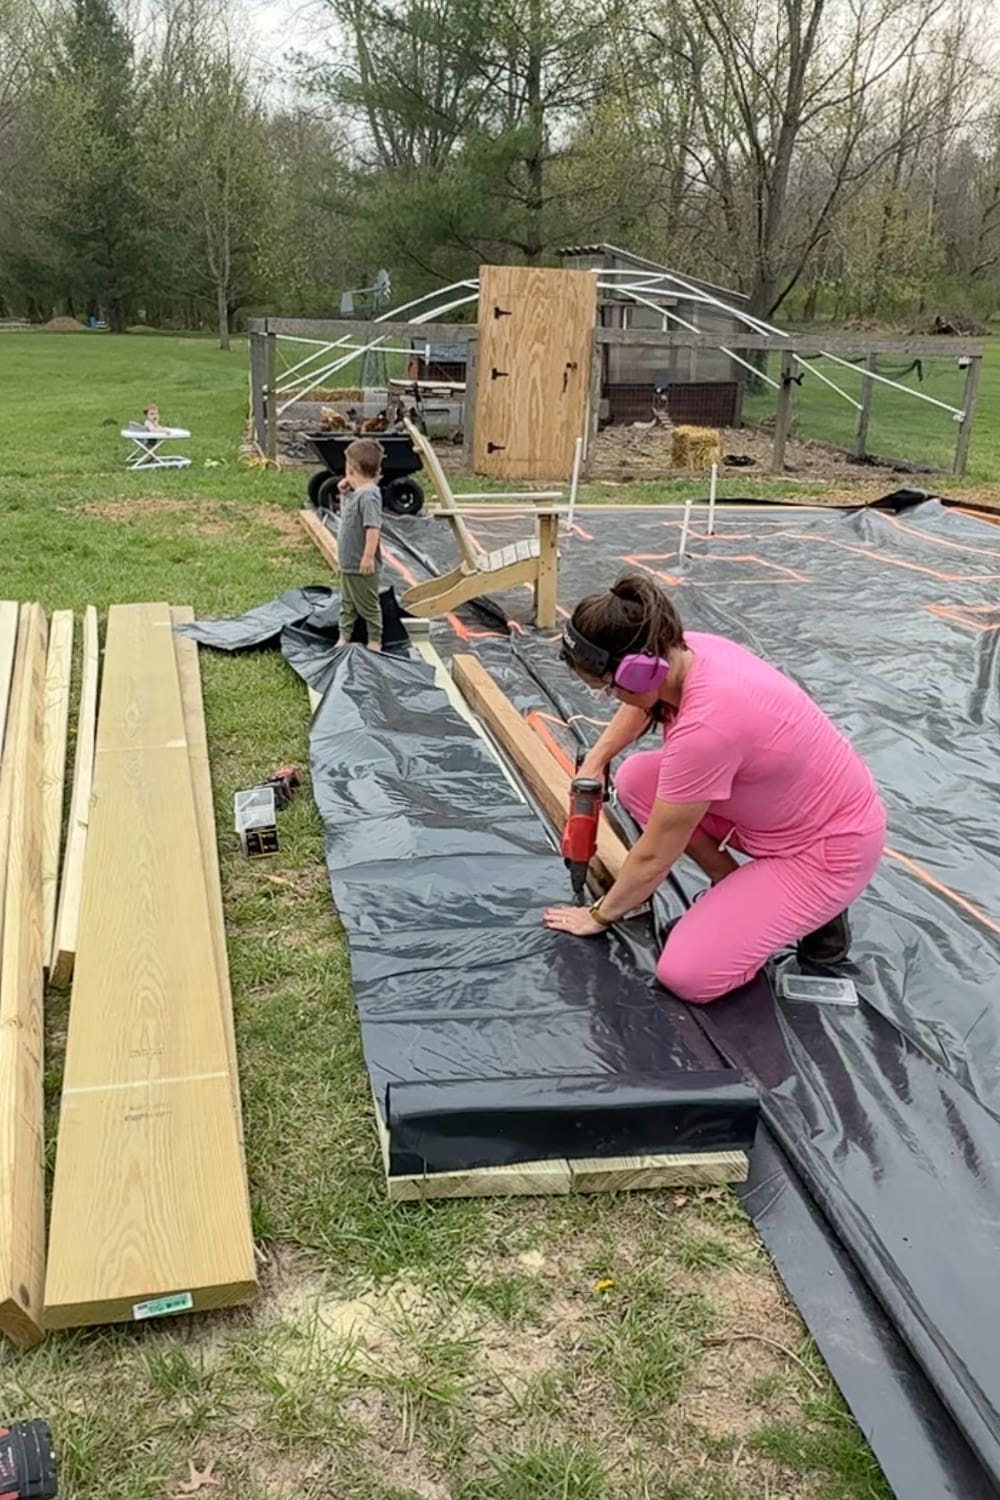
Before I cut a single board, I did some important groundwork… literally. I started by leveling out the area where the garden would go. This step is totally necessary if you want your boxes to sit straight and look good. (Check out my full post on how I leveled the ground here → How to Level Ground for Garden Beds (Easy DIY Method))
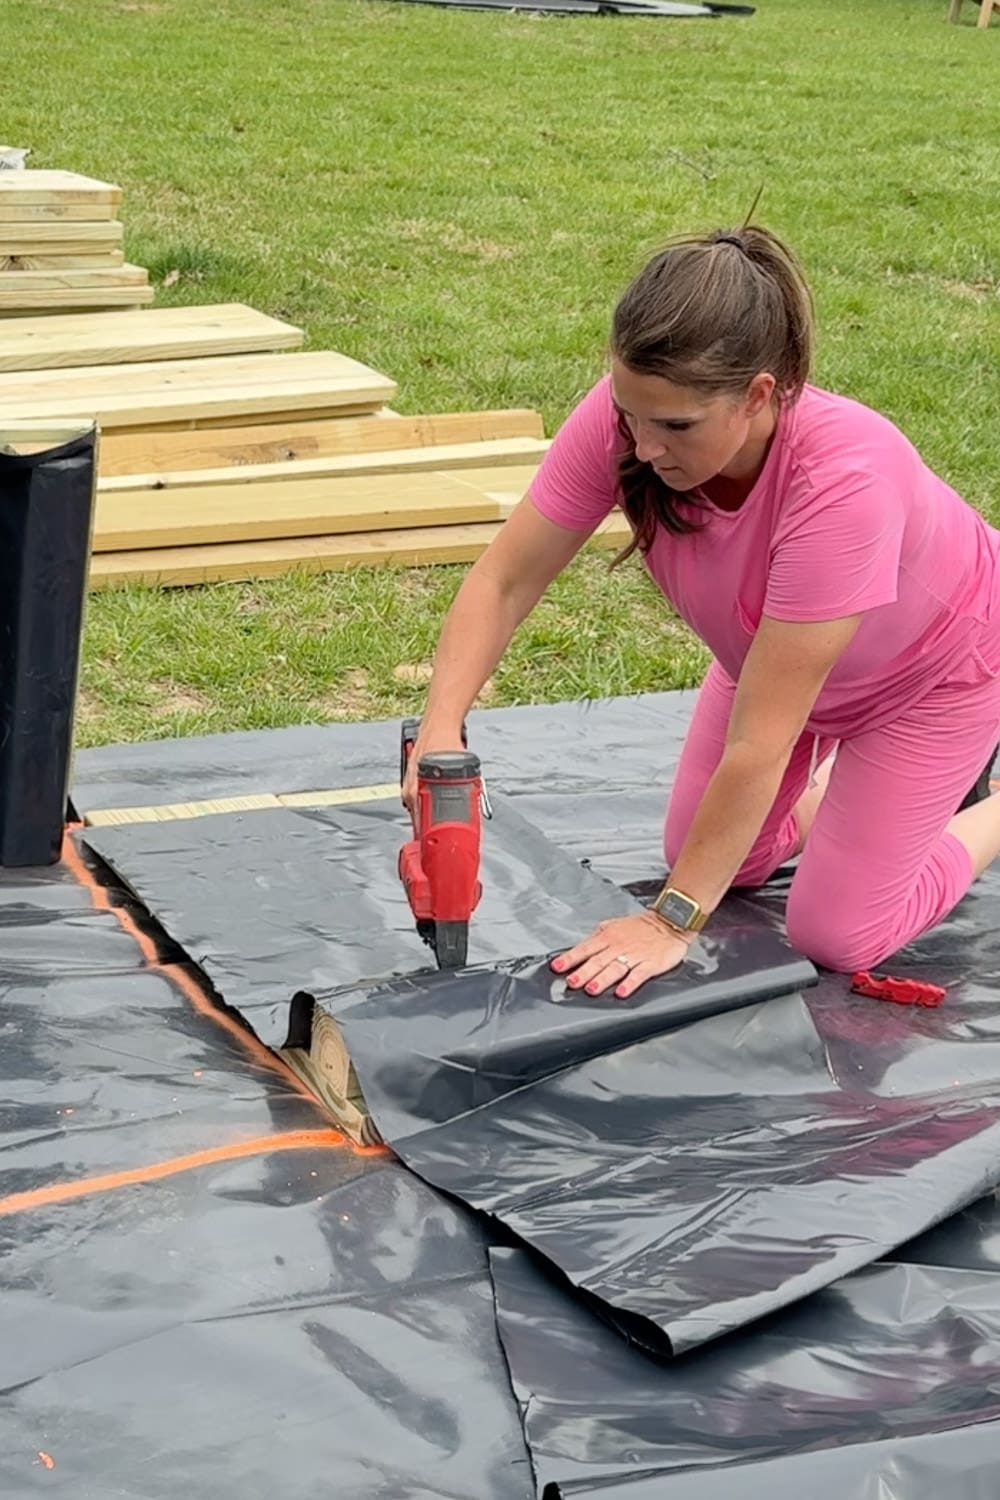
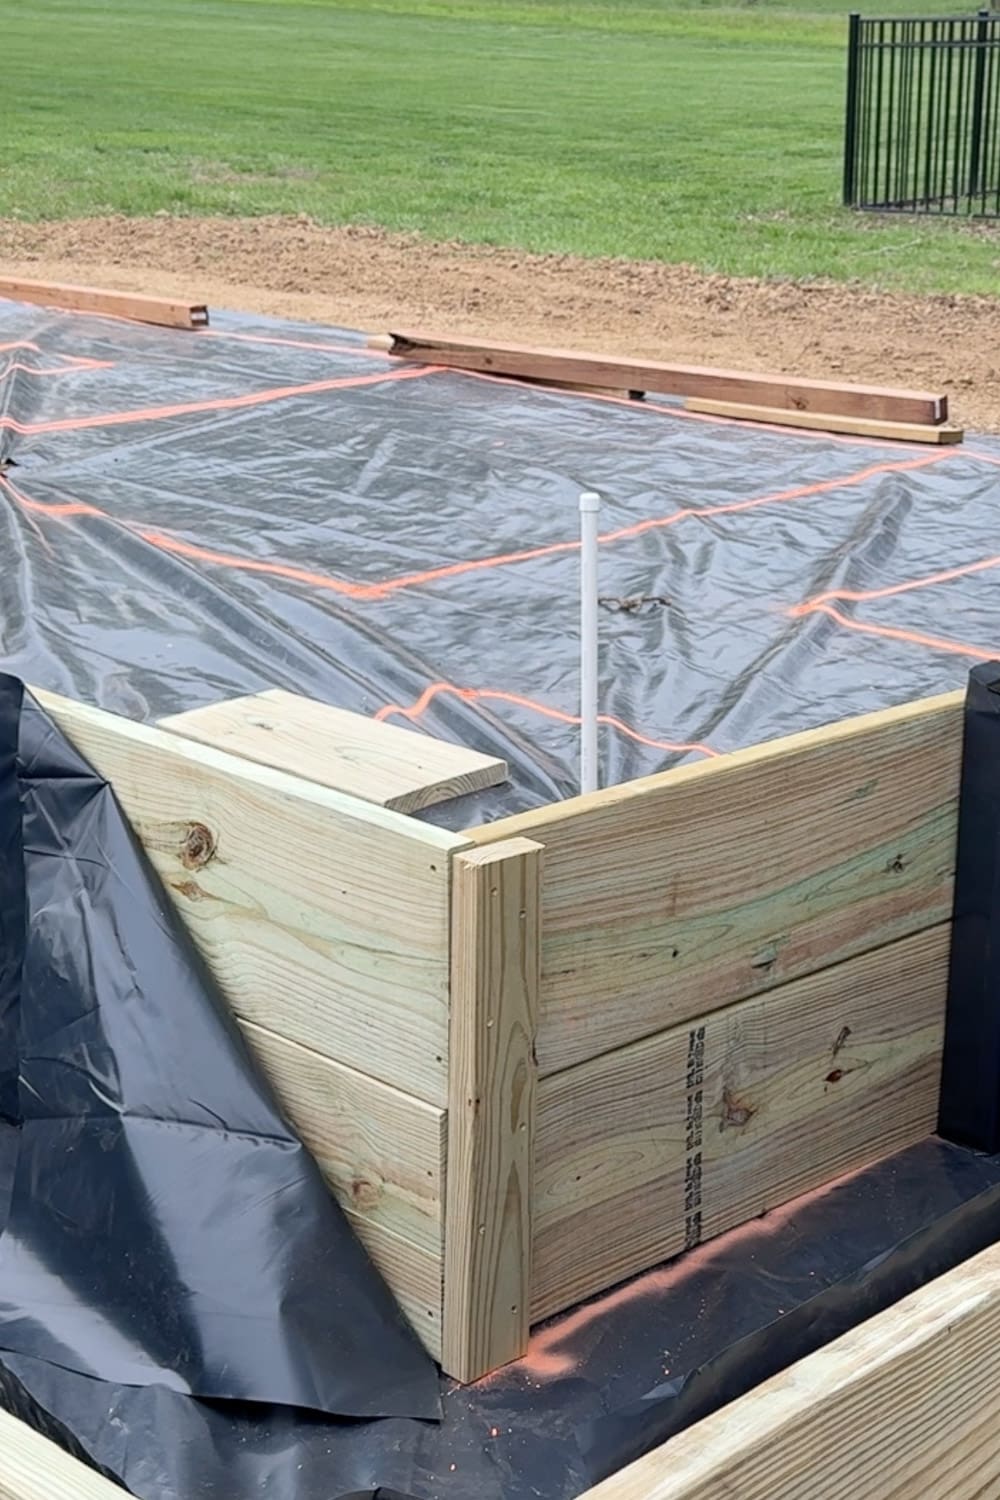
We also buried water lines so that each box will have its own water source built right in. So smart and so worth doing before anything goes on the ground. Then we covered the entire area with a thick black plastic sheeting to prevent weeds from growing up in the walkways between the beds. (I walk through that whole process in this post → Weed Control for a Garden That Actually Works)
Once the plastic was down, I used marking paint to map out exactly where each box would go. This made it so easy to visualize the layout and made sure everything would fit the way I planned.
Getting the Lumber for DIY Raised Garden Beds
Okay, here’s where things got interesting. This project takes a LOT of lumber, and we don’t own a pickup truck. Enter: the U-Haul. Honestly, it came in clutch. If you’re taking on a big project like this, don’t be afraid to rent a moving truck for the day; it’s totally worth it.

When it came to choosing lumber, we went with pressure-treated boards. Pressure-treated wood is going to last so much longer outdoors, which is exactly what you want for a permanent garden structure. The one thing to know is that the preservative chemicals used in pressure-treated wood mean you don’t want the garden soil coming in direct contact with the wood. But don’t worry, we’re going to line the inside of the boxes with plastic, which solves that problem (and helps the wood last even longer!).
If you want to skip the plastic liner, you could use cedar or redwood for your DIY raised garden beds instead, which are both naturally rot-resistant and chemical-free. Just know it will raise the cost of the project.
Step 1: Cut Your Boards
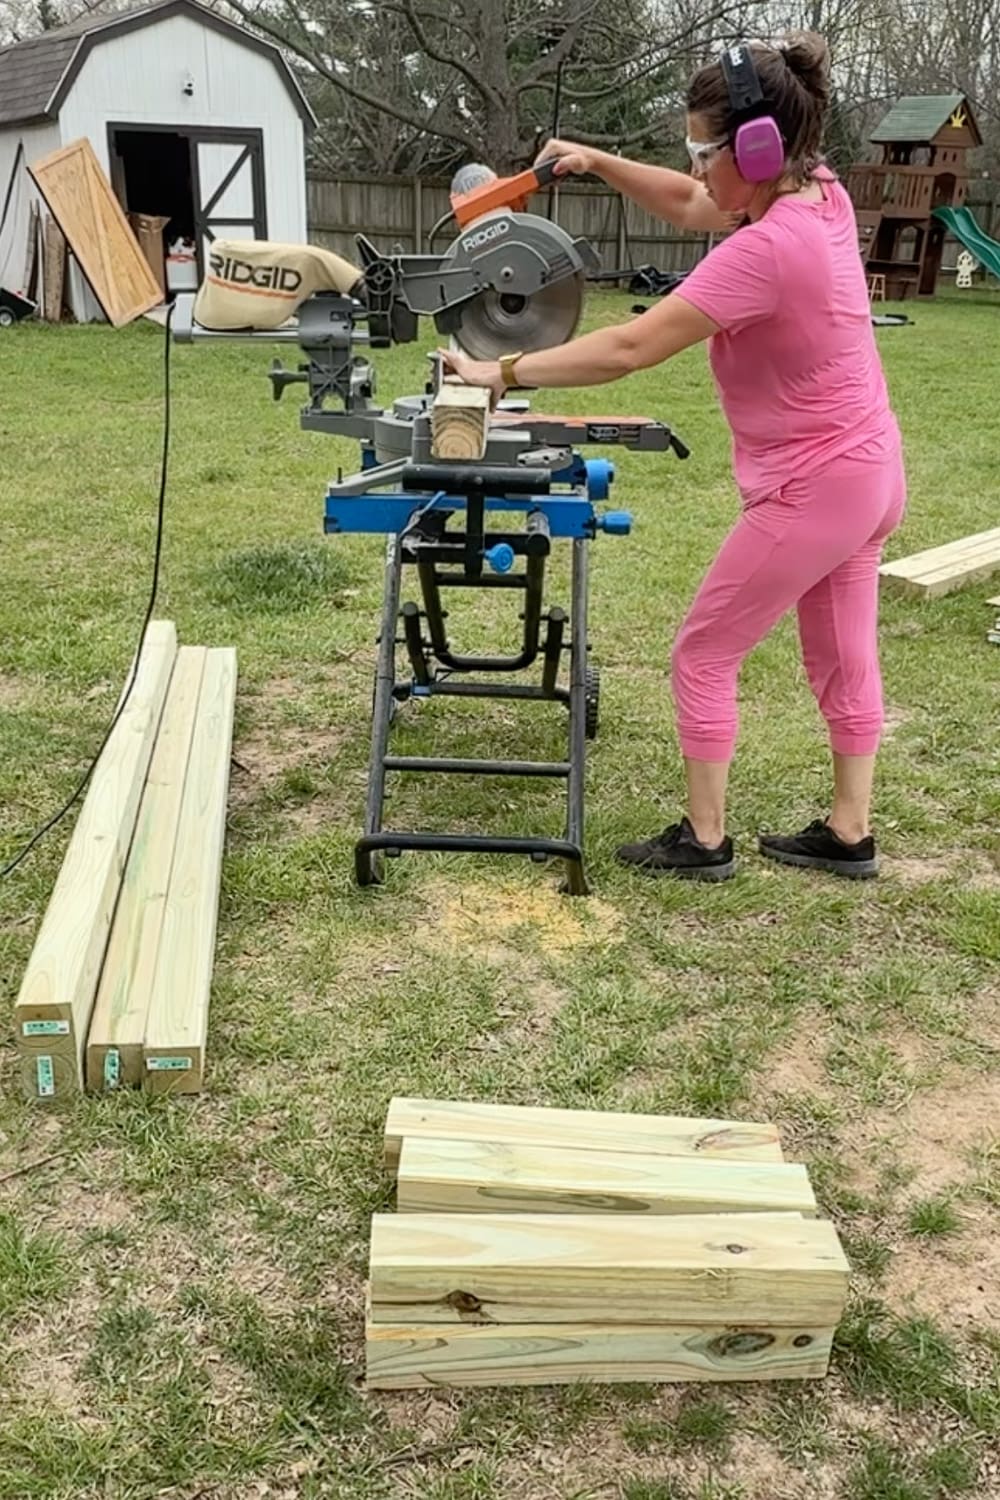
First things first, cut everything to length. I went back and forth between using my circular saw and my miter saw, and honestly, both have their place. If a board is really long and heavy, it can actually be easier to use a speed square to mark your cut line, then cut it with the circular saw close to the ground. But if you have a helper or a couple of sawhorses, a sliding miter saw is going to give you the cleanest, easiest cuts.
For these beds, I’m using:
- 4x4s for the corner posts (cut to 24″)
- 2x12s for the side panels, stacked to make the beds 24 inches tall

At our last house, I used 2x10s, which are cheaper, but make a shorter bed. My back said absolutely not this time. (Curious what the 20″ tall beds look like? Check out that build here → How to Build DIY Tall Outdoor Planter Boxes)
Step 2: Assemble the Side Panels
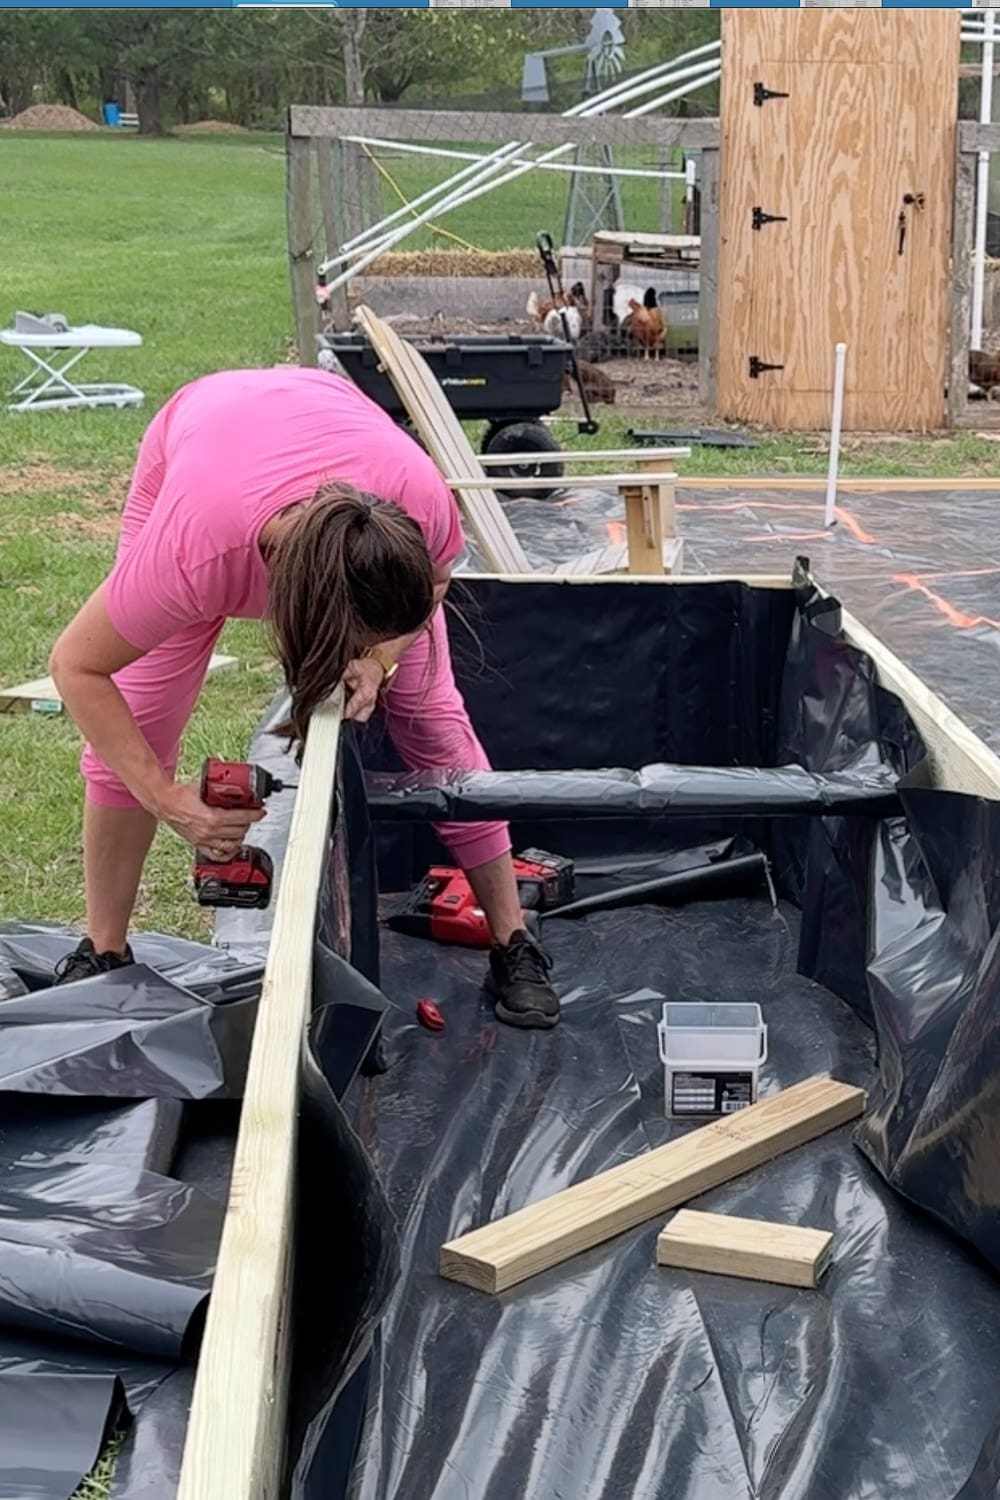
Once your boards are cut, lay your 2x12s out flat on the ground and place a 24″ 4×4 near the corner, leaving a gap from the end equal to the thickness of your 2×12 boards (this is where the perpendicular side will connect later). Attach the boards to the 4×4 with wood screws.
To add extra strength, I also attach a couple of pieces of scrap wood along the inside of the panel as additional support, screwing them in with my impact driver (a drill would work too).
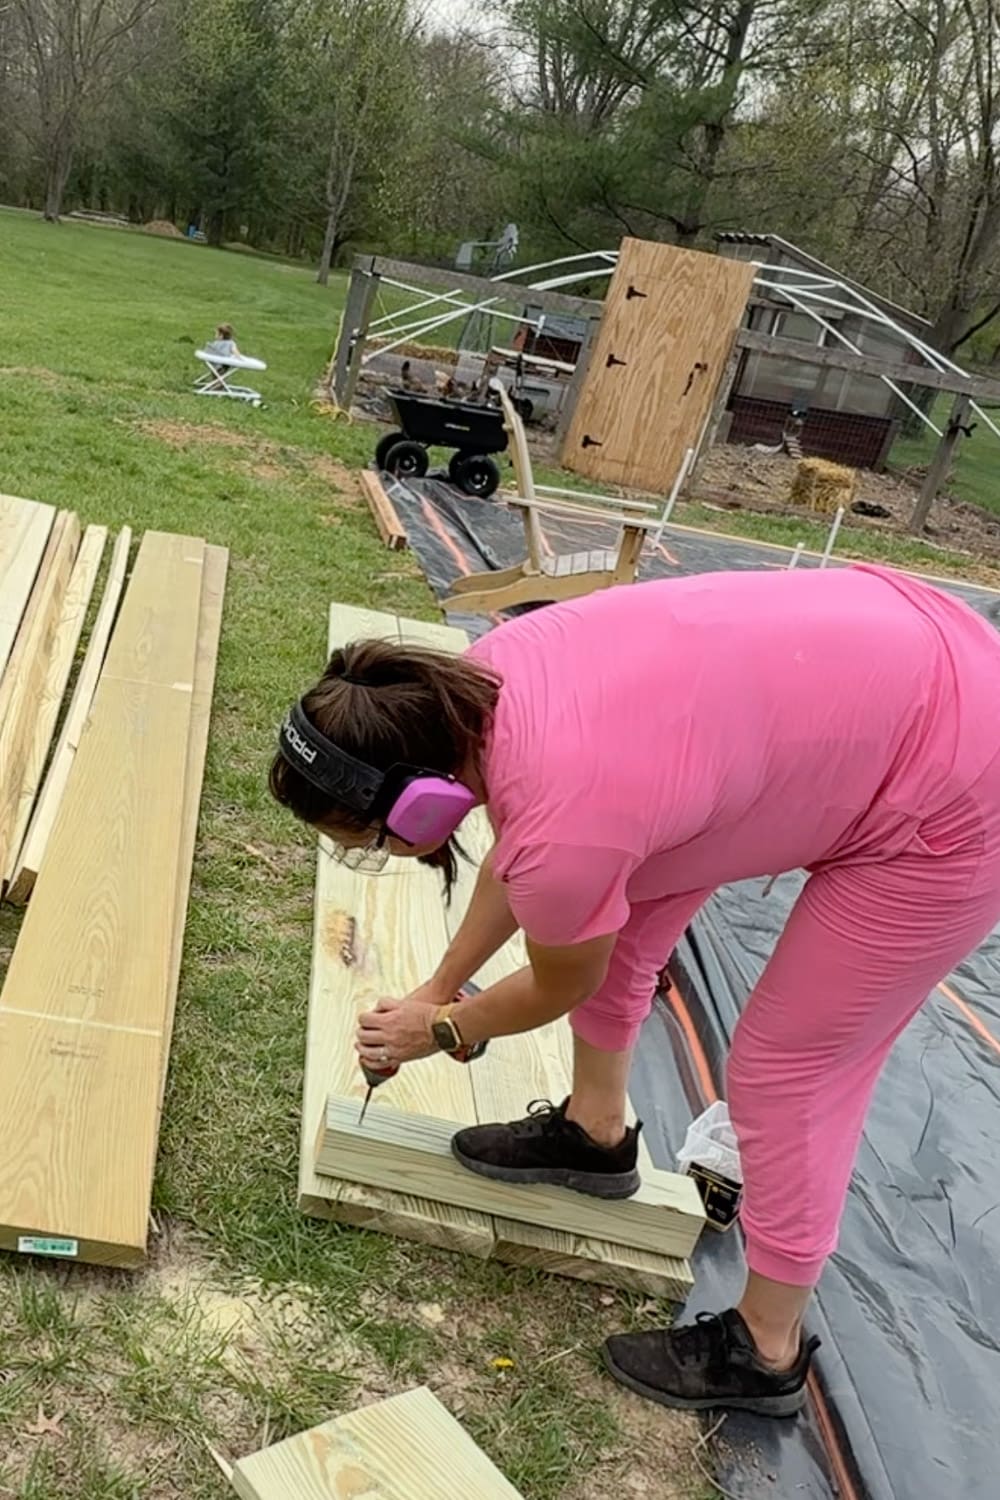
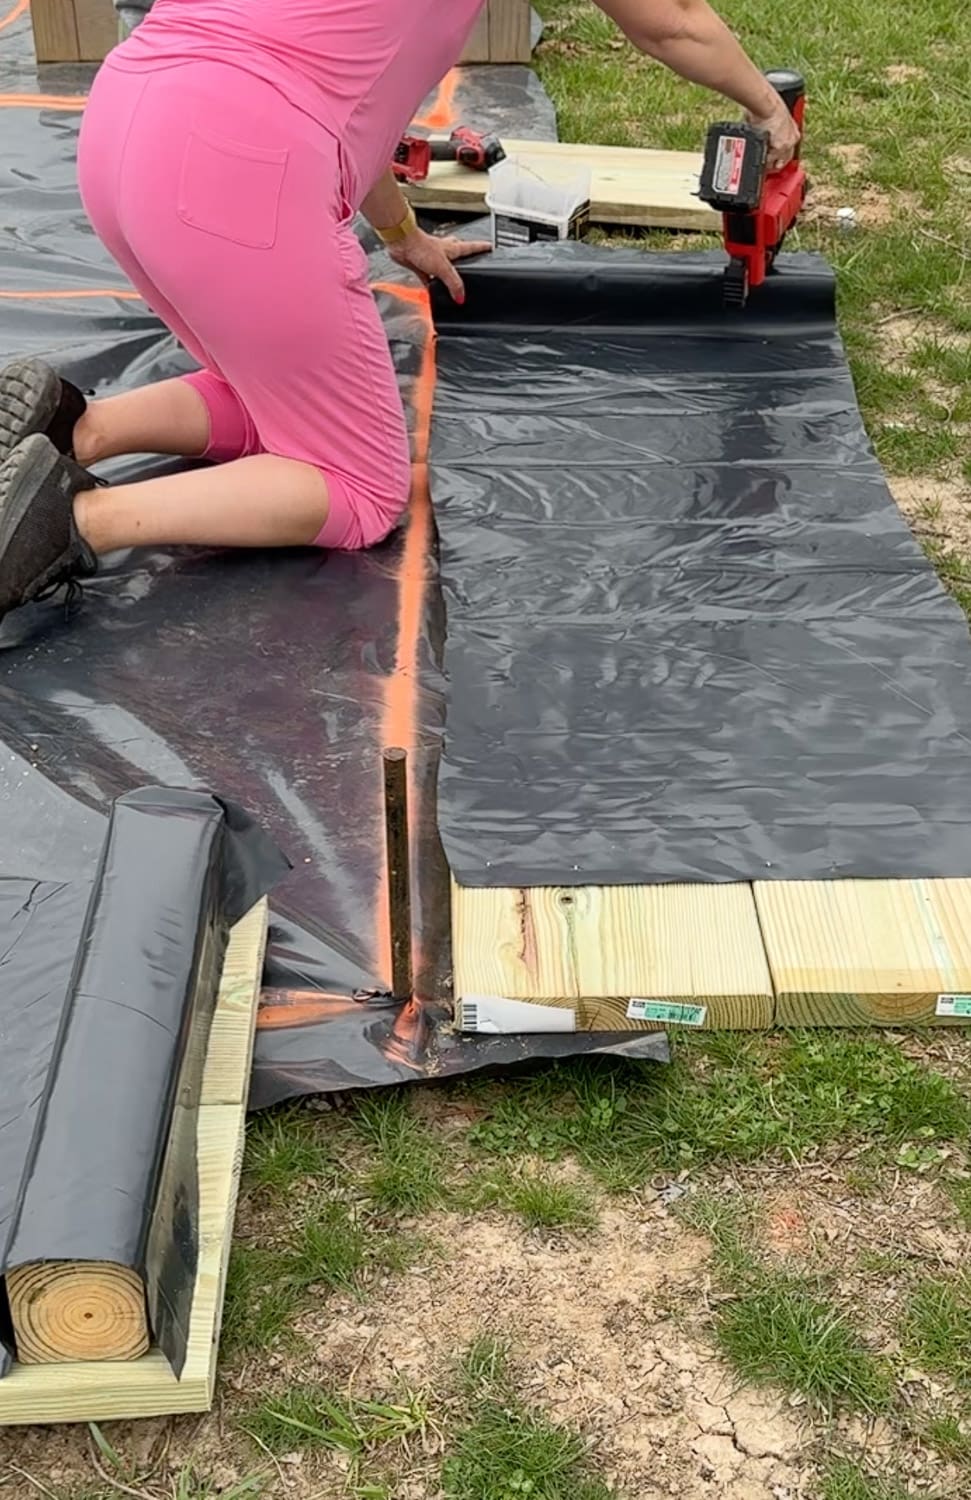
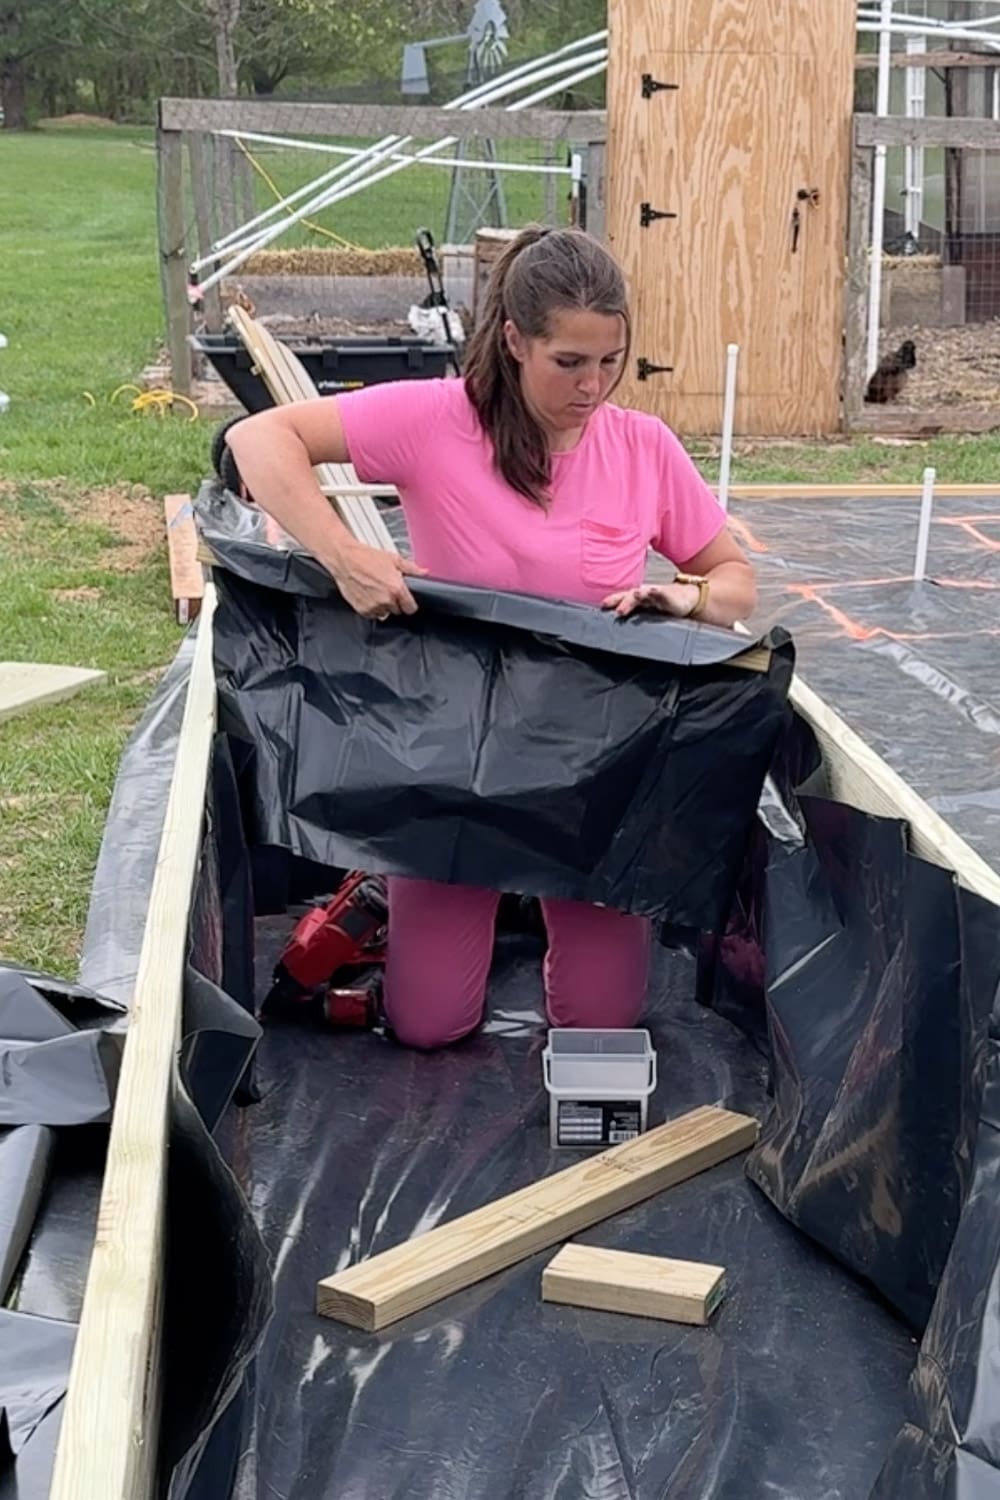
Once the panel is assembled, it’s time to line it with black plastic. Cut your plastic to fit, and use a staple gun to attach it securely to the inside of the panel.
For the next panel, repeat the same process, but only place a 4×4 at the far end. The end that will connect to your first panel will share that panel’s 4×4. One 4×4 per corner is all you need!
Step 3: Connect the Corners
Once you have two panels built and lined, bring them together at the corner and attach them with wood screws driven in from both directions.
Then just keep building, add more sides, work your way around the box. For shorter sides, you can skip the interior scrap wood support since the shorter length doesn’t need it.
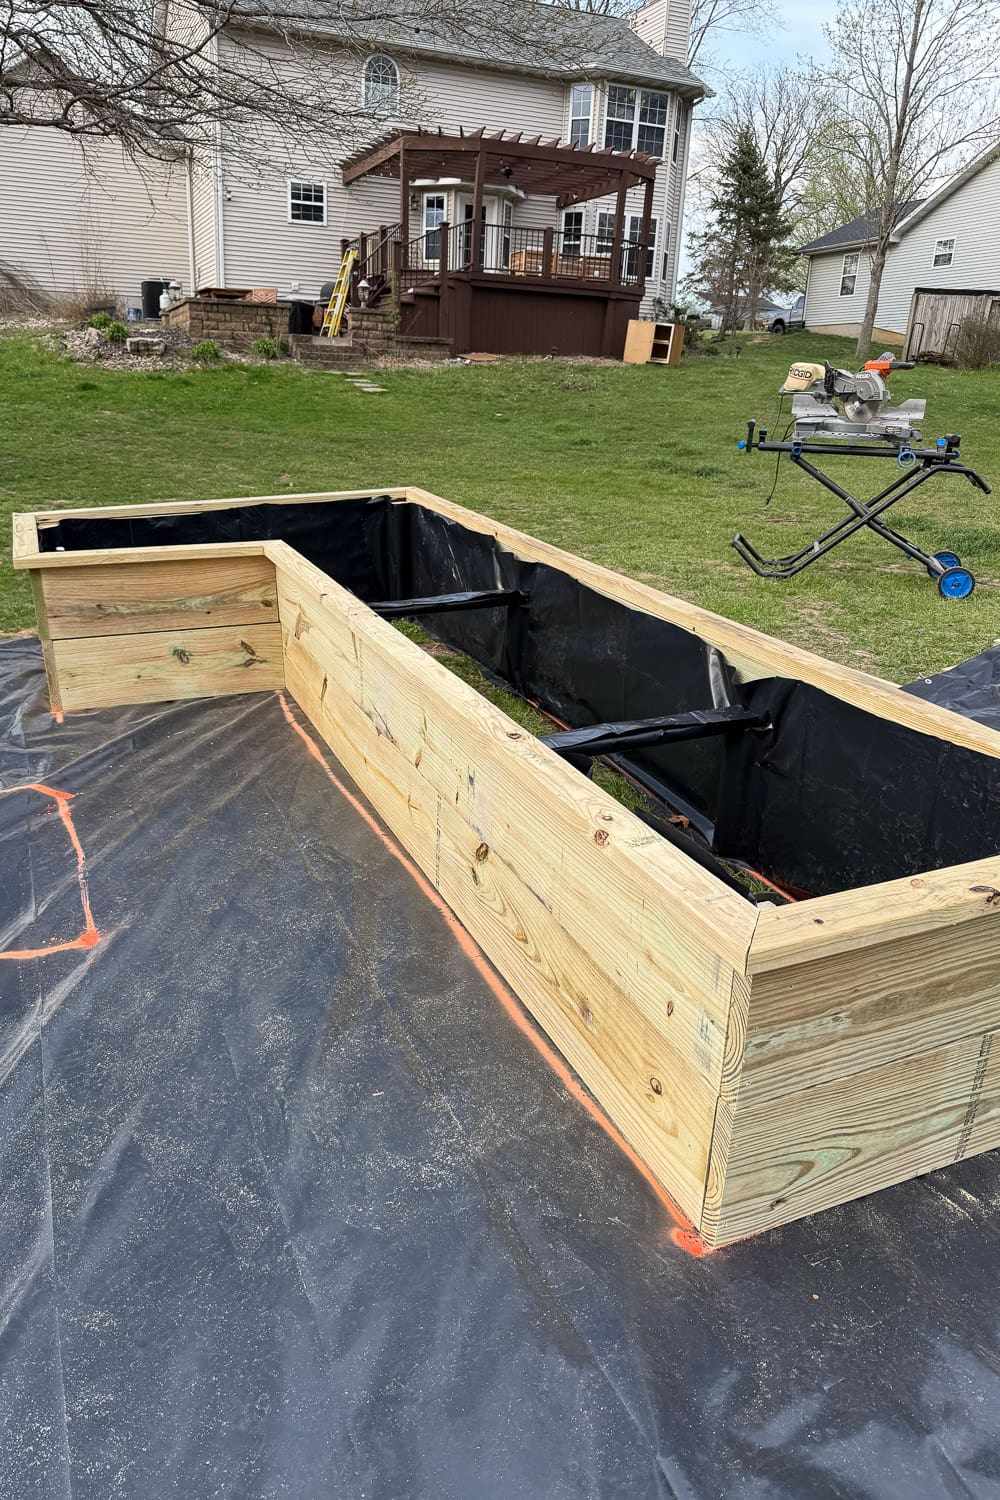
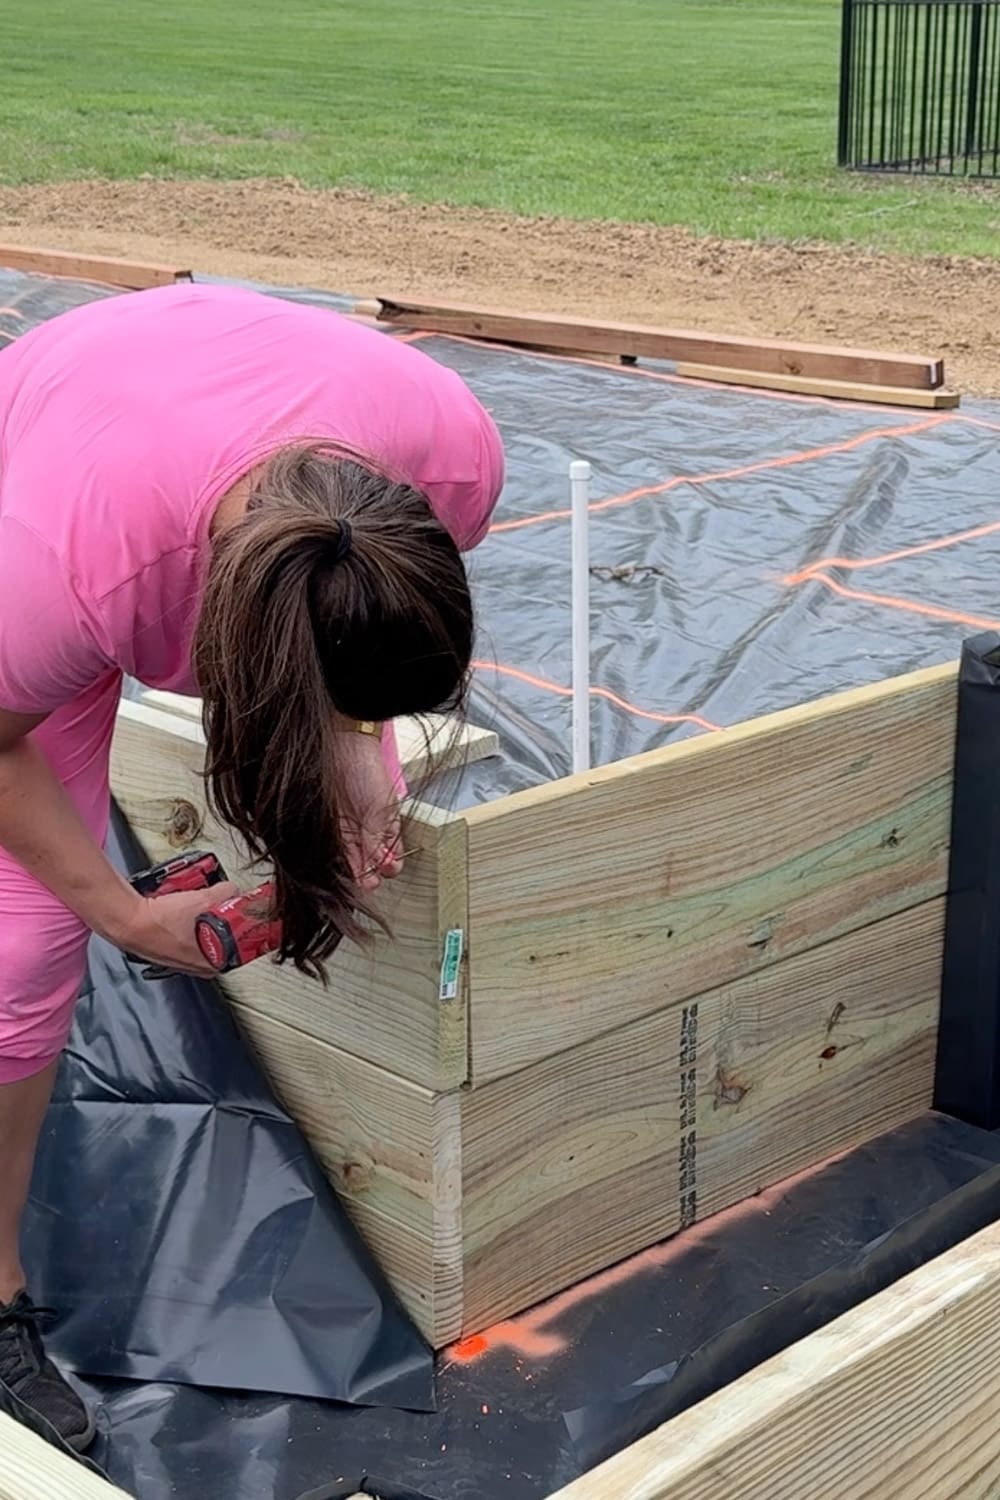
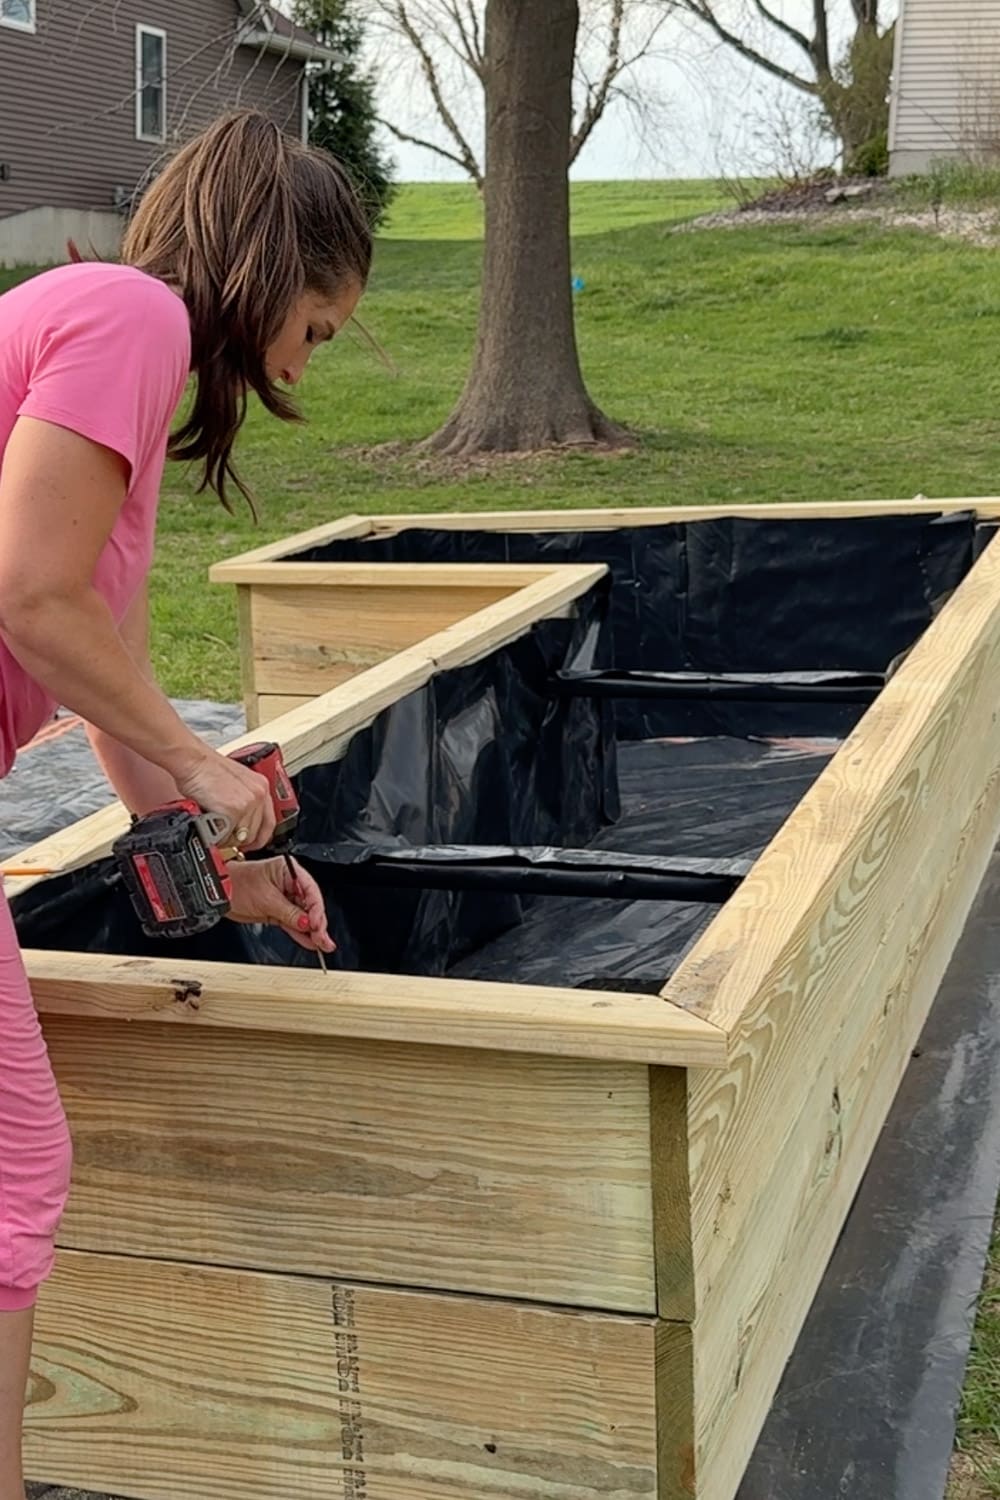
Step 4: Reinforce Outside Corners (For L-Shaped Beds)
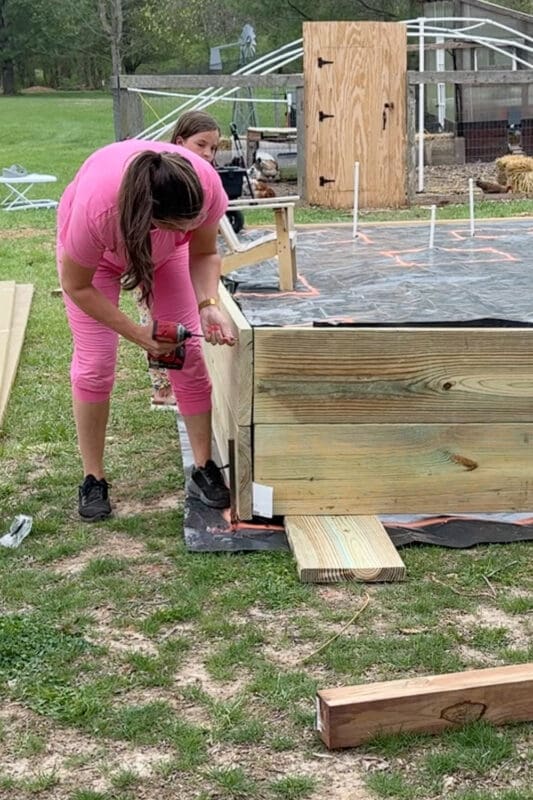
If your DIY raised garden bed design includes an L-shape like mine, you’ll have an outside corner to deal with on the inside of your box. Instead of placing a 4×4 on the outside of the box (which would look bad), I screw through the face of one panel into the edge of the other to connect them. Then I add a flat 2×4 board, screwing it into both panels to strengthen and support the joint.
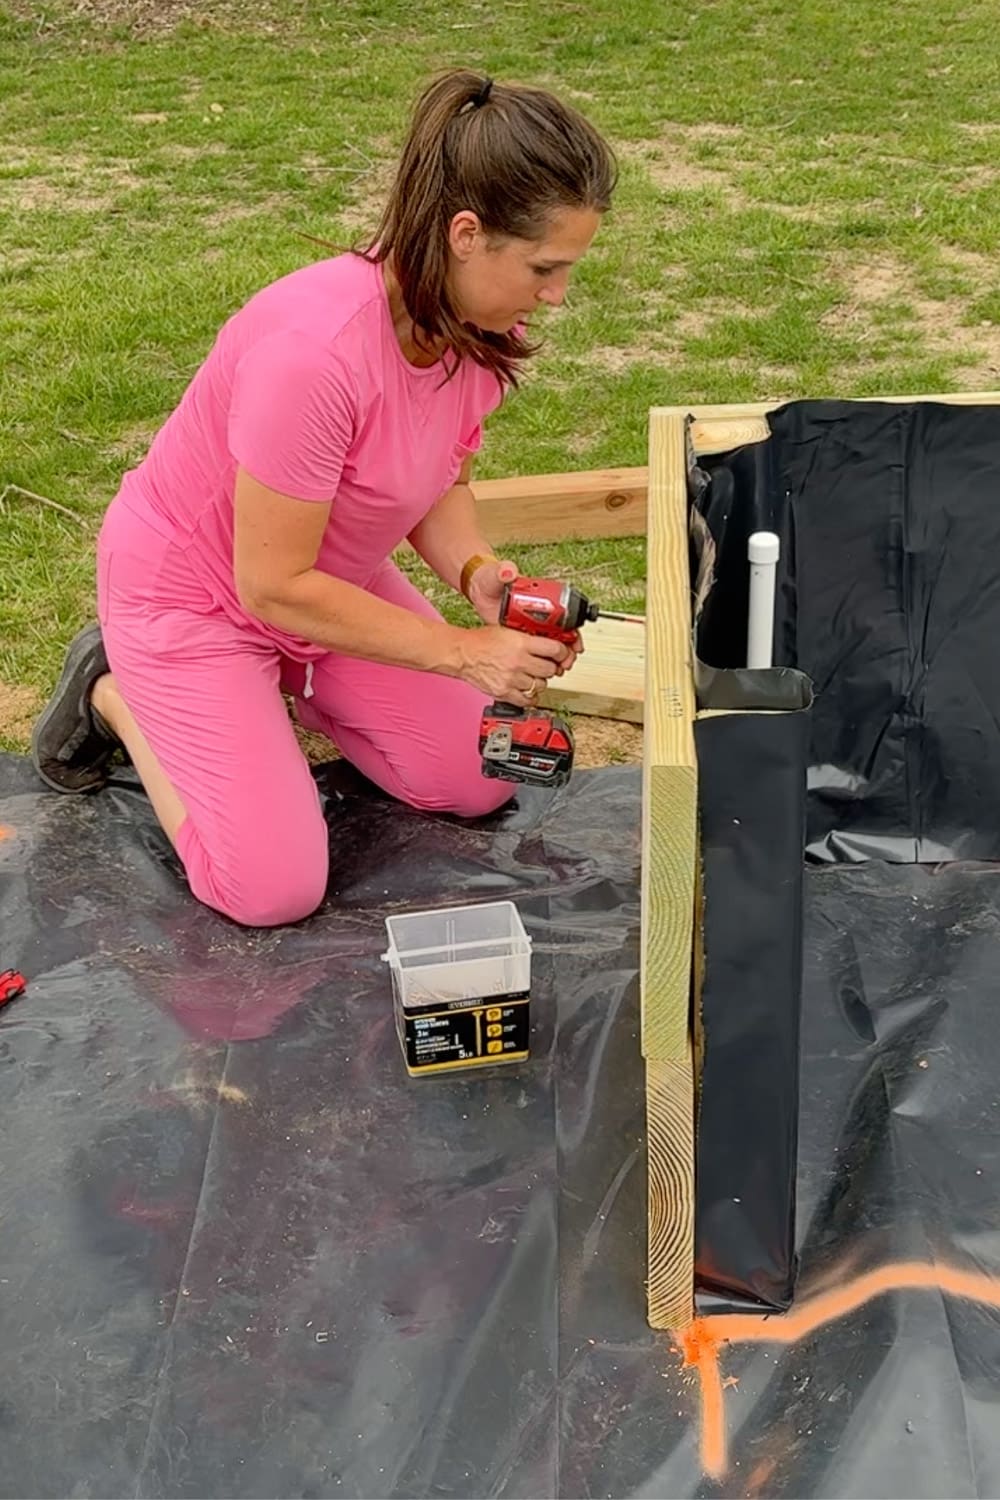
Step 5: Add Interior Support Beams
This step is important. Don’t skip it! On your longer sides, the weight of the soil will cause the walls to bow outward over time if nothing is holding them in. To prevent this, I attach a 2×4 support beam across the width of the box, connecting both long sides and pulling them in tight.
I position mine just slightly below the top of the box so it’s not too noticeable. Before attaching the 2×4, I tucked a small scrap block of wood behind the plastic liner and screw it to the side of the box. This gives the support beam something to rest on and adds extra stability underneath it.
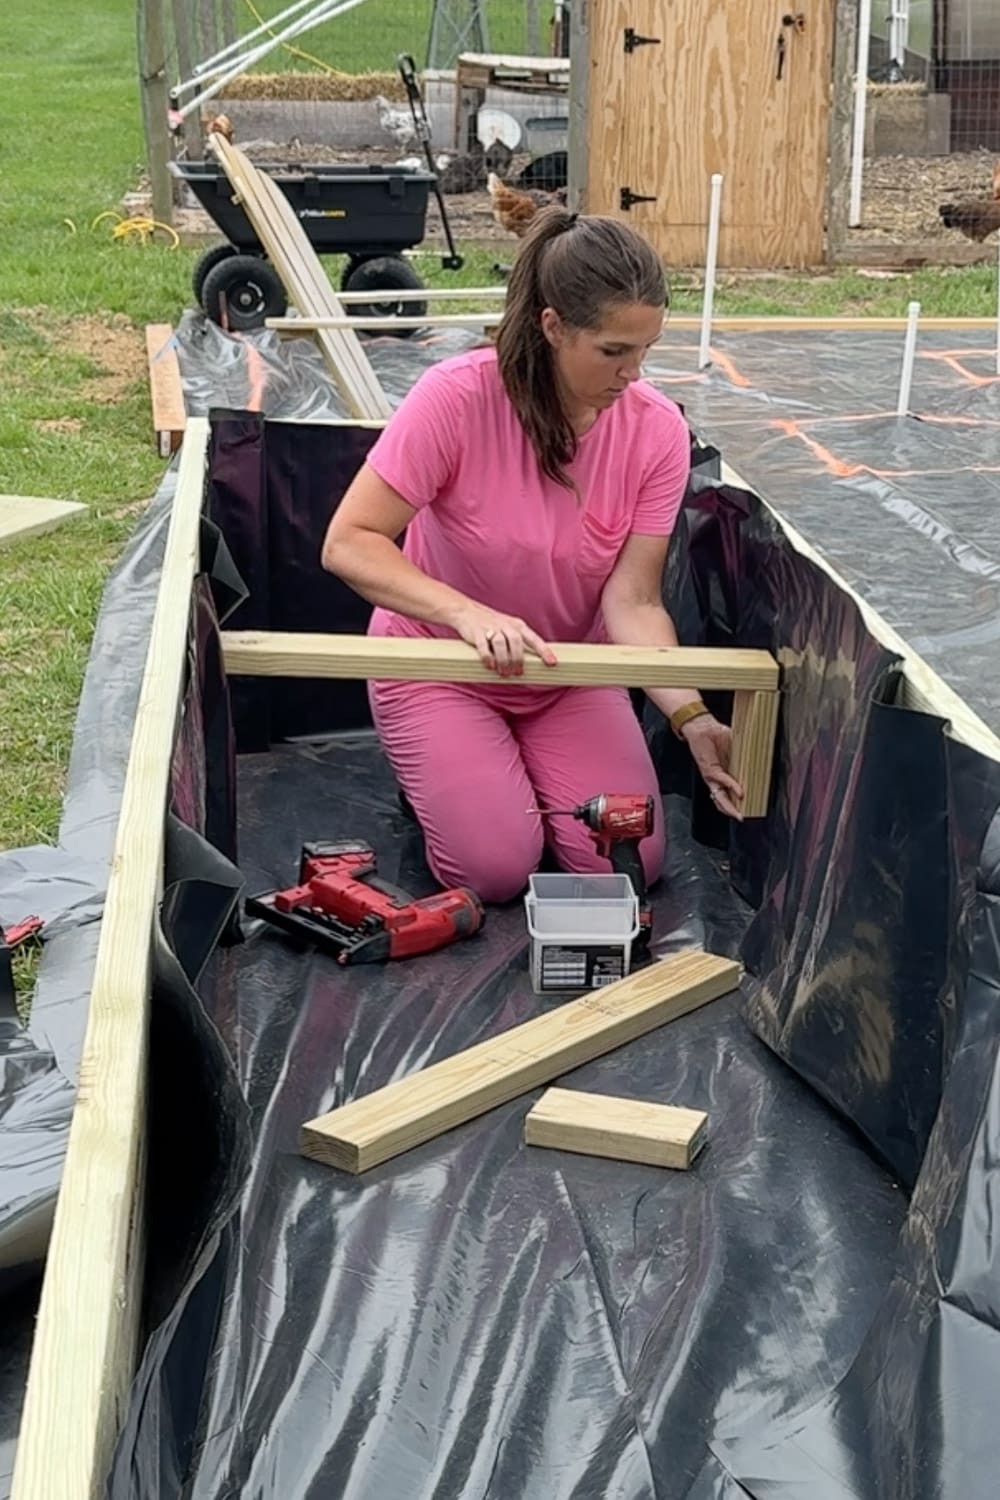
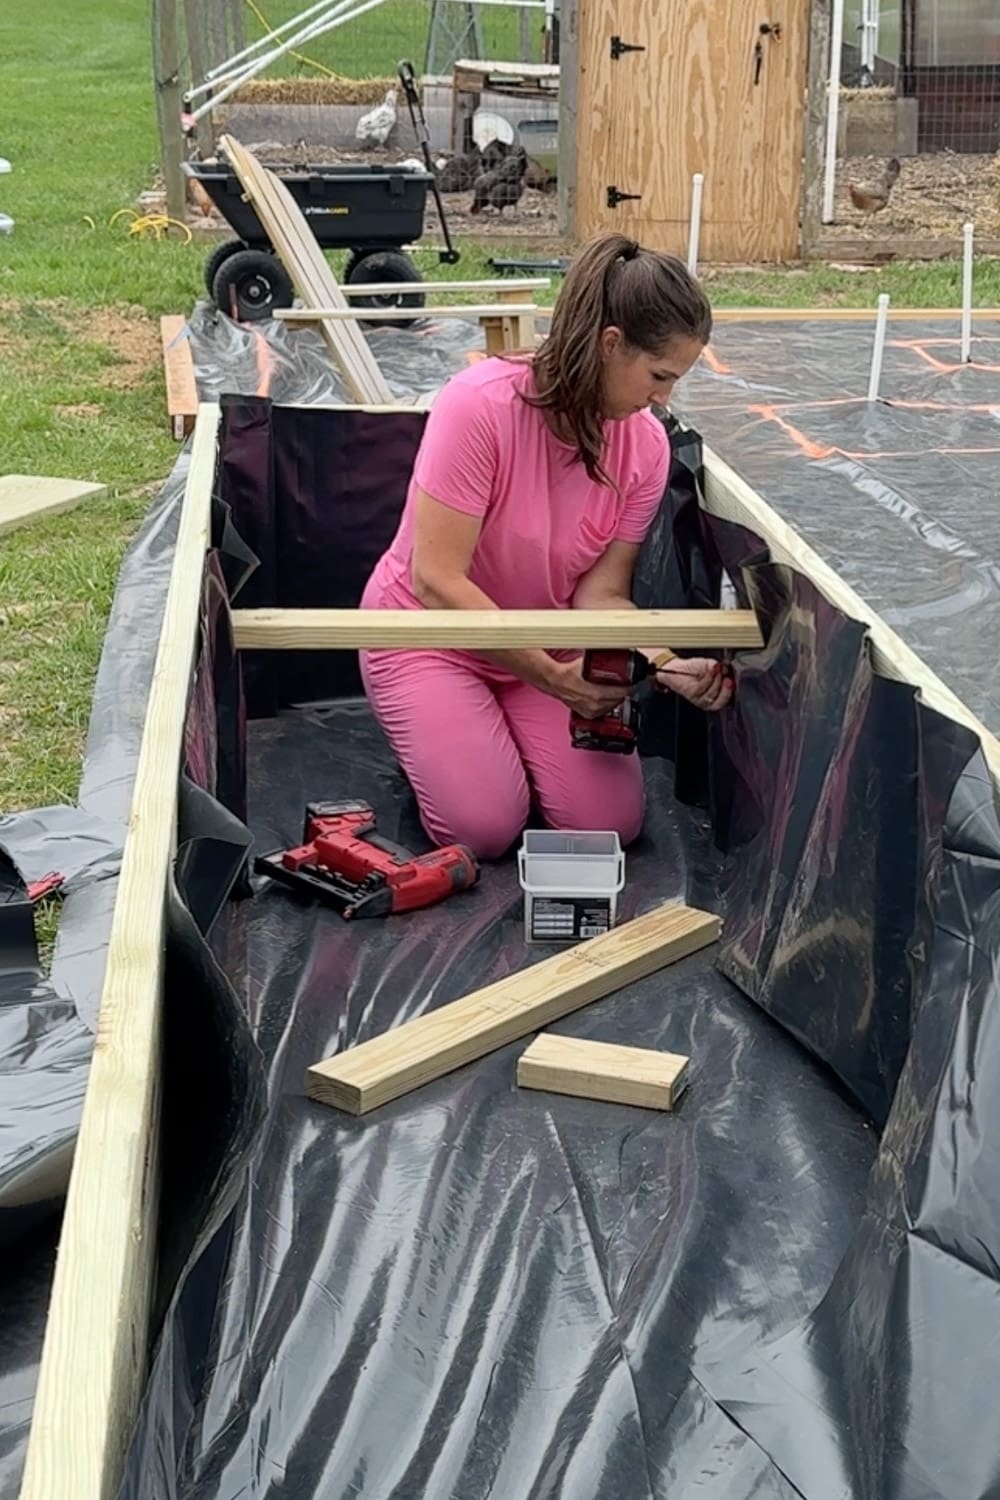
Then I wrap the 2×4 itself in black plastic (to protect both the wood and the soil from any chemical contact) and attach it with screws angled from the inside and through the outside of the box walls.
I did a total of two support beams on the longer side. The shorter end of my L-shaped box didn’t need the extra support.
Step 6: Add the Cap (Optional, But Do It!)
Okay, technically, you could stop after the support beams. The box is functional at that point. But I’m adding a cap, and here’s why: it completely transforms the look of the bed. It goes from “plain wood box” to “beautiful, intentional garden feature.” It’s such a small step, but it makes such a big difference.
To cap the bed, I use pressure-treated 2x4s with mitered corners for a clean, finished look. I work my way around the box, attaching the cap boards through the top down into the edge of the box walls.
My DIY Raised Garden Bed is Done
Seriously, I’m so happy with how these are turning out. I have a few more to build before the full garden is complete, we’ll have several different sizes and shapes, but they all follow the same basic process:
- Level and prep the ground
- Lay weed barrier and mark box locations
- Cut boards to length
- Assemble side panels with 4×4 corner posts
- Line panels with black plastic
- Connect corners with screws
- Reinforce outside corners with 1x4s (if applicable)
- Add interior support beams on long sides
- Add a mitered cap for a finished look
More beds are coming, and I cannot wait to show you the finished garden! Make sure you’re following along so you don’t miss the next update. Have questions about the build? Drop them in the comments. I’d love to help!
One Important Note: Remove the Weed Barrier!
If you laid down plastic weed barrier before building your beds like I did, make sure you cut it out from the inside of the box before filling it with soil. If you leave it in there, you’ll block drainage and end up with a waterlogged mess. Cut it out and let that soil drain naturally down to the ground below.
📌 Save This DIY Raised Garden Bed for Later
Loving this project? Don’t lose it! Pin this post so you can come back to it when you’re ready to start building your own DIY raised garden beds. Whether you’re just starting to plan your garden layout or you’re ready to pick up a saw, this guide will be right there waiting for you.
FAQ: DIY Raised Garden Beds
It depends on what you’re growing! I went with 24 inches for maximum comfort and root depth, but most vegetables do well in beds that are at least 12 inches deep. If you’re growing root vegetables like carrots or potatoes, deeper is always better. For herbs and shallow-rooted plants, even 8–10 inches can work.
Pressure-treated lumber is the most affordable and durable option. It will hold up for many years outdoors. Just make sure to line the inside with plastic so the soil doesn’t come in direct contact with the wood. If you prefer to skip the liner, cedar and redwood are both naturally rot-resistant and chemical-free, though they come at a higher price point.
Modern pressure-treated lumber (post-2004) uses copper-based preservatives that are considered much safer than older formulas. That said, I personally don’t like taking any chances with food I’m feeding my family, so I line all of my beds with black plastic to create a barrier between the soil and the wood. Better safe than sorry!
The black plastic weed barrier I laid down in the walkways between the beds goes a long way toward keeping weeds at bay. Inside the beds themselves, using high-quality soil and adding a layer of mulch on top will help suppress weeds significantly. You’ll still get a few here and there, but it’s much more manageable than an in-ground garden!
To calculate how much soil you need, multiply the length x width x depth of your bed (in feet) to get cubic feet. For example, a 4×8 bed that is 2 feet deep needs 64 cubic feet of soil. I recommend a mix of topsoil, compost, and a quality garden mix for the best results.
