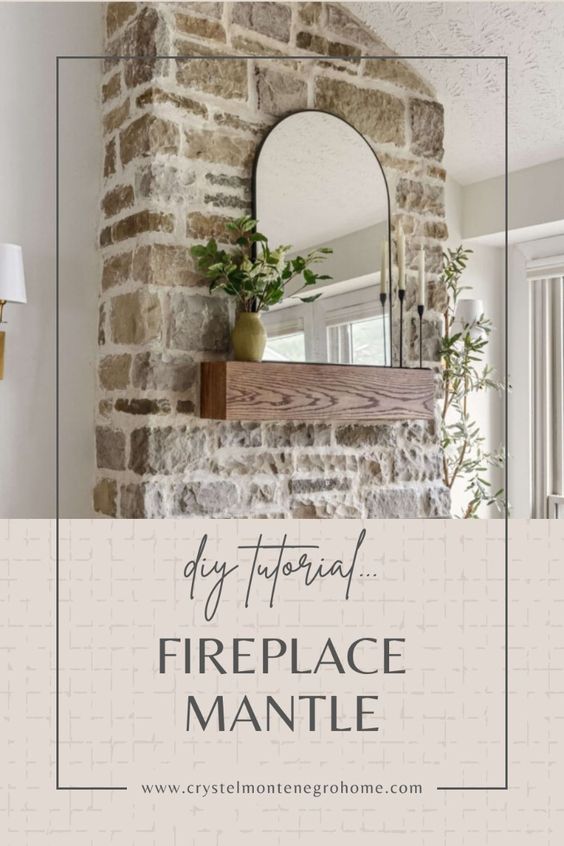
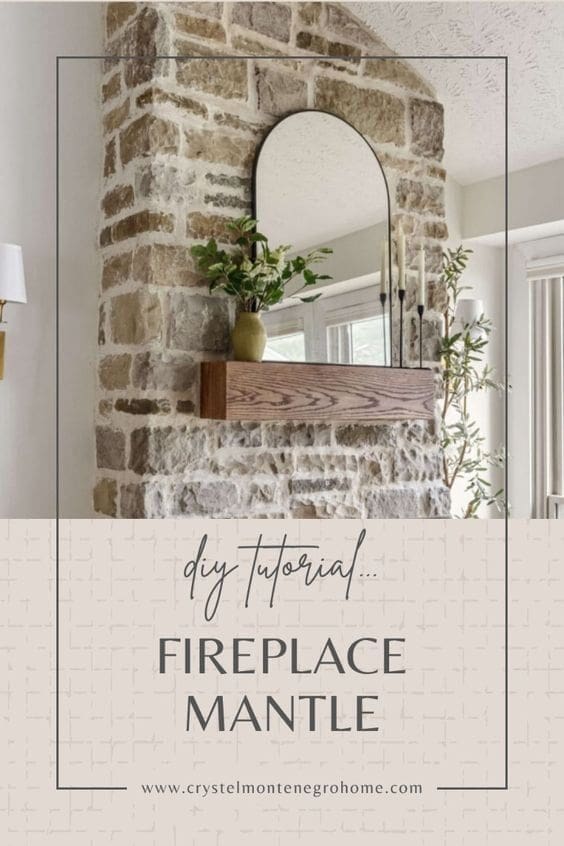
How to Build a DIY Fireplace Mantel With a Hidden Outlet!


Updated August 6, 2025
(updated 2025) What’s a fireplace without a mantel? When I built my fireplace from the ground up, I knew a custom DIY fireplace mantel would completely elevate the look. It’s not just for everyday décor (although I do love styling it year-round) – it also becomes the focal point for holidays, especially Christmas.
In this guide, I’ll show you how I built my oak fireplace mantel from scratch, including a built-in outlet for Christmas lights!
This mantel was actually part of a larger project where I built the entire fireplace from the ground up. If you want to see how I framed the wall, ran the electrical, and added stone floor to ceiling, click here for the full DIY fireplace tutorial.
Why Build Your Own DIY Fireplace Mantel?
✅ Customizable: Make it the perfect size and style for your space.
✅ Budget-Friendly: A beautiful mantel at a fraction of the cost of store-bought.
✅ Functional Design: Built-in outlet for lights, holiday décor, and more.
✅ Rustic Charm: Made from sturdy oak, it looks like a solid beam for a timeless look.

Watch the Full DIY Fireplace Mantel Video Tutorial
Prefer a visual guide? Watch my step-by-step video tutorial on how I built and installed this gorgeous DIY fireplace mantel. 👇
Table of Contents
- Why Build Your Own DIY Fireplace Mantel?
- Watch the Full DIY Fireplace Mantel Video Tutorial
- Tools You’ll Need to Build a Fireplace Mantel
- Materials You’ll Need for a DIY Wood Fireplace Mantel
- Step 1: How to Build the Frame for a DIY Oak Fireplace Mantel
- Step 2: How to Bevel Wood Edges for a Seamless Mantel Look
- Step 3: Assembling the Mantel Box
- Step 4: How to Stain and Seal a DIY Floating Mantel
- Step 5: How to Add a Built-In Outlet to a DIY Mantel
- Step 6: How to Install a DIY Fireplace Mantel on a Stone Fireplace
- Before and After: A Cozy Fireplace Transformation
- Want to See Another DIY Mantel Idea?
- 📌 Save This Project for Later
- FAQ: DIY Fireplace Mantel Tips
Tools You’ll Need to Build a Fireplace Mantel
Before you get started, here’s the exact list of tools I used for this project:
Materials You’ll Need for a DIY Wood Fireplace Mantel
Here’s what you’ll need for this project:
- Oak 1x8s
- Wood glue
- Wood filler
- Stain
- Polycrylic
- Wood screws
- Miter saw
- Table saw
- Painters Tape
Step 1: How to Build the Frame for a DIY Oak Fireplace Mantel
When building my DIY fireplace mantel, I chose oak because it’s both sturdy and beautiful, especially when stained. I wanted the oak boards to look like a solid beam once the project was done.
Using a miter saw, I cut three pieces to the desired mantel length – one each for the top, front, and bottom. I also cut two smaller end pieces.

Step 2: How to Bevel Wood Edges for a Seamless Mantel Look
I adjusted the blade on my table saw to a 45° angle to bevel the edges of these boards.

The front piece got all four edges beveled, while the other pieces had only three beveled edges, leaving the side that would sit against the fireplace straight.


Step 3: Assembling the Mantel Box
Time to assemble this DIY fireplace mantel! I laid them out, beveled edges down, and taped them together for alignment.


After flipping them over, I applied wood glue to all the joining edges and folded the boards into a box.

A brad nailer came in handy to secure the corners, but be careful with the angle – if you shoot the nails in too steeply, they might poke through and then you’ll need to pull them out and fill the holes with wood filler. Trust me, I’ve learned this the hard way!

You want to make the seams disappear when building a DIY fireplace mantel. I did this by gently pressing along the edges with the neck of my hammer.
Step 4: How to Stain and Seal a DIY Floating Mantel
After filling any gaps or nail holes with wood filler and sanding everything smooth, I stained the mantel in Early American, my go-to color for warmth and richness. It’s no shocker that I reached for it when building this DIY fireplace mantel. This is the same color I used on my stair railing and floating bathroom shelves.


Once the stain dried, I sealed it with Polycrylic for a subtle sheen and protection.

Step 5: How to Add a Built-In Outlet to a DIY Mantel
Since I wanted an outlet in the mantel, I traced the electrical box on the side. Then, I drilled starter holes big enough for the jigsaw blade to fit in at all four corners of my cutout. Then, I used the jigsaw to cut out the rest of the opening.


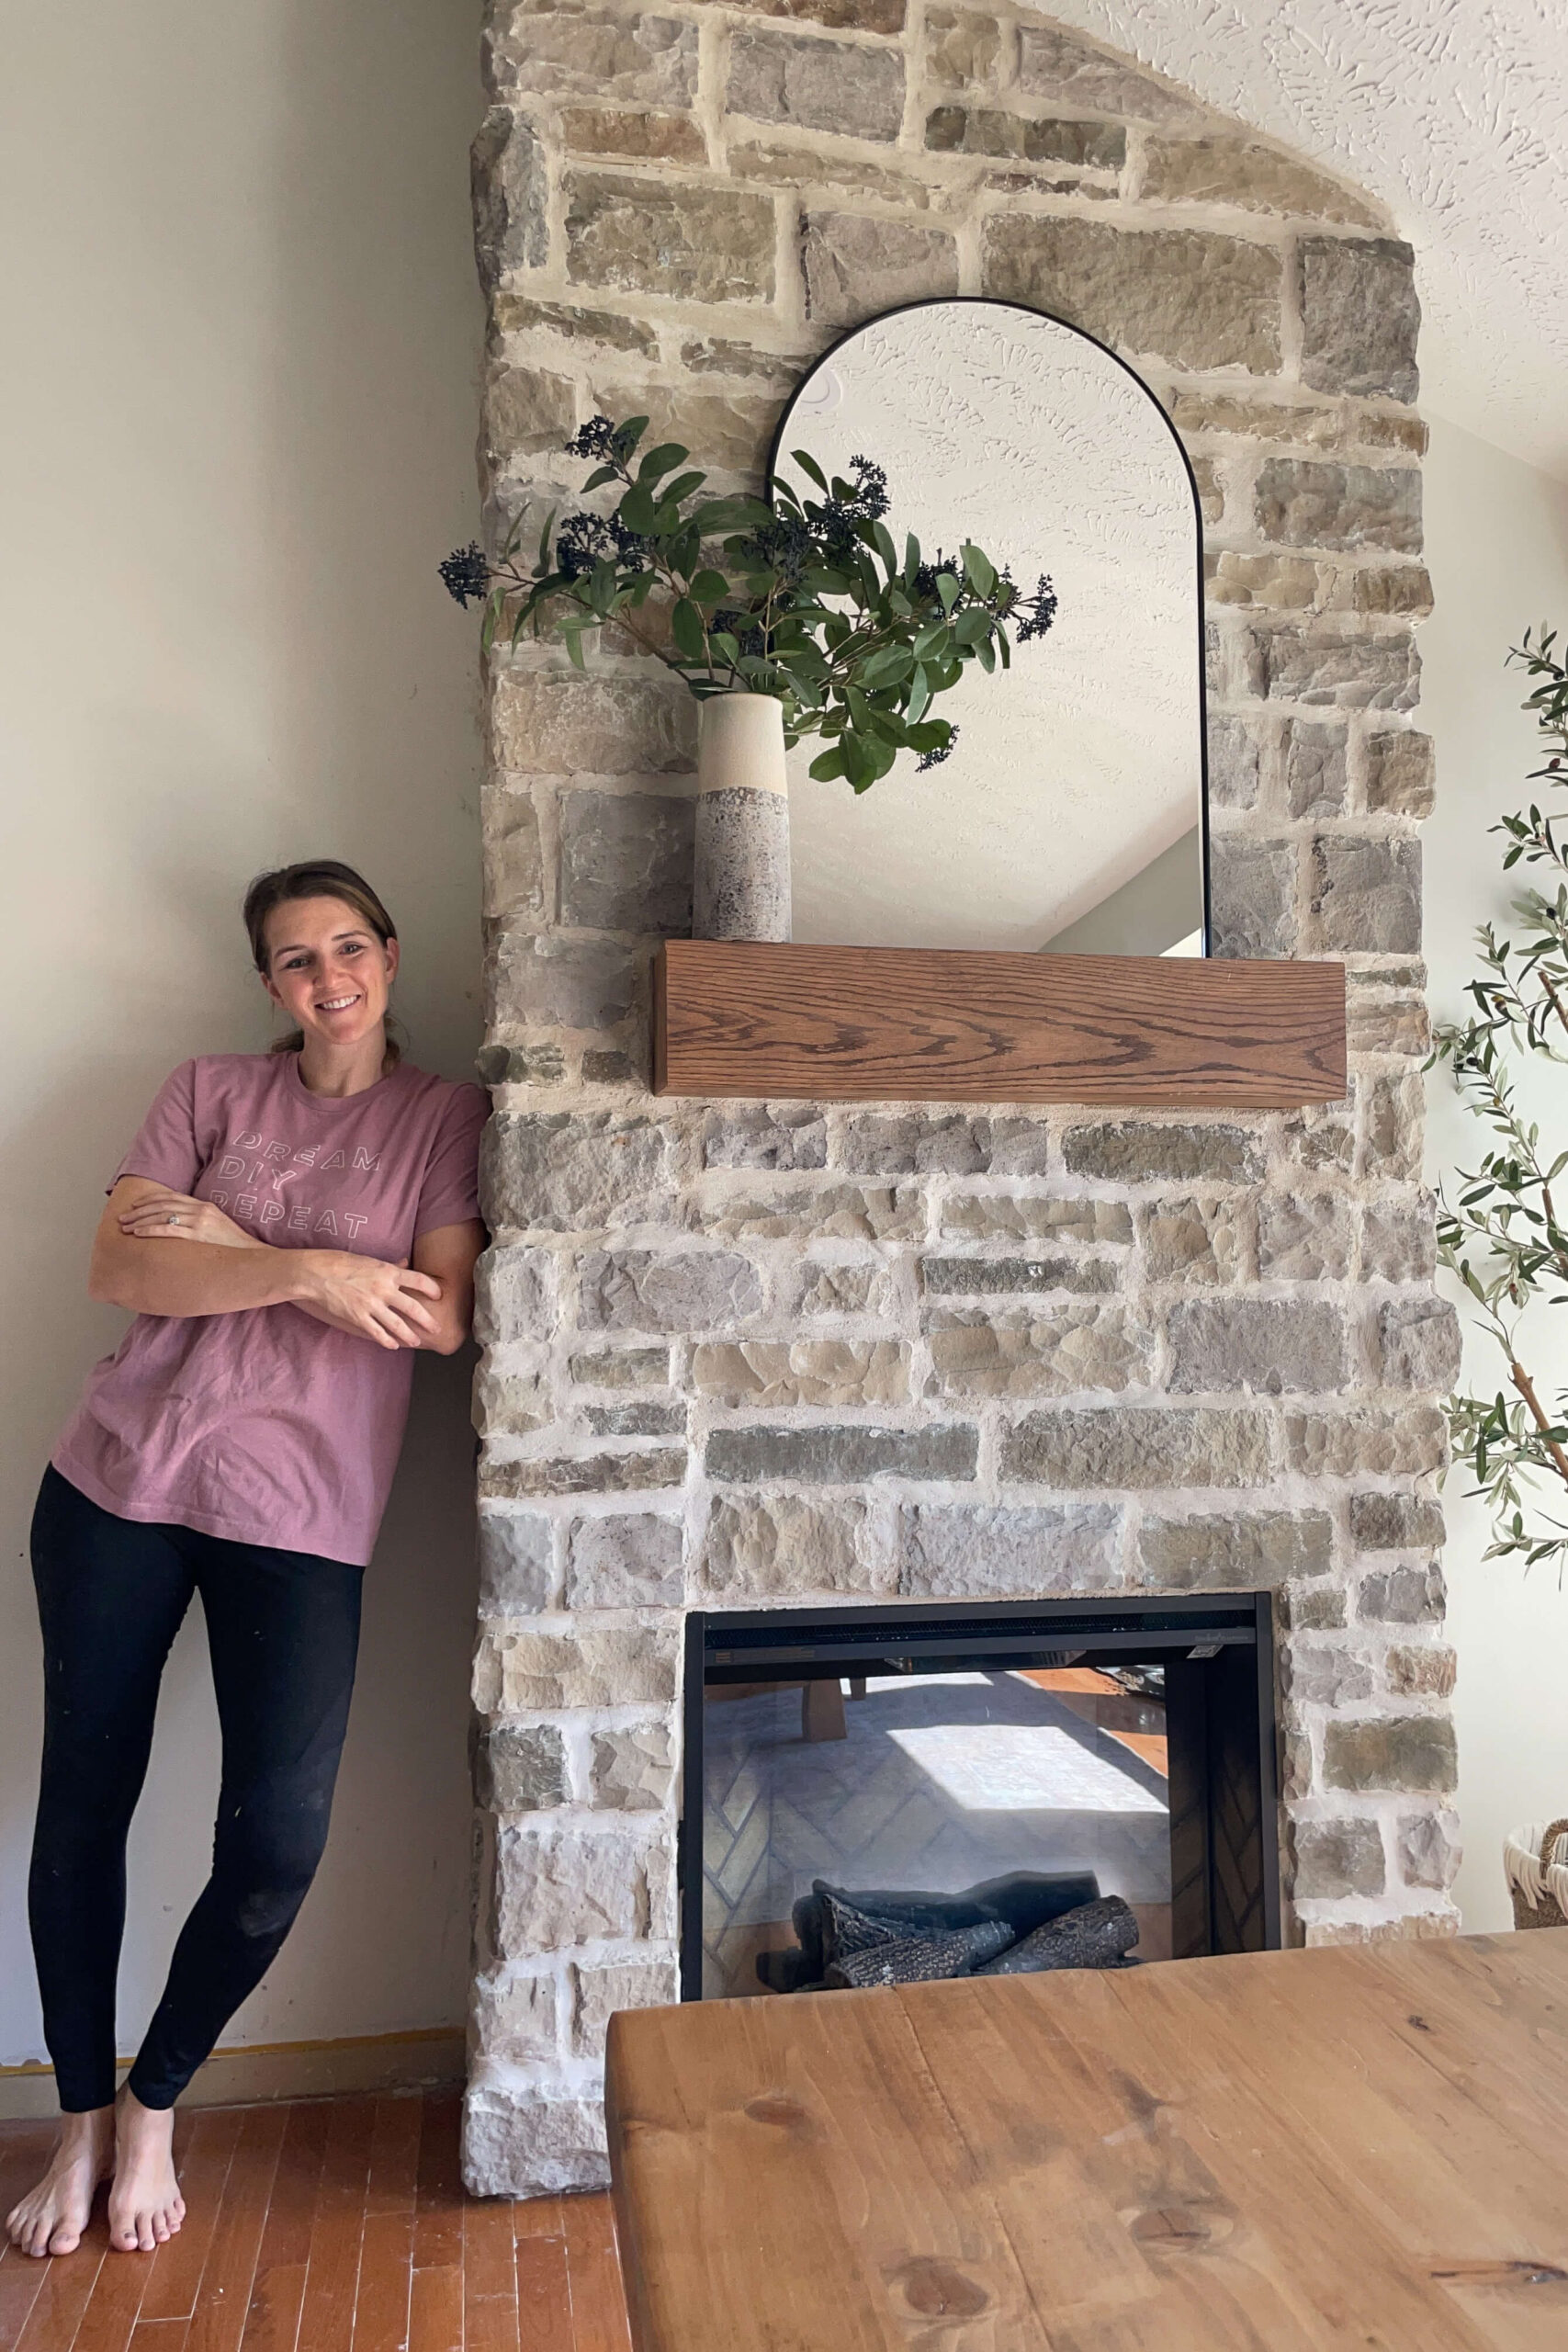
Step 6: How to Install a DIY Fireplace Mantel on a Stone Fireplace
With the mantel fully built, it was time to install it. Since I had built the fireplace in my dining room from scratch, I added a crossbeam during the framing process that would support the weight of the mantel. To further secure it, I installed another 2×4, attaching it through the sheeting to the crossbeam I had previously installed.
This new support beam sat just above the outlet wiring, and of course, I made sure everything was level before moving forward.

Next, I set the DIY fireplace mantel on top of the 2×4 support beam. I fed the electrical wire through the outlet hole, then attached the mantel to the support beam using screws placed near the back. N need to worry about the screws being visible, as the stonework would eventually cover them.

Once the mantel was secured, I wired in the outlet. We are done with building and installing this DIY fireplace mantel!

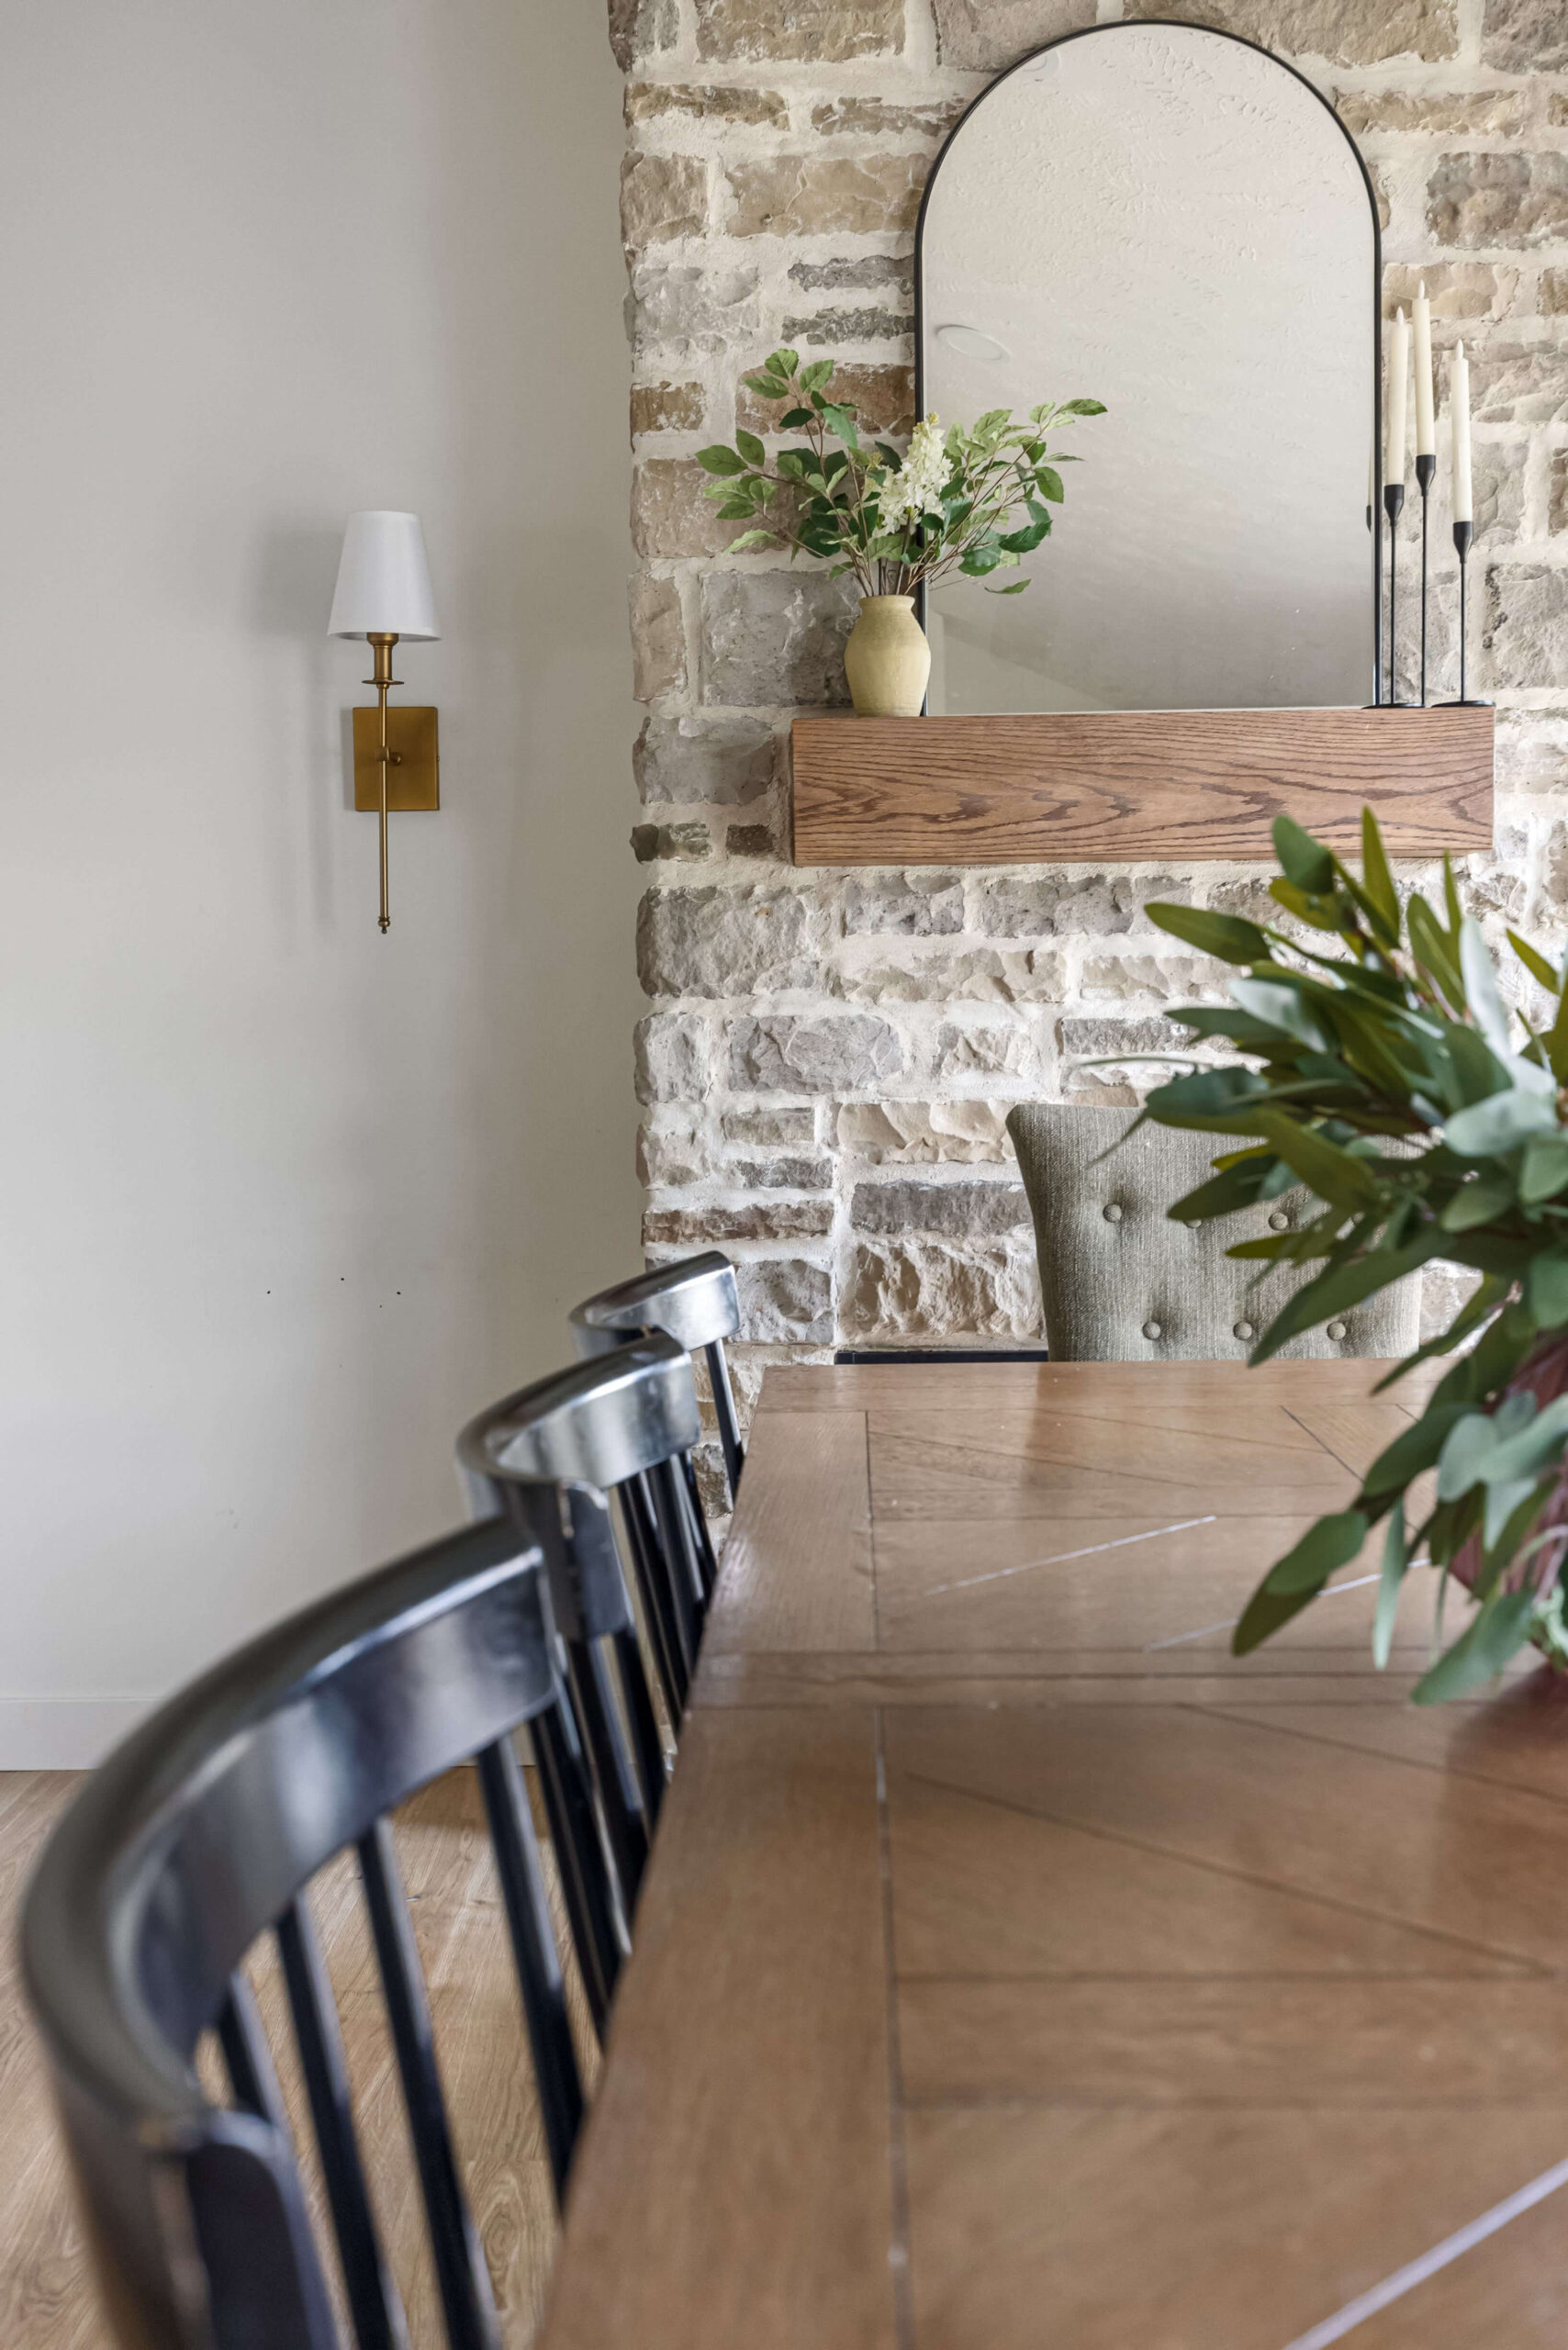
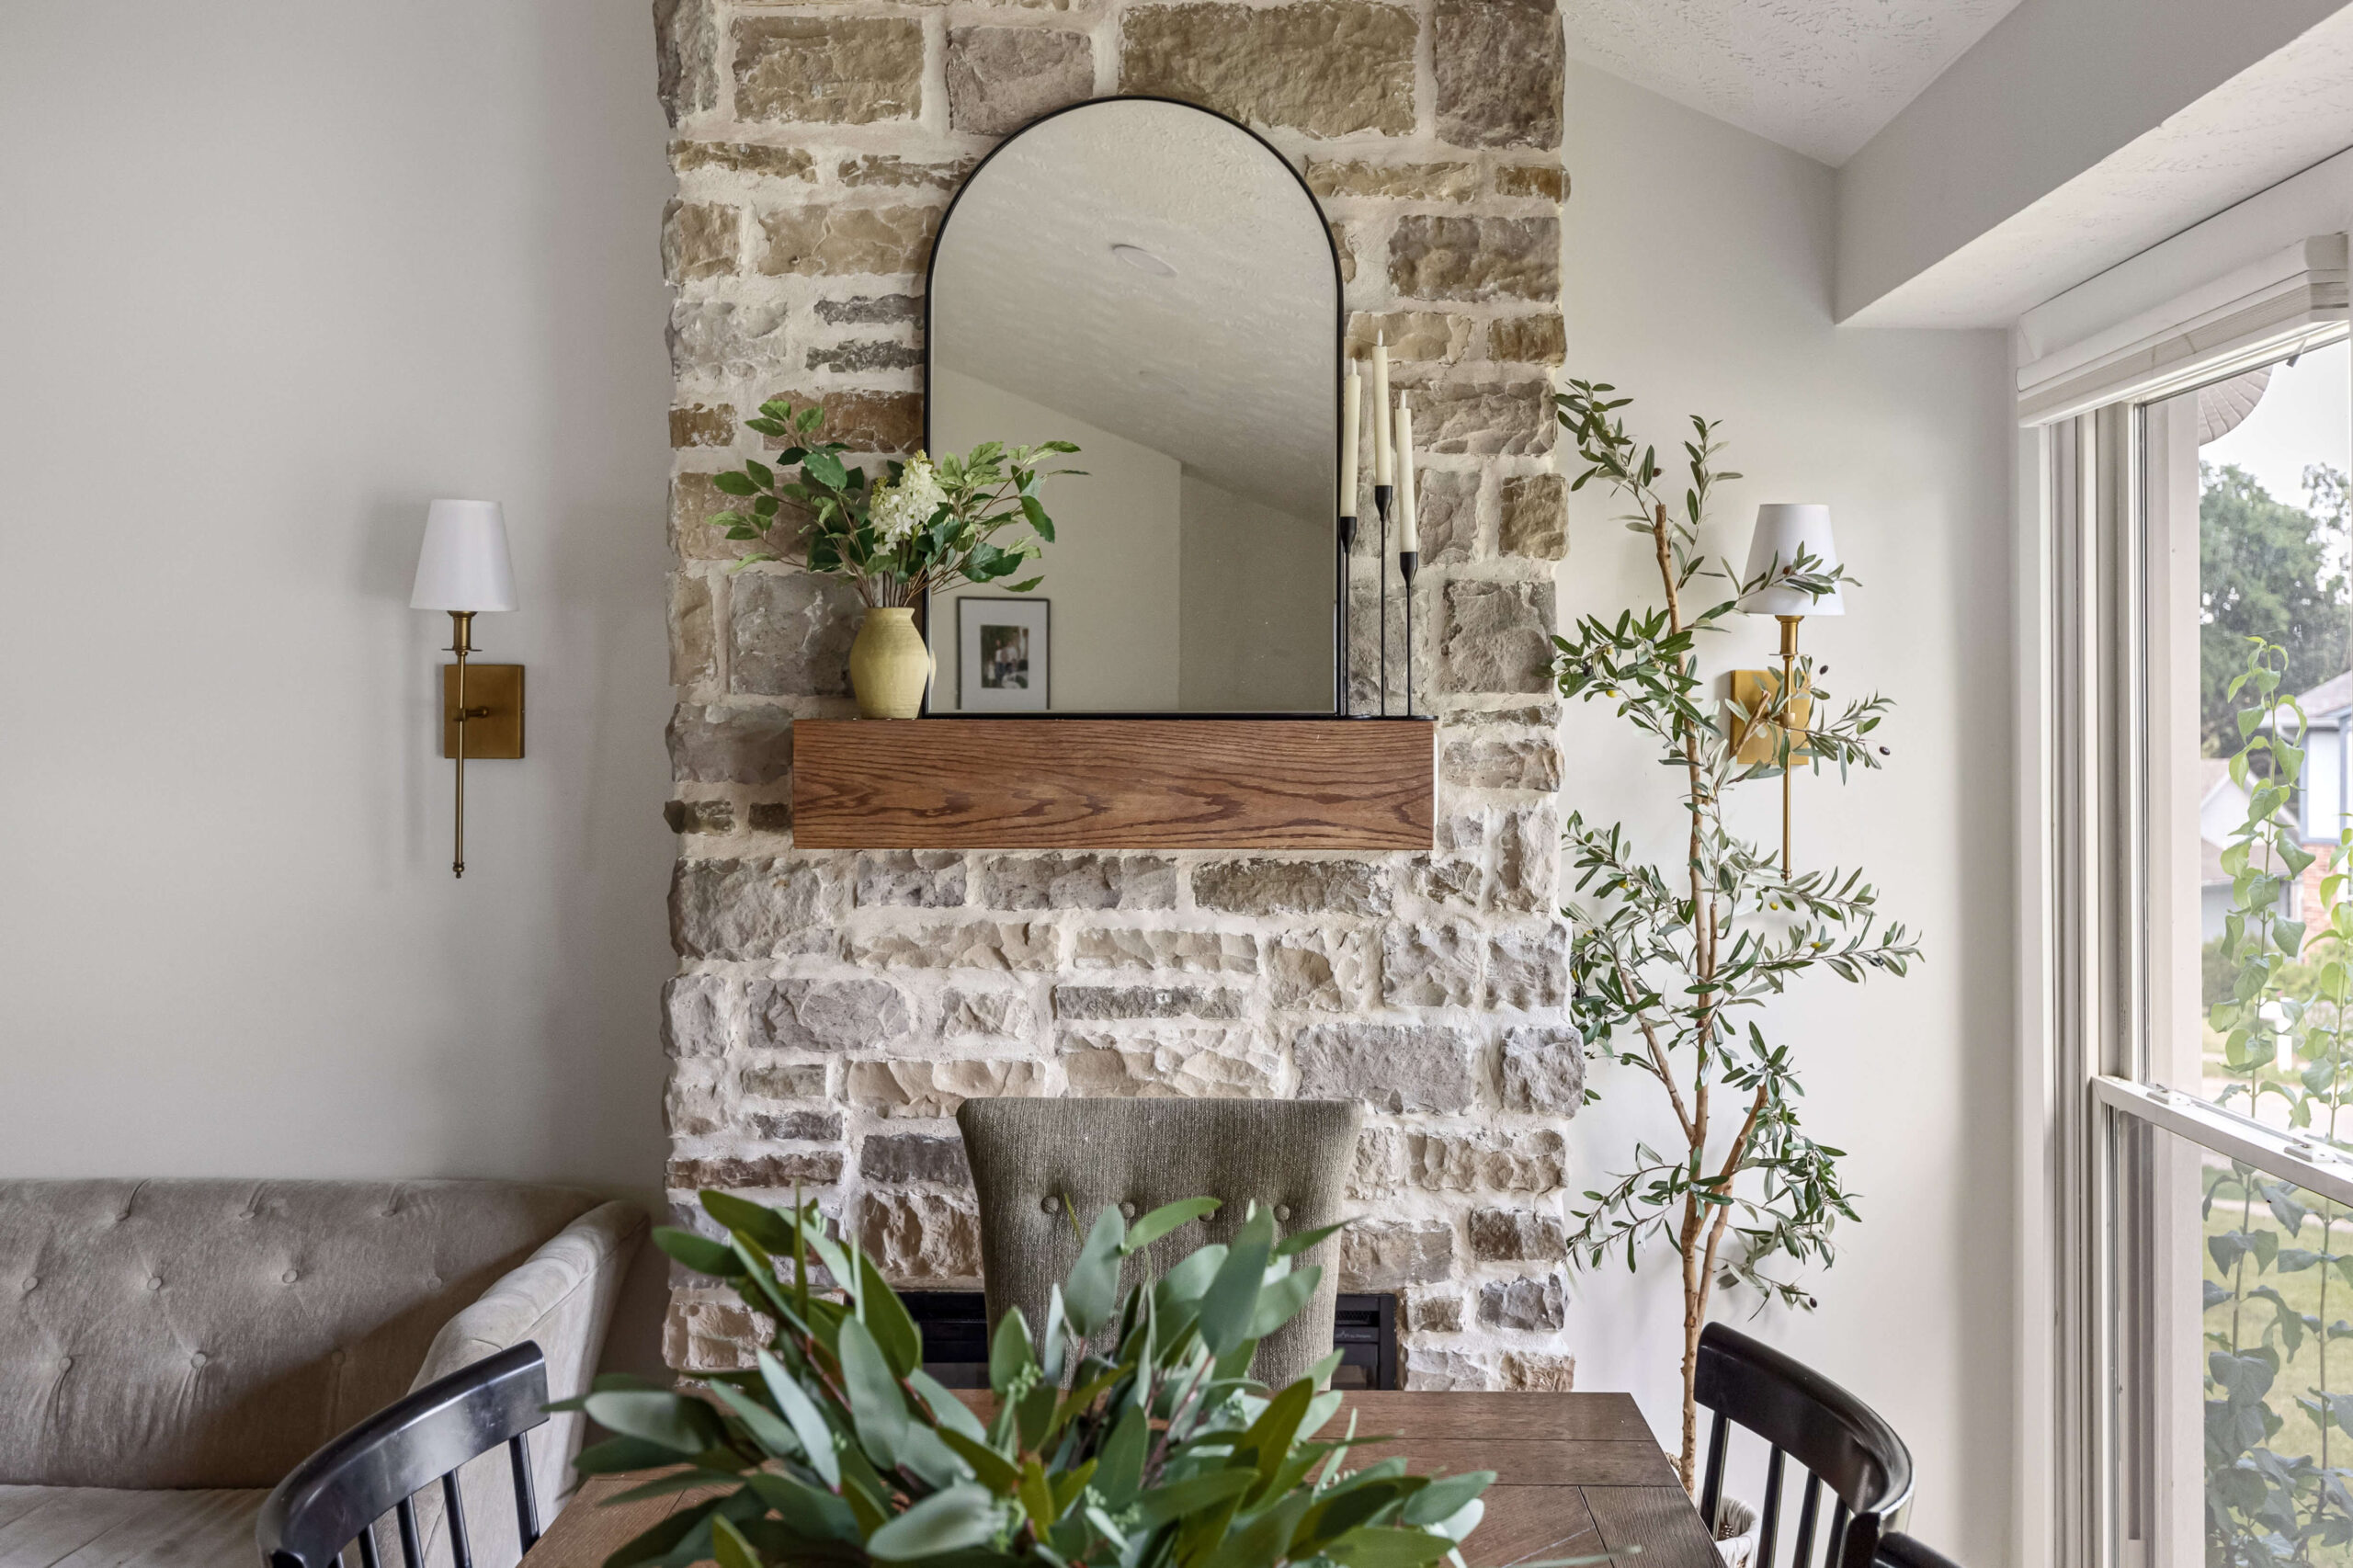
Before and After: A Cozy Fireplace Transformation
After completing the stonework and installing the fireplace insert, I was proud of how everything turned out! This DIY fireplace mantel brings a cozy and inviting atmosphere to my dining room and serves as a stunning focal point.
Want links to anything you see here in my dining room? I have all the details for the decor and more listed here.
Want to See Another DIY Mantel Idea?
If you’re loving this project and want to try a different style, I’ve also built this DIY floating beam mantel that looks like a solid wood beam but is hollow and lightweight. It’s another great option if you’re going for a rustic modern look – or if you’re working with a different kind of fireplace setup.
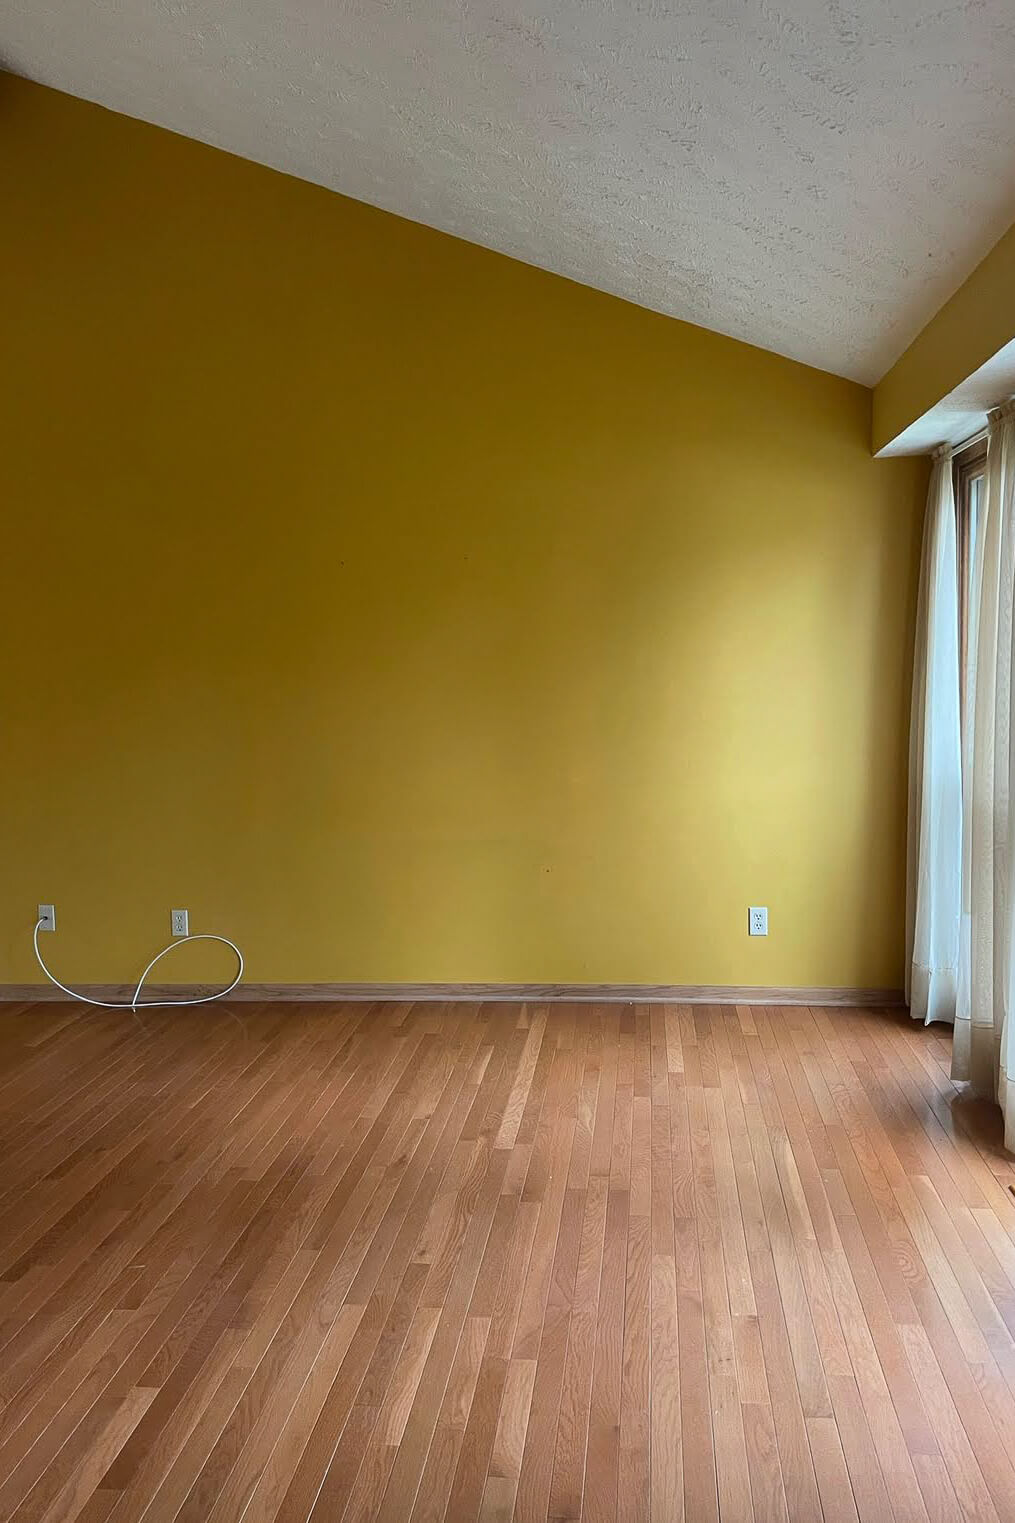
Here’s a before photo just so you can see what a difference adding the fireplace made to this room. I have a full tutorial showing you how I built this floor-to-ceiling stone fireplace surround all by myself.
📌 Save This Project for Later
Pin this tutorial so you can come back to it when you’re ready to build!
FAQ: DIY Fireplace Mantel Tips
For a durable and classic look, hardwoods like oak, maple, or walnut are great options. Softwoods like pine are more affordable and easier to work with but may be less durable over time.
The thickness of your mantel depends on the style you want. Most mantels are between 1.5 to 3 inches thick, but a chunkier look can be achieved by creating a faux beam using thinner wood.
Yes! For safety and stability, it’s important to attach the mantel to wall studs or a secure support beam. This ensures it can support weight, especially if you plan to decorate it with heavy items.
The height of a mantel typically ranges from 48 to 60 inches above the floor, depending on the size of your fireplace and the room’s ceiling height. For a custom look, consider the scale of the room and how you’ll decorate it.