DIY Bay Window Trim and Classic Picture Frame Molding


Updated May 15, 2025
If you’re lucky enough to have a beautiful bay window in your home, consider upgrading it with bay window trim and picture frame molding. This easy DIY project adds elegance and style, making your bay window a standout feature in any room.
This is a beginner level DIY project that uses a few basic tools and materials.
Tools
- Taping knife
- Brad nailer
- Miter saw
- Laser level
- 24 inch level
- Small torpedo level
- Caulk gun
- Paint brush
Materials
- All-purpose joint compound
- 1×6 pine
- 1×4 MDF trim
- 1×2 MDF trim
- 1×6 MDF trim
- MDF casing
- Crown molding
- Painter’s tape
- Wood filler
- Caulk
- Paint
Prepping to Install Bay Window Trim
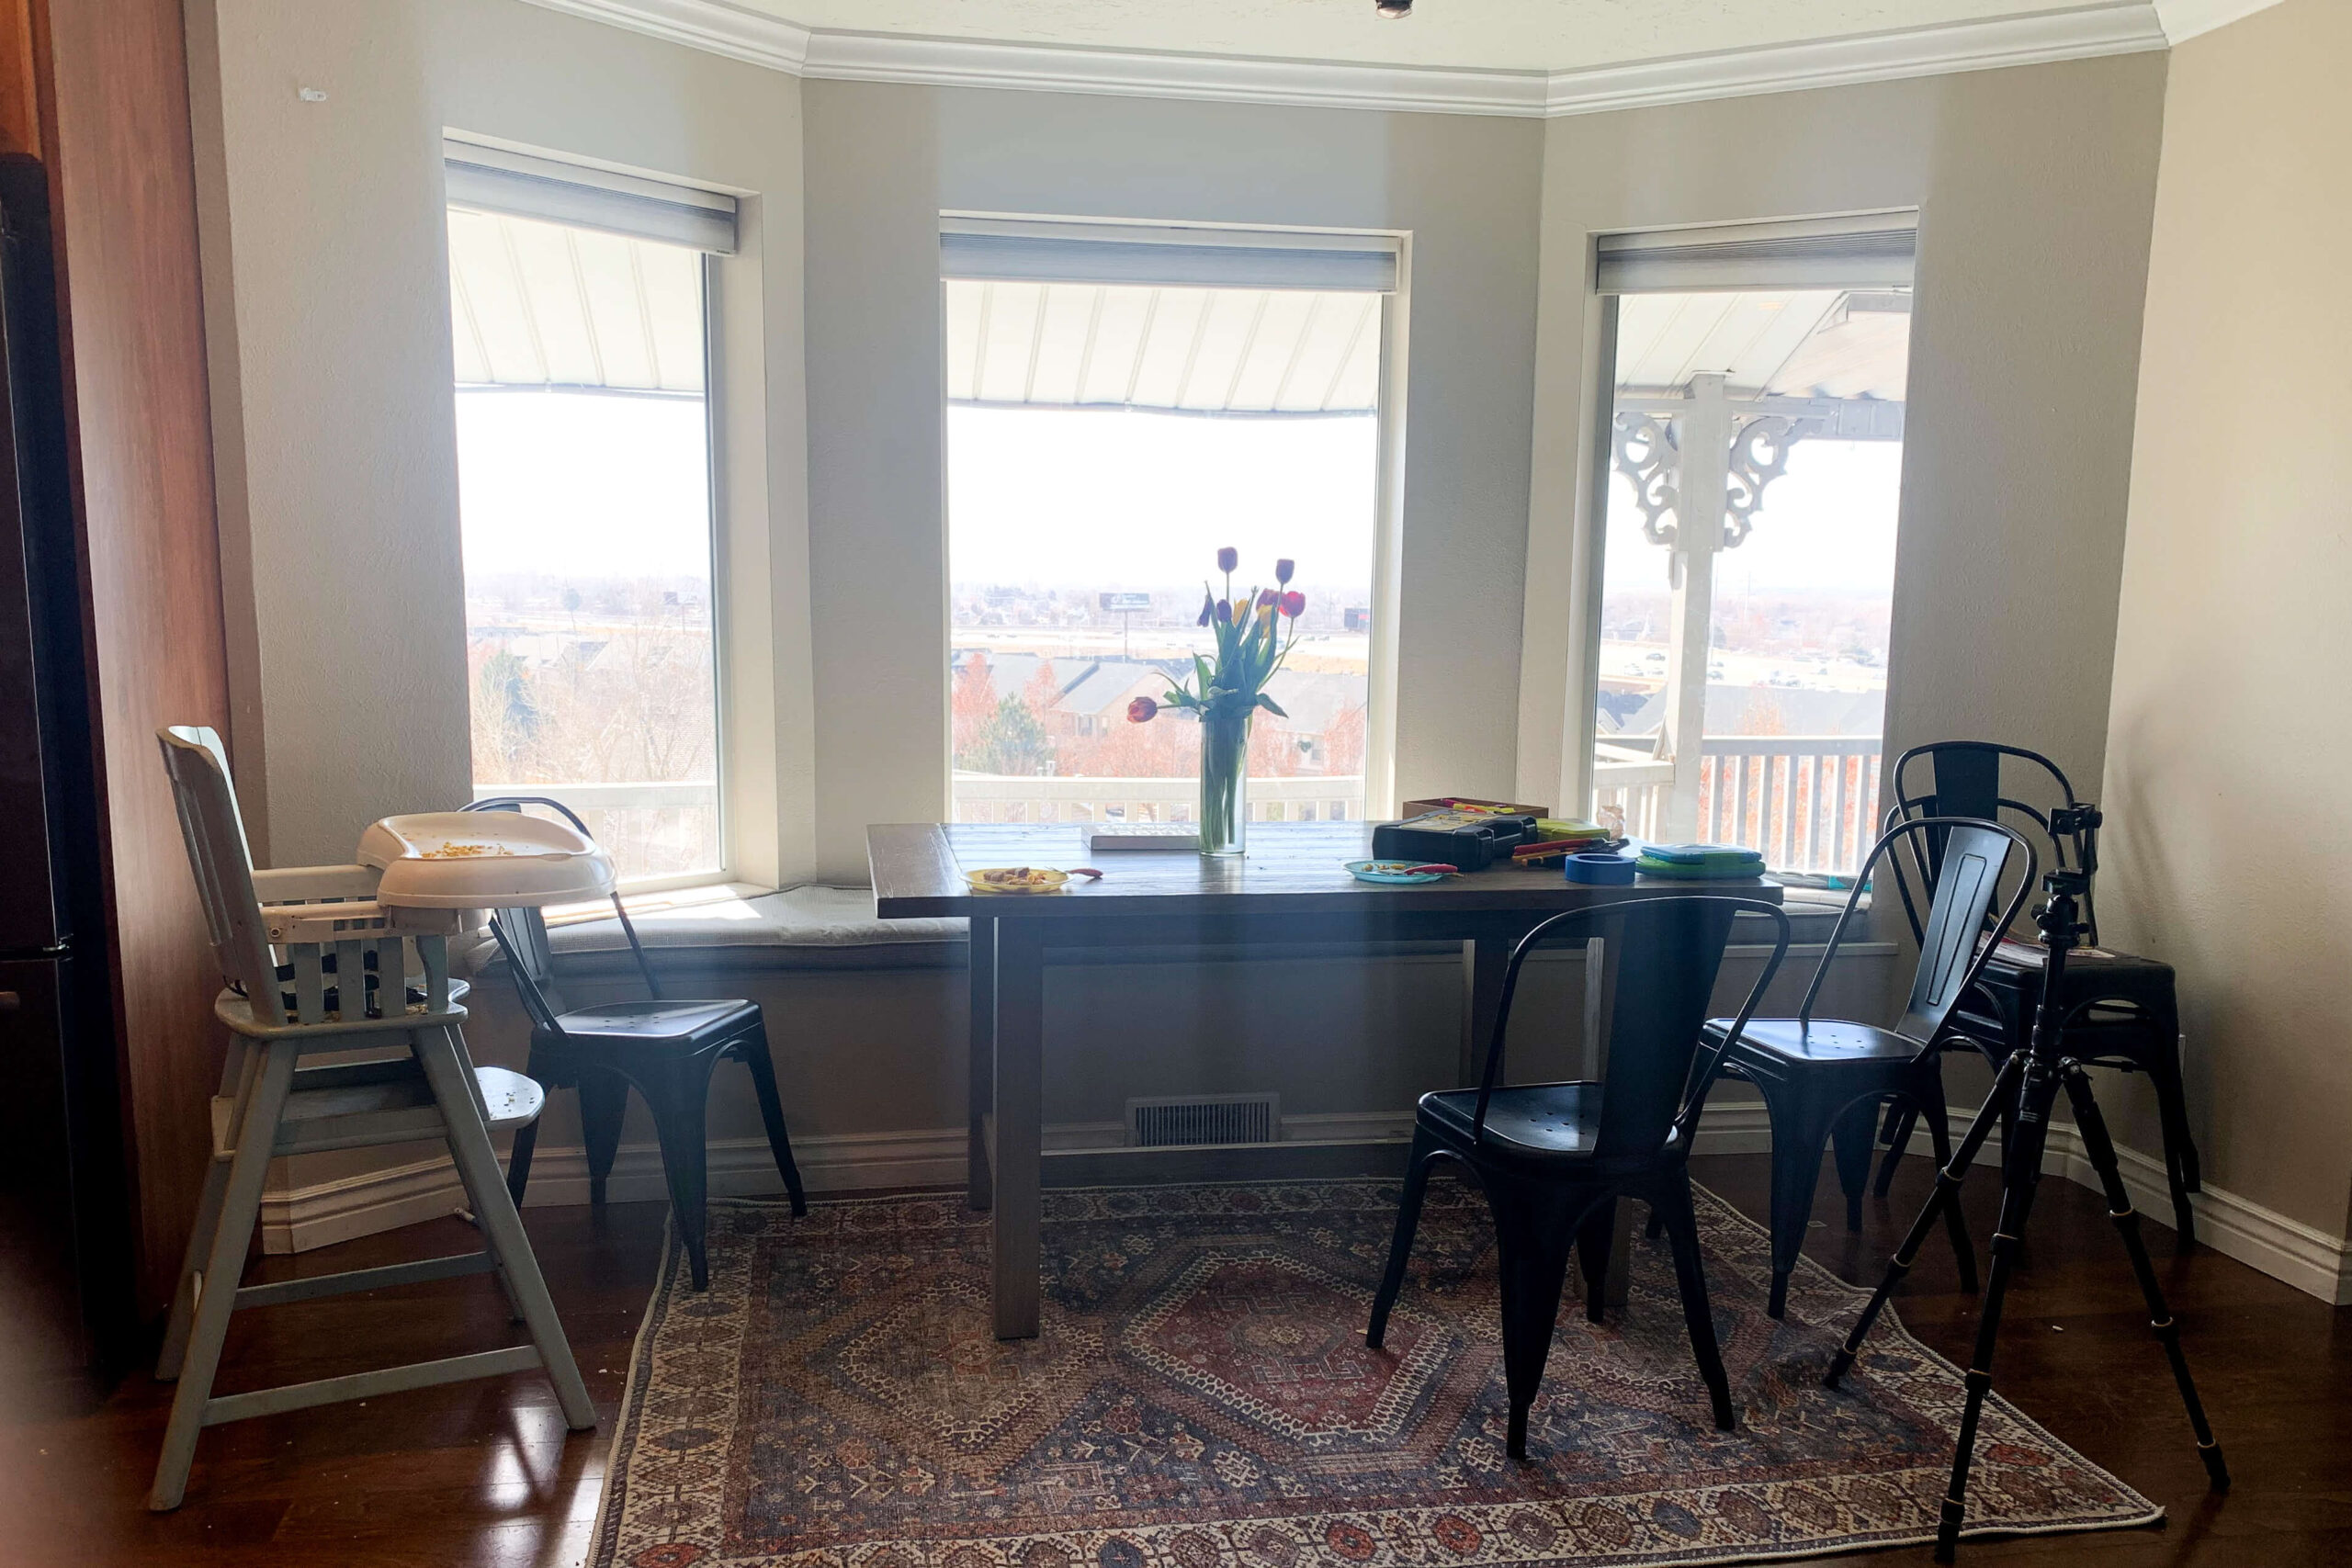
In our previous home in Utah, we had a gorgeous bay window with a stunning view, located right off the kitchen in our dining nook. I wanted to enhance this space by adding classic bay window trim and picture frame molding.
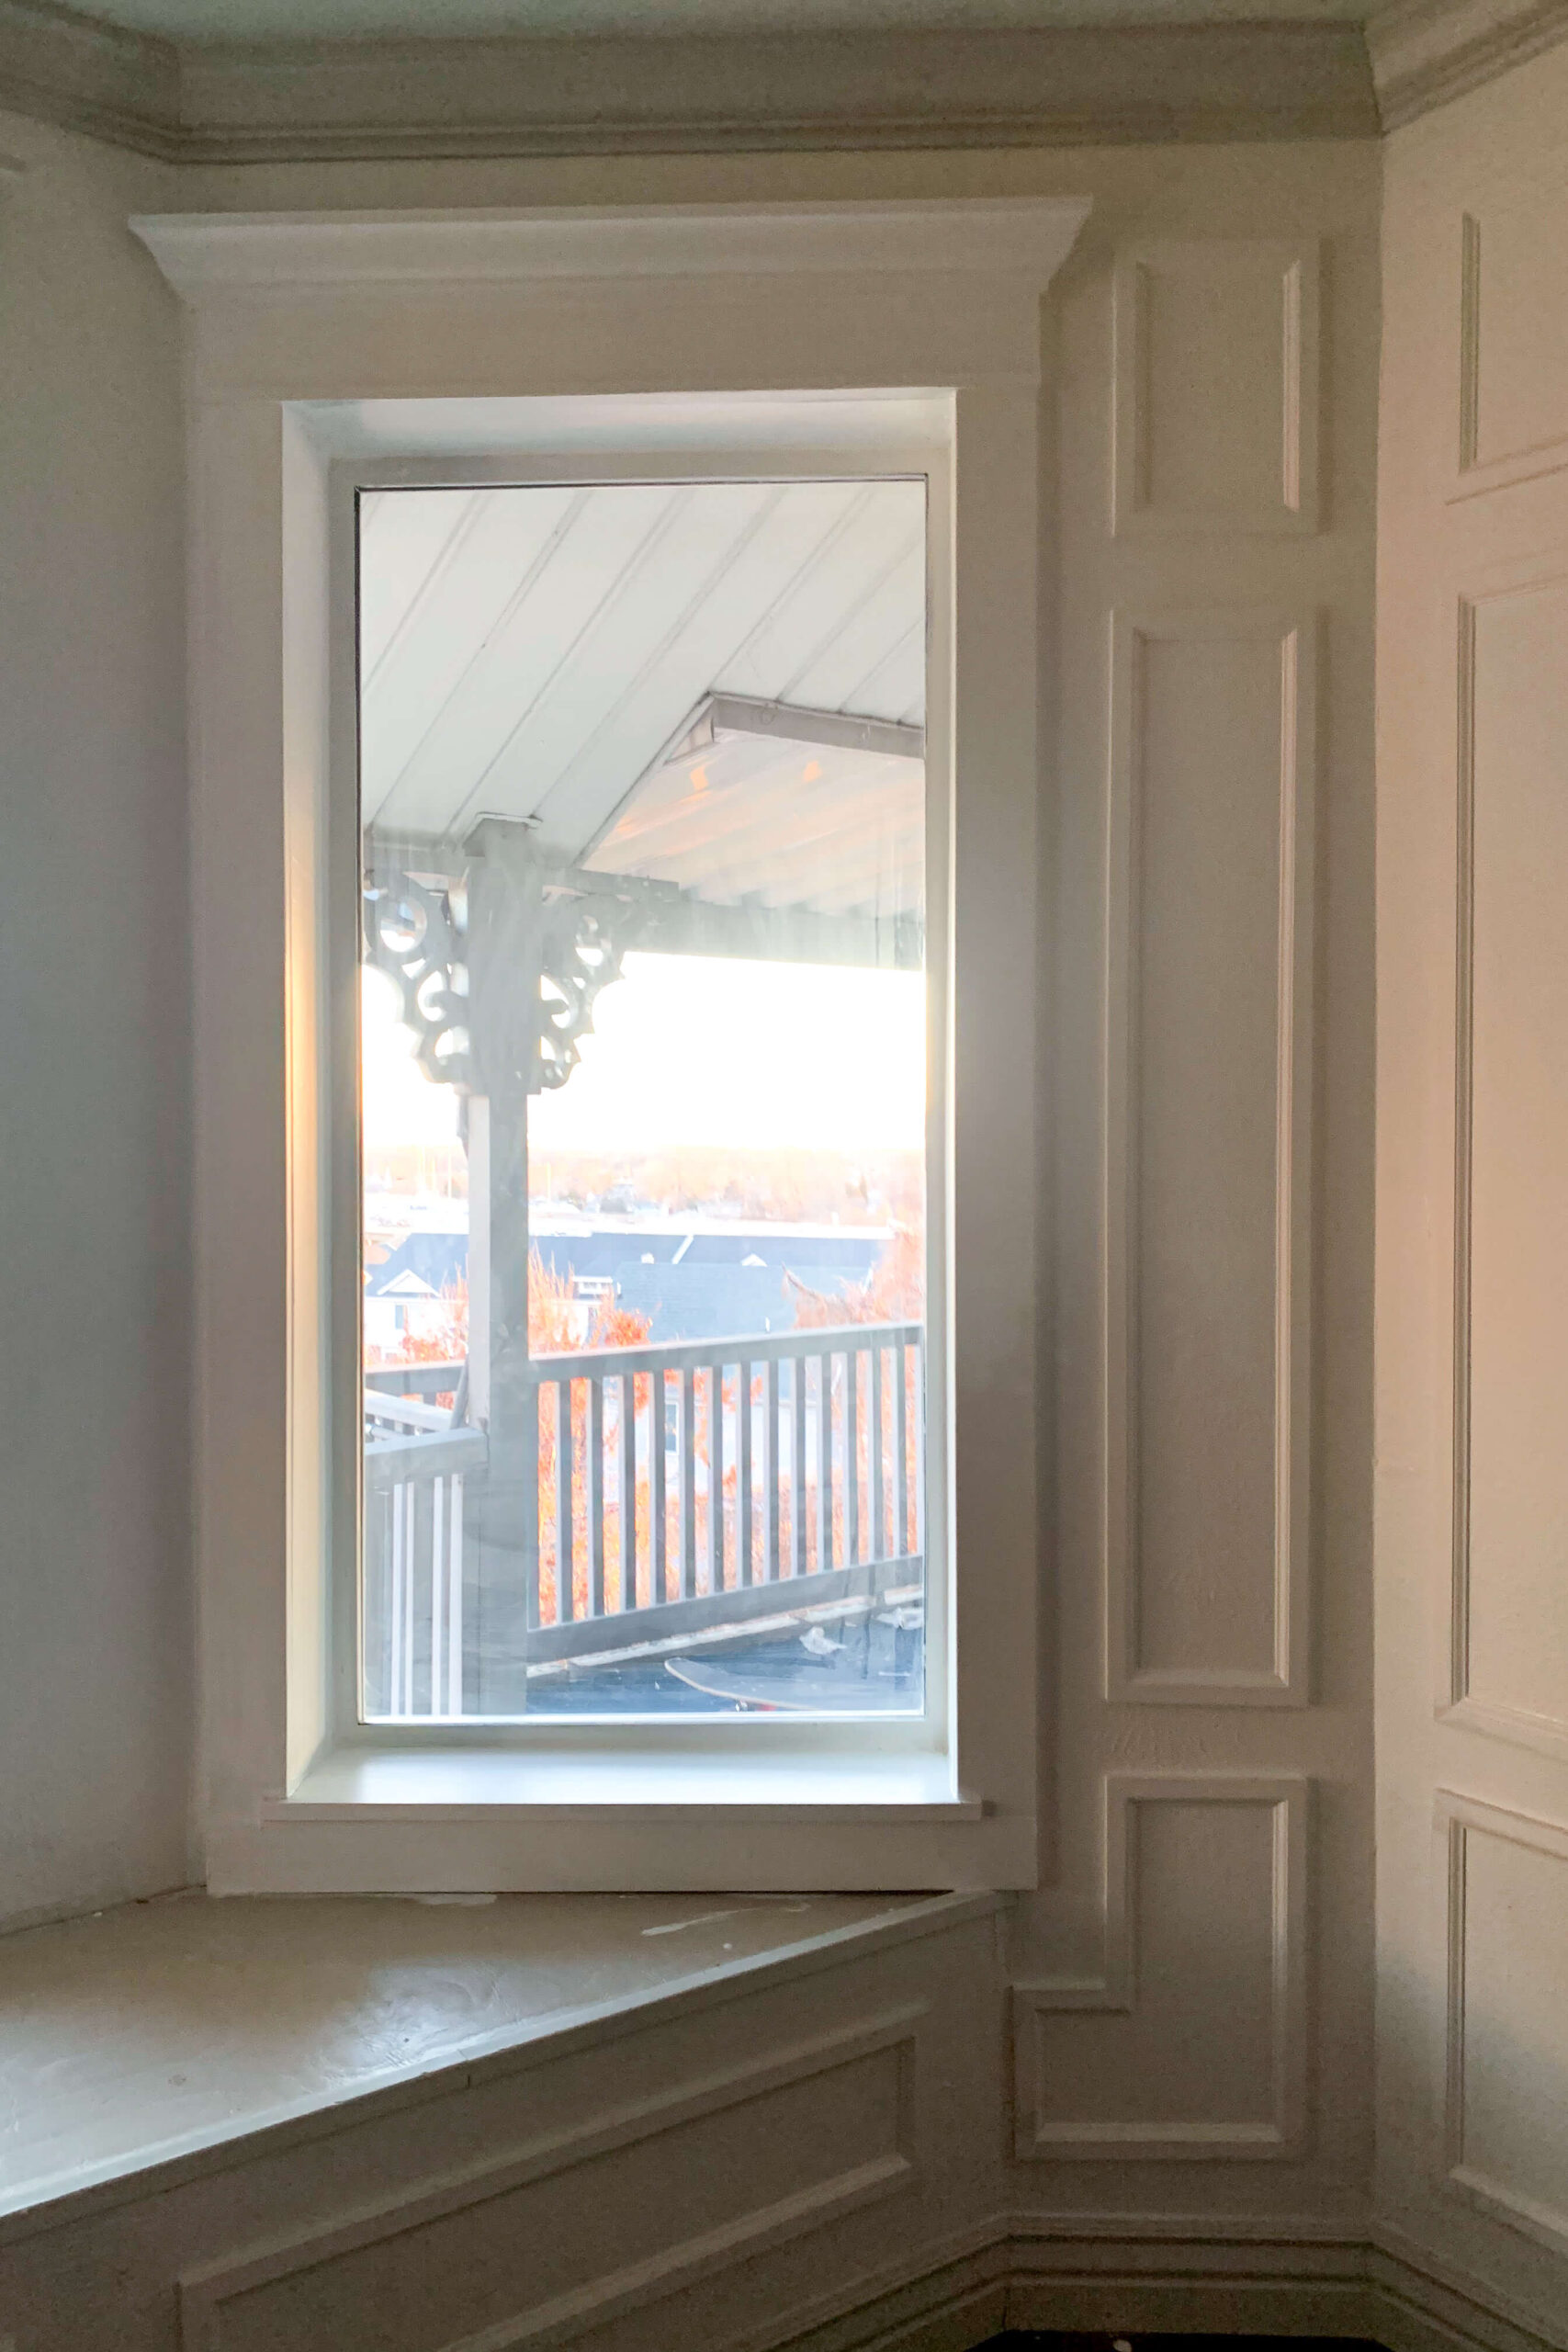
Here’s a look at what I started with. The room already had a classic style with tall baseboards, a ceiling medallion, and crown molding, so the bay window trim and picture frame molding I planned would fit right in.
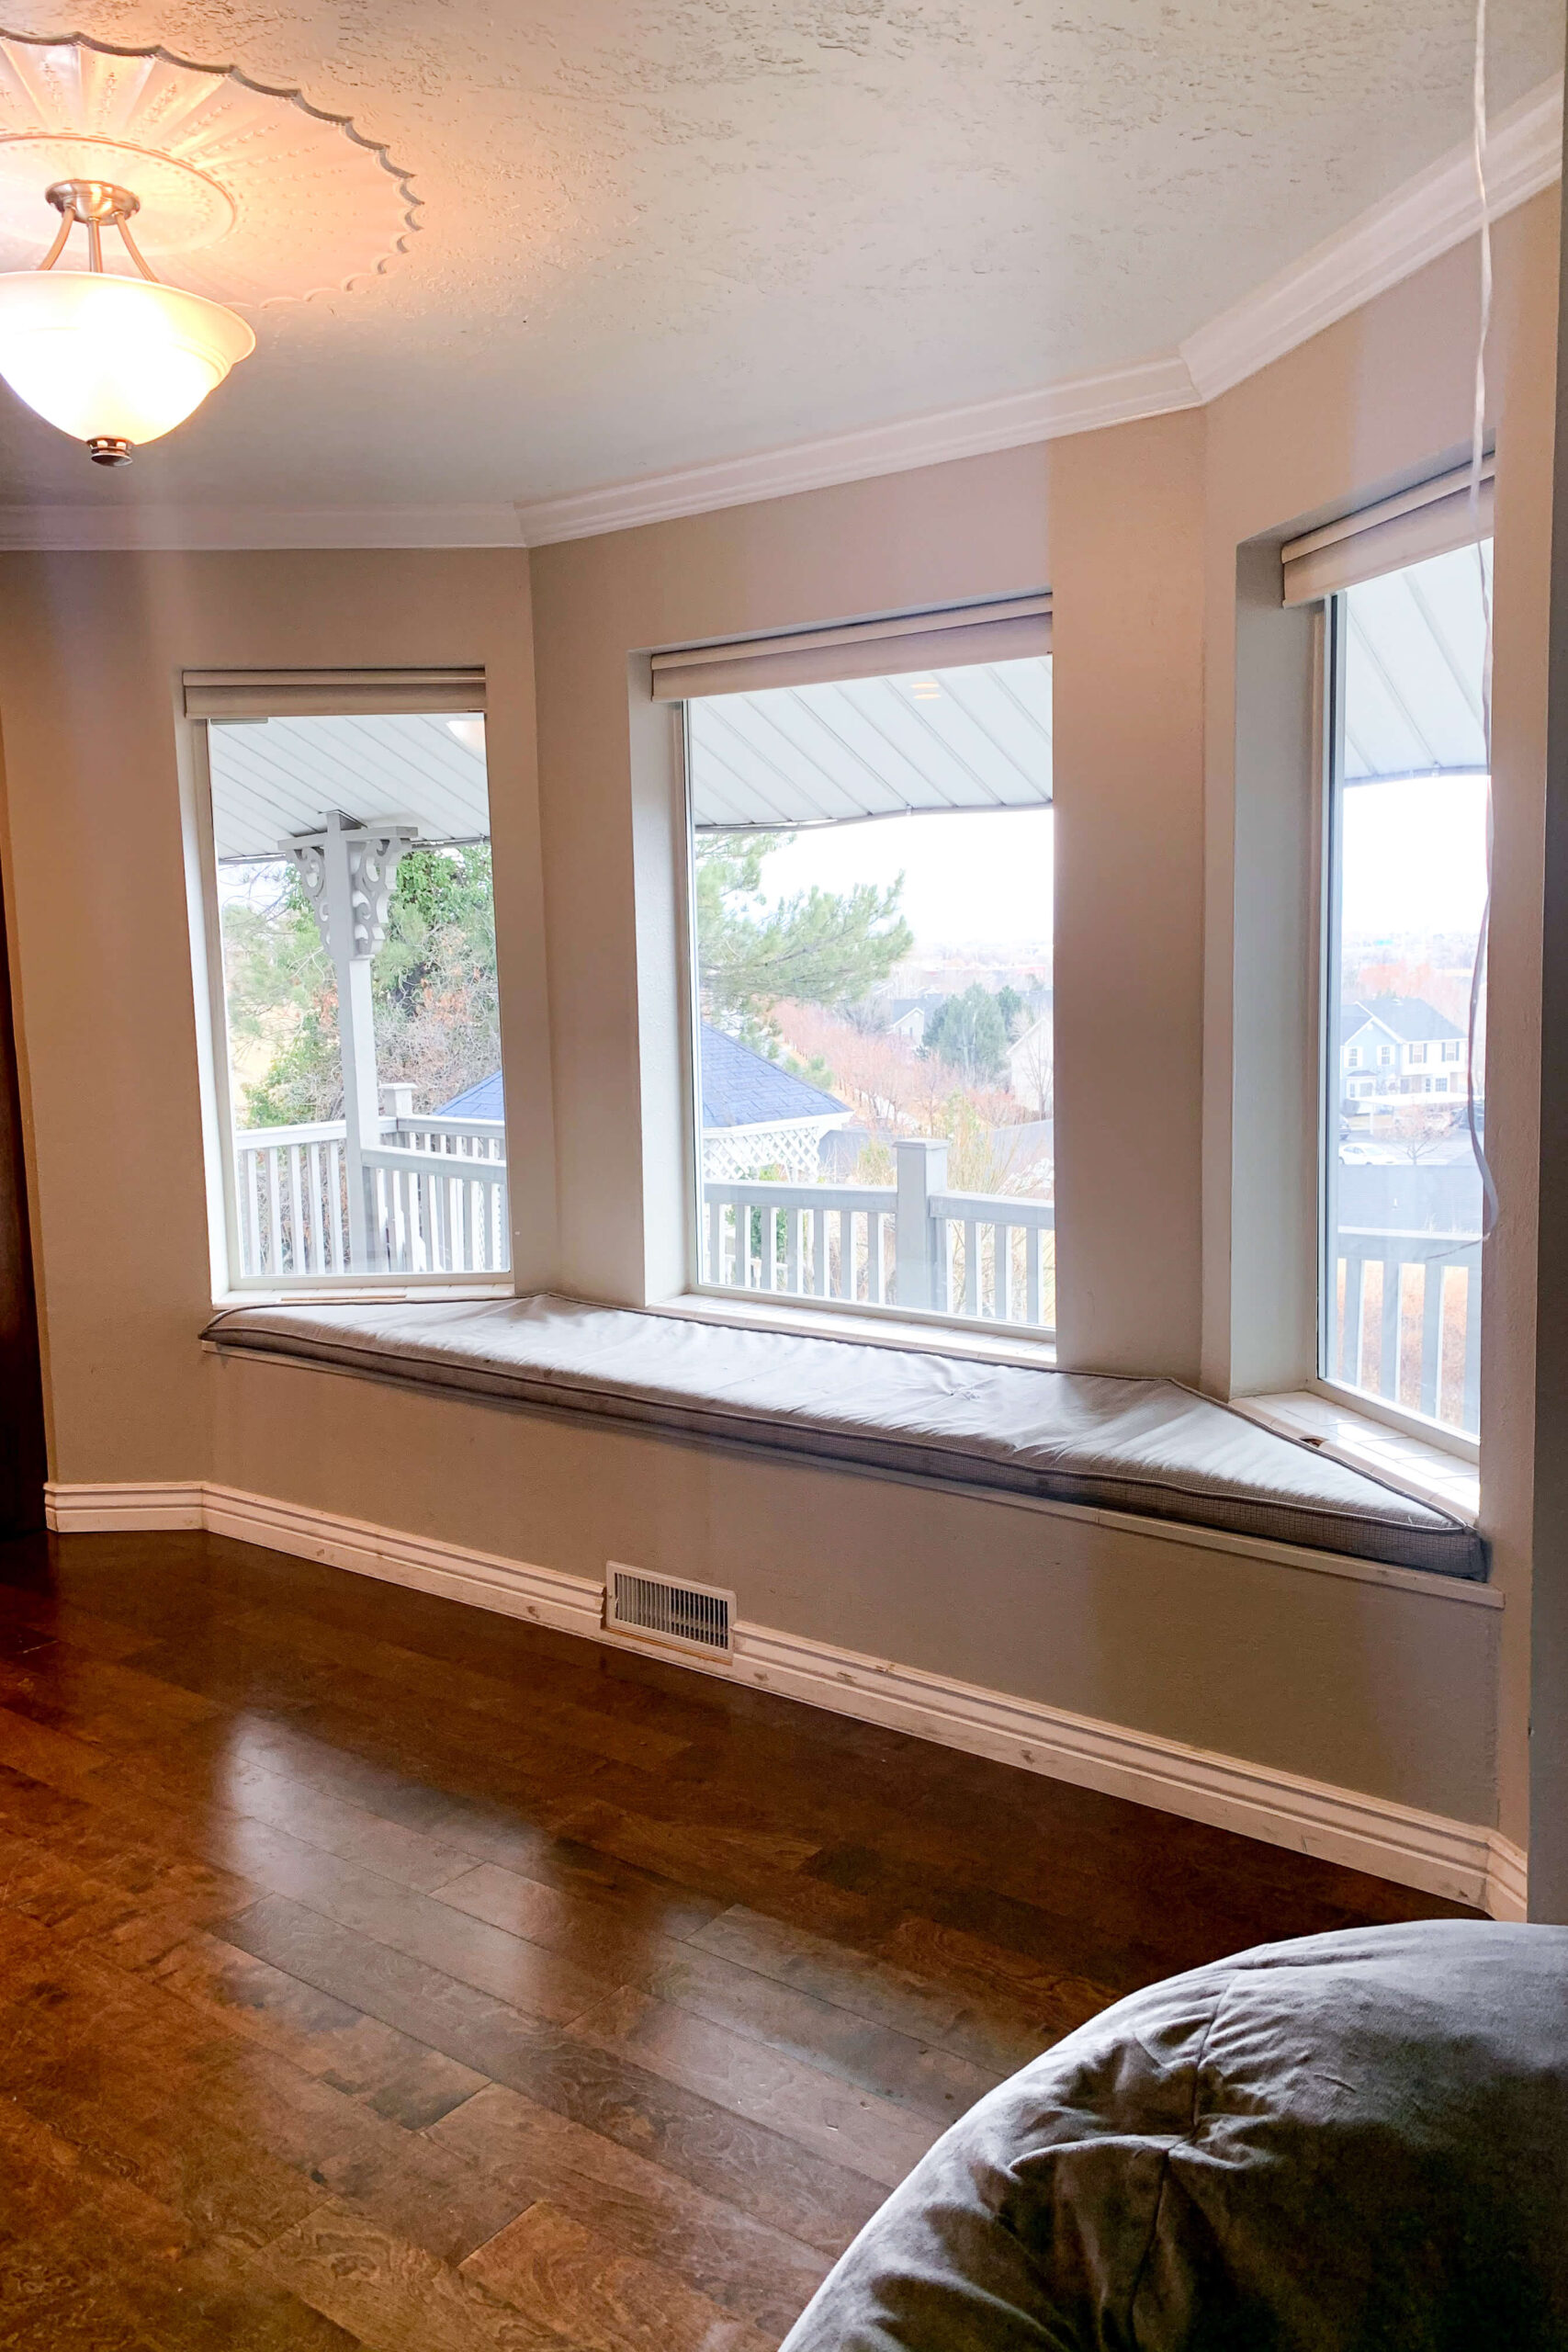
First, I removed the tiles that served as a window sill. I planned to add a real wood window sill and casing.

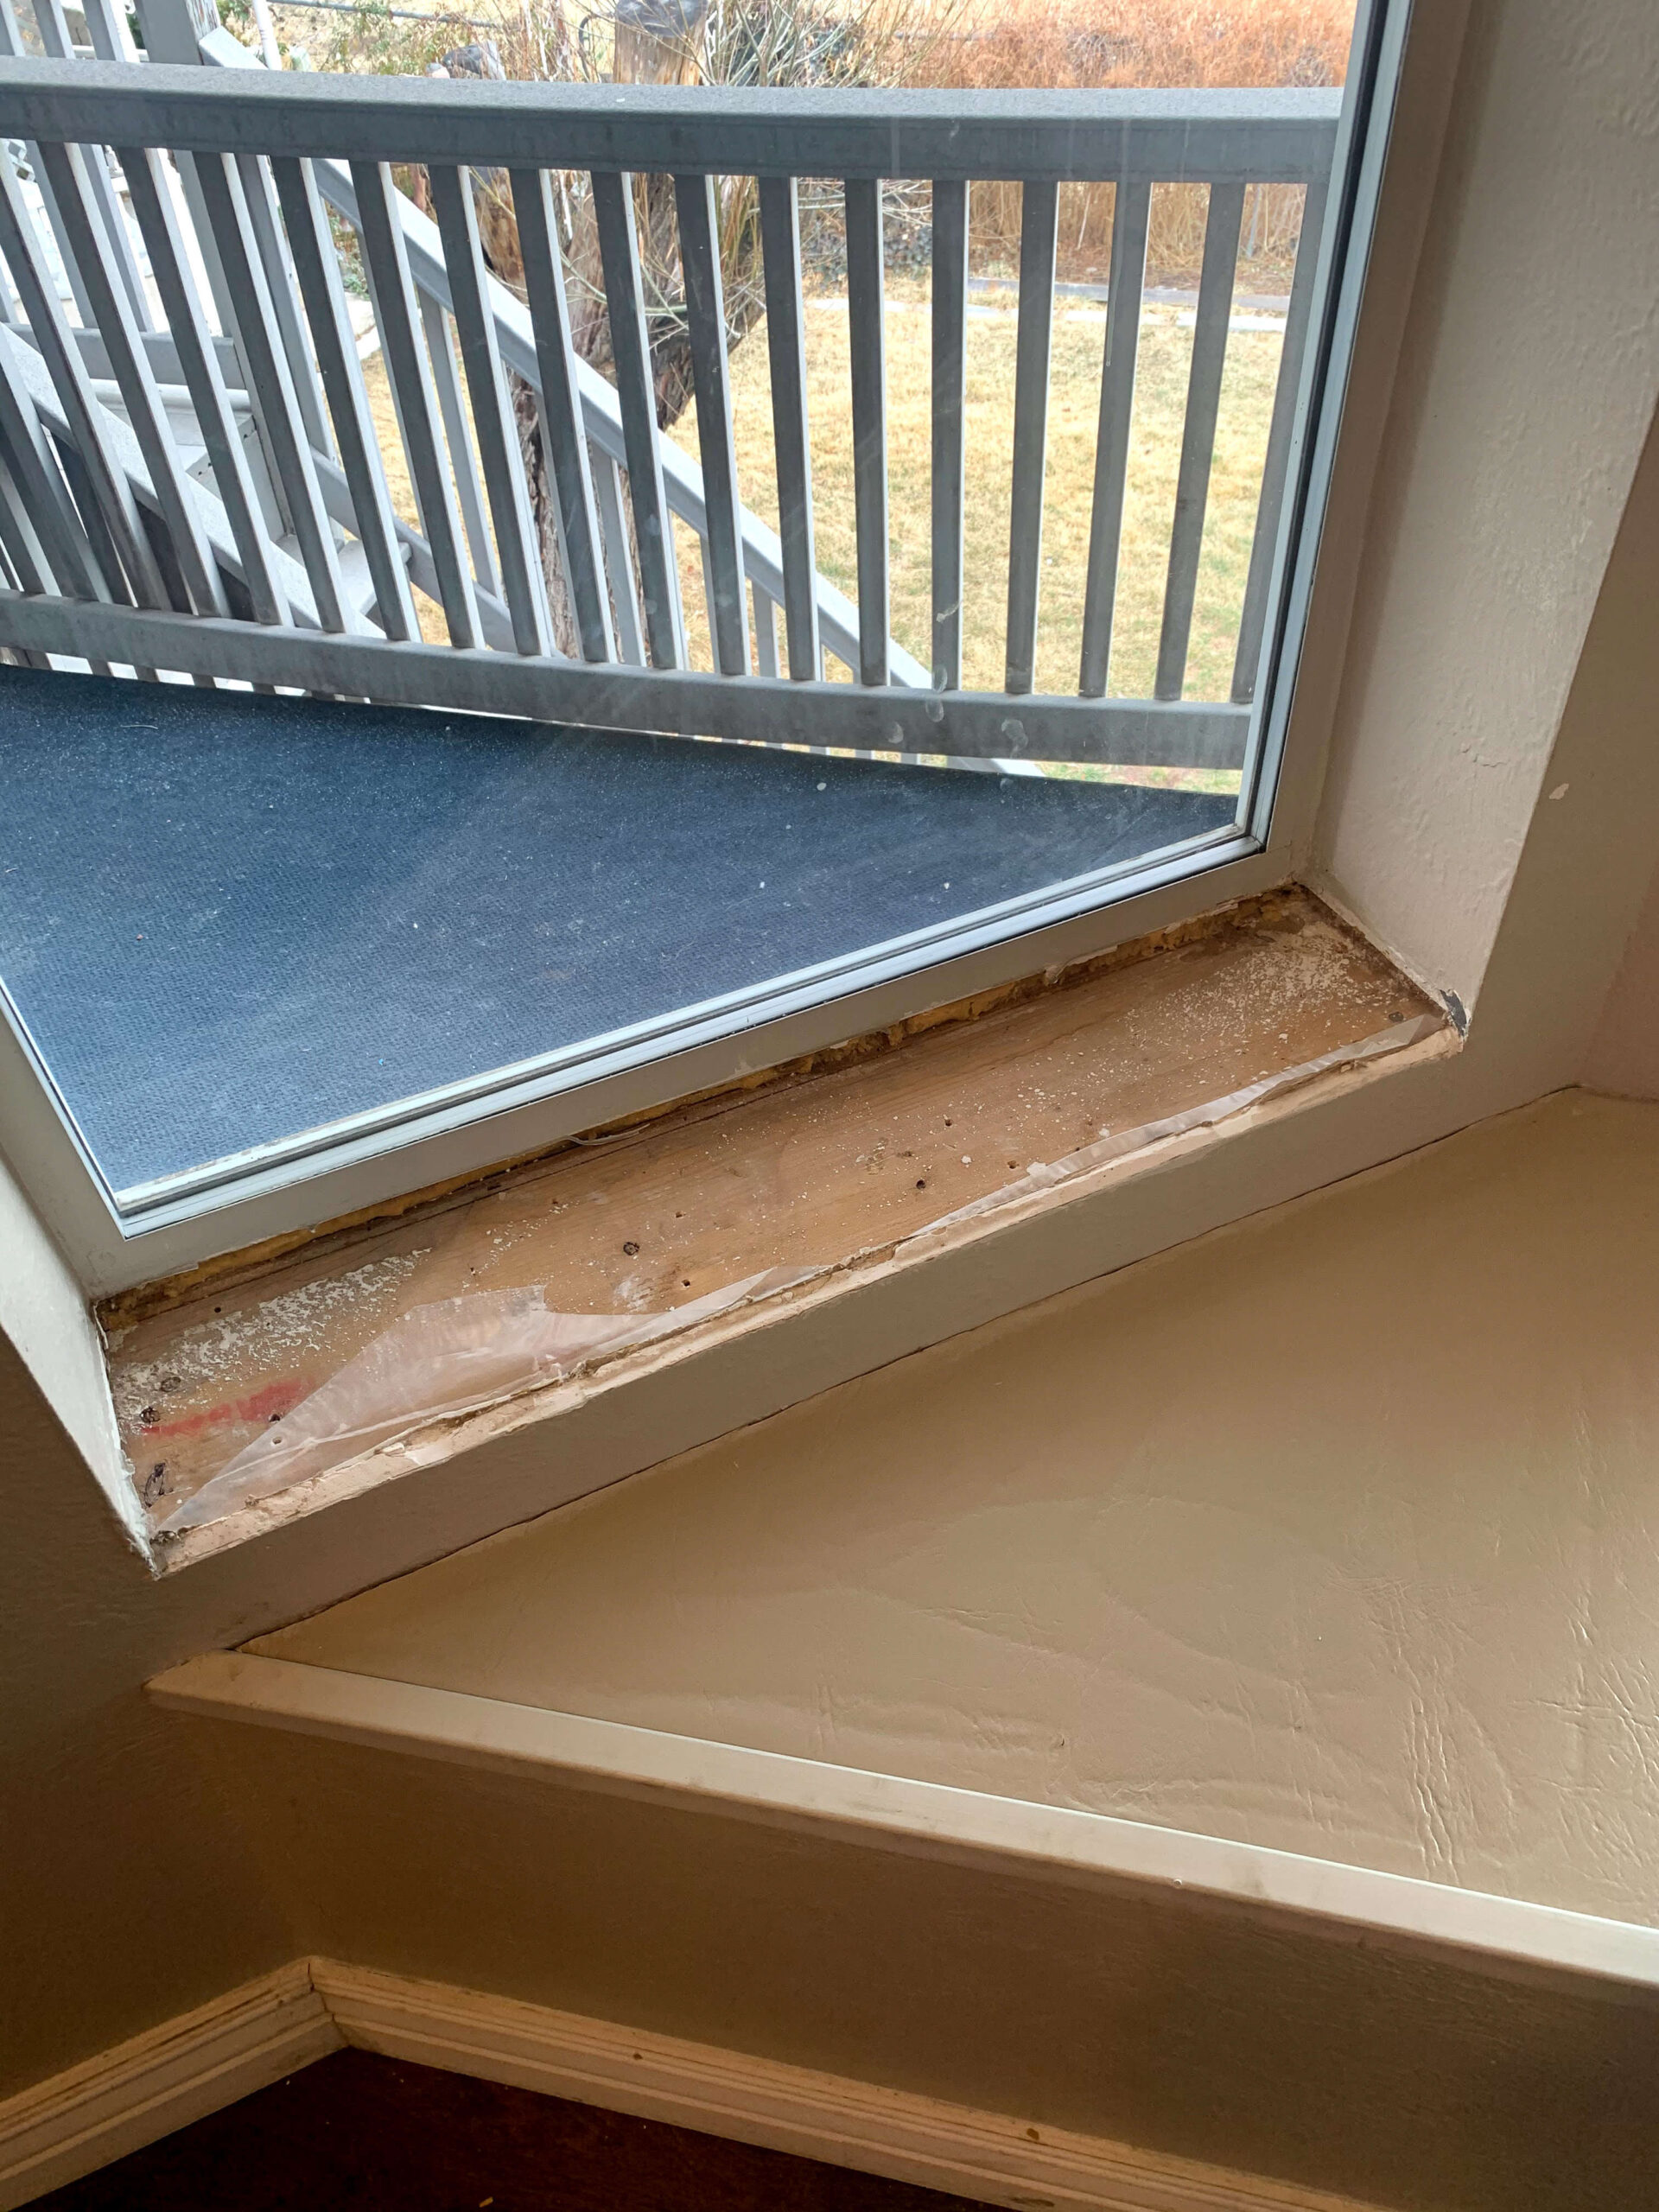
Next, I needed to skim-coat the drywall inside the bay window. The textured walls in this house wouldn’t work for me here—I wanted a smooth, seamless look to match the trim. Using a taping knife and all-purpose joint compound, I smoothed out the texture.


Installing the Bay Window Trim
Adding bay window trim is a simple five-step process. First, I installed the window sill using a 1×6, notched to fit snugly into the bottom edge of the window.

Next, I added trim to the bottom and sides of the window with 1×4 primed MDF. The bottom piece goes first, followed by the side pieces, with a small notch cut out to fit around the window sill.
For the top, I started with a small 1×2 turned on its side, creating a thin ledge, and then added a 1×6 header on top.


Side note: You can attach all these trim pieces with a brad nailer. I used a pneumatic one at the time, but I’ve since upgraded to a battery-powered brad nailer—so much better! I’ll link it here; it’s one of my favorite tools!
Finally, crown molding goes on top. The extra width of the 1×6 header is key because it gives the crown something solid to attach to. For a finished look, cut the crown molding ends at a 45° angle, then add two small pieces on each side. This gives the illusion of the crown wrapping around the header.

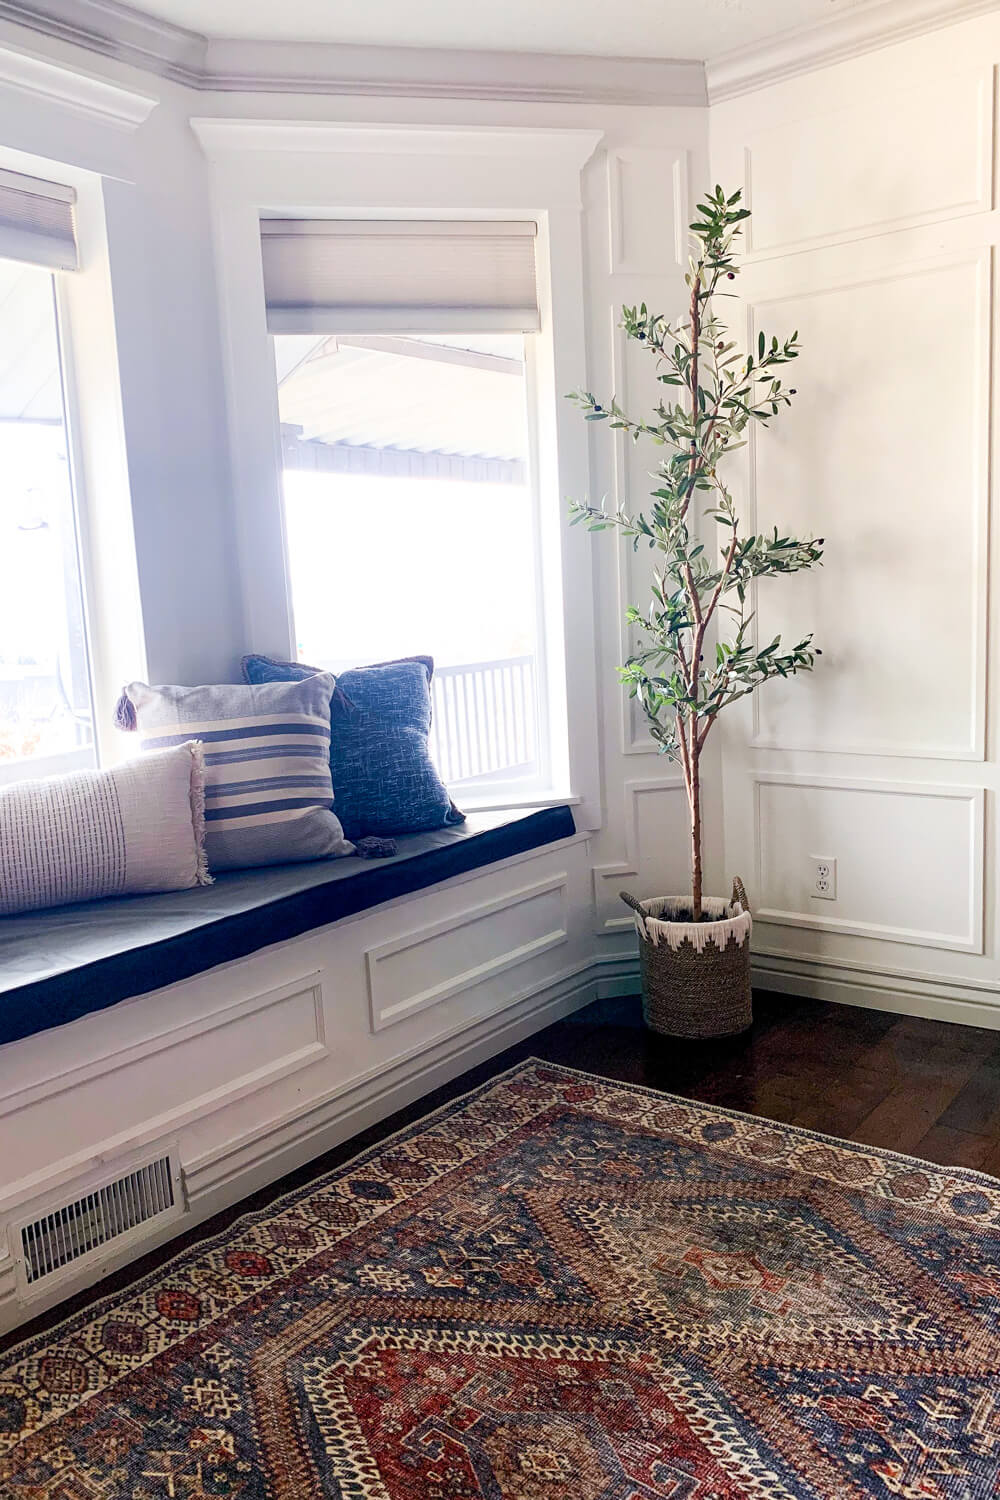
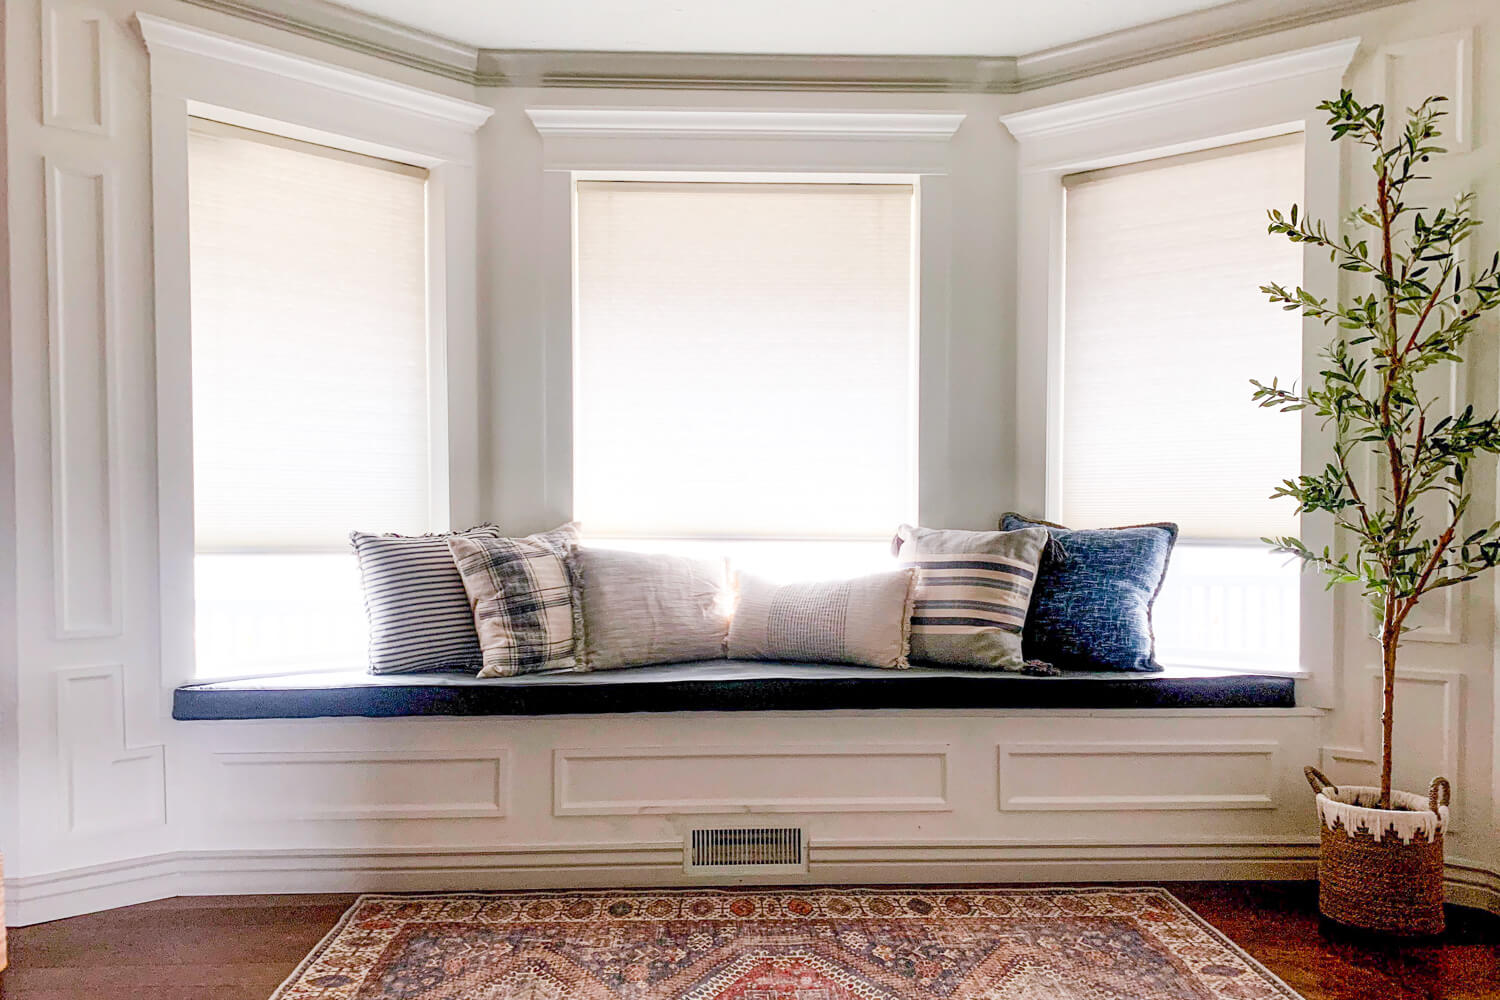
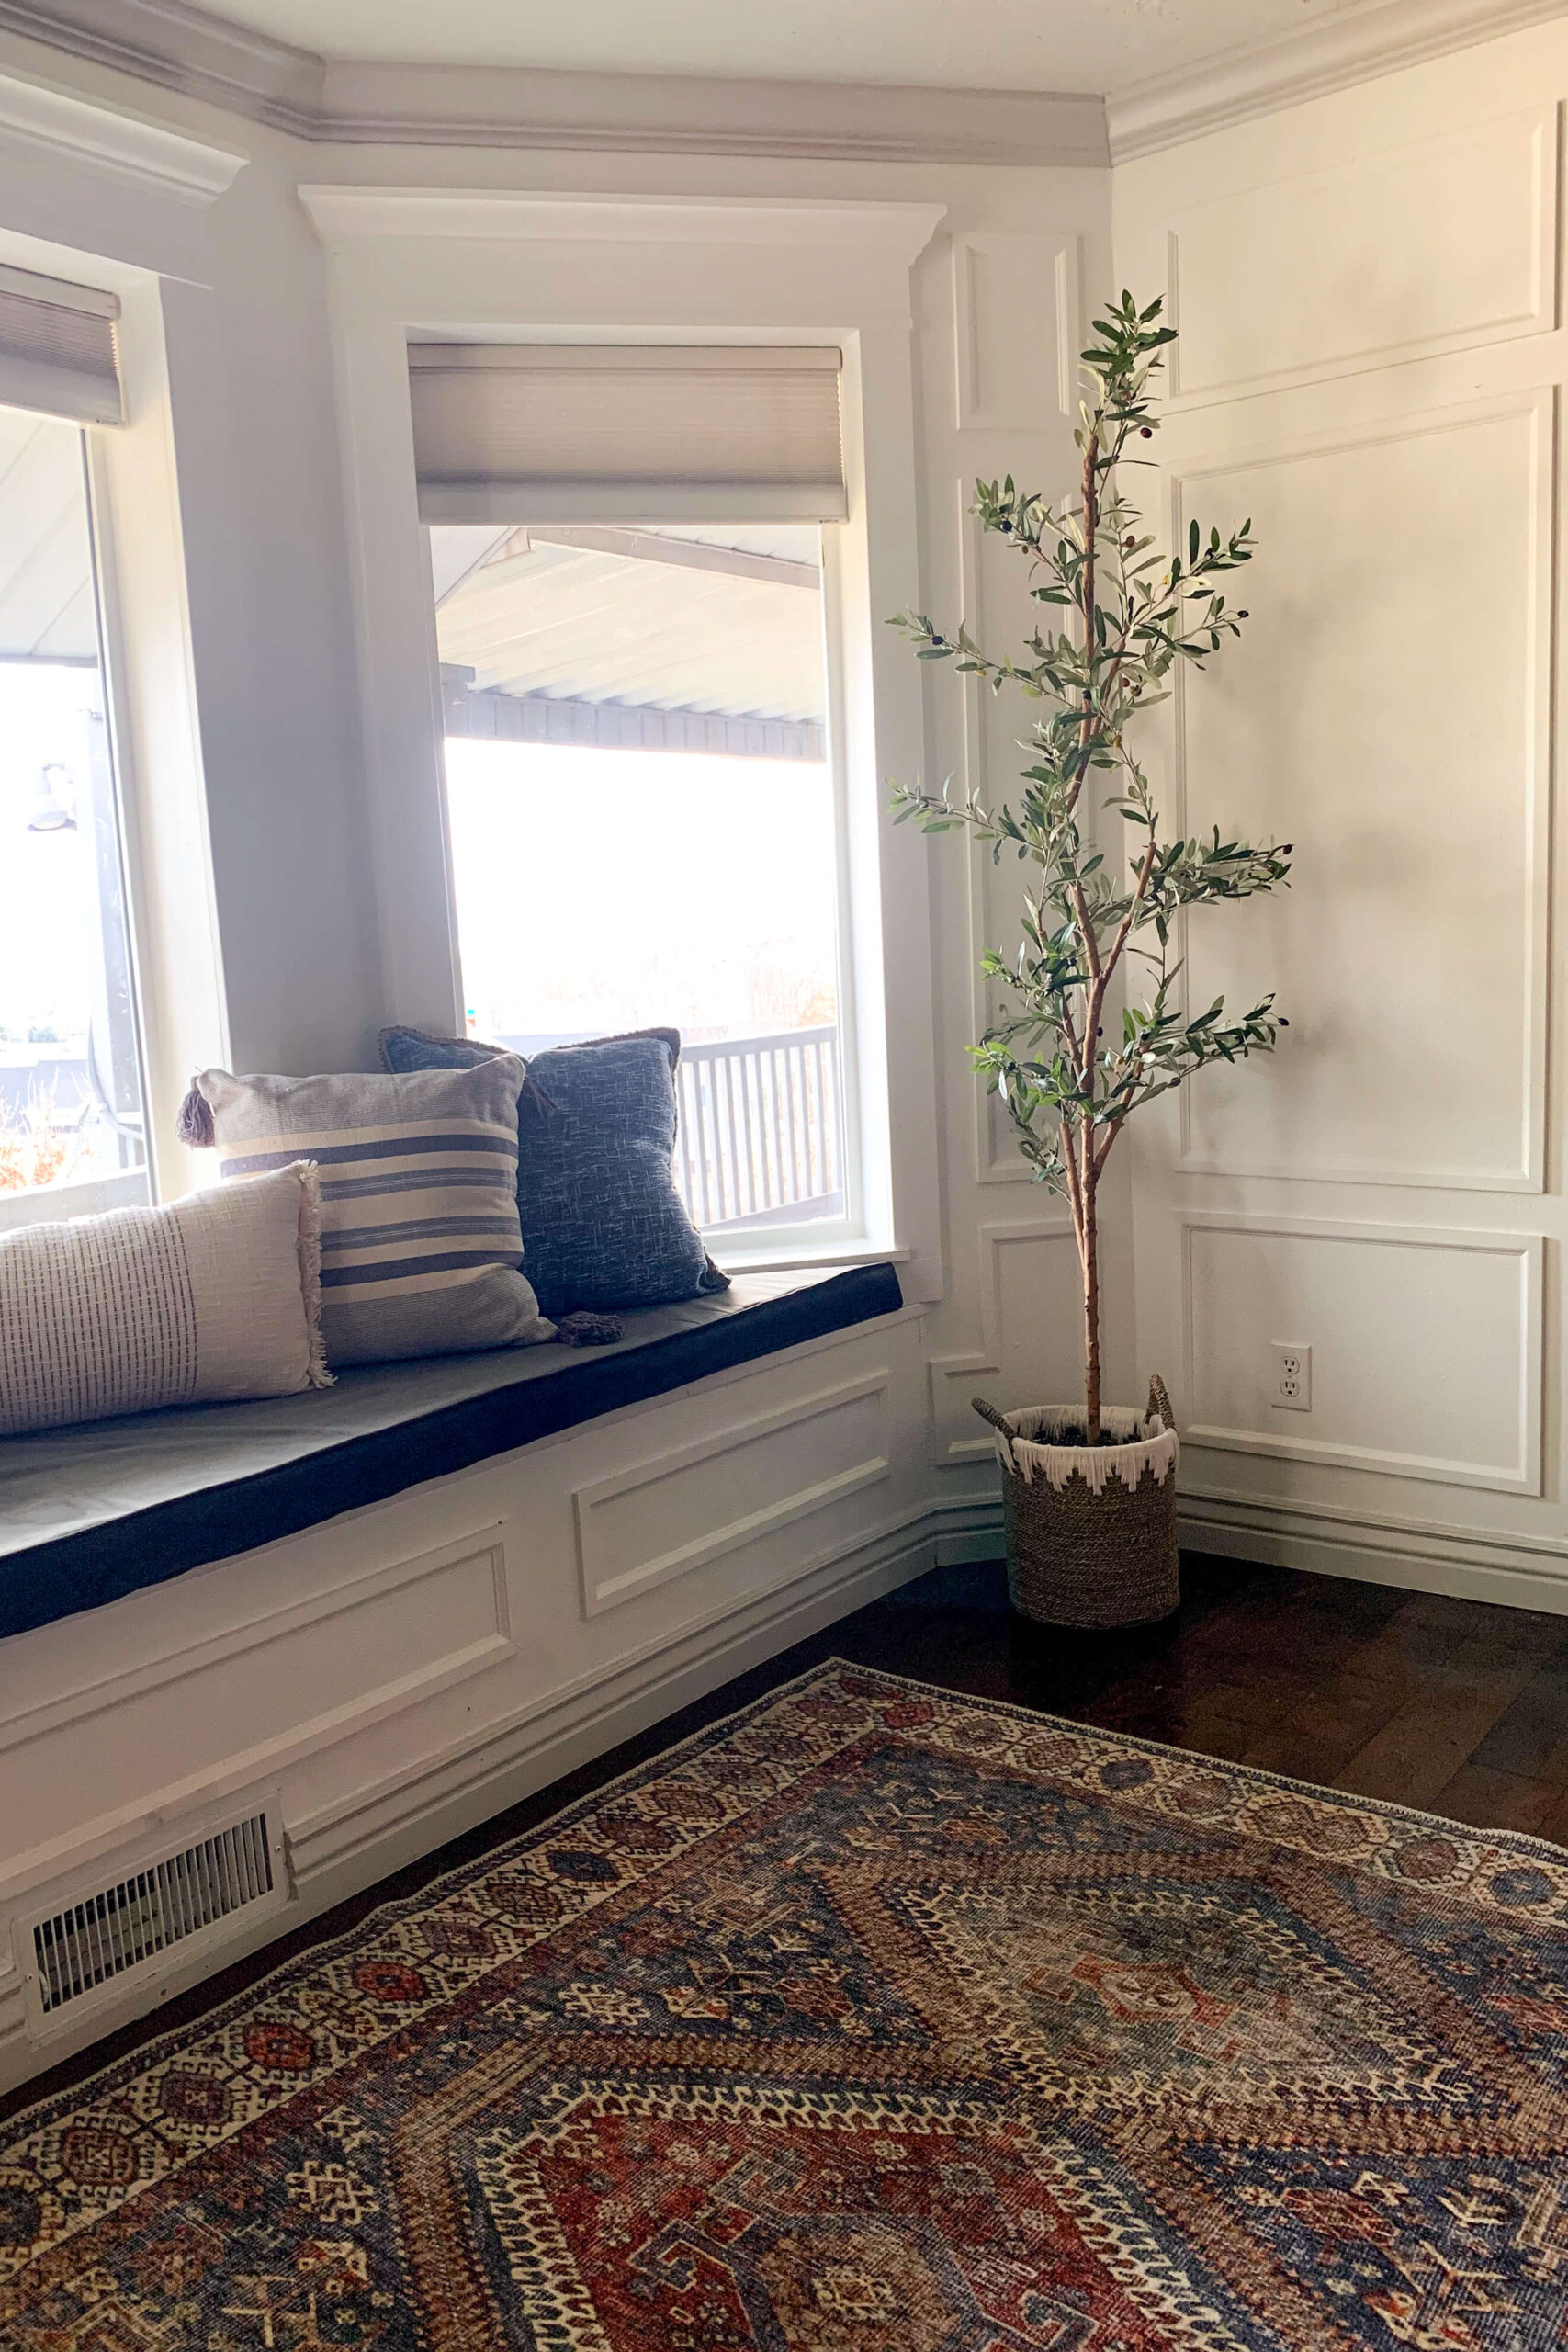
Isn’t that lovely? The bay window trim adds so much to this little dining nook.

Installing Picture Frame Molding
Installing picture frame molding on the walls isn’t difficult, but you’ll want a few different levels to help. I used a laser level, a 24 inch level, and a small torpedo level, all of which helped keep the trim straight!
For the area under the window seat, I started with three rectangles, beginning with the middle one. Using a level and a brad nailer, I attached it to the wall.


Once the middle rectangle was done, the laser level helped me align the other two perfectly on each side.

For the walls on the left and right of the bay window trim, I used painter’s tape to mark out my trim plan, then attached the MDF casing with my brad nailer, just like the rest of the trim.

Painting All the Trim and Molding
Before painting, I caulked all the seams and filled the brad nail holes with wood filler. These final steps elevate your project from DIY to professional quality.


After painting, I was in love. The bay window trim and picture frame molding look like they’ve always been there, fitting seamlessly with the room’s classic style while elevating it at the same time.
Adding window shades, a few pillows, and a gorgeous rug completed the cozy feel of the room.
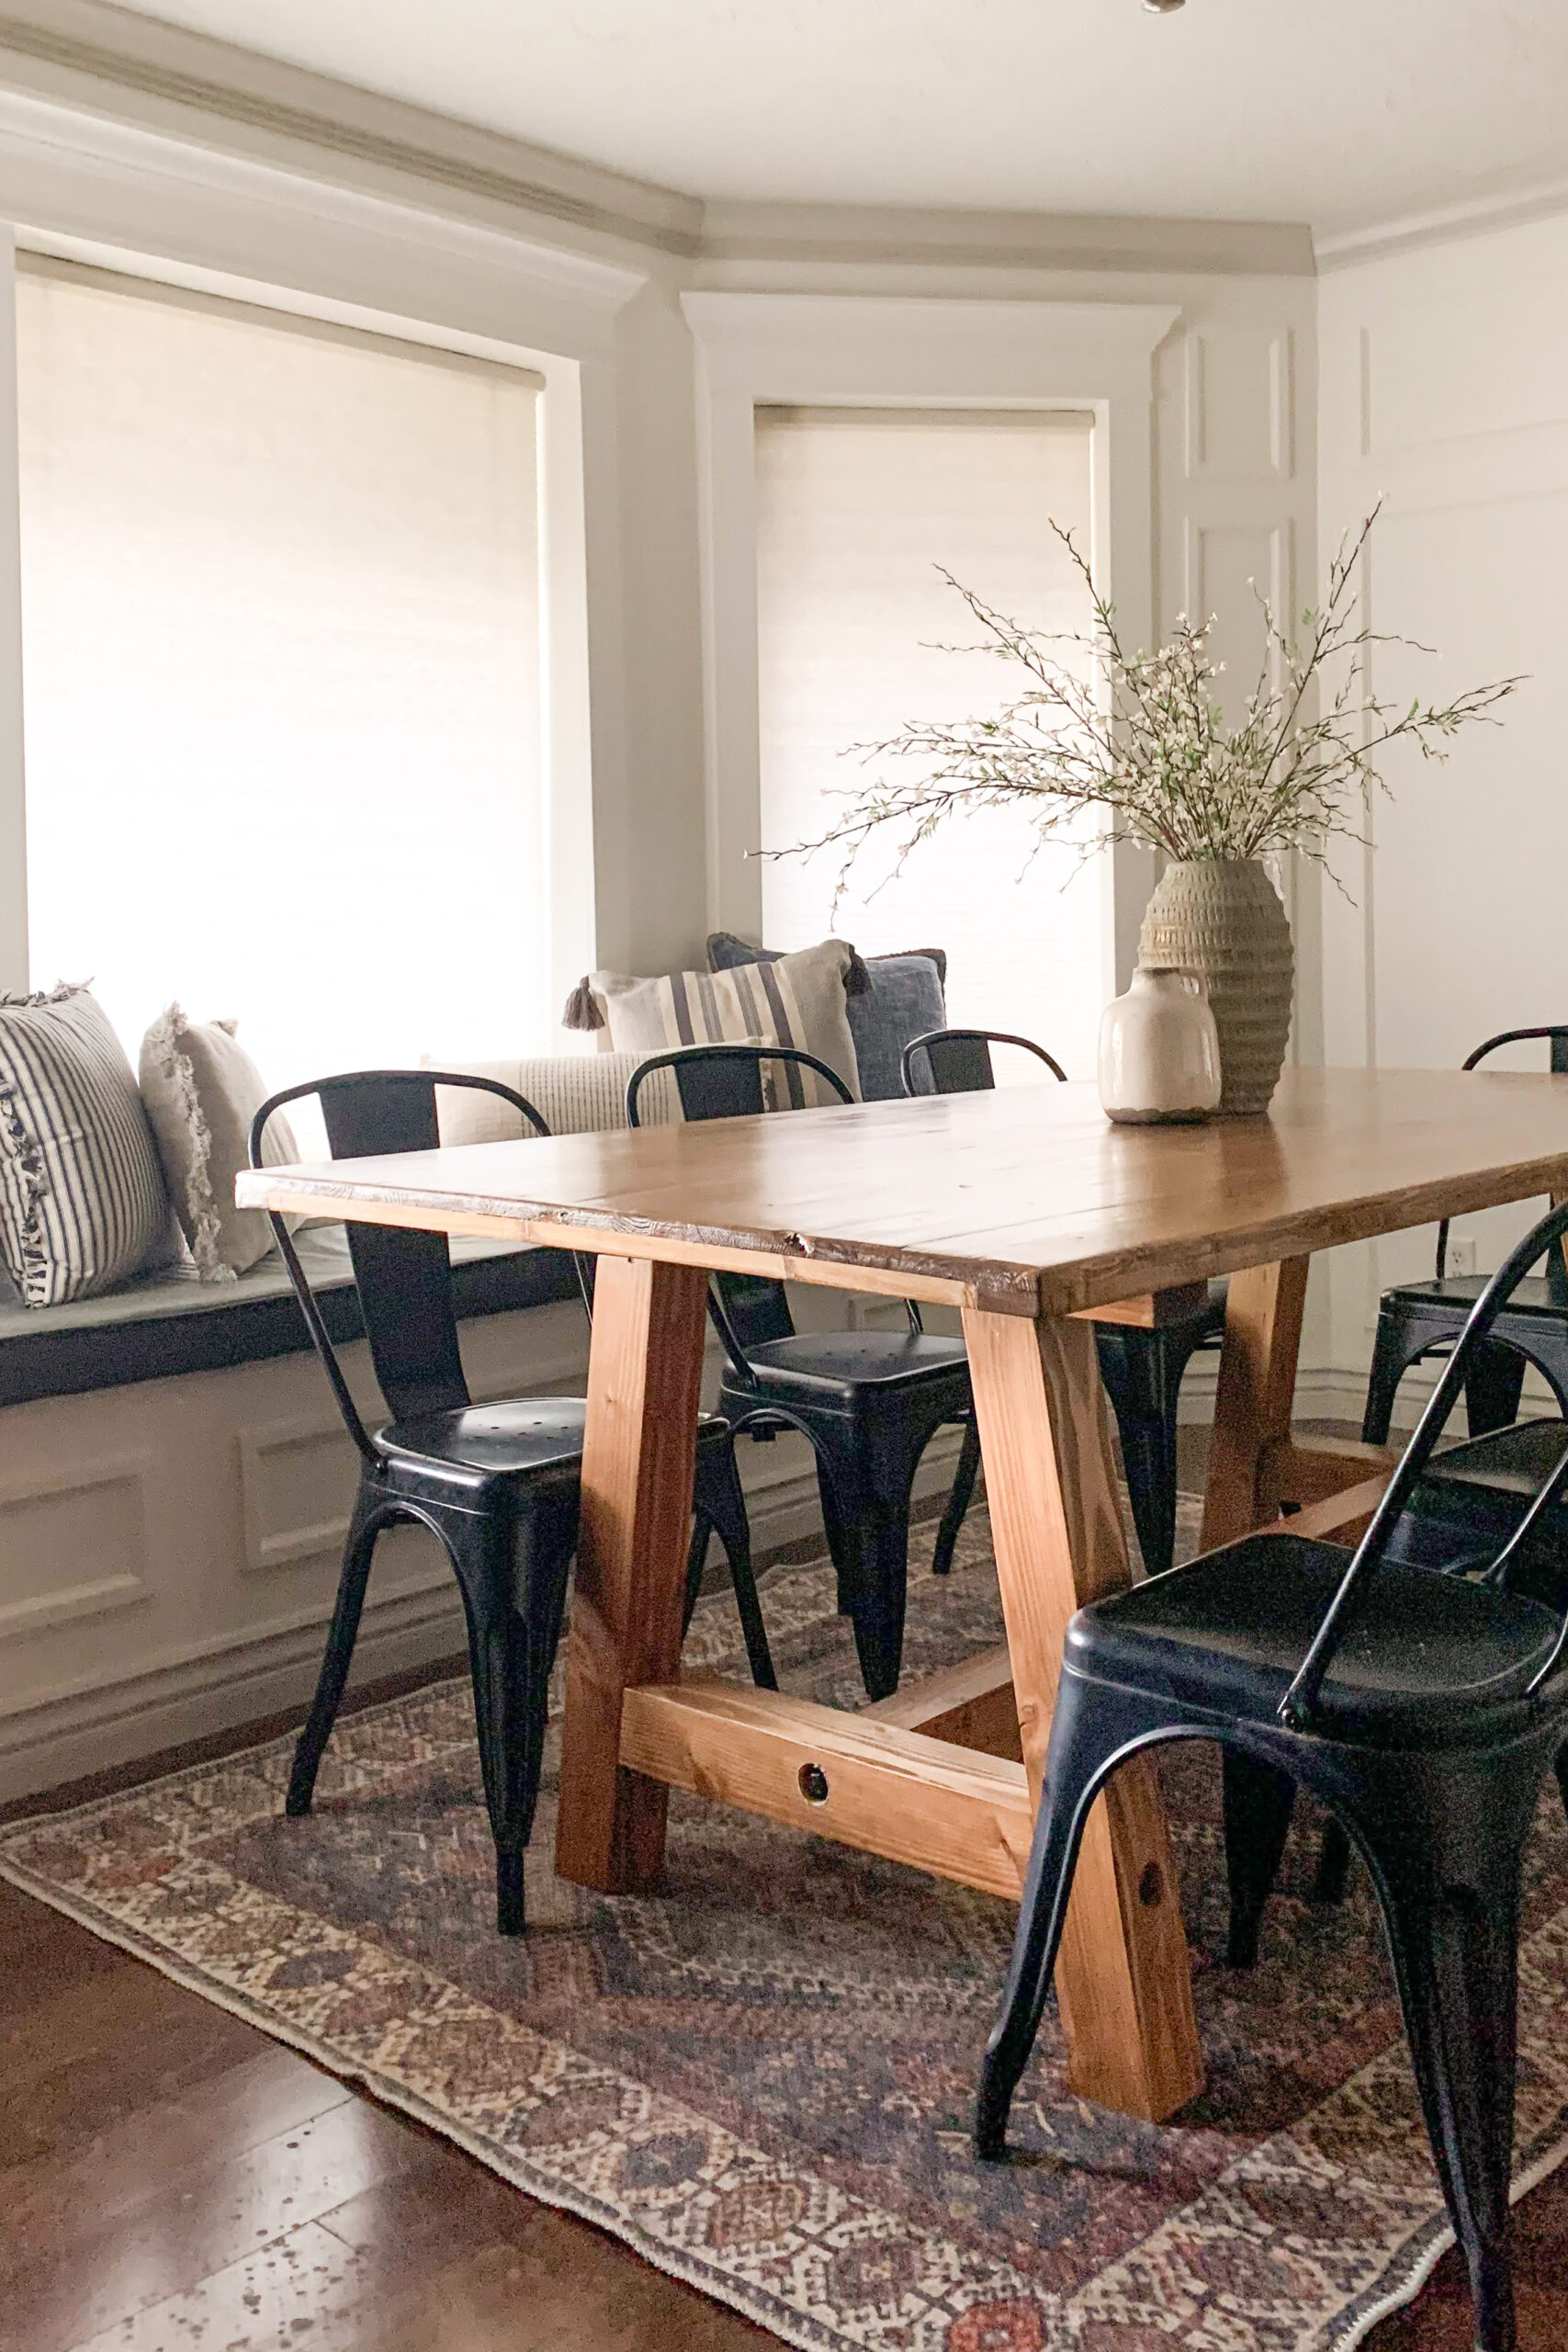
I’m especially thrilled with how the space looks with the table I built from scratch. The bay window trim, picture frame molding, and the entire room turned out gorgeous! I’m so happy with it.
If you have any questions, leave them in the comments. I’m always happy to help and want to empower you to beautify your space with your own DIY projects!

This project was in the main, upstairs kitchen, but it’s in the same house where I built the waterfall island and redid the fireplace down in the basement kitchen. You can read more about those projects by clicking on the links.


Where is this rug from
You can find it at Home Depot. The name of it is Lotus Ripon Blue Red Vintage Medallion Botanical Area Rug