

Updated November 19, 2025
DIY countertops are the best way to get a high-end look without the high-end price tag. In our kitchen, I wanted the look of beautiful marble, but I did not want to spend thousands of dollars on stone. So we built DIY countertops from plywood, wrapped them in marble contact paper, then coated them with epoxy for a gorgeous, durable surface that can hold up to real family life.
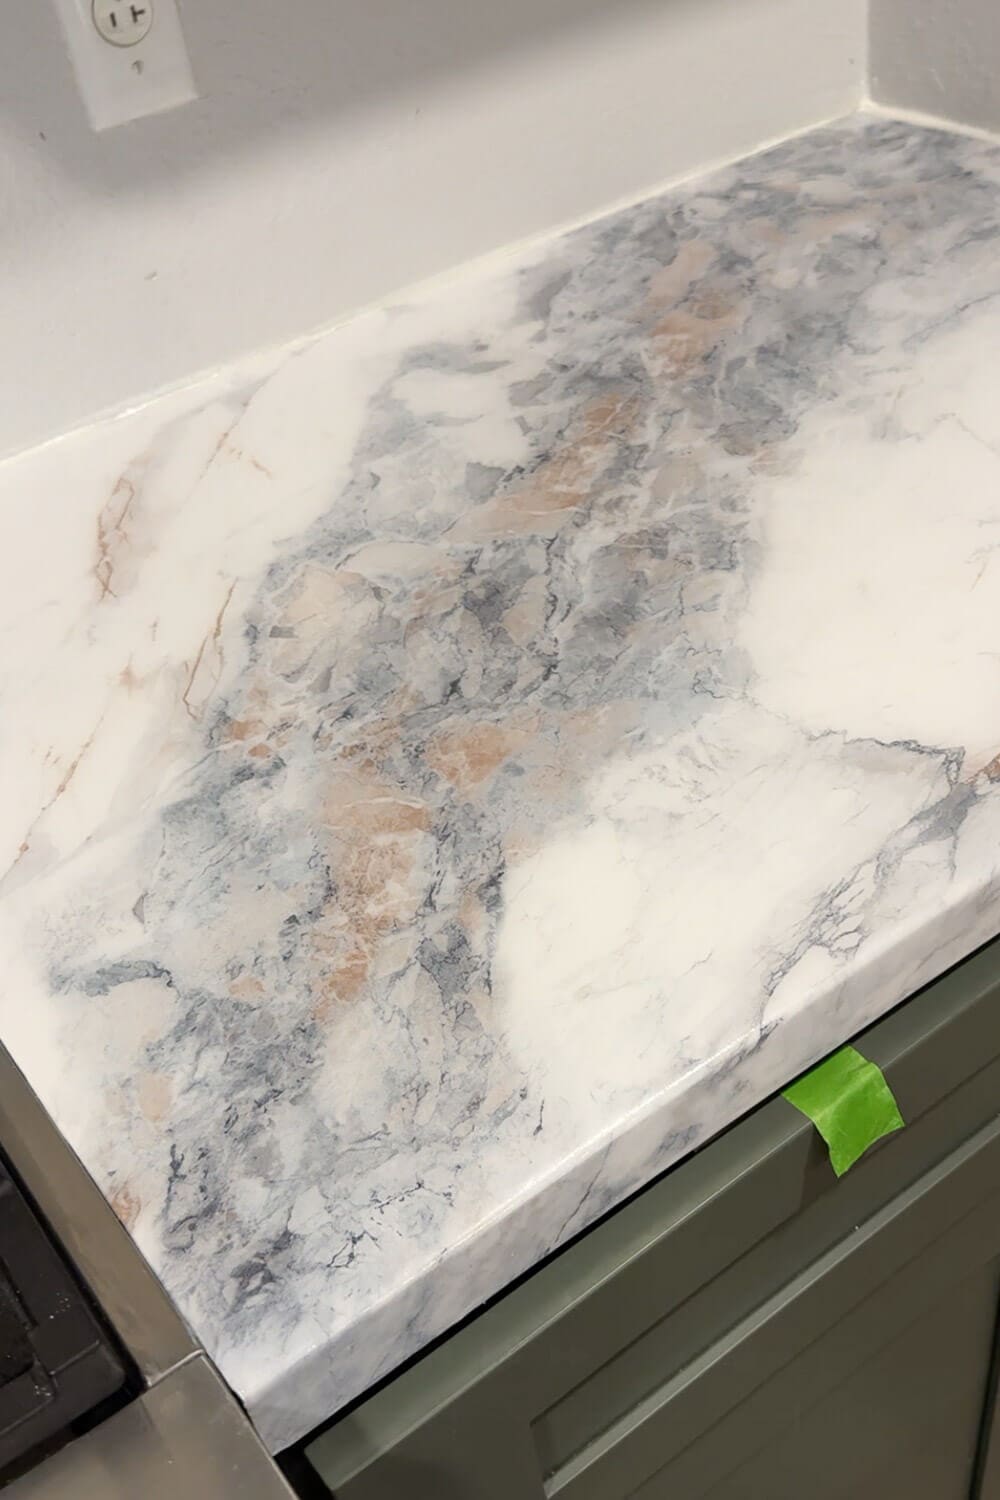
Table of Contents
- Tools and Materials for DIY Countertops
- Why DIY Countertops?
- Step 1: Build the Base for Your DIY Countertops
- Step 2: Frame in the Sink Opening
- Step 3: Add Edge Trim
- Step 4: Filling the Seams
- Step 5: Round Over the Edges
- Step 6: Seal the Plywood
- Step 7: Cover the DIY Countertops with Marble Contact Paper
- Step 8: Pour Epoxy Over the Faux Marble
- Step 9: Finish with a Durable Top Coat
- Our DIY countertops and kitchen progress so far
- How Well Do Epoxy Countertops Hold Up?
- 📌 Save these DIY countertops for later
- FAQ About DIY Countertops and Epoxy
Tools and Materials for DIY Countertops
Before you dive into building your DIY countertops, it helps to have all your tools and materials ready to go. This is everything I used to make our plywood countertop base, and add the faux marble finish.
Why DIY Countertops?
The biggest pro to DIY countertops is the cost savings. To have real marble installed in this kitchen would be over $6,000. These DIY countertops are costing us about $600 in materials. Big difference! And unlike real marble, my DIY epoxy countertops are extremely durable, heat-resistant, and stain-resistant. They do take a few days and some effort, but the payoff is huge.
You can also use my epoxy method to change the look of existing countertops, whether you have stone, butcher block, laminate, or something else. I even used this process to go right over a granite bathroom countertop in another project, and it worked beautifully. You can see how well that worked out in the video below.
Step 1: Build the Base for Your DIY Countertops
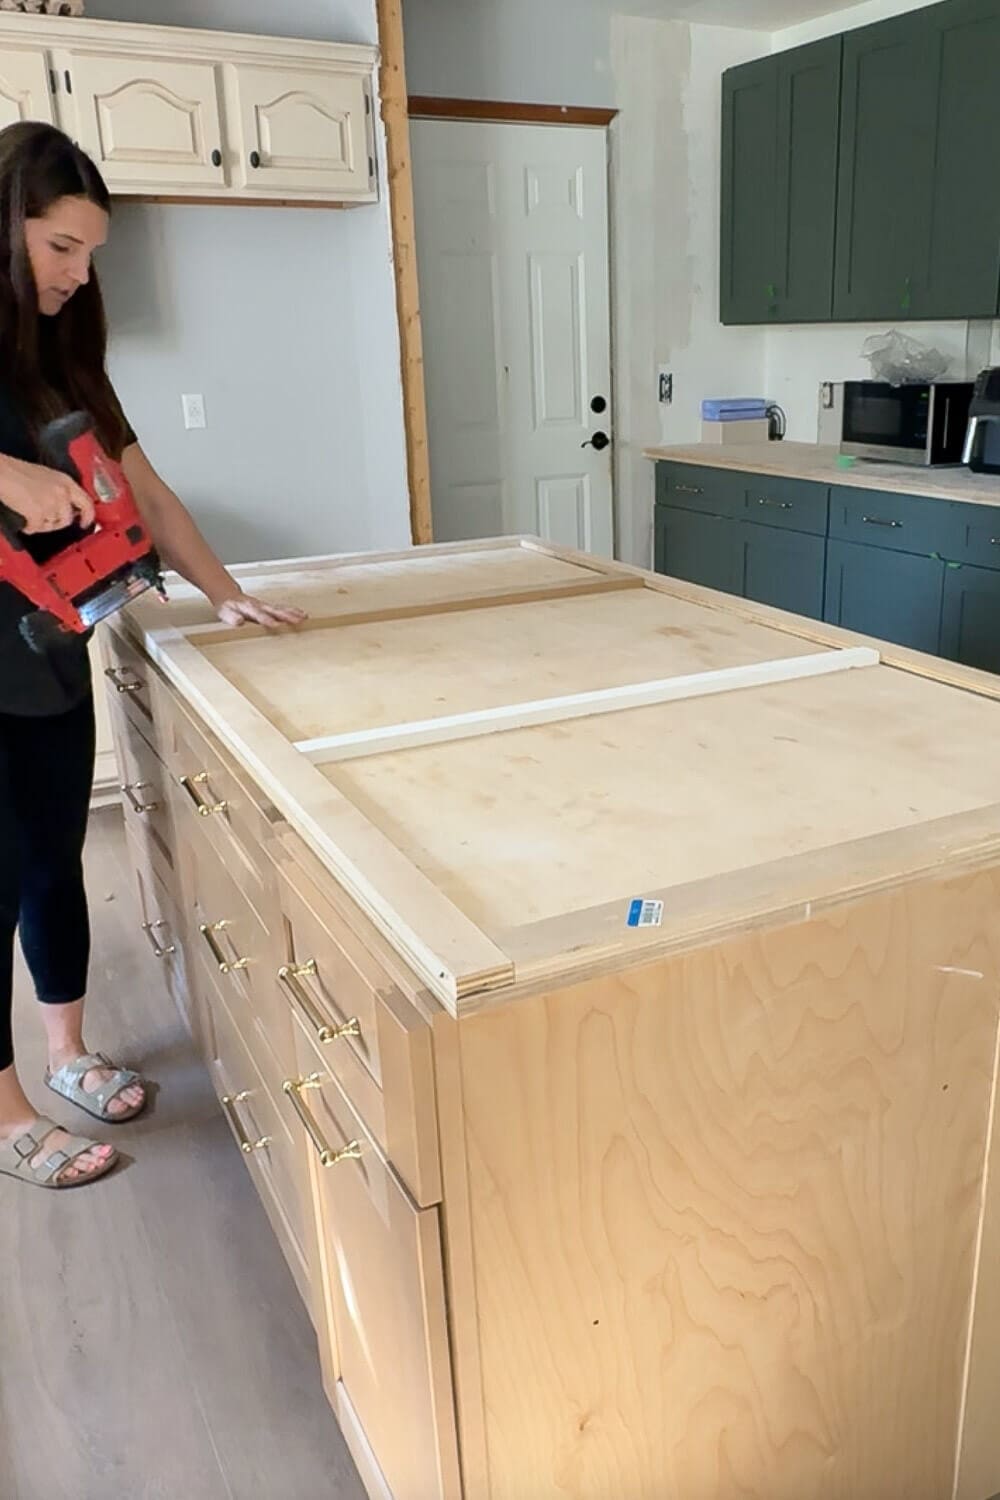
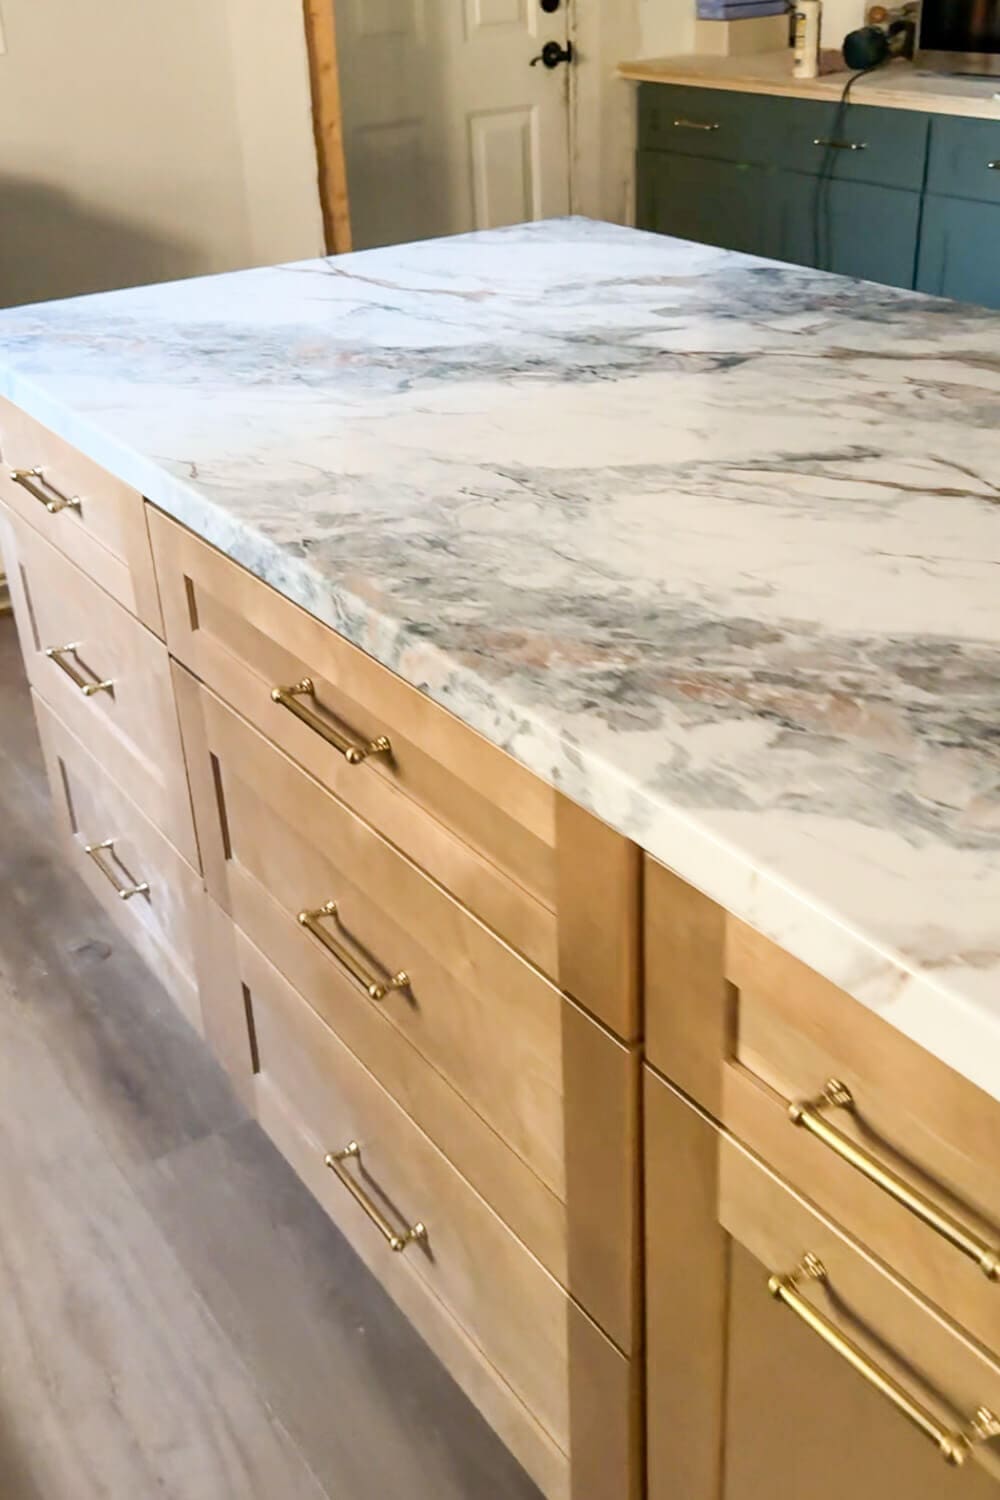
We moved into this house in June and are doing a total kitchen remodel. We changed the layout and installed new cabinets, which means we had to start our DIY countertops from scratch. For the base, I am using 3/4 inch plywood, cut to size with my circular saw, to fit each run of cabinets.
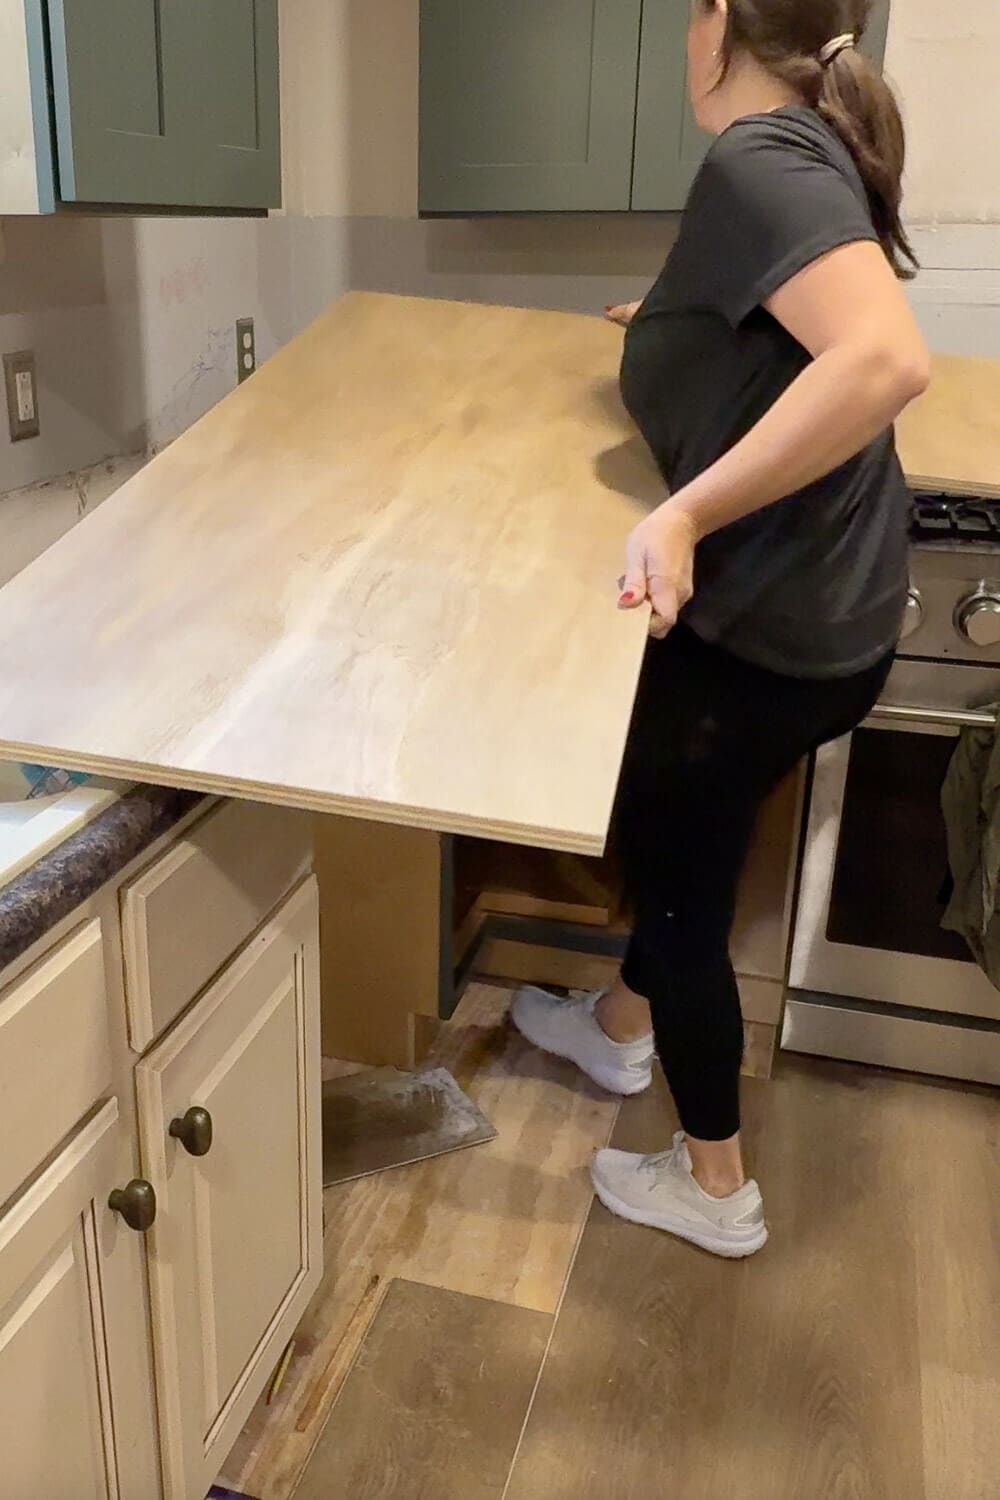
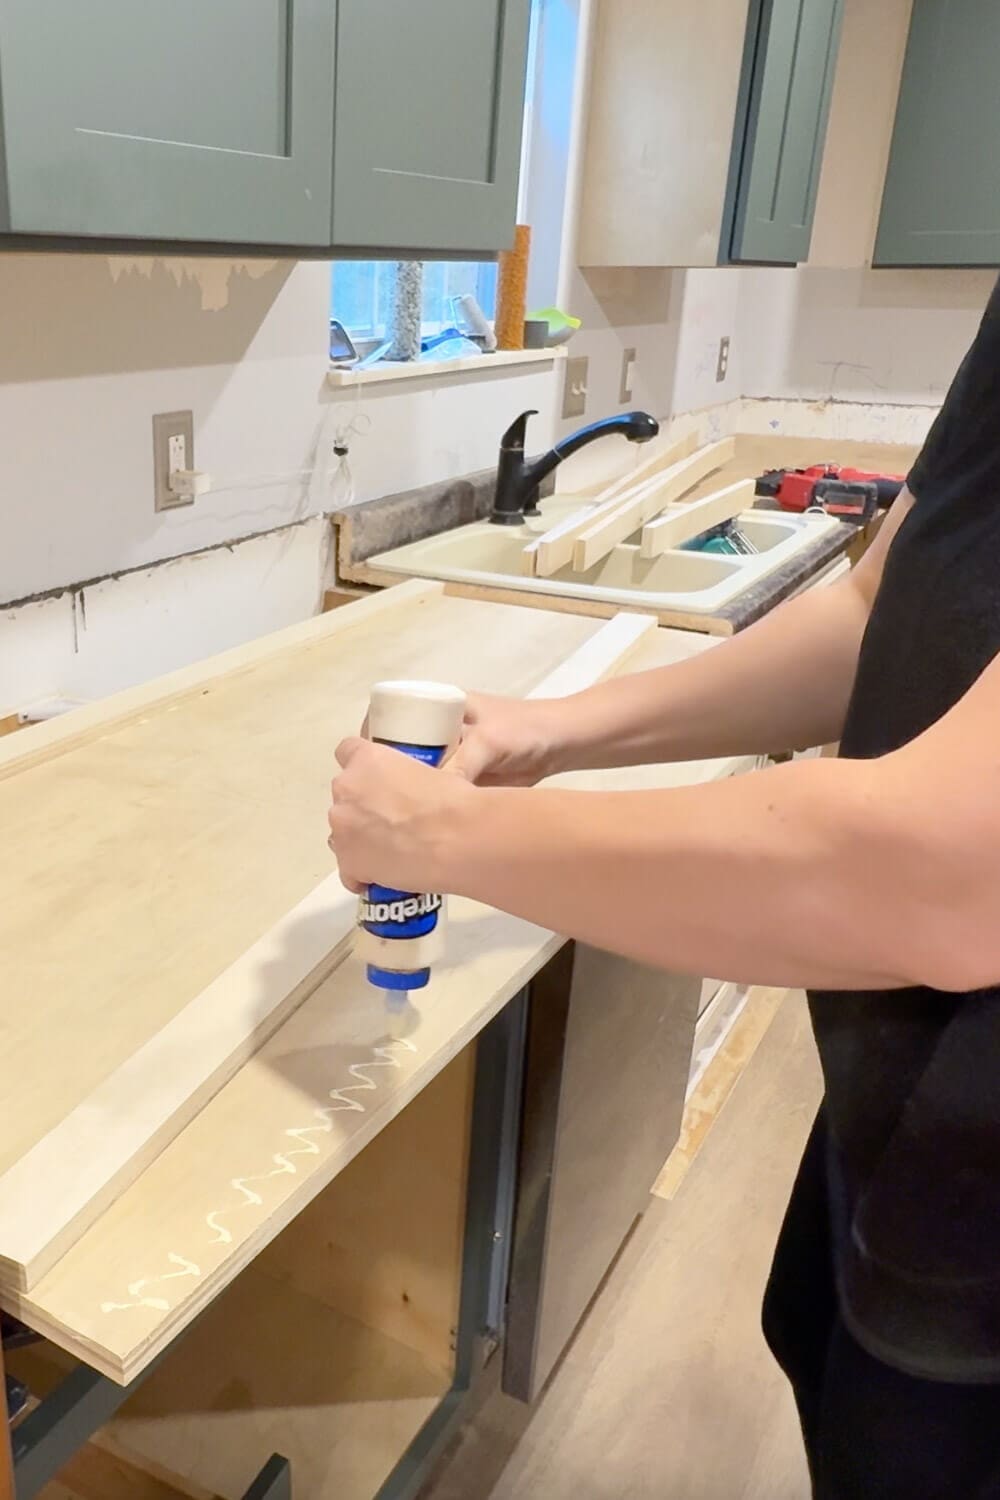
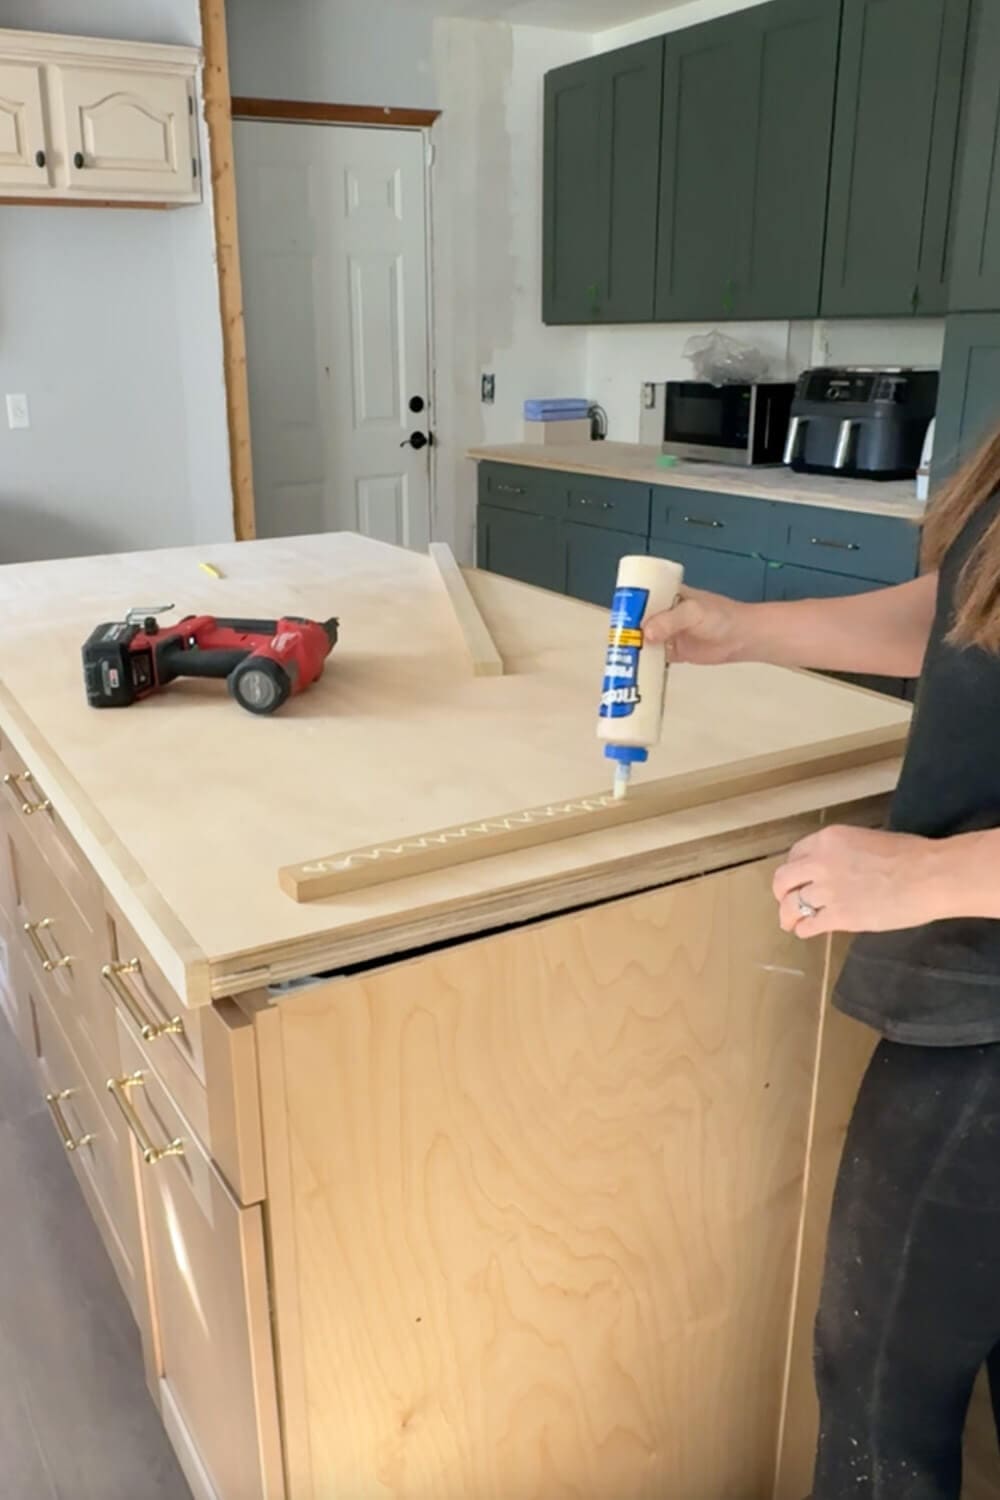
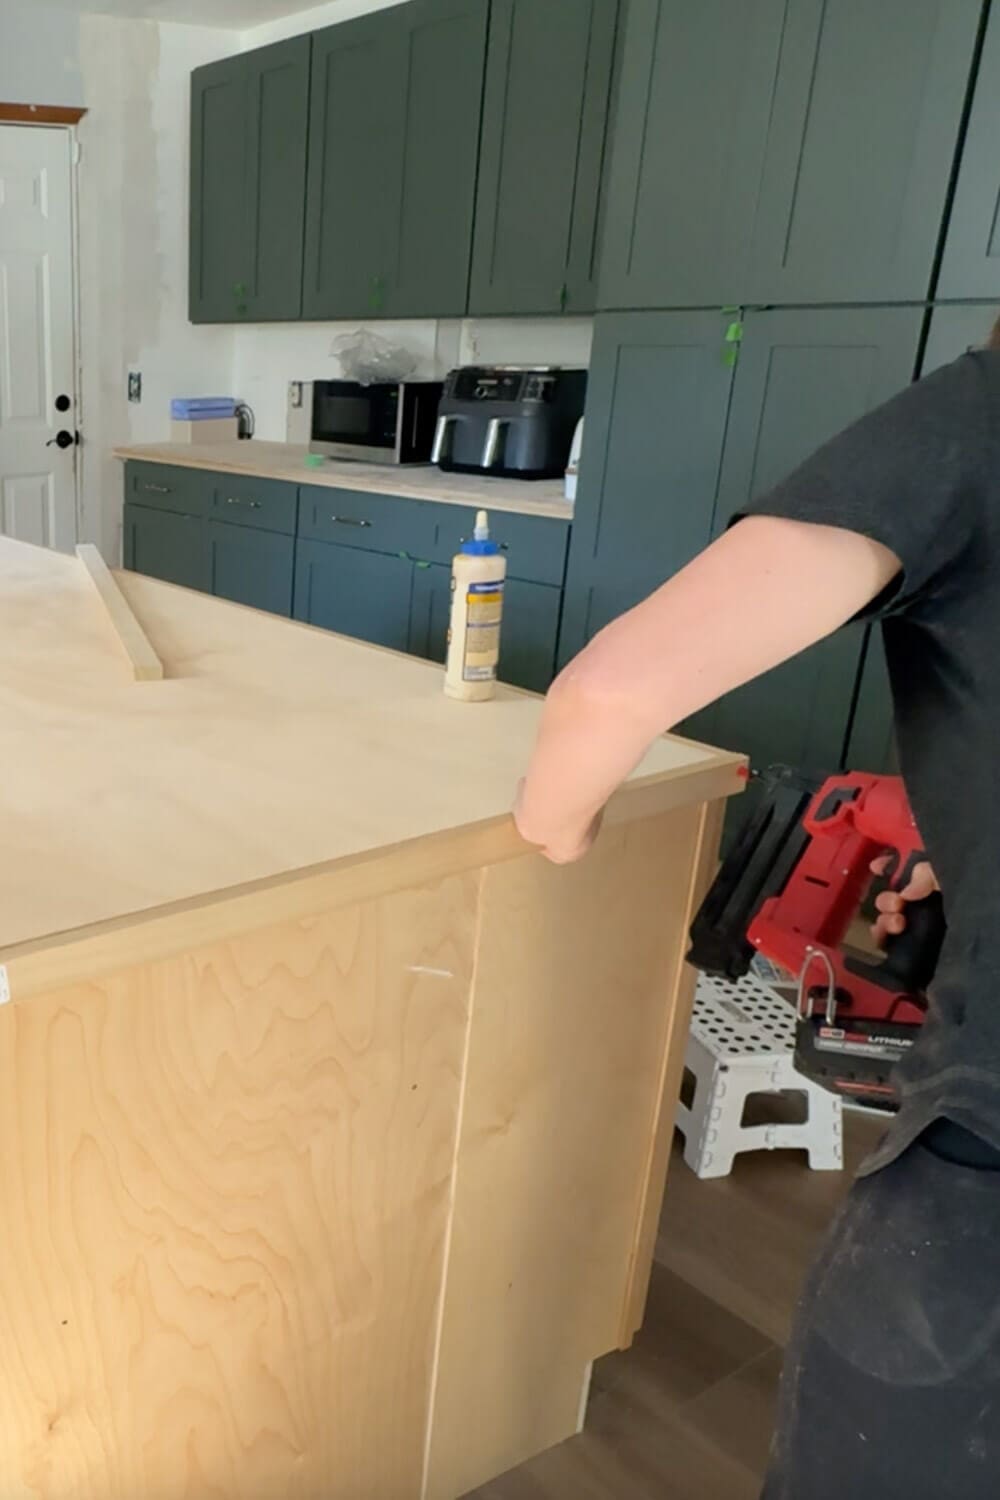
Real marble countertops are thicker than 3/4 inch, so to give our DIY countertops that chunky, stone look, I “beefed up” the edges with a second layer of plywood just along the outside. This is much cheaper than doubling up the entire countertop. I cut narrow strips, added wood glue to the back, and attached them with my brad nailer.
For the island, the countertop is deeper, so I also added some extra bracing underneath in addition to the edge pieces. This keeps everything solid and sturdy without risking any sagging or warping in the middle.
Step 2: Frame in the Sink Opening
When you buy a sink, it usually comes with a paper template so you can trace and cut the opening. That is how we did it in our last kitchen. But this time around, we tried something a little different.
Instead of laying a full sheet of plywood and cutting a giant hole, we used the sink template as a guide to frame around the opening with plywood pieces. We built the countertop around where the sink will go, matching the size and shape of the template. This saves material and makes the sink area easier to support and work around.
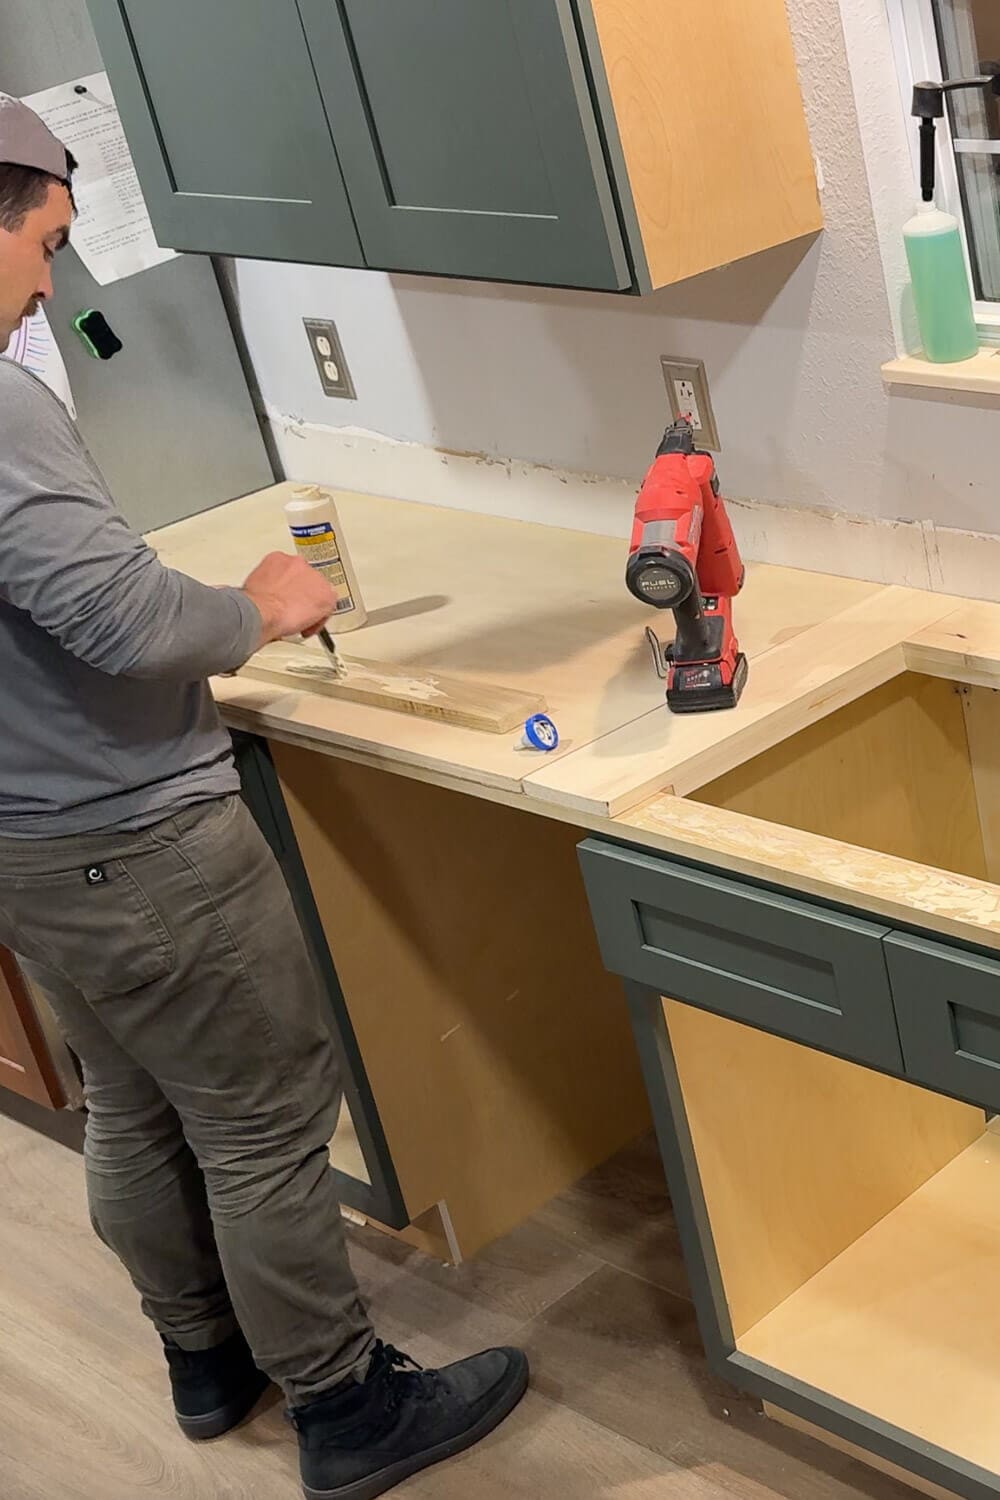
Before we move on, this is a great time to drill any holes you need for your faucet setup. Think through what you want: faucet, instant hot water, soap dispenser, filtered water tap, etc. You’ll need to drill those holes in your countertops before pouring any epoxy.
Step 3: Add Edge Trim
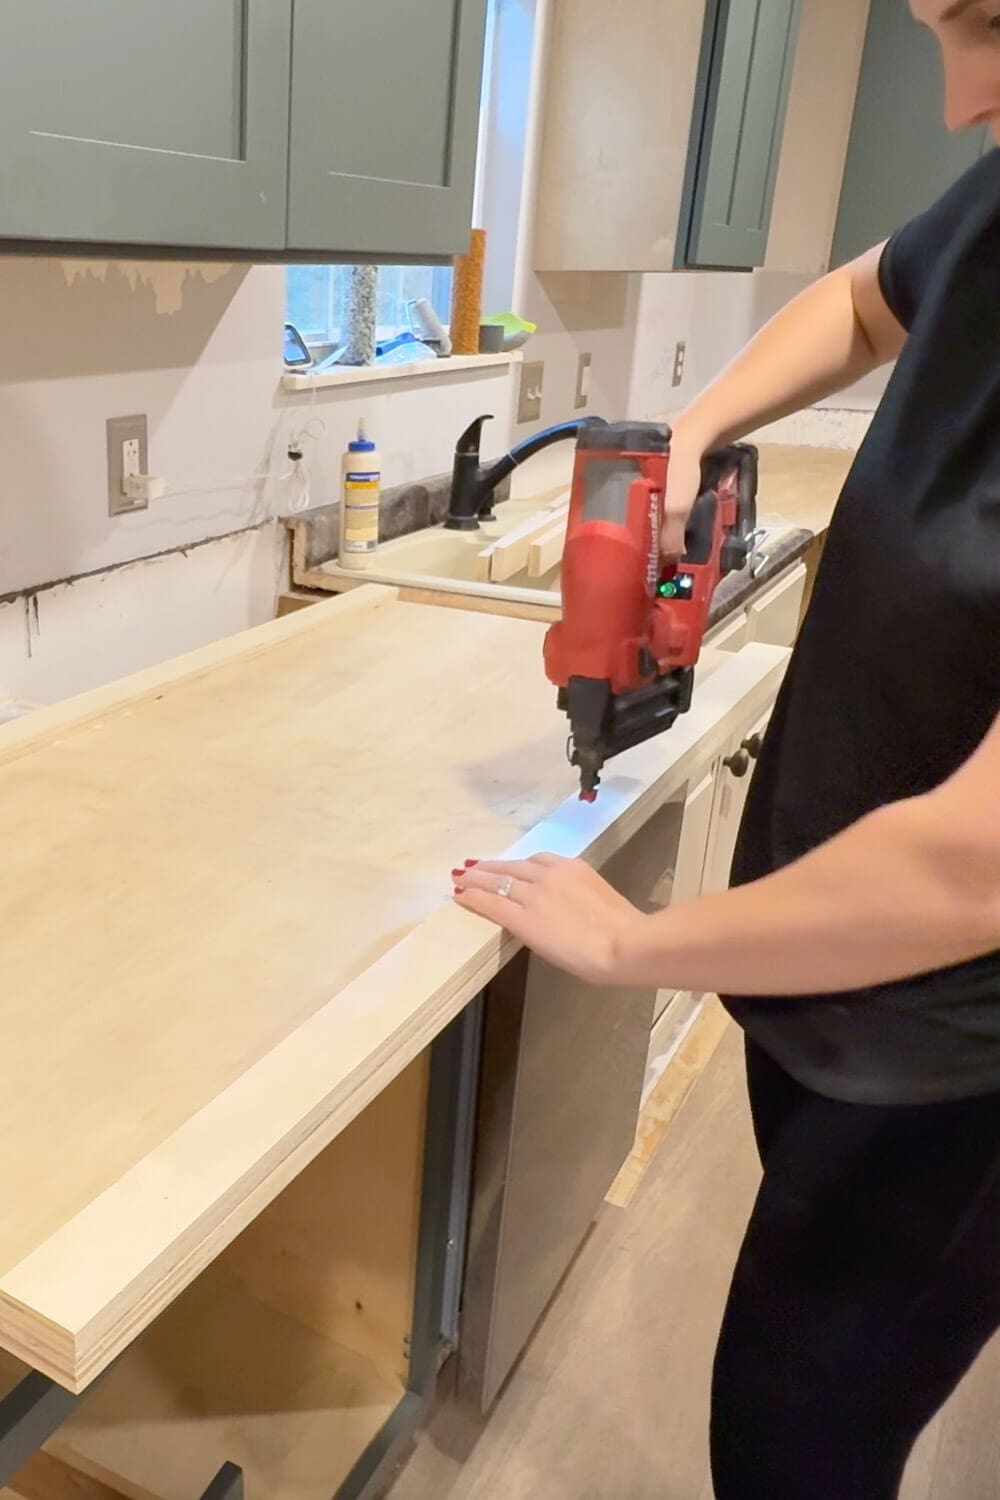
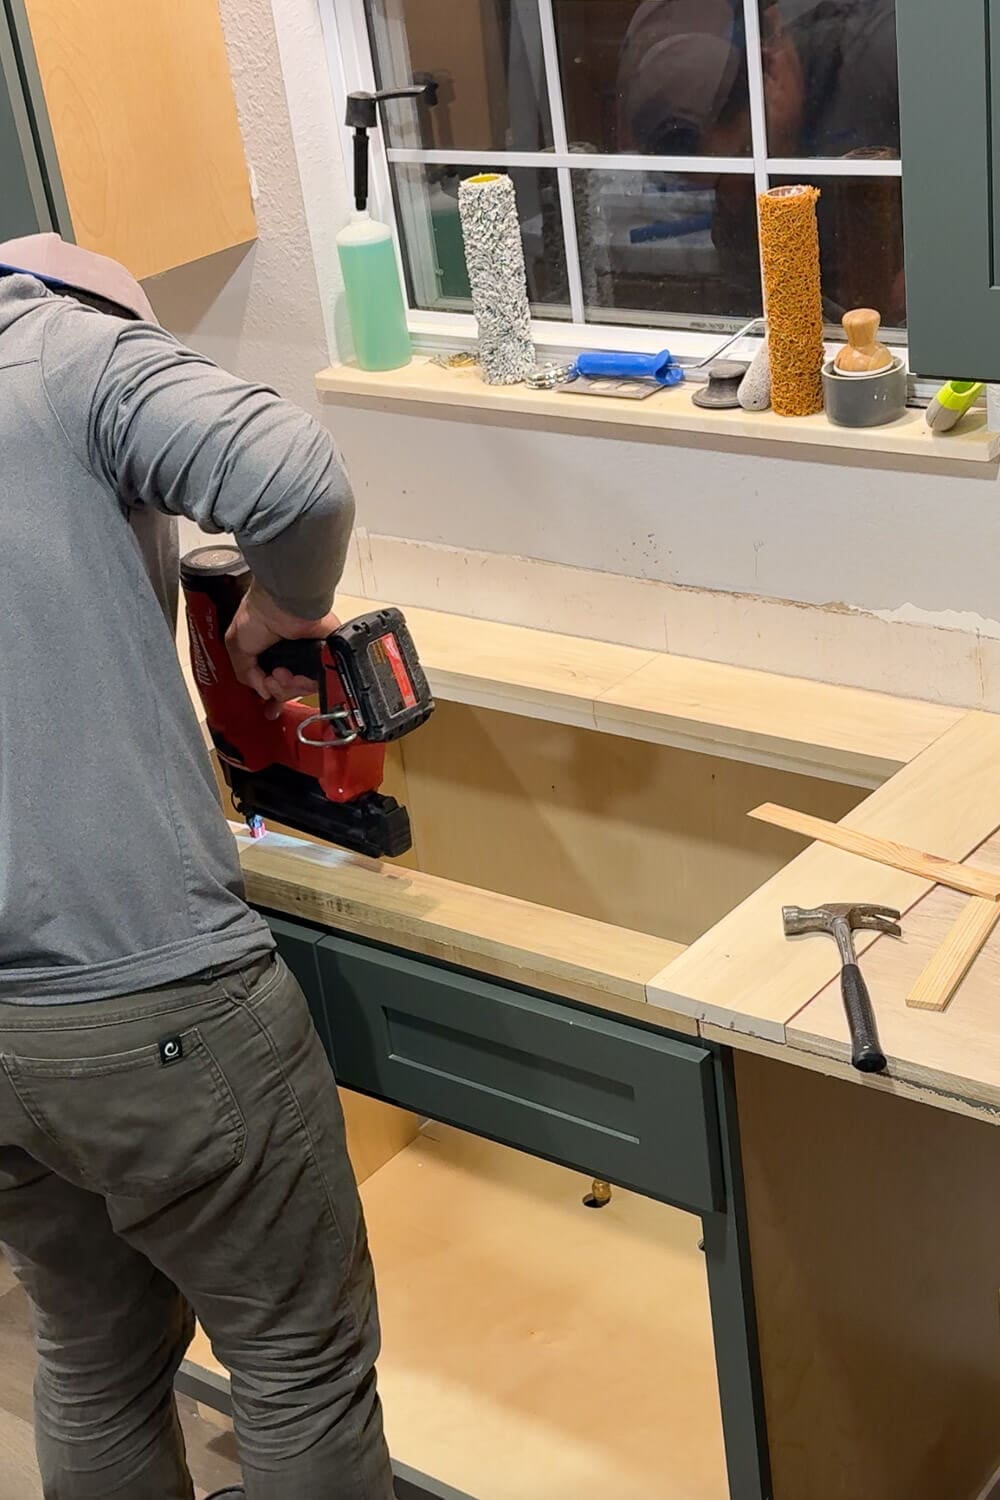
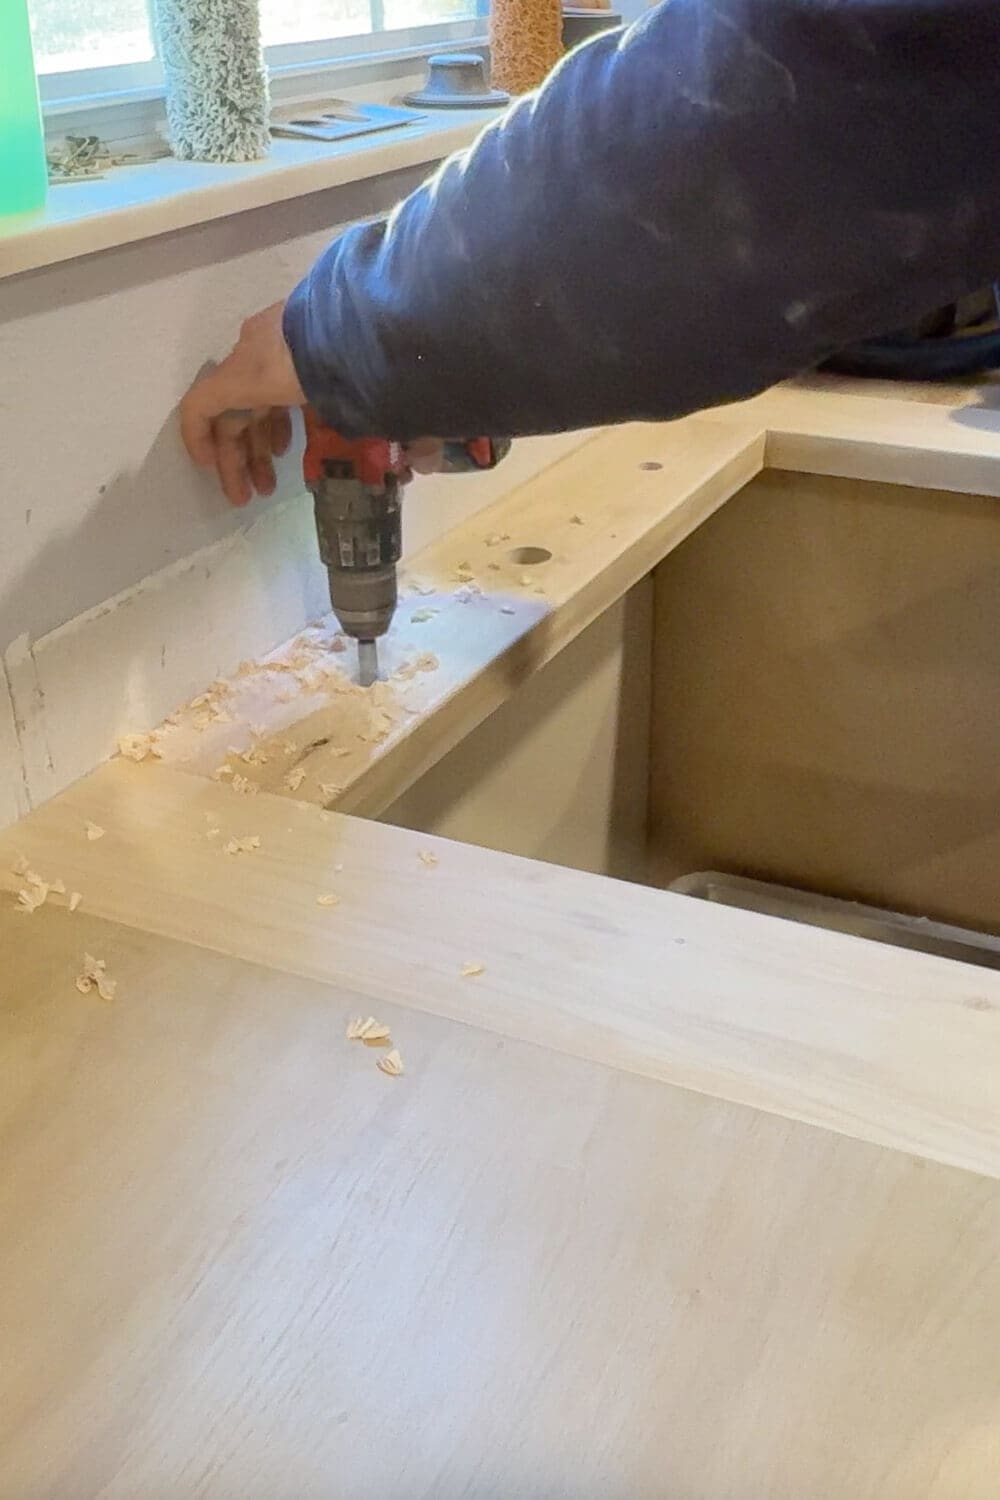
Once the main plywood pieces are installed, I used wood glue and my brad nailer to attach 1×2 strips along the front edge of the counters and all the way around the island. This hides the seam between the main plywood and the smaller pieces I added underneath, giving my DIY countertops a nice, clean profile.
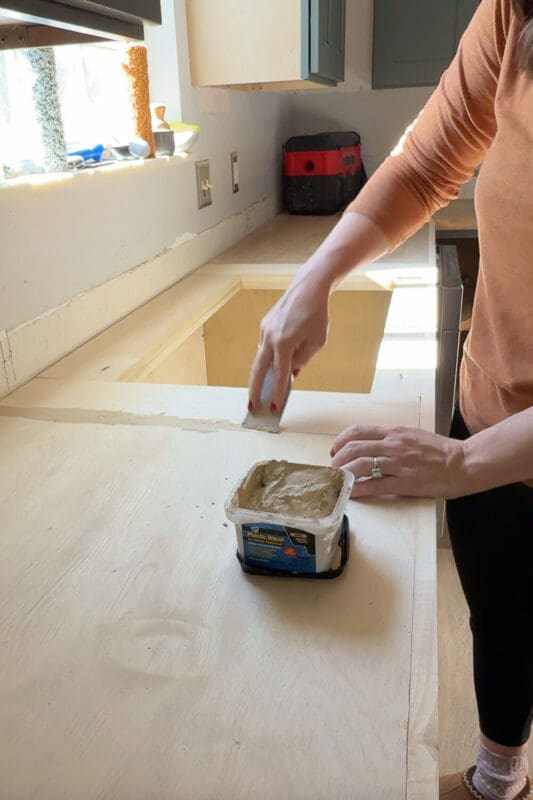
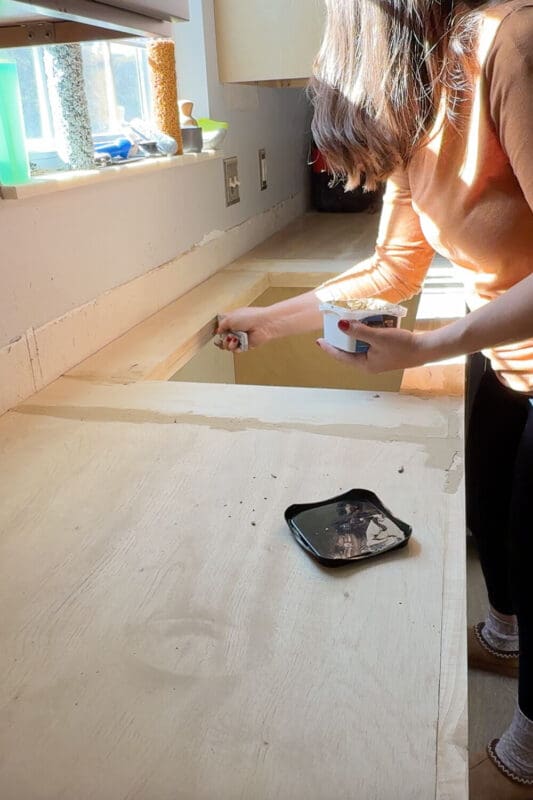
Step 4: Filling the Seams
Then it’s time to fill the seams and make everything look like one solid slab. I used wood filler on:
- All seams between plywood pieces
- The doubled-up edges around the sink opening
- Any small nail holes along the front where I attached the trim
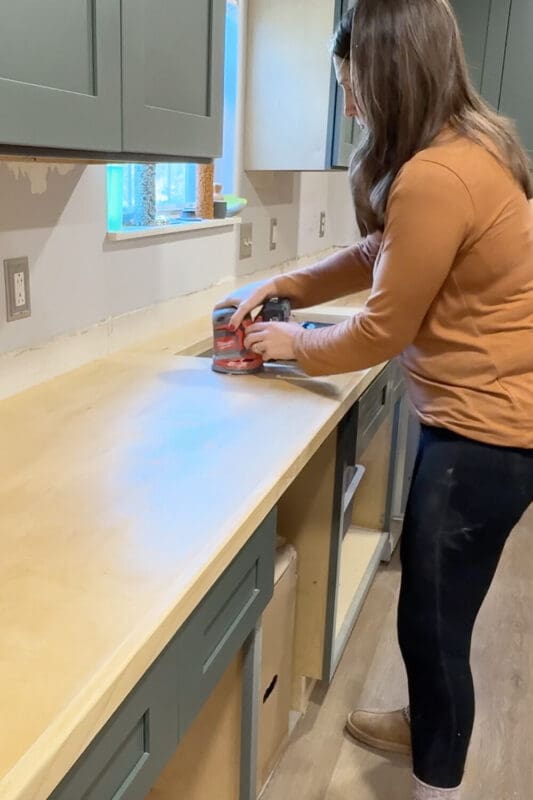
After the wood filler dries, I use my handheld sander to smooth everything out, then wipe it down to remove all the dust. This step makes a big difference in how professional your DIY countertops look in the end.
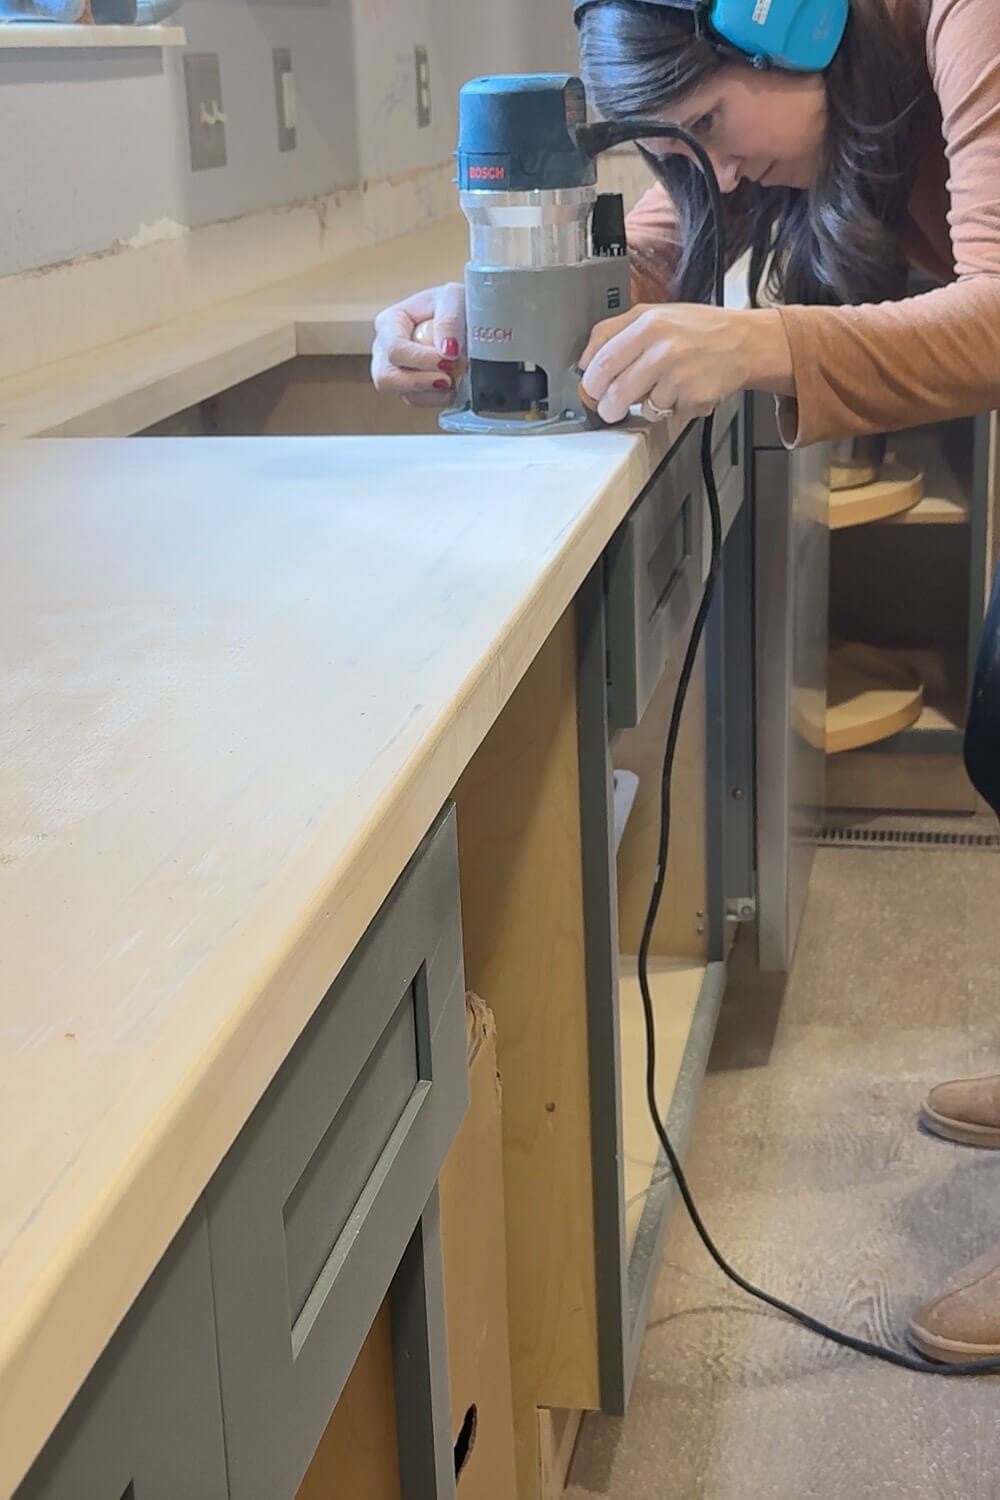
Step 5: Round Over the Edges
Sharp corners are not my friend, especially in a busy kitchen with kids. I also wanted the DIY countertops to look as close to stone as possible, so I grabbed my router and rounded off all the exposed edges. I went along the front edges, all around the island, and around the sink opening.
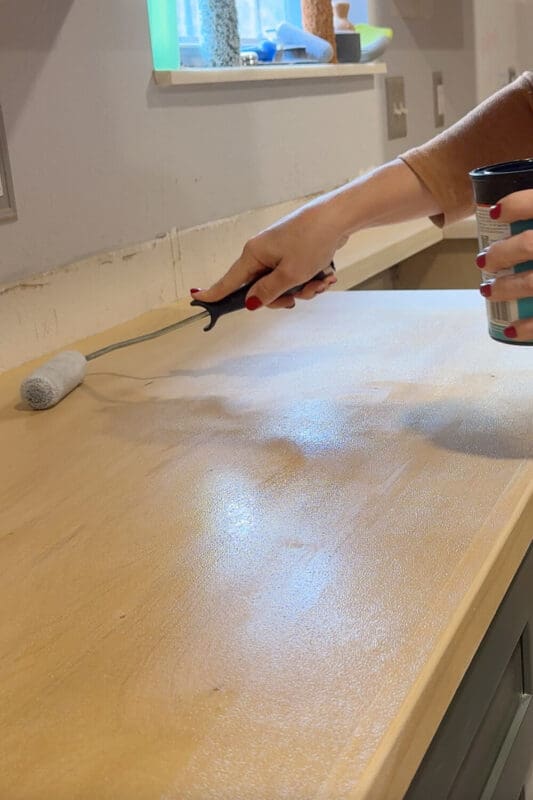
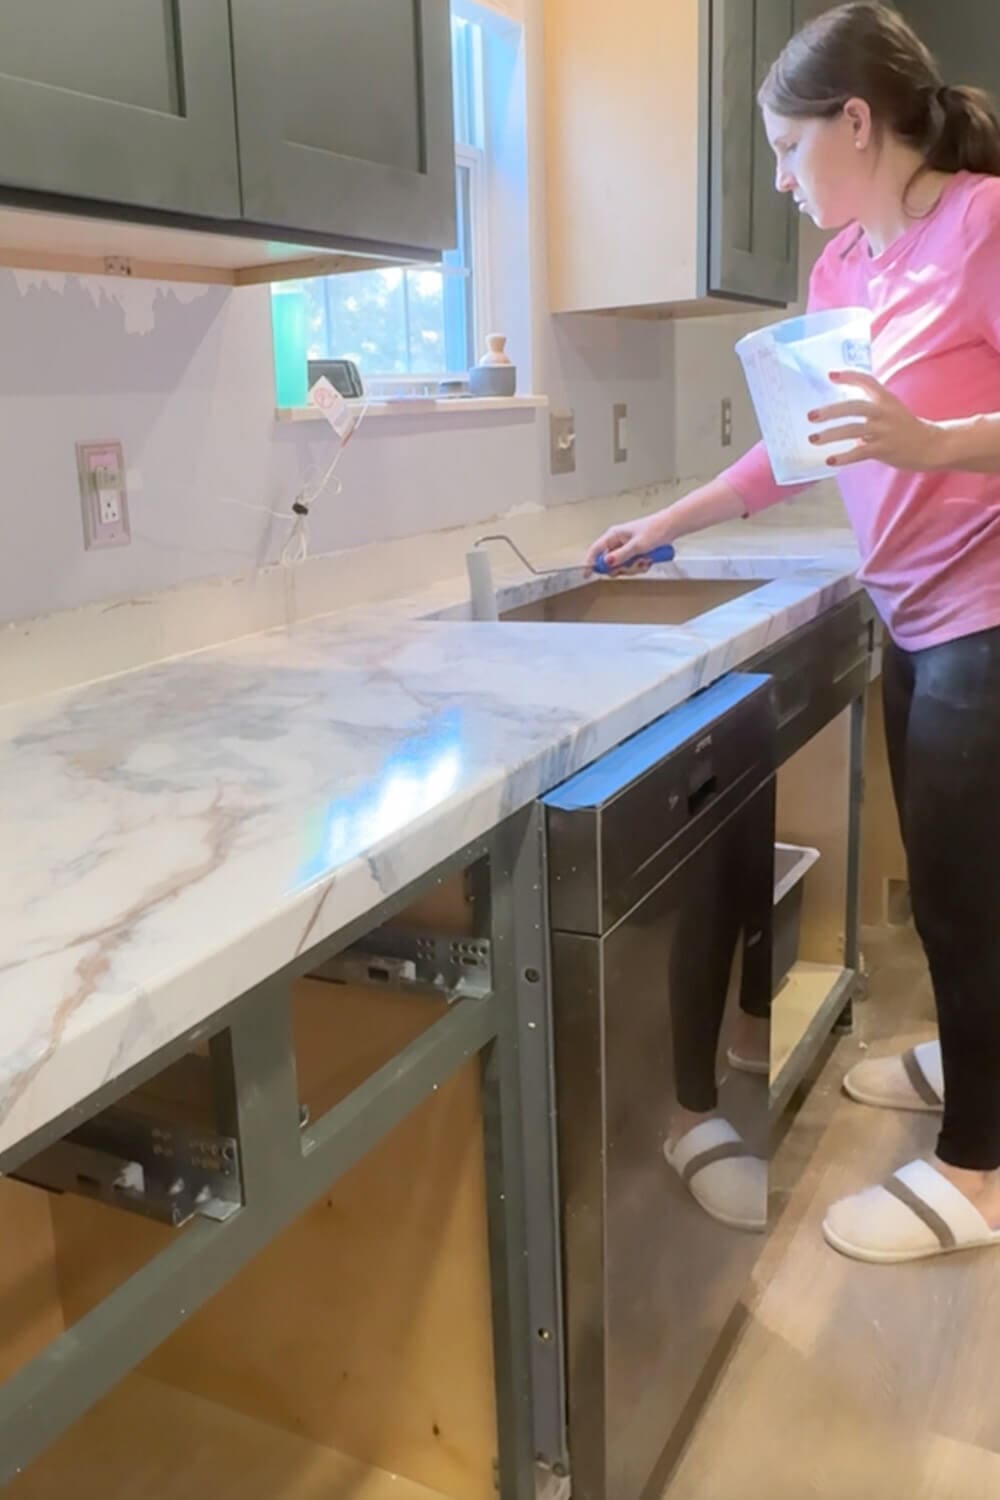
Step 6: Seal the Plywood
Next, I opted to seal the plywood to help the contact paper adhere better. I rolled on a coat of polycrylic with a foam roller for a smooth, even finish. Once it dried, I lightly sanded again and wiped everything clean.
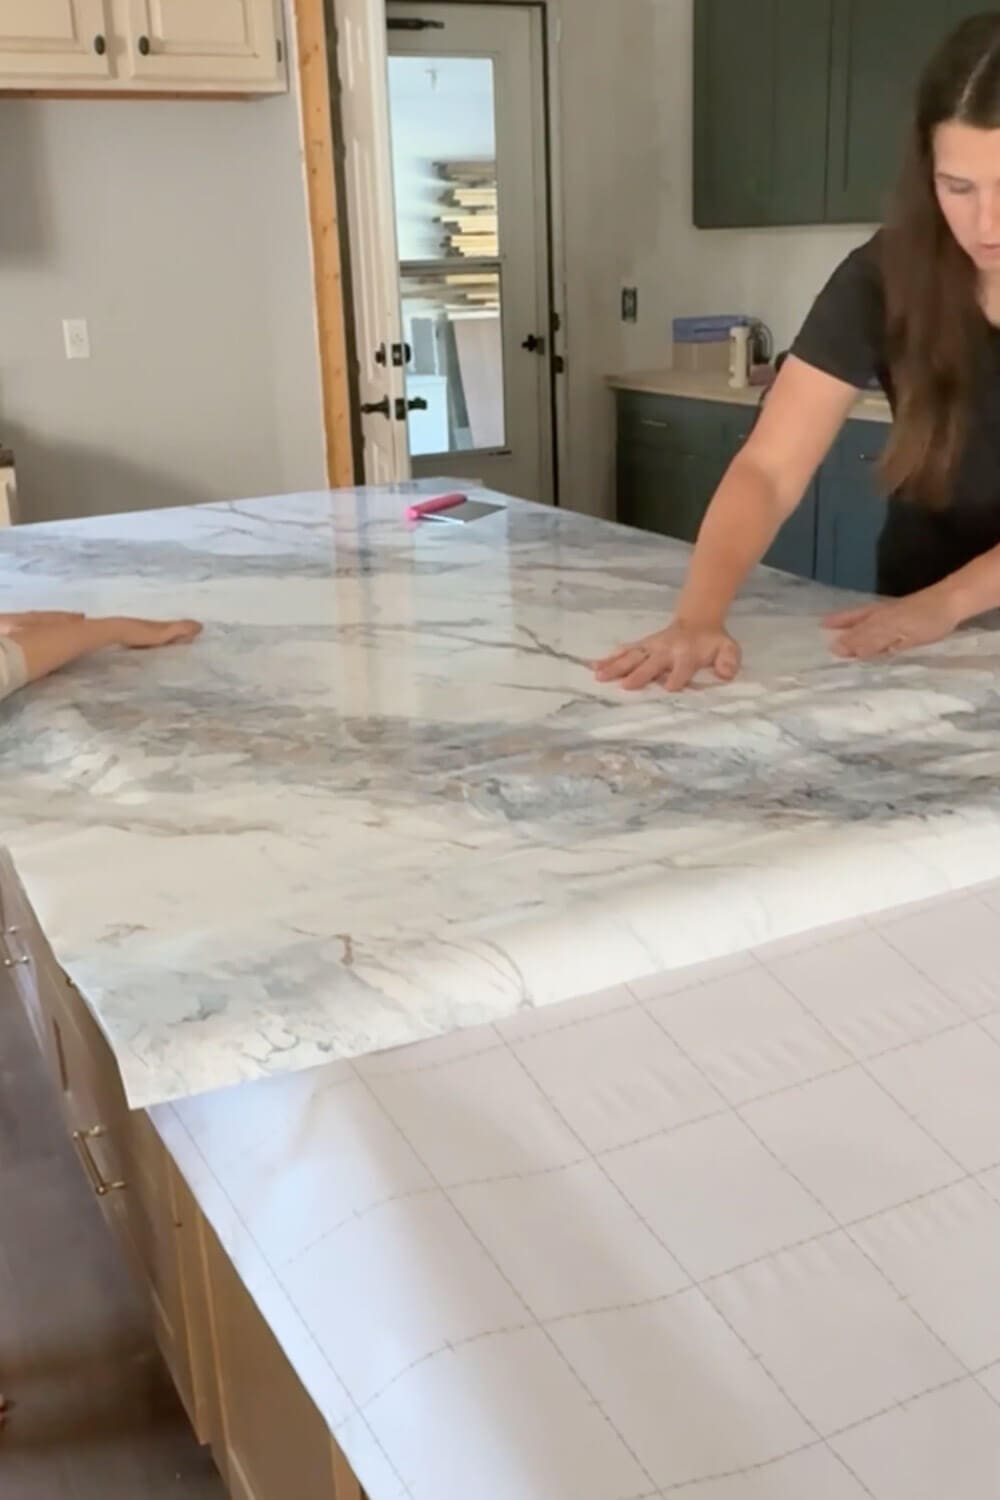
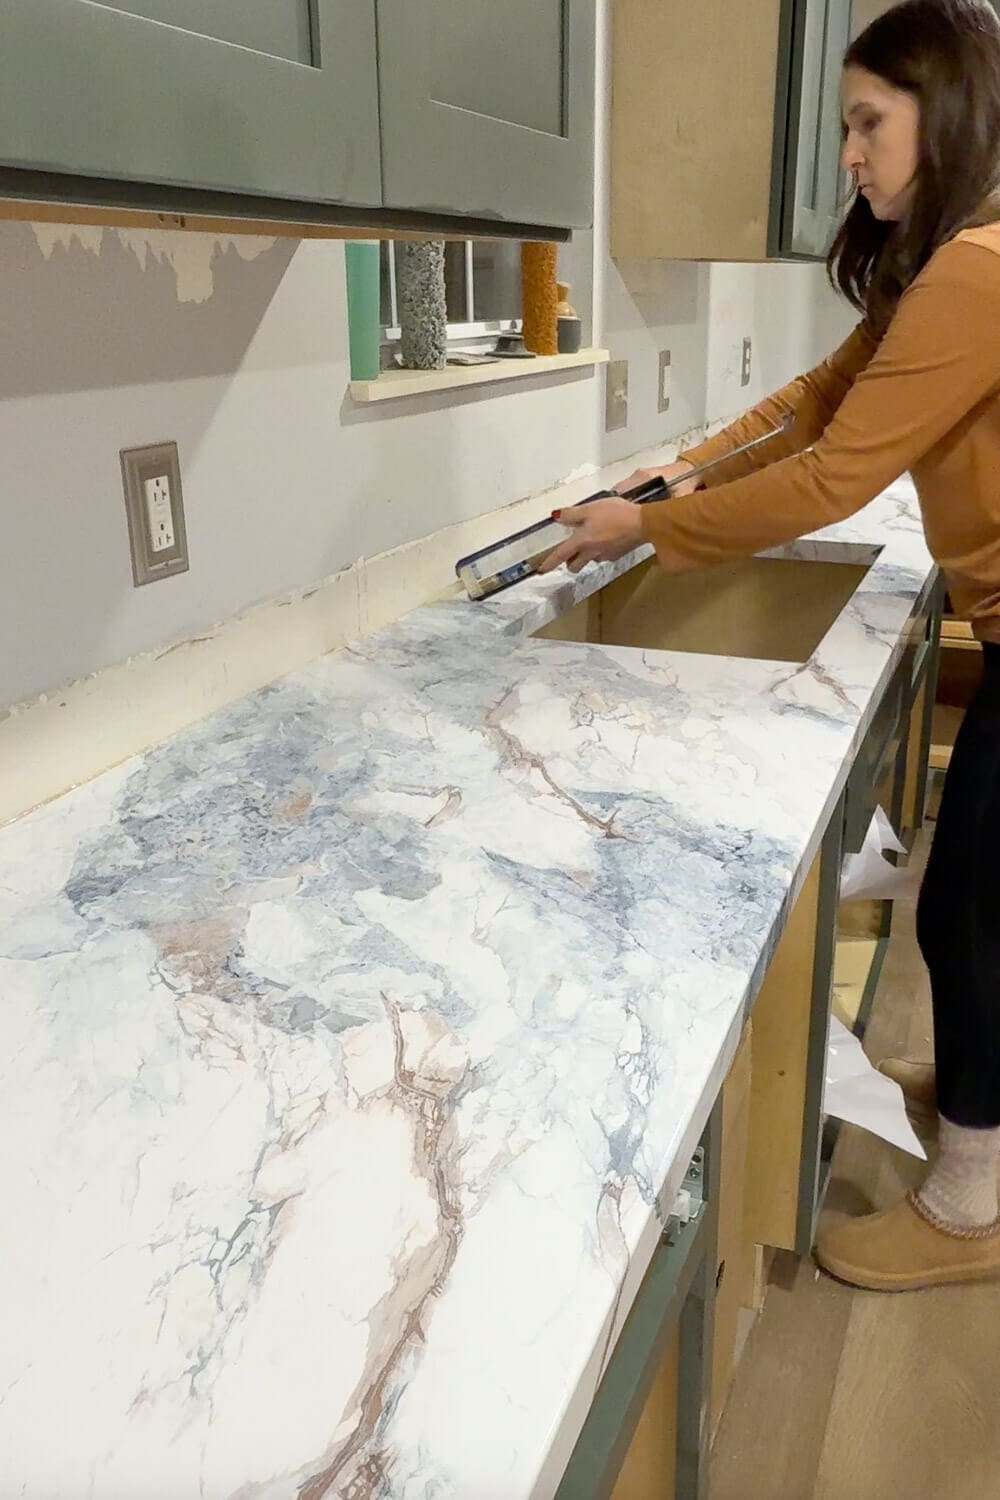
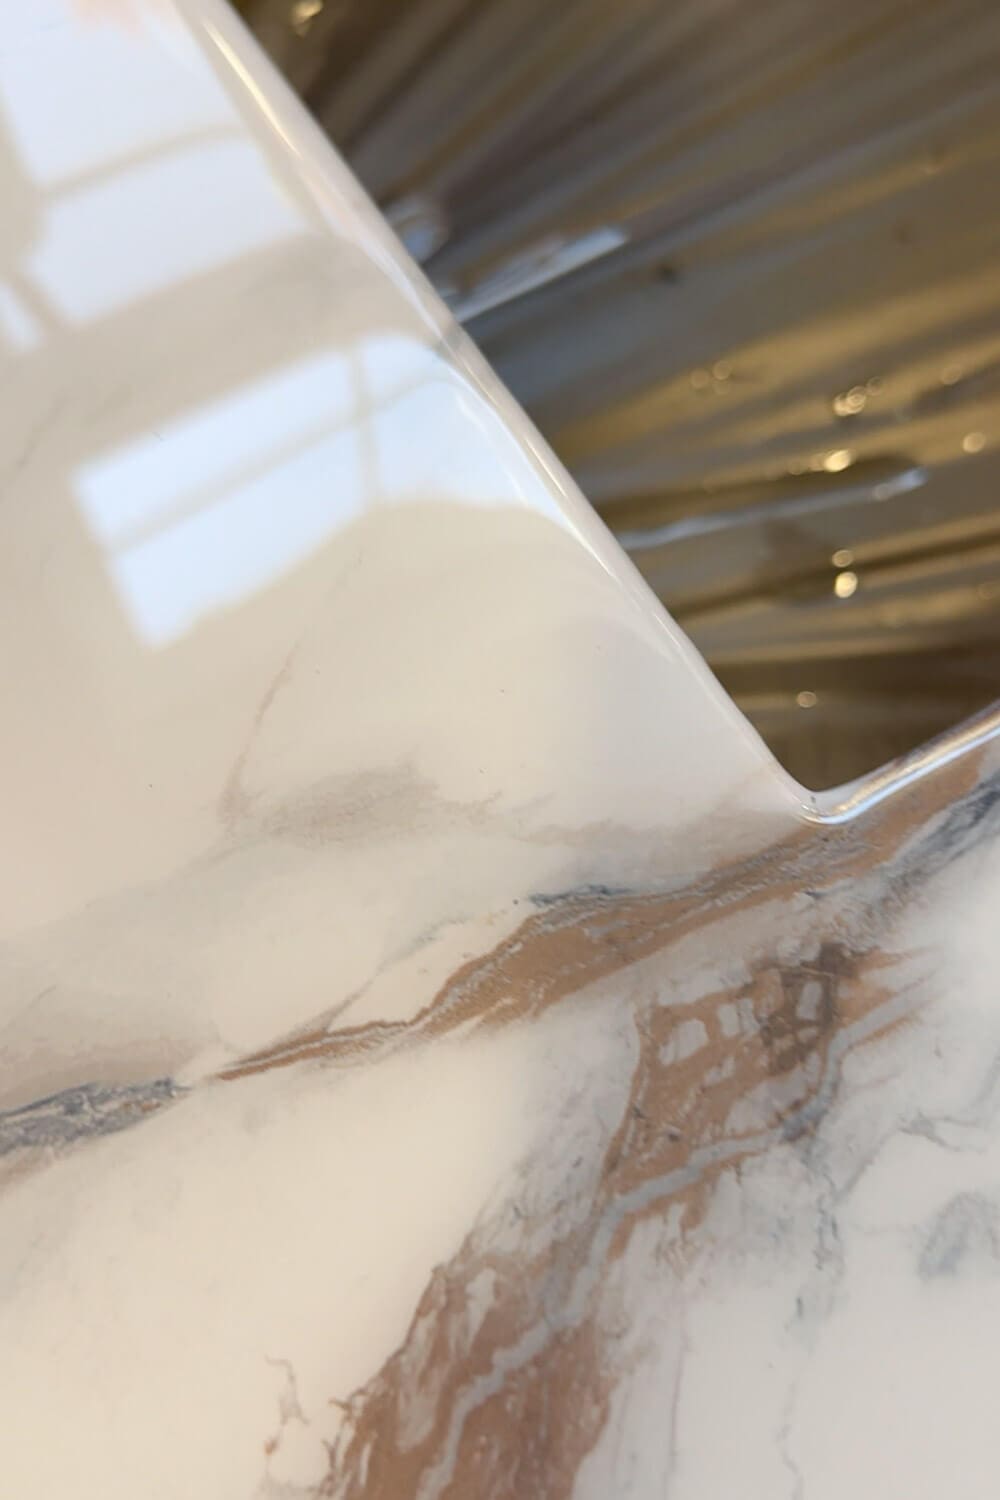
Step 7: Cover the DIY Countertops with Marble Contact Paper
Now for the fun part. I bought a gorgeous marble contact paper with really intricate veining that looks like a slab you would find in a fancy stone yard. In my previous kitchens, I hand-painted a faux marble look before pouring epoxy, but this time I wanted to try something different, more detailed, and more dramatic.
Applying the countertop wrap is a lot like installing peel-and-stick wallpaper. You work slowly, peel backing as you go, and smooth out air bubbles. I have a full post that walks you through exactly how I apply the contact paper. DIY Faux Marble Countertops with Contact Paper (Step-by-Step)
If you would rather paint your own marble pattern instead of using contact paper, I also have a post that shows how I achieve a hand-painted faux marble effect (The Best Way to DIY Epoxy Counters). Either way, you’ll end up with DIY countertops that look like marble once the epoxy goes on.
After the contact paper is installed, it is almost time to pour the epoxy. The last prep step is running a bead of silicone along the back edge of the countertop where it meets the wall. This helps keep the epoxy from sneaking down the gap.
Step 8: Pour Epoxy Over the Faux Marble
This is the third kitchen I’ve done epoxy counters in, so I’ve got my system down. It’s totally DIY friendly, but it can be a little finicky, and I’ve learned a lot over the years. I put everything into an e-book that walks you through the whole process, lists the exact products I use, and has all my best tips and tricks to help you get the best possible results.
Step-By-Step Epoxy Process
Here’s an outline for the basic process of pouring epoxy on countertops.
- Mask and protect everything
- Tape off:
- Floors (farther out than you think you need)
- Cabinet faces and drawers
- Sink, faucet holes, backsplash, appliances, walls
- Use plastic drop cloths + painter’s tape. Epoxy is basically impossible to remove once it cures.
- Tape off:
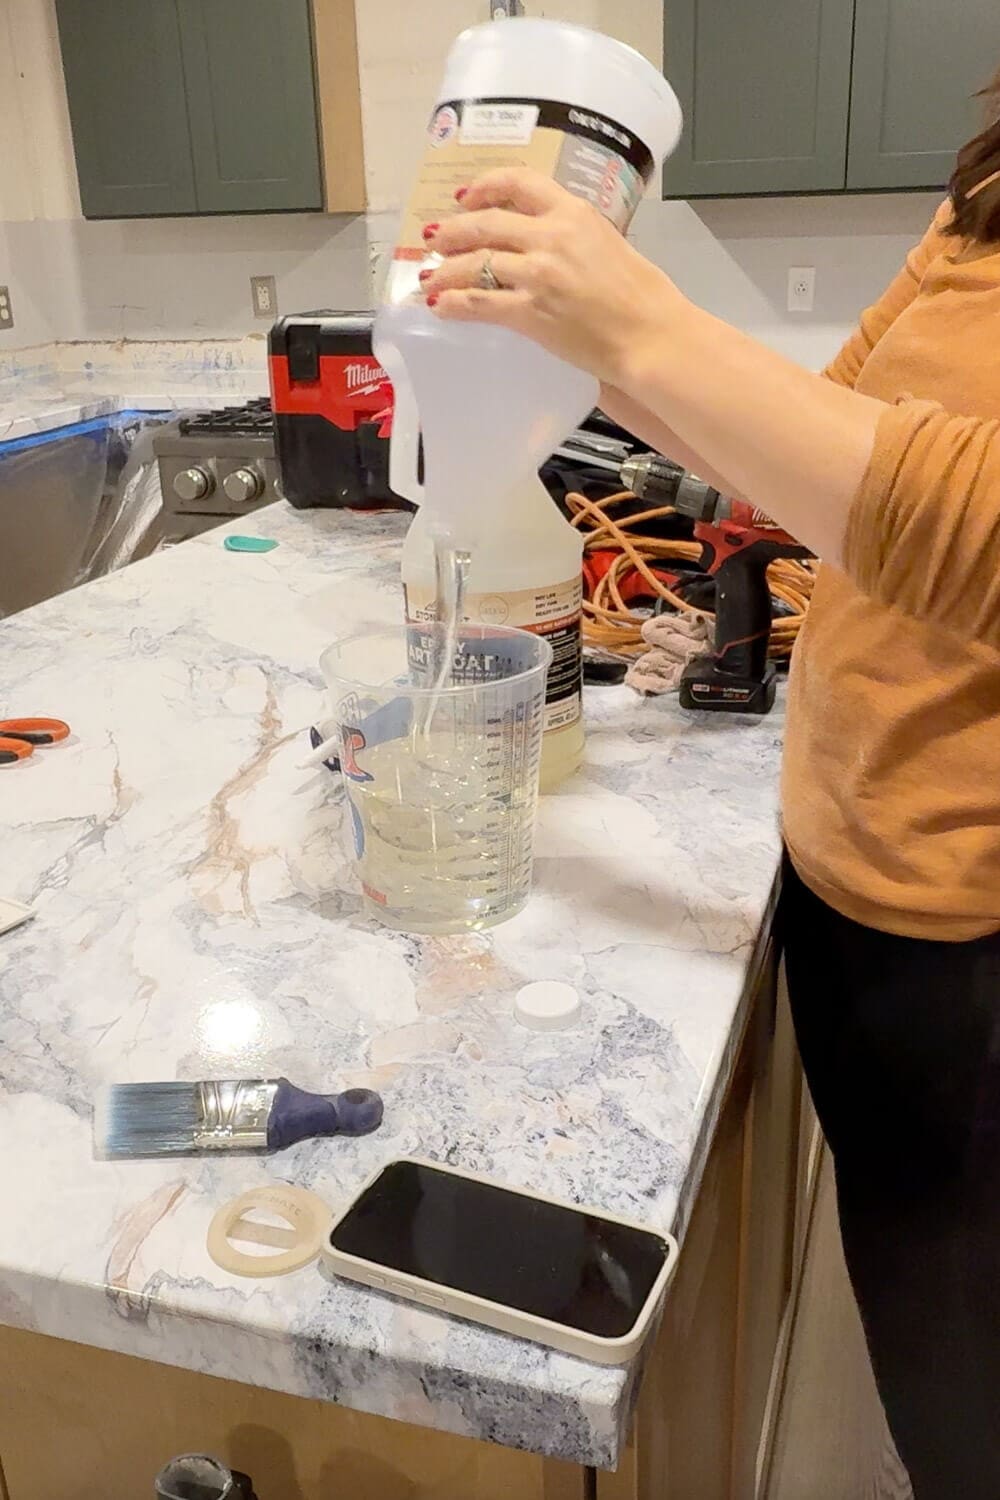
- Measure and mix the epoxy
- Pour the two-part epoxy into a bucket.
- Stir slowly but thoroughly for about 2 minutes, scraping the sides and bottom so it’s completely combined.
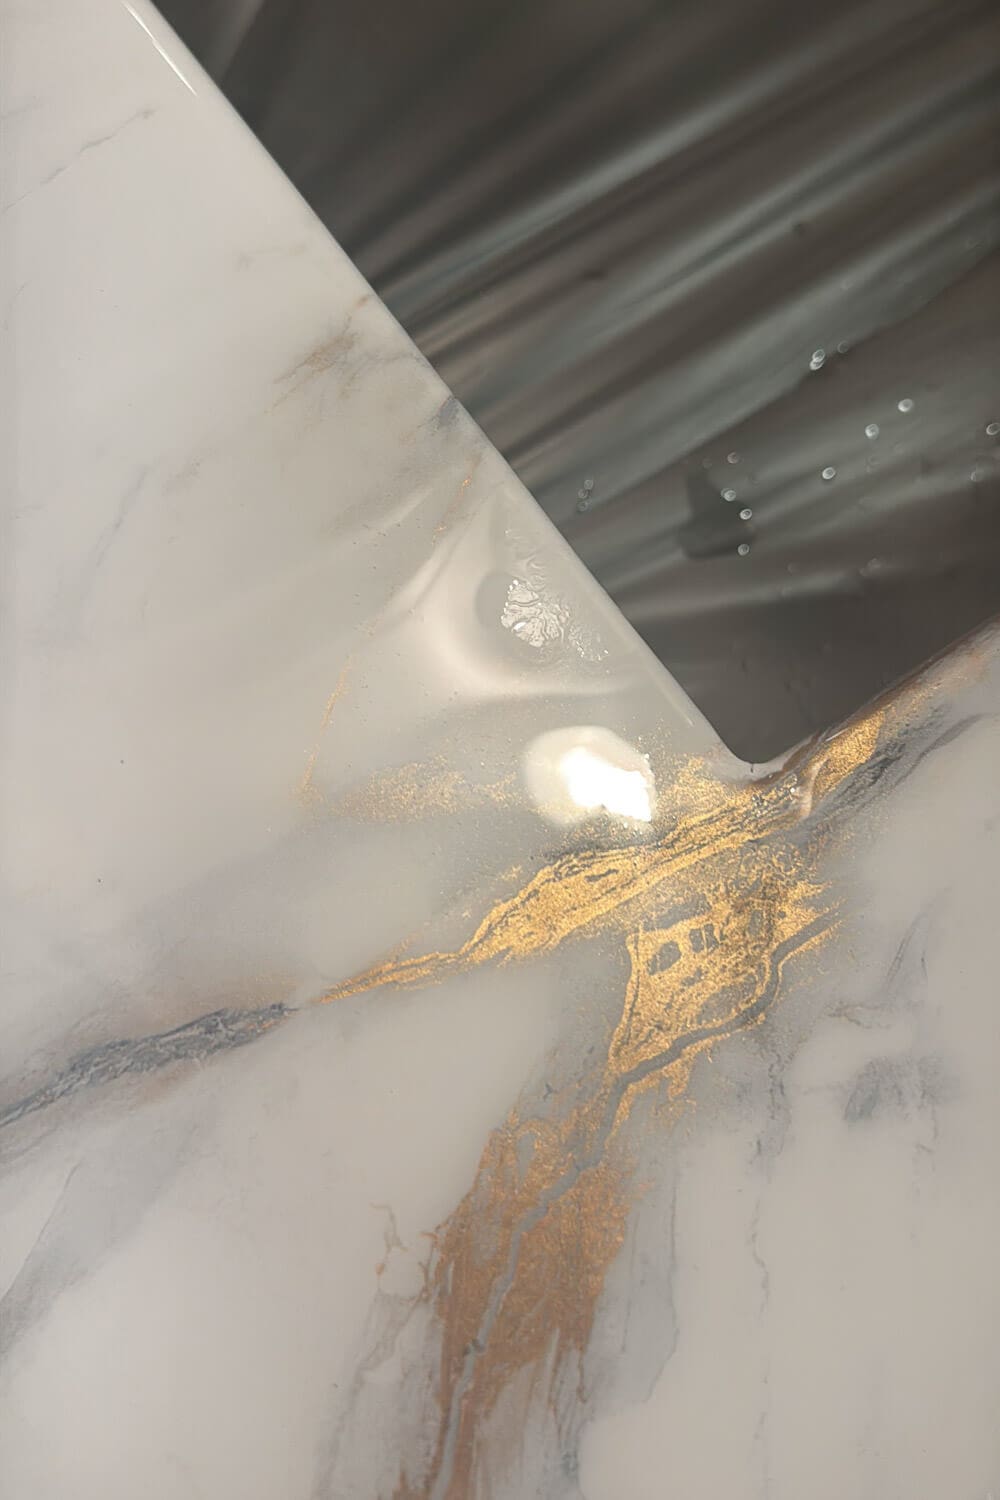
- Pour epoxy onto the counters
- Pour directly onto the surface in ribbons, spreading it out a bit as you go.
- Brush and trowel it out
- Use your synthetic brush to push epoxy into corners, around the sink opening, and down along the vertical edges, too.
- Then use a 1/4″ square-notched trowel to pull the epoxy across the whole surface into an even layer.
- Pop bubbles with a heat gun
- Within the 45-minute working time, run a heat gun back and forth over the surface to pop any bubbles you find.
- Pick out dust and lint
- While it’s still fluid, use a toothpick to carefully pluck out any lint, bugs, or random specks you see.
- Pull tape and plastic at the “sweet spot”
- Around 4 hours in, when the epoxy is set enough not to flood but still flexible, carefully remove painter’s tape and plastic sheeting.
- Scrape drips underneath
- Use a paint stick or straight edge to run along the underside of the countertop edge and knock off any drips.
- Do this once right after pulling tape, then check at least once an hour for new drips to form.
- Apply second coat
- After 24 hours, follow steps 1-8 to apply a second coat of epoxy.
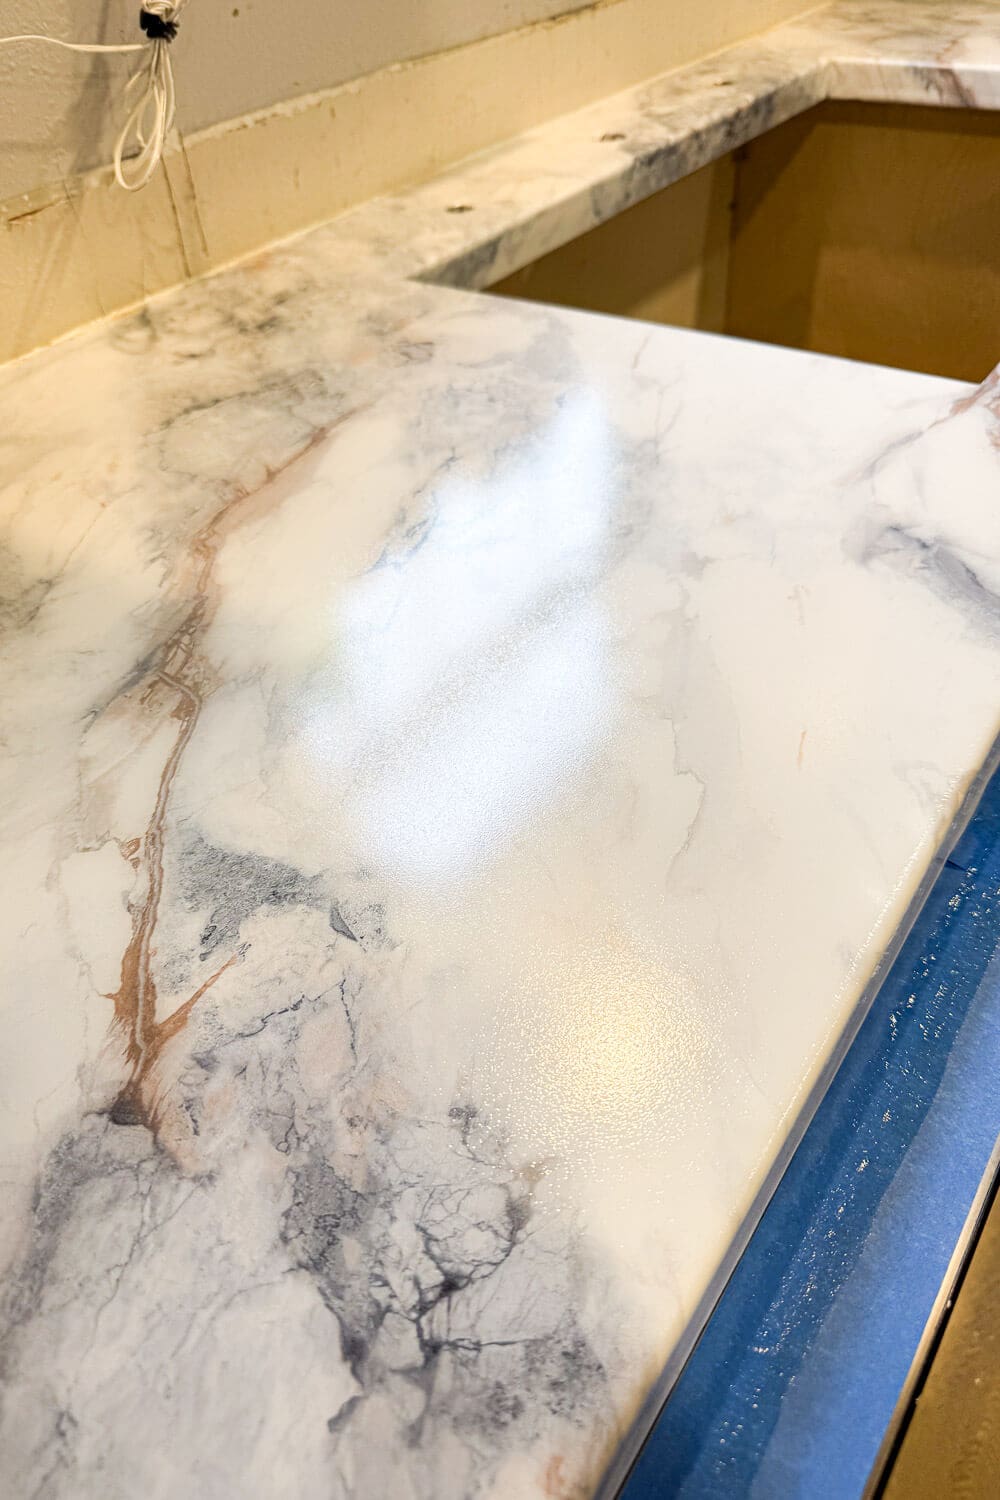
Applying a Second Coat of Epoxy on Countertops
Some people say a second coat of epoxy isn’t necessary, but I say don’t skip it. You can see in this area by the sink that, despite my best efforts, the first coat kept sliding off, leaving a few bare spots. A second coat smooths everything out, fills in any missed areas, and gives you a thicker, more durable countertop for the long haul.
Step 9: Finish with a Durable Top Coat
Once the epoxy has cured, there is one more very important step: the top coat. The top coat is absolutely essential and should not be skipped. Rolling on a top coat gives your DIY epoxy countertops a beautiful finished sheen and makes them even more durable and stain-resistant.
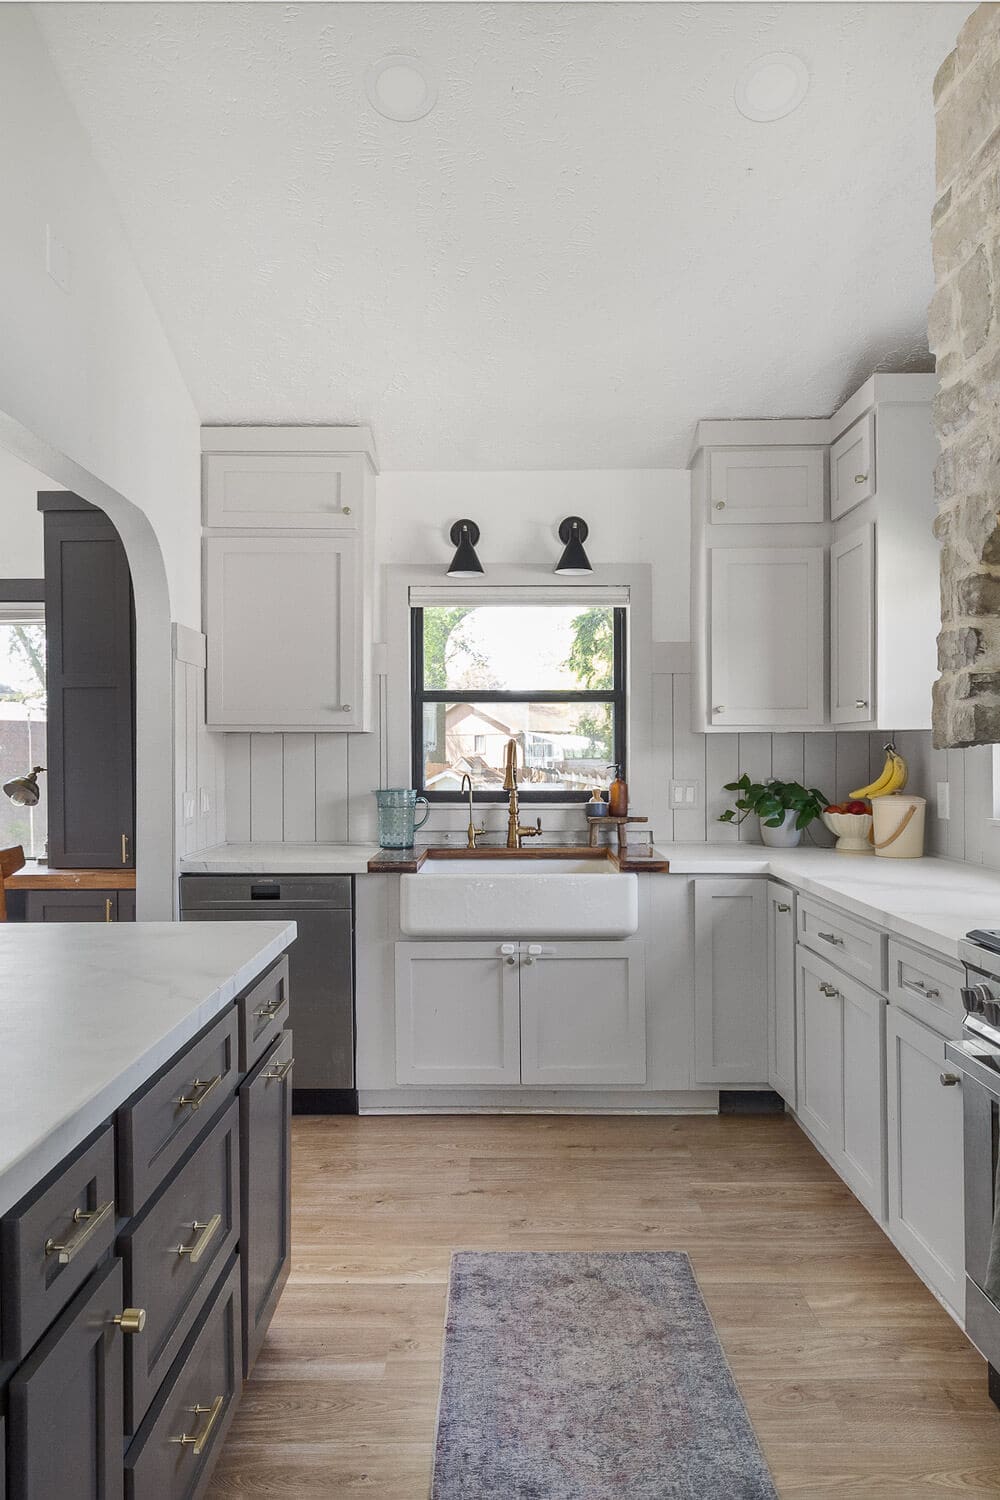
In our previous kitchens, we used a glossy top coat. For this kitchen, I decided to try a matte instead, and I love how soft and modern it looks. Both finishes are great options, so it just depends on the style you are after.
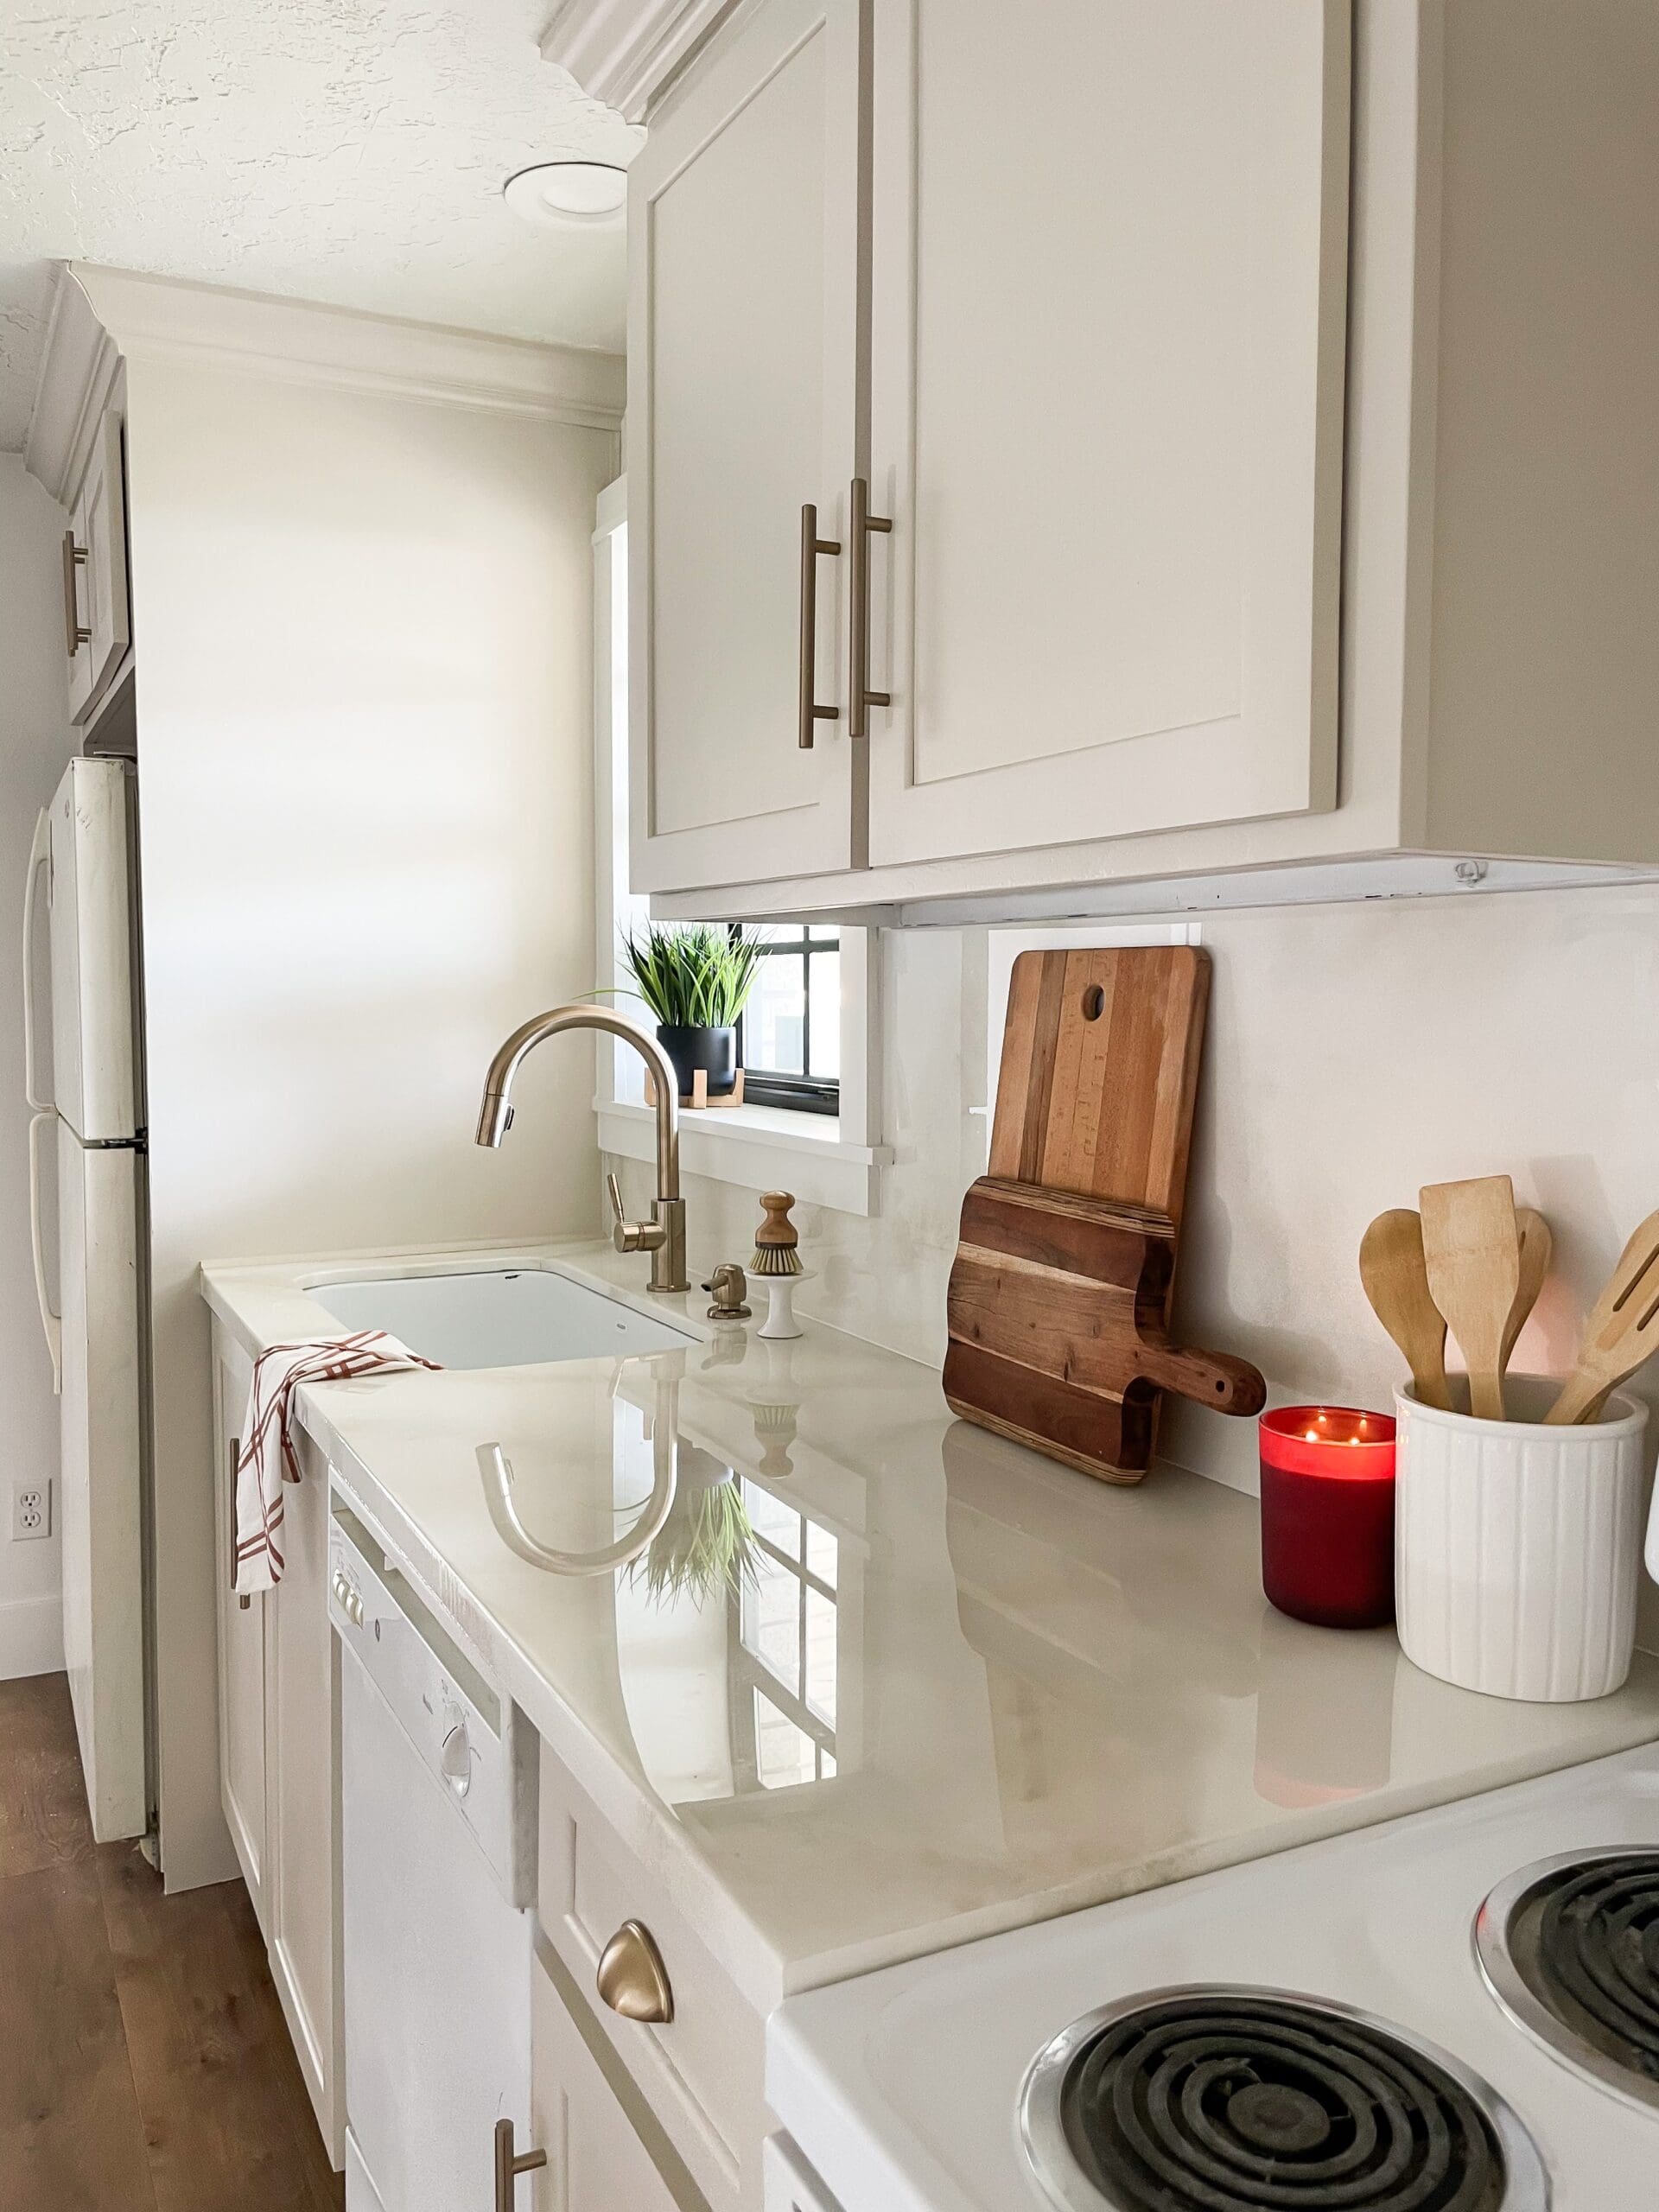
Our DIY countertops and kitchen progress so far
Right now, the countertops are done, but the rest of the kitchen is still very much a work in progress. If you want to follow along as we keep working on the kitchen, finishing the island, painting our panel-ready fridge to match the cabinets, customizing storage, and dialing in all the styling details, come hang out with me on Instagram. I share all the behind-the-scenes of our DIY kitchen remodel there, from the big wins to the messy reality of living in a DIY remodel with five kids!

How Well Do Epoxy Countertops Hold Up?
If you’re wondering how long DIY countertops with epoxy actually last, we put them to the test in our last house. We lived with those epoxy countertops for three years before we moved, and they saw everything: daily cooking, kids, dishes dropped in the sink, hot pans, and all the real-life mess.
Overall, they held up amazingly. I have a full review post about how our epoxy kitchen countertops looked when we moved out and what we learned to do differently this time. If you’re on the fence about trying epoxy for your DIY countertops, definitely give that post a read. 3 Years Later: How Our Epoxy Kitchen Countertops Are Holding Up
📌 Save these DIY countertops for later
Want to remember this DIY countertops tutorial for your own kitchen remodel? Save it to Pinterest so you can find all the steps, tools, and epoxy tips when you’re ready to tackle your counters. Pin this photo to your kitchen remodel, DIY countertops, or budget home projects board, and come back to it anytime.
FAQ About DIY Countertops and Epoxy
Epoxy DIY countertops hold up really well when they are prepped correctly, poured in the right conditions, and finished with a good top coat. Our last kitchen had epoxy countertops for three years with daily use, and they still looked great when we moved. I do recommend a top coat and having a solid base like plywood.
Yes, you can pour epoxy over existing countertops like granite, laminate, butcher block, or solid surface as long as they are properly cleaned, lightly scuffed, and primed. I have a separate project where I did epoxy over a granite bathroom countertop, and the process is very similar to what I used on these DIY countertops.
Epoxy is more heat-resistant than many countertop finishes, but I still recommend using trivets or hot pads. Brief contact with a warm pan is usually fine, but setting a very hot pan directly on epoxy isn’t the best idea.
With normal family use, epoxy DIY countertops can last for many years. The key is good prep, having a solid base, doing a second coat, and adding a protective top coat. In my review post about our previous epoxy kitchen countertops, I share exactly how they looked after three years of daily use.
