

Do you ever have projects that are so easy and satisfying to do that you don’t want them to end? No? Well, me either. But I did kinda sorta start to maybe almost feel something like that about this easy DIY shiplap wall that my sister and I put together. (But I’ll be honest, it was mostly my sister). There is something satisfying about installing shiplap on a big open wall, though. Especially when you’re working with straight boards and straight walls. (Not exactly the case with this one, but it was close).
We’ve been working on remodeling the Little Stone Cottage that my sister just purchased to turn into a vacation rental. (It’s is now open for booking!!) It’s seriously the cutest thing! You can check out how I renovated the bathroom by painting and installing beadboard wainscoting on the walls, updating the old medicine cabinet, installing open shelving over the laundry area, painting the shower, and painting the tile floors.
So, I’m finally ready to show you a section of the kitchen area. This is how it looked when we started.
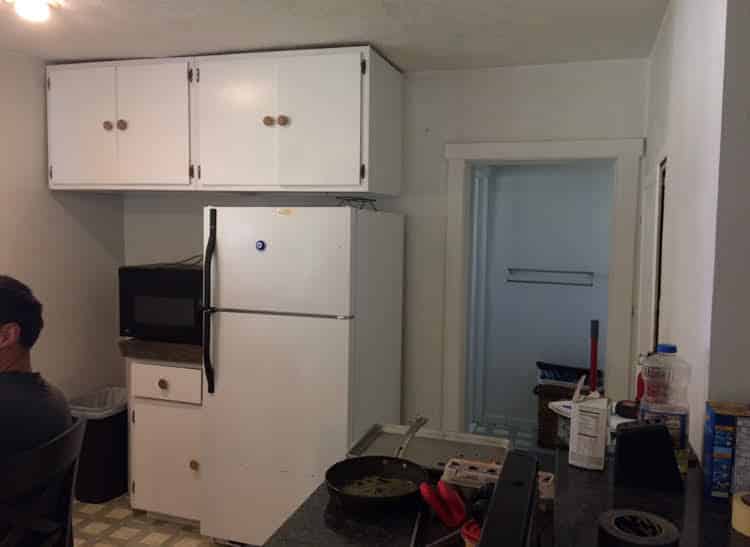
You can’t really tell in this picture, but off to the side in that wall there is the door to a pantry that fills the space under the stairs. Since this was to become a vacation rental and we already had plenty of cabinet space, we didn’t really need a pantry. So my sister Haylee opened up that wall and re-framed the door to fit the refrigerator, then slide the refrigerator into the wall to open up space. She then knocked out those old cabinets and suddenly we had room for the dining table! Voila!
Getting Started
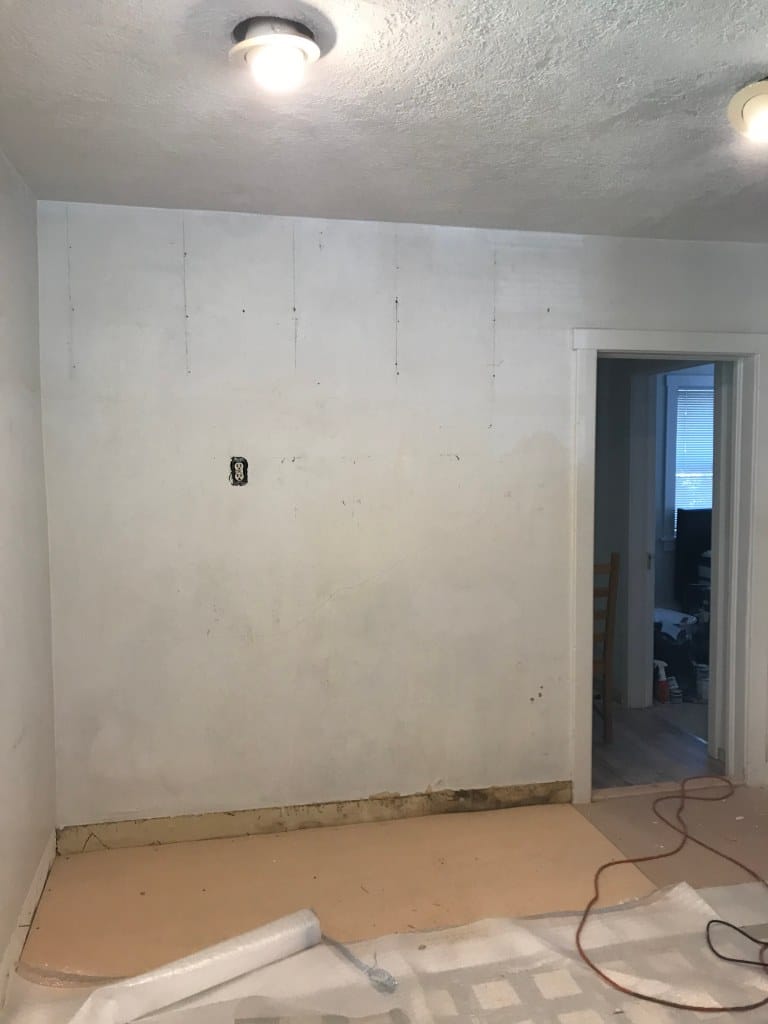
Now onto the fun stuff. Haylee purchased 4 sheets of 4×8 particle board at Lowe’s for about $10 a piece and had them ripped long-ways into 5 3/4″ strips, which Lowe’s does for free. This accounted for the width that the saw blade takes out to make all of the pieces as even as possible. Before we nailed up the first piece, we made sure to use a level to make sure it was level rather than trusting the walls to be square. After all, the house is over 80 years old. Once we did that it was smooth sailing from there, and we were able to just use that first piece as our guide.
Since there were two of us working on the wall, we started from the top and worked our way down brad nailing the strips onto the wall using a nickel to space the gaps. This allowed us to decide what we wanted to do with the bottom piece once we knew where it would land. We didn’t need it to hit the floor, we just needed it to go low enough that we would be able to cover the remaining space with the baseboard.
If it were just one of us doing the project, however, we would have started from the bottom up because it is easier to rest the strips on top of the nickels and nail it in with the other hand than it is to hold up the board and place the nickels and nail it in. On the sections of the wall that were longer than the 8 foot strips, we simply cut the remaining piece and butted it up against the longer strip. Then we switched up the 8 foot strip and put it on the opposite end of the wall on the next row so we wouldn’t have two seams stacked on top of each other.
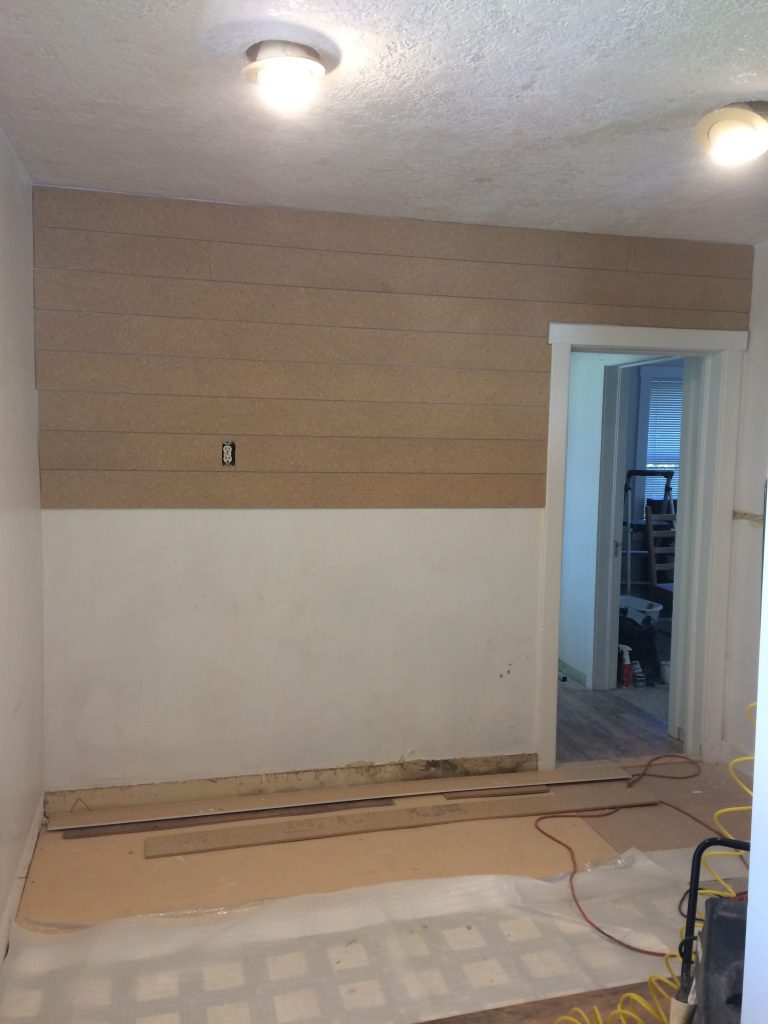
Then with what felt like as quick as you could bat an eye, it was all done! We did have to notch out around the outlet which was a little bit tricky, but Haylee is pro at that kind of stuff and made it look like a piece of cake. (The process, not the actual outlet. THAT would be impressive 🙂 )
Finish It Up
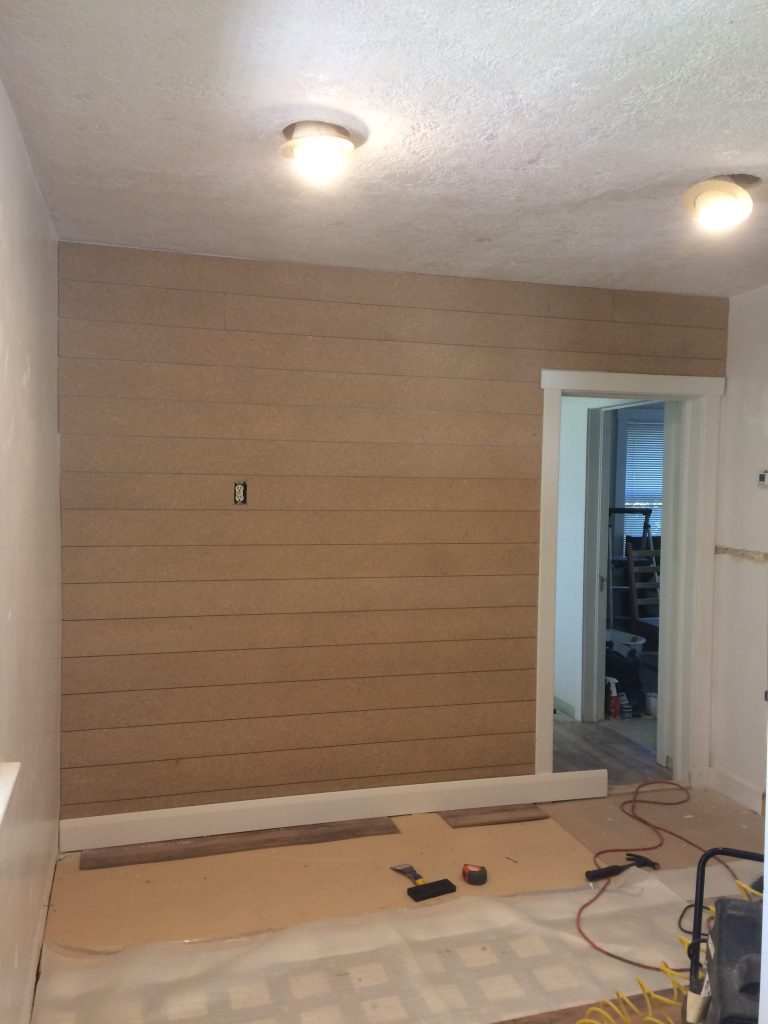
Once we had the wall all nailed up all we needed to do was caulk any gaps between the particle board and the door frame and opposite wall. Caulk fixes everything! I like THIS KIND) The very last step was to paint! At first we thought that since we were using particle board for our shiplap we didn’t want to use an acrylic paint because the water in it would absorb and cause the particle board to swell. After testing a piece, though, we discovered that it did not swell! So that was nice.
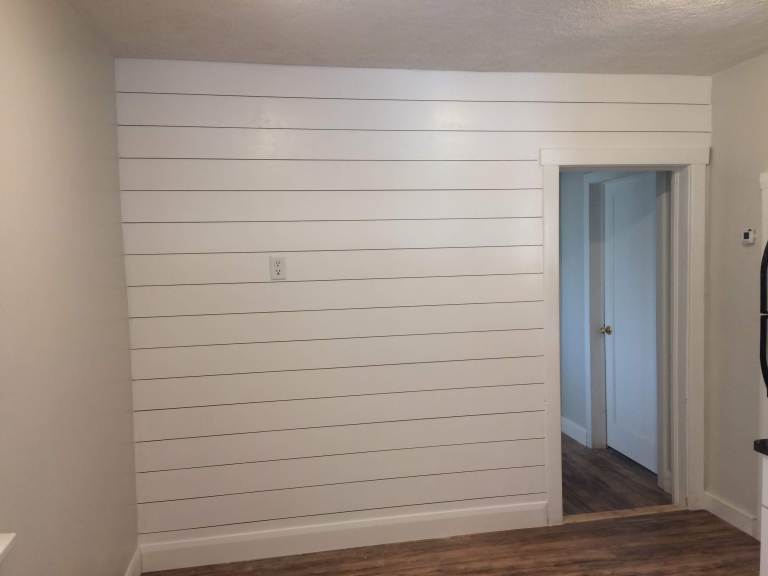
Doesn’t it look like a million bucks?! And to think it only cost about $40 not including the paint. Now that’s a steal!
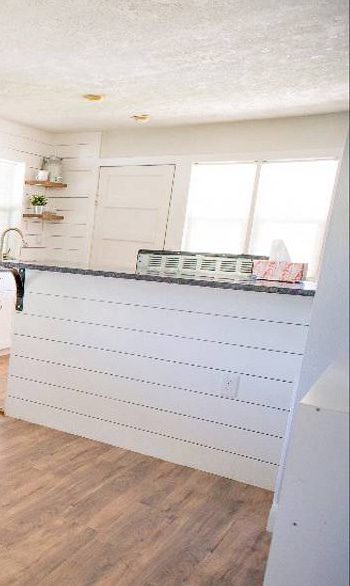
I also want to show you how we installed the same shiplap on the peninsula that separates the kitchen from the living space. This is what it looked like before:
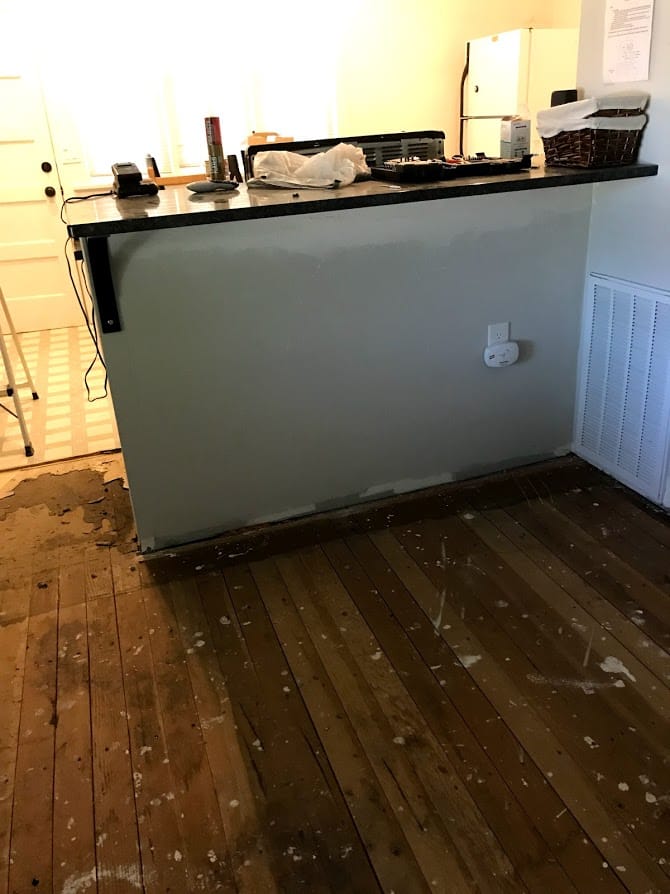
Kind of just a boring old wall. Now I’ll show you the after, with a sneak peak (lucky you!) of the finished kitchen shelving behind that I’ll be doing a post on later.
What do you think about this DIY shiplap??

Thanks for tuning in! I’m excited to show you all the rest of the kitchen area so keep an eye out for more posts!
XOXO,
Crystel
Leave a Reply

What color did you paint your shiplap? Thanks
I’m SOOOO sorry but I don’t remember since it was so long ago and my sister was the one that bought the paint.