

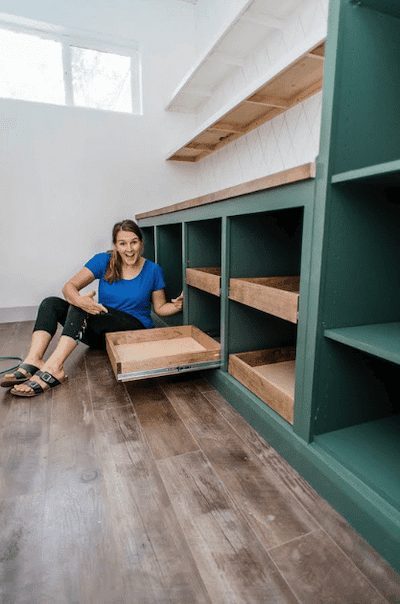
The last missing piece of the Butler’s Pantry was to build sliding drawers. The pantry would have looked fine without them, but the space that I created in the lower cabinet was size-able, and it would have been difficult to reach things in the back. Not impossible, but difficult.
So, I built drawers to create a more functional area, as well as for the purpose of adding “how to build sliding drawers” to my resume. Building a drawer is a rite of passage for woodworkers.
This post includes affiliate links. If you purchase from these links, I may get a small commission from the seller. But the great thing is, this doesn’t cost you any extra money!
SUPPLIES
- 20 inch drawer slides
- (1) 3/4 x 48 x 96 inch Sande Plywood
- (1) 1 x 4 x 96 inch Select Pine
- 1/4 inch Brad Nails
- Kreg Pocket Hole Jig
- 1 1/4 inch Pocket Hole Screws
- Wood Glue
- Sand Paper
- 1 inch Screws
- Stain color of your choice (I used Early American by Varathane)
TOOLS
How to Install Drawer Spacers
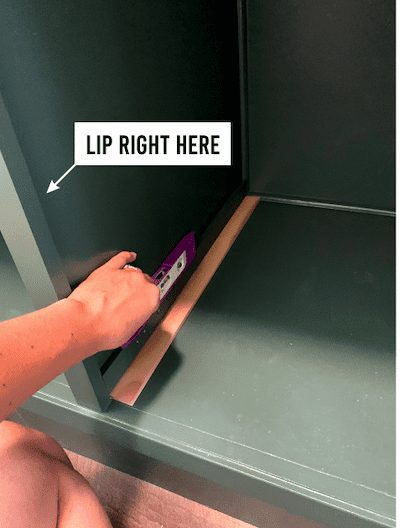
Right off the bat, I ran into an obstacle. I had to figure out a way to avoid the drawer from being blocked by a vertical lip on the front of the cabinet. The lip was part of the cabinet frame, but I hadn’t taken into account that I would run into a clearance problem when installing the sliding drawers.
To fix the problem, I made spacers that would be secured to the sides of the cabinet, and the slides would be secured to the spacer. I did this by measuring how far the lip butted out (3/8 inch), and the depth of the cabinet (18 5/16th inches).
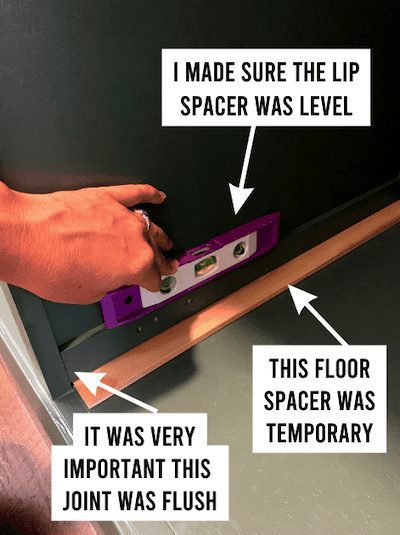
I took a 1 x 2 x 96 inch select pine board and cut it down with my table saw to 3/8 x 18 5/16 inches. I painted the spacer the same beautiful Caldwell Green as the cabinet. I also wanted to lift the drawer off the floor of the cabinet, so I cut an additional 3/8 inch x 18 5/16 inch piece the the lip spacer would temporarily rest on.
Before I could attach the lip spacer, I needed to make sure it were flush and level. On the inside of the cabinet, I laid the floor spacer down, added a thin line of wood glue to the lip spacer, and set in on top.
I positioned my small level on top of the lip spacer and, after ensuring it was level and flush. It was secured using wood glue and 1 inch screws, which weren’t long enough to end up poking through the cabinet wall.
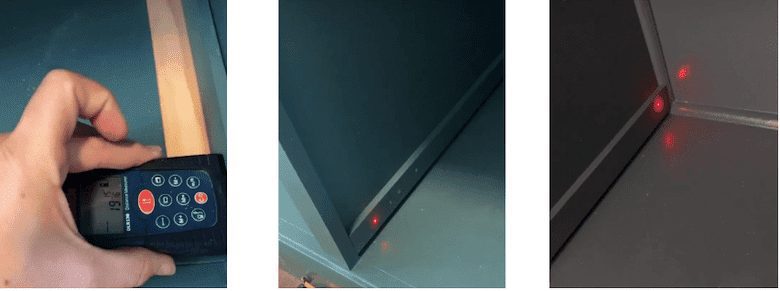
Now that left spacer was level, I could install the right spacer, which would be adjusted the most to make sure everything was square. Just like the left side, I measured and cut spacers. I laid the floor spacer in place, set the lip spacer on top, and used my laser level to measure the distance from spacer to spacer in front and back.
These two distances needed to be the same if I wanted my drawers to work properly. I pushed the lip spacer tight against the cabinet and measured. The front was 19 15/16th inch, and the back was almost the same; only 1/16th of an inch off, which was good enough for me.
Had it of been off by more, I would have placed a shim at the back of the cabinet to make up the difference. Now that I knew everything was square, I made sure the lip spacer was level, and used wood glue and 1 inch screws to secure it to the side of the cabinet.
How to Measure and Cut a Drawer
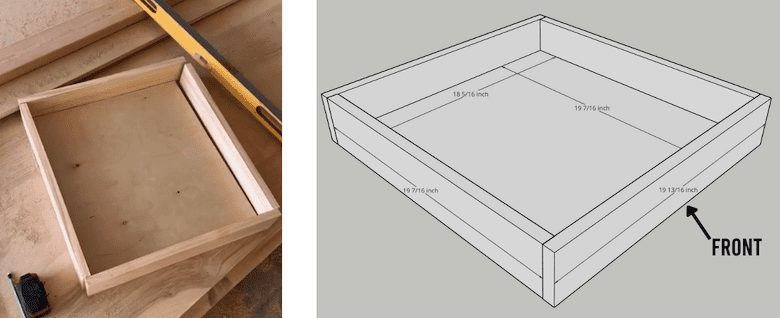
The base of the drawer needed to be cut first. I calculated the width by subtracting 1/2 inch from the spacer to spacer measurement (19 15/16th). So, in my case, the bottom would be 19 7/16th wide. If you need help adding or subtracting measurements, check out this calculator.
To calculate the depth of the drawer, I measured from the cabinet opening to the back, along the floor of the cabinet, which was 18 5/16th inches.
The final cut of the drawer base was 3/4 x 18 5/16 x 19 7/16 inch and was cut out of the 3/4 inch plywood.
The front, back, and sides of the drawer were cut out of 1 x 4 inch select pine. The front and back measured 3/4 x 3 1/2 x 19 13/16th, and the sides measured 3/4 x 3 1/2 x 19 7/16th. Because this drawer needed to be perfectly square, I measured and remeasured everything very carefully.
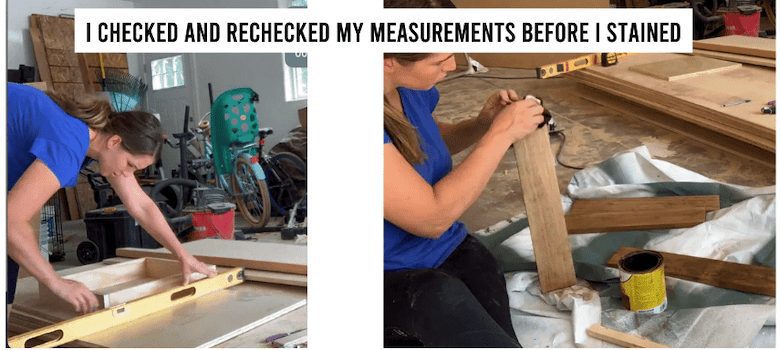
Before I attached all the pieces together, I sanded both sides of each piece with my orbital sander and 220 grit sandpaper, and stained the wood Early American by Varathane.
How to Build a Drawer
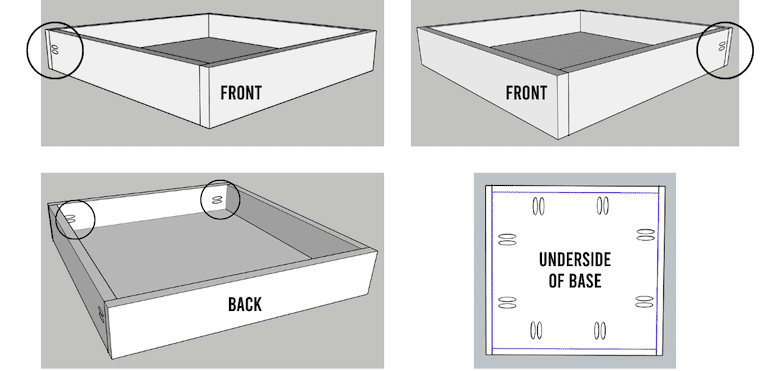
I planned to join everything together through pocket holes, so I had to strategically place them so they wouldn’t be noticed.
The pocket holes on the front would only be seen if someone were bending over the drawer, and since that would be weird, it seemed like a good place. The pocket holes in the sides would be in the back of the drawer, and the drawer wouldn’t be pulled out far enough for anyone to ever see them. Genius.
To assemble the drawer, I set my base on a very level ground. Before I screwed anything together, I made sure to add a thin line of wood glue to the joints. The base and the bottom of the drawer walls needed to be flush, and then using 1 1/4 inch pocket screws, I attached the walls of the drawer together first.
Then I flipped the drawer over and attached the base to the walls. Just wipe away any wood glue that was squeezed out of the joint.
How to Install Drawer Slides
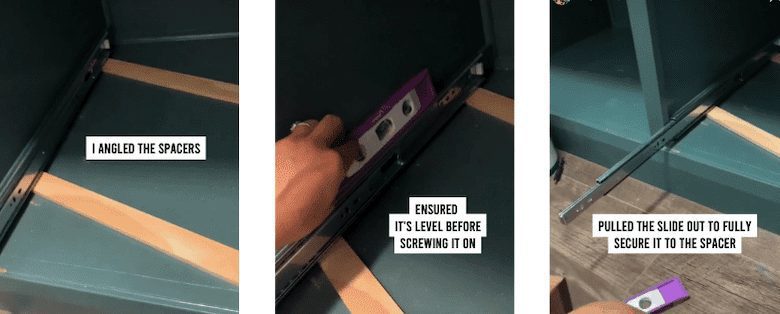
To ensure the drawer slides were equal distance from the cabinet bottom on both sides, I slid spacers underneath the lip spacer. Then I screwed the back of my drawer slides into the lip spacer, making sure the slide was level before screwing in the rest. The process was repeated on the opposite side. Using those angled spacers made installation super quick.
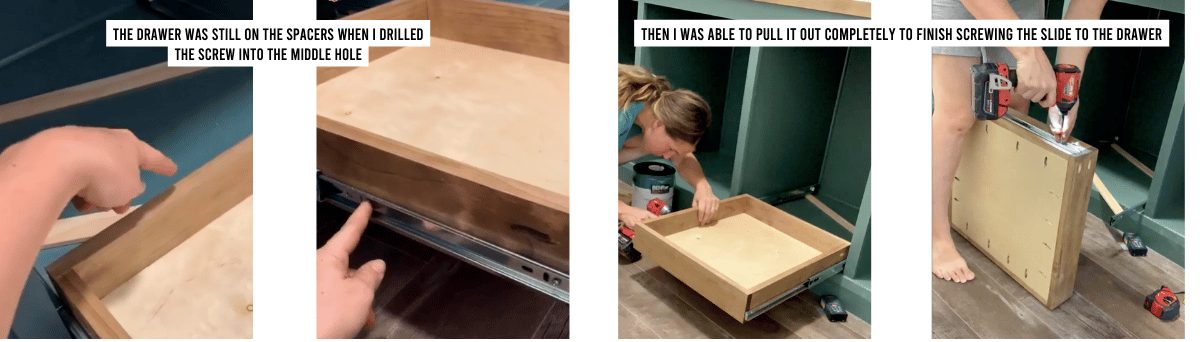
Then, I put the drawer in the cabinet and pulled my slide out so it was flush with the front of the drawer.
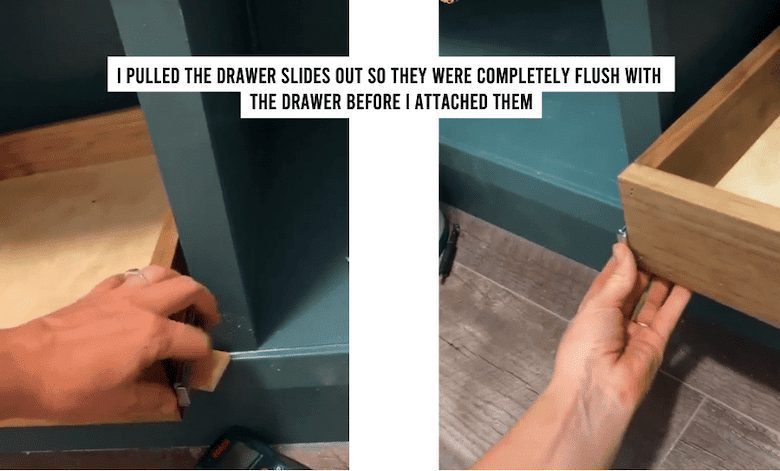
I drilled a screw through the front hole of the slide. Then I pulled my drawer out further while still making making sure the back of the drawer was resting on the spacers. I drilled a screw through the middle hole of the slide, and then pulled the drawer completely out, and screwed through the back hole into the drawer. Copy and paste on the opposite side of the drawer.
I’m done! Except not really because I still had 3 more drawers to build and install.
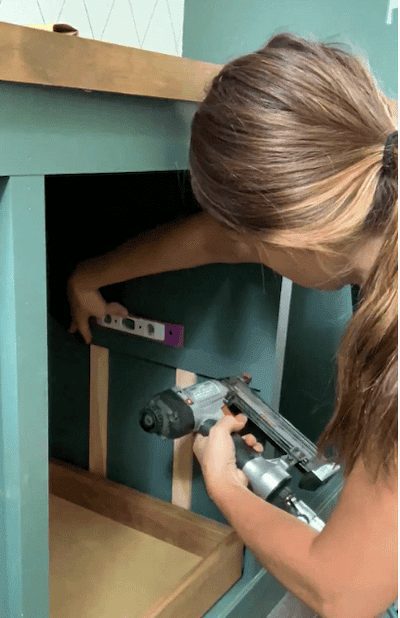
I wanted two drawers in the cabinet, one above this one. I used the same process as above, but with a slight variation. I had to figure out where I wanted my upper drawer to sit, and to make it easy on me, I cut two identical spacers that would sit on top of the bottom lip spacer.
Okay, now I’m done! These drawers weren’t nearly as intimidating as I had thought. They were the final item to check off on this pantry build, and it turned out more beautiful than I had imagined. I’m definitely the favorite sister for awhile.
Have I peaked your interest in how I built the butlers pantry? I have all the tutorials on my website!
This is the How to build a Butler’s Pantry Part 1 where I explain how to build the cabinets, and in the Butler’s Pantry Build Part 2, I explain how to do all the frame and finish work.
Check this post out if you like that Herringbone Counter.
These are the floating shelves I built for all the appliances that need quick access.
Do you like the wallpaper design you see in the pictures? I did that with a sharpie!
And lastly, if you’re a visual learner, all of my stories for my projects can be found in my highlights on my instagram account @crystelmontenegrohome.
Please leave a comment and let me know if you’ve ever attempted to build or install drawers. I’d love to hear what worked for you and what you wish you had known.
Leave a Reply
