

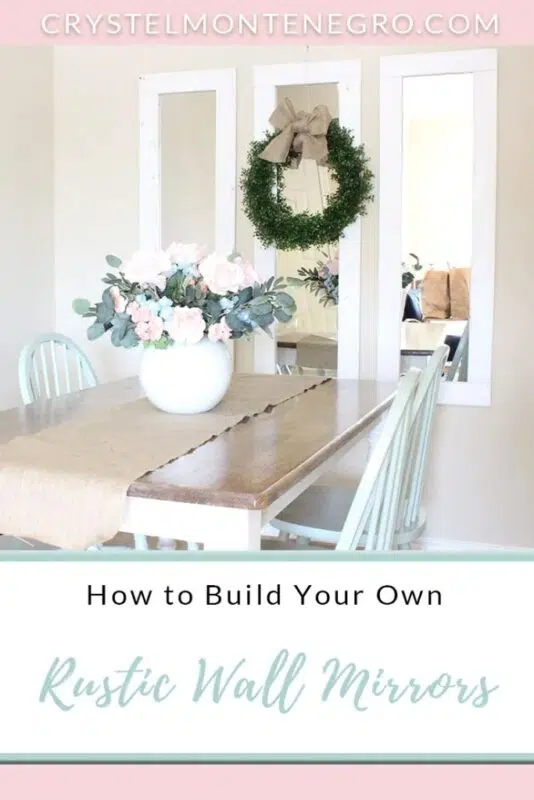
Alright everybody, so I have been ignoring my little dining nook up until recently because I haven’t really had the means to do anything with it. My situation has changed lately, however, when my sister brought me up her miter saw from Houston for me to use it for the month! I can now do all of those wood projects that I’ve been wanting to for oh so long! I got the idea for these rustic wall mirrors from Shanty2chic, some of my favorite builders out there! This project is very similar to my post from a while back on framing a bathroom mirror, only this time it’s with the super cheap full length Walmart mirrors you can buy for 5 bucks! Yeah, pretty awesome.
Materials List for 3 mirrors
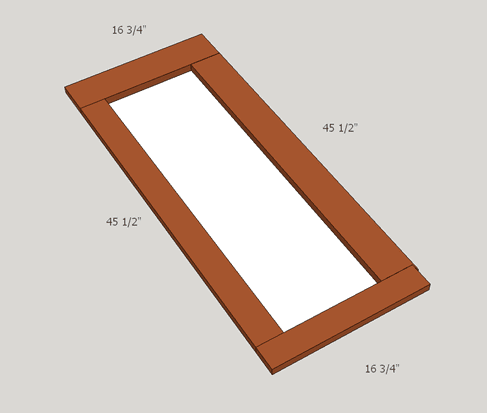
- Six 1×4 boards cut at 45 1/2″
- Six 1×4 boards cut at 16 3/4″
- 3 Mainstays Door Mirrors
- Kreg Jig and bits
- 1 1/4″ Screws
- 24 AJB Washers
- 3/4″ screws
- Picture hanging kit
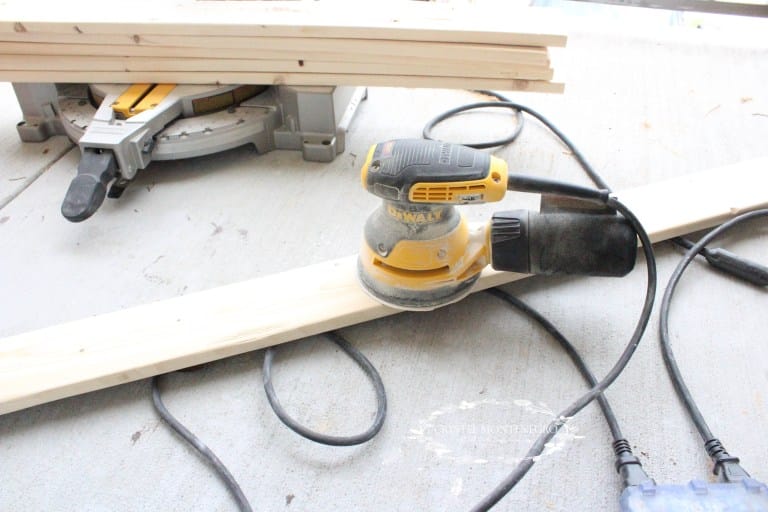
It’s actually pretty simple. I have a miter saw, but you really don’t even need one for this project since you can go to Home Depot or Lowes and they will make the cuts for you. Just make sure you have the correct dimensions.
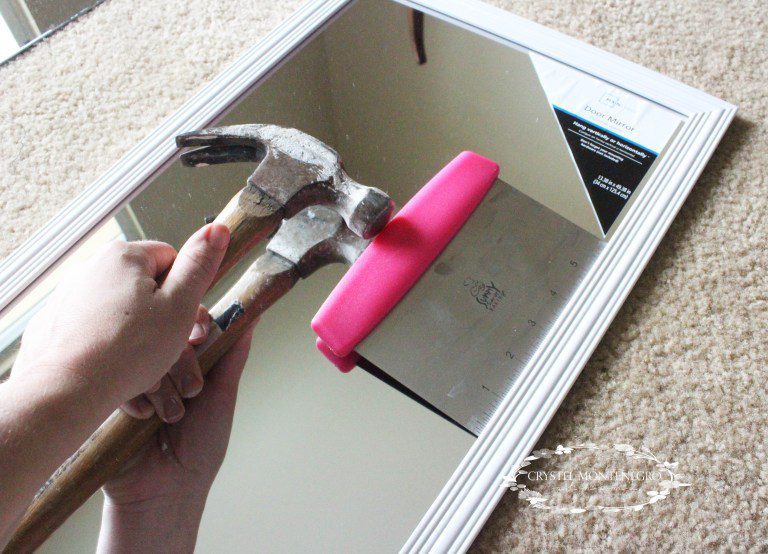
I began by taking off the existing frame around the mirrors. This was actually quite tricky because it was glued onto the mirrors and I didn’t want to break the glass. As long as you can find something thin, sharp, square and flat I think it should work. I used my baker’s blade, but you could also use a scraper or wedge of some sort.
I gently wedged my blade underneath the frame and hammered it to separate the frame from the glass. You’re going to be tempted to pull up on the blade to separate it but if you do, DON’T pull it very high. You will break the mirror! Trust me, I learned this from experience. I just worked my way all the way around the edge of the frame separating it gently.
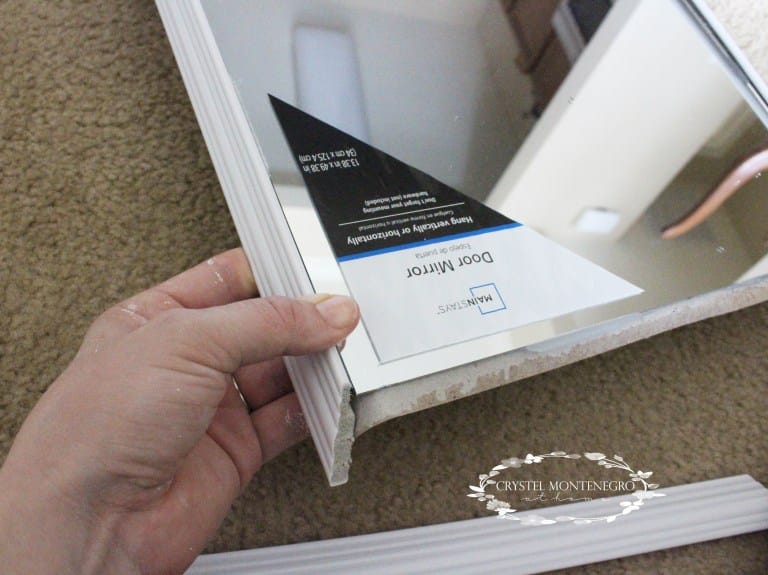
Eventually you’ll get to the point where you can pull off the frame. You’ll see bits of glue left over on the frame but I didn’t worry about this since it was going to be covered up anyway.

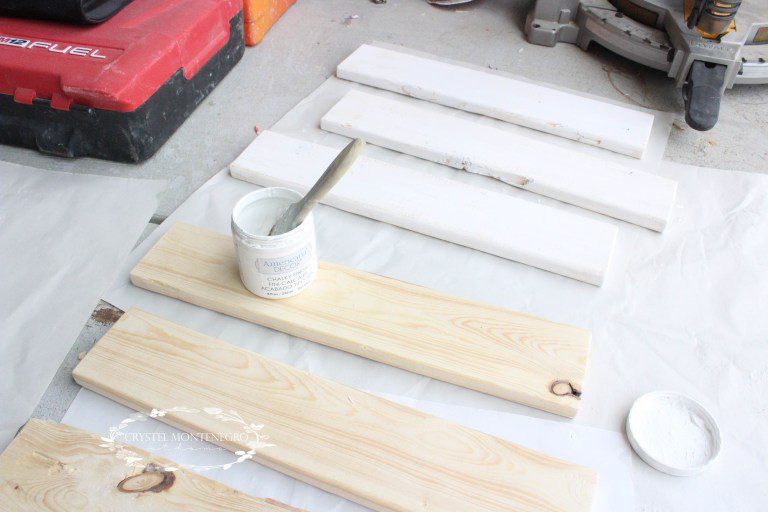
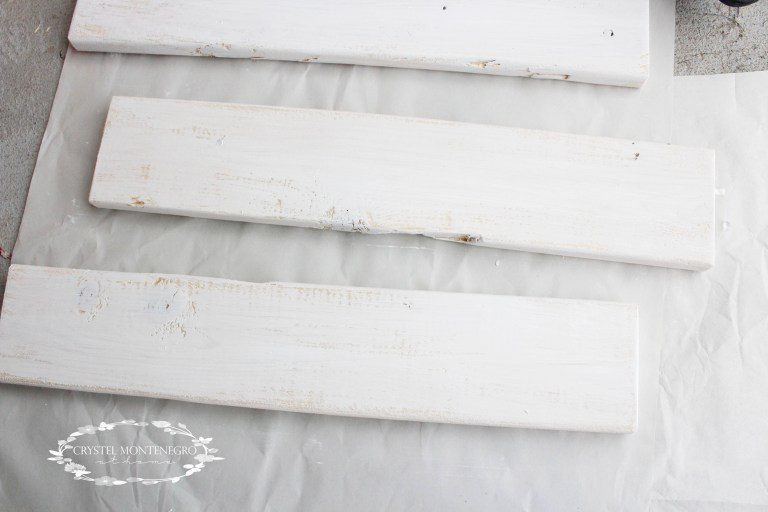
Now that you’ve got your mirror de-framed, you can start on building the new frame. First, sand down your boards to prep them for painting. I wanted mine to have a rounded corner, so I sanded the sharp corners off.
Next, paint or stain them to your liking. I used Americana Decor chalk paint in Everlasting and gently brushed over my wood. I wanted these to look more rustic, so I left some of the wood showing through.
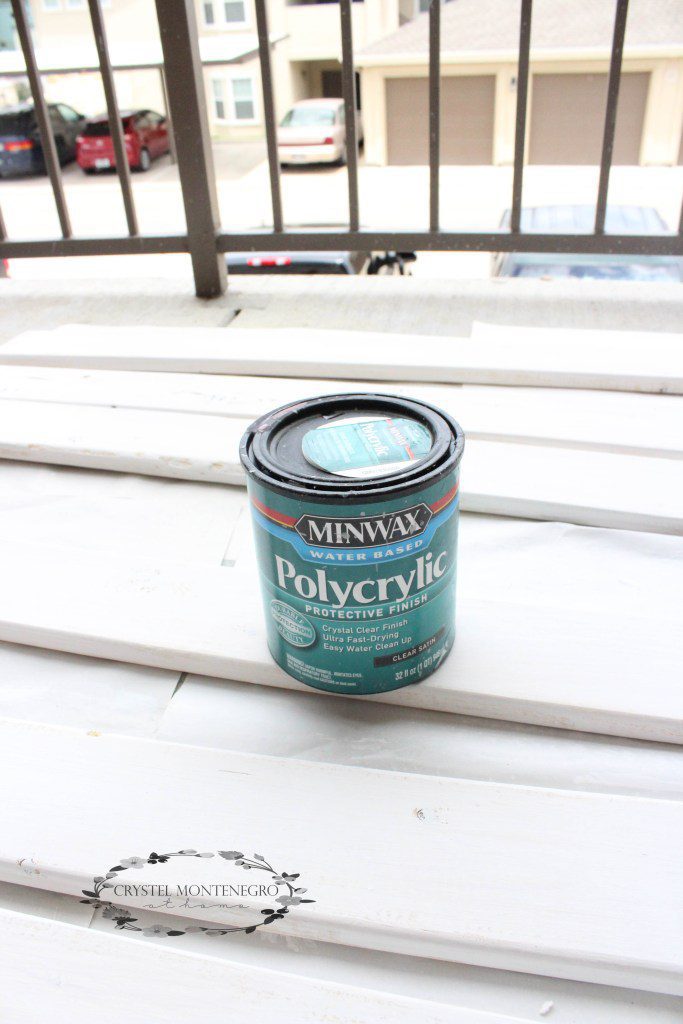
I put on a top coat of Minwax water-based Polycrylic to protect it.
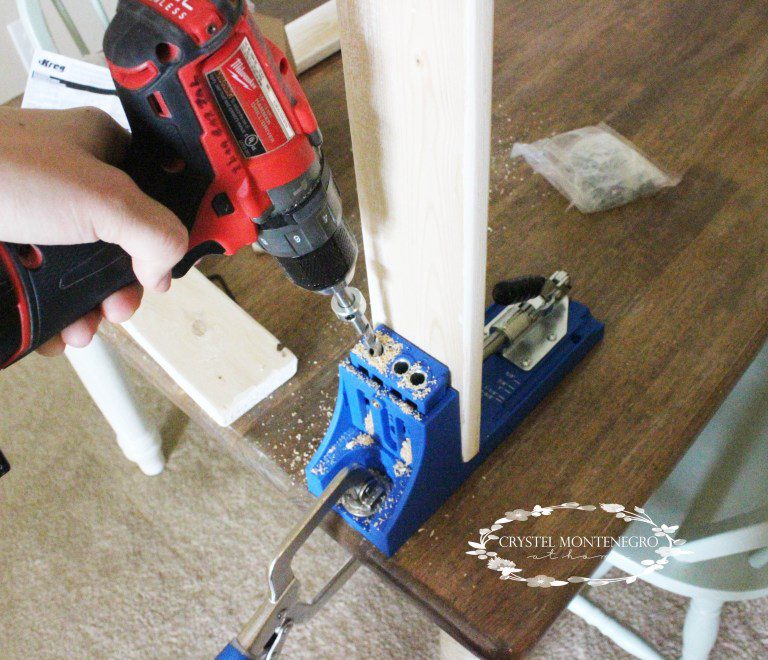
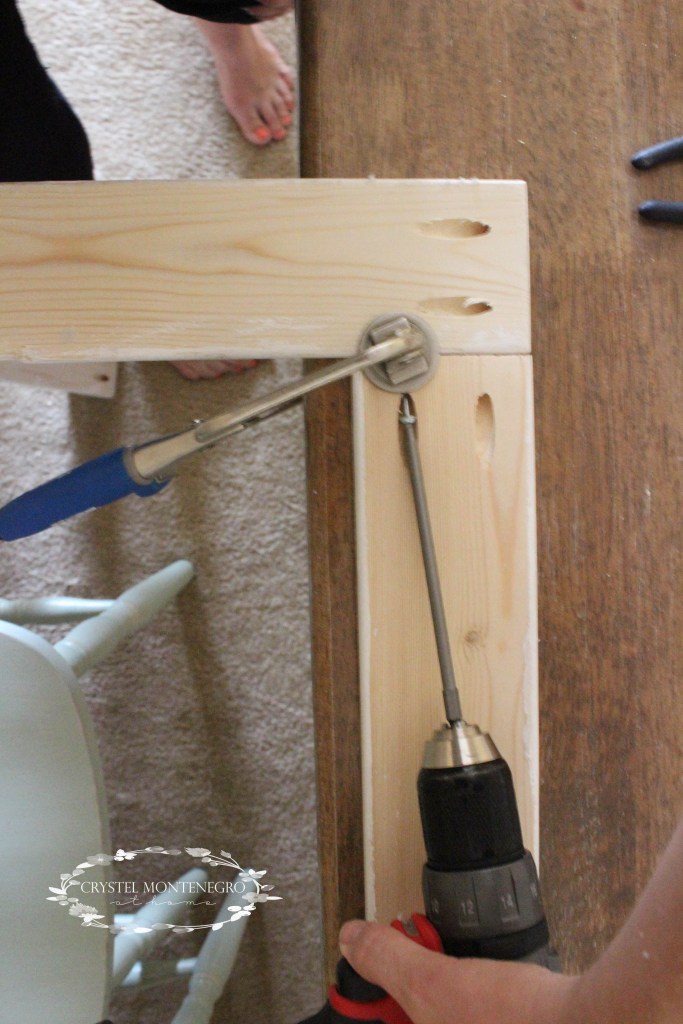
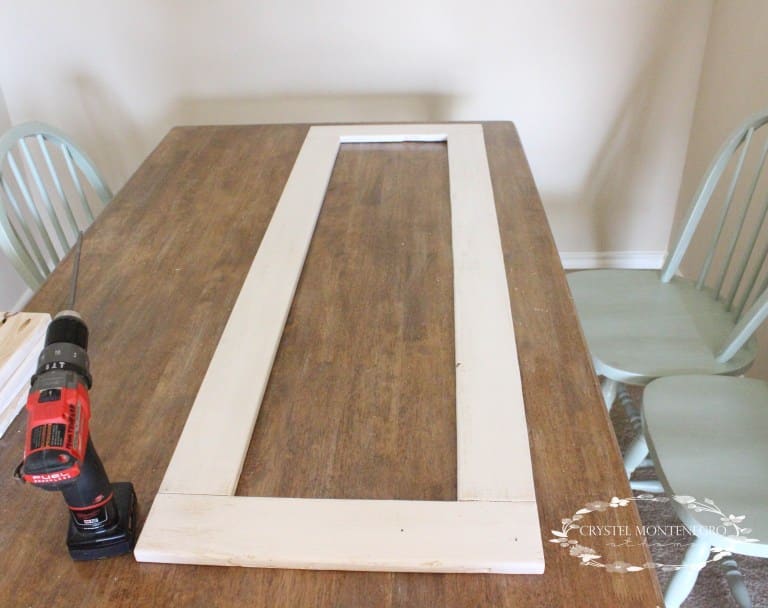
Once you’ve got your boards all painted, drill two pocket holes in both ends of the 45 1/2″ boards.
I accidentally drilled holes in the other boards without thinking. Pocket holes in the short boards are unnecessary.
Line them up and secure the boards using 1 1/4″ screws.
Now the frame is all ready!
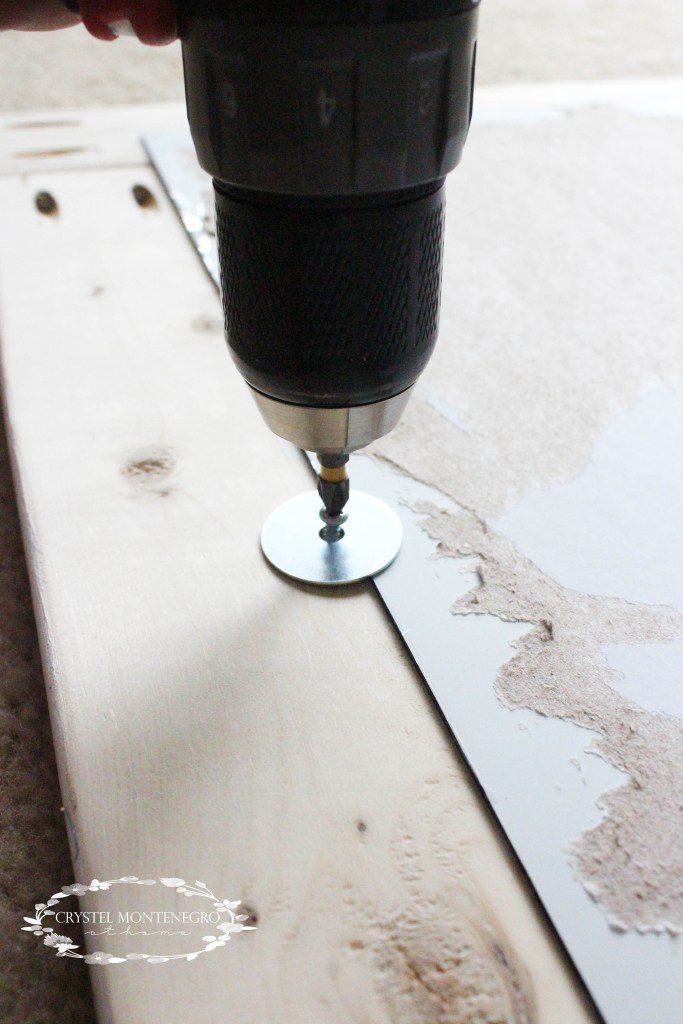
Flip your frame over and center your mirror. The mirror should overlap the mirror between 1/2″ and 1″. Secure the mirror by placing your washers partly on top of the mirror to hold it in place. When you screw it down, make sure you use screws whose head is larger than the hole of the washer. When you screw it down DO NOT SCREW IT TIGHTLY. You’ll want to make sure it’s just tight enough that the washer can still slightly move. If you screw it down too tight the mirror will break when you put any kind of pressure on it, even to wash it.
Once you’ve got your mirrors fastened, attach the picture hanging hardware and hang!

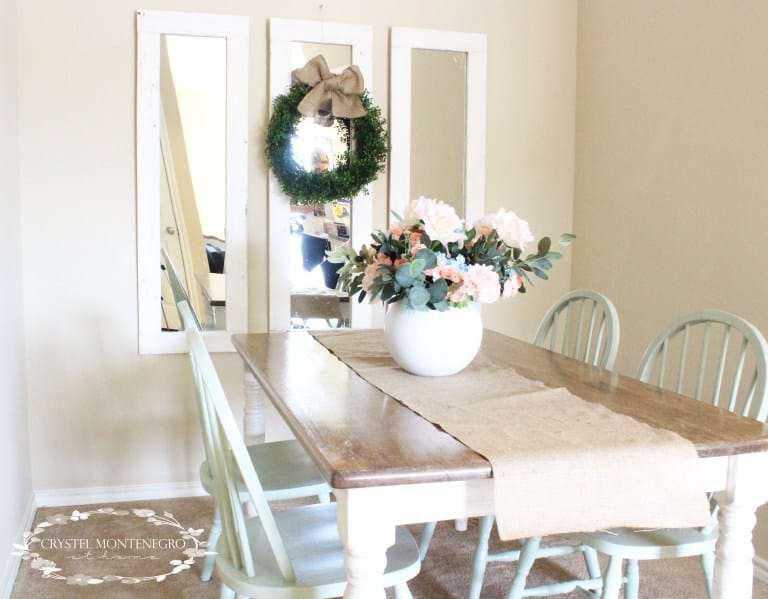
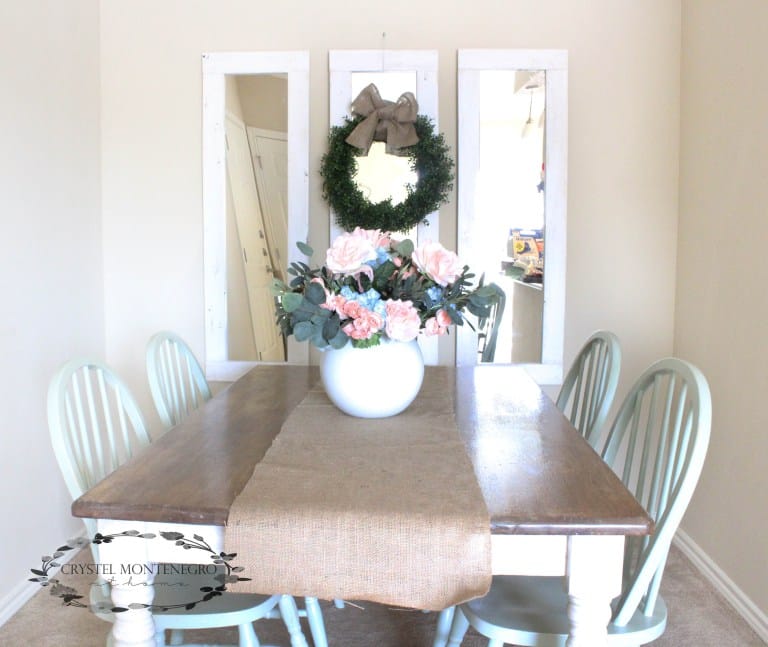
Nothing to it! I think I did the entire project for less than $20. Is that a steal or what?! If you want to learn how I made that wreath you can check it out here!
And don’t forget to check out my other dining room nook posts below!
Flower Arranging 101: Large Flower Arrangements
Kitchen Table and Chairs Makeover – What NOT to do!
XOXO,
Crystel
Leave a Reply
